82 Front Yard Landscaping Ideas for Any Home
Explore 82 front yard landscaping ideas, from clear paths and layered beds to water-wise gardens, with practical notes on site, upkeep, and safety.
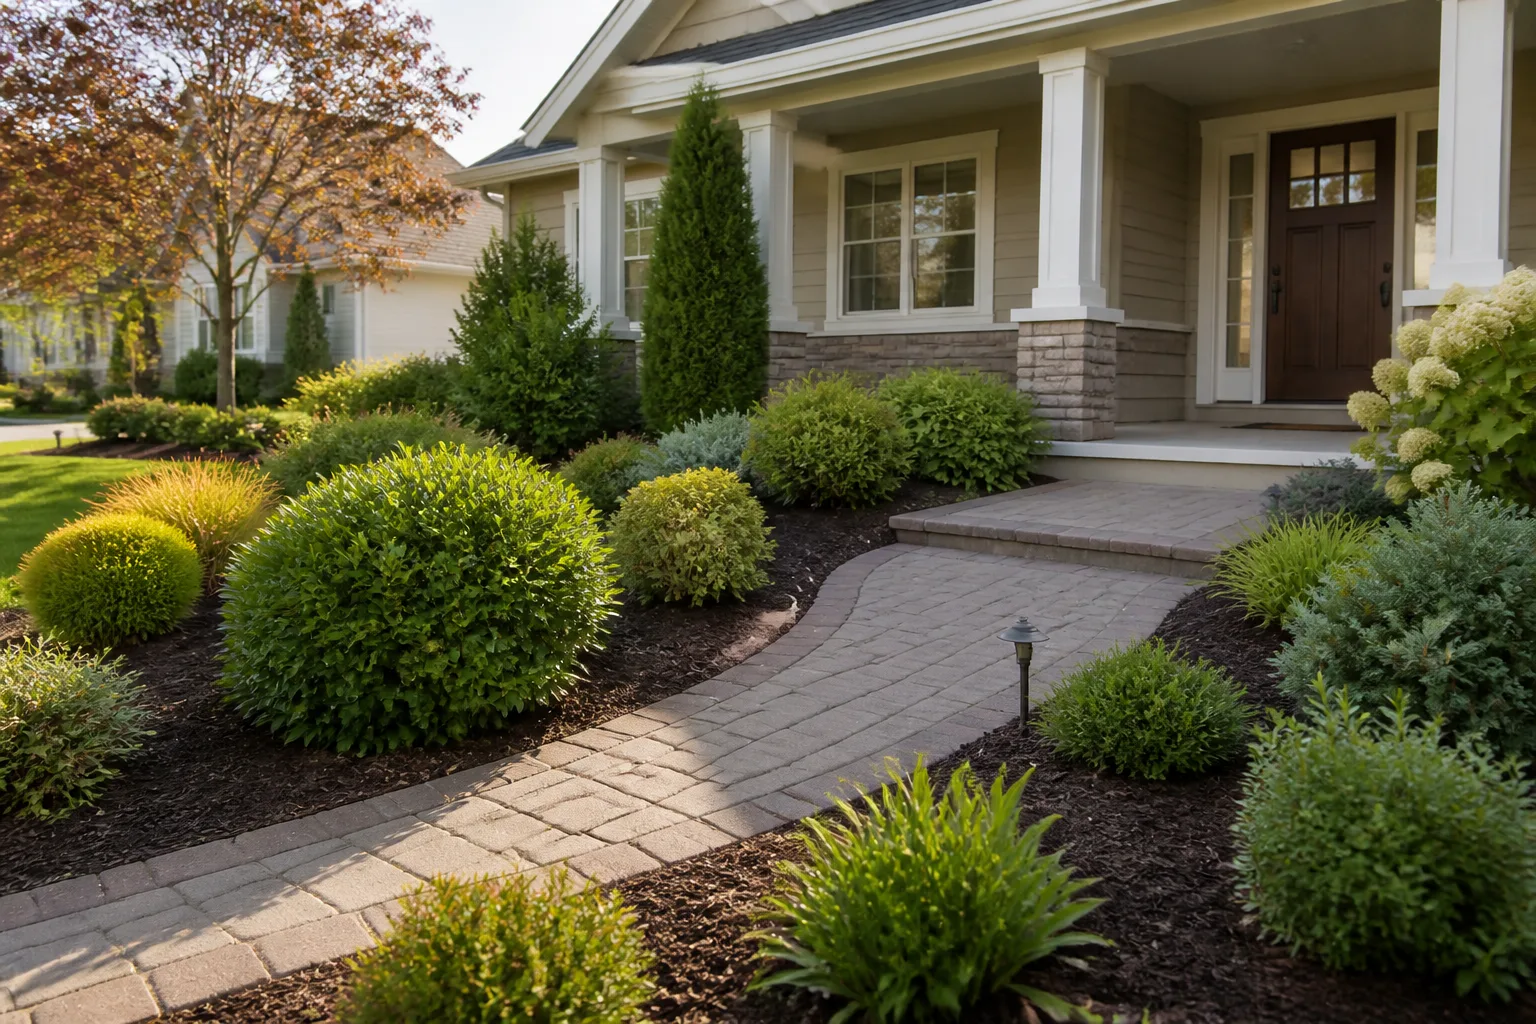
A front yard can be formal, loose, colorful, mostly green, lawn-centered, or almost entirely planted. What makes it feel finished is not a fashionable plant or a matching set of pots; it is a clear arrival route, a few repeated shapes, and choices that fit the conditions you actually have. Treat the 82 ideas below as adaptable design moves, not a shopping list to install all at once.
Start with the parts that affect function—water, access, utilities, sight lines, and mature plant size—then choose a style. The Penn State Extension principles of garden design are a useful foundation for scale, unity, and repetition. For a front garden specifically, the RHS front-garden design guide is a reminder that a welcoming layout must balance planting with usable paths and surfaces.
Read the site before choosing a look
Walk the yard after rain and again during a sunny part of the day. Sketch the house, property line, driveway, walk, existing trees, downspouts, meters, and outdoor taps; then note where water stands, where snow gets pushed, where people cut across the lawn, and how much sun each bed receives. A front yard is not one uniform planting zone: the strip under the eaves may stay dry while the foot of the same wall collects roof runoff.
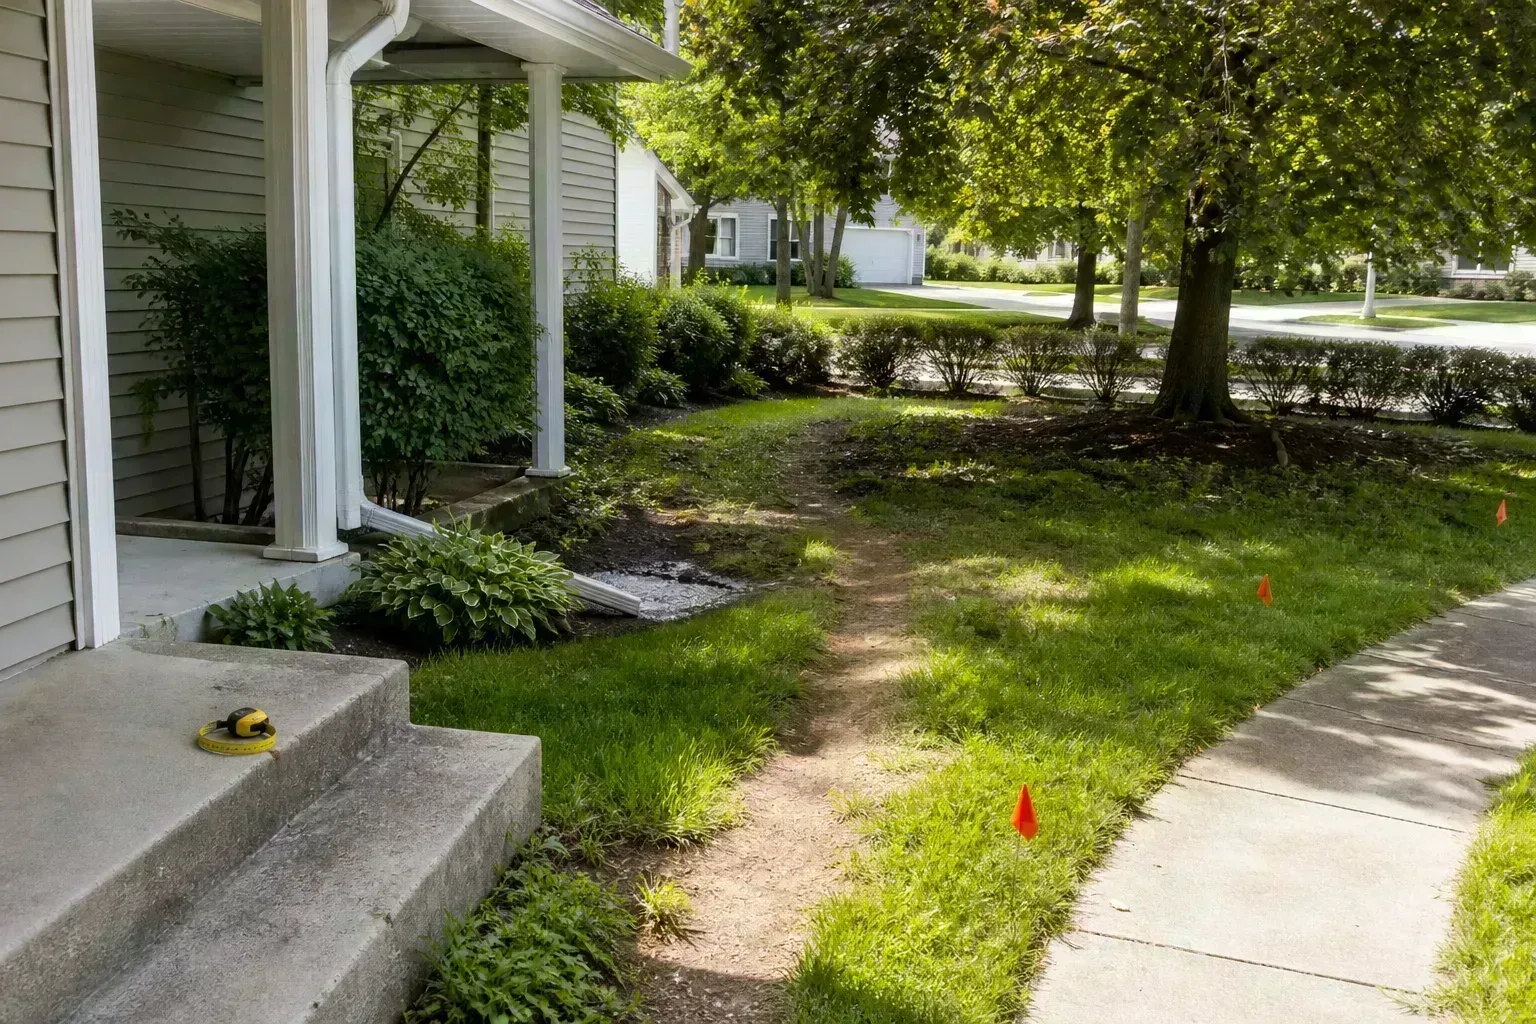
Measure plantable areas from the house outward, and use the plant’s mature width—not the nursery pot—to decide how much room it needs. The University of Minnesota Extension guide to planting trees and shrubs emphasizes selecting for the site and allowing plants room to develop. Before digging in the United States, request a utility locate through Call 811’s before-you-dig guidance; private irrigation, lighting, and invisible-fence lines may need separate locating. Check property boundaries, local rules, and any HOA restrictions before adding a wall, fence, curbside bed, or new hard surface.
Ideas 1–8: Make the entry and architecture feel connected
-
Echo the front-door color in a small planting. Choose one or two flowers or foliage tones that pick up the door, shutters, or trim. Repeating a color in a few places makes the house and garden feel related without turning every bed into a color match.
-
Use a pair of substantial entry containers. Two pots can frame a stoop or doorway, but they need drainage and enough soil volume for the exposure. Choose plants for the actual sun and wind at the door; matching containers do not require identical plantings.
-
Plant a low, continuous foundation bed. A broad bed under windows looks calmer than isolated shrubs dotted along the wall. Keep mature height below important windows and leave access to vents, meters, hose bibs, and siding for maintenance.
-
Make a simple porch-side planting portal. Place a taller shrub or narrow ornamental grass on one side of the entry, then balance it with a lower container or perennial group on the other. This asymmetry directs attention to the door without crowding steps.
-
Create a small fragrance pocket beside—not across—the walk. A locally hardy fragrant shrub or perennial near a porch seat can make the entrance more inviting. Keep thorny, allergenic, or bee-attracting plants away from a narrow passage or frequently used doorway.
-
Give the mailbox a low, tidy planting frame. A crescent of low groundcover and a few seasonal flowers can connect a roadside mailbox to the house. Keep the box, post, delivery approach, and driver’s view unobstructed, and verify any right-of-way rules.
-
Repeat one house material in the garden edge. A restrained brick band beside a brick facade or a similar stone in a path can tie the foreground to the house. Use the material once or twice rather than mixing several competing borders.
-
Use a deliberate view from the front window. Arrange one focal plant, sculpture, or small tree where it can be enjoyed indoors as well as from the street. Check that it will not grow into a window, cover an address sign, or block a view needed when backing out.
Ideas 9–16: Give visitors a clear, comfortable route
-
Make the main walk direct and obvious. A legible route from sidewalk or drive to the door feels more welcoming than a decorative path that makes visitors guess. Keep its surface stable and slip-resistant for the climate, and leave room for the people who use it.
-
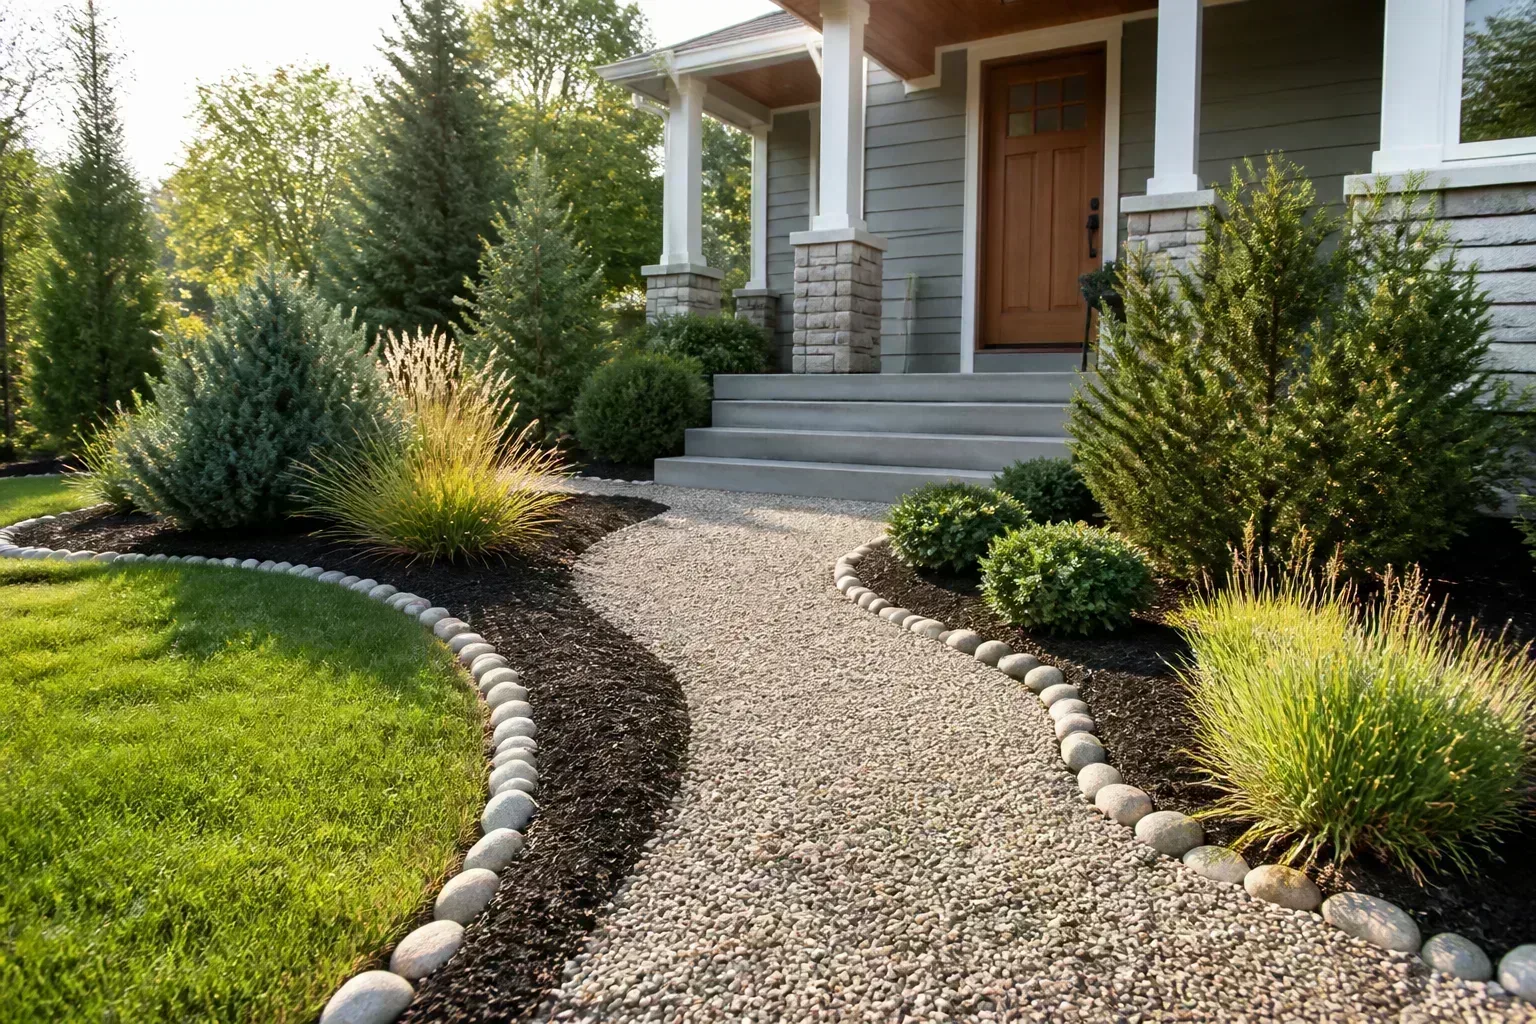
Let a gentle curve soften a long approach. A broad curve can slow the eye and make a long front yard feel more intimate. Keep the destination visible and avoid tight bends that reduce usable width or turn routine snow clearing into a chore.
-
Frame a path with one consistent edge. A narrow planting strip, brick soldier course, or flush metal edge gives the walk a clean outline. The edge should keep mulch and soil in place without becoming a raised trip hazard.
-
Add a generous landing at the door. A flat pause area makes room to open the door, set down a parcel, or wait for someone. Use materials that drain and stay secure underfoot, and coordinate step and landing changes with local building requirements.
-
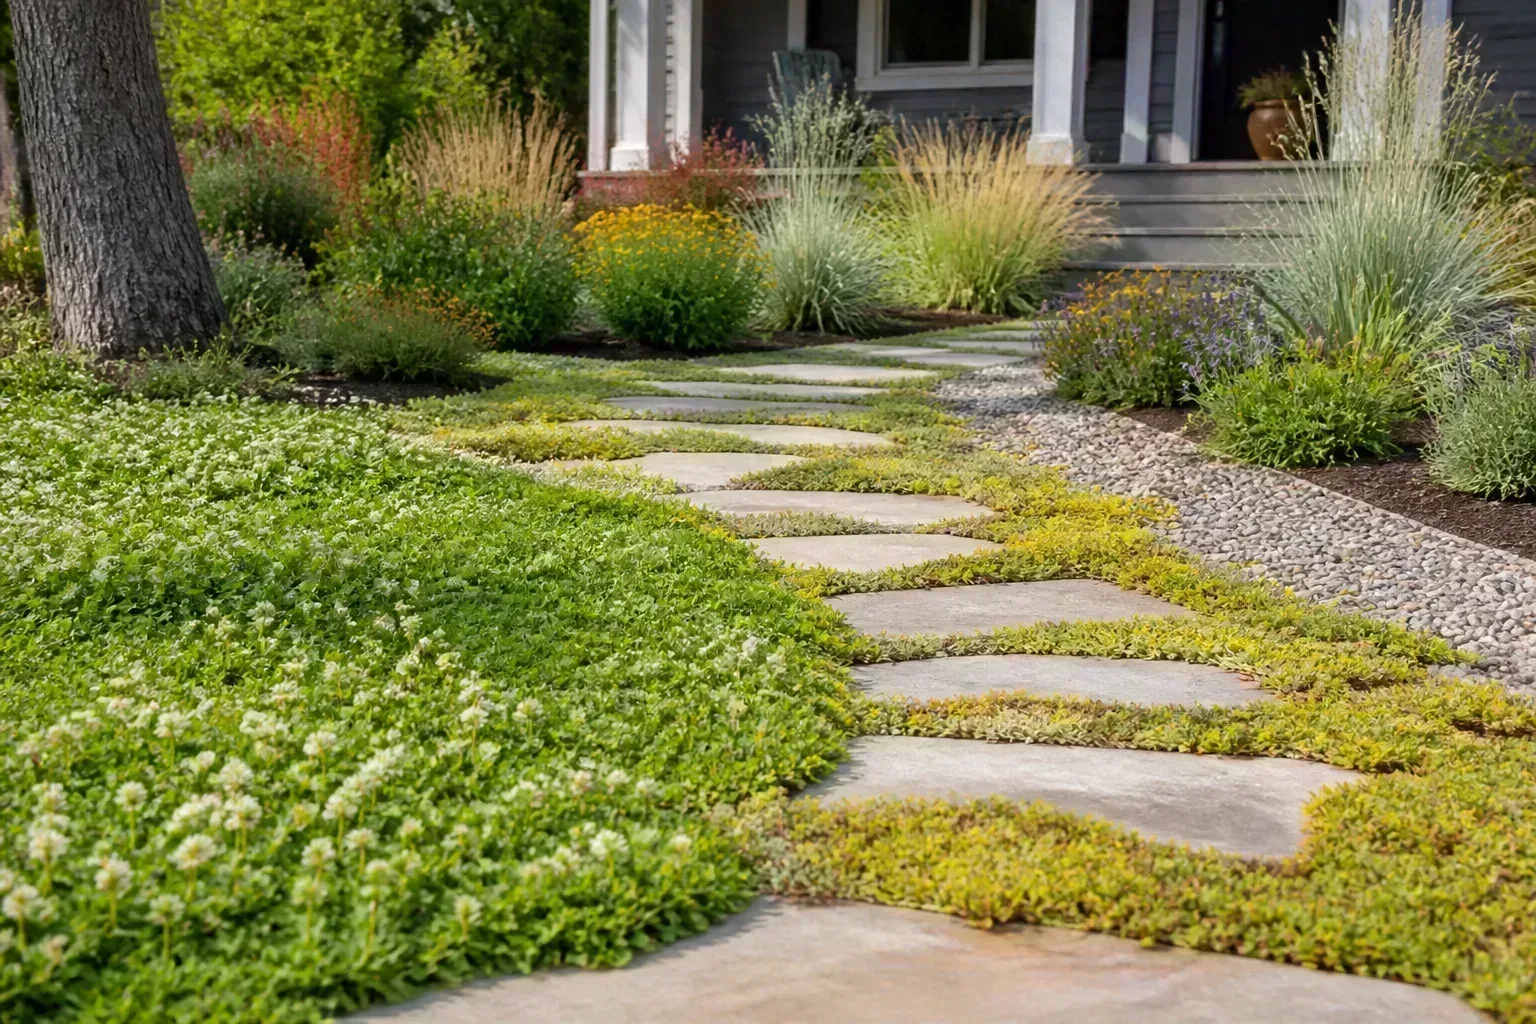
Use stepping stones for a secondary garden route. Stones set through low groundcover can connect a mailbox, side gate, or small bed without paving the whole yard. They are best for occasional garden access, not as the only route for mobility devices or wheeled deliveries.
-
Branch a small path to a useful side-yard destination. A simple spur to bins, a hose, or a gate reduces shortcuts through beds. Keep the route wide enough for the object being moved and preserve a clear strip for utility access.
-
Design a step-free approach where the site allows. A continuous, firm, stable route can make the entrance easier for strollers, visitors with mobility needs, and wheeled deliveries. Slope, cross-slope, width, handrails, and landings are site- and code-dependent; have a qualified professional check the design rather than guessing at a universal dimension.
-
Try a permeable gravel or grid path in a suitable spot. Stabilized aggregate can fit a naturalistic or water-conscious design, but loose stone can be difficult for wheels and may migrate into beds. The base, edging, slope, and local drainage rules matter as much as the surface; see the RHS guidance on permeable paving.
Ideas 17–25: Shape beds with layered planting
-
Widen a foundation bed until it can hold layers. A narrow strip often forces shrubs against the wall and leaves no room for a lower front edge. Draw the mature plant circles first, then widen only as much as access and the site allow.
-
Set a curved island bed into a broad lawn. An island can anchor an open yard when it has a clear outline and looks finished from all sides. Place its tallest element near the center or slightly off-center, then lower the planting toward the lawn.
-
Use a crescent bed to soften a straight facade. One broad curve can counter a boxy house without making mowing complicated. Keep the bed’s outer edge smooth enough to cut with a mower and repeat the curve elsewhere only if it supports the overall plan.
-
Layer plants by height without hiding the house. Put taller shrubs toward the back of a bed and shorter plants near the walk, but keep windows, address numbers, and sight lines open. The exact height depends on the facade, window sill, street, and mature size of each plant.
-
Repeat small groups instead of planting one of everything. Three drifts of the same low perennial can read as a design even when bloom is sparse. Repeat the shape or foliage at intervals, then vary bloom timing or texture for seasonal interest.
-
Let foliage carry a shady bed. Ferns, evergreen groundcovers, and regionally suitable foliage plants can create contrast without depending on constant flowers. Confirm moisture needs and spread; some familiar shade groundcovers are invasive in particular regions.
-
Make a restrained two-color flower border. Choose one dominant bloom color and one supporting color, then use foliage and neutral hardscape to bridge gaps. A small palette can still feel lively when heights, leaf shapes, and bloom periods differ.
-
Naturalize spring bulbs beneath later-growing perennials. Plant bulbs in loose clusters where their leaves can ripen after flowering, then let emerging perennials help cover the fading foliage. Check local winter suitability and avoid mowing or cutting the bulb leaves prematurely.
-
Plan bloom succession rather than a single peak. Combine plants that flower at different times so the bed does not look finished for only one month. Use a calendar from your region, and include dependable foliage or evergreen structure for the weeks between blooms.
Ideas 26–33: Add structure with trees, shrubs, and vertical layers
-
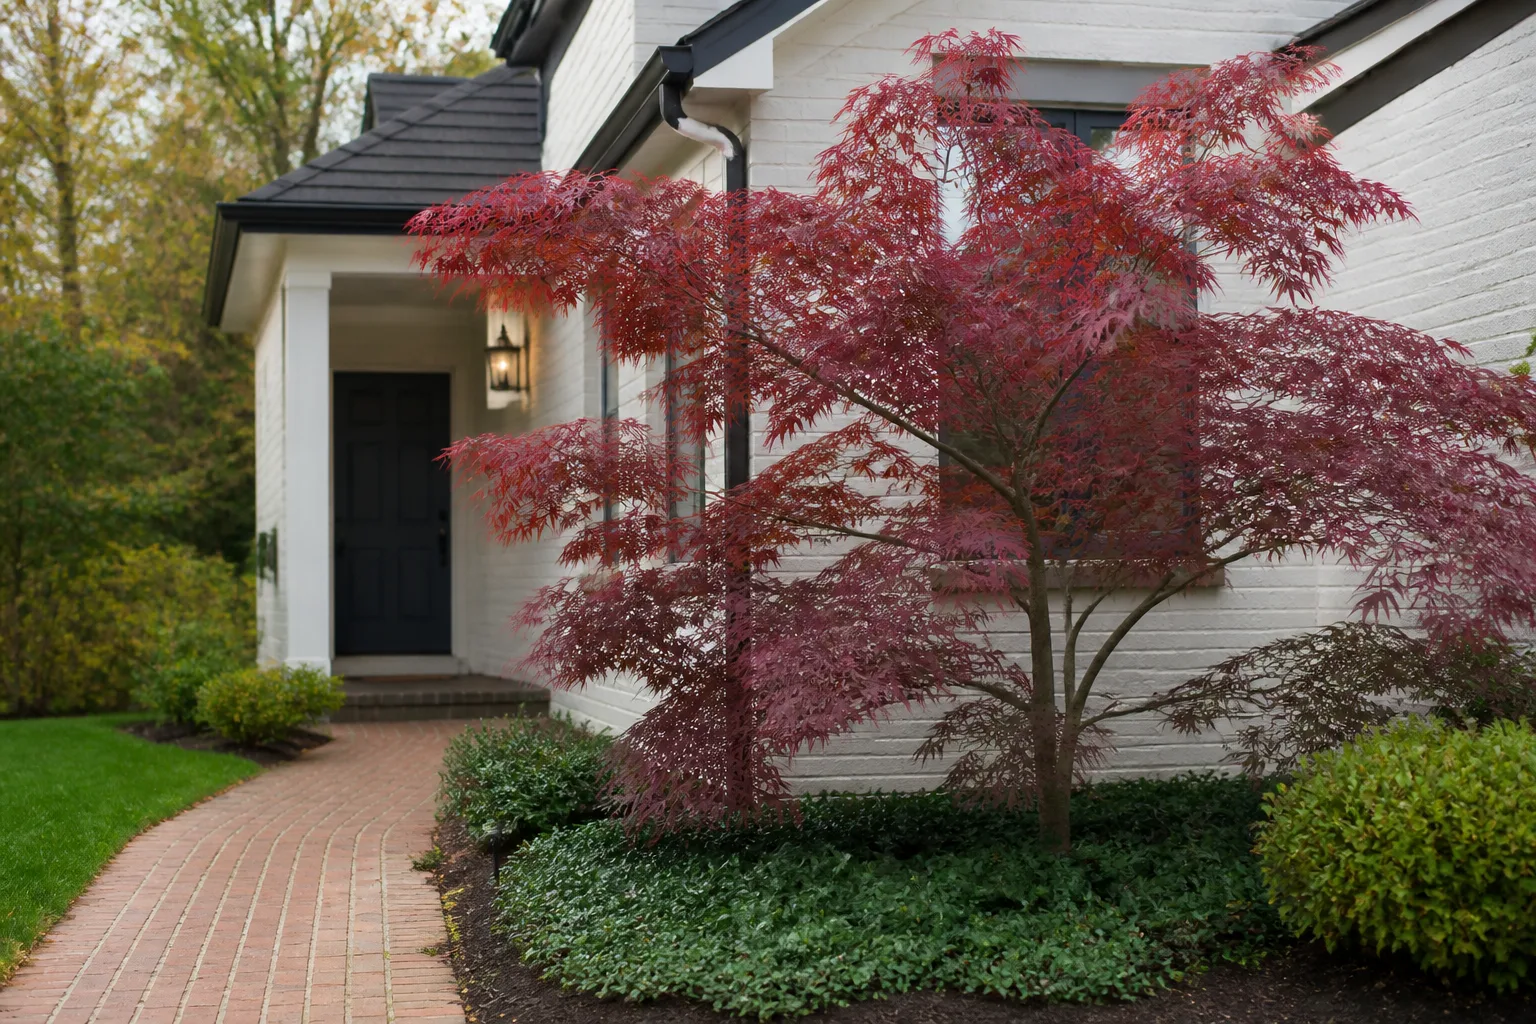
Choose one small focal tree sized for the actual yard. A multi-stem ornamental tree can give a modest front garden height and seasonal character. Verify its mature canopy, root space, overhead wires, foundation distance, and local performance before selecting a species or cultivar.
-
Keep a healthy mature tree and plant beneath it carefully. Existing canopy is valuable structure that can take decades to replace. Avoid raising grade, piling mulch, or trenching through major roots; use shade-tolerant plants that can establish with minimal soil disturbance.
-
Use a few evergreen anchors for winter shape. Repeated compact shrubs can make a front bed read clearly after perennials die back. Select cultivars that remain within the available width without frequent shearing, and check local disease or pest pressures.
-
Build a layered privacy screen instead of a solid hedge. Combine shrubs, small trees, and lower planting in a staggered line to soften a view while keeping the yard green. Keep the planting below required sight lines and leave space to prune from both sides.
-
Group flowering shrubs as a loose border. Three shrubs of one locally suitable type can make a stronger visual block than several unrelated specimens. Match sun, soil, moisture, and mature width; don’t force a large shrub into a narrow path-side bed.
-
Use a fruiting or edible small tree as an ornamental focal point. A locally adapted fruit tree can add blossom and a harvest, but fallen fruit, wildlife, pruning, and pollination needs are real trade-offs. Keep it away from paving that would become slippery or stained.
-
Train a suitable vine on a freestanding trellis. A trellis can add height where a deep bed will not fit, especially near a gate or blank wall. Choose a non-invasive climber for the region, anchor the support for wind, and keep it off gutters and siding unless the structure is designed for it.
-
Create an allée with evenly spaced small trees. A short row can emphasize a walkway or long lot and lend rhythm to a simple house. Confirm mature canopy and root spacing, keep the row clear of underground and overhead utilities, and do not plant a formal avenue where it narrows access.
Ideas 34–42: Rethink the lawn with a purpose
-
Keep a useful lawn and give it a deliberate shape. A compact rectangle can work well for play, pets, or a clear foreground. The goal is not to eliminate turf automatically; keep the area that earns its mowing and reduce the awkward edges that do not.
-
Replace skinny, hard-to-mow strips with a bed or path. A narrow ribbon between fence and sidewalk often needs more trimming than it contributes visually. Widen a planted border or use a suitable permeable path, while checking access, drainage, and local right-of-way rules.
-
Make the lawn edge a broad curve rather than a zigzag. Gentle, mowable contours create a softer outline without adding many difficult corners. Mark the curve with a hose before digging and mow it from the same angle you will use later.
-
Use regionally appropriate groundcover in low-traffic areas. Groundcovers can replace mowing in a shaded or dry patch if they suit the soil and climate. Check spread and local invasive lists first, and remember that most need weeding and watering while they establish.
-
Try a low-input turf mix where people still need to walk. A locally recommended grass blend can be a better choice than a lawn alternative that cannot tolerate foot traffic. Match it to sun, rainfall, and use; reduce fertilizer or irrigation only when the species and local conditions allow.
-
Create a native pollinator border with a crisp outer edge. Group regionally native flowers and grasses by light and moisture, with blooms across the growing season. A clean mown edge makes a wildlife-friendly planting read as intentional; check local native lists rather than copying a distant plant palette. Penn State Extension’s native-plant spotlights offer a starting point for wildlife-oriented regional choices.
-
Convert part of the lawn to a framed meadow planting. A small meadow can add habitat and seasonal texture without turning the whole yard into an unmanaged patch. Choose species for the local ecoregion, plan establishment weeding, and confirm that height and appearance rules permit it.
-
Make a dry garden with gravel only where the site supports it. Heat- and drought-adapted plants can suit a sunny, fast-draining area, but gravel reflects heat and does not make a thirsty plant water-wise. Use a limited palette and avoid blanket rock cover in humid or shaded beds.
-
Group plants into watering zones. Put plants with similar water needs together so irrigation can be adjusted to the bed rather than the whole yard. The EPA WaterSense landscaping tips recommend climate-aware plant selection and grouping by water need; local water restrictions and rainfall still determine the right schedule.
Ideas 43–50: Work with grade, water, and hardscape
-
Use a planted splash area below a downspout. A short run of stone, a rain chain, or a planted basin can make roof runoff part of the design. Keep overflow directed away from foundations and neighboring property, and make sure the downspout still functions during heavy rain.
-
Place a rain garden at a suitable low point. A shallow, planted depression can hold a temporary pulse of runoff where the soil and layout support it. Test drainage and plan a safe overflow; do not put it against the foundation or assume every wet spot is a good rain-garden site.
-
Shape a shallow vegetated swale to slow surface flow. A broad, gently sloped channel can guide water while remaining part of the landscape. Confirm where the water will go during a storm and use local engineering or extension guidance if the flow is large or near a building.
-
Terrace a slope in short, planted steps. Several low terraces can create usable planting areas and reduce the visual sweep of a bank. Retaining walls that hold soil or loads require proper drainage and sometimes permits or engineering; do not improvise a tall wall from a photo.
-
Use permeable paving for a suitable parking strip or apron. Permeable pavers can make a hard-working area feel integrated with planting while allowing water through the surface. They need a correctly built base and maintenance, and local rules may limit changes near sidewalks or streets.
-
Make a small stone or brick threshold pad. A compact pad can catch muddy shoes and provide a defined transition from path to porch. Use a stable, reasonably level surface, leave drainage routes open, and pick a finish that is not slippery in rain or frost.
-
Add a flush mowing strip between turf and beds. A level band of pavers or stone gives mower wheels a clean edge and can reduce string-trimming. Keep it even with surrounding grade so it does not collect water or become a raised obstacle.
-
Use a dry creek bed only where it follows real runoff. A shallow stone channel can make a seasonal drainage route look intentional, but decorative rock alone will not fix erosion or flooding. Size the route for actual flow and provide a stable, safe outlet before planting around it.
Ideas 51–58: Make small front spaces useful
-
Turn a little-used corner into a compact sitting court. A small permeable surface and one comfortable chair can make a front yard a place to pause, not just a view from the street. Keep the route to the door clear and orient seating for privacy without blocking windows.
-
Build a low seat wall along a planted edge. A short wall can define a bed and offer a place to sit while waiting. Make it stable, avoid sharp corners beside a narrow path, and check whether the wall height or location triggers local review.
-
Plant a narrow side setback vertically. Use a slim trellis, a repeated row of small pots, or a narrow groundcover ribbon where width is limited. Preserve a working corridor to meters, gates, drains, and the side of the house.
-
Use window boxes as a seasonal accent, not a high-maintenance obligation. Choose a box and brackets rated for the load, provide drainage, and match plants to the window’s sun and wind. Accessible watering matters: a beautiful box that cannot be reached safely soon becomes a chore.
-
Group portable containers in one composed cluster. Three containers in related materials or colors look more intentional than scattered pots. Use larger vessels that do not dry as fast, ensure drainage, and account for their weight before placing them on a porch or stair.
-
Plant herbs in an ornamental front-border pocket. A sunny, reachable strip can combine culinary herbs with flowers and foliage. Choose herbs suited to the local climate and soil, keep thorny or sprawling plants out of the walk, and avoid harvesting from roadside areas exposed to vehicle spray.
-
Make a welcoming gate garden. A simple gate framed by low planting can mark the transition from public walk to private yard. Keep hardware accessible, preserve visibility through or around the gate, and select climbers that will not become difficult to contain.
-
Give a small porch one defined plant shelf or trough. A single fixed planting zone can add greenery where there is no bed space. Secure it against wind, protect siding and drainage, and keep the stair landing clear rather than lining every step with pots.
Ideas 59–66: Stretch color and texture across the seasons
-
Drift early bulbs beneath deciduous trees. A broad, repeated cluster can bring color before the canopy leafs out. Choose bulbs suited to local winters and let the foliage die back naturally; later perennials can hide the declining leaves.
-
Build a border around successive bloom periods. Pair early, midseason, and late-flowering plants with foliage that remains attractive between peaks. Use a local bloom calendar; the same cultivar can flower weeks apart in different climates.
-
Concentrate annual color in one easy-to-refresh pocket. A small patch near the entrance can provide bright seasonal color without requiring annuals across every bed. Match the species to sun and irrigation, and plan for regular watering during hot or windy weather.
-
Use a two-tone palette that changes with the season. Keep the structural greens and hardscape consistent, then let one flower color shift from spring to autumn. This gives the garden variety without forcing every bloom to match the house year-round.
-
Choose foliage for contrast after flowers fade. Combine broad leaves, fine grasses, silver or dark foliage, and different heights so the bed still has form between blooms. Confirm that each plant’s mature spread leaves room for air and access.
-
Add a restrained fall-color moment. One regionally suited shrub or small tree with autumn color can anchor the view without making the whole garden depend on a short display. Consider leaf drop, fruit litter, and the available root and canopy space.
-
Leave selected seed heads for winter texture and wildlife. Upright stems can catch frost and give a bed structure after flowering. Keep the practice selective: remove diseased material, maintain sight lines, and cut back species that self-seed aggressively in your region.
-
Combine evergreen shapes with deciduous movement. A few stable evergreen forms give winter structure while grasses or perennials add motion in warmer months. Space plants for mature size so the evergreen does not become a permanent pruning project.
Ideas 67–74: Choose a style that relates to the house
-
Use a modern, restrained composition. Repeat a small number of plant forms, set them against a limited hardscape palette, and keep edges clean. The effect depends on proportion and negative space, not on covering the yard in stone.
-
Borrow cottage-garden abundance but give it a frame. Mix flowers, grasses, and climbers in generous groups, then contain them with a clear path edge or low boundary. Homes & Gardens’ front-yard cottage-garden examples show the style range; choose plants for your region rather than copying a temperate British palette.
-
Use symmetry to settle a formal entrance. Repeat bed shapes or matching shrubs on either side of a central path. If light or drainage differs, keep the structure symmetrical and adapt the plants to each side instead of forcing identical species into unlike conditions.
-
Create a woodland-inspired front garden beneath existing trees. Layer shade-tolerant native or regionally adapted plants beneath the canopy, leaving a simple route through the planting. Protect tree roots and check whether plants will tolerate dry shade rather than assuming a woodland site stays moist.
-
Shape a water-wise garden around local dryland plants. A gravel or mineral mulch palette can suit an arid climate when species are adapted to heat, soil, and cold snaps. Do not import a Southwestern plant list into a humid or freezing region without checking local suitability.
-
Use Japanese-garden influence as a principle, not a prop list. Restraint, asymmetry, careful stone placement, and a quiet focal view can inform a small front garden. Avoid mixing decorative lanterns, gravel, and maples as a theme kit without considering the actual site and cultural context.
-
Echo the home’s age and materials without making a replica. A brick cottage may suit a relaxed border and reclaimed paving, while a contemporary facade may call for fewer, larger plant masses. Use one architectural cue, then adapt the planting to current accessibility and maintenance needs.
-
Design for a windy or coastal exposure. Use plants and materials tested for local wind, salt, and storm conditions, and avoid tall unstable containers at the entry. Check regional extension lists; “coastal tolerant” is not interchangeable across coastlines.
Ideas 75–82: Add details that earn their place
-
Light the route and one focal feature, not every plant. Shielded, low-glare fixtures can help people find the walk while keeping light out of neighbors’ windows and drivers’ eyes. Follow local electrical requirements and choose outdoor-rated equipment for the exposure.
-
Place one sculpture where the garden needs a focal point. A stone, metal, or ceramic piece can hold attention when flowers are between seasons. Give it breathing room and a stable base; several unrelated ornaments can make a small yard feel crowded.
-
Add a birdbath where it is visible and easy to clean. Place it near cover but not so close that predators can hide directly beside it, and keep a path for routine scrubbing and refilling. In freezing climates, plan to drain or protect it seasonally.
-
Make house numbers easy to see from the street. Put clear, contrasting numbers on a wall, post, or low planting backdrop that will not disappear behind foliage. Keep the address visible at night and avoid placing signs where they conflict with official signage.
-
Keep a service-access strip around utilities and equipment. A narrow gravel or low-groundcover zone can look tidy while leaving meters, cleanouts, air-conditioning units, and utility panels reachable. Never conceal a required clearance with shrubs or a fixed planter.
-
Use reclaimed stone or brick as a limited accent. Reuse material for a path border, small pad, or bed edge when it is sound and suitable for outdoor use. Check for contaminants or unstable pieces before bringing salvaged material into a garden.
-
Add a small recirculating fountain only if you can maintain it. A modest water sound can animate a quiet entry court, but pumps, evaporation, winterizing, and cleaning are recurring work. Check local water limits and keep cords and basins out of the clear route.
-
Leave room for maintenance before the planting fills in. Plan a route for a hose, mower, ladder, and seasonal pruning, and avoid narrow gaps that cannot be reached without stepping on plants. Good access is a design feature that keeps a front yard looking cared for.
Adapt a favorite idea to your climate and household
Treat a design photograph as a composition, not a plant prescription. Translate it into a few elements—such as a focal tree, a curving walk, and a repeated border—then select species from local extension or native-plant lists. Check regional invasive status before buying anything that spreads; a plant sold in one area may be restricted or ecologically damaging in another.
Water needs, winter temperatures, summer heat, salt exposure, soil drainage, and shade from mature trees can change which version of an idea will work. The EPA’s WaterSense landscape guidance recommends planning around local climate and grouping plants with similar water needs. That does not mean every yard should be xeric: a rain garden, a useful lawn, and a dry border can coexist when each occupies the right part of the site.
Before building, check property boundaries, easements, street-tree and right-of-way rules, driveway sight triangles, local water restrictions, permits, and HOA requirements. A bed close to a public sidewalk has different height and access needs from a private foundation border. If drainage, steep slopes, walls, or accessible routes are involved, get site-specific advice from the relevant local department or a qualified landscape professional.
Budget and build in sensible phases
Make a base sketch and mark what must stay: healthy mature trees, drains, service access, the main walk, and any useful lawn. Add the main route and drainage decisions next, then draw bed outlines, choose a small repeated palette, and price materials. This sequence prevents spending on decorative plants before you know where excavation, grading, or a path needs to go.
Build one visible, manageable section first. You might widen a foundation bed, edge the walk, and plant one group of shrubs, then observe how it handles a full season before extending the same pattern. Reuse divisions and sound materials where practical, but do not budget around free plants until you know they suit the conditions. Keep a contingency for soil, delivery, drainage, and any work that should be done by a professional.
Avoid the front-yard mistakes that create extra work
Do not copy a full photo literally. Mature plants can cover windows, undermine a narrow path, hide an address, or block a driveway view. Do not solve a wet site with a mound of soil over roots, send runoff toward a neighbor, or use gravel as a substitute for assessing drainage. A surface that lets some water through still needs a suitable base and a safe overflow route.
Avoid planting first and checking the utilities, rules, or access later. Before digging in the United States, request an 811 locate and separately identify private lines; elsewhere, use the local service. Keep plant height low where drivers, cyclists, and pedestrians need to see, and verify local standards instead of assuming one clearance applies everywhere.
Finally, do not confuse “low maintenance” with “no maintenance.” A meadow needs establishment weeding, a hedge needs pruning, containers need water, and a rain garden needs a safe overflow. Choose the work you are willing to do, group tasks and plants, and leave enough access to perform them without damaging the design.
Conclusion
The strongest front yard is a good fit for the home and the people who use it. Start by mapping light, water, circulation, mature plant space, utilities, and local rules; then choose a few ideas that reinforce one another instead of trying to install all 82. A clear route, repeated planting, suitable surfaces, and realistic maintenance will make the design feel considered long after the first season.



