How to Propagate Plants From Cuttings
Learn how to propagate plants from cuttings with the right node, medium, light, humidity, and aftercare for houseplants, herbs, shrubs, and more.
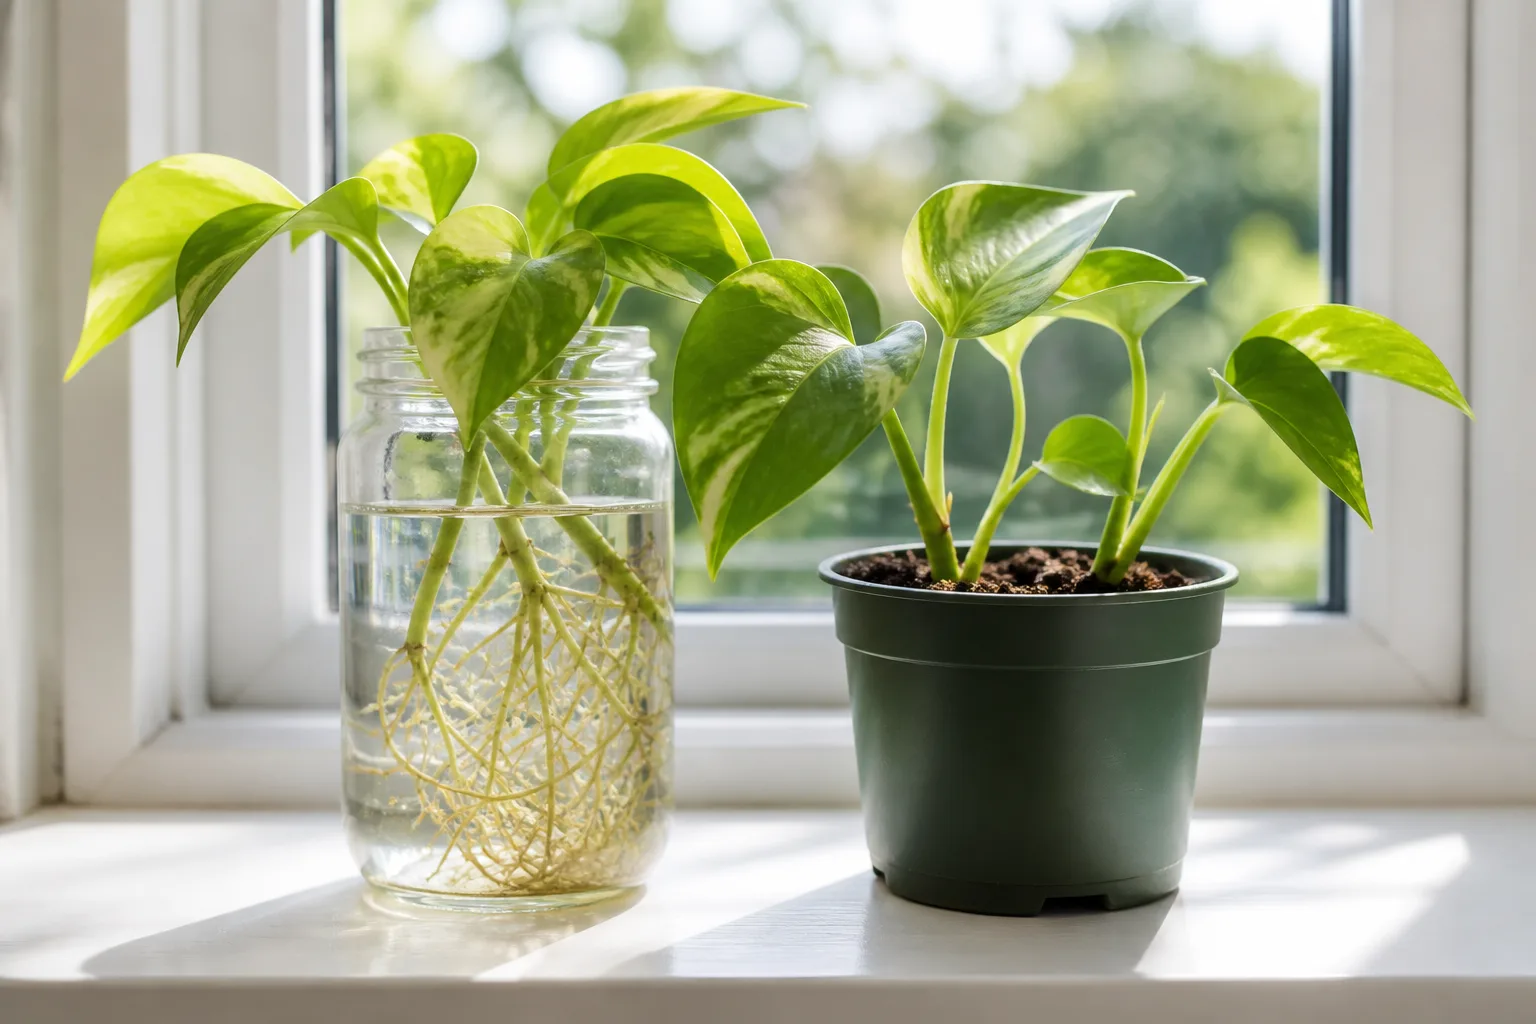
The most reliable way to propagate a plant from a cutting is to start with a healthy, well-hydrated stem that contains a viable node, then give it moisture, air, warmth, and gentle light in the right balance. The basic cut is quick; the judgment around that cut—what part of the stem to use, whether to root it in water or a medium, and how to prevent rot—is what determines whether you get a plant or a shriveled stem.
This method works beautifully for many houseplants, herbs, annuals, perennials, and some shrubs. It is not a universal shortcut: a pothos vine, a rosemary tip, and a dormant willow stem do not need exactly the same timing or aftercare. Use the guide below as a decision system, then check the care requirements for the particular plant you want to multiply.
The Quick Answer: Match the Cutting to the Plant
For a first attempt, choose a plant that grows obvious leafy stems and is actively producing fresh growth. Pothos, philodendron, tradescantia, coleus, mint, basil, peperomia, and many similar plants are forgiving because a short stem section with a node can often produce roots without elaborate equipment. BBC Gardeners’ World Magazine likewise recommends healthy, flexible, non-flowering growth and a gritty, well-drained medium (BBC Gardeners’ World Magazine: Plants for Cuttings).
Use this beginner rule: soft, flexible, non-flowering growth is usually the easiest place to start. If the stem is old and rigid, the plant is dormant, or the species is known to root slowly, you can still try, but expect a longer wait and use the method recommended for that type of wood. A cutting that is technically alive can still fail if it loses water faster than it can form roots.
Before you cut, ask three questions. Is the parent plant actively growing and free of pests or disease? Does the piece contain at least one node, bud, or other structure the species can use to make roots? And can you keep the cutting warm, lightly shaded, and consistently moist without leaving it in stagnant wet conditions?
How Stem Cuttings Make a New Plant
A stem cutting is a piece of stem with one or more attached leaves or buds. Once separated from the parent plant, it must develop roots of its own; after those roots can supply water, the cutting becomes an independent plant. This is a form of vegetative propagation, so the new plant generally keeps the parent’s defining traits more closely than a seed-grown plant would. Purdue Extension explains that cuttings are useful for preserving characteristics such as variegation, sex, and other named-plant traits that may not come true from seed (Purdue Extension: New Plants From Cuttings).
The node is the critical landmark. It is the point where a leaf, bud, side shoot, or aerial root joins the stem, and it contains the growth tissue and hormone activity that can support root initiation. The stem section between two nodes is an internode; for most ordinary houseplant stem cuttings, an internode by itself is a poor bet even if it looks green.
Once you sever the stem, the leaves keep losing water through transpiration while the cutting has no roots to replace that loss. That is why successful propagation is a balancing act: leave enough foliage to support the cutting, remove enough to reduce evaporation, keep the rooting end in an airy moist environment, and protect the leaves from heat and direct sun. The cutting is not “resting” while you wait; it is spending stored energy on wound response and new root tissue.
Choose the Parent Plant and Stem
Select a parent plant that is vigorous for the season, not merely large. Avoid stems with blackened tissue, pest stippling, soft rot, unexplained yellowing, or a heavy load of flowers. A cutting can carry problems into a new pot, and high humidity around a weak or infected piece makes those problems harder to see and easier to spread.
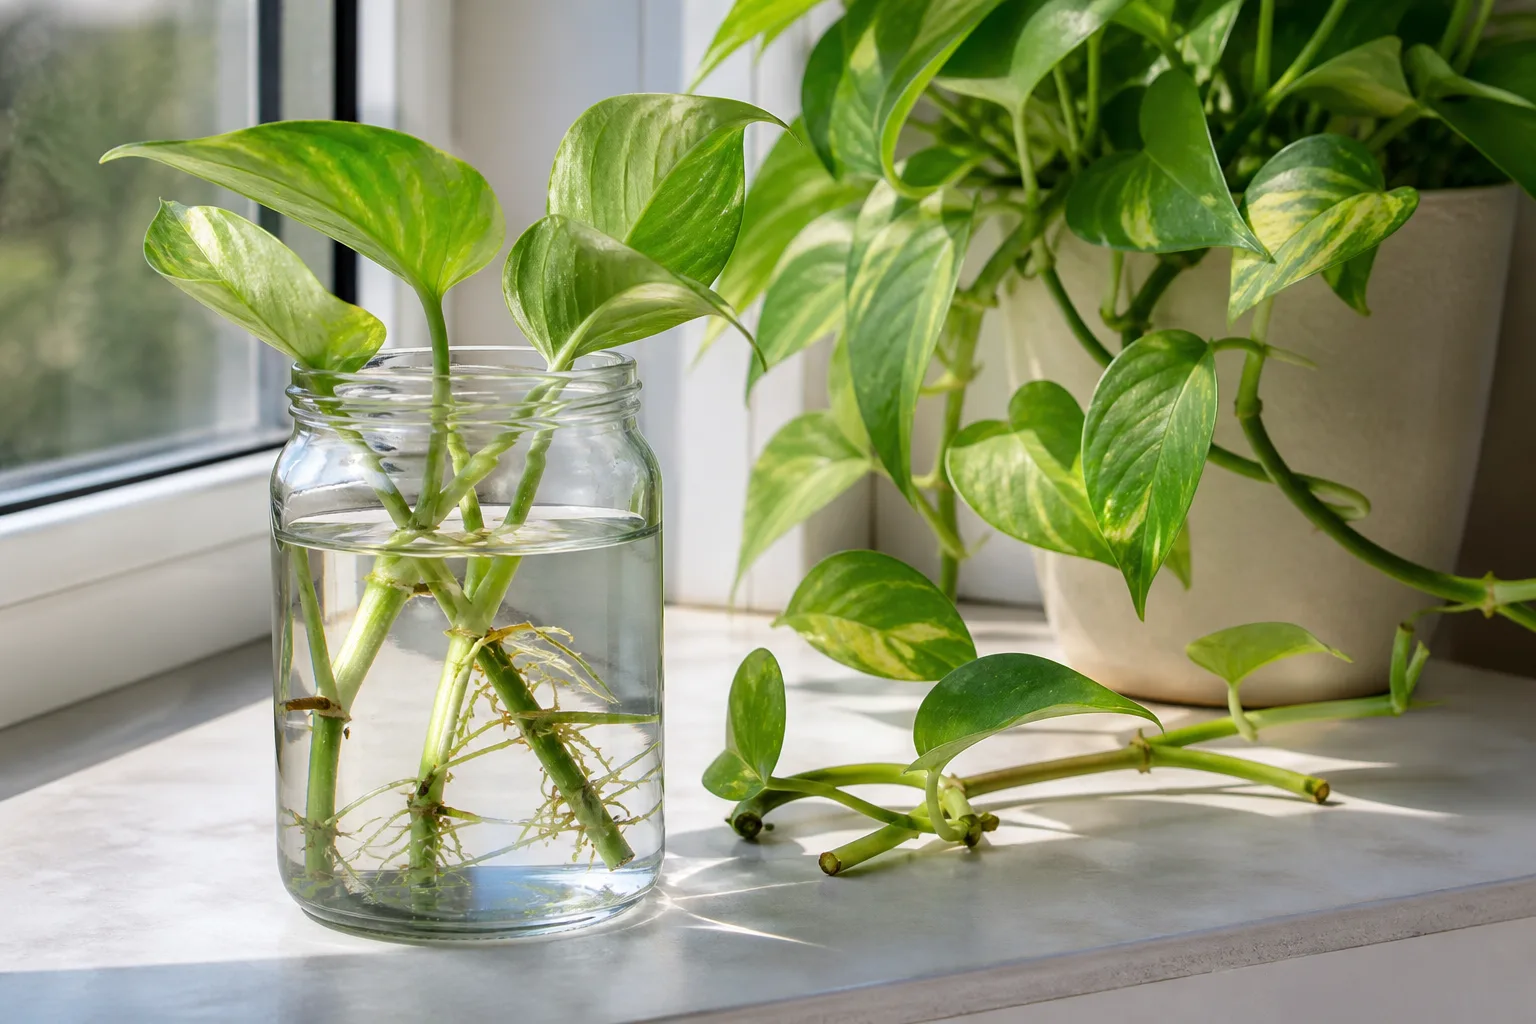
Water the parent plant thoroughly the day before if it is dry, and take the cutting early in the day when the tissues are full of water. Keep the harvested piece out of sun while you work. If you must delay preparation, place it in a clean plastic bag with a little moisture and keep it cool; the RHS advises preparing soft material promptly because it wilts quickly (RHS: Propagation Techniques).
For a typical leafy houseplant, aim for a cutting about 4 to 6 inches long with at least one strong node and a few leaves above it. A very long cutting carries more leaf area to support and more stem to dry or rot, while a tiny piece may not have enough stored energy. The exact length matters less than the node, healthy tissue, and a manageable leaf-to-stem ratio.
Softwood and Herbaceous Cuttings
Herbaceous stems stay soft rather than becoming woody, so they can often be taken whenever the plant is actively growing. This includes many houseplants, annual herbs, and tender perennials. Choose a stem that bends easily and feels firm rather than watery or limp; the tip should look like useful new growth, not a flower stalk that is already committing its energy to bloom.
Softwood cuttings come from young growth on woody plants, usually in spring or early summer. The RHS describes this material as soft and flexible and notes that it has high rooting potential, which is why softwood is often the best chance for plants that are more difficult later in the year (RHS: Softwood Cuttings). Take the piece from a non-flowering shoot when possible, and pinch off buds if that is the only healthy material available.
Semi-Hardwood and Hardwood Cuttings
Semi-hardwood cuttings use current-season growth whose base has begun to firm while the tip is still relatively soft. They are common for evergreen shrubs, climbers, herbs, and some deciduous shrubs in late summer to early autumn. The RHS recommends choosing healthy shoots with short internodes and a firm base, and keeping them shaded and cool until they are prepared (RHS: Semi-Ripe Cuttings).
Hardwood cuttings come from mature, dormant stems, usually taken in winter or early spring. They are useful for selected shrubs, vines, trees, and plants such as willow or forsythia, but they generally root more slowly than softwood. Purdue Extension notes that hardwood cuttings may take two to four months, so do not discard a firm, healthy piece after only a few weeks because it has not produced leaves.
Choose Water or a Rooting Medium
Both methods can work, but they solve different problems. Water is easy to observe and forgiving when you are learning to identify nodes; a rooting medium gives roots air as well as moisture and avoids a later transition from water-grown roots to a potting environment.
| Choose water when… | Choose a rooting medium when… |
|---|---|
| The plant is a vigorous, soft-stemmed houseplant or herb. | The cutting is woody, slow, rot-prone, or intended for garden planting. |
| You want to see root development without disturbing the cutting. | You want the roots to form in the environment where they will continue growing. |
| You can keep the vessel clean and the node submerged without leaves sitting in water. | You can provide a porous mix, gentle humidity, and a warm rooting zone. |
| You will move the cutting before roots become long and tangled. | The species is known to make weak or poorly adapted water roots. |
Missouri Botanical Garden makes the important distinction that some plants root in water, but cuttings generally develop a better root system in a soilless potting mix; it also points to sand or perlite for cuttings that need extra drainage (Missouri Botanical Garden: Propagating Plants by Cuttings). Treat that as a useful default, not a ban on water propagation.
When Water Is the Practical Choice
Water propagation is especially useful for pothos, philodendron, tradescantia, coleus, mint, and many other plants with obvious nodes along flexible stems. It lets you see whether the node is producing roots, makes it easier to demonstrate the process to children, and removes the guesswork of checking whether a hidden cutting has rooted.
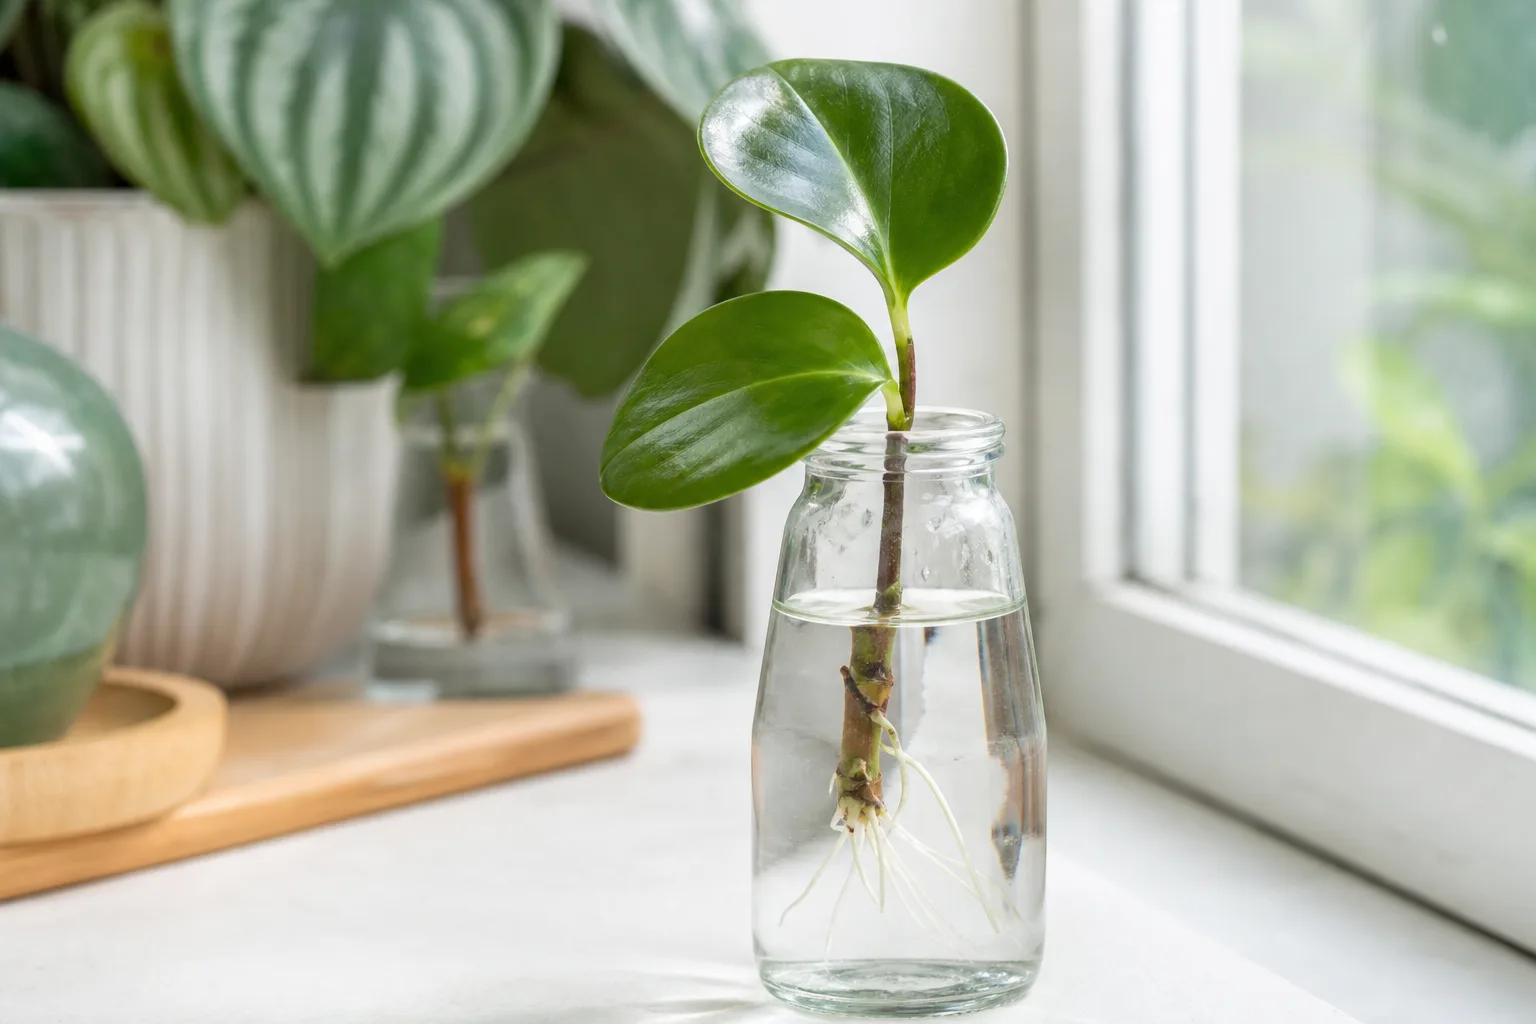
The weakness is that a cutting may make long, pale water roots and then pause after potting as it adjusts to a porous medium. Cloudy water, a submerged leaf, or a soft base means clean the vessel and recut above damaged tissue rather than simply topping up the jar.
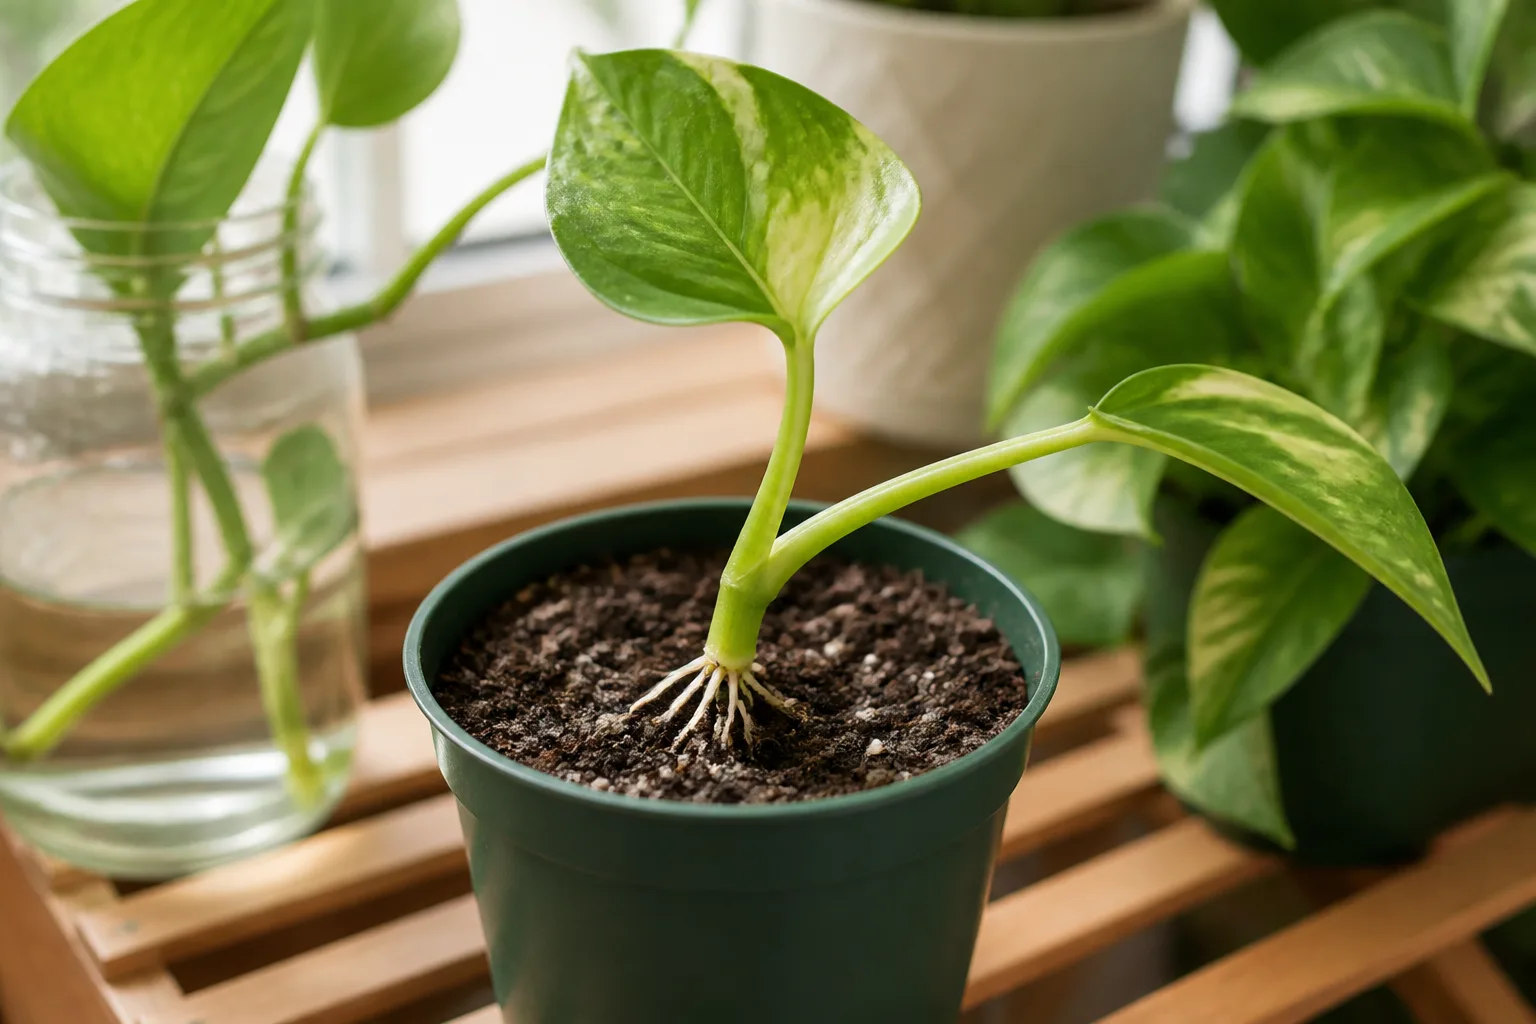
Use a small clean glass or jar, cover one or two nodes, and keep every leaf above the waterline. Place it in bright, indirect light, refresh cloudy water, and pot it while the roots are young enough to handle.
When a Rooting Medium Is the Better Choice
Use a rooting medium for most woody cuttings and for any plant that is prone to rot when kept in a jar. A suitable mix should hold moisture around the cutting while leaving air spaces around the developing roots. Purdue Extension gives a 50:50 vermiculite-and-perlite mix as one workable example and emphasizes that continuously waterlogged media deprive roots of air (Purdue Extension: New Plants From Cuttings).
You can use a fresh, well-drained cutting mix made from ingredients such as perlite, vermiculite, coir, clean sand, or a peat-free propagation compost. Do not use soil dug from the garden for a small indoor propagation pot; it can compact around the stem and introduce organisms into a fresh wound. Pre-moisten the mix, then let excess water drain before inserting the cutting.
Step-by-Step: Root a Stem Cutting in a Medium
This is the best all-purpose procedure for a leafy cutting that you want to move directly into a potting routine. Assemble a clean container with drainage, fresh pre-moistened rooting medium, sharp pruners or a knife, a pencil or dibber, and a loose clear cover that can be kept away from the leaves.
- Prepare the cutting station first. Clean the pot, tool, work surface, and any cover. Have the parent plant hydrated and the medium ready so the severed stem is exposed for as little time as possible.
- Make the basal cut just below a node. Choose a healthy non-flowering section and cut cleanly rather than crushing the stem. For a normal leafy cutting, leave one to three nodes above the portion that will sit in the medium.
- Reduce the leaf load. Strip leaves from the lower section so none will be buried or touch the medium. Leave the top two or three leaves when they are modest in size; halve very large leaves or remove another leaf if the piece wilts quickly.
- Remove flowers and buds. Flowers do not help root initiation and can use the cutting’s stored resources or mold under a cover. If the parent has only flowering shoots, pinch the flowers off and use the healthiest stem available.
- Use rooting hormone selectively. Many easy houseplants root without it. If you use a commercial product, place a small amount in a separate cup, follow its label, lightly coat only the basal portion, and discard the used powder instead of returning it to the container. Missouri Botanical Garden specifically warns against contaminating the original hormone supply with a wet cutting.
- Make the planting hole before inserting the stem. A pencil hole slightly wider than the cutting prevents the medium from scraping off the hormone and keeps you from forcing the stem through compacted mix. Set the cutting deep enough to secure at least one node, but keep the remaining leaves above the surface.
- Firm, then water sparingly. Press the medium gently around the stem so there are no large air gaps, then water enough to settle the mix. Drain the container fully; the goal is moist contact, not a saturated pocket around the wound.
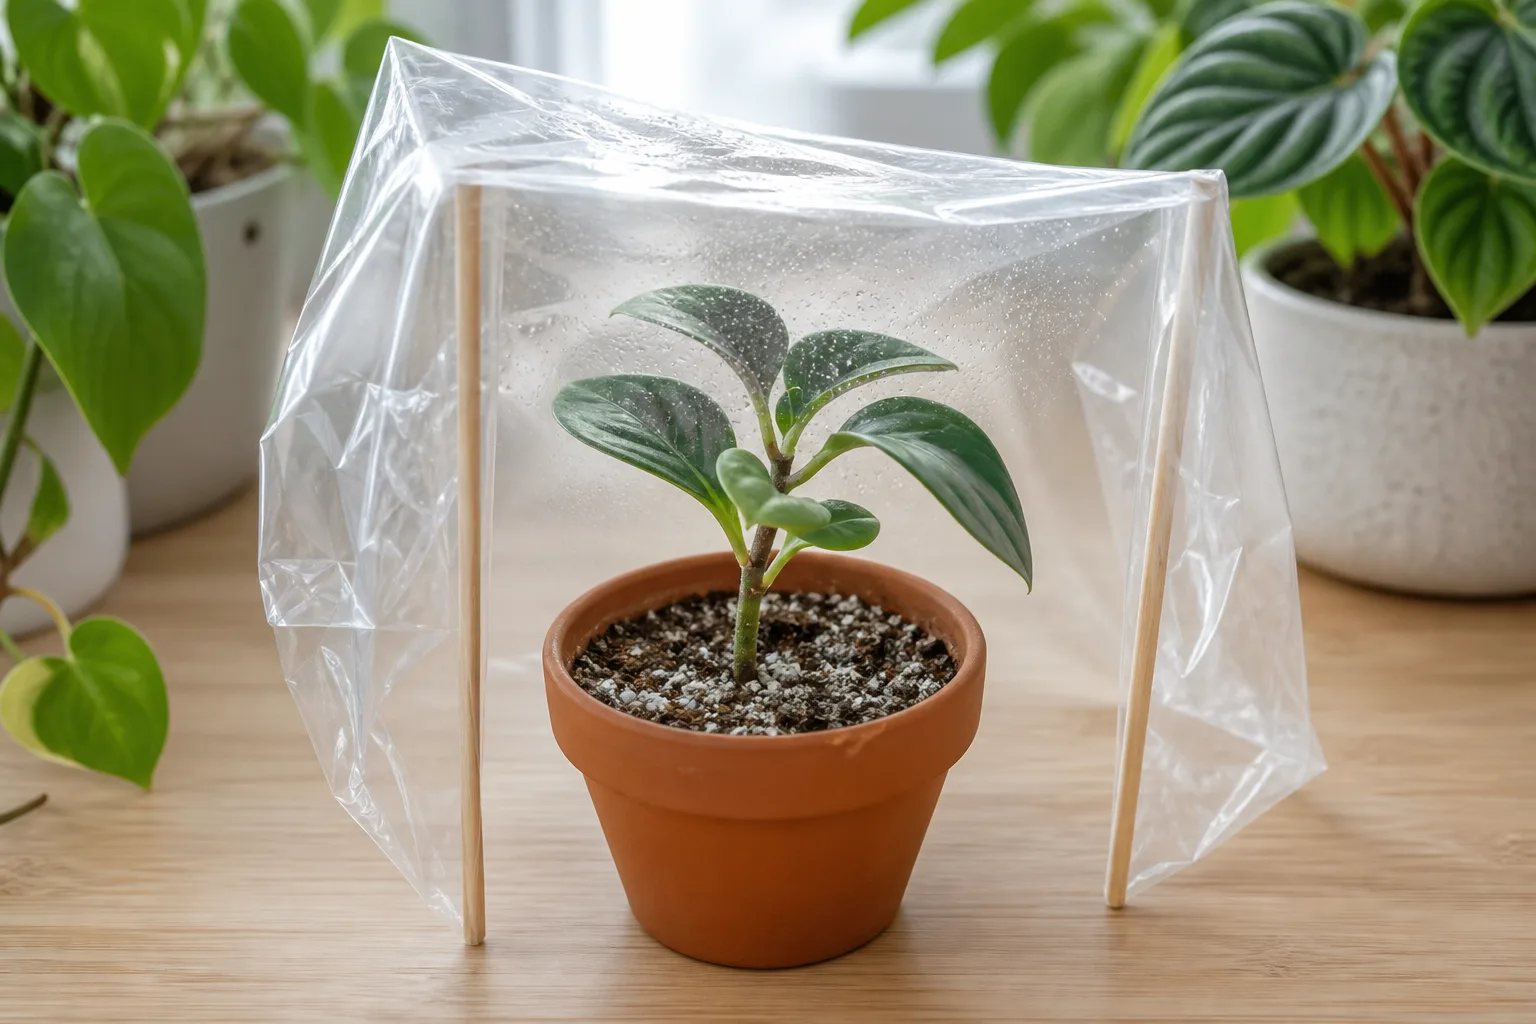
- Cover without sealing in stagnant moisture. A clear bag, propagator, or inverted container can slow water loss, but it must not touch the leaves. Leave room for air movement and vent regularly; visible condensation that never clears, gray mold, or a collapsing stem means the cover is too wet or too warm.
The first week is about keeping the cutting alive, not pulling it up to search for roots. Check the mix with a finger or wooden stick, remove fallen leaves, and keep shared cuttings spaced so a rotting piece can be removed without disturbing the others.
Step-by-Step: Root a Cutting in Water
Water propagation starts with the same selection and trimming decisions. Take a fresh, healthy stem, cut just below a node, and remove any leaf that would be submerged; water is not a substitute for having the correct piece of stem.
Choose a vessel that supports the cutting without forcing the stem against the glass. Cover one or two nodes with clean water, keep all leaves dry, and place the jar in bright indirect light. Direct sun can heat the water and foliage, while a dark corner may leave the cutting green but unable to produce useful new growth.
Inspect the jar every few days. Top up or replace water as needed, rinse away slime, and watch the submerged stem for color or texture changes. Healthy new roots are usually pale and firm; a brown, soft, foul-smelling base is rot, not a sign that the cutting is “settling in.” Cut back to clean tissue with a sanitized tool and restart in fresh water or a porous medium if enough viable node remains.
Once the roots are a little over an inch long and branching, move the cutting into a small pot of moist, airy mix. Make a hole large enough to lay the roots in without folding them into a tight knot, firm the mix gently, and keep the plant in slightly higher humidity for the first few days. The transition is easier when the plant is moved before the roots become long, brittle, and specialized for a permanently submerged life.
Create the Rooting Environment
The environment should be warm, bright, moist, and airy, but none of those words means “maximum.” A sealed bag in hot direct sun can cook a cutting; a cold, wet pot can rot it; a dry room with a strong fan can desiccate it before roots appear.
Aim for a warm root zone around 65 to 75°F (18 to 24°C) for many soft and herbaceous cuttings. Purdue Extension recommends that range and notes that bottom heat can help when the surrounding area is too cool. Avoid placing a covered pot on a hot radiator or in a small glass box that receives intense midday sun.
Give cuttings bright indirect light or diffused light. Leaves still need light to support the cutting, but the lack of roots makes them less able to recover from heat and water loss. A few hours of gentle morning light may be suitable for some plants; filtered light is the safer starting point until you know how the species responds.
Keep the medium evenly moist, never permanently soggy. Water when the surface is beginning to dry or when the container feels lighter, then let it drain; do not water by a calendar if the pot is still heavy and wet. A humidity cover should reduce leaf loss, not replace drainage and airflow.
Vent the cover at least several times a week, and more often if the room is warm or condensation coats every surface. The RHS recommends ventilation and regular removal of dead or diseased material to reduce fungal problems, and advises hardening rooted cuttings gradually rather than exposing them to a sudden change in air movement (RHS: Softwood Cuttings).
Do not fertilize until the cutting has roots and is making fresh growth in its pot; then begin with a weak, label-directed feed appropriate for that plant.
Know When Roots Have Formed
Rooting time depends on the plant, cutting type, season, temperature, and medium. A vigorous herbaceous or softwood cutting may show roots in one to three weeks, while semi-hardwood material can take longer and hardwood cuttings may need several months. Epic Gardening gives a broad range of roughly one week to two months for many stem cuttings and stresses that the type of plant changes the wait (Epic Gardening: A Guide to Propagating Plants Using Stem Cuttings).
Use evidence rather than impatience. In water, look for firm roots that branch rather than one long pale strand; in a medium, a gentle lift after the expected first rooting window may show resistance. Purdue Extension recommends checking after two or three weeks, then returning an unrooted cutting to the mix and waiting another one to two weeks rather than tugging daily.
New leaves are encouraging, but they are not absolute proof of a strong root system. A cutting can open a stored bud before it has enough roots to support normal growth, so judge the whole picture: firm stem, stable leaves, resistance in the medium, visible roots where appropriate, and steady new growth after the humidity is reduced.
Pot Up and Harden Off
Pot a rooted cutting into a container only slightly larger than its root system. A large pot is not a reward for success; it leaves too much mix wet around a small root ball and makes moisture harder to judge. Use a draining pot and a standard mix suited to the plant, then water enough to settle the roots without leaving the pot in a saucer of standing water.
Reduce humidity gradually. Open a bag or propagator a little more each day, or remove it for short periods and watch the foliage. If the cutting wilts badly, replace the cover and try a slower transition; if it stays firm, continue extending the uncovered periods until it grows normally in room air.
For garden-bound plants, harden them off over about two to three weeks. Start in a sheltered, shaded outdoor spot for a short period, then increase light and exposure gradually while protecting the young plant from strong wind, cold nights, and sudden heat. The RHS explains that this gradual change lets the leaf cuticle adapt so the plant loses less water when it leaves the protected propagation environment (RHS: Propagation Techniques).
Keep the new plant in its training pot until it is actively growing and the root ball holds together. A tiny cutting with a few roots is still vulnerable to rough handling. Once it has filled the container enough to use the available water and has resumed growth, move it to its permanent pot or garden position at the depth and exposure suited to the species.
Troubleshoot the Three Common Failures
Propagation problems are easier to solve when you diagnose the sequence rather than react to one symptom. A wilted green cutting is asking for less water loss; a black, soft base is usually asking for less stagnant moisture; a cutting that stays green but does nothing may need time, warmth, a different season, or a different method.
If the cutting wilts within hours or a day, reduce the leaf surface, move it away from direct sun and heat, and restore a little humidity. Check that the basal end is actually in water or in contact with moist mix, but do not respond by flooding a medium that already feels wet. If the parent was dry or the cutting sat out before planting, start again with a fresh, hydrated piece when possible.
If the base turns brown, black, or mushy, remove the cutting from the wet environment and inspect the tissue. Cut back to firm, clean stem above the rot if a healthy node remains, discard contaminated mix, wash the container, and restart with a more porous medium and less water. Crowded cuttings, buried leaves, leaves pressed against a plastic bag, dirty tools, and stagnant condensation all increase the chance of mold or rot; Missouri Botanical Garden and RHS both emphasize clean equipment, drainage, ventilation, and removing failed material promptly.
If the cutting stays green but does not root, first stop disturbing it. Confirm that the temperature is not cold, the medium is not waterlogged, the cutting has a viable node, and the plant is in an appropriate active-growth season. If the piece is healthy and the species is known to be slow, keep monitoring; if the material is old, flowering, atypical, or repeatedly fails, switch to a younger cutting or research whether layering, division, leaf propagation, or grafting fits the plant better.
Specialized Cuttings and Difficult Plants
Not every plant needs a leafy tip cutting. Purdue Extension describes cane cuttings for thick-stemmed plants such as dracaena and dieffenbachia, where a stem segment with buds can root and produce a new shoot. It also describes leaf-bud cuttings, which use a short piece of stem with one leaf and one bud, and leaf cuttings for selected African violets, peperomias, succulents, rex begonias, and snake plants.
These methods have a crucial orientation rule: the part that was closest to the parent plant must remain the basal end when the cutting is inserted. Mark the top before cutting a long cane or leaf, because a segment placed upside down may not root or may send growth in the wrong direction. Specialized methods also have plant-specific moisture rules; a succulent leaf, for example, should not be treated like a thin tropical stem under a sealed, wet cover.
Some woody plants need more patience or a different technique. Wounding the base can help selected difficult shrubs by exposing more rooting surface, but it also creates another wound that must stay clean. The RHS notes that heel cuttings can retain a small piece of older bark with useful rooting tissue, while layering keeps a shoot attached to the parent until roots form; those are practical alternatives when a detached cutting repeatedly fails (RHS: Propagation Techniques).
When Cuttings Are the Wrong Method
Do not force a cutting method onto a plant simply because the internet makes it look universal. A stem with no node or bud is not a normal stem cutting, and a bulb’s growing point is not recreated by chopping the visible leaves. Some plants are better multiplied by offsets, division, runners, layering, air layering, root cuttings, or seed.
Choose another method when the parent is diseased, the only available material is badly stressed, the species is notoriously slow from cuttings, or the new plant must retain a rootstock’s special qualities. Grafting can combine a desirable top with a vigorous root system, while division is usually more direct for a plant already growing as a clump. The RHS treats propagation as a choice among methods and timings, not a single technique that fits every plant (RHS: Propagation Techniques).
There is also a practical reason to stop. If a plant is rare, expensive, protected by a collection policy, or subject to local rules about taking material, confirm that propagation is allowed and that you are using clean, legal stock. For ordinary houseplants and garden plants, take only a few pieces from a healthy parent and leave it with enough foliage to recover.
Conclusion
The first successful cutting usually comes from a simple match: a healthy parent, a fresh stem with a node, a clean cut, fewer leaves, and a rooting environment that is moist but not airless. Start with an easy soft-stemmed houseplant if you are learning, use water when visibility and convenience matter, and choose a porous medium when root quality, woody material, or a direct transition to potting mix matters more.
Give the cutting time, check it on a schedule instead of tugging every day, and treat wilt, rot, and stalled growth as clues about the environment or the plant type. With that approach, propagation becomes repeatable garden practice rather than a jar of hopeful stems.