How to Propagate Peperomia: Stem Cuttings and Leaf Cuttings
Learn how to propagate peperomia with stem cuttings in water or soil, plus leaf cuttings for solid-color varieties. Step-by-step timing, rooting setup, and aftercare.
What This Guide Covers
This page is the practical, step-by-step guide for propagating peperomia at home. The job here is straightforward: choose the right method for your peperomia type, take a clean cutting, set it up in water or soil, and keep it alive until roots form.
Peperomia is one of the easiest houseplants to propagate — Clemson HGIC and NC State Extension both confirm that stem cuttings and leaf cuttings root readily under normal indoor conditions. You do not need a greenhouse, specialized hormones, or years of experience. You need a healthy parent plant, clean scissors, and the discipline to keep moisture controlled rather than constant.
If you want the full care context first, use the Peperomia overview. If you already have a struggling cutting and need to diagnose what went wrong, jump to the Peperomia propagation page for troubleshooting detail. This guide stays focused on executing the three core methods and getting roots.
The Three Methods at a Glance
| Method | Best for | Speed | Difficulty |
|---|---|---|---|
| Stem cuttings in water | Beginners, all peperomia types | 2–4 weeks to roots | Easiest |
| Stem cuttings in soil | Skipping transplant shock, all types | 2–4 weeks to roots | Easy |
| Leaf cuttings in soil | Solid-green varieties, minimal parent impact | 4–8 weeks to plantlet | Moderate |
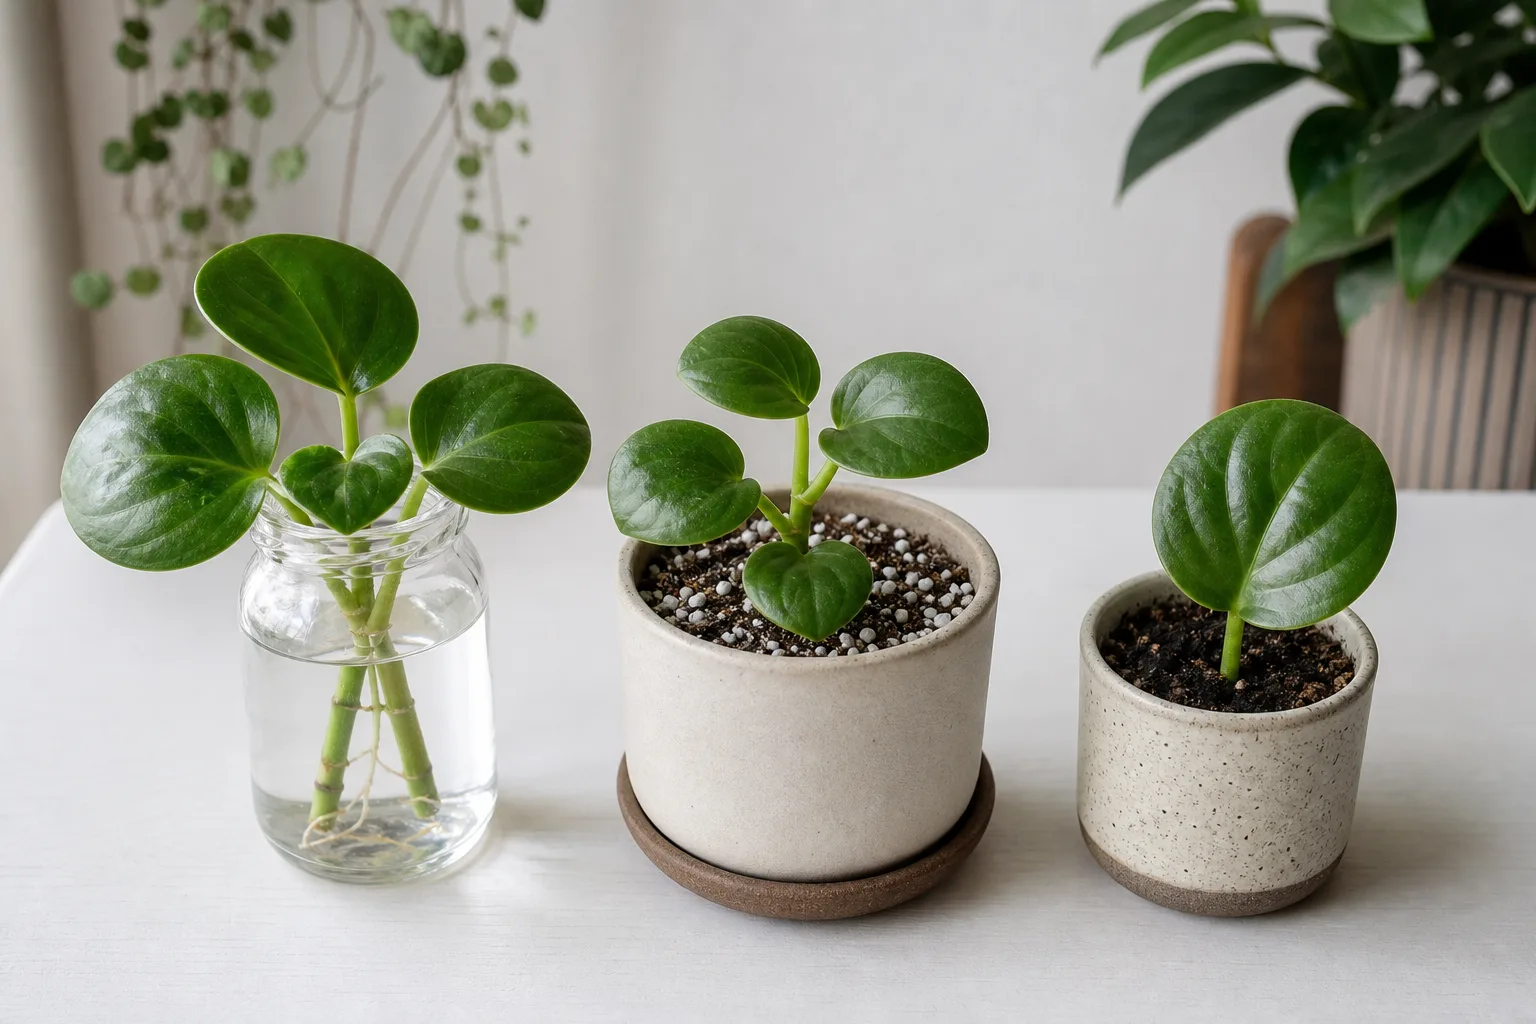 |
University of Arkansas Extension notes that propagation is easy by stem or leaf cuttings, and Missouri Botanical Garden confirms both methods for the genus. You are working with a plant that wants to root — your job is to give it the right conditions and then stay out of its way.
One critical rule before you start: variegated peperomia varieties — like variegated baby rubber plant (Peperomia obtusifolia ‘Variegata’) or tricolor Peperomia clusiifolia — should only be propagated from stem cuttings, not leaf cuttings. Leaf cuttings from variegated plants frequently lose their color pattern and produce solid-green offspring. If you want the variegation to carry over, use a stem cutting that already shows the color distribution you want.
When to Propagate Peperomia
The best time to propagate peperomia is spring through early summer, when the parent plant is actively pushing new leaves and indoor temperatures stay between 18–26°C (65–78°F). Longer daylight hours and warmer rooms speed up root formation at the cut site.
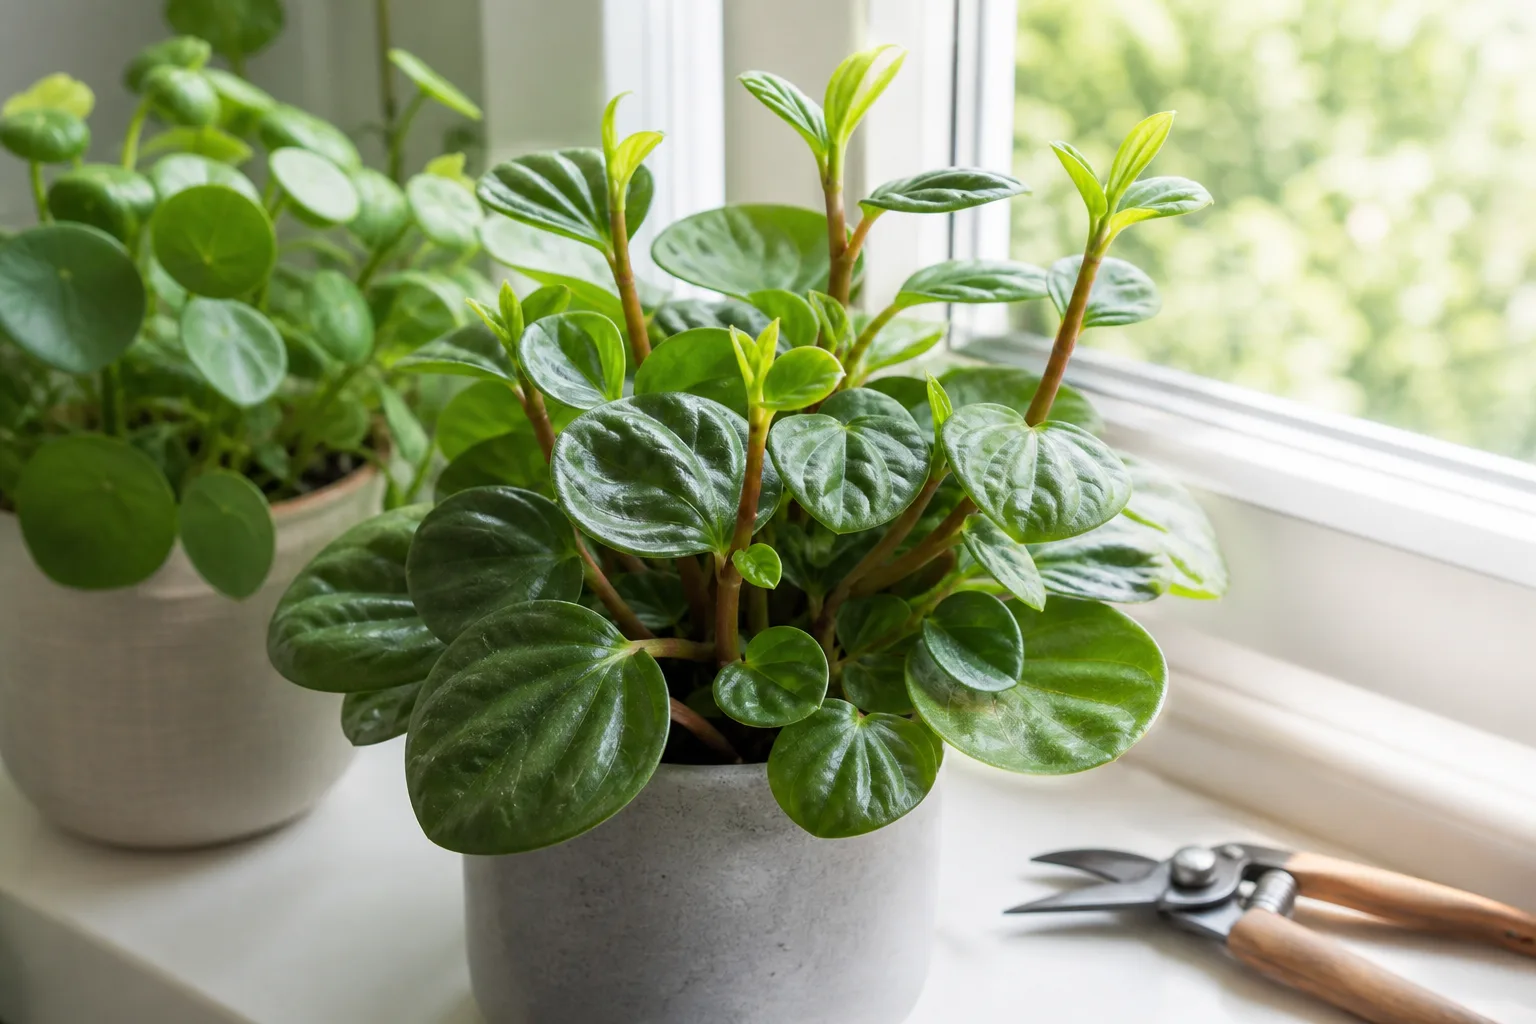
That said, peperomia is forgiving on timing. Indoor growers with stable warmth and supplemental light can root cuttings in autumn or winter — just expect a longer wait. A cutting that roots in three weeks during June may sit unchanged for five or six weeks in December. If you propagate in cooler months, use the smallest pot that fits the cutting, maximize bright indirect light, and water sparingly.
Before you cut, confirm the parent plant shows firm leaves with even color, no widespread yellowing, and no sticky residue suggesting pests. A healthy donor is the single most important variable in propagation success. Weak, soft stems from an overwatered or stressed plant often collapse before they anchor.
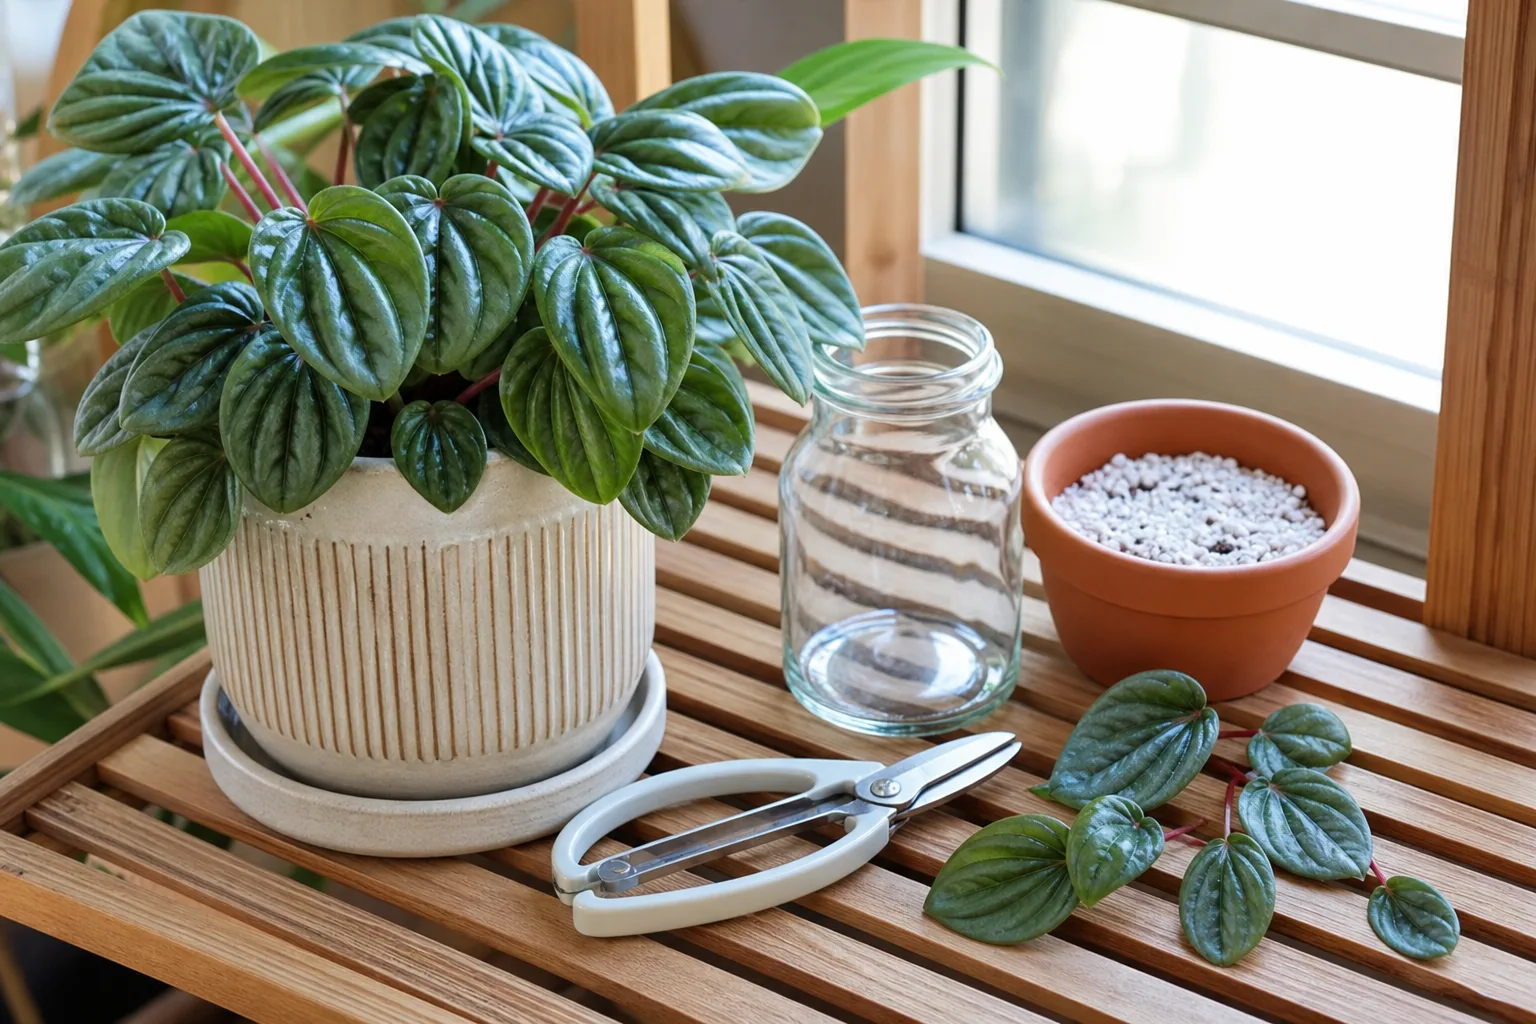
What You Need Before You Start
Gather these items before you make the first cut:
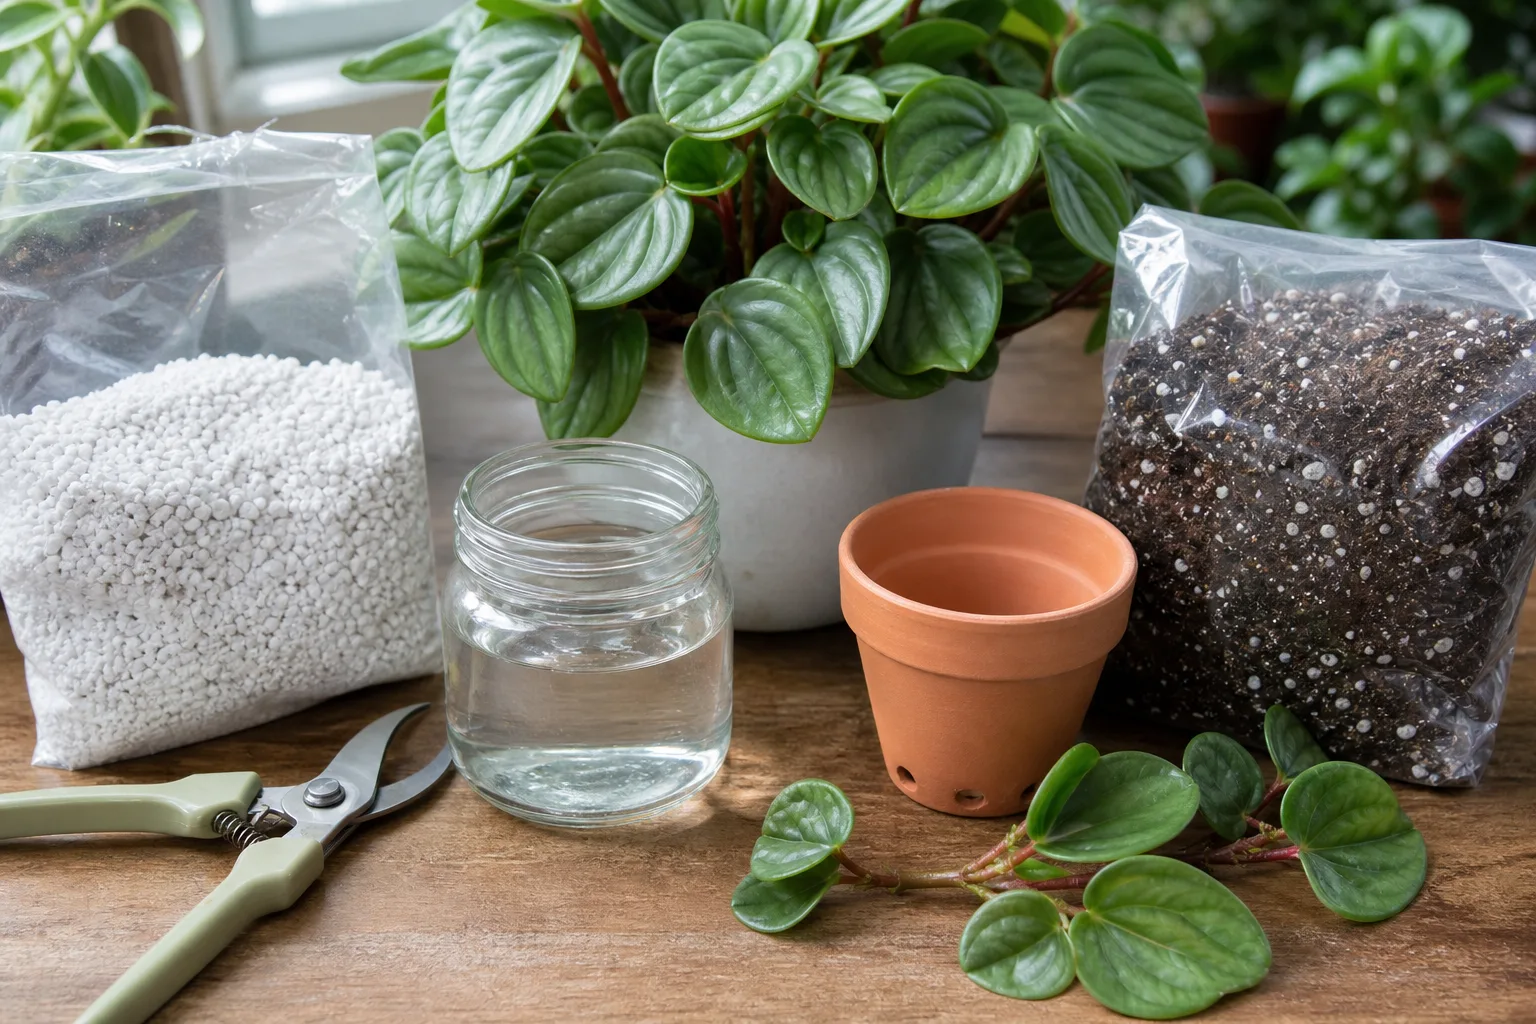
- Sharp, clean pruning shears or scissors — wipe blades with 70% isopropyl alcohol
- Healthy peperomia plant — firm leaves, no pests, actively growing
- For water propagation: a clear glass or jar, room-temperature water
- For soil propagation: a small pot with drainage holes, well-draining potting mix (a 50/50 blend of houseplant mix and perlite works well), optional rooting hormone
- Bright indirect light — an east-facing window or a spot 1–2 meters from a south or west window
Method 1: Stem Cuttings in Water
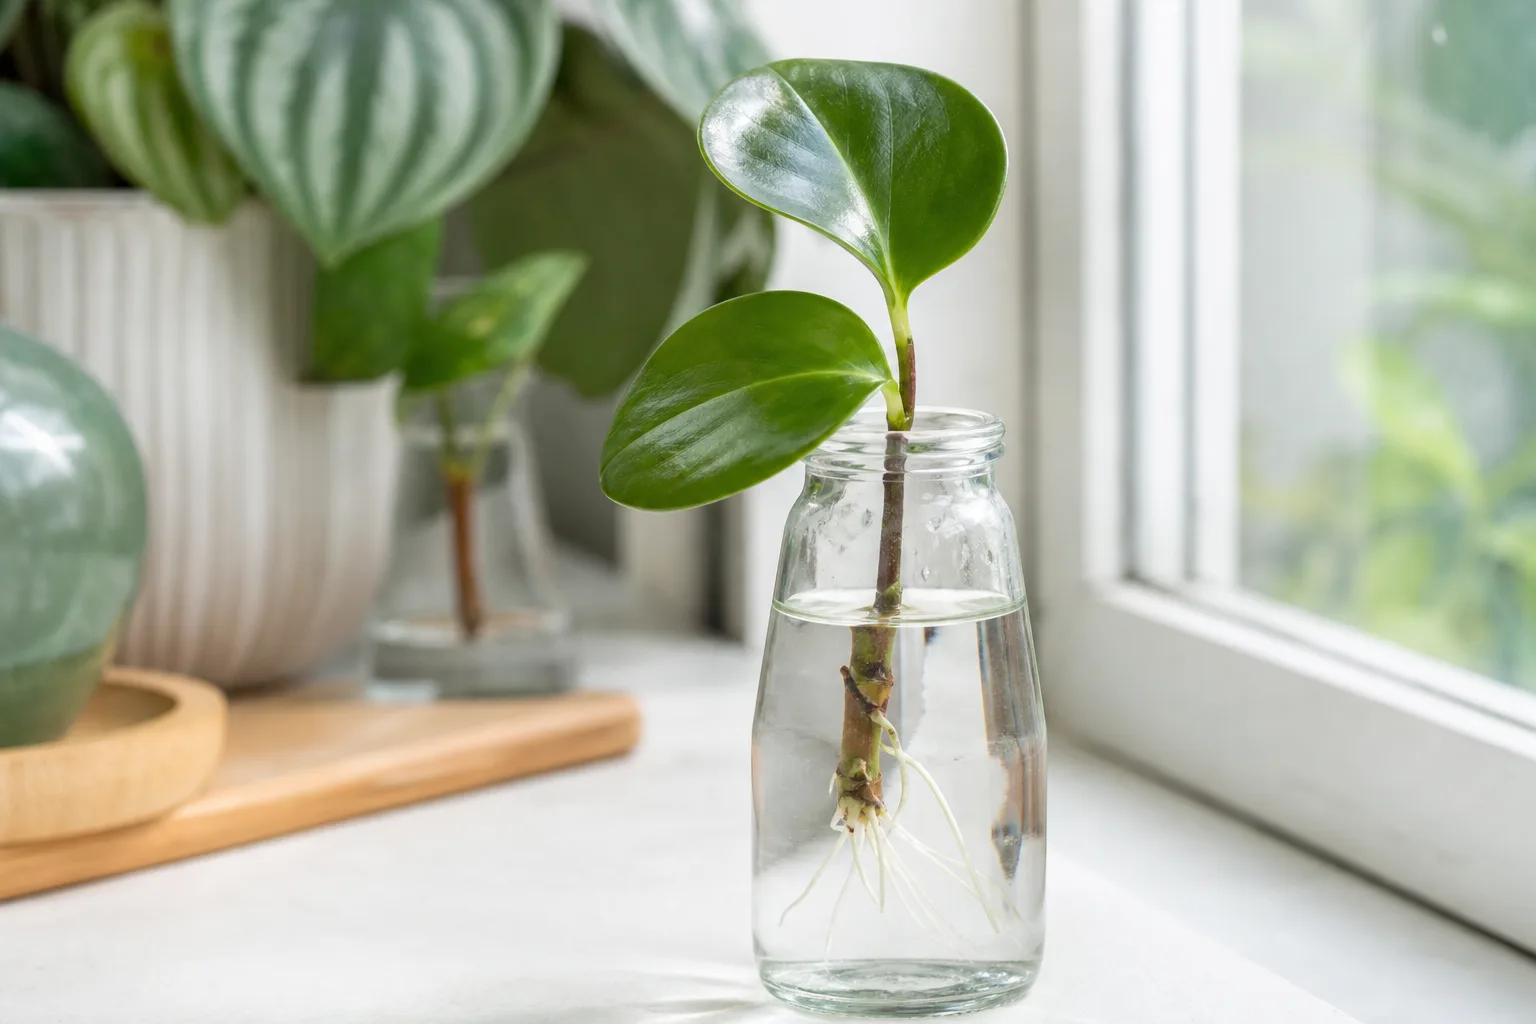
Water propagation is the most beginner-friendly method because you can see roots forming and catch problems early. Unlike pothos or philodendrons, peperomia does not strictly require a node to root — a stem with a leaf is sufficient — but including a node gives you the fastest and most reliable results.
Step-by-Step
-
Select a healthy stem with at least 5–8 cm (2–3 inches) of length and two to four leaves. Choose a stem that is firm and green, not woody or yellowing.
-
Make a clean cut just below a node — the slightly swollen point where a leaf attaches to the stem. One clean snip with sterilized shears; sawing crushes tissue and invites infection.
-
Remove the lowest leaf or pair of leaves so at least 2–3 cm (about 1 inch) of bare stem sits below the water line. One or two leaves should remain above the surface for photosynthesis. If the remaining leaves are unusually large, trimming them by one-third reduces water loss while the cutting has no roots.
-
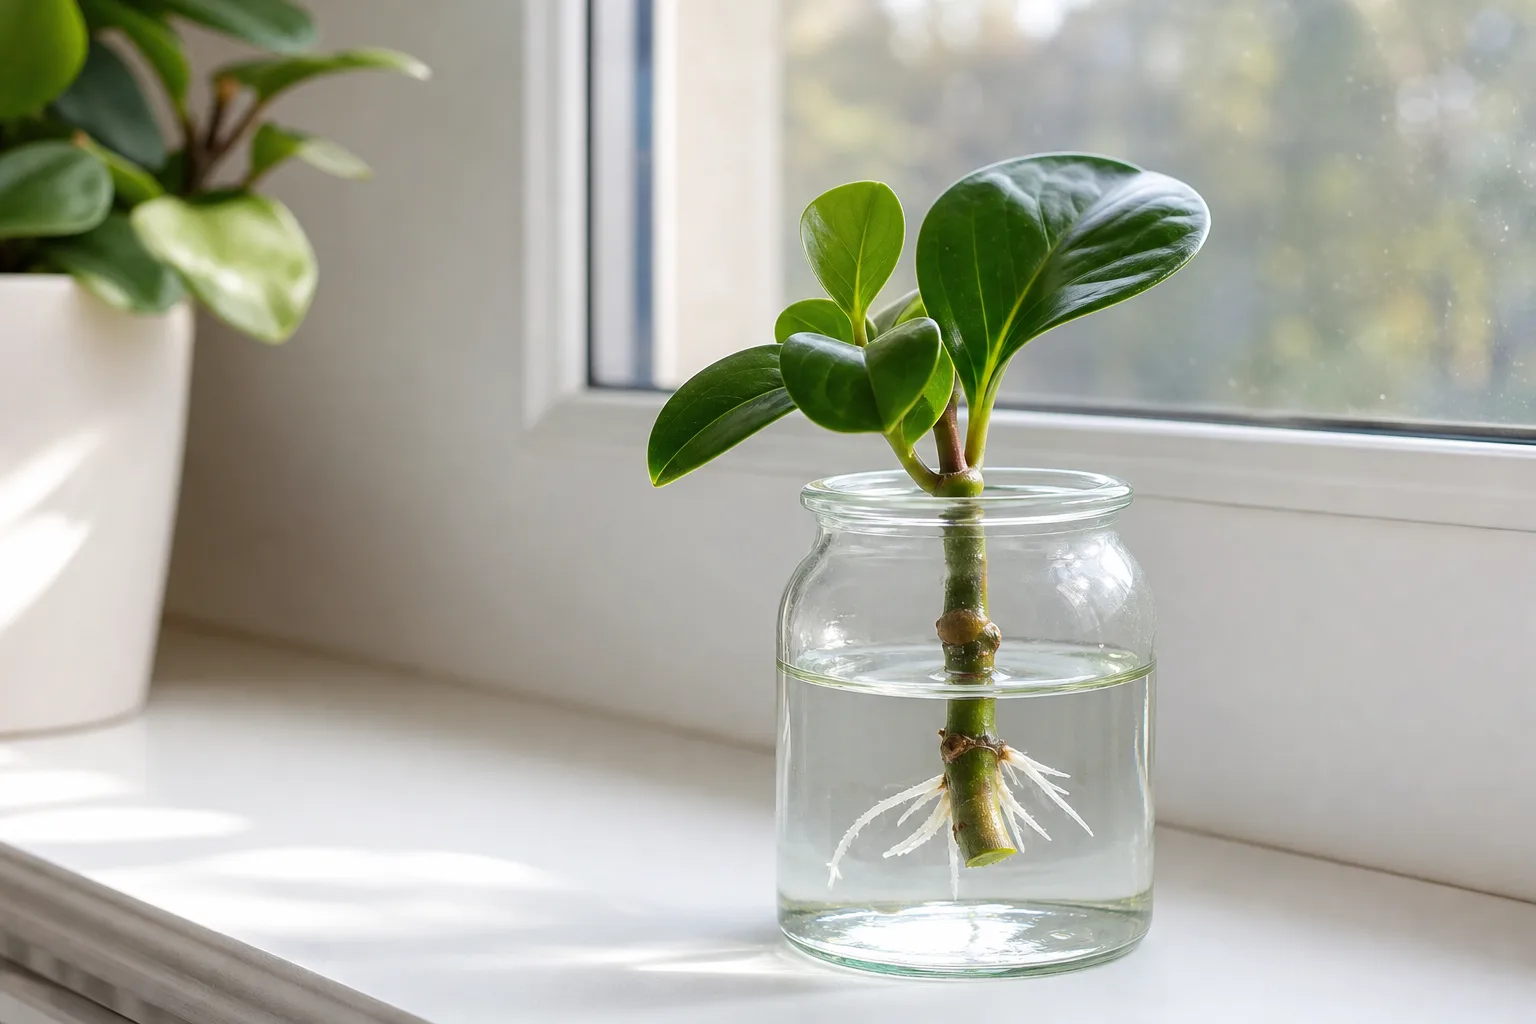
Place the cutting in a clear glass or jar filled with room-temperature water. The cut end and any exposed nodes should be submerged; all leaves must stay above the water line. A narrow glass helps the cutting stay upright.
-
Set the jar in bright indirect light. An east-facing window or a spot 1–2 meters from a south or west window is ideal. Avoid direct sun through the glass — it heats the water and stresses the cutting.
-
Change the water every three to five days. Stagnant, cloudy water breeds bacteria that attack the cut end. Clemson HGIC recommends placing cuttings in bright indirect light and refreshing the water regularly. If the water looks cloudy or smells off between changes, change it immediately.
-
Watch for roots. Tiny white, almost translucent roots typically appear within two to four weeks during warm, bright conditions. Let them grow until they reach 2–3 cm (about 1 inch) long before transplanting. Do not rush — fragile root nubs torn during early potting set the cutting back.
-
Transplant to soil once roots are well-established. Fill a small pot with well-draining mix, make a small hole, gently place the rooted cutting, and firm the mix lightly around the stem. Water once to settle the soil, then keep the mix lightly moist — not wet — for the first one to two weeks while the water-grown roots adapt to soil.
A rooted cutting in a jar is not a permanent home. Peperomia is not an aquatic plant, and leaving cuttings in water for months produces long, tangled, fragile roots that struggle after potting. Move to soil once roots hit the 2–3 cm mark.
Pros and Cons
Pros: High visibility — you see roots form and can catch rot early. Minimal setup. Easy to monitor water quality. Great for beginners and for salvaging a broken stem.
Cons: Water-to-soil transplant shock — water-grown roots are delicate and need careful handling during potting. Requires regular water changes. Temptation to leave cuttings in the jar too long.
Method 2: Stem Cuttings in Soil
Soil propagation skips the water-to-soil transition entirely. Roots form directly in the medium the plant will live in, which means no transplant shock and a cleaner long-term setup. The trade-off is that progress is hidden underground — you cannot see roots forming, and impatience leads people to dig up cuttings and damage new growth.
Step-by-Step
-
Take a stem cutting the same way as for water propagation — a healthy stem 5–8 cm long with a clean cut below a node, lower leaves removed to expose a bare section for planting.
-
Optional: dip the cut end in rooting hormone. Rooting hormone powder or gel (containing indole-3-butyric acid) can speed up root initiation but is not required for peperomia. If you already own it, a quick dip before planting helps. If you do not, skip it — peperomia roots reliably without it.
-
Fill a small pot with well-draining mix. A 50/50 blend of standard houseplant mix and perlite works well. Pre-moisten the mix until it holds shape when squeezed but does not drip water. The pot must have drainage holes — peperomia cuttings rot quickly in standing water.
-
Insert the cutting so the bare node is buried 1–2 cm (½–¾ inch) deep. Firm the mix gently around the stem so it stands upright without wobbling. Do not bury leaves or bury the stem deeper than necessary — deep planting invites stem rot.
-
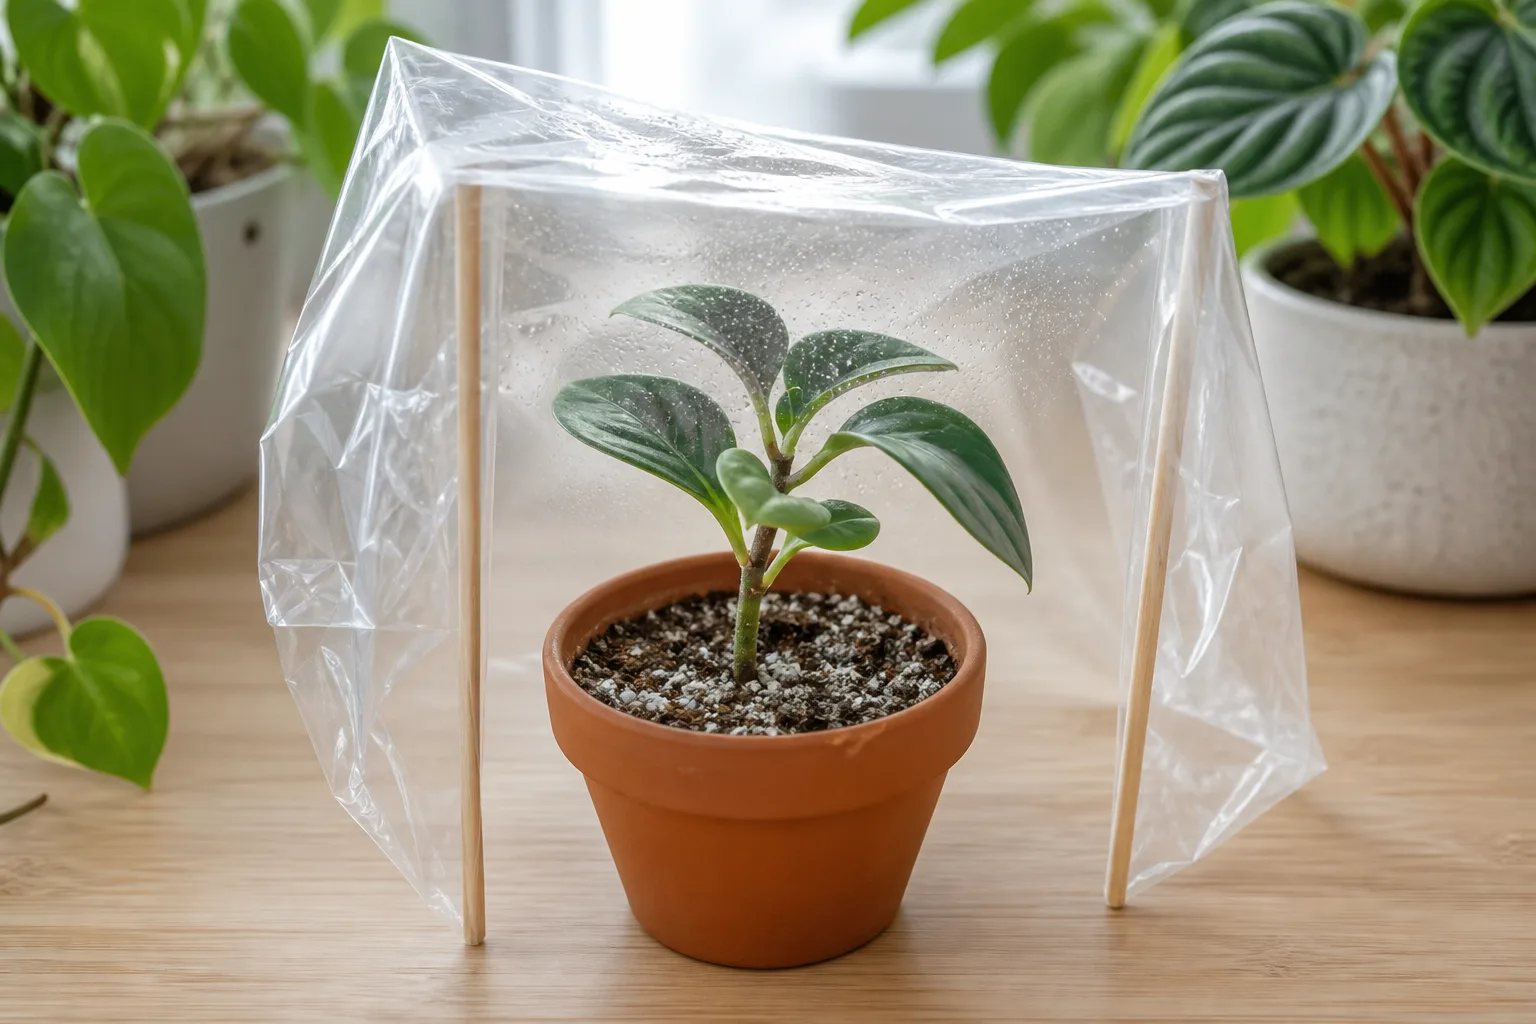
Create a humidity environment. Peperomia cuttings root faster with elevated humidity during the first few weeks. Place a clear plastic bag over the pot, propped on stakes so the plastic does not touch the leaves, or use a seed-starting tray with a clear lid. This mini-greenhouse reduces water loss from the leaves while roots are absent.
-
Vent daily. Remove the cover for 10–15 minutes every day to exchange stale air. If you notice condensation dripping inside the bag or mold forming on the soil surface, increase ventilation time. Stale, saturated air inside a sealed bag rots cuttings faster than open air dries them out.
-
Keep the mix lightly moist, not wet. The surface should approach dryness between waterings while the root zone stays barely damp. Check with a finger — if the top 1–2 cm feels dry, add a small amount of water. Overwatering is the number one cause of soil propagation failure.
-
Watch for new growth. A fresh leaf unfurling or the stem stiffening and standing taller are better success signals than pulling the cutting to inspect roots. Remove the humidity cover once new growth appears and gradually acclimate the plant to normal room humidity over a few days.
NC State Extension recommends well-drained soil and warns that overwatering causes root rot — a warning that applies even more strictly to rootless cuttings in small pots.
Pros and Cons
Pros: No transplant shock — roots grow in their permanent medium from day one. Teaches the same moisture discipline mature peperomias need. Cleaner windowsill setup without jars of water.
Cons: Hidden progress — you cannot see roots forming. Silent rot if the mix stays wet or the room is cold. Feels slower because all the early action happens underground. Requires daily venting of the humidity cover.
Method 3: Leaf Cuttings in Soil
Leaf cuttings are the slow-but-steady option. This method is ideal when you have a perfect leaf from a solid-green peperomia and want to multiply it without altering the parent plant’s shape. It is also genuinely satisfying to watch a tiny plantlet emerge from the base of a single severed leaf.
Do not use leaf cuttings for variegated peperomias. The regeneration process does not reliably carry variegation through leaf tissue. You will likely get a healthy green plant — but without the cream, yellow, or pink coloration of the parent. For variegated types, stick to stem cuttings.
The Petiole Is Non-Negotiable
The petiole — the short stalk connecting the leaf blade to the main stem — is what makes leaf propagation work. A leaf blade alone, sliced off flush with no stalk, may sit green in the soil for weeks but rarely produces a full plant. The petiole contains the vascular and meristematic tissue needed to push new roots and shoots.
Cut the leaf from the parent where the petiole meets the main stem, leaving at least 1–2 cm (½–¾ inch) of petiole on the leaf. Choose a mature, firm leaf free of spots, pest damage, or yellowing. For unusually large leaves on Peperomia obtusifolia, some growers cut the blade in half horizontally to reduce water loss while keeping the petiole intact — the cut edge calluses quickly and the petiole still drives regeneration.
Step-by-Step
-
Take a leaf cutting with at least 1–2 cm of petiole attached. Make a clean cut where the petiole meets the main stem.
-
Optional: dip the petiole end in rooting hormone. As with stem cuttings, this can speed things up but is not required.
-
Fill a small pot with well-draining mix and pre-moisten it. Insert the petiole vertically into the mix so only the petiole is buried — the leaf blade stays above the surface. Firm lightly so the leaf stands upright.
-
Cover with a clear plastic bag or humidity dome, propped so the plastic does not touch the leaf. Leaf cuttings have no stem to store water and lose moisture through the blade while roots are absent. Elevated humidity buys time for the petiole base to activate.
-
Vent daily for 10–15 minutes. Keep the mix barely moist — a light spray when the surface lightens in color, not a soaking. Overwatering is the most common reason leaf cuttings fail; the semi-succulent blade stores more water than it looks like it can.
-
Place in bright indirect light, never direct sun through the cover — greenhouse temperatures build in minutes and cook the leaf.
-
Wait. Expect four to eight weeks before a small plantlet appears at the petiole base. The original leaf may eventually yellow and drop — that is normal once the new plant has its own leaves. Do not discard the pot early. When the plantlet has two or three small leaves and resists a gentle tug, treat it as an established seedling.
Aftercare for Newly Rooted Peperomia
A newly rooted peperomia needs steadier conditions than a mature plant. The root system is young, the pot is small, and the plant cannot handle the moisture swings an established peperomia shrugs off.
Watering: Water when the top 1–2 cm (½–¾ inch) of mix feels dry, then water thoroughly until a little drains from the bottom. Empty the saucer. Peperomia’s semi-succulent leaves forgive a brief dry spell far better than wet roots.
Light: Bright indirect light — the same conditions the cutting rooted in. Do not move a newly potted plant into lower light or direct sun while it establishes.
Fertilizer: Hold off until new growth is clearly self-sustained — usually four to six weeks after visible root establishment. When you start, use a quarter-strength balanced houseplant fertilizer. Peperomia is a light feeder, and excess nitrogen on a small root system burns leaf tips.
Repotting: Do not rush into a larger pot. Peperomia has shallow roots and prefers being slightly snug. Move to the next size container only when roots circle the drainage holes or growth stalls — typically six to twelve months for a cutting-started plant.
Signs of success: Firm leaves, shorter internodes on new growth, and resistance to a gentle upward tug at the stem base. Yellowing of the oldest leaf on a cutting is often normal as the plant directs energy to roots. Widespread yellowing, blackening at the soil line, or a stem that turns soft and hollow means rot — remove the plant, trim back to firm tissue if any remains, and restart with drier mix.
Common Mistakes and How to Fix Them
Most peperomia propagation failures trace to a short list of causes. Diagnose the symptom, identify the cause, and restart with better material rather than nursing a rotting cutting indefinitely.
Mushy stem at the water line or soil line: Too much moisture, poor airflow, or a cutting that was weak before you started. Cut back to firm green tissue, let the fresh cut air-dry for two to four hours, and restart in fresh water or drier mix. Reduce watering and vent any humidity cover daily.
Leaf collapse on a stem cutting with no roots: The remaining leaves are losing water faster than the cut stem can replace it. Trim one leaf by half to reduce transpiration, move to slightly brighter indirect light, and confirm the humidity cover is not trapping heat. Do not compensate with heavier watering — the problem is water loss through the leaves, not water shortage at the cut end.
Cutting sits unchanged for eight or more weeks: In winter or dim light, this is often slow metabolism, not death. Move the cutting closer to a bright window without direct sun, confirm room temperature stays above 18°C (65°F), and verify the node or petiole end is actually buried or submerged. If spring arrives and nothing happens, the cutting may have been taken from a section with no viable growth point — re-cut below the next node.
All-green offspring from a variegated parent after leaf propagation: Expected biology, not bad luck. Leaf cuttings from variegated plants frequently revert to solid green. Propagate variegated types from stem cuttings that show the desired color pattern on multiple leaves.
Sour or cloudy water in a propagation jar: Bacteria are colonizing the stem wound. Change the water immediately, rinse the stem, and switch to fresh water in a cleaned jar. If the stem end has turned brown and soft, cut back to firm tissue or discard the cutting entirely.
Pest transfer from parent to cutting: Hidden mealybugs, spider mites, or scale insects in leaf axils travel with the cutting. Inspect the parent under good light before cutting, wipe stems with diluted isopropyl alcohol if pests are present, and quarantine new cuttings for two weeks after rooting.
Pet Safety During Propagation
Peperomia is listed as non-toxic to cats and dogs by the ASPCA. This makes it one of the safer choices for pet households — including when you have jars of cuttings on low shelves or windowsills where curious animals can reach them.
Non-toxic does not mean the plant should become pet food. Ingestion of any plant material can cause mild vomiting or stomach upset. Keep propagation jars and small pots out of reach where possible, and contact your veterinarian if a pet eats a large amount or shows concerning symptoms. The ASPCA Animal Poison Control Center is reachable at (888) 426-4435 (consultation fee may apply).
When Stem Cuttings and Leaf Cuttings Are Not the Answer
Sometimes the fastest propagation method does not involve waiting for roots at all.
Division — separating a mature, multi-stem peperomia into smaller plants at the root ball — gives you instant rooted plants with no rooting lottery. This works best when the parent plant has multiple stems emerging from separate root zones and you are already repotting. Water the plant one day before dividing, gently tease apart root clusters, and pot each section with roots plus at least one stem. For detailed division steps, use the Peperomia propagation page.
Choose division when:
- You have a mature, crowded plant ready for repotting
- You need results in days, not weeks
- You are propagating a variegated variety and want guaranteed color preservation
- The plant has visible pups or side shoots with their own roots
Where to Go Next
- Peperomia propagation — the full propagation hub with division walkthroughs, troubleshooting detail, and week-by-week timelines
- Peperomia overview — whole-plant care context: light, water, soil, and species guide
- Peperomia watering — moisture discipline that applies during propagation aftercare
- Peperomia light — light placement for cuttings and young plants
- Peperomia soil — mix recipes for propagation and potting
Conclusion
Propagating peperomia is straightforward when you match the method to your plant and keep moisture controlled rather than constant. Stem cuttings in water give beginners visible roots and quick feedback. Stem cuttings in soil skip transplant shock and build roots in their permanent medium. Leaf cuttings with petiole work for solid-green varieties when you want minimal impact on the parent plant. For variegated types, stick to stem cuttings — leaf cuttings usually lose the color pattern.
Start with a healthy parent, make clean cuts, keep the medium lightly moist rather than wet, and place cuttings in bright indirect light. Roots typically appear in two to four weeks for stem cuttings during warm seasons, and plantlets emerge in four to eight weeks from leaf cuttings. When something rots, cut back to firm tissue and restart with drier conditions rather than waiting for a lost cause to recover.
Follow that rhythm and peperomia becomes one of the easiest houseplants to multiply — for filling out your own collection, sharing with friends, or turning a single leggy plant into a windowsill of new pots without another trip to the nursery.