How to Propagate Pothos in Water and Soil
Propagate pothos successfully with step-by-step water and soil methods, node cutting tips, rooting timelines, and transplant aftercare.
Quick Answer: Water vs Soil for Pothos Propagation
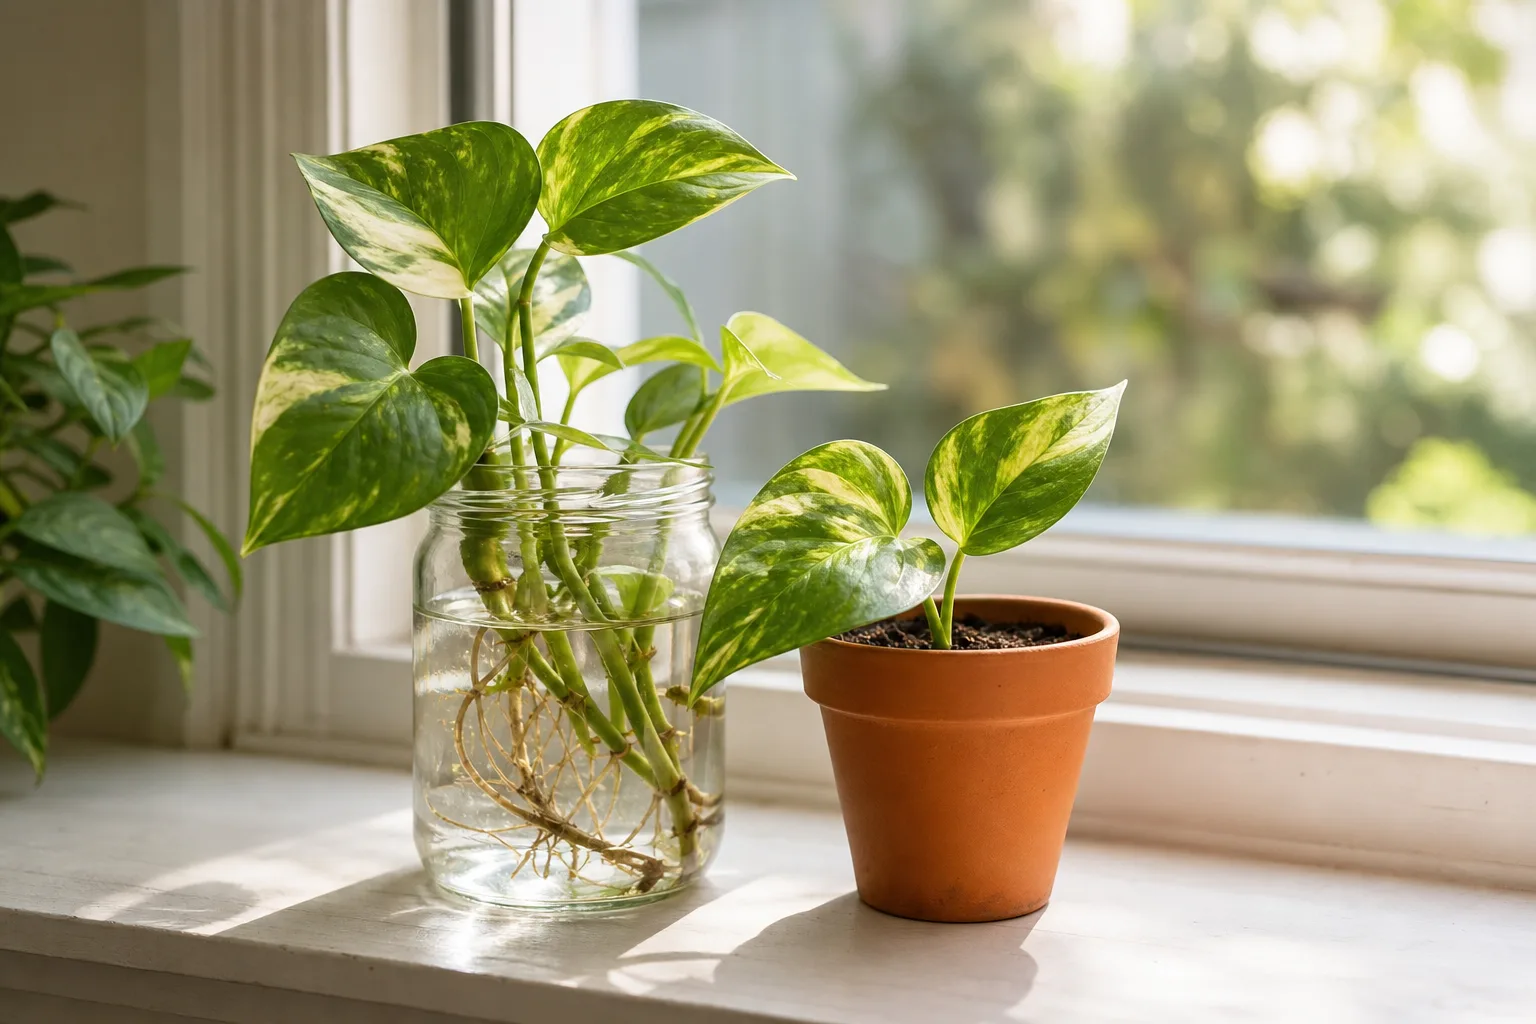
Water propagation is the easiest way to see progress — roots become visible through the glass, and you can catch rot before it spreads. Soil propagation produces roots that are better adapted to pot life and skips the transplant step entirely. Pothos is one of the most forgiving houseplants to propagate: healthy cuttings with a node will root in either medium within a few weeks under warm, bright indirect light.
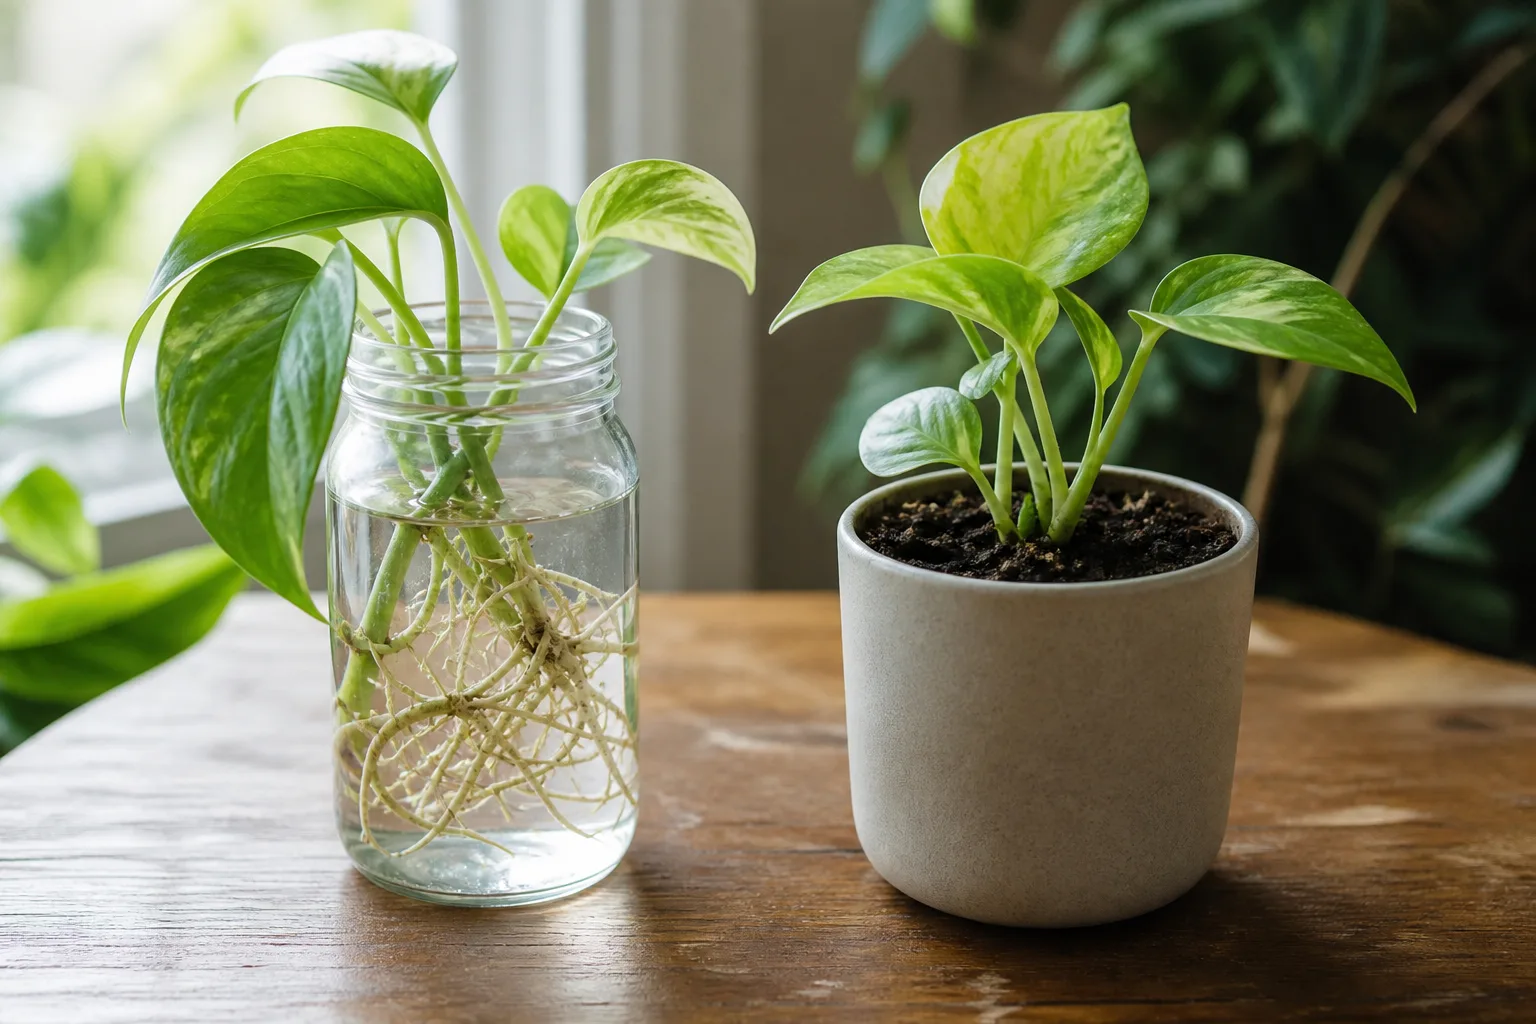
If your goal is to fill out an existing pot or multiply your collection for free, both methods work. Choose water for visibility and learning. Choose soil when you want fewer steps between cutting and a finished plant. This guide covers the full workflow for each method so you can pick the one that matches your habits.
Pothos (Epipremnum aureum) is commonly propagated from stem cuttings with a node and attached leaf. (Clemson HGIC) Wisconsin Horticulture Extension notes pothos is easily propagated and able to grow in relatively low light, making it one of the most popular houseplants in North America. (Wisconsin Horticulture)
Who This Guide Is For
This page is for anyone who wants clear, actionable steps to propagate pothos from stem cuttings in water or soil — whether you are doing it for the first time or have had mixed results and want a reliable workflow. Beginners will get a complete water propagation walkthrough. Growers who prefer fewer steps will get a direct-to-soil method.
You are not in the right place if you need general pothos care (use the pothos care guide) or in-depth propagation troubleshooting with cultivar-specific detail (use the pothos propagation hub). You are exactly in the right place if your search was “how to propagate pothos” and you want one guide that compares water and soil methods with step-by-step instructions and practical timing.
When to Use This Guide vs the Pothos Hub
| You need… | Start here (this guide) | Use the hub instead |
|---|---|---|
| Pick water or soil for stem cuttings | Yes | — |
| Step-by-step cutting and rooting instructions | Yes | — |
| Water-to-soil transplant timing | Yes | — |
| Sphagnum moss or perlite propagation | Mentioned | Propagation hub |
| Division method for bushy pots | Mentioned | Hub |
| General pothos care and lighting | Link out | Pothos care guide |
 |
This guide is the practical workflow companion to the propagation hub — not a duplicate of it.
How Pothos Propagation Works
Pothos propagation hinges on one anatomical detail: the node. A node is the small brown bump or swelling on the stem where leaves, aerial roots, and new growth points emerge. The Royal Horticultural Society describes Epipremnum as an easy houseplant that roots readily from stem cuttings. (RHS) That ease depends entirely on including healthy node tissue on every cutting.
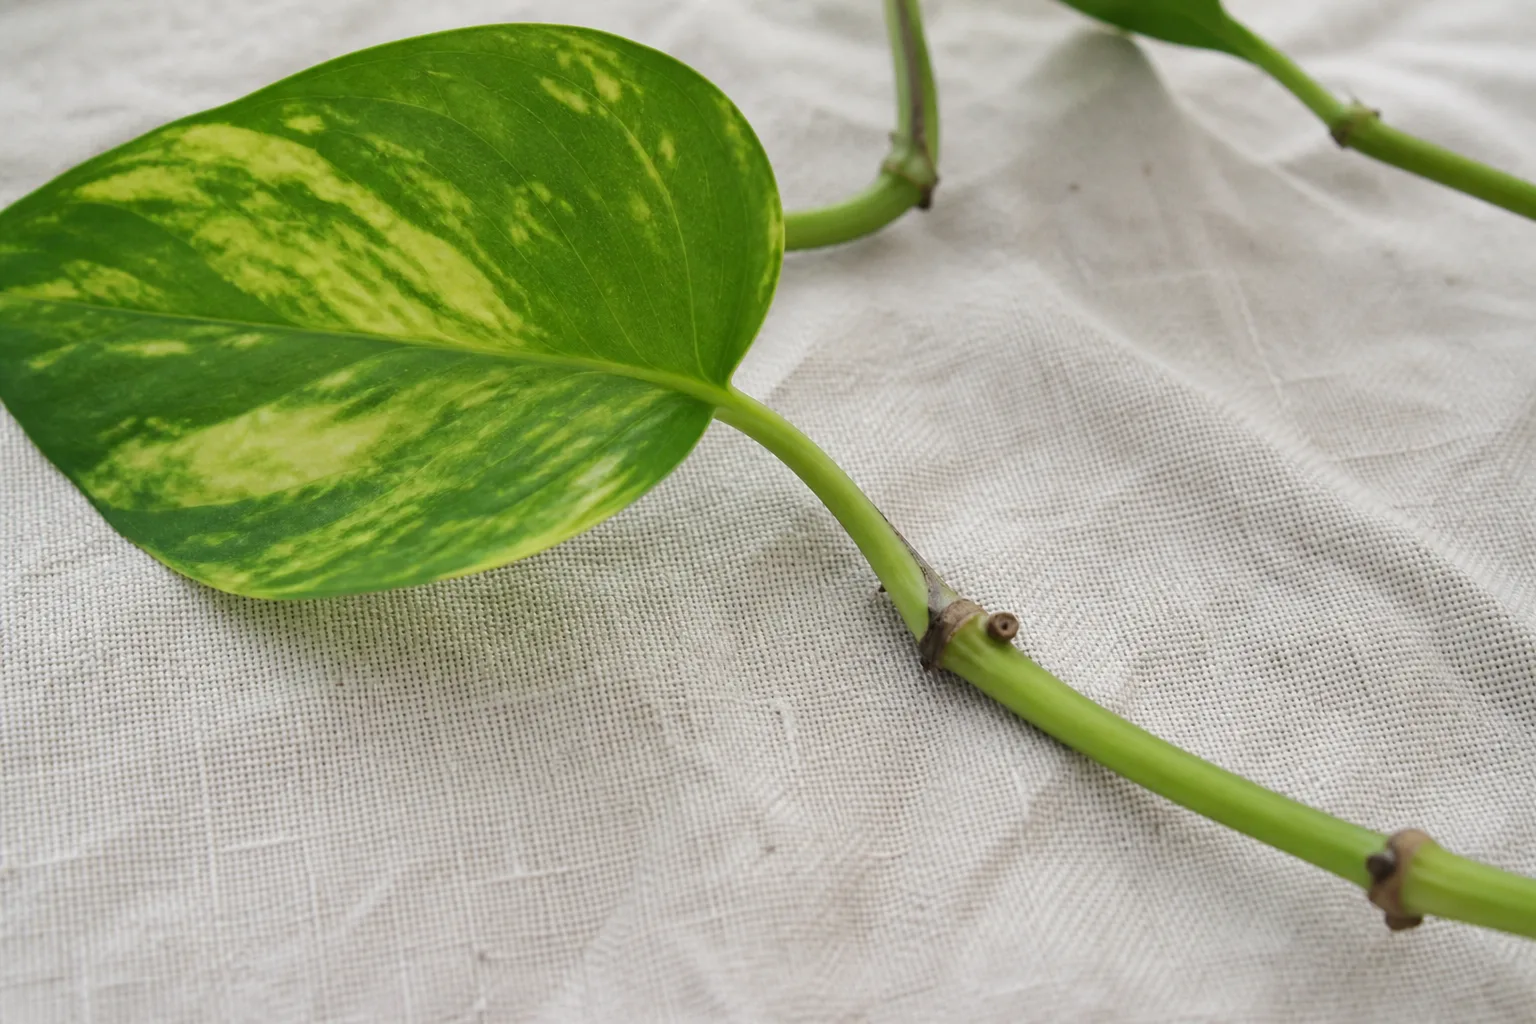
A leaf or petiole without a node may stay green in water for a week or two, but it will never produce roots or a new plant. The node contains the meristematic cells that can differentiate into roots and shoots. Once you internalize that rule — no node, no plant — the rest of propagation becomes a matter of clean cuts, clean water or soil, and stable warmth and light.
Missouri Botanical Garden notes pothos stems root easily from cuttings, and that the plant can be pinched back to encourage branching. (Missouri Botanical Garden) That dual purpose — pruning for shape plus propagation — is why pothos is the gateway plant for so many indoor growers.
Before You Cut: Timing, Tools, and Parent Plant Health
Best timing is spring through summer, when pothos is actively growing. Propagating during the active growing period generally helps the parent plant recover more quickly than fall or winter propagation. Winter propagation can still work under grow lights and stable warmth, but rooting is slower and rot risk is higher.
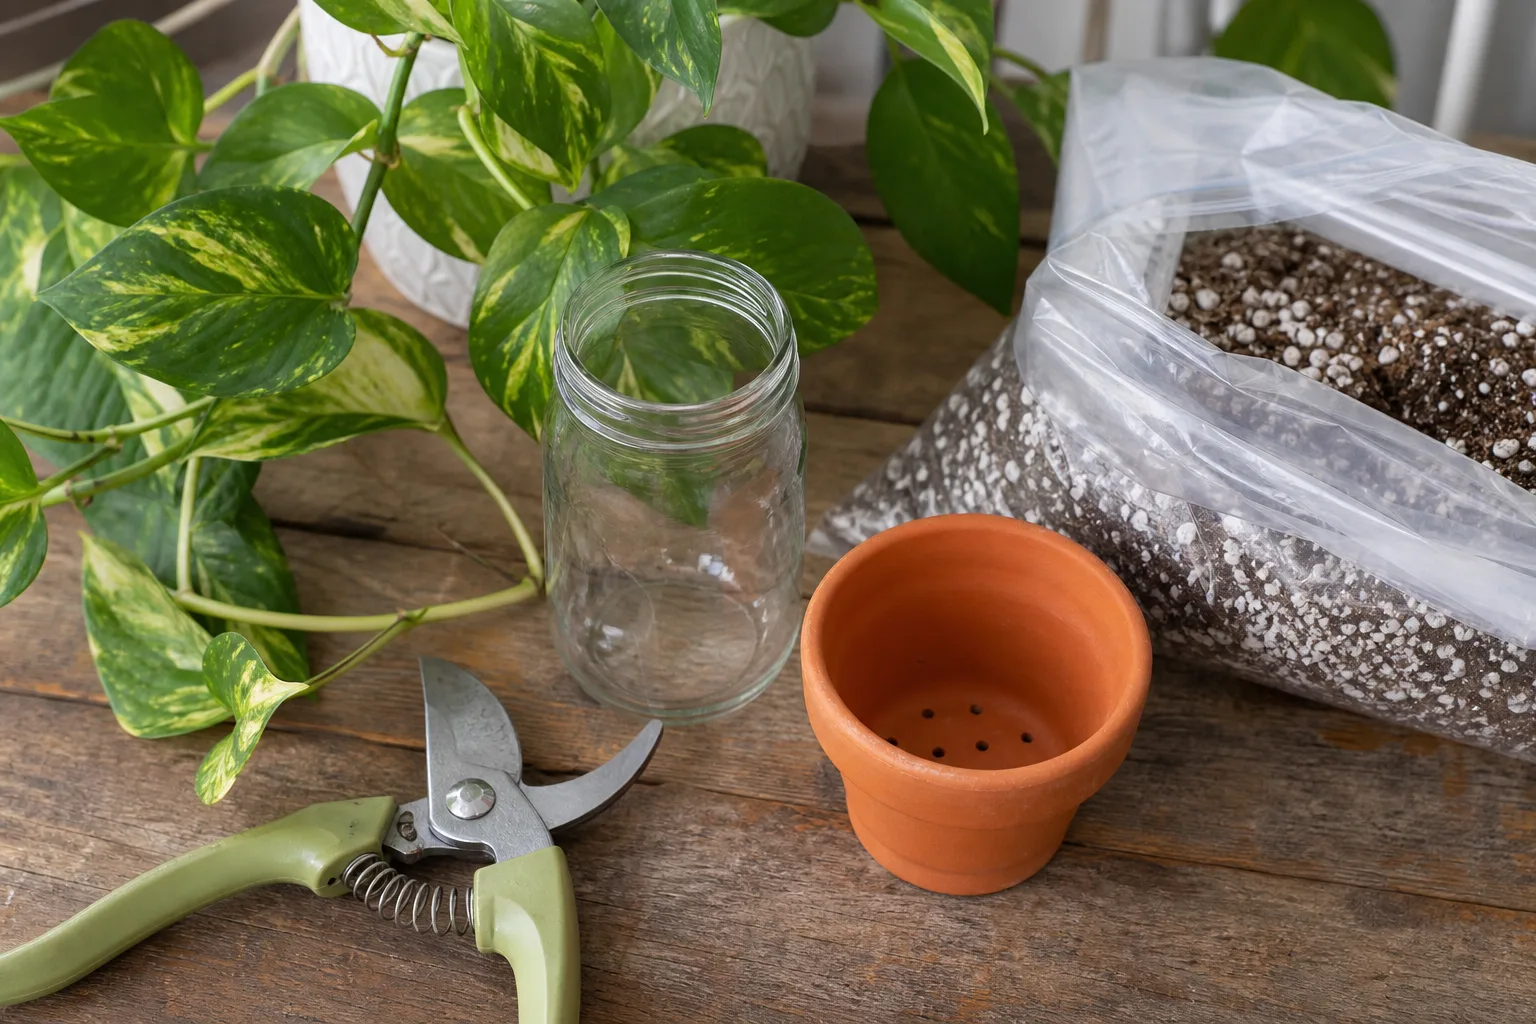
Gather before you cut:
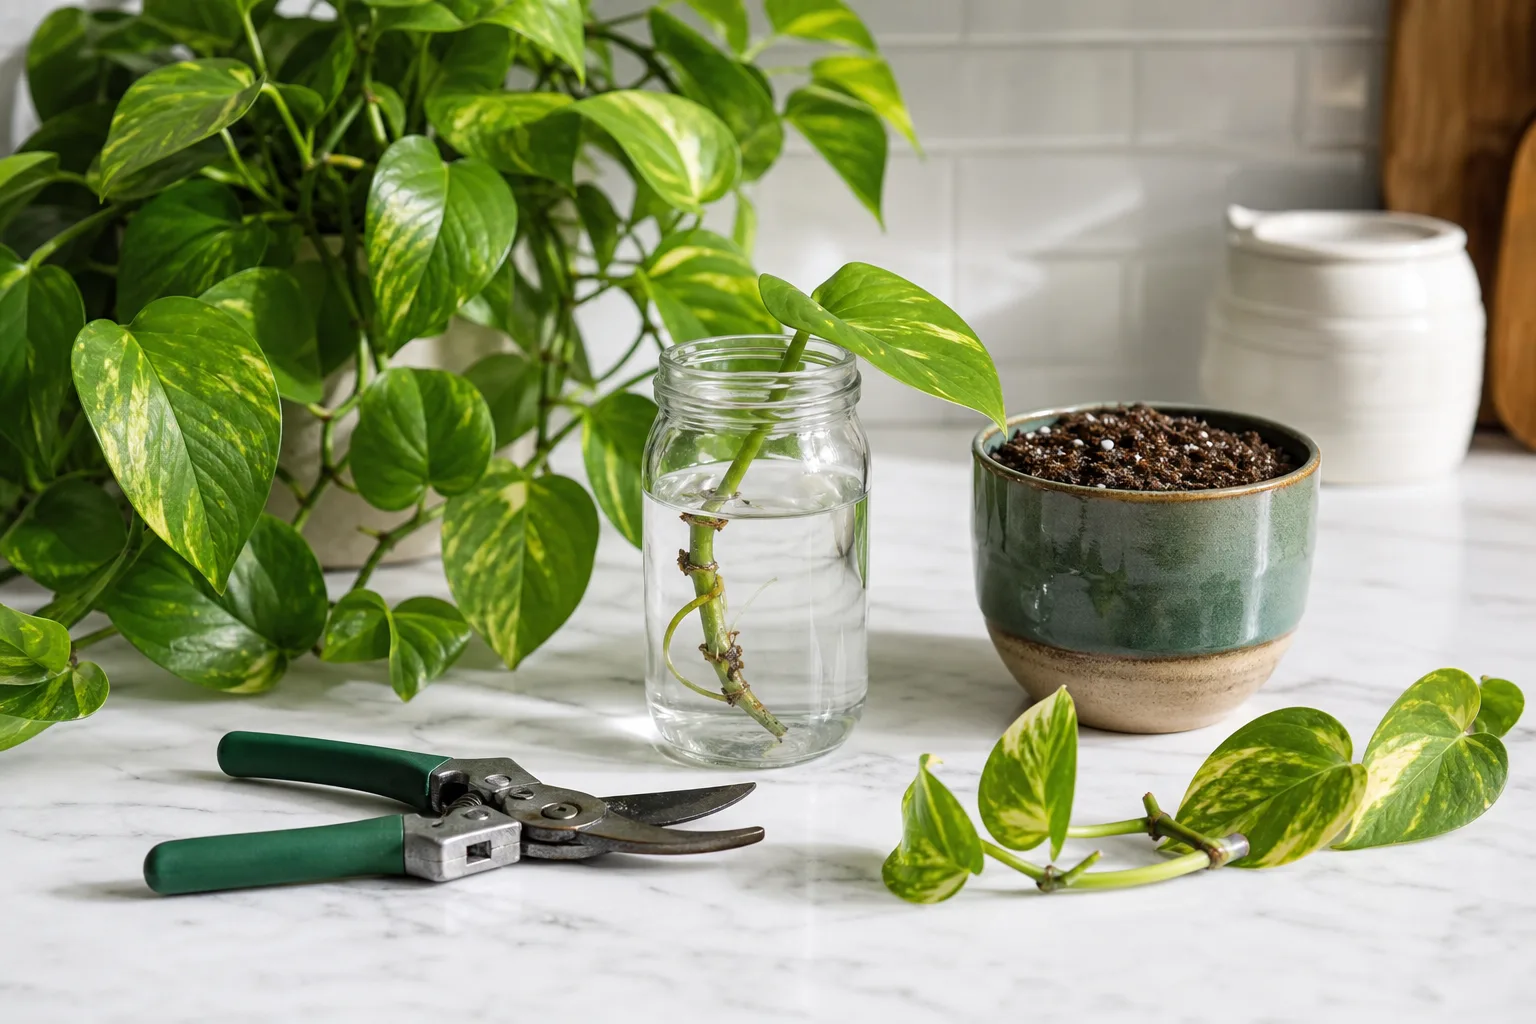
- Sharp bypass pruners or scissors, wiped with 70% isopropyl alcohol or dilute bleach
- For water: a clean clear glass or jar, room-temperature water
- For soil: a small pot with drainage holes, well-draining indoor potting mix
- Optional: rooting hormone powder (more useful for soil propagation)
- A warm spot with bright indirect light — an east-facing windowsill or a few feet back from a south or west window
Propagate from healthy, vigorous vines. Yellowing leaves, pest damage, or recent repot stress on the parent plant produce weaker cuttings. Water the parent a day before cutting so tissue is fully hydrated. Never take material from a plant you would not trust to recover from pruning.
Take more cuttings than you need. Better Homes & Gardens suggests taking extra cuttings because some may not root. (Better Homes & Gardens)
Where to Cut Pothos for Propagation
Cut the stem just below a node at a 45-degree angle. The node must stay on the cutting, not on the parent stub. Gardening Know How notes the node is crucial because that is where new roots will form. (Gardening Know How)
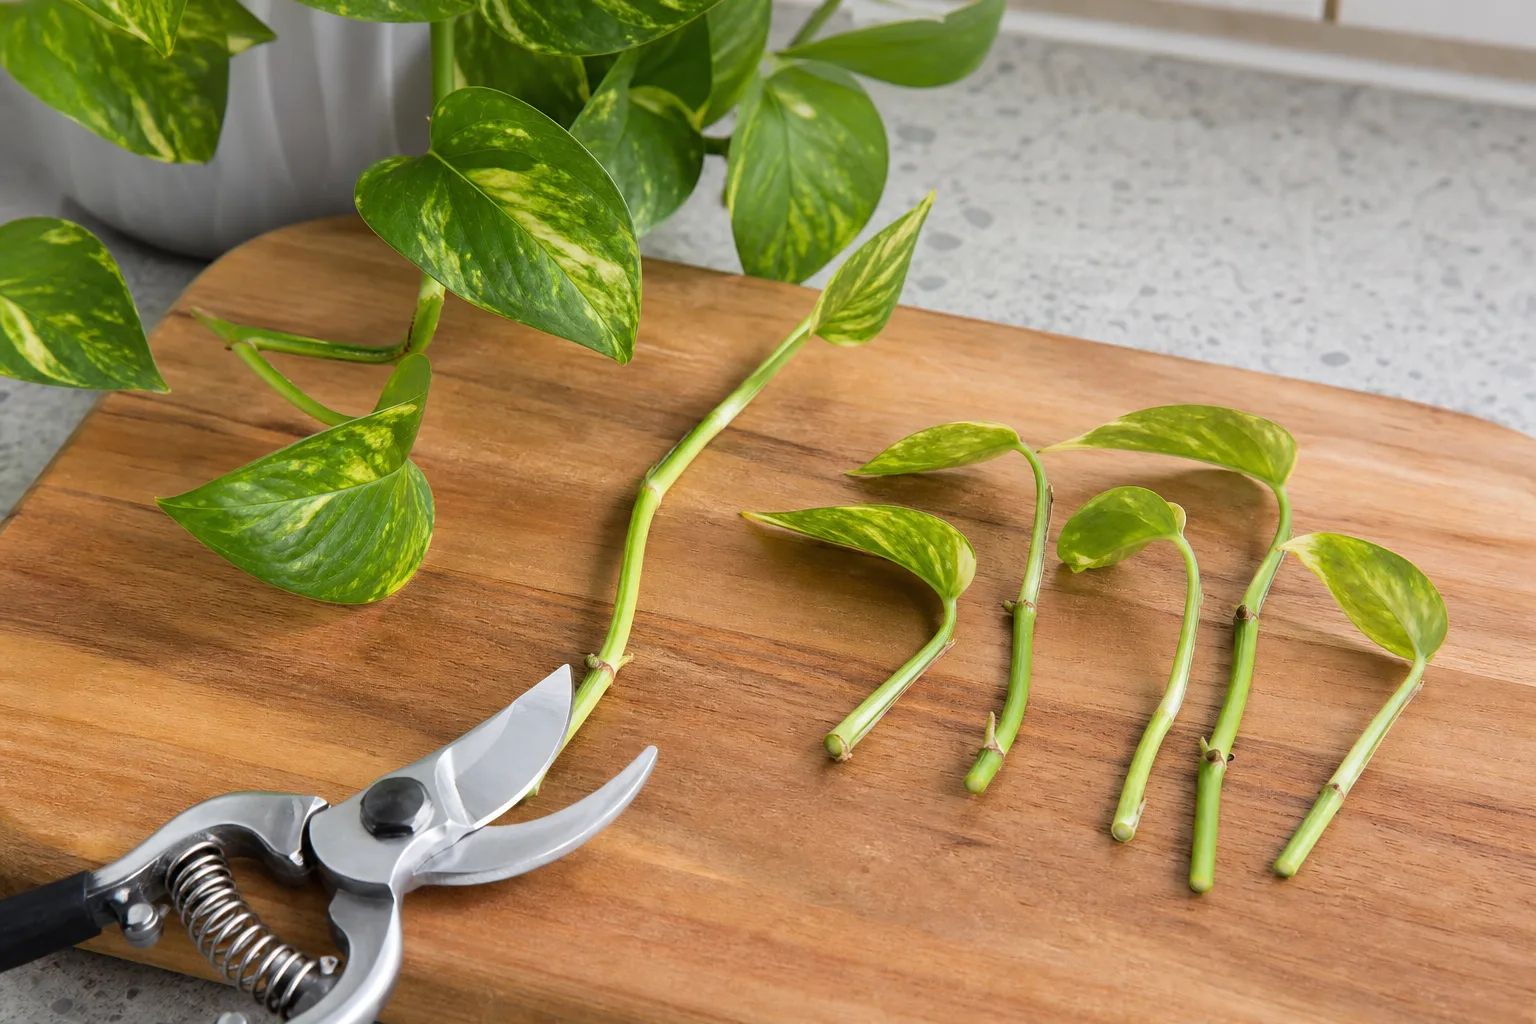
Each cutting should have:
- At least one node (two or more nodes per cutting increase success)
- At least one or two leaves at the top
- A length of roughly 4–6 inches (10–15 cm)
For a leggy vine with several nodes, you can make multiple cuttings from a single stem. Cut between nodes so each segment has its own node and leaf. Multiple cuttings can go into the same jar or pot — pothos does not mind company.
Orientation matters. When you take cuttings from a long vine, keep track of which end was closer to the roots. Plant or submerge the basal end (closer to the parent roots), not the tip. Inverted cuttings usually fail.
How to Propagate Pothos in Water
Water propagation is the most popular method because roots are visible and problems are easy to spot. You can watch the entire process from node to root to transplant.
Step-by-Step: Water Propagation
- Using sterile pruners, take 4–6 inch cuttings just below a node. Each cutting should have at least one or two leaves and one or two nodes.
- Remove any leaves that would sit below the waterline. Leaves submerged in water rot quickly and foul the water. Leave one or two leaves at the top of each cutting.
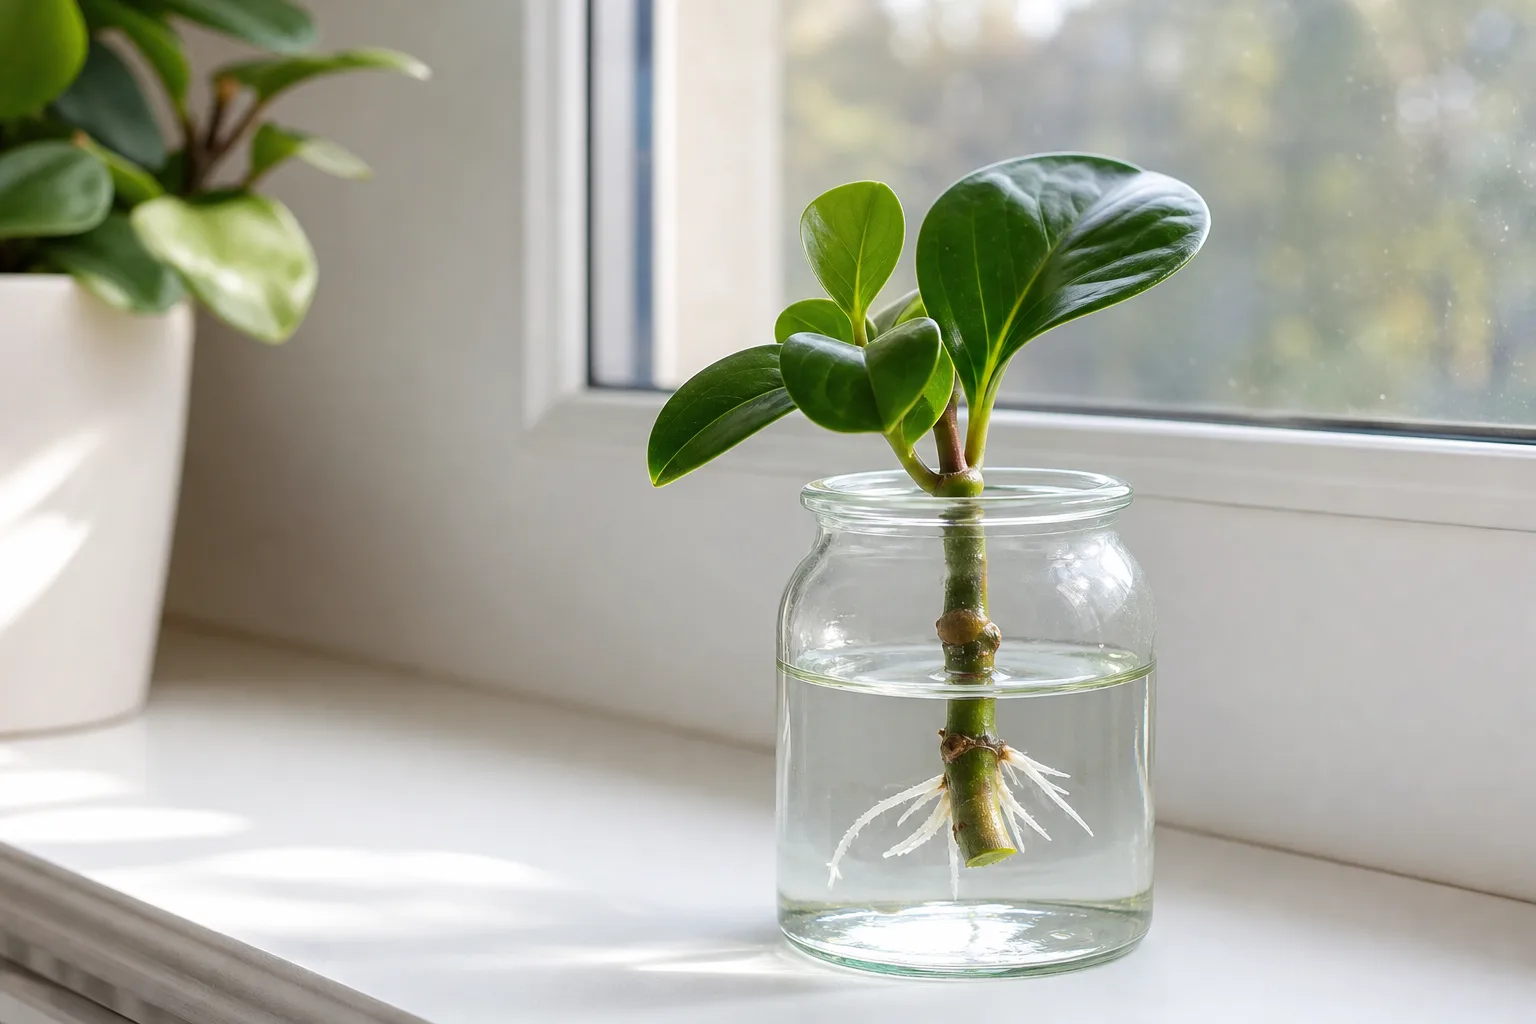
- Place cuttings in a clean glass jar filled with room-temperature water. Submerge the bare nodes and the cut end, but keep all leaves above the waterline.
- Set the jar in bright indirect light — not harsh direct sun, which can heat the water and stress the cuttings.
- Change the water once a week or whenever it looks cloudy. Stale water is a common rot trigger in water propagation, so regular changes help keep the cutting environment fresh.
- Roots should appear from the nodes within 1–2 weeks under warm, bright conditions. They start as small white nubs and elongate over the following weeks.
- When roots are 2–3 inches long and have some branching, the cutting is ready for transplant into soil. For most indoor setups, this takes 3–6 weeks total.
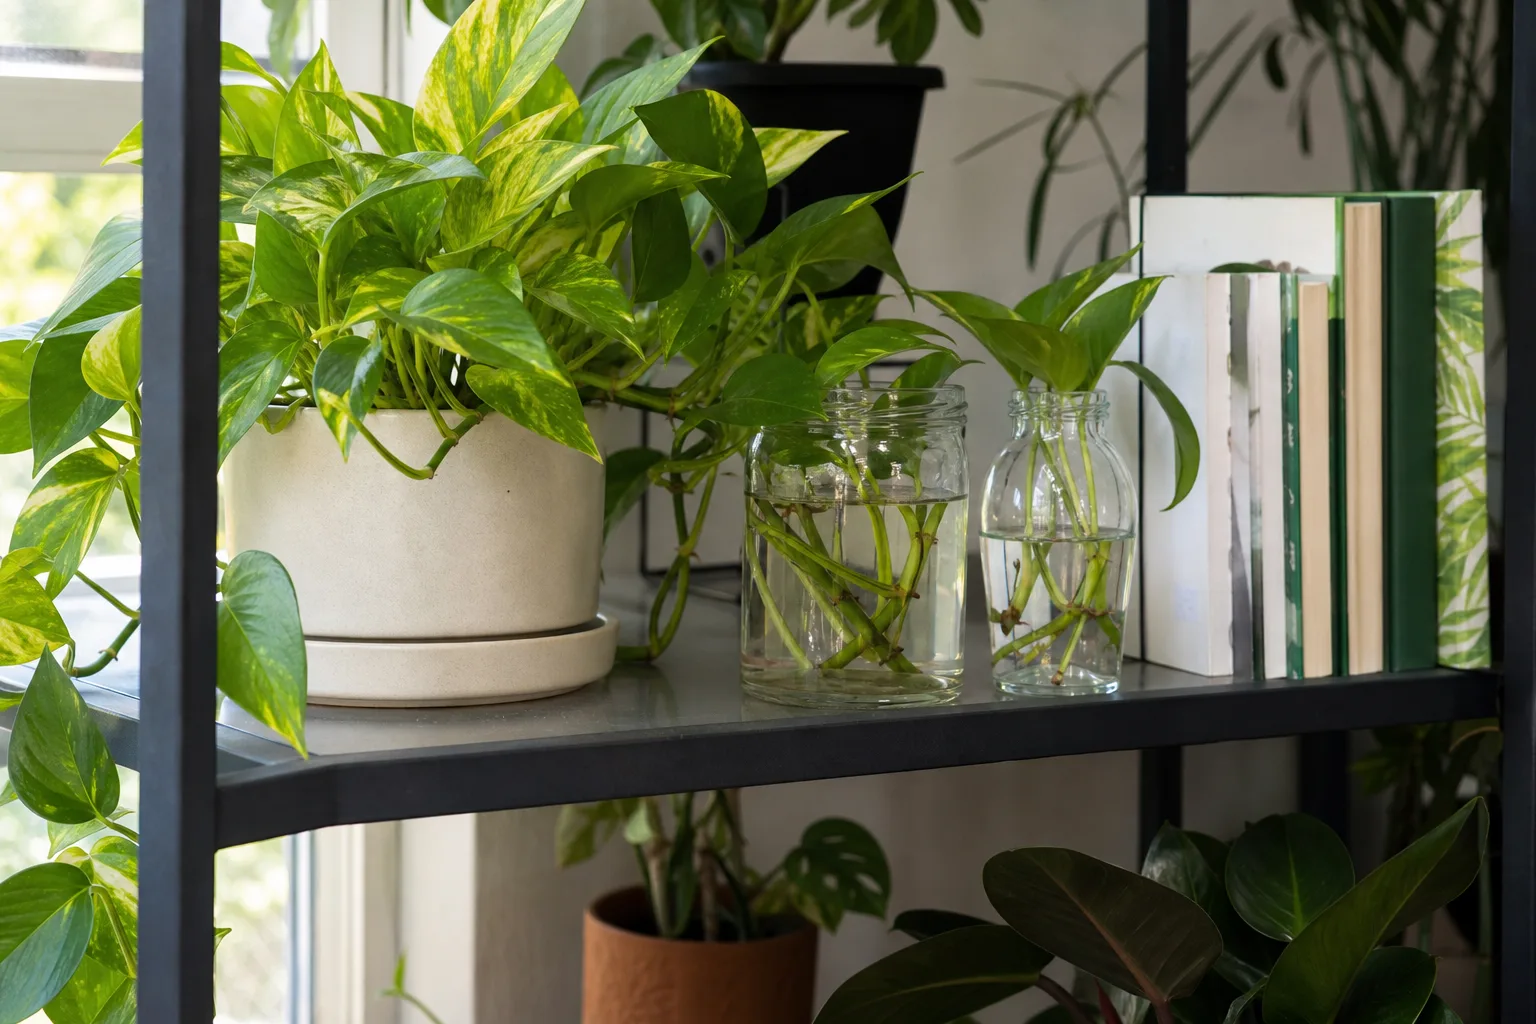
You can keep pothos cuttings in water for months if you change the water regularly and add diluted liquid fertilizer occasionally. Roots will grow long and fill the jar. But water-grown pothos eventually benefits from moving to soil — the plant grows faster and fuller with root-zone nutrients and aeration.
Water-to-Soil Transplant: How to Avoid Shock
The transition from water to soil is the most common failure point. Roots grown in water are adapted to constant moisture and low oxygen. Moving them to soil shocks the root system if you skip the adjustment period.
- Fill a small pot with drainage holes using well-draining potting mix. A standard indoor mix amended with perlite works well.
- Make a hole in the soil, place the rooted cutting so the nodes sit just below the surface, and gently firm the soil around the stem.
- Water thoroughly after planting.
- For the first 1–2 weeks, keep the soil evenly moist but not soggy — this bridges the gap between water roots and soil roots and helps the new roots acclimate.
- Place in bright indirect light and avoid direct sun or fertilizer until you see new leaf growth.
- After two weeks, gradually let the soil dry more between waterings, matching the care rhythm of an established pothos.
Some drooping or yellowing of older leaves after transplant is normal — the cutting is adjusting, not dying. New leaf growth within 2–4 weeks confirms the roots have taken hold.
How to Propagate Pothos in Soil
Soil propagation plants the cutting directly into potting mix, so roots form in their long-term environment. You lose the visibility of a water jar, but you skip the transplant step entirely. Better Homes & Gardens notes that soil propagation produces sturdier plant roots and cuttings that may not need to be transplanted later. (Better Homes & Gardens)
Step-by-Step: Soil Propagation
- Take 4–6 inch cuttings with at least one node and one or two leaves, same as for water propagation. Cut just below a node at a 45-degree angle.
- Remove the lower leaves so the bare nodes will sit below the soil surface. Leave one or two leaves at the top.
- Optional: dip the cut end into rooting hormone powder. Rooting hormone is more useful for soil propagation than water propagation because the cutting stays in place. Better Homes & Gardens notes rooting hormone can cause cuttings to root faster and help prevent rot. (Better Homes & Gardens)
- Fill a small pot with drainage holes using pre-moistened well-draining potting mix. A standard indoor mix amended with perlite works well.
- Poke a 1–2 inch deep hole in the mix with your finger or a pencil. Place the cut end into the hole so the nodes are buried and the leaves stay above the surface. Firm the soil gently around the stem.
- Water thoroughly after planting to settle the soil around the cutting.
- Place in bright indirect light. Keep the soil evenly moist but not soggy for the first several weeks while roots develop.
- Rooting in soil typically takes 4–6 weeks. You will know roots have formed when the cutting resists a gentle tug and starts producing new leaf growth. Better Homes & Gardens gives a similar 4–6 week rooting window. (Better Homes & Gardens)
- Once established, reduce watering frequency to match normal pothos care — let the top inch or two of soil dry between waterings.
For homes with dry air, placing a clear plastic bag or humidity dome over the pot for the first week or two can help cuttings retain moisture while roots form. Remove it once new growth appears to avoid fungal issues.
Water vs Soil: Side-by-Side Comparison
| Factor | Water Propagation | Soil Propagation |
|---|---|---|
| Best for | Beginners who want visible roots | Growers who want one-step rooting |
| Visibility | High — roots visible through glass | Low — progress is underground |
| Typical root window | Roots in 1–2 weeks; transplant-ready in 3–6 weeks | Roots in 4–6 weeks |
| New leaf growth | 2–4 weeks after transplant | 2–4 weeks after rooting |
| Transplant steps | Two (cut → water → soil) | One (cut → soil) |
| Rot risk | Stale water, submerged leaves | Dense wet mix, cold rooms |
| Rooting hormone | Not needed | Optional but helpful |
| Best season | Spring through summer | Spring through summer |
| Can it stay in the medium? | Yes, months with fresh water and diluted fertilizer | Yes, it is already in its permanent pot |
Both methods work reliably. Pothos is forgiving — if a water cutting does not root, try soil; if a soil cutting stalls, try water. The plant’s resilience is part of why it is one of the most popular houseplants in the world.
How to Propagate Multiple Cuttings for a Fuller Pot
One of the best uses of propagation is making a sparse pothos look fuller. Instead of rooting one cutting per pot, plant several rooted cuttings together in a single container.
- Take 5–8 cuttings from the same parent plant (or multiple parents).
- Root them all in water or soil using the steps above.
- When roots are ready, plant 3–5 cuttings per 4-inch pot, or 5–8 per 6-inch pot, spacing them evenly.
- Water thoroughly and follow the same aftercare as a single cutting.
Combining propagation with pruning is the fastest way to turn a leggy, bare-stemmed pothos into a bushy, full plant. Missouri Botanical Garden notes that pinching stems back encourages branching. (Missouri Botanical Garden) Every pruning session is an opportunity to root more plants.
Can You Propagate Pothos in Sphagnum Moss or Perlite?
Yes. Sphagnum moss and perlite are intermediate options between water and soil. Moss holds moisture around the node while providing more oxygen than standing water. Perlite in a clear cup gives partial visibility of roots with less transplant shock than water.
These methods are useful if you have had rot issues in water or slow rooting in soil. They are covered in depth on the pothos propagation hub. For most beginners, water is the easiest starting point, and soil is the most direct path to a finished plant.
Division: When Cuttings Are Not the Answer
If your pothos is already bushy with multiple rooted stems in one pot, you can propagate by division instead of cuttings. Gently remove the plant from its pot, separate a section with its own root mass, and repot both sections into fresh mix. Division gives you an instant plant with no rooting wait time. Use the pothos propagation hub for the division walkthrough; this guide stays focused on stem cuttings.
Common Propagation Problems and Fixes
Cutting Rots in Water
Rot shows as mushy, brown, or black stem tissue and a foul smell. The most common causes: leaves were left below the waterline, water was not changed, or the cutting came from an unhealthy vine.
Fix: Trim the rotted portion back to firm green tissue with sterile pruners. Remove any submerged leaves. Place in a clean jar with fresh water. Change the water weekly.
No Roots After 3–4 Weeks
If the cutting is still firm and green but has not rooted, the issue is usually low light, cool temperatures, or a weak cutting. Move to brighter indirect light and warmer conditions. Cuttings from the middle of a long vine sometimes have less vigor than tip cuttings; if one segment stalls, try a fresh tip cutting from the same parent.
Cutting Wilts After Water-to-Soil Transplant
Transplant shock is normal. Water-grown roots are adapted to constant moisture. Keep the soil evenly moist for the first one to two weeks and avoid direct sun. Some drooping is expected. New growth within 2–4 weeks confirms the roots are adapting.
Yellow Leaves on New Cuttings
One or two lower yellow leaves on a cutting can be normal — the plant is redirecting energy to root production. Remove yellow leaves so they do not rot in water or soil. If all leaves yellow, check for rot, inadequate light, or the cutting being left too long in water without nutrients.
Parent Plant Looks Sparse After Taking Cuttings
Taking multiple cuttings from the same vine can thin the parent’s appearance. To minimize this: take cuttings from multiple vines rather than stripping one bare, prune just above a node so the parent can branch, and root the cuttings back into the same pot once they are established.
Pothos Propagation and Pet Safety
Pothos (Epipremnum aureum) is toxic to cats and dogs because it contains insoluble calcium oxalates. The ASPCA lists oral irritation, burning of the mouth, excessive drooling, vomiting, and difficulty swallowing as possible signs of ingestion. (ASPCA)
Propagation setups create additional risks: jars of water with cuttings are often placed on low shelves or windowsills within easy reach of pets. Keep propagation containers out of reach. Dispose of trimmed leaves and stems where pets cannot access them. If a pet chews or eats pothos material and shows symptoms, contact your veterinarian or the ASPCA Animal Poison Control Center at (888) 426-4435 (consultation fee may apply).
Wash hands after handling cuttings. Pothos sap can irritate sensitive skin.
Aftercare: Light, Water, and Feeding for New Pothos Plants
Once your propagated pothos is rooted and established, treat it like a mature plant:
- Light: Bright indirect light for fastest growth. Pothos tolerates lower light but grows slower and may lose variegation. See the pothos light guide.
- Water: Water when the top 1–2 inches of soil are dry. Do not water on a fixed schedule — check the soil first. See the pothos watering guide.
- Soil: Well-draining indoor mix with perlite. See the pothos soil guide.
- Fertilizer: Wait until you see active new growth before feeding. A balanced liquid houseplant fertilizer diluted to half strength every other month during the growing season is usually enough. See the pothos fertilizer guide.
- Repotting: Repot only when roots circle the pot or emerge from drainage holes. A pot that is too large holds excess moisture around young roots.
For the complete care framework, use the pothos care guide and the pothos care hub.
Conclusion
Pothos propagation is one of the easiest ways to multiply your houseplant collection. Take a cutting with a healthy node, root it in water for visibility or soil for a direct path to a finished plant, and keep it in warm bright indirect light while roots develop. Water roots appear in 1–2 weeks; soil roots take 4–6 weeks. After transplant, keep the soil evenly moist for the first week or two, then transition to normal pothos care.
The single most important rule: include a node on every cutting. No node means no roots and no new plant. Everything else — medium choice, rooting hormone, container type — is secondary to that one requirement. For division, moss propagation, and cultivar-specific guidance, continue with the pothos propagation hub. For ongoing care after your cuttings are potted, use the pothos care guide.
Related Guides
- Pothos care guide — light, water, soil, pruning, and common problems for established plants
- Pothos propagation hub — division, moss propagation, and deeper troubleshooting
- How to water indoor plants the right way — soil-check habits that apply during propagation aftercare
- Repotting houseplants — when and how to up-pot newly rooted cuttings
- Snake plant propagation: water vs soil — same comparison framework for Sansevieria leaf cuttings