How to Safely Prune Clematis Plants by Group and Season
Learn how to safely prune clematis by flowering group, when to cut each type, how much to remove, and what to do if the variety is unknown or overgrown.
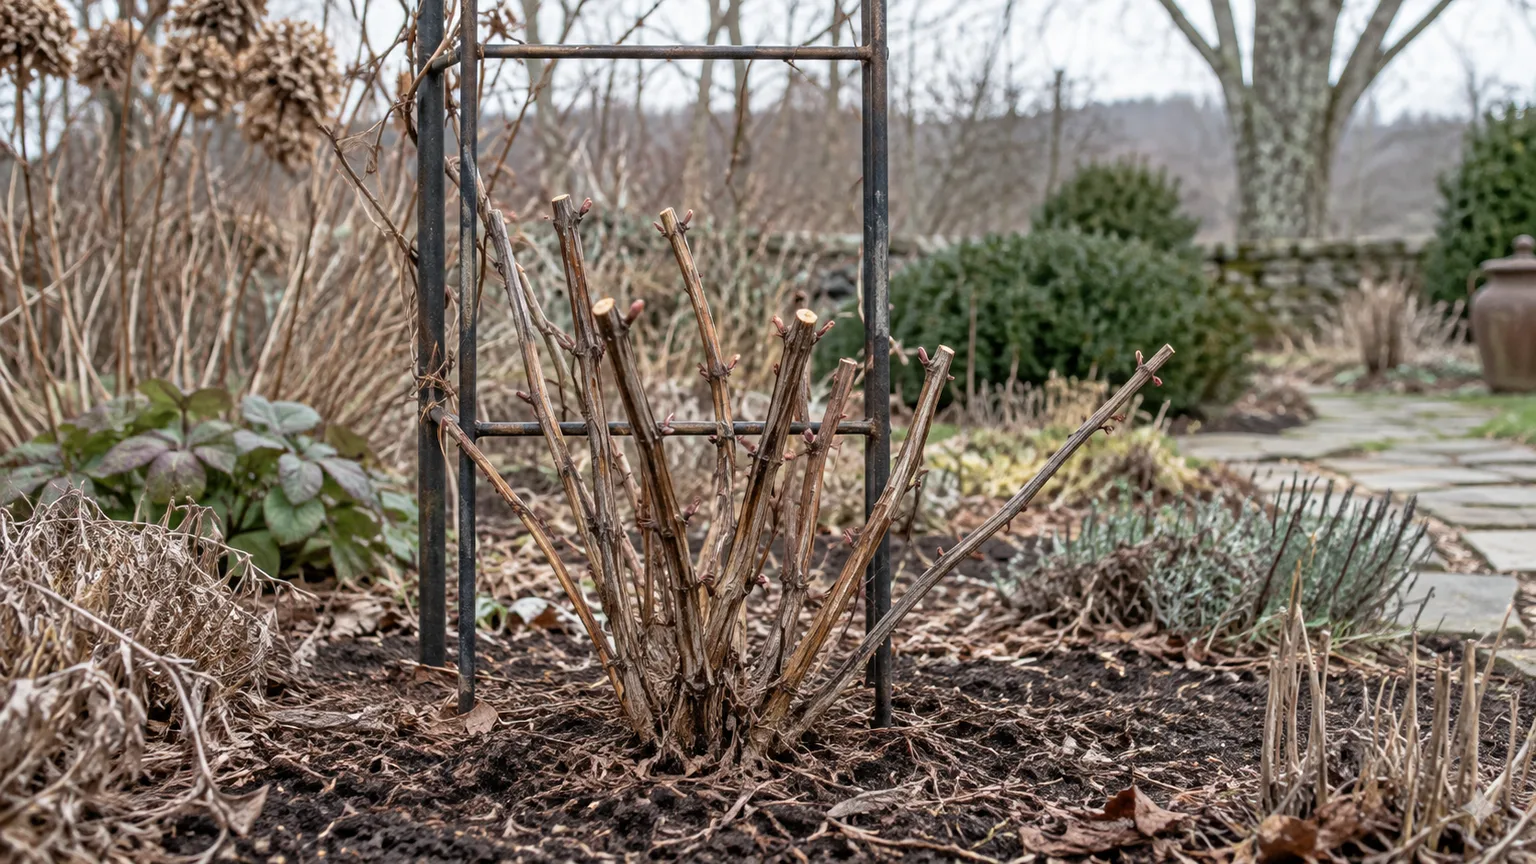
The right time to prune clematis depends on when it flowers and whether those flowers grow on last year’s stems or this year’s new growth. Identify the pruning group before making a structural cut: early spring bloomers usually need little pruning, large-flowered spring clematis need a light hand, and late-summer types can be cut back hard while dormant.
If the plant’s name is missing, resist the urge to tidy the whole vine in late winter. Remove only clearly broken or dead growth, watch when it blooms this season, and use that flowering window to choose a safer pruning plan next year.
| Clematis group | Typical bloom pattern | Flowering wood | Routine pruning |
|---|---|---|---|
| Group 1 | Winter or spring, before early summer | Stems made the previous season | Usually none; shape just after flowering |
| Group 2 | Large flowers in spring or early summer, sometimes a second flush | Mostly previous-season stems, with some later flowers on new growth | Light cleanup in late winter; optional light trim after the first flush |
| Group 3 | Mid- to late summer, often into fall | Current-season growth | Cut back to low, healthy buds in late winter or early spring |
These are practical groups, not a measure of how “woody” or vigorous a vine looks. The Royal Horticultural Society explains that the groups are based on flowering time and the age of the wood that carries flowers; some U.S. references call the same groups A, B, and C instead of 1, 2, and 3. See the RHS clematis pruning guide and University of Illinois Extension’s clematis notes for regional reference points.
The safe short answer: identify before you cut
For an established clematis, start with the plant tag, invoice, or cultivar name if you have it. Search the name with “pruning group” in a trusted clematis or extension reference; flowering time alone is a useful clue, but a warm spring, cool summer, or unusual growing site can shift the calendar.
If the identity is unknown, do not use “clematis” as a reason to cut every stem down to the base. A Group 3 vine generally responds well to hard late-winter pruning, while a Group 1 or Group 2 vine may already hold the buds for its next main display on those stems. The conservative choice protects flowers until you have observed one full season.
Routine pruning is not mandatory for every clematis. Group 1 plants can be left alone if they fit their support; Groups 2 and 3 benefit from selective pruning that keeps growth accessible and encourages flowering where you can see it.
How the three pruning groups work
Think of the groups as a map of where next season’s flowers are stored. If blooms open early on stems that survived winter, preserve that old framework; if the vine blooms late on shoots that start from the base each spring, you can remove most of last year’s tangle.
The labels can also tell you what kind of cut is low-risk. Group 1 is primarily a post-flowering tidy, Group 2 is a selective trim that preserves old stems, and Group 3 is a deliberate annual cutback while the plant is dormant. The BBC Gardeners’ World clematis-group overview gives a useful visual summary of those patterns.
Group 1: flowers arrive on last year’s stems
Group 1 clematis flower early, usually in winter or spring and before early summer, on shoots made during the previous growing season. Examples include Clematis alpina, C. macropetala, C. montana, and evergreen C. armandii. These vines often do not need routine pruning at all; remove dead or damaged stems and shape only when growth is outgrowing its space.
When shaping is necessary, wait until the main flowering has finished, then shorten selected shoots to a healthy side shoot or pair of buds. This gives the plant the rest of the growing season to make stems for the following spring. A hard renovation cut can remove the next display, so use it only when a neglected vine truly needs a reset.
Group 2: spring flowers and sometimes another flush
Group 2 includes many large-flowered hybrids that bloom in spring or early summer from short shoots on last season’s stems. Some cultivars also flower again later on new growth, but that second flush is usually less dependable than the first. ‘Nelly Moser’ and ‘The President’ are common examples; confirm the cultivar’s listed group before pruning.
This group rewards restraint because a green stem in winter may carry spring flowers. In late winter, remove dead, weak, or broken sections and shorten live stems only to strong, visible buds. After the first flush, you can deadhead or lightly trim flowered stems to a healthy pair of buds to encourage fresh growth and a possible later bloom; avoid turning that trim into a full cutback.
Guides vary in how much they recommend shortening Group 2 stems in late winter. The shared principle is clearer than any fixed height: retain healthy old stems and their buds, then make a light post-flowering cut only if you want to trade a little growth for a tidier shape or possible repeat flowers.
Group 3: late flowers form on this year’s growth
Group 3 clematis flower from mid- or late summer into fall on shoots that grow during the current season. Many C. viticella, C. tangutica, and C. texensis cultivars, along with ‘Jackmanii’ and other late-flowering large-flowered hybrids, belong here. Because those stems do not yet exist in winter, an established Group 3 plant can be cut back while dormant without removing its coming season’s flower buds.
Left unpruned, a Group 3 vine can keep extending from last year’s ends and concentrate its flowers high above a bare lower framework. A late-winter cut to a low pair of healthy buds resets the flowering framework near the base, makes the new growth easier to train, and simplifies spring cleanup. The Clematis guidance from Clemson Cooperative Extension also describes late bloomers as flowering on current-season growth and suitable for a hard spring cutback.
When to prune clematis in your climate
Use the plant’s stage and flowering cycle, not a fixed date from another climate. In much of the Northern Hemisphere, Group 1 is shaped after its spring flowers fade, Groups 2 and 3 receive their main dormant-season work in late winter or early spring, and Group 2 may get a second light trim after its first flush. In the Southern Hemisphere, shift the months by season; the same “after bloom” and “before active growth” cues still apply.
For Group 3, wait until the worst hard freezes are past but cut before vigorous new shoots become long and easy to snap. A mild region may reach that window earlier than a colder one, while a short-season garden can delay the cut until the buds are visibly swelling. If shoots have already started, cut carefully between them rather than snapping or sweeping them away.
Group 1 is the opposite timing problem: cutting before its spring bloom can remove buds that formed the previous year. Once flowering is finished, prune promptly enough that new growth has time to mature before winter. This timing logic is more reliable than saying “prune clematis in February” without naming the group.
Tools and setup for a clean, controlled cut
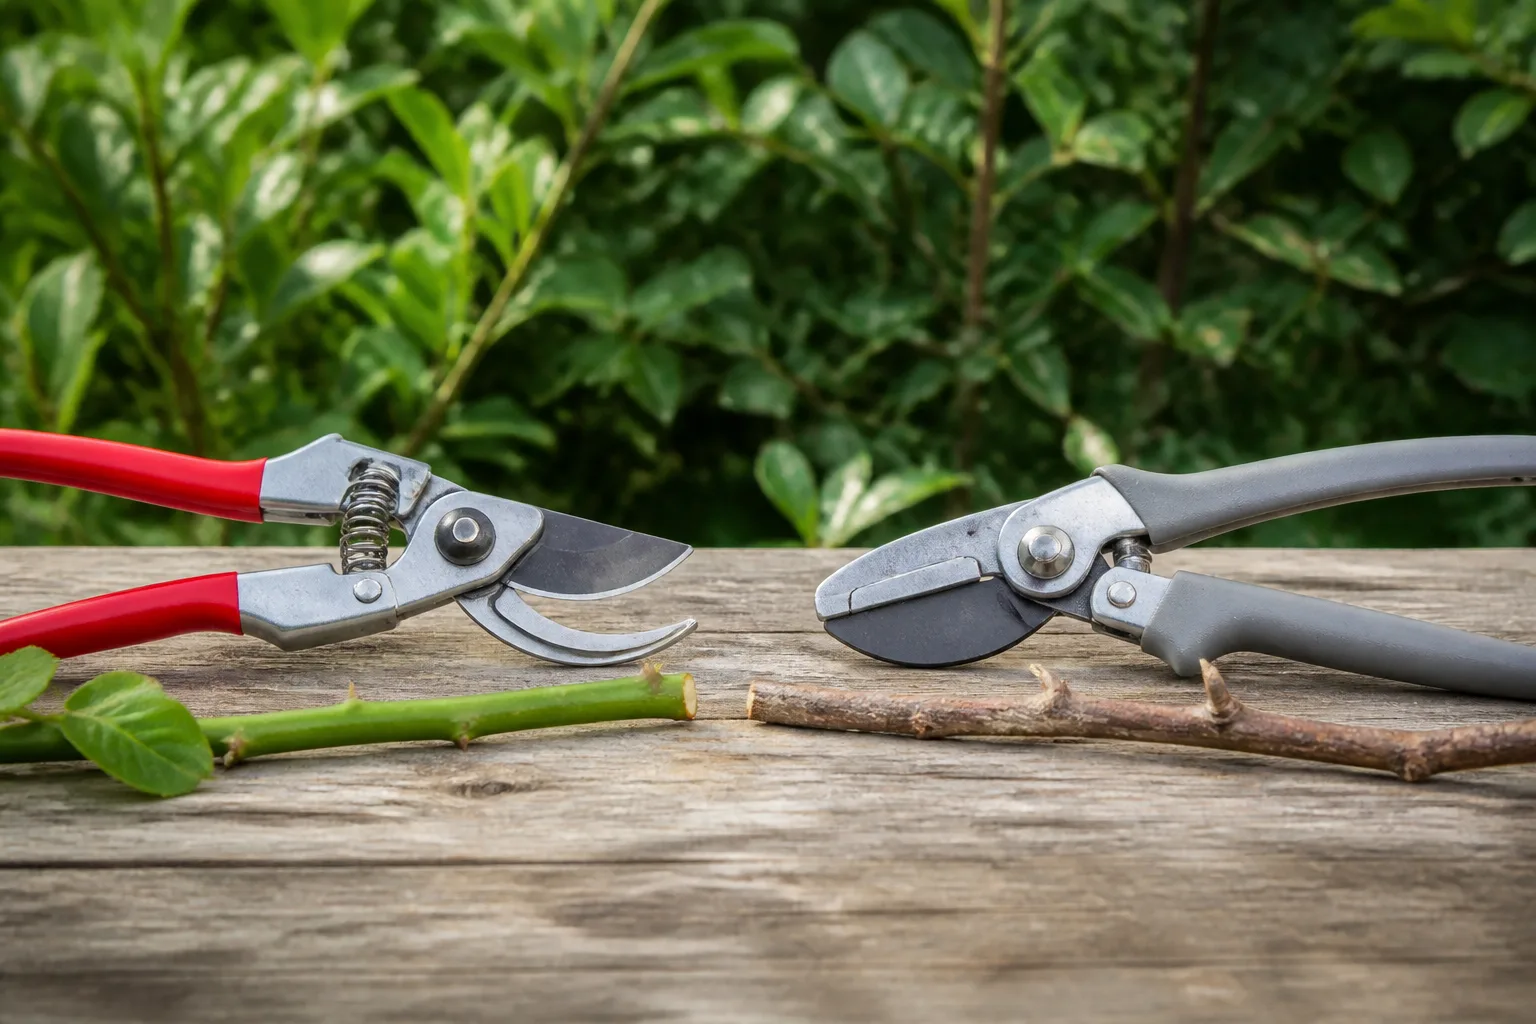
For most stems, use sharp bypass pruners that make a clean cut without crushing the vine. Keep loppers nearby for thicker established stems, plus soft ties for guiding what remains; a saw is rarely needed for ordinary annual pruning. Wear gloves when working through tangled vines, and keep the support visible so you can tell which stems belong to the clematis and which belong to a neighboring plant.
Before cutting, follow each stem from the top toward the base and identify live buds, dead sections, rubbing stems, and ties that have started to constrict growth. Clematis can wrap its leaf stalks around thin support, so pull a stem free slowly instead of yanking the entire vine off a trellis. If disease is suspected, clean cutting tools between affected sections; for routine healthy pruning, sharp clean blades are the key.
Make cuts just above a pair of healthy buds or a suitable side shoot, leaving a small stub rather than cutting flush into the bud. A slight angle sheds water, but do not obsess over the angle: correct group, healthy bud, and a clean cut matter more. Put dead, diseased, or damaged debris in the appropriate yard-waste stream rather than leaving a damp tangle at the plant’s base.
How to prune Group 1 after the flowers fade
First remove flowers that have faded and any stem that is plainly dead, broken, or badly damaged. On the living framework, select the shoots that need to be shortened to keep the vine within its allotted space, then cut each one back to a strong side shoot or healthy bud. If the plant is well placed and not tangled, stopping after deadwood removal is a sound pruning plan.
Avoid clipping the whole outside of the vine into a tight ball. That can remove more flowering wood than intended and leave a dense outer shell with weak light and air movement inside. Instead, thin a few crossing or crowded stems at their origin and keep the remaining framework spread across its support.
If an old Group 1 vine has become too large to manage, renovation is possible, but schedule it just after flowering and accept that the following spring’s bloom may be reduced. The RHS says a renovation cut can be made to about 6 inches from the base, but that severe reset should not be repeated within three years. For a valuable or vigorous plant, renovate only part of the framework each year so some stems remain to flower.
How to prune Group 2 without losing its main bloom
Start in late winter by looking for live buds on last year’s stems. Remove dead or weak growth first, cutting back until you reach a healthy bud or a living side branch; leave intact stems that are carrying plump buds. If you cannot tell whether a cane is dead, delay the cut until buds begin to swell rather than removing it based on brown bark alone.
Do not cut a Group 2 clematis to the ground as a routine annual task. That removes the old wood that carries the spring display and can leave you with vigorous leaves but few or no early flowers. If the vine is top-heavy, choose a few long stems to shorten rather than reducing every stem by the same amount.
After the first flush, decide whether a second flowering is worth encouraging. Remove the spent flower and trim the flowered section back to a strong pair of buds or side shoot; on a large vine, do this selectively so you preserve some uncut growth and keep the structure balanced. The RHS pruning guide recommends a light post-flowering cut for Group 2, while noting that some plants can be left except for dead shoot ends.
If the plant produces little or no second flush, do not assume your cut was wrong. Cultivar, growing season, plant maturity, light, and available moisture all affect repeat flowering; the main goal is to maintain a usable framework without removing the next spring’s buds.
How to prune Group 3 for flowers along the vine

In late winter or early spring, cut last year’s stems back to the lowest strong pair of buds you can find on each healthy stem. For an established plant, that often leaves roughly 12 to 24 inches (30 to 60 centimeters) above soil, but the bud position is a better guide than the ruler. A dense old crown may have visible buds higher up; retain those rather than cutting blindly to bare ground.
Work one stem at a time and keep the buds you want pointed toward the support. Remove all dead or badly tangled top growth, then gather and discard the cut stems so they do not snag on new shoots. The result may look severe, but Group 3 sends up new flowering growth after the cut; it is not being asked to flower from last year’s canes.
Some herbaceous clematis also flower on current-season shoots and can be cut near ground level in late fall or early spring. If the plant is a nonclimbing or shrubby type, verify its species guidance first rather than assuming it follows the standard woody-vine height. For a new plant, follow the planting-year advice below instead of applying the full mature-vine routine.
How to prune a young clematis
Do not treat a newly planted vine as though it has already built the framework of a mature plant. First follow the cultivar’s label or a trusted local recommendation; establishment pruning can differ from routine annual pruning and may be intended to encourage several basal stems rather than maximize flowers immediately.
Some extension guidance recommends cutting a newly planted clematis back to around 12 inches the spring after planting to encourage branching, but this is not a reason to repeat a hard cut every year on a Group 1 or Group 2 vine. The University of Illinois Extension clematis page gives that establishment advice alongside its separate group-specific pruning recommendations. If your plant arrived already trained on a support or is growing vigorously, check the nursery’s cultivar directions before making the cut.
During the first seasons, loosely tie new stems to the support and distribute them sideways as well as upward. More stems starting low can help fill the framework, while a single stem trained straight to the top can leave the bottom bare for years. Keep ties loose enough to accommodate thickening stems and avoid pulling young shoots into a sharp bend.
How to renovate a tangled or neglected clematis
Before renovation, find out which group you have and decide how much bloom you are willing to lose. For Group 1, work just after flowering; for Group 3, use the late-winter cutback window; for Group 2, renovate gradually because severe winter pruning may remove the primary spring display. If the group is unknown, use the observation plan below rather than using a renovation cut to guess.
For a large old vine, a staged reset is usually easier on both the plant and the support. In the first year, remove deadwood, free a few stems from the tangle, and shorten only the worst offenders. In later seasons, thin or replace more of the old framework after you see how the plant responds and how much flowering you want to preserve.
A one-time severe cut can be reasonable when a vine has outgrown its location, the base is inaccessible, or the support needs repair. It may lose a season of flowers, especially if the group is uncertain, and it can expose the crown to more sun or cold than the old vine did. Water during dry spells while new shoots establish, keep the root zone from drying completely, and retrain the new stems rather than expecting them to rebuild a perfect screen unaided.
What to do when you do not know the clematis group
If you inherit an unlabeled vine, let it flower before making a major cut. Record the approximate first bloom date, whether it flowers before or after early summer, and whether a second flush appears later. Photographs of the flowers, leaves, seed heads, and the whole vine can help a local extension office, nursery, or clematis society identify it.
Use the bloom window as a cautious shortcut, not as proof of cultivar identity. A clematis flowering before early summer is usually best left unpruned until after bloom; a vine that begins flowering from midsummer onward is more likely to tolerate a late-winter Group 3 cut. The International Clematis Society pruning notes also advise using flowering time when the variety is unknown, while emphasizing that local season changes the month.
Until the plant is identified, remove only obvious hazards: snapped stems, diseased material, or growth blocking a path. Avoid a hard fall tidy because it can remove buds on early-flowering vines; avoid a hard late-winter cut because it can remove those same buds before you know what is waking. The trade-off is a somewhat untidy vine for one season in exchange for keeping the chance of bloom and learning the plant’s cycle.
Why clematis flowers only at the top
Flowers high above a bare base usually point to a framework that has been allowed to extend year after year, especially in Group 3, or to a pruning pattern that preserved the upper stems without encouraging lower branching. The plant is not necessarily unhealthy; it may simply be flowering on the newest growth at the ends of old, tall canes.
For a confirmed Group 3, the annual late-winter cutback resets the growth closer to the ground. For Group 2, prune selectively after the spring flush and train several stems across the support so new growth does not all race up one narrow channel. Group 1 may stay more open and woody, so solve an unwanted bare base with groundcovers or a lower neighboring planting rather than cutting away its spring flowering wood.
Light and growing conditions still matter. A vine on a shaded lower wall may grow more weakly near the base, and a crowded support can funnel shoots upward; thinning the tangle and spreading stems laterally may improve the display. Pruning cannot compensate for a site that is too dark, too dry, or too cramped, so adjust the support and basic growing conditions as well as the cut.
Common clematis pruning mistakes
The costliest mistake is cutting an unidentified clematis hard in late winter. That is a good routine for many Group 3 cultivars and a poor routine for Groups 1 and 2, whose buds can already be sitting on the old stems. If the plant name is uncertain, wait through bloom and make a smaller, reversible cut afterward.
Another mistake is assuming that every brown stem is dead. Clematis can leaf out later than neighboring perennials, and a cane that looks lifeless may still have live buds lower down. Scratch only a small patch of bark if needed, then wait for growth before removing borderline stems; avoid pulling at stems that are anchored through a trellis.
Gardeners also lose flowers by pruning Group 1 before it blooms, by hard-cutting Group 2 in winter, or by removing every spent flower stem when only selective deadheading was needed. At the other extreme, never pruning a Group 3 vine can produce a tall tangle with flowers beyond reach. The fix is not “prune harder”; it is to match the cut to the group and purpose.
Finally, do not make a large cut during an active flowering period unless the vine is damaged or unsafe. Removing live stems midseason can shorten the display, and a stressed plant may not have time to replace the growth you removed. Make structural decisions during the group’s safe window and reserve emergency cuts for genuine damage.
After pruning, train new stems across the support
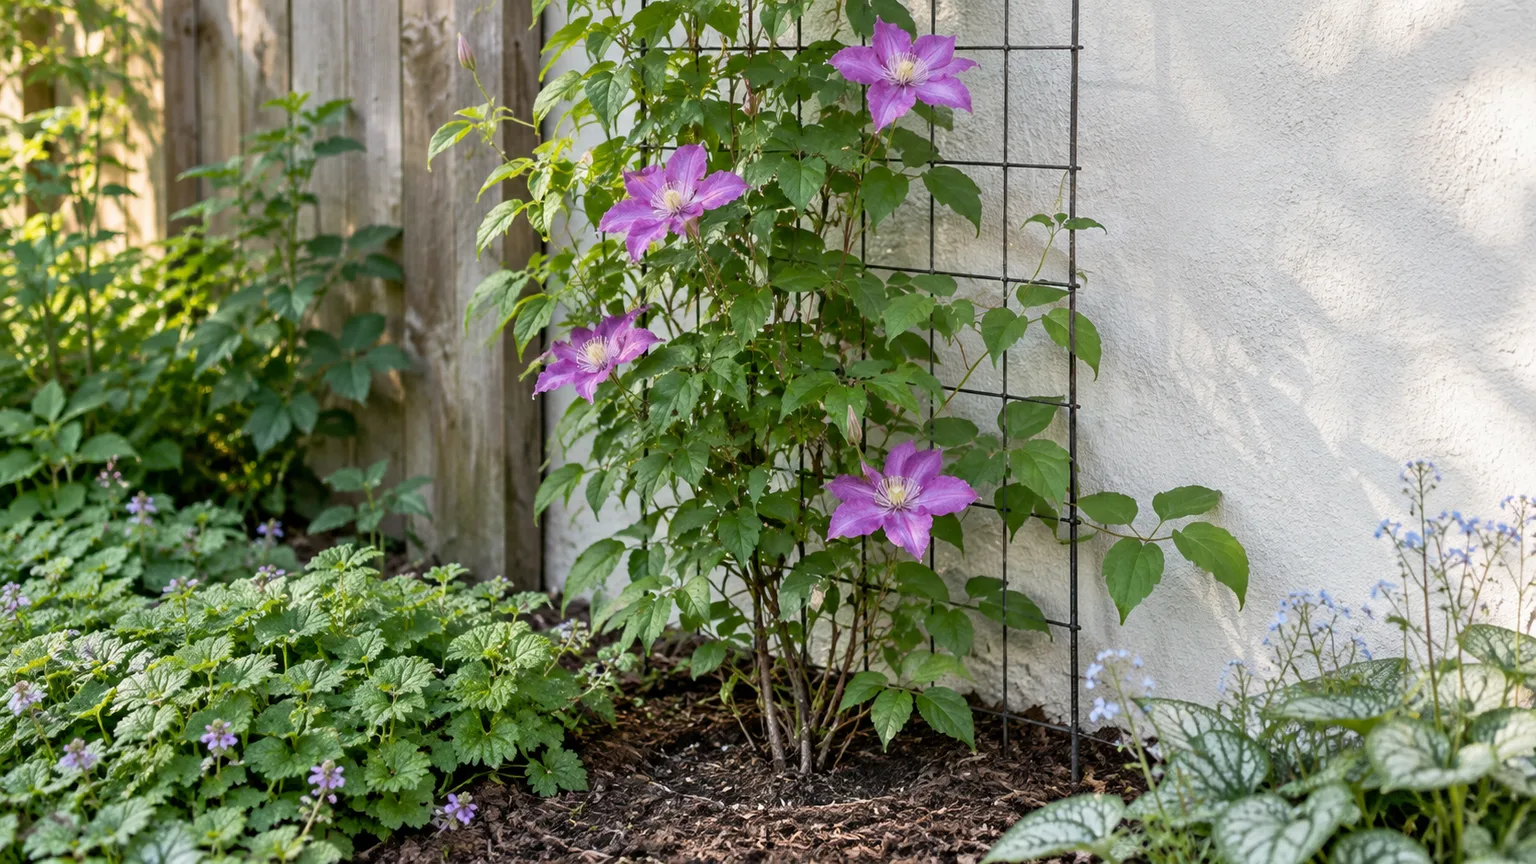
Pruning creates the structure; training decides where that structure fills in. As new shoots grow, spread them across the trellis or wires and tie them loosely with soft ties. Clematis climbs by wrapping leaf stalks around supports, so thin horizontal or diagonal wires are easier for it to grasp than a wide flat wall.
Check ties every few weeks during active growth and loosen or replace any that pinch. Guide stems before they become long and brittle, but do not twist them sharply around a support. A wider spread gives the vine more places to carry flowers and can help soften the top-heavy look over time.
After flowering, note what worked: first bloom date, where flowers formed, which stems were strong, and whether the cut produced a repeat flush. Add those observations to the plant tag or garden journal. That small record is especially helpful for Group 2 cultivars and unnamed vines, where the best pruning height depends on both the cultivar and the shape you want.
Conclusion
To prune clematis without sacrificing its flowers, identify the group before shortening live stems. Leave Group 1 mostly alone until its spring flowers fade, prune Group 2 selectively so old flowering wood remains, and cut established Group 3 vines back to low healthy buds in late winter or early spring.
When the label is gone, let the vine bloom for a season and use the timing as evidence. A cautious cut may leave a little extra growth, but it protects the flowers while you learn whether the plant blooms on old wood, new wood, or both.


