How to Replace a Lawn Irrigation Sprinkler Valve
Replace a leaking or failed sprinkler valve step by step, with practical advice on valve types, waterproof wire splices, PVC connections, backflow rules, and testing.
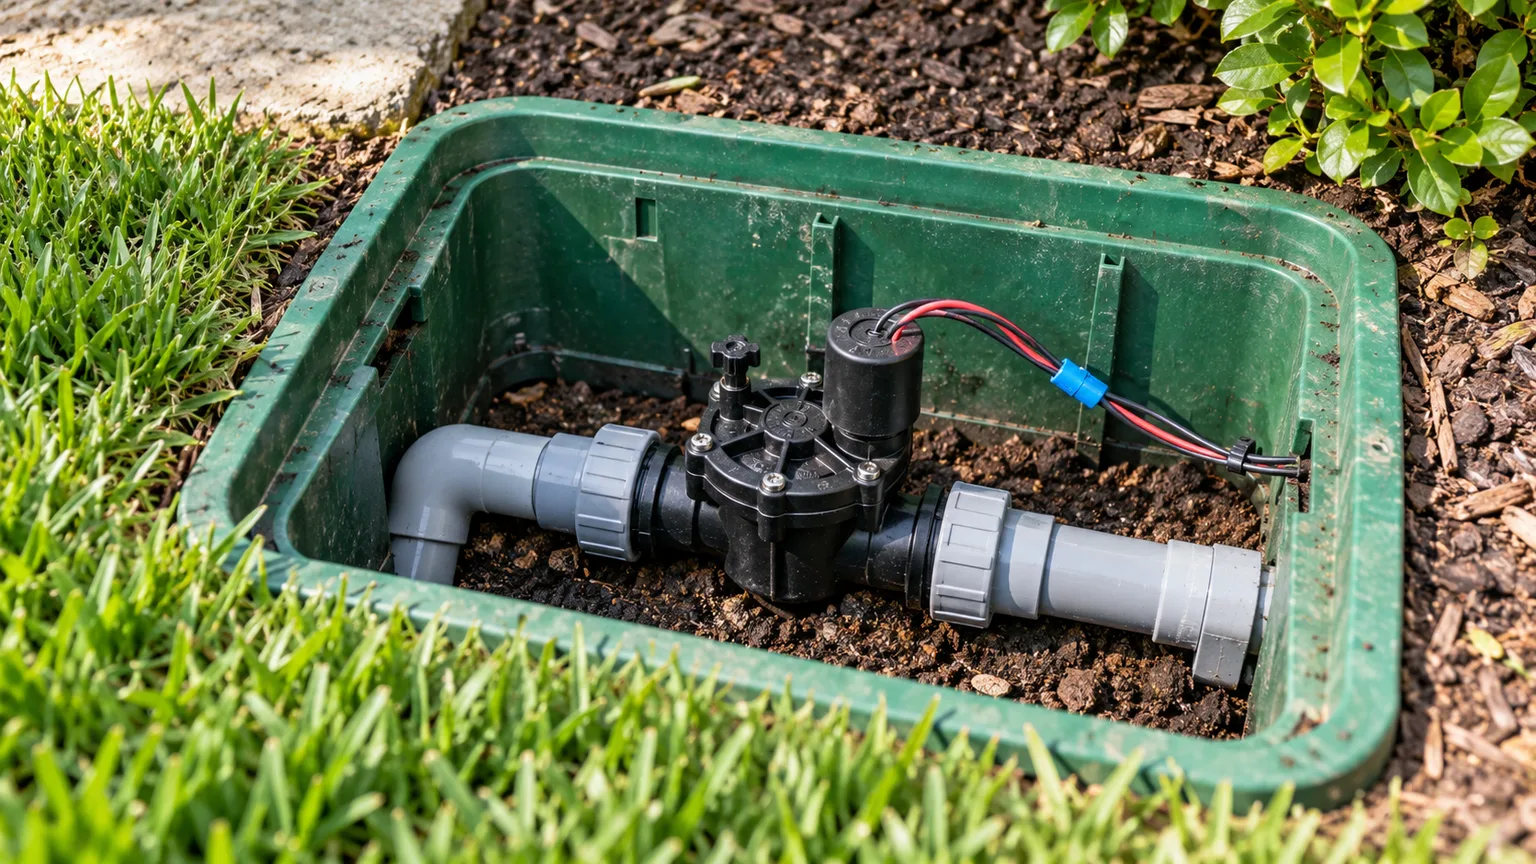
A sprinkler valve replacement is a plumbing repair with a small low-voltage wiring job attached. Before you cut pipe, confirm the valve itself has failed, identify whether it is an inline or anti-siphon model, and make sure you can shut off the irrigation supply. Those three checks prevent the most common expensive mistake: cutting out a valve that only needed a solenoid, a clean diaphragm, or a repaired wire splice.
This guide covers a typical residential zone valve connected to PVC irrigation pipe. Systems vary: some use polyethylene tubing, unions, compression fittings, manifolds, or a separate backflow device. Use the replacement model’s installation instructions and local requirements where they differ from this general sequence; never improvise a change to the potable-water backflow assembly.
First, confirm the valve is the problem
A zone that will not run does not automatically mean its valve is bad. Check that the controller is powered, the schedule or manual test is calling the correct station, and the irrigation shutoff is open. Then compare the problem zone with a working zone: if the other zones have normal pressure but one stays dry, the fault is likely local to that station, its field wire, solenoid, valve, or lateral pipe.
A zone that keeps flowing after the controller turns it off also has several possible causes. Dirt trapped under the diaphragm, a damaged diaphragm, a manual bleed screw or solenoid left open, or a controller still energizing the station can all mimic a failed valve. IrrigationTutorials’ solenoid-valve repair guide explains why debris and diaphragm condition are worth checking before replacing the entire body.
If the valve model allows it and you are comfortable following its service instructions, shut off water and inspect or replace the solenoid, diaphragm, or seal first. A solenoid is the electrical actuator; the valve body and diaphragm control the water passage. Replacing only the failed service part usually avoids cutting pipe, but not every valve is designed for field disassembly, and parts must match the exact model.
Low pressure across several zones points more toward a closed supply valve, backflow device restriction, pump or supply issue, or a main-line leak than one zone valve. A wet spot near one valve box can mean a leaking bonnet or connection, but a broken pipe a short distance away can send water downhill into the same box. Locate the actual leak before buying a replacement.
Identify your valve type and replacement requirements
Open the valve box or inspect the exposed assembly and read the manufacturer and model number from the body or bonnet. Look for the flow arrow molded into the body, the port diameter and thread type, the valve’s pressure and flow range, the solenoid rating, and any flow-control feature. Two valves with the same pipe size are not necessarily interchangeable: connection style, water source, pressure, controller compatibility, and available space also matter.
An inline zone valve is installed in the pipe, commonly inside a below-grade valve box. An anti-siphon valve sits above grade and combines a zone valve with a vacuum-breaker or anti-siphon feature. Replace an anti-siphon assembly with a compatible assembly that preserves its protective function and required placement. Do not substitute a buried inline valve for an anti-siphon device simply because its ports fit.
Separate the zone valve from the main irrigation shutoff and backflow preventer. The zone valve opens and closes one watering circuit; it is not a device that protects drinking water from irrigation-system backflow. The Irrigation Tutorials backflow overview explains that accepted device types and installation rules depend on the local water authority or building department. If replacement would alter a backflow assembly, anti-siphon height, or the connection to a potable supply, stop and consult the authority or a qualified irrigation professional.
Match the original valve where possible, especially when it is part of a manifold or has a built-in flow control or pressure feature. Rain Bird notes that its solenoids are designed for a low-voltage controller signal and that solenoid types are matched to valve applications in its irrigation valve solenoid information; Hunter likewise publishes model-specific PGV valve installation and service information. Check the exact model manual rather than assuming that a brand name or wire color tells you the correct electrical or plumbing specification.
Gather tools and materials before opening the line
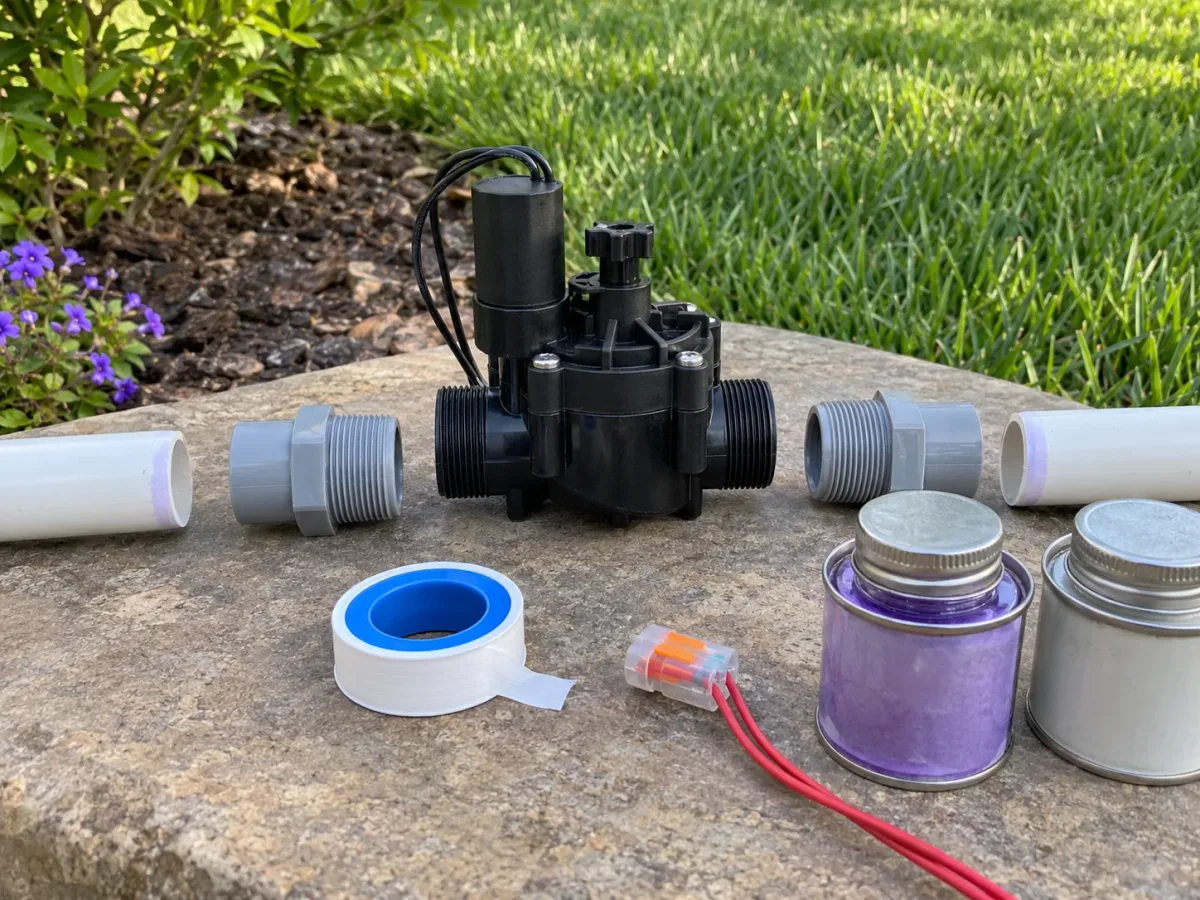
For a typical PVC inline-valve swap, assemble a replacement valve that matches the original specifications, compatible PVC adapters or repair fittings, a PVC cutter or fine-tooth saw, a shovel or hand trowel, a utility knife or deburring tool, tongue-and-groove pliers, a marker, and a rag. You may also need PTFE thread-seal tape, the primer and solvent cement required for the pipe and fittings, new waterproof direct-burial wire connectors, and a small container to catch residual water.
Do not buy fittings until you know which ends will remain after the old valve comes out. One layout may leave a threaded adapter that the old valve can unscrew from; another may require cutting both pipes and rebuilding with two adapters or a union. If the pipe is too short to fit a replacement, a compatible slip repair coupling or a redesigned short section may be necessary. A dry fit on the bench is cheaper than discovering in the open trench that the new valve cannot reach both pipe ends.
If the system uses polyethylene pipe, copper, galvanized steel, or a proprietary manifold, use the manufacturer-approved transition fittings and joining method for that material. PVC primer and cement are not universal pipe glue. Keep the valve body, solenoid, and wiring away from cement, grit, and standing water while you work.
Shut off water and isolate the control circuit
Close the dedicated irrigation shutoff upstream of the valve manifold if one is present. It may be near the backflow preventer or where the irrigation branch leaves the house. Turn it slowly and do not force a corroded or seized handle; a broken shutoff can turn a small repair into a main-water emergency. If there is no separate irrigation shutoff, you may need to close the home’s main supply, but only do so if you know how to restore it safely. Sprinkler Doctors’ repair shutoff instructions describe common residential shutoff arrangements.
After closing the water, briefly command the affected zone or open its approved manual bleed feature only if the valve instructions permit it. This can release some trapped pressure, but it does not prove the pipe is depressurized. Stand clear of the connection and expect residual water when cutting; if the line continues to flow, stop and find the actual upstream shutoff before proceeding.
Turn off the irrigation controller and unplug its low-voltage transformer if it has a plug. If the controller is hardwired to a building circuit, use its normal control switch and do not open the controller enclosure or touch its mains terminals; line-voltage work belongs to a qualified electrician. At a typical residential valve, the field wires carry low-voltage control power, often 24-volt AC, but verify the rating on the controller and valve. Rain Bird describes this low-voltage control signal in its solenoid documentation. Do not use a mains-voltage tester on the valve conductors or treat low-voltage field wiring as permission to work inside the controller.
Expose the valve and document the original layout
Lift the valve-box lid and remove enough soil to expose the entire valve, both pipe connections, and the wire splice area. Work from the outside inward with a small trowel so you do not puncture a nearby pipe or nick a buried conductor. Clear loose soil from around the bonnet and fittings, but keep debris from dropping into the open line once it is cut.
Before disconnecting anything, take clear photographs from above and from the sides. Note which pipe is upstream and downstream, which way the flow arrow points, where the solenoid and flow-control knob sit, and which field conductor was connected to the station wire and which to the common. Wire colors vary by installer; label the conductors instead of relying on a convention.
Inspect the joints and body for the actual failure point. A cracked valve housing, stripped port, broken threaded adapter, or split pipe calls for more than a solenoid. A loose wire splice, dirt under the diaphragm, or a torn replaceable gasket may be repairable without removing the body. If the valve box contains several valves on a manifold, label the target station and avoid disturbing the other valves’ wiring or fittings.
Remove the old inline zone valve
A named-author Hunker replacement guide describes one common setup with threaded male adapters and solvent-welded pipe, but actual valve boxes vary. Inspect your own joints before choosing where to cut.
If one side of the valve threads onto a male adapter that is solvent-welded to the pipe, cut the opposite pipe as close to its fitting as practical while leaving enough straight pipe for a new connection. Once that side is free, rotate the old valve off the remaining threaded adapter. Use pliers on the valve or fitting flats only when the manufacturer provides them; squeezing the plastic bonnet or body can crack it and damage the pipe connection you intend to keep.
Some installations have no threaded side to unscrew, or there is too little room to rotate the valve. In that case, cut both pipes close to the old valve and plan adapters for both ends. Make each cut square to the pipe and leave as much usable length as possible. A diagonal cut or a cut too far from the fitting can leave short stubs that will not seat securely in the new socket.
Catch and remove the old valve without pulling on the field wires. Use a deburring tool or knife to remove burrs from cut PVC, keeping the tool pointed away from your hand and the pipe wall. Cover or cap exposed pipe ends while measuring and preparing fittings so loose soil cannot enter the irrigation line. If you find brittle, cracked, or sun-damaged pipe beyond the cut, extend the repair to sound pipe instead of burying a weak joint.
Prepare the replacement valve and fittings
Set the new valve beside the old one and compare body length, inlet and outlet size, port thread, solenoid position, flow-control feature, and flow-arrow direction. Confirm that the valve is rated for the system’s pressure and flow and that it is suitable for the water source. If a model change shifts the height or orientation of an anti-siphon or backflow feature, do not proceed on fit alone; verify local requirements first.
Assemble the threaded adapters into the valve before solvent-welding any pipe. Apply PTFE tape to male pipe threads only when the valve manufacturer permits it, wrapping in the direction that will not unwind as the adapter is threaded. The Irrigation Tutorials guide to leak-free threaded connections warns that overtightening plastic fittings can split the female port and that sealants can contaminate irrigation components. Use the model instructions for the approved sealant and tightening method; do not apply tape to a slip socket or use pipe dope unless the valve maker explicitly allows it.
Start adapters by hand so the threads engage straight. If they bind, back them out and restart rather than forcing a cross-thread. Tighten plastic ports only enough to seal as directed; a wrench can crack or distort the body. Point the valve’s flow arrow in the direction of water movement and orient the solenoid where it remains accessible after the valve sits in the box.
Dry-fit the valve and pipe pieces without cement. Check that the new body aligns with the remaining pipe without strain, that each pipe end reaches its socket fully, and that the assembly leaves room to remove the lid and service the solenoid later. Mark the alignment with a pencil or marker, then take the assembly apart for gluing. This dry run is especially useful when the valve sits between fixed pipes with little flex.
Fit the valve and make the pipe connections
Use only pipe, adapters, primer, and solvent cement listed as compatible with the material and diameter in your system. Read the product labels before opening a can: some combinations require primer, some have specific temperature limits, and the required working and cure times vary with pipe size, temperature, humidity, and pressure. Do not use PVC cement on polyethylene pipe or substitute a generic adhesive because it happens to fit the gap.
When the pipe system uses solvent-welded PVC, prepare the socket and pipe end exactly as the cement maker directs. Work cleanly, apply the specified primer and cement to the correct surfaces, seat the pipe fully, and align it to the marks before the joint grabs. Hold the connection in place as directed so it does not push back out. Keep cement out of the valve’s interior and control passages, and wipe drips from outside the joint without disturbing it.
If both sides had to be cut, install the second side with the fitting sequence planned during the dry fit. A union or repair coupling can make the assembly serviceable, but it must be pressure-rated for the irrigation line and compatible with the pipe. Do not bend the pipes to force them into alignment; constant side load can stress the valve ports and create a leak later.
For a threaded repair, support the old adapter so the torque does not twist the buried pipe. A fitting that turns in the ground can loosen a joint farther upstream. If an adapter is badly fused, cracked, or impossible to remove without damaging the pipe, cut back to undamaged material and rebuild with approved fittings rather than repeatedly wrenching on the valve body.
Reconnect the low-voltage field wires
Once the valve is mechanically installed and dry, reconnect the field conductors to the solenoid leads using new waterproof connectors rated for direct burial and irrigation use. Match the common and the station conductor to the labels or photo you made, and push the connection fully into the connector’s sealing material according to its instructions. Ordinary indoor wire nuts, electrical tape alone, and loosely twisted bare copper are not durable waterproof splices inside a wet valve box.
Most standard AC solenoids do not depend on polarity, but that does not make every valve electrically interchangeable. DC latching solenoids, unusual controllers, and particular valve models can have specific lead or polarity requirements. Follow the exact model diagram; if it does not identify the solenoid type or you cannot confirm the controller output, stop and ask an irrigation technician.
Keep wire connections above standing water where the box layout allows, leave a little service slack, and do not pull hard on the solenoid leads. The field wires at the valve are separate from the controller’s mains supply. Never splice or probe the mains side of a hardwired controller as part of a valve replacement; have a licensed electrician handle any work there.
Allow the joint to cure and restore water slowly
Do not use a universal “one or two hours” rule for solvent-welded irrigation pipe. The cement manufacturer’s cure table determines when a joint can be pressurized; pipe diameter, cement type, temperature, humidity, fit, and operating pressure all affect the wait. If conditions are cold or damp, or the label calls for a longer time, wait longer. Pressurizing too early can force a joint apart even if the outside looks dry.
When the stated cure period has passed, check that the irrigation shutoff is still accessible and that the zone controller remains off. Open the supply valve gradually so the line fills without a sudden pressure surge. Watch the new joints, threaded adapters, valve bonnet, and nearby pipe for drips or movement before energizing the solenoid.
If water appears before the zone is called, close the supply again and locate whether the leak is at a threaded connection, slip joint, bonnet, or adjacent pipe. Do not try to stop a pressurized leak by cranking harder on a plastic fitting. Depressurize, dry the area, inspect the seal and alignment, then correct the joint according to its connection type.
Test the repaired zone before closing the box
With the box open and the supply pressurized, restore controller power and run only the repaired station manually. Stand near the valve while another person watches the sprinkler heads if the zone is out of sight. The solenoid should respond, water should pass through the valve, and the heads should operate without a new leak around the body or pipe joints.
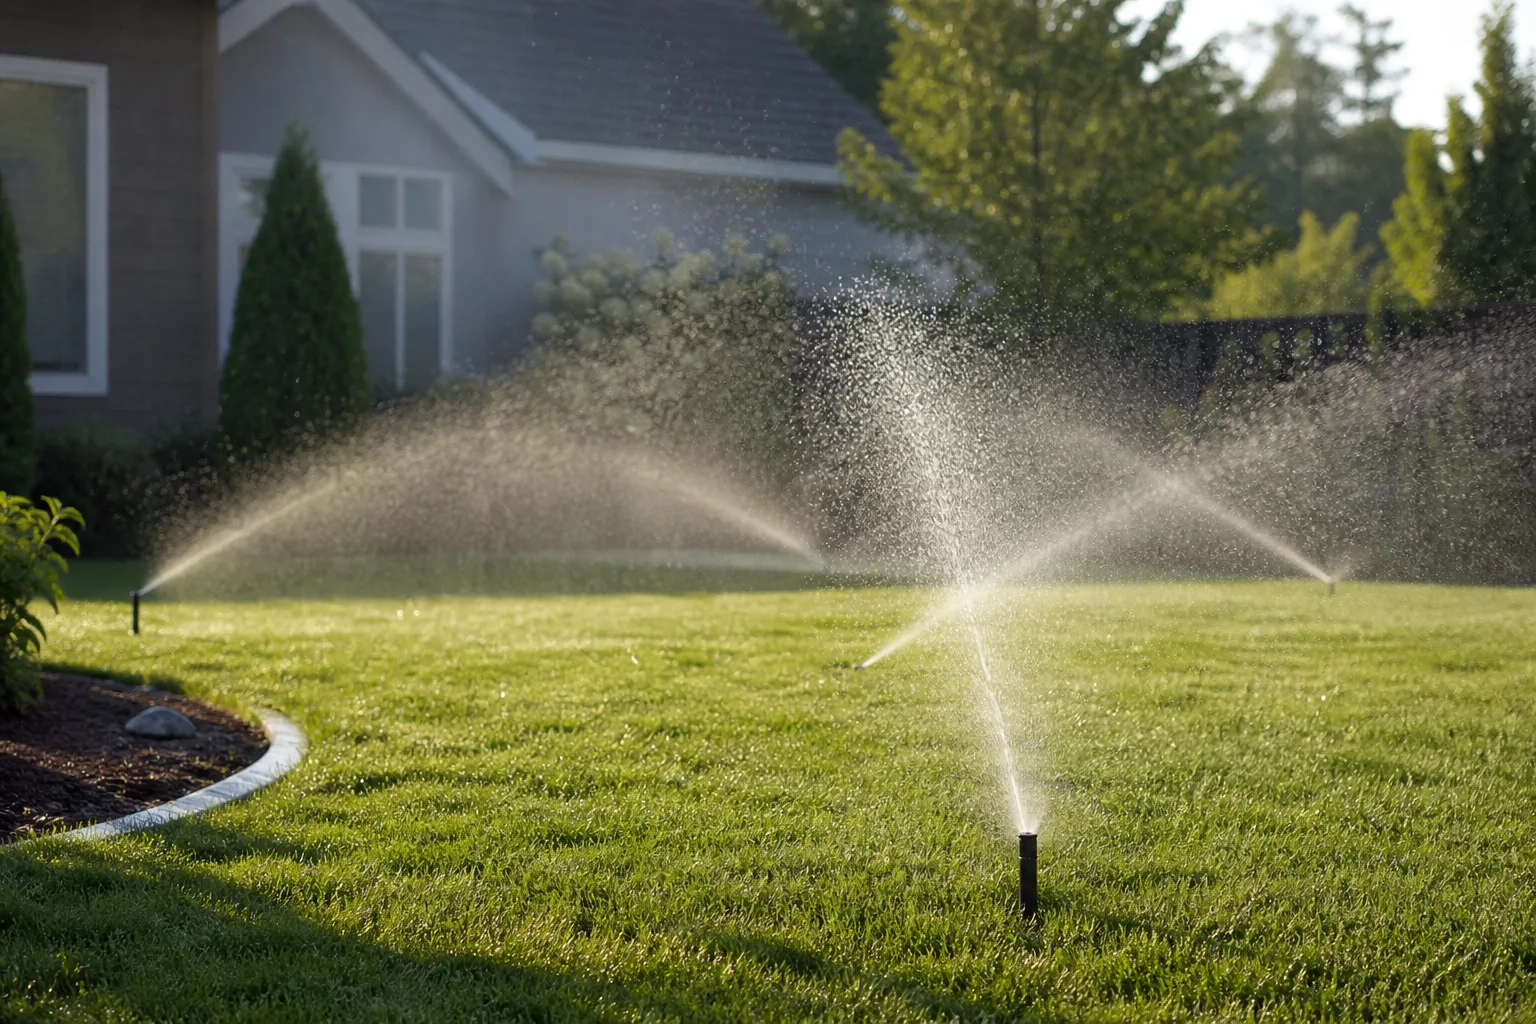
Turn the zone off at the controller and confirm that the valve closes. A brief dribble from low sprinkler heads can be water draining from lower parts of the line; persistent flow from heads or a continuously wet valve box is different and deserves another check. Do not leave the system unattended while the new valve is being tested.
Observe the repaired zone long enough to confirm stable operation, not merely a momentary click. Check whether all expected heads rise, whether the spray pattern is reasonably consistent with the other zones, and whether water is escaping into the box or trench. If flow is weaker than before, inspect the flow-control setting and upstream shutoff, then look for a clogged filter, damaged lateral line, or debris rather than assuming a new valve is defective.
After the test passes, arrange the wiring so it is not pinched, set the valve securely in the box, and keep the box lid accessible at or slightly above surrounding grade. Backfill carefully without pressing heavy clods against the valve or fittings. Keep a record of the model number and repair date in the controller box or home maintenance notes; that saves time when the next service part is needed.
Troubleshoot leaks, weak flow, or a valve that stays on
Water leaks at the body, thread, or glued joint
A leak at the bonnet or body may indicate a damaged diaphragm, seal, crack, or unevenly tightened cover. Shut off and depressurize the zone before opening the valve. Follow the model’s service diagram for screw sequence and gasket position; overtightening plastic screws can strip their threads and create a second failure.
A leak at a threaded adapter usually points to damaged or crossed threads, insufficient approved sealant, or excessive tightening that cracked the female port. A solvent-weld leak can come from a pipe that was not fully seated, a contaminated or wet joint, incompatible cement, insufficient cure, or a pipe cut at an angle. These joints need to be depressurized and rebuilt correctly; adding exterior glue or sealant over a leaking connection is not a durable repair.
If the box fills but the visible valve joints remain dry, the break may be on a nearby pipe hidden by soil. Turn the system off, remove standing water, and observe where water first reappears when the supply is briefly restored. Do not keep running a suspected broken mainline; it can erode soil and undermine paving or a foundation.
The zone will not open or will not shut off
If the zone will not open, verify controller output, station selection, upstream water, and solenoid wiring before replacing the valve again. A bad solenoid, open field wire, disconnected common, clogged valve port, stuck plunger, or closed flow-control stem can all prevent operation. Test only the low-voltage valve circuit according to the controller and valve manuals; if the reading or wiring layout is unclear, have a technician diagnose it.
If the valve will not close, make sure the controller is not still commanding that station and that no manual bleed feature was left open. Debris caught at the diaphragm seat is a common mechanical cause; an incorrect diaphragm, damaged seat, or cracked body can also leak. Shut off water before inspecting internal parts, and do not enlarge tiny ports or lubricate a solenoid plunger unless the manufacturer directs it.
Weak flow or standing water remains
Weak flow may come from a partially closed irrigation shutoff, a flow-control setting, a restriction in the backflow assembly, low supply pressure, a kinked pipe, clogged filter, or a leak downstream. Compare nearby zones and inspect the whole route before blaming the new valve. A fresh valve cannot restore pressure lost through a broken lateral pipe or a clogged head.
Water remaining at one low sprinkler head after the zone shuts down may be ordinary drainage from the lowest point of that zone. Water that continues flowing for a long period, a rising water bill, a soggy box, or a wet strip that returns between cycles points to a leak or a valve that is not sealing. When a symptom is ambiguous, leave the controller off and ask an irrigation specialist to distinguish normal drainage from a valve or pipe fault.
Preserve backflow protection and know when to hire a pro
Irrigation water can contain soil, fertilizer, animal waste, and other contaminants, so the system must remain separated from potable plumbing by the backflow protection required in your jurisdiction. The backflow preventer is often a separate assembly upstream of zone valves, while an anti-siphon valve combines zone control with a specific vacuum-breaker design. Neither is replaced safely by choosing whichever valve has matching threads.
Requirements can differ by water provider, state, and local plumbing code. Keep an existing backflow device, air gap, drain, and required anti-siphon location intact; do not cap a discharge, bury an above-ground device, or lower an anti-siphon valve to fit a new box. Check the local authority before changing the type or location, and hire a certified backflow tester or licensed irrigation/plumbing professional when the work affects a regulated device.
Call a professional if the shutoff will not stop water, the valve is integrated into a backflow assembly or pump system, pipes are under pressure from a well you cannot isolate, the manifold is cracked, the line material is unfamiliar, or the old pipe is too short to rebuild without major excavation. Choose an electrician for controller mains wiring. A valve-box replacement is a reasonable DIY job only when the water can be isolated, the plumbing layout is understood, and the work can be made watertight without altering required protection.
What affects the cost and time?
The price depends less on the valve alone than on what is damaged and how the system is assembled. A matching solenoid or diaphragm is usually a smaller parts job than a full valve replacement; a valve with threaded adapters may be straightforward, while a buried manifold with short, brittle pipes can require extra fittings, excavation, and labor. Anti-siphon and backflow work can involve code-specific parts or testing, so it should not be estimated as a simple inline-valve swap.
For a homeowner doing the work, plan for the time to identify the model, expose and dry-fit the assembly, make the pipe connections, wait the full cure interval, and test before backfilling. The glue’s required cure time may be longer than the physical repair. If water cannot be shut off reliably or a wrong fitting could affect the potable-water connection, the practical cost-saving choice is to call a qualified professional before cutting the line.
Conclusion
A dependable sprinkler valve replacement starts with diagnosis and ends with a leak-free zone test. Confirm that the valve body needs replacing, match the valve and fitting style, isolate both water and controller power, preserve the original wiring and flow direction, and follow the pipe-cement and model-specific instructions. Restore pressure only after the joints have cured, then watch the valve and every connection while the repaired station runs.
Treat low-voltage field wires and controller mains as different systems, and keep required backflow protection intact. If the job involves an anti-siphon or backflow assembly, an unisolated water supply, unfamiliar pipe, or line-voltage wiring, stop and bring in the appropriate licensed professional.