15 Rustic Garden Design Ideas for Any Yard
Explore 15 rustic garden design ideas, from winding paths and reclaimed wood to layered planting, with practical tips to make each feature work in your yard.

A rustic garden is less about buying antique-looking décor than creating a place that seems to have grown into its setting. Natural textures, useful paths, relaxed planting, and a few objects with visible age can do that in a tiny patio or a broad backyard. The look works best when each weathered thing has a purpose and plants are chosen for the conditions you actually have.
Start with one practical improvement—often a path or a planting bed—and let the style develop around it. These ideas show how to make a garden feel welcoming and lived in without turning it into a collection of props.
1. Begin with materials already on the property
Before you shop for planters or decorative fencing, take an inventory of what the yard already contains. Look for sound bricks, spare pavers, fallen branches, old edging, stones uncovered during digging, sturdy containers, and timber that is clearly suitable for outdoor use. Reusing a few materials in more than one place gives a garden a visual thread: the same brick might edge a bed and appear in a small sitting area, while the same stone could mark a path and a pot cluster.
A material does not become a good garden feature simply because it is old. Check that a chair is stable, a container drains, a piece of wood is not rotting, and an old vessel has not held chemicals or other unknown contents. Keep uncertain reclaimed items decorative and away from edible beds. Gardens Illustrated’s guide to reclaimed garden materials emphasizes looking at what is already available and using salvaged items selectively; that restraint is useful in a small yard as much as in a large designed landscape. Start with a short palette—perhaps wood, brick, and terracotta—so the garden feels gathered rather than random.
2. Let a winding path guide the stroll
A path can make a small yard feel like a series of discoveries, but it should still connect places you genuinely use. Sketch the route from the door to the shed, water source, vegetable beds, or favorite seat before bending it for effect. A gentle curve can hide a destination for a moment; a path that loops without a reason can waste space and make carrying tools harder. Keep the frequently used route direct, then allow a secondary path to wander through planting.
Gravel, reclaimed brick, stone, wood chips, or even a mown strip can work, depending on slope, drainage, traffic, and who needs to use it. Fine Gardening’s pathway guidance recommends choosing materials and width around how the route functions, including whether a gardener must bring a wheelbarrow through. Gardenista’s low-impact pathway guide also highlights keeping paving proportionate and choosing locally appropriate, water-permeable surfaces where they fit the site. In practice, stabilize the walking line where people turn or carry loads, edge loose gravel so it stays put, and avoid a slick surface on a shaded incline.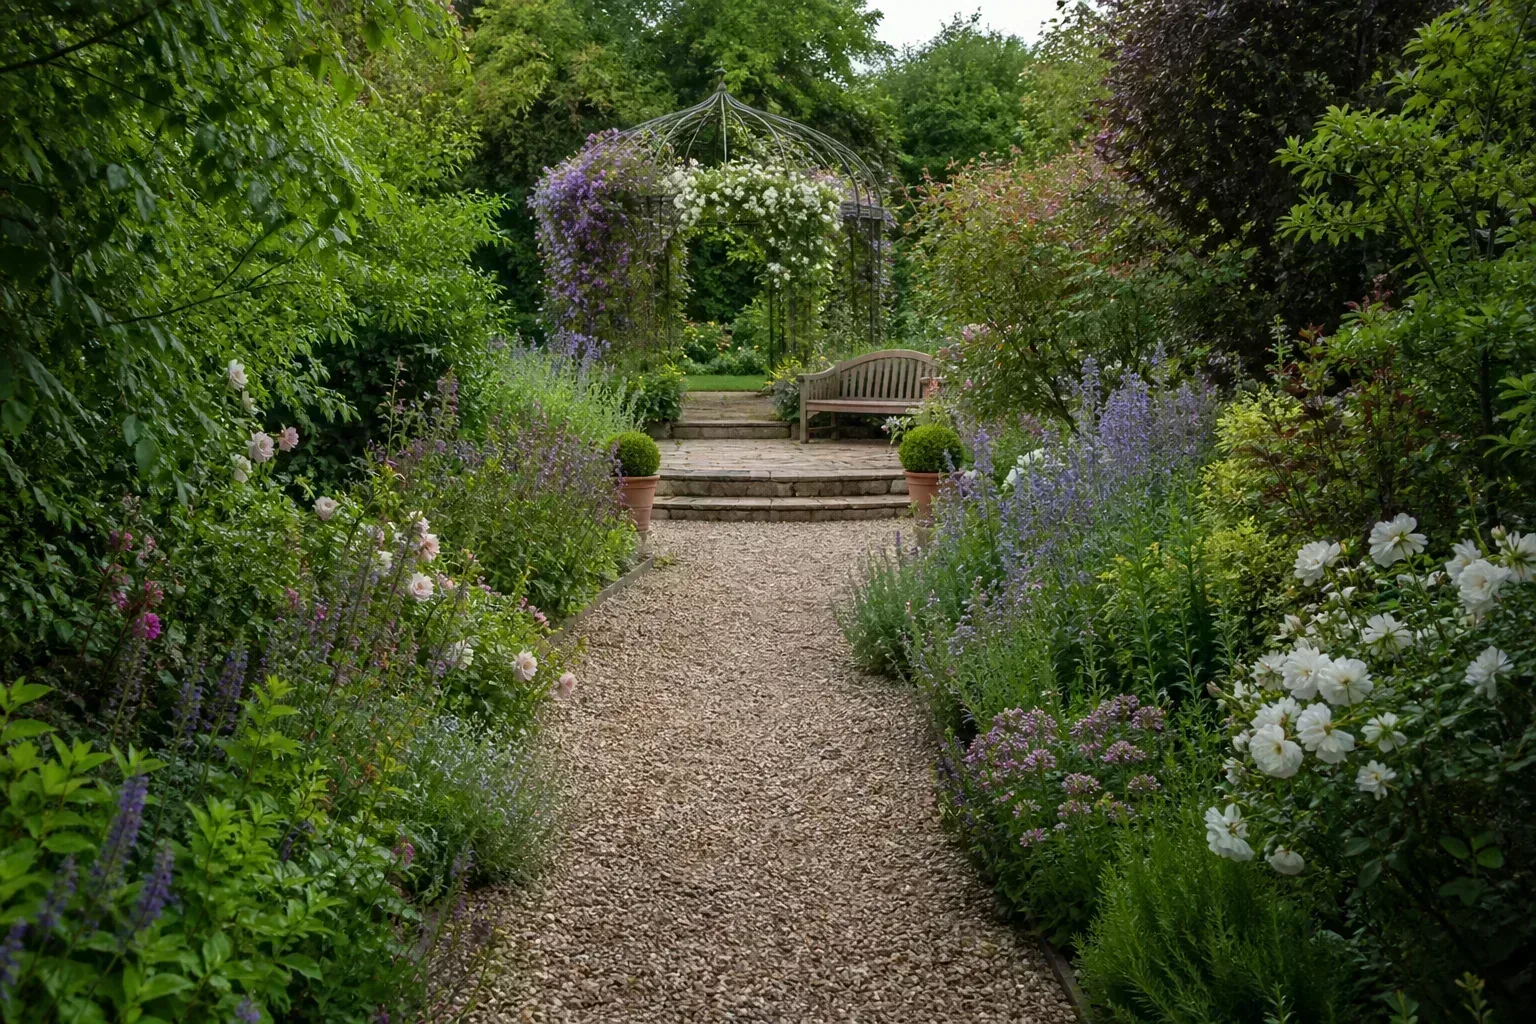
3. Build a useful raised bed from honest materials
Raised beds bring a rustic look when they appear to belong to the garden rather than arrive as a matching kit. A simple rectangle of known, untreated lumber, reclaimed brick, or a clean metal container can frame vegetables, flowers, or a mixed edible border. Repeat the bed’s material in a nearby edge or bench, and leave enough room to tend every side. A bed you cannot reach into comfortably tends to become a decorative obstacle rather than a productive part of the yard.
A salvaged stock tank or galvanized trough can be useful where soil is poor or rabbits are a persistent issue, but check drainage before filling it and make sure it has a safe, known history. Do not treat every found container as automatically suitable for growing food. Give the bed a location with the sun the crops need, then plan a route for water, mulch, and harvest. A modest bed close to the kitchen can be more charming and more successful than a large one at the far end of the garden that is inconvenient to maintain. The rustic character comes from simple construction and productive planting, not from making the edges look artificially distressed.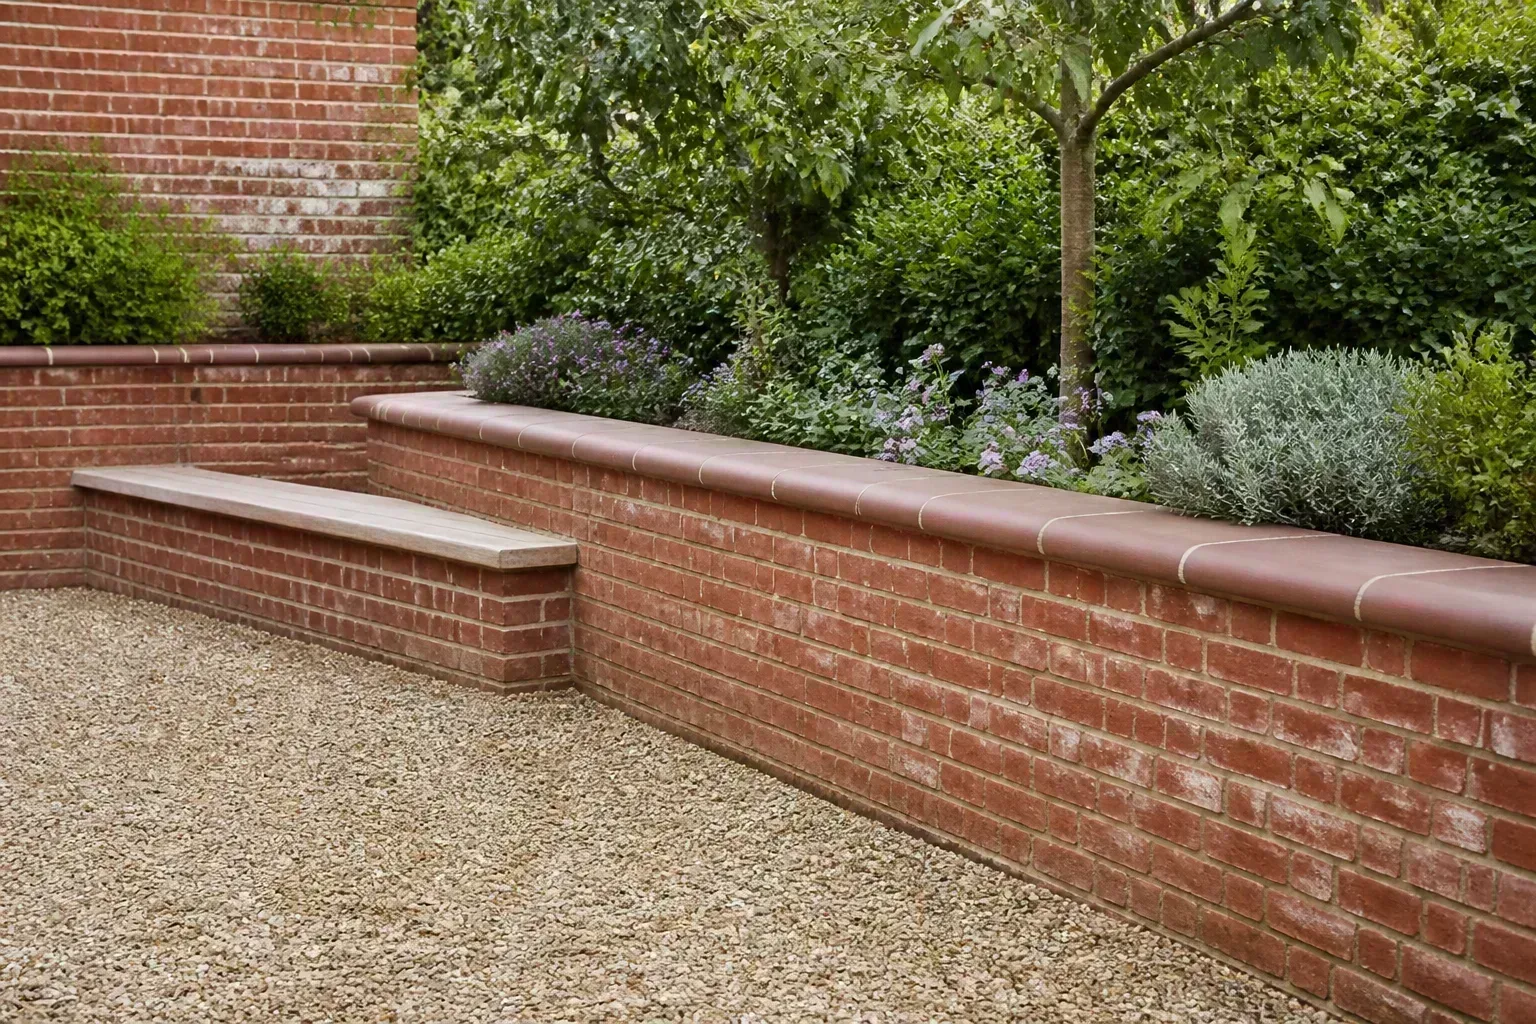
4. Layer plants by height, texture, and season
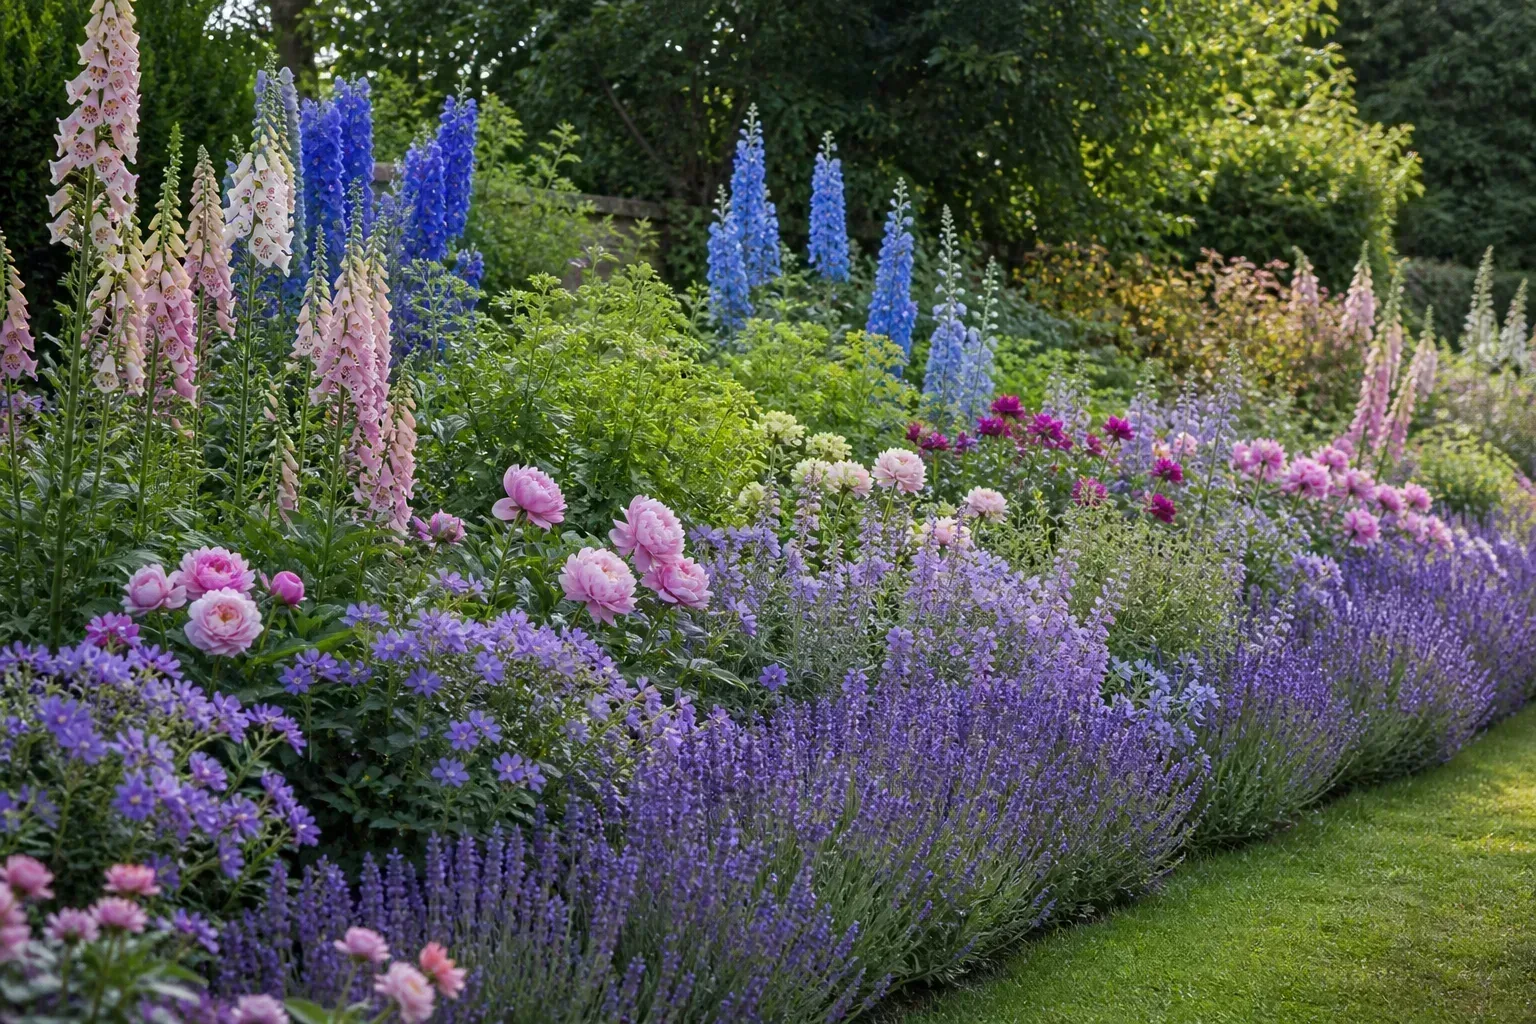
An informal border looks full when it has a readable structure: taller shrubs or ornamental grasses at the back, medium perennials in the middle, and low plants near the path. That is different from placing one of everything wherever there is an opening. Repeat a few plants in loose groups so the eye has places to rest, then vary leaf shape and bloom time to keep the planting interesting beyond a single week. A mix of evergreen or persistent structure, summer flowers, seed heads, and spring bulbs gives the garden something to offer in more than one season.
Use mature size, not the nursery pot, to plan spacing. A shrub that looks small at planting may eventually shade a narrow path or crowd a bench. Penn State Extension’s native-plant resource and the University of Minnesota Extension Plant Elements of Design tool both emphasize matching plants to site conditions and landscape use. That principle matters more than whether a plant looks “cottage” in a photograph: note the actual sun, drainage, soil, mature spread, and water needs before buying. In a hot, dry bed, repeat drought-tolerant plants rather than trying to imitate a lush, irrigated garden from a different climate. A loose look still needs deliberate spacing and a plan for what will fill in.
5. Use regionally suited groundcovers to soften edges
Low plants can make a path, wall, or raised bed look as if it has settled naturally into the landscape. Choose a groundcover for the precise job: knitting together a sunny bank, covering a dry strip under a tree, filling gaps between stepping stones, or reducing bare soil beside a border. These sites have different light, moisture, foot-traffic, and soil conditions, so one “easy” plant rarely works everywhere. Avoid using a spreading groundcover where it will swallow smaller plants or creep into a neighbor’s lawn.
Penn State Extension explains that native groundcovers can be useful in challenging landscape areas, including slopes where erosion and maintenance are concerns. The guidance also stresses site and soil preparation, establishment watering, and choosing spacing according to the plant’s growth habit. Native does not mean maintenance-free on day one: new plants need attention while roots establish, and a local species list should be checked against your region rather than copied from another state. Penn State’s wildlife-friendly plant resource can help readers see how native trees, shrubs, and perennials fit into a broader yard planting. Once the right plants knit together, a natural edge looks softer without relying on plastic landscape fabric or a thick row of decorative objects.
6. Group mismatched pots with a simple visual rule
A collection of different pots feels charming when it has one or two unifying details. You might keep most containers in a related earthy palette, repeat the same material in several sizes, or place the most colorful glazed pot as a single accent among terracotta and stone. Arrange pots in small clusters rather than a straight line: one larger pot gives the group weight, with smaller ones stepping down around it. Varying height creates a garden vignette, while keeping a repeated color or shape stops the display from looking like leftover inventory.
Make the arrangement work for the plants as well as the photograph. Match each container to the plant’s root space and watering needs, keep drainage holes open, and group plants with similar sun and moisture requirements. A shallow decorative cachepot can hold a nursery pot, but empty standing water after rain so roots are not left submerged. Heavy stone or ceramic containers should be placed before filling because wet growing mix can make them difficult to move. If the patio is small, use three pots with different heights instead of crowding the walkway with a dozen tiny containers. The weathered look is most convincing when the plants are healthy and the pots are allowed to age naturally.
7. Make a small seating nook part of the planting
A bench tucked where a path bends gives the garden a reason to slow down. Choose a spot with a view worth sitting with, some afternoon shade if your climate is hot, and a clear route so the seat does not become hidden behind growth. A simple timber bench, stone seat, or two sturdy chairs can work; the right choice depends on whether you want a quiet place for one person or a spot for guests. Leave room to approach and sit comfortably rather than surrounding the seat with plants that scratch, sting, or block access.
Use planting to frame the nook, not seal it off. A shrub or trellis can create a sense of enclosure behind the seat, while lower flowers beside it preserve the view into the rest of the garden. Place a small table only if there is room to set down a drink without narrowing the path. Fine Gardening’s rustic cabin garden example puts function first, then uses a walk through the planting to create a feeling of invitation. That is a helpful order: first make the seat pleasant and usable, then add the flowers, pots, or lanterns that make it feel personal. A well-placed bench often contributes more to the character of a garden than several decorative signs.
8. Give an old bench or table a useful second life
Vintage furniture gives a garden a sense of history, but it should still be safe and suited to outdoor exposure. Check joints, legs, fasteners, and the underside for rot before setting an old chair on a path or deck. Metal furniture may need rust treatment or a stable base; painted wood may need a finish appropriate for exterior use. If the item is too fragile for sitting, use it as a display stand for a light pot—never a heavy planter that could tip or break the furniture.
A small table beside a vegetable bed can hold harvest baskets, while a sturdy bench can turn a shaded corner into a destination. Avoid buying a whole matching vintage set just to “complete” the look; one older piece mixed with durable, comfortable seating can feel more natural and last longer. Keep clearance around gates and paths, and consider how rain, wind, and winter storage will affect the piece. Gardens Illustrated documents how gardeners repurpose reclaimed materials and furniture, but the strongest examples give each object a clear job. If the item adds only visual clutter or creates an awkward obstacle, leave it out. Character comes from use and patina, not from the number of old things in the yard.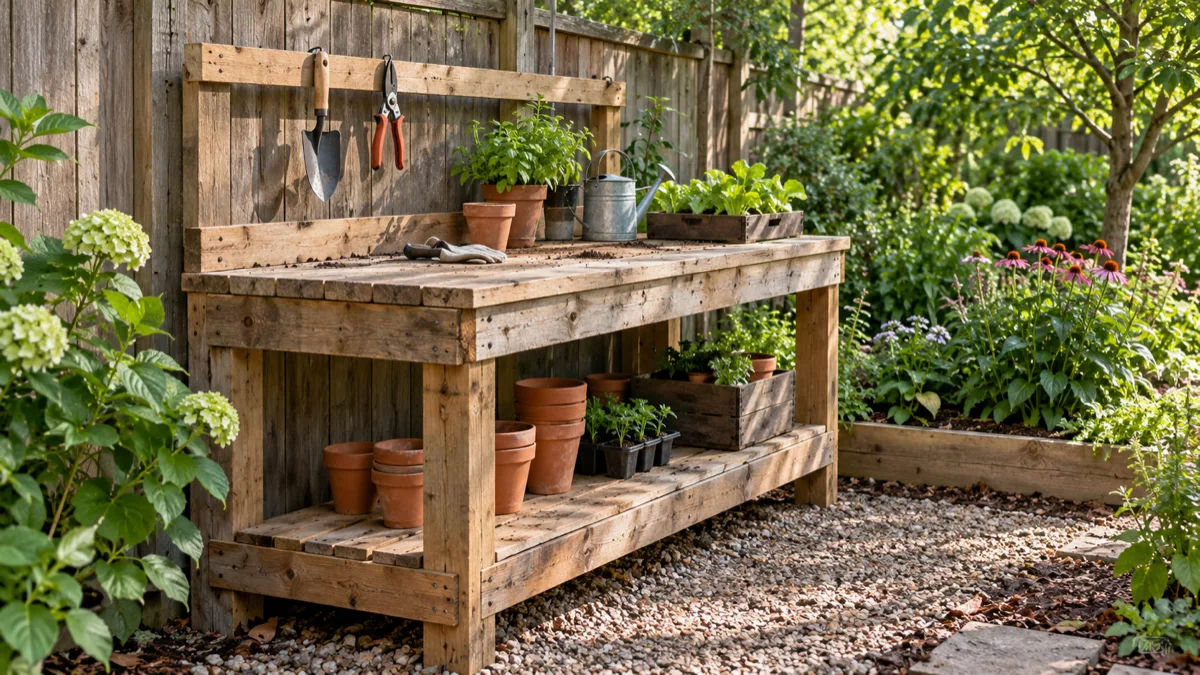
9. Use brick and stone as quiet structure
Brick edging, a low stone wall, or a few broad pavers can give loose planting a backbone. Choose a scale that fits the home and the garden: a narrow brick edge may be enough around a modest bed, while a larger property can support a short dry-stacked wall or a small landing where paths meet. Reclaimed bricks add color variation and visible age, but their dimensions may differ, so test a short section before committing to a long line. When mixing stone types, repeat each in more than one place to make the combination feel intentional.
Hard surfaces need a practical plan. A compact, stable route matters near doors and places where people carry watering cans or carts; a permeable gravel or planted gap can work elsewhere if it does not wash away. Keep water flowing away from the house and do not build a tall retaining feature without considering the slope and the pressure behind it. Gardenista’s low-impact path discussion argues for proportionate paving and materials suited to the place; that is especially useful when a rustic style tempts you to add stone everywhere. Let plants spill around the edges, but keep joints, drainage routes, and walking surfaces accessible enough to maintain.
10. Add a gate, arch, or trellis with a job to do
A simple gate or arbor can make a garden entrance feel like a threshold. Place it where it marks a real transition—from front yard to side garden, from a lawn to a vegetable area, or from an open path into a more private sitting space. Reclaimed wood, weathered metal, or a modest timber frame can blend with surrounding materials. If the structure is purely decorative, keep it small; an oversized arch can dominate a compact yard and make the informal planting feel staged.
A trellis earns its footprint when it supports a climber, screens an unattractive view, or creates shade at a useful spot. Choose a plant suited to the local climate and the structure’s strength, and allow enough room for pruning and airflow. A vigorous vine can bend a light trellis or shade plants below it, so do not choose by flower color alone. Keep the gate swing clear and make sure the opening remains wide enough for the tools or cart you routinely move through. Rustic garden structures work best when they solve a spatial problem—privacy, orientation, support, or passage—instead of acting as an isolated ornament.
11. Put hanging planters where they add height safely
Hanging baskets bring flowers or trailing foliage above ground level, which helps a small patio feel layered. Use them where the structure is rated for the load and where watering is manageable: a porch beam, a sturdy pergola, or a purpose-built bracket may work, while an unknown branch or weak railing may not. A saturated basket is much heavier than a dry one, and wind can swing it into a window or a person walking below. Keep baskets out of head-height routes and secure the hanger so it cannot twist loose.
Choose a location based on the plant’s actual light and heat tolerance. A basket beneath a roof may stay dry even in rain, while one in full afternoon sun can dry quickly and need frequent checks. Mix plants with similar watering needs and leave room for mature trailing growth so stems do not tangle in doors or lights. In a small courtyard, a single basket can draw the eye upward and free floor space for seating. In a larger garden, repeat baskets in a limited number of positions rather than hanging them from every available hook. Their informal appeal comes from living foliage, not from an excess of suspended containers.
12. Place herbs and vegetables near the dining spot
An edible garden feels rustic when it is part of daily life rather than hidden in a remote corner. Put herbs you use often near the kitchen door or outdoor table, and locate larger vegetables where sun, soil, water, and access make sense. A few raised beds, a row of pots, or a narrow strip along a fence can all work. Keep paths wide enough for harvesting and carrying a watering can, and leave enough space between plantings for airflow and maintenance.
Create the impression of abundance without mixing plants blindly. Herbs such as thyme, chives, parsley, or basil have different light and seasonal needs, and perennial herbs may need more space than annuals. Use labels if you are learning what is planted, but avoid turning the beds into a row of signage. A nearby table can become an outdoor dining spot with a small vase of cut flowers and a basket for the harvest. If the garden is mostly shade, grow edibles suited to that light rather than forcing sun-loving crops into poor conditions. Rustic style can accommodate a productive garden as long as the layout makes harvesting easy and the plants are not treated as decoration alone.
13. Add water at a scale you can maintain
A small fountain, birdbath, or shallow water bowl can bring sound and movement to a quiet corner. Choose one feature and make it visible from a seat or a frequently used window. A weathered stone basin may sit comfortably beside old brick, while a simple recirculating fountain can suit a courtyard where there is no room for a pond. Check the pump, power source, cleaning needs, and winter care before buying; a feature that is difficult to maintain often becomes a dry ornament after one season.
If you already have a pool, use planting and natural materials around its edge to connect it to the garden, but keep plants and loose gravel out of the route people use to enter and exit. A large water feature is not a shortcut to a naturalistic landscape. It brings more design, filtration, safety, and maintenance decisions than a small basin. For wildlife, a stable shallow drinking spot with a way for small creatures to climb out may be a more manageable addition than an ornamental pond. Keep water clean and refresh it regularly, especially in hot weather. The rustic effect should come from a feature that belongs in the space, not from adding water simply because it appears in a garden photograph.
14. Make one small feature useful to wildlife
A birdhouse, birdbath, or flowering native border can make a rustic garden feel alive. Choose a nest box for the bird species native to your area and place it according to the requirements for that species; a decorative birdhouse with an unsuitable entrance or exposed placement may look charming but remain unused. If you provide food, commit to cleaning the feeder and keeping the area tidy. A birdbath needs a stable footing and regular water changes, not just a one-time placement under a tree.
Plants can support wildlife in a more lasting way than a collection of ornaments. Penn State Extension’s wildlife-friendly planting resource highlights trees, shrubs, and herbaceous plants that contribute to habitat, while its groundcover guidance describes native plants as one option for difficult landscape sites. Use local guidance to choose species that fit your region and yard, and avoid assuming that a plant is beneficial everywhere just because it is native in another state. Keep a portion of the garden less manicured if you can, with seed heads or leaf litter in appropriate areas, while maintaining clear paths and removing diseased material as needed. One well-chosen habitat feature is enough to start; you can build on it as you observe what visits.
15. Carry the garden onto the porch, stairs, or terrace
A rustic garden does not have to stop at the lawn. A porch, wide staircase, balcony, or city terrace can connect to the landscape through plants, natural textures, and a consistent color palette. Place containers at different heights but keep the steps and doorways clear. On a terrace, use a few larger pots around the perimeter rather than dozens of small ones in the walking route; group them to create a green edge and leave the center open for movement or a table.
Treat every container as a small growing environment. Check drainage, weight limits on elevated decks, exposure to wind, and how quickly pots dry in sun. For stairs, secure lightweight pots where they cannot be kicked or knocked over, and do not narrow a route that people need to use every day. A rustic effect can come from simple terracotta, stone, or wood paired with vigorous but site-appropriate plants; it does not require an old object on every tread. In a rental or city home, movable containers and a weathered bench may give you all the character you want without permanent construction. Keep the route functional first, then use the edges to bring the garden closer to the house.
Conclusion: Make the garden feel collected over time
A convincing rustic garden grows from a few connected decisions: use a modest palette of natural materials, make paths lead somewhere, choose plants for the conditions on site, and bring in old objects only when they serve a purpose. Start with the part of the yard that frustrates you most—an awkward route, bare slope, unused corner, or inconvenient vegetable bed—and solve that before adding décor.
Then let the garden change. Plants fill in, wood weathers, and a pot or bench may need to move as the space matures. Keep what works, remove what creates clutter, and add one feature at a time. That slow, practical approach gives a garden the relaxed charm of a place that has been cared for and used, not assembled all at once.



