How to Skip Trowel Texture on Drywall, Step by Step
Learn how to skip trowel texture on drywall, from surface prep and compound consistency to trowel strokes, repairs, drying, primer, and paint with dust control.
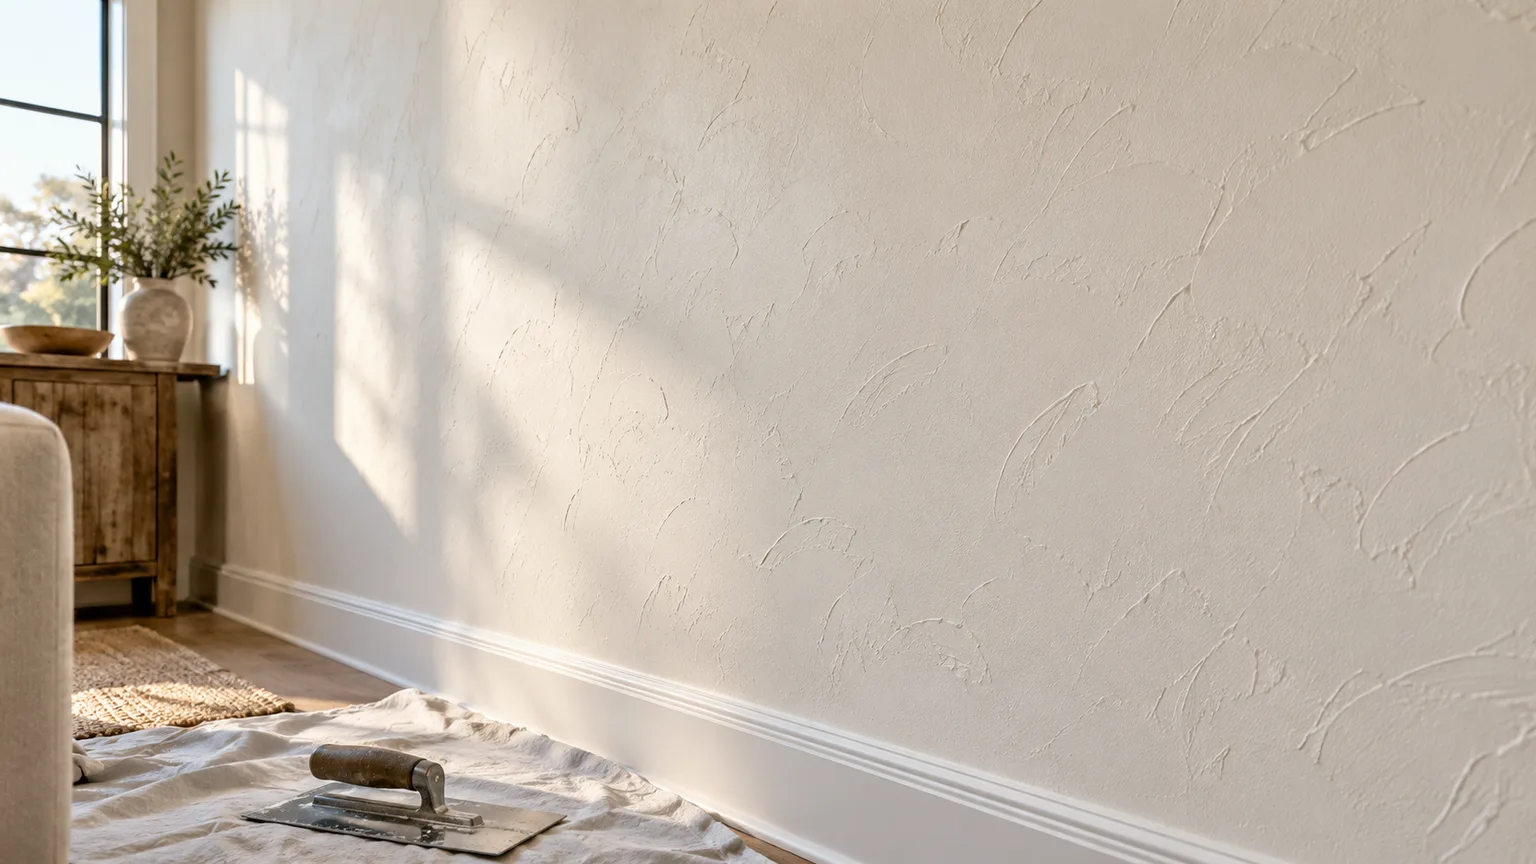
Skip trowel texture is a hand-applied drywall finish made from thin, irregular swaths of joint compound. A trowel skips over the surface, leaving flattened ridges beside open valleys; the pattern should look deliberate from across the room, not like random lumps up close. It can soften the look of minor surface variation, but it will not rescue loose tape, a damp wall, or a badly uneven seam.
The reliable way to learn it is to prepare a small sample board, tune the compound until it spreads without sliding, and repeat the same light-pressure motion in manageable sections. Do that before you start on the living-room wall. The texture is forgiving in appearance, but the first wet pass is not easy to undo after it dries.
Decide whether skip trowel suits your wall
Choose skip trowel when you want a hand-worked finish with visible variation and do not need a perfectly smooth, uniform plane. It can be a practical choice for a wall whose surface is sound but has small cosmetic inconsistencies that would make a smooth finish time-consuming. The texture adds visual character; it does not correct a bowed wall, loose corner bead, raised screw heads, or poor taping.
Expect trade-offs. Raised texture catches side light, so a wall that looks subtle in a sample may appear more pronounced beside a window or under a ceiling spotlight. It is also harder to dust and harder to patch invisibly than a smooth wall. If you want easy cleaning, a crisp modern surface, or a finish that can be repaired with a quick skim coat, keep the wall smooth.
Skip trowel versus knockdown
Both finishes use joint compound and create an irregular surface, but the application sequence differs. Skip trowel is hand-spread with a trowel or broad knife; knockdown is commonly sprayed into peaks and then lightly flattened after it begins to set. A skip-trowel pattern usually has broader, less repetitive patches, while knockdown often has tighter, more evenly distributed islands.
| Finish | Typical application | Visual effect | Better fit when |
|---|---|---|---|
| Skip trowel | Hand-spread in thin sweeping passes | Open, varied ridges and valleys | You want a relaxed, artisan look and can practice the hand motion |
| Knockdown | Spray texture, then flatten the peaks | Denser, more repeated flattened marks | You need to texture a broad area quickly and can manage spraying |
| Smooth finish | Several coats, careful feathering, sanding | Flat surface with little shadowing | Cleanability and easy future repairs matter most |
A tool substitution changes the texture. A flexible wide drywall knife can approximate the skip pattern, but its narrower blade may leave longer lines and sharper edges than a rounded trowel. Decide which finish you want before buying tools, then practice with the actual blade you plan to use.
Check the wall before you cover it
Inspect the whole wall in strong side light, not only under the room’s usual overhead lighting. Look for raised tape edges, open seams, nail or screw pops, loose corner bead, old adhesive, glossy paint, grease, cracks, and areas that feel damp or soft. Mark defects with painter’s tape so the texture does not tempt you to forget them.
Repair the substrate first. Set proud fasteners, secure loose edges, fill holes and open joints with an appropriate compound, and let repairs dry before removing dust. Family Handyman notes that a drywall butt joint can require a thin, wide buildup of compound to disappear; hiding that hump with heavy texture can make the wall look even more lumpy. Use the texture as a finish, not as a shortcut for unfinished joint work.
Painted walls need a separate adhesion check. A clean, firmly bonded matte finish is a different surface from glossy enamel, flaking paint, wallpaper residue, or a wall with cooking grease. Follow the texture compound’s label for compatible surfaces and primer; clean and degloss only as directed. If paint lifts when tested in an inconspicuous spot, remove or stabilize the failing layer before texturing.
When to pause or call a professional
Do not texture over active water damage, mold growth, soft drywall, a moving crack, or a surface that sheds paint when rubbed. Fix the cause and replace or stabilize the damaged material first. A decorative layer can conceal evidence temporarily while the underlying failure continues.
If the job requires sanding or scraping an old textured coating or paint and you do not know what it contains, stop before disturbing it. Older building materials can present hazards that a fresh coat of compound will not solve; ask a qualified professional about appropriate testing and safe removal. For ordinary joint-compound dust, NIOSH warns that drywall sanding can expose workers to high dust levels and, in some cases, respirable silica. Reduce dust at the source, keep people out of the work area, and follow the compound’s safety data sheet and applicable respiratory-protection guidance.
Gather tools and choose a compound
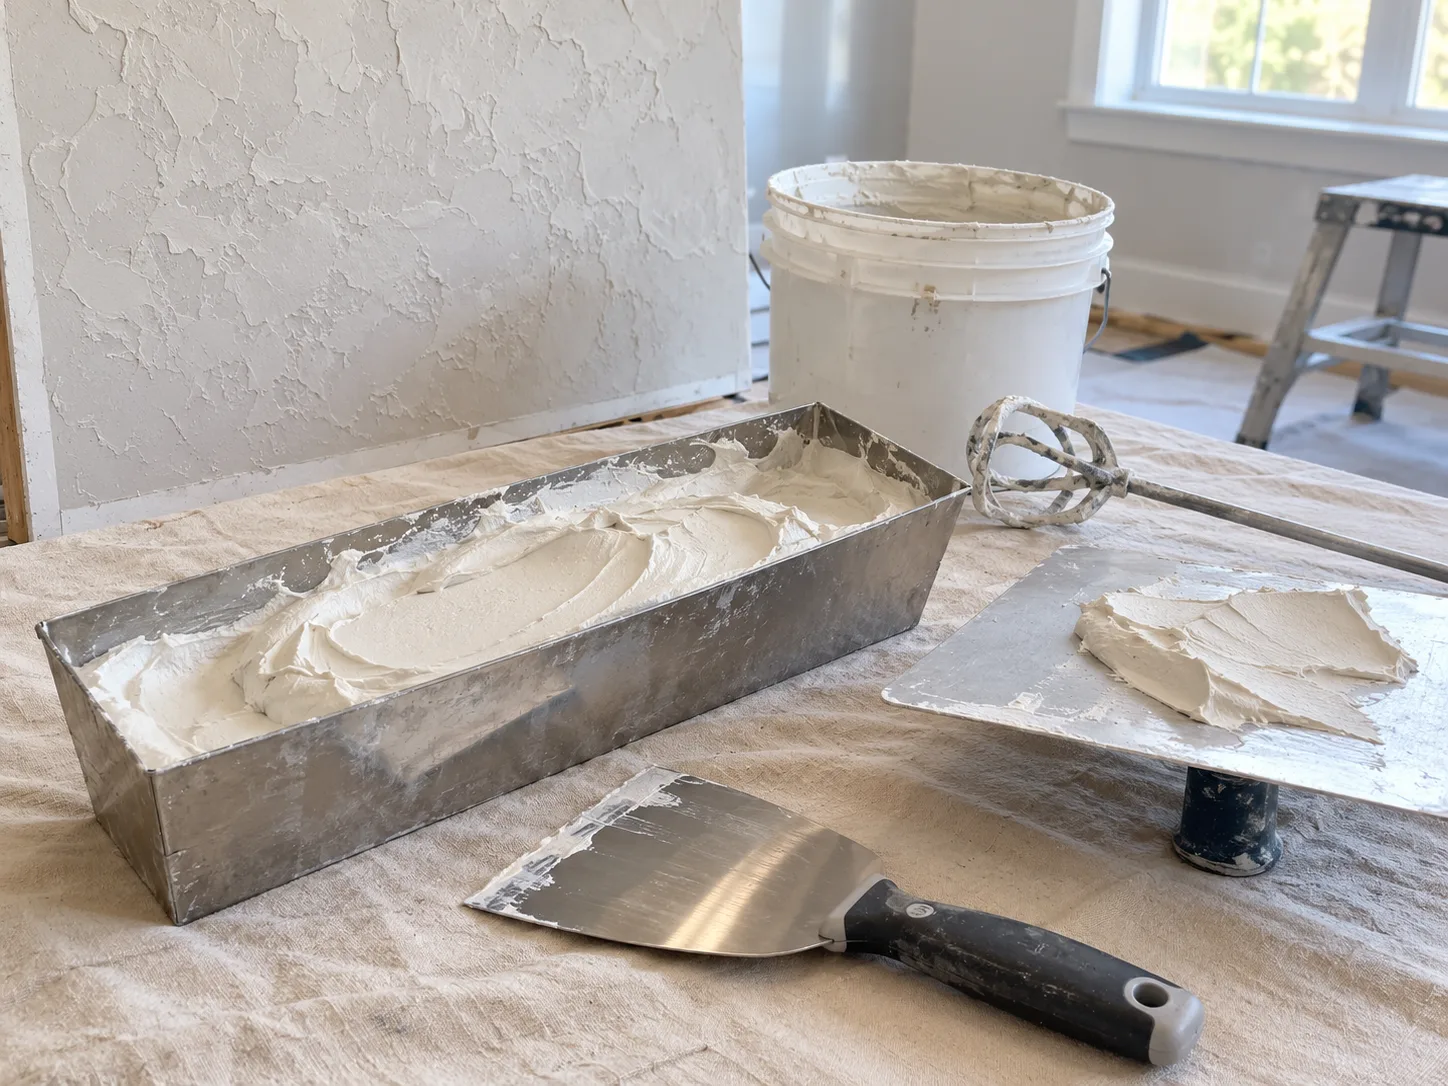
For the trowel method, use a clean drywall hawk, a stainless-steel finishing trowel with a comfortable flexible blade, a smaller knife for loading and edges, a mixing bucket, and a paddle mixer. A mud pan and broad taping knife are useful alternatives if a hawk feels awkward. You will also want a practice panel, work light, drop cloths, painter’s tape, a dust mask or respirator selected for the task, eye protection, and a vacuum suited to fine dust.
Premixed all-purpose joint compound is a workable starting point because you can adjust it gradually with water. Setting-type compound hardens through a chemical reaction and has a working-time window, so it is less forgiving while you are learning a hand-applied finish. Use it only when you know its set time, can mix small batches, and can clean tools before it hardens. Do not add sand or a texture additive casually: extra grit changes the drag, appearance, cleanup, and dust profile. Use an additive only if its label says it is compatible with the compound and application.
USG’s product guidance for its all-purpose compound says the surface should be clean and dust-free, water may be added to reach a workable viscosity, the material should dry thoroughly before sanding or recoating, and its stated drying time can be up to 24 hours depending on temperature and humidity. That is product-specific guidance, not a guarantee for every compound or every thickness. Keep the label and technical sheet for your own product nearby.
Prepare the wall and room
Remove furniture or move it well away from the wall, then cover floors and anything that cannot be moved. Mask baseboards, window trim, doors, and adjoining surfaces; compound splatter is easier to prevent than to scrape from a finished floor. If you remove outlet or switch covers, switch off the relevant circuit and keep wet compound away from electrical openings.
Clean the wall using a method compatible with its existing finish, then let it dry fully. Scrape only loose, safe-to-disturb material; do not aggressively sand unknown old coatings. Patch defects and make sure repairs have dried. On new drywall, finish joints and corners enough that the wall has a stable, even base before texturing. Wipe or vacuum away dust, because compound applied over a dusty surface may not bond well.
Before mixing a full bucket, shine a work light across the wall from the side. That raking light reveals ridges and shadows your ceiling light hides. Texture will soften small visual differences, but it will not make a sharp seam, bulging fastener, or poorly aligned board disappear. Fix anything that would still catch your eye if the wall were painted smooth.
Mix mud to a workable consistency
Start with the compound in a clean bucket and add water in small increments while mixing. Scrape the bucket sides and bottom so dry pockets do not become hard crumbs on the trowel. Use the product’s instructions rather than a fixed “one cup per bucket” recipe; product formulas, bucket sizes, and starting thickness vary.
The target is a smooth compound that clings to the hawk but releases from the blade under a controlled sweep. If it falls off the hawk, slumps down the wall, or strings into drips, it is too loose. If the trowel chatters, gouges, or leaves thick ridges every time, the mix may be too stiff, your blade angle may be too steep, or you may be pressing too hard. Change one variable at a time.
A small test is more useful than a kitchen-style consistency analogy. Spread a thin pass on the practice board, wait briefly, and make a light second pass across it. The blade should glide without dragging dry clumps, while the compound should stay where it lands. Add water a little at a time if the mud is hard to spread; if you over-thin it, blend in more compound and retest.
Practice on a sample board first
Use a scrap of drywall or a primed board at least a couple of feet wide, finished with the same base preparation as the wall. Mark off several panels and test one change at a time: a smaller load, a shallower angle, lighter pressure, or a different sweep direction. Let a sample dry before you judge it. Wet compound looks darker and more dramatic than the final painted surface.
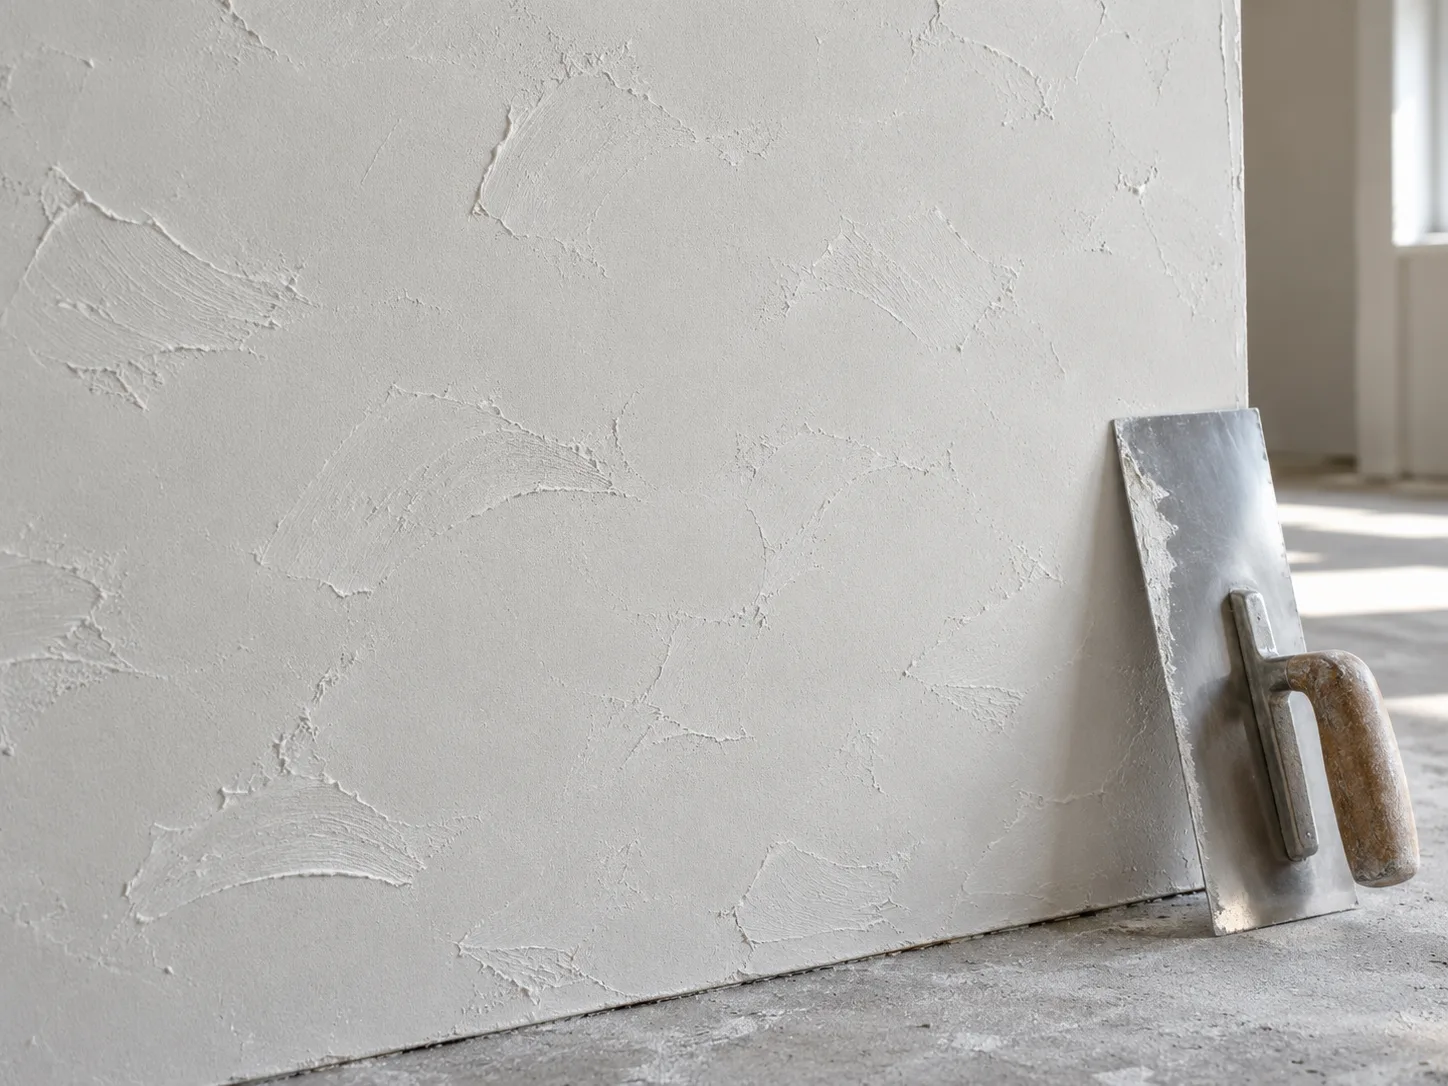
Look at the panel from both close range and across the room. Close up, you want thin flattened deposits, no sharp burrs, and no repeated “C” or “S” marks that make the pattern look stamped. From across the room, check that the bare spaces feel balanced and that the texture does not form a stripe or a border. If you cannot repeat a look on the sample, you are not ready to repeat it over a full wall.
Also test the actual finishing system. Prime and paint one dried sample if color and sheen are important; primer can change how valleys and ridges catch light, and a glossy paint usually makes surface variation more visible. Keep the best sample as your reference while you work. It gives you a target for mud thickness, spacing, and overall contrast.
Apply the texture with a hawk and trowel
Load the hawk with a manageable amount rather than filling it to the rim. Pick up only a small ribbon of compound on the trowel edge; a thick slab is more likely to leave a hard ridge than a soft skip. Set the blade at a shallow angle, roughly 10 to 20 degrees as a starting point, and use light pressure. The exact angle depends on blade flexibility, compound consistency, and the wall, so tune it on your sample rather than treating the number as a rule.
Make a short sweeping pass, lift the blade, and begin the next pass with a slight change in direction. The edge should briefly catch and release rather than scrape the entire layer flat. Let some of the prepared wall remain open between deposits. A few overlapping strokes are useful, but avoid tracing a tidy repeated loop; repetition becomes obvious once paint emphasizes the shadows.
Work in small sections—about 3 by 3 feet is a reasonable starting zone—so you can blend each area while the compound is still workable. The goal is not to coat every square inch evenly. It is to distribute a thin, random pattern across the wall without creating a heavy perimeter or leaving an accidental bald strip. Keep enough compound on the blade to avoid dry scraping, but wipe it clean if the edge begins to collect lumps.
Step back every few passes. If one patch is much heavier than the rest, flatten or lift it while it is wet and rework the area. If a section has too little texture, add a light pass that follows the surrounding rhythm instead of filling the bare spot with a blob. Keep a damp sponge and clean water nearby for tools, but do not wet the wall indiscriminately; excess water can soften the compound and change its behavior.
Carry the pattern through corners and ceilings
Plan where you will stop before mixing. Inside corners are a natural break, but a long uninterrupted wall often has no convenient stopping point. At a corner, use a smaller knife to bring the compound close to the edge, then soften the transition with the same light texture rather than leaving a thick bead. On a ceiling, use smaller sections and a secure work platform; overhead work is tiring, and fatigue makes pressure inconsistent.
For a ceiling, protect fixtures and floors especially carefully, and do not stand on the top steps of a ladder or overreach to save a move. Reposition the platform so your shoulders stay relaxed and you can see the area under side lighting. If you cannot work safely overhead or maintain control for the full surface, a drywall finisher is a sensible choice.
Use a drywall knife as an alternative
A broad drywall knife can make skip-like texture when a trowel is uncomfortable or unavailable. Choose the widest blade you can control without bending it unpredictably. Put a small, even amount of compound along one edge, hold the knife nearly flat, and let one corner or a short section of the edge skim the surface. A knife tends to create longer, straighter marks, so vary the direction and lift cleanly between passes.
Do not press the whole knife flat to “smooth” each mark; that can erase the skip and leave a broad smear. If the blade leaves a sharp raised line, reduce the mud load or pressure and lower the angle. If it barely deposits compound, raise the angle slightly or add a little more to the edge. Use the same sample-board test as the trowel method because a wide knife still behaves differently from a rounded finishing trowel.
The knife method is particularly useful for a small repair or tight area, but it can be harder to make visually consistent across a large wall. If you switch tools halfway through, make the change at a corner or other natural break. Mixing tool signatures in the middle of one continuous wall can create a noticeable transition.
Keep a large wall visually consistent
Divide the wall into work zones before beginning, but do not create visible grid lines. Start near the top corner and work across, then move down in overlapping bands, keeping a wet edge where practical. Use the same trowel, angle, approximate mud load, and general stroke scale throughout. Consistency comes from repeating a range of motions, not from stamping the same exact mark.
Periodically compare the wet wall with your dry sample and look at it from the doorway. The texture should read as an even field rather than clusters separated by smooth seams. If you work alone, pause before the compound sets and scan the whole section under side light. If a second person helps, agree on one person applying the texture or practice together first; two different hands can make the same recipe look like two finishes.
Do not rush to cover every open patch. Skip trowel is not meant to be a uniform coating, and adding more mud to every bare space tends to make the wall heavier with each pass. If you are uncertain whether the pattern is too open, let a test section dry and paint it. It is much easier to add a small amount of texture later than to remove thick relief from an entire wall.
Correct skips, ridges, seams, and heavy patches
Correct defects while the compound is wet whenever possible. Use a clean blade to lift excess material, wipe the blade, then make a light pass that fades into the surrounding texture. Do not keep chasing every small mark; repeated correction usually adds more mud and makes the patch larger. Step back and judge the repair under the same side light used to inspect the rest of the wall.
| What you see | Likely cause | Better correction |
|---|---|---|
| Long, sharp lines | Blade too steep, too much mud on the edge, or too much pressure | Lower the angle, lighten pressure, and use a smaller load on the sample first |
| Mud slides or sags | Compound too thin or a heavy deposit | Mix in more compound, scrape off the sag while wet, and retest |
| Bare patches that look accidental | Passes are too far apart or the edge is too clean | Add a light, short skip that blends into the surrounding marks |
| A repetitive swirl or stripe | Strokes are too uniform or always travel the same way | Vary pass length and direction; do not repeat a fixed loop |
| A visible seam or hump | The underlying joint or butt joint was not finished adequately | Correct the joint after drying; do not bury it under more texture |
| A patch looks much heavier | Too much compound was applied during the correction | Remove excess while wet; after drying, flatten only the high points and retexture a wider transition |
Dry ridges can be knocked down carefully, but sanding a textured finish can remove the surrounding pattern and create dust. NIOSH describes drywall sanding dust as a respiratory and eye-irritation concern and notes that dust controls can reduce exposure. Use the least sanding necessary, contain the work area, prefer dust-capturing tools or a compatible damp-sanding method when the product allows it, and follow the safety information for the compound and equipment. Do not sweep dry dust into the air.
Dry, prime, and paint the finish
Let the compound dry completely before sanding, priming, or painting. Temperature, humidity, ventilation, and thickness affect drying, and a surface that feels dry can still be damp in a thicker deposit. Follow the compound label; USG’s product guidance gives up to 24 hours for its all-purpose compound depending on temperature and humidity. If the texture remains darker or cool to the touch, give it more time rather than sealing in moisture.
Remove only sharp, unwanted burrs. NIOSH recommends reducing drywall-sanding dust at the source, and its engineering-control information describes vacuum sanding systems as one way to reduce airborne exposure in work settings. For a DIY wall, use an appropriate dust-collection setup, avoid aggressive dry sanding, wear protection suited to the product instructions, and clean with a vacuum rather than dry sweeping. USG also specifies careful sanding with 180- or 220-grit paper for its product; check the instructions for your own compound instead of assuming all formulations behave alike.
Prime the entire texture with a drywall primer or other primer approved for the compound and paint system. Joint compound absorbs paint unevenly, and primer helps the finish coat cover more consistently. Once primer is dry, inspect the wall again under side light; small high spots are easier to spot before the color coat. Touch up only the areas that need work, let them dry, and reprime those repairs.
Use a roller nap that reaches into the texture without splattering excessively, and keep a brush for corners. Work with a steady wet edge and avoid repeatedly rolling over paint that has begun to set, which can pull compound or leave uneven sheen. A flatter paint sheen usually softens shadows; satin or semi-gloss reflects more light and can make every ridge more noticeable. Test the chosen paint on your sample board before committing to a whole room.
Blend a future patch into existing texture
Texture repairs are possible, but the goal is to make the patch disappear at normal viewing distance, not to recreate every original mark exactly. First fix the underlying hole or crack and bring the repair nearly flush. Let the patch dry, remove dust, prime if the compound system calls for it, and use the original sample or a photo taken in the same lighting to guide the new pattern.
Start the skip-trowel marks at the center of the repair and lighten them as you move outward. Extend the transition beyond the damaged spot so the edge does not form a visible circle. Let it dry, prime the repair, and compare it with the wall from the doorway. If the mismatch is still obvious, adding a little more texture across a wider section often blends better than piling compound onto the original small patch.
For a prominent wall, an area near a window, or a patch that crosses a corner, repainting the whole wall may be the cleanest route. Color and sheen can make a technically close texture match look different. Save a labeled dry sample, the compound name, and the paint color and sheen; those details make later repairs more predictable.
Conclusion
A convincing skip-trowel finish comes from controlling the surface, not from making a complicated pattern. Start with a clean, stable wall, mix compound in small adjustments, and practice until a light pass leaves the kind of thin, varied ridges you want. Work in manageable sections, use side light to spot heavy patches, and correct problems before they dry.
The finish is forgiving only when the preparation is sound. If the wall is damaged, old paint or texture may be hazardous to disturb, or overhead work is beyond your comfort level, pause and get the surface assessed. Once the texture dries, prime it, test the paint on your sample, and keep that sample for repairs later.