Alocasia Black Velvet Propagation: Division & Corm Method
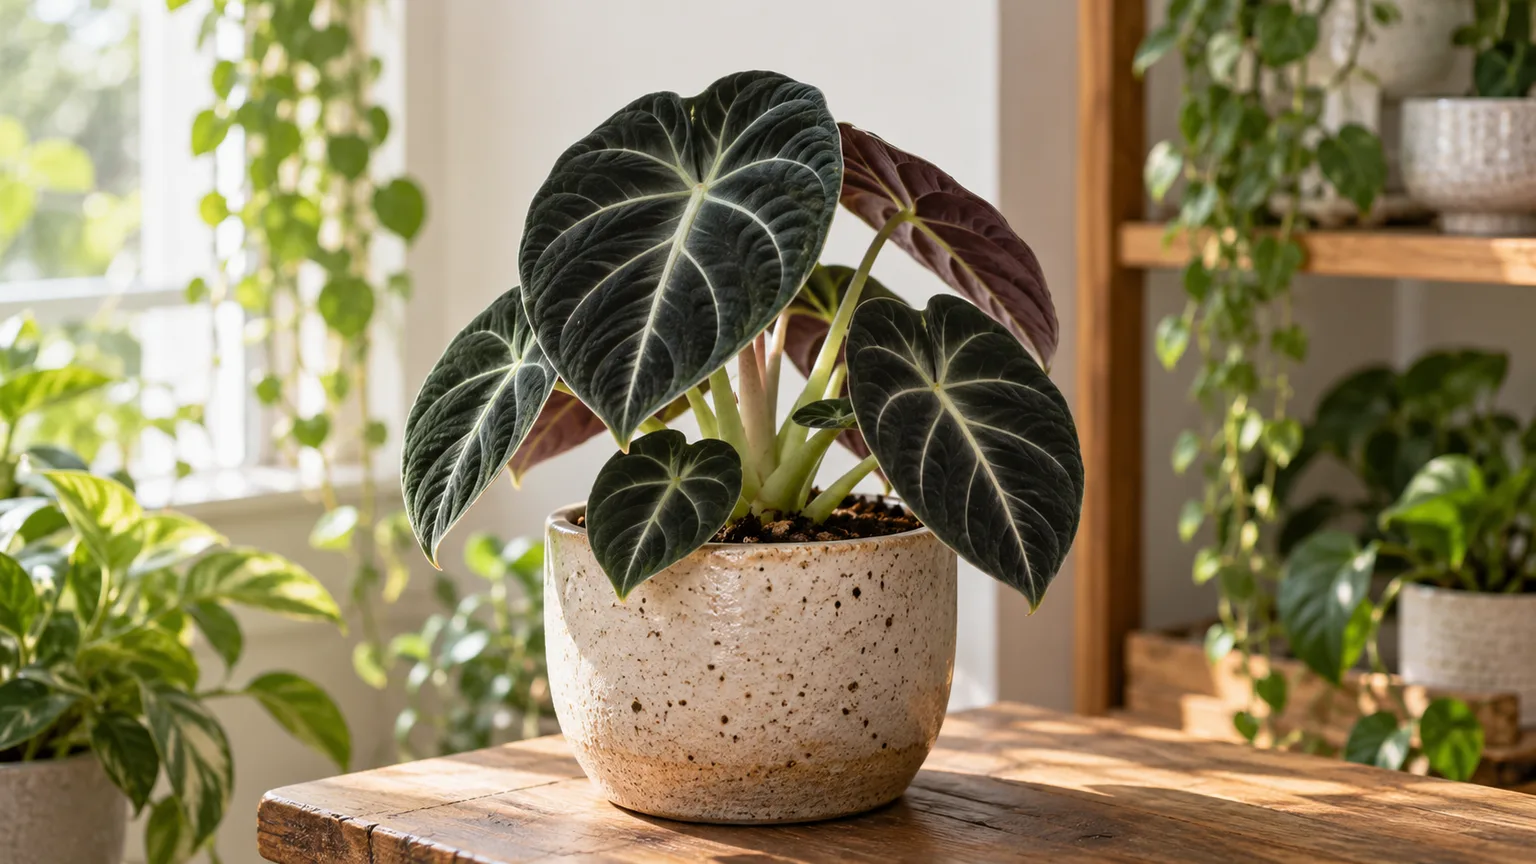
Alocasia Black Velvet Propagation: Division & Corm Method
Alocasia Black Velvet Propagation: Division & Corm Method
Written by sai-ananth for LeafyPixels. Reviewed by the LeafyPixels Review Board against botanical references, extension propagation guidance, and LeafyPixels Black Velvet care data.
What Black Velvet Is and Why Biology Dictates Your Options
Alocasia Black Velvet is the trade name most shops use for selected forms of Alocasia reginula, a species formally described in 2011 by Agung Kurniawan and Peter C. Boyce from material cultivated at the Bali Botanic Garden and originally collected in Eastern Kalimantan, Indonesian Borneo. The EPPO Global Database records the species as native to Borneo. The popular Black Velvet, Silver Dragon, and Green Dragon labels all refer to bullate-leaved selections distinguished mainly by how dark, pale, or matte the interveinal patches appear. For a full care picture beyond propagation, see the Alocasia Black Velvet overview.
That taxonomy matters because propagation follows the plant’s clonal biology. reginula spreads by a short underground rhizome that produces shoots and, over time, drops small storage organs called corms into the surrounding soil. A corm is a modified underground stem that stores starch and water; a rhizome is the horizontal stem leaves and petioles emerge from. Offsets are new shoots on the rhizome with their own small root systems. You cannot make a new plant from a leaf, because there is no node along the petiole capable of producing a new meristem. You can make new plants from rhizome divisions and from corms sifted out of the pot.
Expect modest yield. Unlike faster species such as Alocasia amazonica (Polly) or Alocasia zebrina, Black Velvet offsets cautiously. A mature 15–20 cm pot often holds two to three visible offsets and perhaps three to ten firm corms when healthy. Collectors who plan annual multiplication should treat each repot as a small harvest, not a factory run.
Division vs. Corm Harvest: Choosing the Right Method
Black Velvet propagation comes down to two reliable home methods: division of established offsets or rhizome sections, and harvest of dormant corms from the soil. Division gives you a small plant with leaves and roots on day one; corm harvest multiplies stock while leaving the visible crown intact, at the cost of weeks to months of waiting.
Division suits any repot where you see offsets with their own roots and at least one leaf. Success is high when cuts are clean, fungicide-dusted, and potted in fresh mix during active growth. Corm harvest suits single-stemmed specimens, root-bound plants, or growers who want several clones from one unpotting without slicing the mother rhizome. A meaningful share of harvested corms never sprout, so plan batches accordingly.
Most experienced growers combine both during the same spring repot: divide offsets that separate cleanly, sift corms into a propagation box, and return the parent to fresh mix with several corms deliberately left behind.
Method Comparison at a Glance
| Factor | Division | Corm harvest |
|---|---|---|
| Best when | Visible offsets with roots | Few offsets; want more plants |
| Time to new leaf | Often 2–6 weeks | Often 4–12+ weeks |
| Typical yield per repot | 1–3 plants | 3–8 corms (not all sprout) |
| Risk to mother | Moderate if over-divided | Low if you leave reserve corms |
| Skill level | Beginner-friendly | Intermediate (humidity/heat) |
| Genetic match | Clone of parent | Clone of parent |
Why Leaf and Stem Cuttings Fail on Alocasia reginula
Alocasia cannot be propagated from a leaf cutting, a lone petiole, or a stem section without a growing point. There is no axillary bud along the petiole capable of producing a new shoot, and Alocasia petioles attach too tightly to the rhizome for useful internode cuttings. The Royal Horticultural Society recommends separating offsets or dividing the rhizome in spring as the reliable propagation routes, which matches what growers observe on reginula specifically.
A leaf rooted in water may produce adventitious roots at the petiole base but will not form a crown or rhizome. Tutorials labeled “water propagation” almost always show a division or a corm misnamed as a cutting. For Black Velvet, stick to division and corm sprouting.
When to Propagate (and When to Wait)
Timing matters more than generic “spring is best” advice suggests. Black Velvet follows a tropical rhythm: active growth in spring and summer, slowdown in autumn, and partial or full dormancy in winter when light and temperature drop. Rhizome cuts and corm harvests heal fastest when the plant is pushing new leaves and root tips are active.
Seasonal Timing for Indoor Growers
The widely cited window for dividing clumping houseplants is early spring as new growth resumes. NC State Extension’s Alocasia guidance places division in spring for the same reason it recommends spring division for clumping perennials: rising sap flow and rapid cell division speed recovery. For Black Velvet in temperate homes, late March through early July is the practical safe window. A heat mat and bright room can extend work into early autumn, but late-summer divisions need time to root before winter.
Skip propagation when the plant has dropped most leaves, when soil stays wet for more than a week, or when it just arrived from shipping. Dormant or stressed rhizomes heal slowly, and pathogens thrive in cool, moist media. Stabilize first — match watering and light to recovery — wait for two to three new leaves, then plan division or corm harvest.
Tools, Sterility, and Pre-Propagation Setup
A clean setup separates a smooth propagation from a tray of rotting corms. Gather tools before unpotting, work quickly once roots are exposed, and protect every cut surface immediately.
Use a sharp, narrow blade — a hori-hori, grafting knife, or clean box cutter — and sterilize with 70% isopropyl alcohol or a brief flame pass. Iowa State Extension’s houseplant division guide stresses that clean cuts heal faster than torn tissue. Keep cinnamon (a common household fungistatic), activated charcoal, or sulfur powder ready; dust cuts the moment you make them. Re-sterilize the blade between specimens if you are processing multiple plants. Alocasia sap contains insoluble calcium oxalate crystals that can irritate skin — wear gloves during cutting and handling, and wash any exposed skin promptly.
Prepare fresh, chunky aroid mix for divisions — see the Black Velvet soil guide for a drain-first recipe. For corms, set up a clear container with a lid or humidity dome, pre-moistened medium, and a propagation zone warmed to 24–27°C if possible. Lay out newspaper, pots, fungicide, and medium in the order you will use them so nothing air-dries while you search for a tool.
Method 1: Division Step by Step
Division rewards patience more than force. Water the plant 24 hours ahead so the root ball holds together. Tip the pot, support the crown, and slide the root ball out. Gently shake or soak away loose soil until the rhizome is visible. Identify each offset — a shoot with its own petioles and root mass connected to the parent rhizome. Offsets without visible roots can still separate but need extra humidity afterward.
Virginia Tech Extension notes that stem cuttings and divisions root fastest when taken during active spring growth and when the rooting medium is warm (70–75°F / 21–24°C). Slice through the rhizome at a natural constriction with one clean cut rather than sawing. Dust every cut with fungicide and let divisions callus in open air for 30 minutes to two hours. Pot each piece one size up at most, at the same depth as before, with the crown at the soil surface. Water lightly to settle mix, then place in bright indirect light at 21–27°C with humidity above 60%. Hold fertilizer for at least four weeks while roots re-establish. If an offset loses all leaves after potting, keep the rhizome warm and humid rather than discarding it — Black Velvet often refoliates from firm storage tissue once roots stabilize.
Method 2: Corm Harvest and Sprouting
Corm harvest is how one unpotting can yield several new plants. Brush soil from the root ball over newspaper and sift slowly. Corms are usually 5–15 mm across, firm, smooth, and tan to dark brown — bead-like compared with white fibrous roots. The largest clusters sit near the rhizome base and along the lower third of the root ball, though older plants also push corms toward the surface.
Detach corms gently; snip anchoring roots with sterilized scissors and keep the basal plate intact. Replant the mother promptly in fresh mix. Take no more than half the corms you find, leave the smallest on the parent, and tuck a few back into soil around the rhizome so the plant keeps its dormancy reserve.
Peel or Leave the Tunic
Each corm wears a thin papery brown tunic that repels water and prolongs dormancy. The practical tradeoff is well-documented among experienced aroid growers: peeled corms in a warm sterile setup often sprout in one to two weeks, while unpeeled corms may sit dormant for three to six months. Peeling adds a handling step and a small contamination risk; leaving the tunic on is lower effort but slower.
Peel gently with a thumbnail after a brief soak if you want speed; stop at creamy flesh and do not gouge the growth point. Dust peeled corms lightly with cinnamon before burying them. If you prefer minimal handling, leave the tunic and commit to bottom heat and patience.
Medium Options Compared
| Medium | Strengths | Weaknesses | Best for |
|---|---|---|---|
| New Zealand sphagnum moss | High moisture retention, airy structure | Roots weave into fibers; harder pot-up | Beginners, high humidity setups |
| Perlite | Sterile, hard to overwater | No nutrients; floats slightly | Overwaterers, recovery rounds |
| Fluval Stratum ± perlite | Moisture without compaction; semi-hydro friendly | Premium cost | Semi-hydro transitions |
Sphagnum moss holds large volumes of water in its hyaline cells and capillary spaces (University of Helsinki sphagnum research), which forgives small watering mistakes. Antimicrobial compounds in Sphagnum tissues can suppress some damping-off fungi in growing media (antifungal sphagnum study). Pre-moisten any medium to a wrung-out sponge feel. Bury the corm two-thirds deep with the pointed growth end exposed.
Heat, Humidity, and Light Targets
Warmth drives corm sprouting more than medium choice. Aim for 24–27°C at corm level — a seedling heat mat under a closed dome is the most reliable approach. Below about 20°C, corms stall or re-enter dormancy. Keep 80–100% humidity inside the dome for the first two to four weeks, burping the container for ten minutes every five to seven days. Light should be bright and indirect; direct sun on a sealed dome cooks corms, while a dark cupboard delays wake-up.
Realistic Timelines and Success Expectations
Online timelines for Alocasia corms skew optimistic. A division with roots and at least one leaf often pushes new growth in two to three weeks. Root-poor offsets may need four to six weeks, sometimes two months in cool rooms. Do not fertilize fresh divisions for at least four weeks.
Corm timelines are wider. Under ideal heat, humidity, and peeling, roots may appear in ten to twenty days and a sprout in two to four weeks, with a true leaf one to two months later. Unpeeled corms, cooler rooms, or stubborn genetics can stretch sprouting to four to twelve weeks. Based on community experience aggregated across houseplant grower forums and platforms such as Reddit’s r/alocasia, roughly six to eight out of every ten sound corms sprout in warm spring batches, with lower success in winter without bottom heat — treat that as observed grower consensus, not a published trial statistic.
Variegated and Pink Black Velvet Forms
Pink, cuprea, and heavily variegated Black Velvet selections often break dormancy more slowly than green forms. The same peeled corm that sprouts in three weeks on a green plant may need ten to fourteen weeks on a variegated clone because reduced chlorophyll limits the energy available to wake the storage organ. Give variegated corms uninterrupted bottom heat, avoid peeling unless you are confident in sterility, and do not discard firm corms before twelve weeks in a cool home. Leaf quality on new divisions can look washed out until the plant re-acclimates; bullate texture returns when light and humidity match what the parent had.
Aftercare for Divisions and Sprouted Corms
The first month after potting is the danger zone for both divisions and sprouted corms. Move a corm to soil when roots reach 2–3 cm and a sprout or first leaf is visible. Use a 6–8 cm pot, a chunky aroid mix from the soil guide, and plant with the growth point at the surface. Gradually open vents or crack the dome over three to five days instead of jumping from sealed humidity to a dry room.
Water lightly and evenly — never let fresh roots sit in waterlogged mix. A single heavy soak in dense substrate can trigger root rot within days. Begin quarter-strength balanced fertilizer only after the first new leaf hardens off.
Potting Up Corms Started in Semi-Hydro
If you sprouted in Fluval Stratum or LECA, transition on the same substrate rather than forcing an immediate soil jump. When roots are 3–4 cm and one leaf is expanding, move the corm to a small net pot or nursery pot with fresh Stratum or a 50/50 Stratum-perlite blend. Keep the reservoir or bottom watering shallow for two weeks so roots stay moist but not submerged at the crown. Once the second leaf hardens, you can shift to a chunky soil mix or stay in semi-hydro if your watering routine already supports it. The goal is one environment change at a time, not soil, humidity, and light shocks in the same week.
Troubleshooting Rot, Dormancy, and Failure
Most propagation failures on Black Velvet fall into a few predictable patterns. The table below summarizes what to look for and what to do.
| Symptom | Likely Cause | Fix |
|---|---|---|
| Corm feels soft or mushy | Bacterial or fungal rot from excess moisture | Trim to firm white tissue, dust with cinnamon or sulfur, callus 24 hours, replant in dry perlite with cracked dome |
| Corm collapses or smells sour | Advanced rot that has spread through the storage tissue | Discard immediately; do not risk nearby corms |
| Firm corm, no sprout after 6–8 weeks | Dormancy; insufficient warmth or light | Raise heat to 25–27°C, improve indirect light, peel intact tunic if unpeeled, wait — baginda corms can take 3+ months in cool homes |
| Division lost all leaves after potting | Transplant shock; roots not yet established | Keep rhizome warm and humid, do not overwater — Black Velvet often refoliates once roots stabilize |
| Mold visible inside propagation dome | Inadequate ventilation | Increase burping frequency; open vents or crack lid for longer periods daily |
| White fuzzy growth on corm surface | Surface mold on dead tissue (not pathogenic if corm is firm) | Wipe off with dilute hydrogen peroxide (1:3 with water), improve airflow, reduce moisture slightly |
PDA Exotic Plants on Alocasia dormancy and rot provides additional context on distinguishing dormant corms from dead ones. Overpotting, early fertilizer, and permanently sealed domes are the other common killers — match pot size to root mass, vent humidity after week two, and keep mix airy.
Protect the Mother Plant: Corm Reserve Ethics
Attached corms are drought and dormancy insurance, not spare parts. When autumn light drops and leaves yellow, energy stored in those corms carries the rhizome through lean months. Stripping every corm often yields a smaller plant next season with fewer offsets. Harvest only the largest mature corms, leave small ones in place, and replant the mother with several corms tucked around the rhizome. Over two or three seasons the plant usually repays that restraint with stronger growth and more divisions worth taking.
When to Skip Propagation Entirely
Do not propagate through active root rot, severe spider mites, or suspected viral streaking on leaves. Sick tissue spreads with every cut, and stressed plants lack reserves to push new growth afterward. Skip midwinter work unless you can hold 24–27°C bottom heat and bright indirect light for months. Skip mail-order plants until they have acclimated and produced two to three new leaves. Propagation solves multiplication, not rescue.
Pre-Propagation Checklist
Confirm active growth: at least one new leaf in the last four to six weeks, no major unexplained leaf drop, roots holding soil without extreme circling. Sterilize blades, pre-moisten media, pre-warm the propagation zone, and water the mother lightly 24 hours ahead. Decide in advance how many offsets and corms you will take and stick to leaving at least half the corms on the parent. Keep dry perlite ready for any corm that comes out soft. Wear gloves during handling — alocasia sap contains calcium oxalate raphides that irritate skin and are toxic to pets if ingested. The unpotting itself usually takes twenty to forty minutes; the rest is warmth, humidity, and patience.
Conclusion
Black Velvet propagation works when the method matches the plant’s clonal biology and your patience matches its slow offset habit. Divide rooted offsets in the spring growth window for the fastest clones; harvest corms when you want more plants without slicing the crown, and peel only if you are ready to manage sterility and heat. Leave reserve corms on the mother, cite realistic timelines instead of miracle promises, and link propagation to the rest of the care system — repotting, soil, watering, and rot recovery on the overview hub. Do those things well and a healthy reginula Black Velvet becomes one of the more predictable jewel alocasias to multiply, even if you only harvest two or three new plants per season (RHS Alocasia growing guide).
When to use this page vs other Alocasia Black Velvet guides
- Alocasia Black Velvet overview — Start here for whole-plant context before deep-diving this topic.
- Alocasia Black Velvet problems hub — Jump to symptom-specific fix guides when this care topic does not resolve the issue.