Alocasia Black Velvet Repotting: When, How, and Best Soil
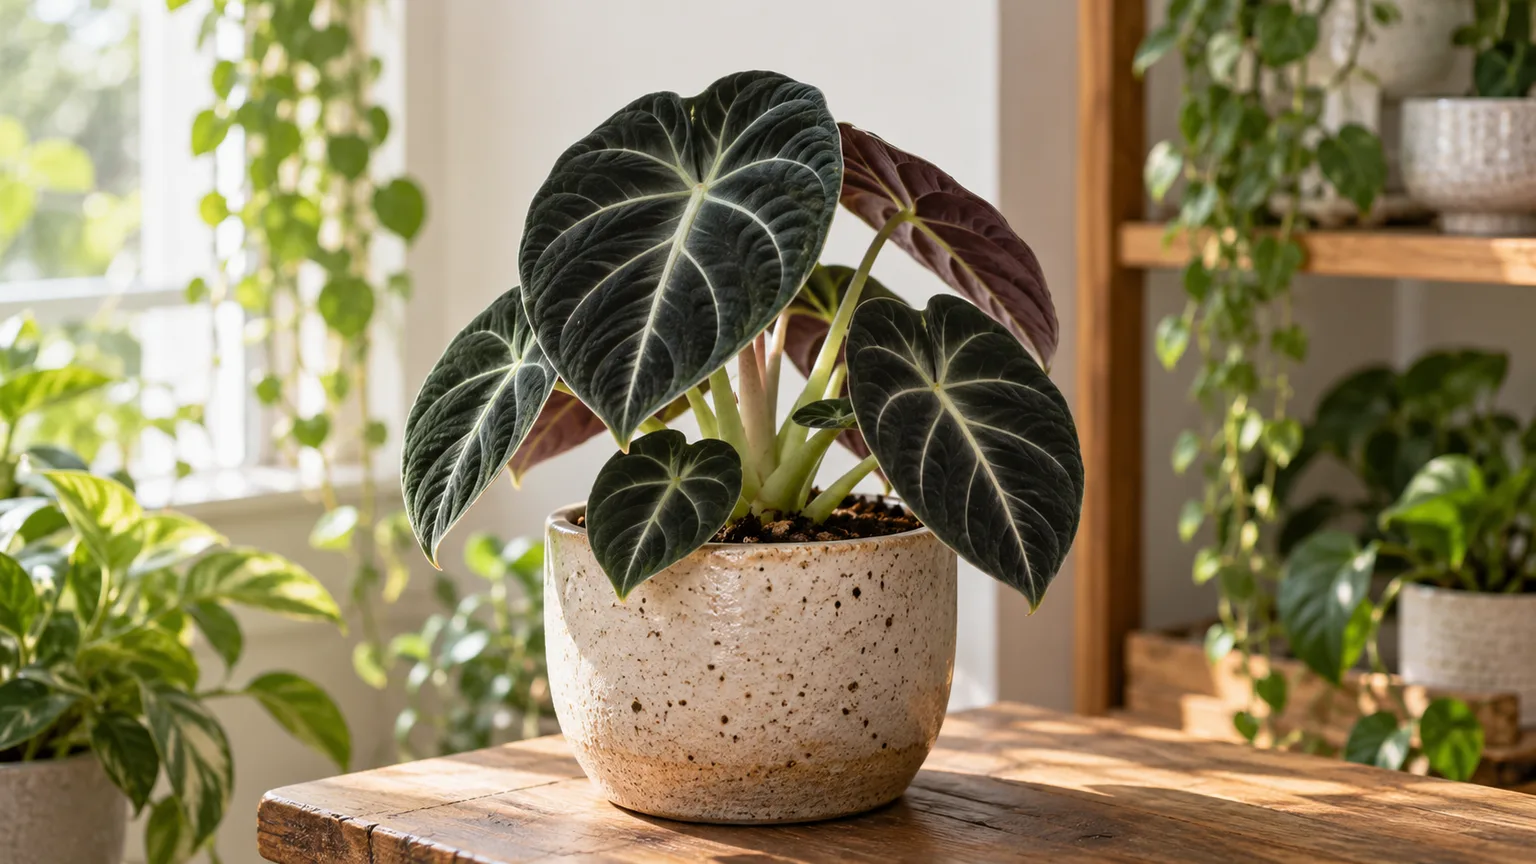
Alocasia Black Velvet Repotting: When, How, and Best Soil Mix
Alocasia Black Velvet Repotting: When, How, and Best Soil Mix
Alocasia Black Velvet rewards patience and punishes haste at repot time. The compact corm and velvet leaves look fragile, but the real risk is below the soil line: a root system that rots fast in wet, compacted mix and recovers slowly when disturbed out of season. Repotting is the highest-leverage moment in this plant’s care calendar — and the one growers most often get wrong by sizing up too far, repotting in winter dormancy, or bare-rooting a corm that needed its reserves left intact.
This guide covers when Black Velvet actually needs a new pot (not on a calendar autopilot), the spring window that protects the corm, how to size terracotta versus plastic, three DIY aroid recipes matched to your home, step-by-step unpotting without tearing fine roots, gentle corm handling at division time, and the four-to-six-week post-repot routine that decides whether the plant bounces back or stalls. Every recommendation ties to Alocasia reginula biology — smaller and slower than Alocasia Polly, more rot-sensitive, and happiest slightly snug in a pot with real drainage.
What “Black Velvet” Actually Means and Why It Changes the Repot
Alocasia Black Velvet is a cultivated form of Alocasia reginula, a small understory aroid native to the limestone outcrops of Borneo. The thick, almost armored leaves and tightly clumping growth habit come from that habitat: a thin layer of leaf litter over calcareous rock, with roots that anchor the plant in shallow pockets of organic matter and aerate through crevices. That origin story matters when you repot, because it tells you what the plant is adapted to and what it is not.
Three things follow from the native habitat. First, Black Velvet is a small, slow-to-medium grower compared with rhizomatous alocasias like A. amazonica or A. odora. The rhizome stays compact, the root mass is modest, and the plant tolerates, even prefers, a snug pot. Second, the roots evolved in a substrate that drains fast and breathes well. Stagnant moisture is the single biggest killer in cultivation. Third, the plant stores energy in true corms and a small rhizome, which means disturbing the root ball costs the plant real reserves and sets recovery back.
Repotting, then, is not a routine chore for Alocasia Black Velvet. It is a deliberate event. Done at the wrong time or into the wrong medium, it can wipe out a season of growth. Done right, it is one of the most reliable ways to reset a struggling plant and to harvest corms for propagation.
The native habitat clue: limestone outcrops in Borneo
In habitat, reginula grows in pockets of decomposing leaf matter on calcium-rich rock. The substrate never stays wet for long. Calcium carbonate from the limestone buffers the pH slightly upward, which is one reason growers often add a small amount of crushed oyster shell, bone meal, or dolomitic lime to a Black Velvet mix. The Royal Horticultural Society and the Missouri Botanical Garden both flag calcareous, well-drained conditions as the closest analogue to the plant’s natural environment. Mimicking that, even loosely, is the single best thing you can do at repotting time.
When to Repot Alocasia Black Velvet
Repotting is a response to a specific problem, not a calendar event. The plant will tell you when it needs more room, and the most reliable tell is the roots themselves. Plan to repot when one or more of the following is true, and only then.
The window is mid-spring through early summer in the Northern Hemisphere, roughly April to early June, after the plant has broken dormancy and started pushing new leaves. That is when root growth is most active and the plant has the energy to recover from root disturbance. Repotting outside that window is a calculated risk, and outside it you should default to top-dressing rather than full repotting.
Three visible signs it is time
The first sign is roots growing out of the drainage holes or circling the surface of the soil. The second is water running straight through the pot and out the bottom without ever seeming to wet the root ball, which usually means the soil structure has collapsed and there is more root than substrate. The third is a sudden stall in growth during the active season despite good light, water, and humidity. Stunted new leaves, smaller than the previous batch, often appear at the same time.
A fourth, less obvious sign is when the substrate itself has broken down. If the mix has compacted into something closer to garden soil than the chunky aroid blend you started with, the air pockets are gone and the roots are slowly suffocating — a timeline consistent with Clemson HGIC indoor plant soil mix guidance on bark decomposition within 12 to 18 months. In that case, a full soil refresh is more important than a size increase.
How often Black Velvet actually needs a new pot
Most healthy Black Velvets only need repotting every 18 to 36 months. That is the consensus across NC State Extension guidance, aroid society literature, and grower experience: the plant prefers to be a little snug, and overpotting is a more common mistake than underpoting. Fast-growing juveniles may need an annual step-up, but a mature, settled plant in a 4- to 6-inch pot can stay in the same container for two full growing seasons.
If you are not sure, do nothing for another season. The single best indicator is the most recent leaf: if new leaves are emerging at roughly the size of older leaves, the plant is fine in its current pot. If they are noticeably smaller and the soil stays wet for a long time after watering, the substrate has likely degraded and a refresh is overdue even if the pot itself is still adequate.
The Best Season to Repot
Spring is the answer in nine cases out of ten. Specifically, repot from mid-spring through early summer, after the plant has clearly broken dormancy. Penn State Extension recommends repotting when the plant is actively growing, typically in spring, and the Iowa State University Extension guide to houseplant care notes that spring is when houseplants resume active growth and recover fastest from root disturbance. You should see active new growth, ideally a leaf partway through unfurling, before you start cutting into the root mass.
Dormancy is the season to avoid. In Alocasia, dormancy is triggered by short days, cooler temperatures, and reduced light, and the plant’s metabolic activity drops by roughly 60% during this period. Pushing the plant into fresh, moist substrate while it is dormant is the textbook setup for corm rot. The two pathogens most often blamed, Phytophthora and Fusarium, thrive in exactly those conditions per University of Wisconsin Extension on houseplant root rots. If you must repot outside the ideal window because the plant is severely root-bound, has active root rot on Alocasia Black Velvet, or is in a contaminated medium, do it, but expect a slower recovery and a higher chance of leaf drop.
Indoors, in a climate-controlled home, the seasonal signal is weaker. A Black Velvet under stable grow lights and steady warmth can effectively be in active growth year-round. Even so, the safer choice is to align your repot with the plant’s own phenology: when it is producing new leaves and roots, repot. When it is holding still, wait.
Choosing the Right Pot: Size, Material, and Drainage
Pot choice is the lever that controls moisture, oxygen, and root temperature. Get it wrong and the best soil mix in the world will not save the plant. Three decisions matter: how much bigger, what material, and how many drainage holes.
How pot size affects moisture
Move up only 1 to 2 inches (about 2.5 to 5 cm) in diameter from the current pot. That is the consistent recommendation from the Royal Horticultural Society, Penn State Extension houseplant repotting guide, and the major aroid care references. The reason is simple physics: a too-large pot holds a much greater volume of moist substrate than a small root system can use, and the water lingers long enough to suffocate the roots.
Snug is the goal. A Black Velvet in a slightly tight pot will push out healthy new leaves and will flower more readily than one in an oversized container. There is no benefit to giving it a “head start” in a much larger pot, only risk.
Terracotta vs plastic vs glazed ceramic
| Factor | Terracotta | Plastic nursery pot | Glazed ceramic |
|---|---|---|---|
| Moisture retention | Low — wicks moisture away from soil | High — non-porous, holds moisture | High — glazed surface is non-porous |
| Dry-down speed | Fast | Slow | Slow |
| Best for | Humid rooms, overwaterers, large plants | Dry air, underwaterers, hanging baskets | Display plants, medium humidity |
| Weight | Medium | Light (can tip in large sizes) | Heavy — stable |
| Root temperature | Cooler (evaporative cooling) | Warmer | Neutral |
| Notes | Nebraska Extension notes clay pots wick excess moisture | Chunky soil mix is mandatory to prevent rot | Best used as cachepot with drainage liner |
For Black Velvet specifically, the answer depends on your watering habits. If you tend to underwater or run dry household air, plastic is safer. If you tend to overwater or you keep the plant in a humid spot, terracotta is the better call. The Royal Horticultural Society specifically recommends a heavy terracotta pot for larger alocasias to add stability. A 4- to 6-inch terracotta pot is a sensible default for a mature Black Velvet.
Whatever you choose, the pot must have drainage holes. A pot without drainage is a self-imposed root rot timer for this species.
The Best Soil Mix for Alocasia Black Velvet
Soil is the foundation of the entire repot, and for an aroid like Black Velvet it is more important than pot choice. The goal is a substrate that holds some moisture for the fine roots and the corm, but drains and aerates fast enough that the roots never sit in saturated conditions.
Why “chunky aroid mix” is the default
A well-built chunky aroid mix typically targets 55% to 65% total porosity with at least 25% to 30% air-filled porosity after drainage. Particle size matters as much as ingredients: pieces in the 0.25- to 0.5-inch range (roughly 6 to 13 mm) keep the macropores open, while fine material below 0.08 inches collapses under the weight of wet substrate and shuts off oxygen to the roots. That is why standard houseplant potting soil, which is mostly fine peat, fails for this plant per Clemson HGIC indoor plant soil mixes. It is too dense on its own.
Three reliable recipes you can mix at home
The recipes below all work, and the right one depends on your watering habits and your home’s humidity. Measure by volume, not by weight.
Recipe 1: Balanced chunky mix (the default)
- 40% coco coir or peat-based indoor potting mix
- 30% orchid bark (fir bark, 1/4 to 1/2 inch grade)
- 20% perlite or pumice
- 10% horticultural charcoal
Add a tablespoon of worm castings per quart of mix for a gentle nutrient base, and optionally a teaspoon of crushed oyster shell or bone meal for calcium. This is the closest all-rounder to what commercial aroid nurseries use.
Recipe 2: Faster-draining mix (for humid rooms, plastic pots, or heavy waterers)
- 30% coco coir or peat-based mix
- 40% orchid bark
- 20% perlite or pumice
- 10% horticultural charcoal
More bark and less fines mean water moves through faster. Use this if your Black Velvet has ever had a hint of corm rot, or if you keep the plant in a glass cabinet or a high-humidity grow tent.
Recipe 3: More moisture-retentive mix (for terracotta, dry air, or under strong grow lights)
- 50% coco coir or peat-based mix
- 25% orchid bark
- 15% perlite
- 10% horticultural charcoal
Use this only if your pot is terracotta, your humidity is regularly under 50%, or you have a tendency to let the mix dry out completely between waterings. The corms can desiccate in a too-fast-drying mix, and a slightly more moisture-retentive base prevents that.
Sterilize the mix before you use it if you are reusing components. Saturated, anaerobic media are where Phytophthora lives, and a fresh, dry blend gives the plant a clean start.
Step-by-Step: How to Repot Alocasia Black Velvet
A clean, slow repot is almost always better than a fast one. Rushing is what damages roots and what triggers the leaf drop that scares most growers into thinking they have killed the plant. Plan for 30 to 45 minutes of unhurried work.
What to prepare before you start
Lay out everything before you touch the plant. You will need the new pot, washed and ready; the fresh soil mix in a clean bucket or bowl; clean, sharp scissors or pruning shears; a chopstick or a pencil for settling soil around the roots; a watering can with a narrow spout; a clean surface to work on; and a sheet of newspaper or a tray to catch loose mix. Have a small bowl of water nearby in case you find a corm to handle, and keep a few small nursery pots ready in case you decide to separate offsets.
Water the plant thoroughly 12 to 24 hours before the repot. The moisture softens the root ball, makes the soil more cooperative, and reduces transplant shock by ensuring the plant is fully hydrated going in. A dry root ball is more likely to tear and crumble during removal.
Removing the plant without tearing roots
Tip the pot on its side, support the base of the plant with one hand, and gently work the root ball loose. Do not pull on the stems. If the plant resists, squeeze or roll the sides of a plastic pot, or run a thin knife around the inside edge of a terracotta pot. Once the root ball is free, set it on the work surface and shake off the loose old soil.
You do not need to bare-root the plant. Stripping the fine root hairs is the single biggest avoidable cause of post-repot wilt. Keep as much of the original root ball intact as you can, and only tease out the bottom and sides where roots have clearly circled.
Root inspection and corm handling
Once the root ball is exposed, look at it. Healthy roots are white, cream, or pale tan and feel firm. Dark, mushy, or foul-smelling roots are rotting and should be trimmed back to healthy tissue with your clean shears. Cut just above the damaged area, leaving a clean edge.
This is also the moment to look for corms. Corms are small, firm, brown to tan nodules, often the size of a peanut or smaller, that grow along the roots and at the base of the rhizome. A mature Black Velvet can carry several at once. See the dedicated corm section below for how to handle them.
Some growers lightly dust the cut root ends with ground cinnamon after trimming, as cinnamon is a traditional, mild antifungal used in home propagation. This practice is not a substitute for clean technique, good drainage, or proper timing — it is a minor adjunct, not a treatment. If you choose to use it, apply only a light dusting.
Placing the plant in the new pot
Add a layer of fresh mix to the bottom of the new pot, roughly 1 to 2 inches deep depending on the pot. Set the plant on top, then check the depth. The original soil line should sit about half an inch below the rim of the pot, and the crown of the plant (where the stems meet the rhizome) should be at or just above the soil surface. Burying the crown is a common cause of stem rot in this species, and it is worth the extra 30 seconds to get the height right before you backfill.
Fill in around the root ball with fresh mix, gently working it between the roots with your fingers. Use the chopstick to settle the mix into the corners and to eliminate large air pockets. Do not tamp hard. A firm but loose fill is what you want; compressed substrate loses the air pockets you worked to create.
Water slowly and thoroughly until you see water running freely from the drainage holes. Let the pot drain completely. Discard any water that collects in the saucer within 10 minutes; standing water at the base raises the local moisture to 100% and is one of the surest ways to start a rot cycle.
Handling Corms Gently During Repotting
Corms are the part of the repot that most generic guides skip, and it is also where the most damage tends to happen. A corm is a small storage organ, a kind of underground battery, and it is the way Black Velvet survives dormancy. The plant produces them along the root system and at the base of the rhizome. A single mature plant can carry ten or more in a season.
To handle them safely, start by gently loosening the soil around any corm you find. Each corm should be firm and pale to medium brown; soft, black, or hollow corms are dead and should be discarded. For corms you want to propagate, twist them off cleanly at the attachment point. Do not cut into a corm to “check” if it is alive. That wound is an entry point for rot and is the single most common cause of corm failure after separation.
After separation, you have two choices. You can plant the corm directly in a small pot of the same aroid mix with the top third of the corm above the soil line, or you can pre-sprout it in a small cup of water. For water pre-sprouting, place the corm in a shot glass with only the bottom 10% of the corm submerged. Replace the water twice a week to prevent bacterial growth. Keep the cup in a warm spot with a root-zone temperature of 75 to 80°F (24 to 27°C). Roots usually appear in 2 to 8 weeks; the first leaf can take 3 to 6 months, and you should not give up on a corm that is still firm.
Do not harvest every corm at once. Corms are also the plant’s emergency reserves during dormancy, and stripping them all is a fast way to weaken the parent. A reasonable rule is to leave at least half the corms attached unless the plant is in active decline or you are dividing for size control.
Post-Repot Care: The First 4 to 6 Weeks
The first six weeks after a repot decide whether the plant bounces back or stalls. The goals during this period are simple: stable warmth, steady humidity, indirect light, and zero fertilizer.
Place the repotted plant in bright, indirect light at 65 to 80°F (18 to 27°C). A north- or east-facing window is ideal, or a spot three to four feet back from a south- or west-facing window. Avoid direct sun for the first two weeks. Direct sun on freshly disturbed roots is a stress multiplier and shows up almost immediately as leaf curl or bleaching.
Hold humidity at or above 60%. A small cool-mist humidifier set to its lowest output is the most reliable tool. Pebble trays raise local humidity unevenly and can encourage fungus gnats; if you use one, keep it clean. A clear plastic bag loosely draped over the pot for the first 7 to 10 days is the cheapest humidity dome and is genuinely effective, though watch for condensation dripping back onto the leaves.
Water carefully. Allow the top inch of the mix to dry before the next water, but do not let the entire pot dry out. The fine new root hairs need consistent moisture to establish. Bottom watering is a good option during this window: set the pot in 1 to 2 inches of water for 15 to 20 minutes, then let it drain. That wets the lower half of the root ball without saturating the crown.
Skip fertilizer for at least 4 weeks, and ideally 6. Fresh roots are extremely sensitive to salt. Fertilizing too early burns the new root hairs, disrupts the microbial colonization of the new substrate, and shows up as brown leaf tips and stalled growth. After 4 to 6 weeks, resume feeding at half the recommended strength with a balanced 3-1-2 fertilizer. Step back up to full strength only after the plant has put out a new leaf at normal size.
Expect some leaf drop. Losing one or two of the oldest leaves in the first two weeks is normal and is not a sign of failure. The plant is pulling energy from those older leaves to push new root growth. New leaf emergence is the clearest signal of recovery, and that is what to watch for. If the plant is producing new growth at the expected size after 4 to 6 weeks, the repot was a success even if it looks rough in the meantime.
Troubleshooting: Is my plant failing or just adjusting?
It can be hard to tell whether a drooping Black Velvet is suffering from a true problem or just going through the normal adjustment period. Here is how to tell the difference:
- Wilting with wet mix, and the pot feels heavy: Likely overwatering in the new pot or a too-large container. Let the mix dry until the top 2 inches are dry before the next watering. If the pot is more than 2 inches larger than the old one, consider downsizing.
- Wilting with dry mix, and leaves feel thin or papery: Likely underwatering or root damage from over-disturbing the root ball. Bottom-water gently and raise humidity to 70% for the next week. If the plant does not improve in 7 days, check for root rot.
- Oldest leaves yellowing and dropping, but new growth is firm: Normal transplant shock. The plant is reallocating energy to root repair. Do not intervene; just maintain consistent care.
- All leaves drooping and the stem base feels soft at the soil line: Likely crown rot from burying the crown too deep. Unpot immediately, trim back to clean rhizome tissue, dust with cinnamon, and repot with the crown at the soil surface. Recovery is possible but not guaranteed.
- No change for 3 weeks, then a sudden perking up: Normal lag phase. Roots are establishing below the surface before the plant puts energy into new leaves. Keep conditions stable and wait.
If the plant is severely drooping or wilting 10 to 14 days after the repot and you cannot identify the cause, the most common culprits are: a too-large pot holding too much moisture, a too-dense mix, a root ball that was over-disturbed, or a repot that happened during dormancy. Trim any dead foliage, drop light levels slightly for a week, water sparingly, and wait. Recovery from severe transplant shock can take 6 to 10 weeks, and patience is the most useful tool you have.
Common Mistakes and Quick Fixes
The most common Alocasia Black Velvet repotting mistakes are predictable and easy to fix once you see them.
Overpotting. The pot is more than 2 inches wider than the previous one. The mix stays wet for days and the leaves are yellowing. Downsize the pot or top-dress with fresh mix and let the plant dry out faster, then re-evaluate in 4 to 6 weeks.
Bare-rooting. The plant was lifted and had all of its old soil washed or shaken off. The fine root hairs are damaged and the plant is wilting. There is no quick fix, but you can speed recovery by keeping humidity high, light low, and watering light. New roots will grow from the rhizome; do not repot again.
Repotting during dormancy. The plant dropped all its leaves within a week and the corms feel soft. Stop watering, keep the pot in a warm spot with Alocasia Black Velvet light guide, and wait. Do not throw the plant out. As long as the corm is firm, new growth will eventually emerge in spring.
Fertilizing too early. Brown leaf tips and halted growth within 2 to 3 weeks of the repot. Flush the pot thoroughly with plain water to leach excess salts, withhold all fertilizer for the next 6 weeks, and resume at half strength.
Compacted mix. Water pools on the surface and runs down the inside of the pot rather than wetting the root ball. The substrate has broken down. The fix is a full repot into fresh chunky mix, even if the pot itself is the right size.
Crown rot recovery: a closer look
Crown rot is the most serious complication of a bad repot, and it demands fast action. Unlike root rot, which develops slowly in the lower pot, crown rot starts at the soil line where the petioles meet the rhizome — a site that was buried too deep during repotting or kept wet by standing water.
The first sign is a soft, dark spot at the base of the lowest petiole. Within days, the affected leaves collapse and the rot spreads into the rhizome itself. If you catch it early — before the rot reaches the corm — you can save the plant. Unpot immediately and cut away every trace of dark, mushy tissue with sterile scissors. You need to see clean, cream-colored rhizome before you stop. Some growers lightly dust the trimmed area with ground cinnamon, which is a traditional antifungal used in home propagation, though it is no substitute for clean cuts and proper aftercare. Let the wound dry for a few hours in open air, then repot in a small pot of fresh, very well-draining mix with the crown sitting well above the soil line. Water sparingly for the first two weeks. If the rot has reached the corm and the corm itself is soft, the plant is unlikely to recover — but wait until the corm is fully hollow before discarding, because firm tissue can still produce new growth.
Wrong pot material for the environment. The mix dries out in a day in a dry, bright room with a terracotta pot, and the leaves are crisping at the edges. Either move the plant to a more humid spot, switch to plastic, or use a more moisture-retentive mix recipe.
Conclusion
Alocasia Black Velvet does not forgive a sloppy repot the way a heartleaf philodendron or a pothos does. Its compact corm, slow root system, and limestone-native biology mean every decision — when to repot, what pot to use, what mix to fill it with — carries more weight than it would for a faster-growing aroid. The plant’s native habitat on Borneo’s limestone outcrops tells you everything you need to know: shallow, fast-draining pockets of organic matter over rock, not deep, moisture-retentive soil. Reproduce those conditions in a pot, and the plant will push new roots within weeks. Ignore them, and the same corm that should have carried it through dormancy will rot before the next leaf unfurls. The difference between a Black Velvet that thrives after repotting and one that stalls for months is rarely luck. It is the willingness to resist the urge to upsize too far, to handle the root ball gently, to leave the corms alone unless you need them, and to wait — really wait — before reaching for fertilizer. A well-repotted Black Velvet will not need another pot for two to three years.
When to use this page vs other Alocasia Black Velvet guides
- Alocasia Black Velvet overview - Start here for whole-plant context before deep-diving this topic.
- Alocasia Black Velvet problems hub - Jump to symptom-specific fix guides when this care topic does not resolve the issue.
- Root Rot on Alocasia Black Velvet - Escalate here when repotting adjustments are not enough.