Mustard Greens Pruning Guide: Harvest, Timing & Bolting
Mustard Greens Pruning Guide: Harvest, Timing & Bolting
Mustard Greens Pruning Guide: Harvest, Timing & Bolting
First, pinch or snip only yellow, slimy, or clearly damaged lower leaves at the base of each petiole with clean scissors. Do not shear the rosette or take kitchen harvests until the plant has enough true leaves to recover—usually when outer blades are at least 3–4 inches (7–10 cm) for baby picks or 6–8 inches (15–20 cm) for full cooking greens. For whole-plant context—cool-season timing, sarson cultivars, and bolting—see the Mustard Greens overview.
Quick answer
Mustard greens (Brassica juncea) are pruned by harvesting leaves, not shaping woody branches. After a quick cleanup of yellow or damaged tissue, your first productive cut is one mature outer leaf (or a small outer cluster), leaving the central crown untouched. Repeat outer picks as leaves reach usable size, always leaving the central crown and youngest inner leaves so the plant can regrow (Harvest to Table). Plants regrow from the crown in cool, moist conditions; once a flower stalk rises, leaf quality drops and the crop should be replaced or finished for seed—not heavily cut back like a perennial herb.
What mustard greens pruning actually means
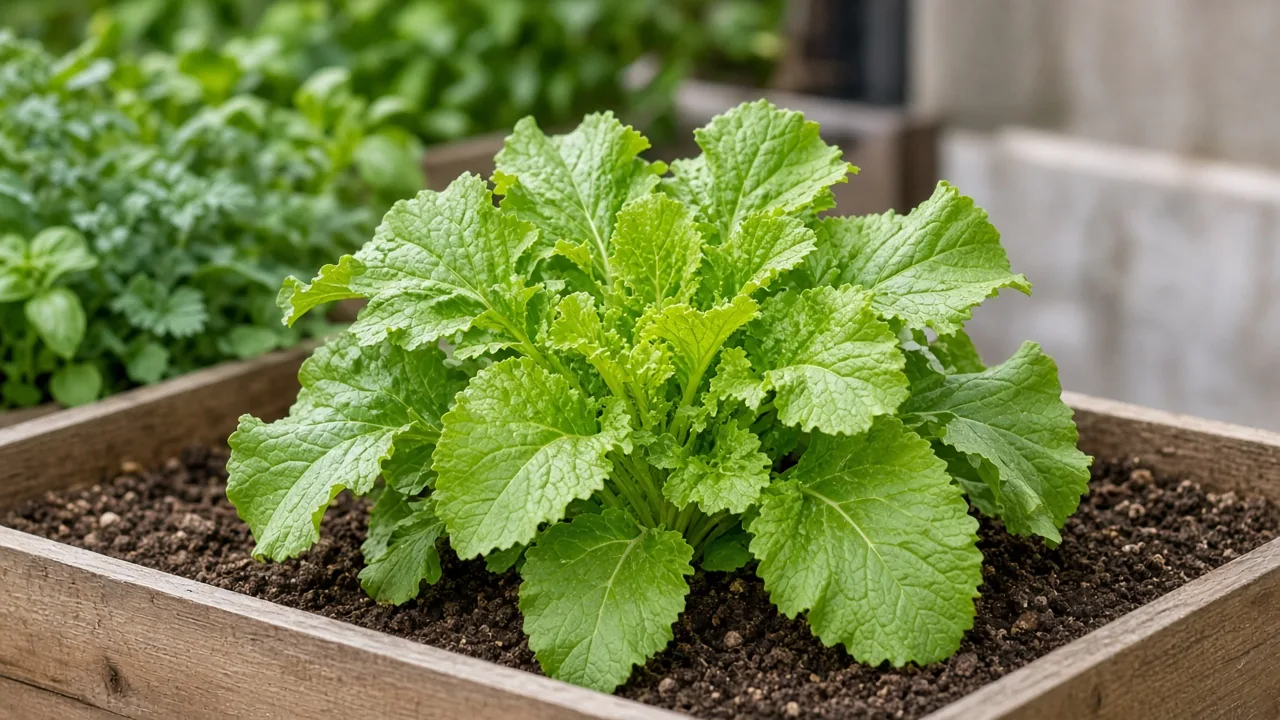
Garden mustard forms an upright basal rosette of peppery leaves on noticeable petioles. New foliage unfolds from the crown—the compressed growing point at or just above soil level. There are no lignified canes to rejuvenate. “Pruning mustard greens” means timed leaf removal that balances kitchen demand with the plant’s short vegetative window before bolting (flowering).
NC State Extension describes Brassica juncea as a cool-season plant that bolts and develops strong flavor in summer heat, with moisture and temperature stress intensifying pungency. Harvest to Table outlines cut-and-come-again harvest by snipping outer leaves while the center regrows. That outer-in pattern is the core pruning judgment for rai saag beds, balcony pots, and dense baby-leaf trays.
Leaves vs whole-rosette harvest
Two legitimate harvest styles serve different goals:
| Goal | Method | Cut placement | Regrowth expectation |
|---|---|---|---|
| Steady kitchen supply | Outer-leaf picking | Individual outer petioles near the crown | Repeated picks over weeks in cool weather |
| One large saag batch | Whole-rosette cut | Scissors just above the crown | Often one partial regrowth flush, then bolt |
| Salad mixes | Baby-leaf shear | 1–2 inches above soil in dense rows | May re-sprout once if roots stay healthy |
Harvest to Table notes baby leaves at 20–25 days (3–4 inches), mature outer leaves at 30–40 days (6–8 inches), and whole-plant harvest at 40–50 days when you want a single large take.
Leaf mustard vs oilseed types
Do not apply this page to oilseed mustard grown mainly for seed (also B. juncea, often called rai or raya in India). Leaf cultivars such as Florida Broadleaf, Red Giant, Green Wave, and Southern Giant Curled are bred for repeated foliage picks. Oil types are a different harvest goal. The overview separates kitchen leaf mustard from seed crops.
When to prune or harvest mustard greens
First harvest size
Wait until seedlings have true leaves beyond the cotyledons. Harvest to Table suggests baby harvest when leaves are 3–4 inches long and mature outer picks when blades reach 6–8 inches. In practice: if only seed leaves are present, delay. If outer leaves are long enough to cook but the center still shows small, pale new leaves, you are in the right window.
Season and bolting pressure
Mustard greens are a cool-season brassica. NC State Extension notes they do best in fall and spring, bolting in summer, with some afternoon shade appreciated as weather warms—especially for baby greens.
In most Indian plains, sow from October into November and harvest through winter while temperatures sit roughly 10–24°C. Cooler hill districts can stretch the season. Hot lowland spells make leaves coarse and push plants toward yellow flowers and bitter flavor within days. Lean on light placement and steady watering rather than aggressive cutting to force growth in heat.
What you can remove anytime
Fully yellow, collapsed, or clearly diseased outer leaves can be removed whenever you see them. That is sanitation, not a heavy prune. Also remove leaves coated in aphids or caterpillar damage if washing is impractical—then inspect the bed before pests move to the crown.
Defer large harvests when seedlings were just transplanted, the pot is waterlogged, or midday heat is wilting healthy leaves. A stressed crown needs stable care more than another strip of foliage.
What to check before you cut
Run a thirty-second inspection:
- Crown health — firm, not sunken or rotting; wet crowns after heavy rain may need fewer cuts, not more.
- Soil moisture — dry, cracking mix slows regrowth and sharpens flavor; water before harvest if plants are limp from thirst, not disease (watering guide).
- Bolting cues — narrowing leaves, faster stem elongation, or a domed bud at the center means leaf harvest is ending.
- Pest or mildew — remove and bag affected leaves; brassicas share pests with cabbage and broccoli, so rotate garden beds when possible.
- Spacing — overlapping rosettes stay wet longer; thin crowded seedlings or harvest alternates to improve airflow.
If growth is pale and stretched toward a window, improve direct winter sun before blaming harvest technique alone.
Tools and sanitation
Use sharp kitchen scissors, bypass snips, or a harvest knife for thick petioles. Dull blades crush tissue and slow drying on curly southern types.
Wipe blades with 70% isopropyl alcohol before you start and when moving between brassica beds. Clean tools reduce the chance of spreading soil-borne diseases on contaminated particles.
Wash hands after handling pest-damaged leaves. Bag and discard heavily infected foliage instead of composting it in small home piles in humid climates.
The first cut to make
After cleanup of yellow or damaged lower leaves, select one mature outer leaf whose petiole is long enough to lift clear of the crown. Cut the petiole close to the crown without slicing into neighboring young leaves or the growing point. Wait three to five days and watch the center: if new leaves unfurl, your timing and cut height were appropriate.
This single outer cut is deliberately conservative. It confirms regrowth before you take a larger kitchen harvest.
How to harvest mustard greens step by step
Outer-leaf cut-and-come-again
- Hold the outer leaf blade up and trace the petiole to the crown.
- Snip with clean scissors or bypass snips.
- Move around the rosette, taking outer leaves only.
- Rinse leaves after picking; grit collects in crinkled cultivars.
Harvest to Table describes this as cut-and-come-again—the standard way to stretch harvest on a fast cool-season crop.
Whole-rosette cut at the crown
When you need a full saag batch—or when bolting starts—cut just above the crown with a single horizontal slice. Harvest to Table lists whole-plant harvest at about 40–50 days when you want one large take.
Whole-rosette harvest can stimulate one more partial flush from the crown if weather stays cool and roots stay moist, but do not depend on multiple heavy shears through summer heat.
Baby-leaf shearing in dense rows
For salad mixes, sow thickly and shear young leaves 1–2 inches above the soil when they reach 3–4 inches tall. This is production harvesting, not maintaining long-lived rosettes. Regrowth depends on variety, fertility, and remaining crown tissue—plan a succession sowing (propagation guide) two to three weeks later rather than expecting endless baby cuts from one line in hot weather.
How much you can safely remove
Harvest outer leaves only until they reach the size you want for the dish. If a recipe needs more, take a few outer leaves from several plants or stagger rows sown a week apart.
Scalping the rosette to bare soil shocks shallow roots, invites crown rot in wet weather, and pairs badly with heat—common triggers for early bolting alongside drought. NC State Extension emphasizes consistent moisture; over-harvesting dry plants accelerates decline and harsh flavor.
Where to cut (and what to leave)
- Cut: Outer leaves with full-sized blades; yellow or damaged petioles at their base; bolted flower stems once you abandon leaf harvest.
- Leave: The central cluster of small, emerging leaves and the crown itself.
- Avoid: Tearing leaves halfway down the petiole (decay entry) or cutting so low you notch the crown.
Mustard greens do not branch from random mid-petiole wounds the way some woody herbs might from nodes. The crown is the only regrowth engine.
Pruning yellow, damaged, or diseased leaves
Remove fully yellow or brown lower leaves anytime—they no longer photosynthesize and can harbor slugs or mildew spores in humid beds. Snip at the petiole base; do not yank, which can disturb shallow roots.
For downy mildew or heavy caterpillar damage, remove affected foliage, improve airflow, and avoid working wet plants. Pruning cannot cure systemic infection; severely spotted rows are often better cleared and re-sown in a new cool window.
Pair repeated yellowing with watering checks—saturated soil and drought both show up on lower leaves before the crown fails.
Bolting: when pruning stops helping
Bolting is the shift from leaf production to flowering. Stems elongate, leaf blades shrink, and flavor turns harsh. NC State Extension links summer bolting and strong flavor to heat; moisture and temperature stress make leaves spicier and less pleasant.
Once a central flower stalk is rising, do not expect hard cutting to restore tender sarson. Options:
- Final harvest — whole-rosette cut for a last cooking batch.
- Seed saving — let selected plants flower if you want seed for next cool season (see propagation).
- Replace — pull bolted plants and sow the next batch in cooler weather.
Pinching the first tiny bud might delay flowering a few days in marginal conditions, but it is not a substitute for succession sowing or heat-aware cultivar choice.
Thinning as preventive pruning
Dense direct sowings often need thinning so each plant can form broad leaves. NC State Extension recommends sowing additional seed every two to three weeks to extend harvest—pair that calendar with spacing that matches your cultivar (often 6–12 inches apart for full-size plants, tighter for baby-leaf rows).
Pull or snip surplus seedlings at soil level when they crowd neighbors. Eat thinnings as microgreens rather than composting tender leaves. Thinning is airflow and size control, not the same as repeated outer-leaf harvest on a mature rosette.
Aftercare and recovery
After any harvest pass:
- Water if soil was dry; morning irrigation at the base keeps foliage drier overnight than evening splashing.
- Mulch lightly in beds to buffer soil temperature swings that hasten bolting.
- Pause extra nitrogen immediately after a heavy cut unless plants are actively growing in fertile soil—follow your normal schedule from the fertilizer guide instead of feeding as a prune reaction.
- Sanitize tools if you removed diseased tissue before moving to healthy rosettes.
NC State Extension notes harvested leaves store 3–5 days in the refrigerator—plan picks close to cooking time for best texture.
Recovery is measured in days, not months. In active cool growth, outer gaps often refill within a week; in heat, regrowth may stall even when cuts were correct.
Signs your harvest rhythm is working
Positive signals:
- New leaves keep emerging from the center between picks.
- Outer leaves reach harvest size again within about a week in cool weather.
- Petioles stay crisp and green without widespread yellowing.
Warning signals:
- Center growth stalls more than a week after a heavy take.
- Buds appear soon after large harvests during warm spells.
- Leaves turn sharply bitter despite gentle picks—often heat or drought, not scissors alone.
Brown margins usually trace to drought or salt stress; fixing watering and soil fertility beats tighter harvest schedules.
Mistakes to avoid
- Shearing the center first — removes the only growing point; regrowth stops or bolts follow.
- Confusing mustard with shrub pruning — no hard rejuvenation cuts; replace bolted plants.
- Harvesting wet, diseased rows — spreads mildew; pick when foliage is dry.
- Stripping too many outer leaves in one pass without recovery days — weakens shallow roots.
- Expecting one October sowing to leaf all summer in hot plains — plan cool-season successions instead.
- Ignoring bolting — bitter leaves do not improve with more cutting.
Succession sowing instead of endless pruning
Mustard greens are productive but short-lived. NC State Extension recommends planting additional seed every two to three weeks to extend harvest. Harvest to Table echoes succession planting every 2–3 weeks for a steady supply.
Pruning extends each rosette’s kitchen life; succession sowing extends the season. Combine both: light outer harvests on plants in their prime, plus new sowings entering the baby-leaf stage as older rows bolt.
Conclusion
Mustard greens pruning is outer-leaf harvest with crown protection—cleanup first, then conservative outer cuts that leave the center intact, and a clear pivot when bolting begins. Match harvest intensity to cool weather and steady moisture; when heat and day length rise, scissors cannot replace a fresh sowing. That rhythm—not heavy cutting—is what keeps sarson tender from first pick to last cool-week flush.
Related Mustard Greens guides
- Mustard Greens overview — cool-season timing, cultivar heat, and when the season ends
- Mustard Greens light — winter sun and afternoon shade in warm spells
- Mustard Greens watering — shallow roots and even moisture after harvests
- Mustard Greens soil — fertile, draining mix that supports regrowth
- Mustard Greens fertilizer — feeding during leaf expansion, not as a prune reaction
- Mustard Greens propagation — succession sowing when bolting ends the crop
- Mustard Greens repotting — transplant timing for seedlings, not mid-season crown cuts