Alocasia Melo Care: Light, Water, Soil, and Humidity
Alocasia melo care starts with filtered light, warmth, and a draining mix. Learn when to water, manage dormancy, and propagate this textured-leaf plant safely.
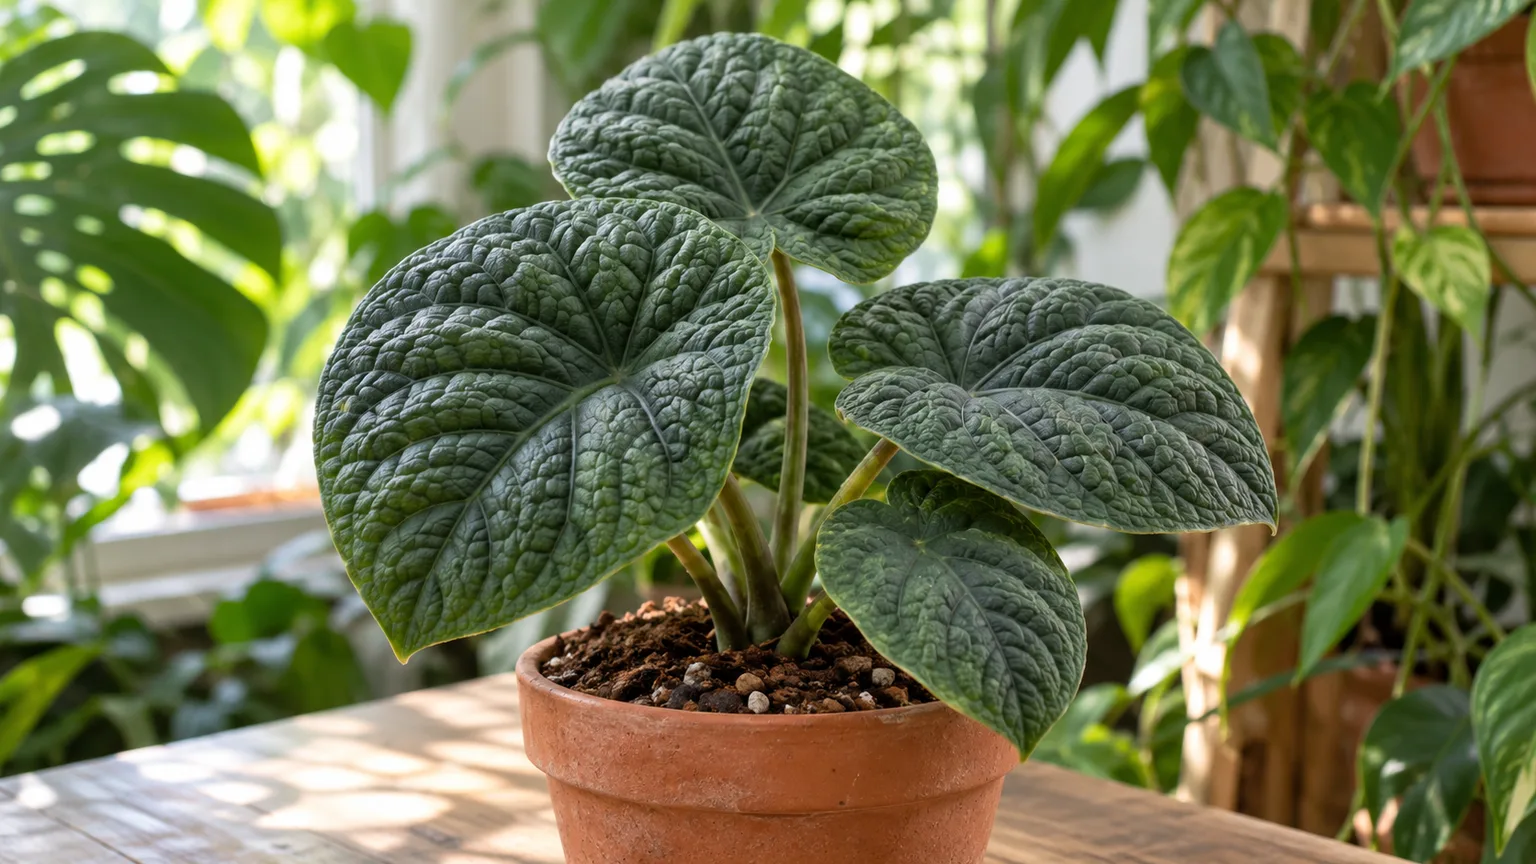
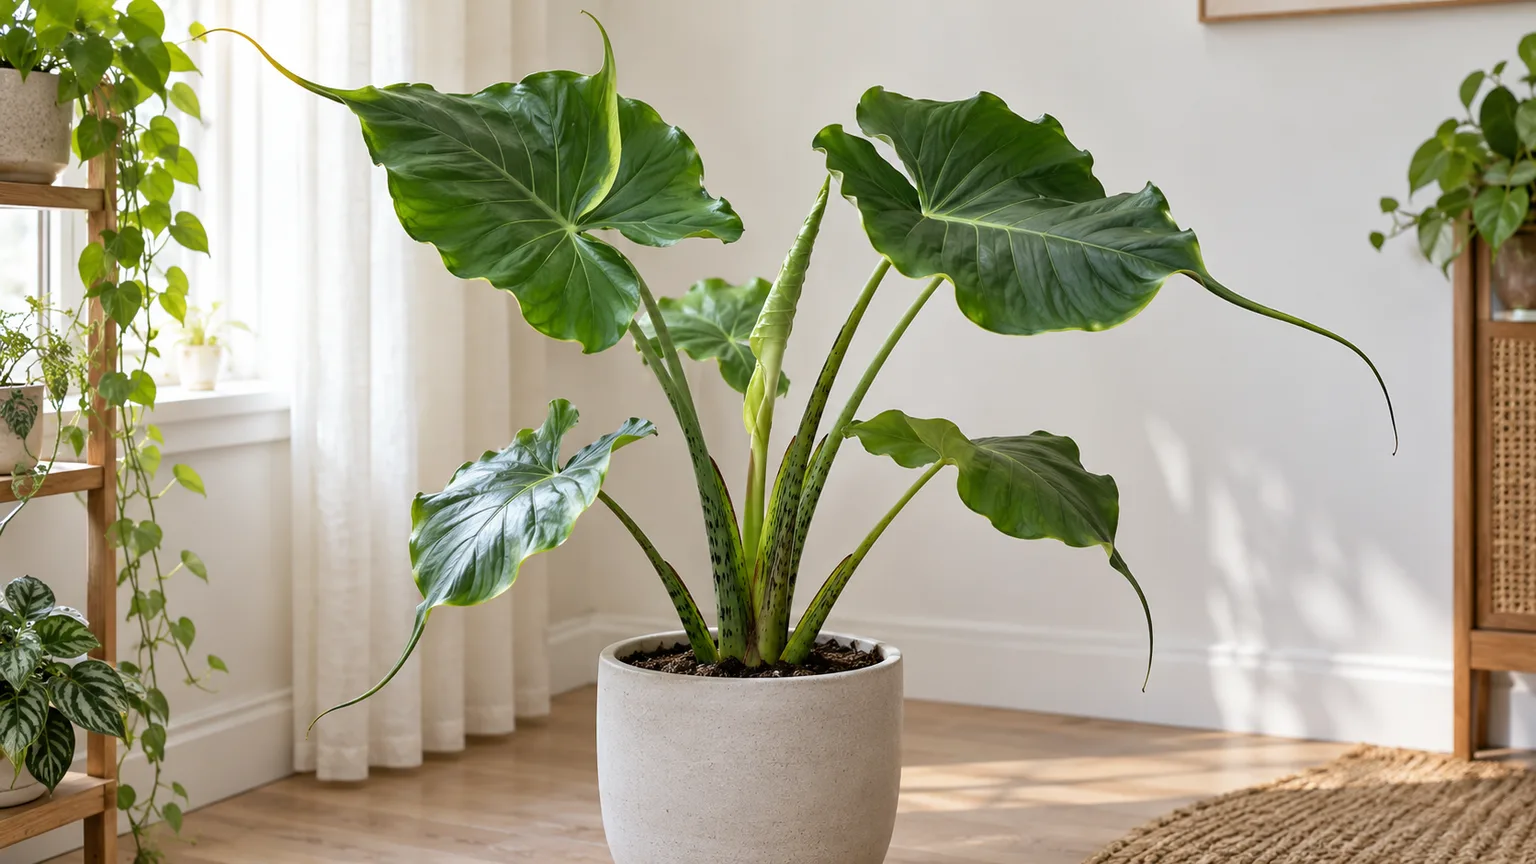
Alocasia melo is grown for its unusually thick, deeply textured leaves: they look pebbled or embossed rather than glossy, and the compact plant makes a strong display without needing a floor-sized pot. Its reputation as a fussy houseplant comes mostly from a mismatch between tropical foliage and indoor conditions—dim light, cold drafts, or soil that stays wet long after watering.
Treat care as a balance between steady warmth and moisture around the plant and plenty of air around its roots. The timing will change with your room, pot, and mix, so a moisture test is more dependable than a weekly reminder.
At a glance: a compact Bornean jewel aroid
Kew’s Plants of the World Online accepts Alocasia melo as a species and lists its native range as Sabah in Borneo, where it grows in a wet tropical biome. Retail labels sometimes mix it with “Alocasia rugosa” or use “Melo” as though it were a cultivar of another jewel Alocasia; compare the characteristic rounded, heavily bullate leaves and check the botanical label rather than assuming those names are interchangeable. Kew’s taxonomic record is the clearest reference for the species name.
For an indoor plant, start with bright filtered light, warm stable temperatures, an airy mix, and a pot with open drainage. A snug pot is useful because it dries more evenly than an oversized container, but “rootbound” is not a goal: if roots circle densely, the mix has collapsed, or water races straight through, plan a modest repot. For a longer species overview, see the Alocasia melo plant profile.
| Need | Practical starting point | What to watch |
|---|---|---|
| Light | Bright, indirect light | Pale scorch patches mean the sun is too strong; stretched growth suggests too little light |
| Temperature | Warm room, ideally around 65–80°F (18–27°C) | Cold glass, vents, and abrupt temperature drops |
| Humidity | Moderate to high; measure before changing the room | Crisp edges can also come from dry roots or salts |
| Water | Thoroughly when the upper mix has begun to dry | Soggy lower mix, not a particular weekday, is the risk |
| Soil | Moisture-retentive but airy and fast-draining | Mix that remains heavy and wet for days |
These are working ranges, not laboratory thresholds for every A. melo. NC State Extension and the RHS Alocasia guide give genus-level advice rather than melo-specific trials, so use their broad guidance—warmth, humidity, indirect light, and moisture with drainage—as a starting point and adjust from the plant’s response.
Set light, warmth, and humidity before you water
The easiest way to create a confusing care problem is to change watering while the plant is still sitting in poor light or cold air. Choose the location first, then observe how quickly the mix dries over a few weeks; this makes later watering decisions much easier.
Give bright, filtered light
Place Melo near a bright window where the leaves receive plenty of ambient light but are shielded from hot midday or afternoon sun. An east-facing window may provide gentle morning sun; at a south- or west-facing window, a sheer curtain or a position slightly back from the glass can soften the exposure. The RHS recommends bright but indirect light for Alocasias, and Epic Gardening’s general potted-Alocasia advice similarly warns that intense direct sun can scorch leaves.
Do not interpret “indirect” as “far from a window.” If the plant makes progressively smaller leaves, leans strongly toward the light, or sits in damp mix for unusually long periods, inadequate light may be slowing water use. Move it gradually closer to the window or add a grow light on a timer; avoid a sudden move from dim shade into direct sun, which can damage leaves before they acclimate.
Keep warmth steady and humidity measurable
Aim for a comfortably warm room and avoid cold window glass, exterior-door drafts, and air-conditioning vents. The RHS advises keeping Alocasias above about 60°F (16°C); a room in the upper 60s to low 80s Fahrenheit is a practical indoor range, while prolonged chill can stall growth and trigger leaf loss. A brief cool night is different from a pot sitting against a cold pane for weeks.
Use a small hygrometer near the foliage if dry edges keep appearing. A humidifier can raise room humidity more consistently than misting, but it should not make the leaves and surrounding surfaces stay wet; leave room for air movement and clean the unit as directed. Epic Gardening suggests roughly 60–80% humidity for potted Alocasias, but you do not need to chase the upper end if the plant is growing well and leaves remain intact.

Crispy margins can reflect dry air, but check root-zone moisture before changing the watering routine.
Choose an airy mix and a close-fitting pot
Alocasia roots need both moisture and oxygen. A dense, fine potting soil may feel reassuringly damp but can leave the lower root zone saturated; pure coarse bark dries too quickly for a small, actively growing plant. Aim for a mix that holds a little water while excess drains and air returns through the root zone.
A useful home blend is a quality indoor potting mix or coco coir combined with orchid bark and perlite or pumice. Start around two parts potting mix to one part bark and one part perlite, then adjust if it stays wet too long or dries before the plant can use the water. There is no need to chase an exact ratio or pH unless a water or soil problem has been diagnosed; drainage, pot size, and room conditions usually matter more.
Use a pot with several unobstructed drainage holes and a saucer that can be emptied. Choose a container only one size larger than the root ball, not one sized for the plant’s eventual height. The RHS also cautions against overpotting Alocasias; the practical reason is that a large volume of unused mix stays wet around a comparatively small root system.
Water by moisture, not the calendar
Water when the top inch or two of mix is dry and the deeper root zone is no longer saturated, then water thoroughly until excess runs from the drainage holes. Empty the saucer after the pot has drained. In a warm, bright room with a small pot, that moment may come quickly; in winter, low light or a cool room can leave the same mix moist much longer.
Use a wooden skewer if the surface is misleading: push it partway down, wait briefly, and check whether damp mix clings to it. A finger test works in a small pot, while lifting the container before and after watering teaches you its dry and wet weights. These checks are more useful than advice to water every Sunday because pot size, substrate, humidity, and season all change the drying rate.
Avoid both extremes. Do not keep the mix constantly wet to imitate a rainforest, and do not let a growing plant become bone-dry for long enough to wilt repeatedly; NC State Extension describes Alocasia soil as moist and well-drained, not waterlogged. If your tap water leaves a crust on the pot or the leaf tips brown despite sound moisture, flush the mix occasionally with clean water and let it drain fully; do not add more fertilizer to a plant with possible salt buildup.
Feed lightly during active growth
Feed only while the plant is making leaves and using water at a steady rate. A balanced liquid houseplant fertilizer diluted to half the label strength every four weeks is a cautious starting schedule in spring and summer; if you prefer the label rate, follow its directions rather than combining products. Gardening Know How’s Alocasia fertilizing guidance also frames feeding around the growing season, while the RHS recommends reducing care as growth slows in winter.
Do not fertilize dry roots, a recently repotted plant, a plant with active root rot, or a dormant corm with no leaves. Nutrients cannot compensate for weak light or damaged roots, and fertilizer left unused in a slow, cool pot can contribute to salt accumulation. If white crust forms on the mix or pot, pause feeding and flush the substrate with room-temperature water that can drain freely.
Repot only when the pot is limiting the plant
A small plant does not need a larger pot simply because a year has passed. Repot when roots densely circle the root ball, emerge from the drainage holes, the mix has broken down and remains wet, or the plant dries out so fast that careful watering no longer keeps it hydrated. Spring or early summer is usually the least disruptive time because active growth can replace damaged roots.
Slide the plant out gently and inspect rather than tearing the root ball apart. Trim only roots that are clearly soft, hollow, or foul-smelling with a clean blade, then pot at the same depth in fresh airy mix; a healthy corm should not be buried much deeper than before. Water once to settle the mix, drain it, and give the plant a stable warm spot while it re-establishes.
If the plant is small and healthy but has a root at one drainage hole, you can wait. A single visible root does not mean the plant is in danger, and unnecessary repotting adds stress while making the soil volume larger than the roots can manage.
Propagate through division or corms
Alocasia melo does not make a new plant from a detached leaf or leaf stalk because those cuttings lack the growing point needed to form a complete plant. The practical options are separating a rooted offset during repotting or sprouting a corm, a small storage organ found around the root mass. NC State Extension lists division as an Alocasia propagation method; Epic Gardening also describes corms as a common way Alocasias produce new growth.
For division, wait until the mother plant is actively growing, remove it from its pot, and look for a distinct shoot with its own roots. Separate at a natural connection with a sterilized knife, keep the new division at its original depth, and give it warmth, indirect light, and evenly moist—not soggy—mix. If no rooted offset is visible, do not cut through the main corm just to force a division.
For corms, collect only firm, healthy corms and leave some attached to the mother plant. Set one in lightly moist sphagnum or another airy propagation medium in a clear covered container, keep it warm and bright but out of direct sun, and open the container periodically so stale air does not accumulate. Keep the medium barely moist; standing water and an airtight, cold container invite rot, while a firm corm with no sprout may simply need more warmth and time.
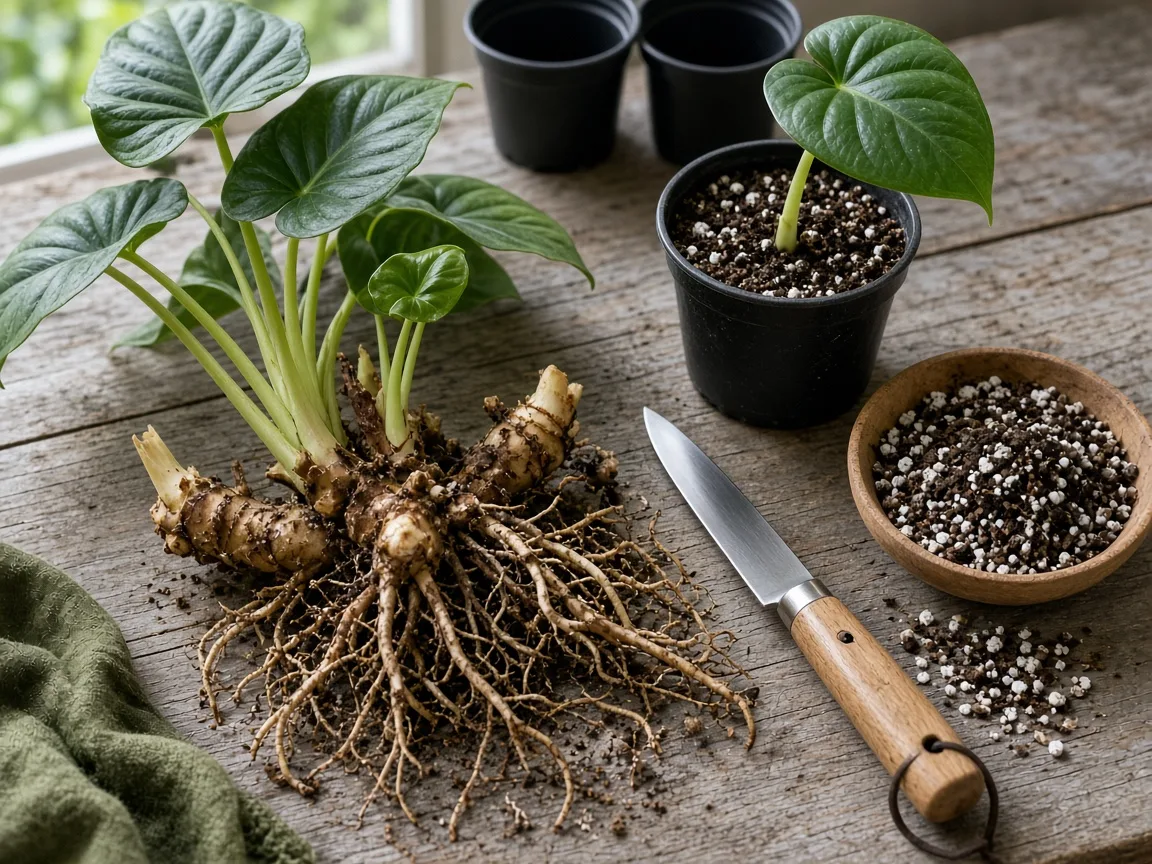
A rooted offset and a corm are separate propagation options; pot each in a small container with drainage.
Once roots and a leaf have developed, pot the young plant into a small draining container rather than jumping straight to a large decorative pot. Open the humidity cover gradually over several days. For more detailed steps and timing, use the Alocasia melo propagation guide.
Read winter leaf loss carefully
Some Alocasias slow down or go dormant when days shorten and temperatures fall. A Melo that loses one older leaf while a new leaf is emerging may simply be reallocating resources; a plant that loses several leaves after a cold spell may be reacting to low temperature or seasonal slowdown. The RHS notes that cooler, drier winter conditions can accompany dormancy in Alocasias, and NC State Extension lists several possible causes of yellowing rather than treating it as one diagnosis.
Before you reduce watering sharply, check the plant and corm. If the mix is wet, stems are soft, or there is a sour smell, suspect root or corm rot instead of dormancy; unpot only when those signs or persistent decline justify inspection. A dormant plant should have firm underground tissue, not a collapsing, mushy base.
When growth clearly stops and the pot dries slowly, stop fertilizer and water less often, but do not let a bare corm shrivel completely. Keep it warm, do not leave it in a cold garage, and wait for renewed growth before returning to regular feeding. Do not respond to every lost leaf with extra water or a series of emergency repots; first identify whether the mix is dry, wet, or cold.
Diagnose problems from pattern and timing
One symptom rarely identifies one cause. Look at how many leaves are affected, whether the newest leaf is healthy, how wet the pot is, and what changed during the previous two weeks; then change one condition and watch the next growth rather than changing light, water, and fertilizer together.
Yellowing or falling leaves
A single oldest leaf turning yellow while newer leaves remain firm is often ordinary leaf turnover, especially if the plant is producing a replacement. Several leaves yellowing at once calls for a root-zone check first: soil that stays wet, a pot with blocked drainage, or a suddenly oversized container can deprive roots of oxygen. If the mix is dry and the pot very light, underwatering may be more likely.

One aging lower leaf has a different pattern from several leaves yellowing together.
Check light, temperature, and pests next. A move into a darker room, cold draft, or sudden change after shipping can cause stress; inspect leaf undersides and petioles for webbing, tiny moving mites, or clustered insects before using any treatment. NC State Extension lists overwatering, underwatering, and inadequate light among possible causes of Alocasia yellowing, which is why the plant’s pattern matters more than the color alone.
Curling and crispy margins
Curling leaves can follow low humidity, dry roots, heat, or abrupt environmental change; it is not a reliable signal to water automatically. Check the mix at root depth and review the room’s humidity with a meter. If the pot is still moist, adding water may make matters worse even though the leaf looks thirsty.
Brown, crisp edges may reflect dry air or repeated drying, but mineral salts and fertilizer buildup can produce similar damage. Correct the underlying condition, remove only fully dead tissue with clean scissors, and wait for the next leaf to judge the change. Existing scars will not turn green again, so evaluate new growth rather than expecting old leaves to repair.
Soft stems, wet mix, spots, and pests
Soft petioles, a collapsing crown, or a bad smell paired with wet mix are stronger warning signs of rot than a single yellow leaf. Check that water can escape, stop watering until the mix begins to dry, and inspect the corm or roots if decline continues; firm cream or pale roots are different from mushy, dark tissue. A damaged corm may not recover, so avoid repeatedly soaking it in a hope that it will perk up.

Yellowing alone does not confirm rot; inspect roots when it appears with wet mix, soft stems, or a sour smell.
Small pale stippling, fine webbing, sticky residue, or cottony clusters can point to spider mites, aphids, scale, or mealybugs. Isolate the plant, inspect nearby leaves and plants, and wipe or rinse pests away where practical; use only a product labeled for the plant and pest, following its directions and local rules. Keep leaves dry after cleaning and avoid spraying a stressed plant in strong light.
Wet foliage and poor airflow can also encourage spotting. The thick, ridged surface is easy to mark, so clean dust with a soft barely damp cloth and let leaves dry; do not repeatedly mist them as a substitute for room humidity.
Is the bathroom a good home for Melo?
A bathroom can work if it also provides adequate light and airflow. A bright bathroom with a window and an extractor fan that is not blowing cold air directly onto the plant may offer useful humidity; a windowless bathroom with dim artificial light can leave Melo short of energy even if the air feels steamy. Humidity does not replace light.
Measure the room outside shower time rather than judging by a brief burst of steam. If humidity rises for ten minutes and then drops, a nearby humidifier or a different bright room may provide a steadier environment. Keep the pot away from splashing water, cold exterior glass, and stagnant corners where foliage remains wet.
Grow it outside only in protected, frost-free weather
In a warm climate, Alocasia melo can spend time outdoors in bright shade or filtered light, protected from strong wind and midday sun. Kew lists its origin as the wet tropical biome of Sabah, not a temperate garden bed, so treat it as a tender container plant anywhere winter temperatures approach the mid-50s Fahrenheit (about 13°C). Bring it indoors before cold nights, and check the leaves for pests before placing it near other houseplants.
Acclimate it over a week or two by starting in bright shade and gradually increasing outdoor exposure. A plant moved straight from a dim room to full sun can scorch even in a humid climate. Outdoors, rain and larger swings in weather also change drying speed, so use the pot’s moisture as your guide and protect it from prolonged downpours.
Handle and place the plant safely
Alocasia tissue contains insoluble calcium oxalate crystals. The ASPCA lists Alocasia as toxic to dogs, cats, and horses, and Poison Control explains that chewing Alocasia can irritate the mouth and throat. Keep the pot and fallen leaves out of reach of pets and children, and wash your hands after pruning or repotting; gloves are sensible if sap irritates your skin.
If a person chews the plant, contact a poison center for case-specific guidance; in the United States, Poison Control can be reached at 1-800-222-1222. If a pet chews it, contact a veterinarian or animal poison service promptly and share the plant’s name. Do not assume that a small nibble is harmless or try a home treatment based on a general article.
Conclusion
Alocasia melo grows best when the leaves get bright filtered light, the room stays warm, and the root zone receives moisture without remaining waterlogged. Build that environment first, water when the mix has begun to dry, and feed only when active growth shows the plant is using those resources.
When leaves change, read the pattern before intervening: an aging leaf, winter slowdown, dry air, and rot call for different responses. With a modest pot, airy mix, measured humidity, and patience through seasonal pauses, this compact Bornean species can be far more predictable than its reputation suggests.