Best Mulch for Vegetable Gardens: 6 Smart Choices
Find the best mulch for a vegetable garden by crop, season, soil, and budget. Compare straw, leaves, compost, clippings, fabric, and plastic.
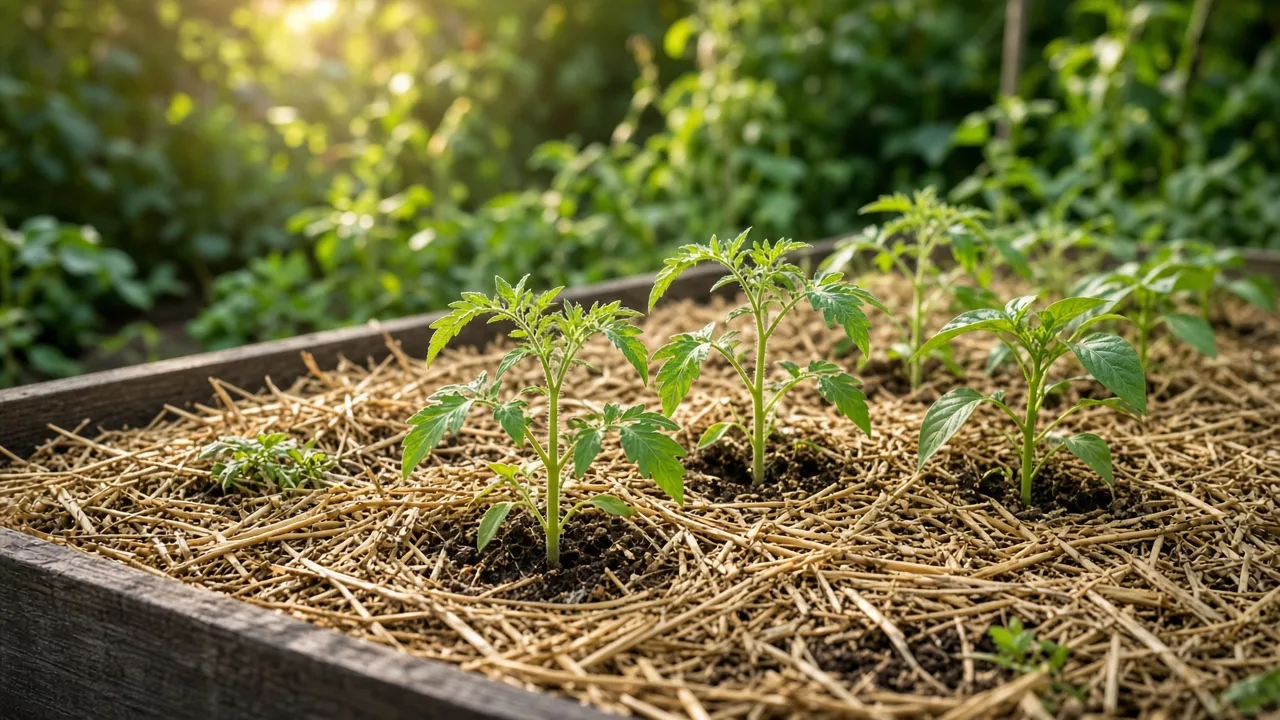
The best mulch for a vegetable garden is usually straw, shredded leaves, or finished compost, but the right answer changes with the crop and the job. A tomato bed that needs a splash barrier, a spring bed that needs warmer soil, and a permanent herb border should not all receive the same material.
Mulch is a cover for the soil, not a cure for poor drainage, compacted ground, or an irrigation system that cannot reach the root zone. Use it to slow evaporation, shade weed seeds, reduce soil splash, soften temperature swings, and gradually add organic matter where appropriate. Choose the material only after deciding which of those benefits matters most.
How to choose mulch without guessing
Start with three questions: What is growing, what is the season asking for, and how much maintenance can you tolerate? Annual vegetables generally benefit from a loose, relatively clean mulch that can be moved for planting and replenished as it settles. Permanent berry beds, herb borders, and paths can handle longer-lasting materials that would be awkward in a densely planted row.
The Royal Horticultural Society describes mulch as an insulating, breathable soil covering that limits weeds, conserves moisture, and protects roots from temperature extremes. Its vegetable guidance uses about 2 inches of organic material as a useful baseline, while also warning that the mulch must not touch the plants. That is a starting point, not a reason to bury every bed to the same depth.
Match the material to the crop and season
Fruiting crops such as tomatoes, peppers, cucumbers, squash, and melons often benefit from a dry, loose layer between the foliage or fruit and bare soil. Straw and shredded leaves reduce splash when rain or overhead watering hits the ground, and they keep low-growing fruit cleaner. They are especially useful once transplants are established, but direct-sown crops need space to emerge before you close the row with a thick layer.
Cool-season crops may prefer an organic mulch that insulates without heating the root zone sharply. In contrast, black plastic can be useful for warm-season crops when early soil warming and aggressive weed suppression are worth the extra work. The RHS specifically notes black plastic as an option for marrows and for growing potatoes without traditional earthing up, but that does not make it a good default for every crop or climate.
Think about the end date as well as the start date. A thin layer of straw or leaves can be raked aside for spring sowing, while fabric with many planting holes or plastic film can turn crop rotation and cleanup into a chore. If you do not have a plan for irrigation under a barrier or for removing the material at season’s end, choose an organic mulch instead.
Fix soil moisture and irrigation before covering the bed
Mulch slows water loss; it does not create water. If the soil is dry, water the bed deeply before spreading the material. If the soil is saturated, wait until it drains enough to breathe. Applying a blanket over already waterlogged ground can prolong poor conditions, while spreading mulch over dry ground can leave roots in a dry pocket that is harder to rewet.
Plan the watering route before the mulch goes down. A soaker hose or drip line can sit on the soil beneath straw, leaves, or fabric, where it delivers water directly to the root zone. With plastic, this decision is essential because the film can block ordinary rainfall from reaching the soil; place the irrigation first, test it, and then secure the plastic.
The six best mulch options, ranked by job
There is no meaningful universal ranking, so this list is organized by the job each material does best. For most home vegetable beds, start with the first three options and move down the list only when you have a specific reason to choose a barrier or a more specialized material.
| Mulch | Best use | Main advantage | Main caution |
|---|---|---|---|
| Straw | Tomatoes, peppers, cucumbers, squash, paths | Loose, clean, and good at reducing splash | Hay contamination, weed seeds, settling, and cooler soil |
| Shredded leaves | Low-cost annual beds and fall soil cover | Free organic matter and moisture retention | Whole leaves mat; thick layers can block water and air |
| Finished compost | Top-dressing active beds | Adds organic matter and nutrients | Expensive in volume; repeated heavy applications can unbalance soil |
| Grass clippings | Thin mulch between established rows | Free and nitrogen-rich | Herbicide residues, seed heads, heat, and wet mats |
| Landscape fabric | Long-term plantings and selected paths | Reliable light exclusion with water permeability | Awkward in annual beds and does not build soil |
| Agricultural plastic | Early heat and high weed pressure | Strong barrier and soil-warming effect | Needs irrigation, removal, and careful hot-weather management |
1. Straw for annual fruiting crops and clean paths
Straw is the best all-around choice when you want a loose mulch around tomatoes, peppers, cucumbers, squash, or melons. It covers bare soil without forming a dense sheet, cushions raindrops, and keeps fruit from resting directly on mud. A 3- to 4-inch loose layer around established vegetables will settle with rain; keep it fluffy rather than packing it into a mat.
Buy straw, not hay. Straw is the dry stem left after grain harvest, while hay is forage that commonly contains seed heads and may carry weed seed. Ask how the material was grown and whether the field received persistent herbicides. University of Minnesota Extension notes that even straw sold as weed-free can sprout unwanted grain, so test a small amount before covering a whole bed if the supplier is unfamiliar.
Timing matters. Spread straw around transplants after they are planted and watered; for carrots, beans, lettuce, and other direct-sown crops, wait until seedlings are a few inches tall so the mulch does not smother emergence. Straw is also useful in paths, where a deeper layer can keep shoes clean, but do not confuse a path layer with the shallower layer needed around living stems.
Straw keeps soil cooler than black plastic. That is helpful in hot weather but can delay warm-season growth in a cool spring, so leave the soil open until it has warmed enough for the crop. Savvy Gardening’s practical straw guide also recommends leaving a couple of inches clear around stems and laying irrigation under the mulch when a hands-off watering routine is needed.
2. Shredded leaves for an inexpensive all-purpose layer
Shredded leaves are the best low-cost mulch for gardeners with a tree canopy or a neighbor willing to share clean fall leaves. They soften soil splash, slow evaporation, and break down into organic matter. Use a mower, leaf shredder, or another safe method to chop them before spreading; whole leaves tend to knit together into a wet blanket that sheds water instead of letting it pass through.
Apply about 2 to 3 inches around established plants, leaving a clear ring around each stem. On empty beds in late fall, a thicker temporary cover can reduce erosion, but move or incorporate the partially decomposed material before direct sowing in spring. If leaves blow into a pile, use a low fence or a few branches to hold them rather than compressing them into a solid sheet.
Source matters here, too. Avoid leaves from areas treated with unknown lawn chemicals, and do not use black walnut leaves as a routine mulch around edible crops. The trusted horticulture guide from Savvy Gardening flags juglone concerns with black walnut leaves and recommends shredding leaves before use; oak leaves are slower to break down but are usable when chopped.
Shredded leaves are particularly good when your goal is soil improvement rather than a polished, long-lasting surface. They will need topping up as they collapse, but that shortcoming is also the benefit: the bed receives small, repeated additions of organic matter instead of a permanent barrier.
3. Finished compost for soil-building top dressing
Finished compost is the best mulch when the bed needs a modest top-dressing of organic matter and you want the material to blend into the soil. Its fine texture settles around plants, improves the surface as it decomposes, and can be used across a mixed vegetable bed without the sharp edges of bark or large chips. Spread roughly 1 to 2 inches rather than creating a deep mound.
Compost is not automatically weed-free or nutritionally neutral. Use mature, stable compost with an earthy smell and no obvious undecomposed food scraps. If it came from a municipal or commercial source, learn what went into it and follow local guidance. A batch that contains viable weed seed, persistent herbicide residues, or a high soluble-salt load can create more work than it solves. Savvy Gardening’s mulch overview also treats finished compost as a fast-breaking-down choice for intensively planted vegetable beds rather than a permanent surface barrier.
More compost is not always better. University of Minnesota Extension warns that deep compost mulch can become expensive, dry into a hydrophobic surface, and push phosphorus or other nutrients too high when applied repeatedly. Use a soil test before turning a thin top-dressing into a deep annual habit, particularly in raised beds that already receive regular compost.
Compost is less dependable than straw for keeping sprawling fruit clean, and a thin layer may not block long-season weeds as well as a coarse, loose mulch. Use it when soil-building is the priority; pair it with straw or shredded leaves when surface weed suppression and splash control matter more.
4. Grass clippings when you can verify the source
Grass clippings can be a useful free mulch between established vegetable rows, but they are a conditional choice rather than a universal recommendation. Only use clippings from a lawn that has not been treated with herbicides or other products that could injure broadleaf crops. If you cannot verify the lawn’s history, compost the clippings in a controlled pile instead of placing them beside food crops.
Fresh clippings are wet, fine, and high in nitrogen. Spread them in a thin 1- to 2-inch layer and let each application dry or settle before adding more. Thick layers can heat up, mat together, smell, and repel water; they can also create a dense, damp collar around a stem. Savvy Gardening recommends thin applications and warns that treated lawns and over-application are the two risks gardeners most often underestimate.
Keep clippings away from seedlings and crowns, and do not use them if the lawn was recently allowed to produce mature seed heads. This material is best for an established row where you can inspect it frequently, not for a newly seeded bed that needs light and air at the surface.
5. Landscape fabric for long-term, low-disturbance plantings
Landscape fabric earns a place when the planting is long-lived, the weed pressure is high, and you can install the barrier before the plants are in the ground. It can work around perennial herbs, berry rows, or wide paths where the layout will not change every few weeks. Secure the edges and overlap seams so light cannot reach exposed soil.
Fabric is less convenient in an annual vegetable bed. Every hole becomes a fixed planting decision, weeds can root in the organic debris that collects on top, and the fabric does not add organic matter as it sits. It also encourages a gardener to treat the barrier as permanent when crop rotation, side-dressing, and moving irrigation lines would be healthier for the bed.
If you use fabric under vegetables, keep the root-zone layout simple and place irrigation beneath or alongside the planting line before covering it. A thin organic layer on top can improve appearance, but it will decompose and create a new seedbed for windblown weeds. Inspect the fabric each season and remove it if it is tearing, restricting planting, or making soil care harder.
6. Agricultural plastic for early heat and strong weed control
Agricultural plastic is the most specialized option on this list. Black plastic can suppress weeds and warm the soil, which may help a heat-loving crop get started in a cool spring. Plastic can also reduce evaporation and soil splash, but those benefits come with a very different maintenance routine from straw or leaves.
The University of Minnesota Extension describes plastic mulch as a system that changes light, heat, moisture, gas exchange, and water movement at the soil surface. In a cool climate that warming may be useful; in hot weather the same film can push the root zone beyond a crop’s preferred range. Do not leave black plastic stretched over a summer bed without checking soil temperature, plant stress, and ventilation at the planting holes.
Irrigation must be installed and tested first. Rain may bead and run off the film, so use a drip line or soaker hose below the plastic and check that every planting hole receives water. Anchor the edges tightly enough to block light but not so aggressively that wind tears the film into fragments.
Plastic is a poor choice if you cannot remove it cleanly or if the bed needs frequent replanting. At the end of the season, pull it before it becomes brittle, collect fragments, and follow local disposal or agricultural-plastic recycling guidance. Biodegradable films are not a magic escape hatch: the University of Minnesota notes that product performance and soil effects vary, and research on long-term breakdown remains incomplete.
Materials that need a narrower use case
Some materials are useful but are often promoted for the wrong part of the garden. Treating every available organic material as interchangeable is how a vegetable bed ends up with a nitrogen problem, a crop covered in weed seedlings, or a path layer that is impossible to plant through.
Wood chips belong mainly in paths and perennial edges
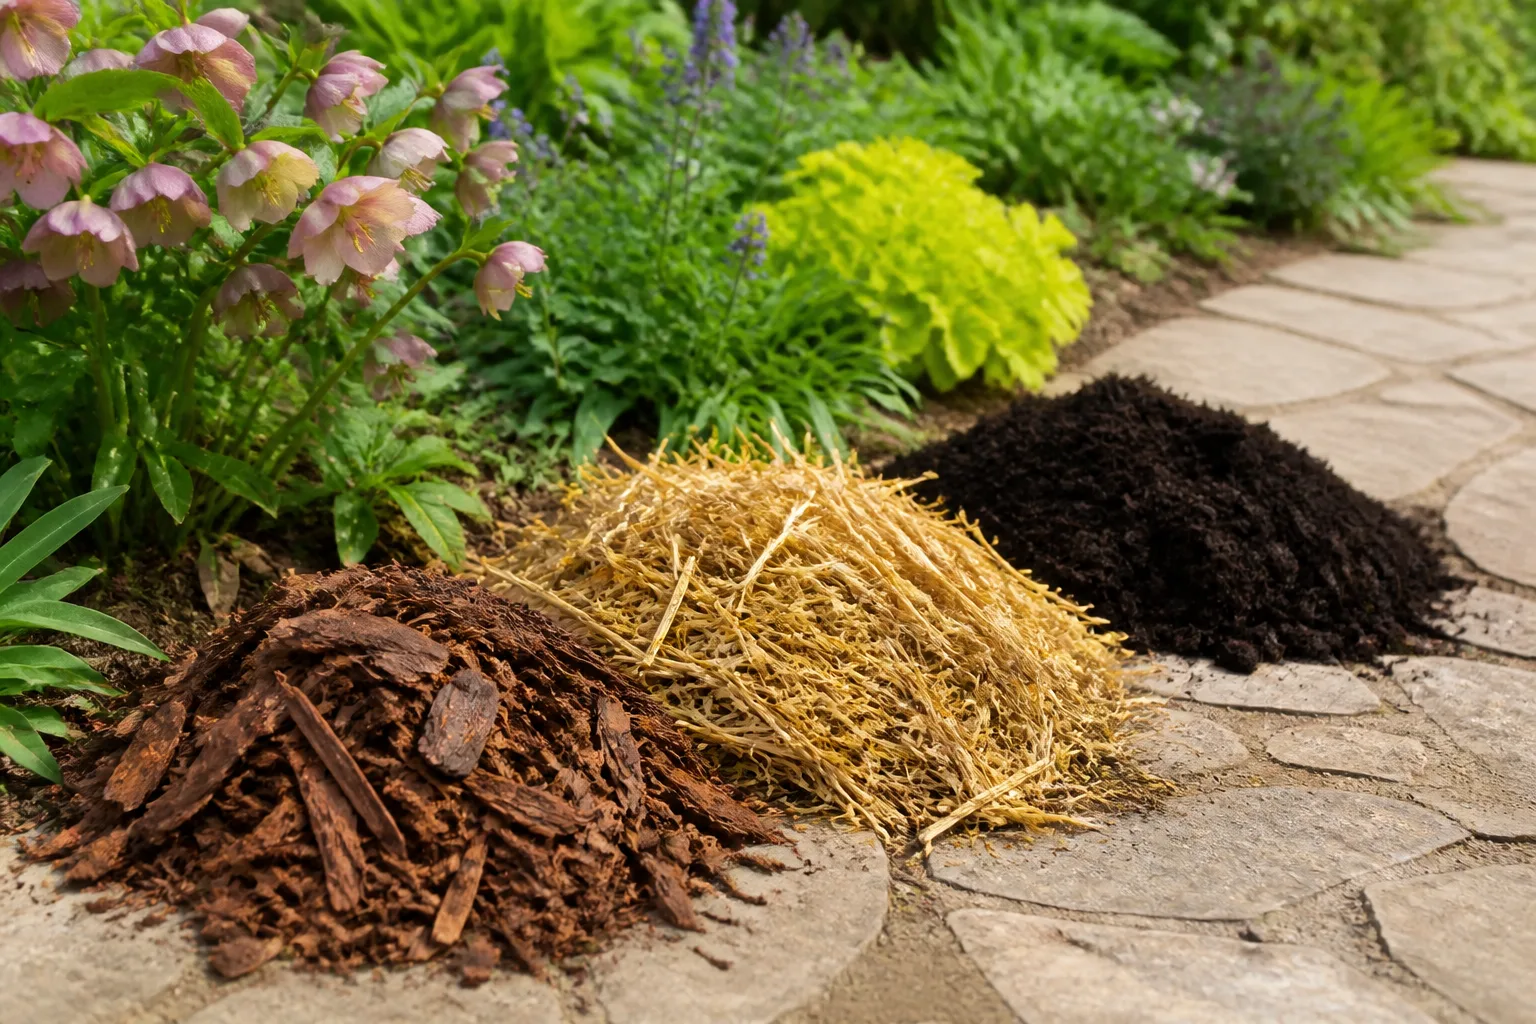
Wood chips are durable, attractive, and excellent for garden paths. They also work around established perennial herbs, berry bushes, or fruit trees where the root zone is not being replanted every few weeks. Their slow breakdown is a benefit in those locations because you are not constantly replacing the surface.
In an annual vegetable bed, keep fresh chips on the surface and away from the active root zone. The University of Minnesota Extension recommends wood chips mainly for walkways because their high carbon-to-nitrogen ratio can draw available nitrogen toward decomposition if the material is mixed into soil or placed too close to crops. Do not till a thick layer of fresh chips into a bed just before planting.
Cardboard is a base layer, not a complete mulch
Plain, uncoated cardboard can help suppress perennial weeds in a path or a new bed when it is laid flat, soaked, and covered with a compatible organic mulch. Remove tape, labels, plastic film, and glossy coatings first, and do not use it as a permanent blanket directly against vegetable stems.
Cardboard is most useful where you need a temporary light barrier under straw or wood chips. In a planted annual bed, a broad sheet can interfere with water movement and make side-dressing awkward. Cut generous planting openings, keep the material from forming a collar around stems, and use it as part of a system rather than calling the cardboard itself the finished mulch.
How to mulch a vegetable bed correctly
Good material applied badly is still bad mulch. The following sequence works for straw, shredded leaves, compost, and carefully managed clippings; fabric and plastic add the extra irrigation and removal decisions described above.
Prepare weeds, moisture, and irrigation first
- Clear existing weeds. Mulch blocks light from many new weed seeds, but it does not reliably kill a rooted perennial weed already in the bed. Pull, hoe, or dig out the weeds before covering the soil, taking care not to damage shallow vegetable roots.
- Water dry soil. Give the root zone a thorough watering if it is dry, then wait for the surface to stop being saturated. Mulch should conserve a good moisture level, not trap a bad one.
- Install irrigation. Lay out drip tape or a soaker hose before spreading a thick layer. Run it long enough to confirm that the full row receives water.
- Choose a clean material. Reject moldy, foul-smelling, visibly contaminated, or seed-heavy material. Ask about herbicides when using straw, hay-like products, grass clippings, or municipal compost.
- Leave the planting line open when needed. Direct-sown crops need light and air to emerge. Add the mulch after seedlings are established, or make a narrow, temporary gap over the seed row.
The RHS step-by-step mulching guidance follows the same practical logic: clear weeds, water when needed, install a mat or membrane before adding material, and keep the plant stem out of the mulch pile. Those simple steps prevent more failures than buying a premium product.
Set thickness and stem clearance by material
Use the table as a working range, then adjust for how quickly the material settles and how wet your climate is. The aim is a continuous cover that still lets rain or irrigation reach the soil.
| Material | Typical starting depth around established vegetables | Keep in mind |
|---|---|---|
| Finished compost | 1–2 inches | Fine material can seal if piled too deeply; test soil before repeated heavy use. |
| Shredded leaves | 2–3 inches | Top up after settling; do not use a dense layer of whole leaves. |
| Straw | 3–4 inches loose | It settles quickly; keep it airy and do not use hay as a substitute. |
| Grass clippings | 1–2 inches | Let layers dry; add small amounts rather than one thick mat. |
| Wood chips | 3–4 inches in paths or perennial areas | Keep out of the annual root zone and do not mix fresh chips into soil. |
Leave at least 2 inches of visible soil around small vegetable stems, and make the gap wider around a thick squash crown or a plant that is already damp at the base. Mulch that touches a stem holds moisture where the plant cannot shed it and makes inspection harder. Reopen the ring after wind, rain, or a top-up layer narrows it.
Check the bed after rain and through the season
Inspect mulch after the first substantial rain. Look for water running off the surface, a crust forming on compost, leaves packed into a sheet, straw blown away from the row, or clippings pressed against stems. Pull the material back, fluff it, or replace it rather than adding another layer on top of a problem.
Check weeds at the edge of the mulch and at each planting hole. A few seedlings are easy to remove; a mature weed growing through the cover is a sign that the layer is too thin, the material contains seed, or the bed was not cleared before application. If the soil stays wet for days, reduce the depth and inspect drainage instead of assuming the crop needs more mulch.
At harvest, move mulch aside only as much as necessary. Keeping fruit off the ground is useful, but do not leave diseased plant debris buried in the layer. After the crop is removed, decide whether the spent mulch should remain as erosion protection, join the compost pile, or be removed because it contains weed seed or disease residue.
Common mulch mistakes that cost more work
The most expensive mulch mistake is choosing by appearance instead of function. A dyed bark product may look tidy but be a poor fit for an annual bed; a free pile of grass clippings may be unsafe if you cannot verify the lawn; and a thick layer of compost may create nutrient imbalance when the bed already has rich soil.
The second mistake is covering weeds and calling the job finished. Perennial weeds can push through loose mulch, while creeping weeds can root in the material on top. Clear the bed first, then maintain the cover before the next flush of weeds appears.
Do not bury stems, seedlings, graft unions, or crowns. Do not add fresh wood chips to the soil just before planting, and do not assume “biodegradable” means a plastic film can be tilled in without checking the product’s directions and local growing rules. Finally, never put a barrier down before you know how the bed will be watered.
If a mulch fails, diagnose the failure instead of changing materials at random. A wet, sour layer needs less depth and more airflow; weeds emerging from the cover need better preparation or a cleaner material; yellowing after fresh chips are incorporated points toward a soil and fertility problem; and heat stress under plastic calls for better timing, ventilation, irrigation, or removal.
Conclusion
For most home vegetable gardens, straw is the safest default around established fruiting crops, shredded leaves are the best low-cost all-purpose choice, and finished compost is the best soil-building top dressing. Grass clippings can work when their source is known and the layer stays thin. Landscape fabric and agricultural plastic are useful tools, but only when their long-term planting, irrigation, temperature, and removal trade-offs fit the bed.
Before you spread anything, clear the weeds, correct the moisture level, install irrigation if needed, and choose a material you can verify. Apply the appropriate depth, leave a clear ring around every stem, and inspect the bed after rain. That routine matters more than the label on the bag, and it is what turns mulch from a decorative layer into a reliable part of vegetable-garden care.



