How to Clean Rust Off Garden Tools
Learn how to clean rust off garden tools, when to soak with vinegar, how to sharpen and disinfect blades, and how to store tools so rust stays away.
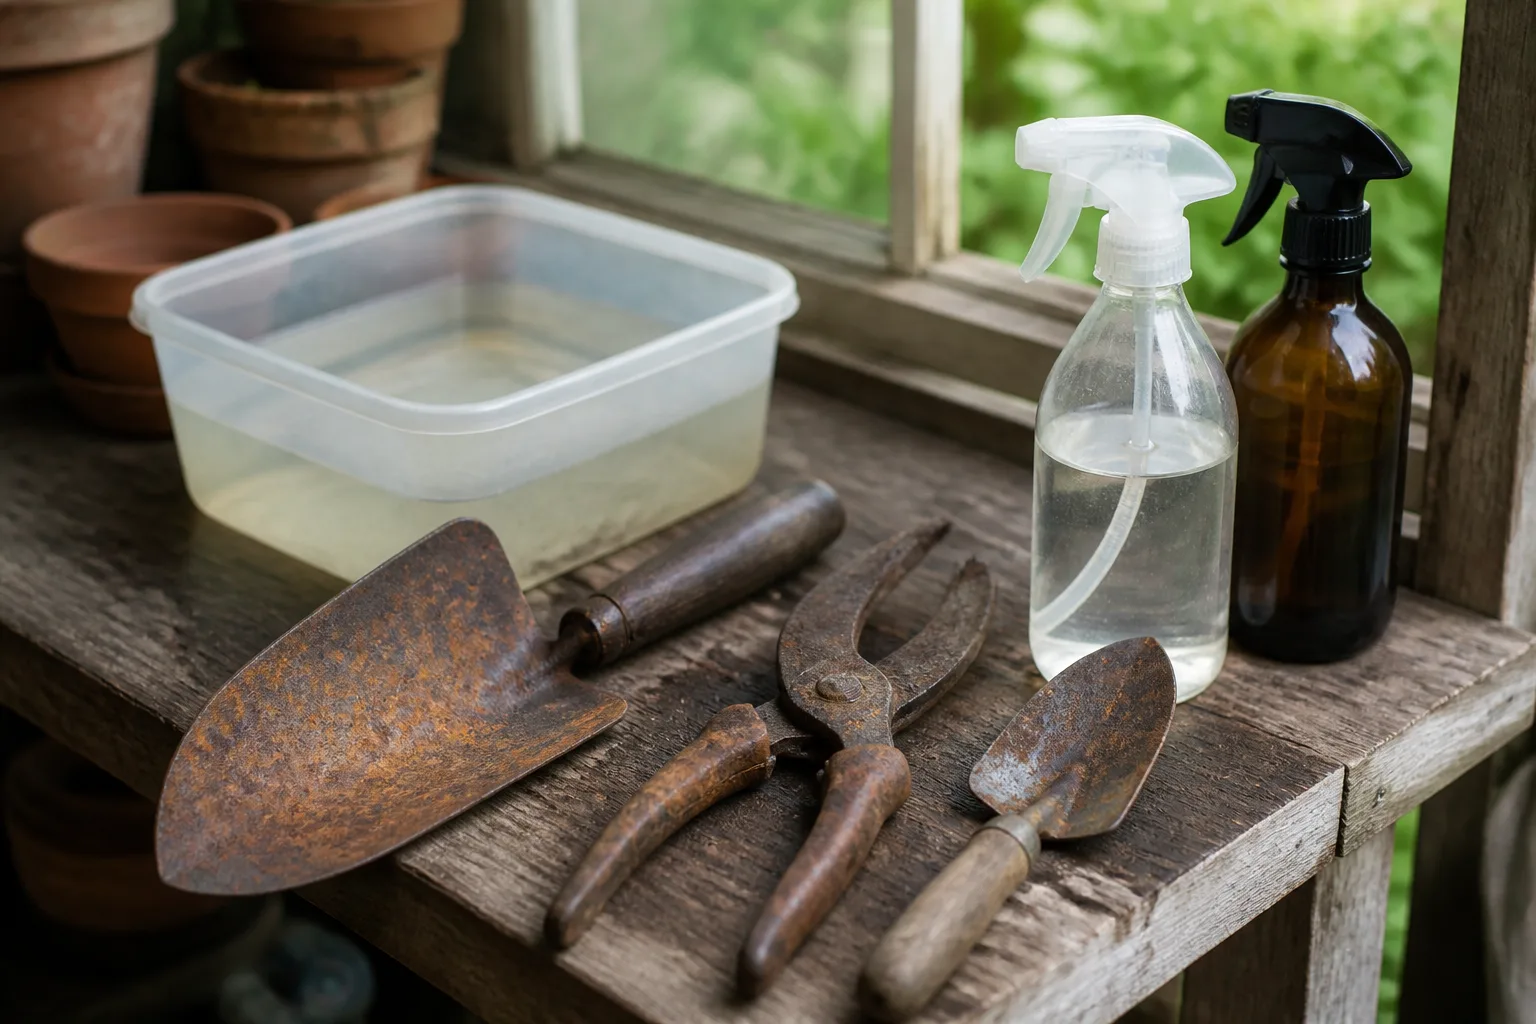
Before a shovel goes into the shed or pruners land in a drawer, give every tool a short clean, dry, and protect tune-up. Remove soil and sap, deal with rust while it is still shallow, dry the metal and joints completely, then leave a thin protective film and store the tool off the floor. That small sequence is more useful than simply putting a rusty tool away and hoping winter air will be kind.
This is not a promise that every tool can be saved. Surface rust is a maintenance problem; deep pits, brittle metal, a bent cutting edge, or a failing handle can become a safety problem. The goal is to identify which one you have before you spend an evening scrubbing.
The Task Is a Clean, Dry, and Protected Tool Tune-Up
Think of end-of-season care as a hand-tool inspection, not a single rust trick. The order matters: dirt and sap hide corrosion, water left after cleaning accelerates it, and oil applied over grit makes the next use unpleasant. The RHS guide to cleaning hand tools recommends brushing away soil, drying tools promptly, oiling metal when needed, and storing them in a clean, dry place.
For most tools, the complete tune-up is:
- Brush or wash off soil, plant residue, and grit.
- Check the metal, fasteners, pivot, blade, handle, and lock.
- Remove light rust mechanically; soak only the rusty metal when a longer treatment is needed.
- Rinse away rust particles and acid residue, then dry every crevice.
- Sharpen cutting edges if they need it, lubricate moving parts, and wipe on a thin metal protectant.
- Hang or rack the tool in a dry, ventilated location.
That sequence also gives you a chance to notice a loose rivet, split handle, or blade that no longer lines up. Finding those issues in the shed is much safer than discovering them halfway through a forceful cut in spring.
Why Rust Starts in Storage
Rust is the familiar reddish-brown corrosion that forms when iron or steel stays exposed to oxygen and moisture. Soil holds water against metal, plant sap leaves a sticky film that traps grit, and a damp floor or unventilated shed supplies the moisture that a clean tool would have avoided.
The vulnerable moment is often the end of a job. A tool looks “mostly clean,” gets left on the ground overnight, and is then stored with damp soil in the hinge or along the back of a blade. By the time you see orange scale, the first prevention step is already clear: get the tool clean and genuinely dry before it goes away.
Sort the Tool Before You Reach for Vinegar
Do not put every garden tool into the same bath. A removable metal blade can tolerate a different cleaning method from a pruner with a spring, sealed bearing, painted finish, wood handle, or manufacturer warning. If the tool manual gives a care instruction, follow that before using an acidic soak or solvent.
Start by opening pruners and loppers carefully, removing a removable blade only if the design allows it, and checking where water could become trapped. For a shovel, spade, fork, or hoe, the working head is usually the part that needs attention; the handle often needs a dry wipe and separate wood care rather than immersion.
Surface Rust Versus Structural Damage
Surface rust looks like orange or reddish film, loose scale, or small spots that leave clean metal after brushing or light abrasion. The tool may be stained, but its blade remains full-thickness, straight, and firmly attached. This is the right territory for a brush, nylon scourer, steel wool, or controlled vinegar treatment.
Deep corrosion creates pits, sharp flakes, thinning metal, holes, or a rough edge that remains after the loose rust is gone. A cutting blade that flexes, bends, will not close squarely, or has a deep notch should not be forced back into service. On a shovel or fork, a deeply pitted head or cracked weld can fail under leverage; on a pruner, a weak spring, loose pivot, or damaged locking mechanism can turn a small cut into an uncontrolled one.
Use vinegar to loosen removable corrosion, not to make unsafe metal safe. If the metal underneath is missing, the tool needs a replacement part, professional repair, or retirement.
What You Need for a Small or Large Tool
Gather supplies before you start so a cleaned tool is not left wet while you search for the next item:
- Stiff nylon brush or old scrub brush for soil
- Nylon scourer or fine steel wool for light rust and sap
- White distilled vinegar or cleaning vinegar for a controlled soak
- Nonreactive container for small metal parts, or a bucket for a large head
- Clean water for rinsing
- Old towels or clean rags, with a narrow cloth for pivots
- General-purpose tool oil or another product approved for the tool
- Fine-grit sandpaper and linseed oil for unfinished wood handles
- Metal file, whetstone, or diamond sharpener matched to the blade
- Work gloves and eye protection
Use a stable work surface, keep the cutting edge pointed away from you, and avoid a loose pile of tools where a hidden blade can catch a hand. Wear gloves when handling steel wool and oil products; RHS specifically flags those precautions for hand-tool maintenance.
Set Up a Safe Rust-Removal Work Area
Work outside, in a garage, or on a washable bench with good ventilation. Put down a tray or scrap cardboard, keep vinegar in a labeled container while it is in use, and keep children and pets away from soaking tools. Do not use a food container that could be mistaken for kitchen storage, and do not pour used rust-colored vinegar back into a bottle meant for cooking.
Separate the cleaning station from the sharpening station. Rust flakes and grit can foul a sharpening stone, while a freshly sharpened edge can cut through a rag or glove. Remove power sources from electric or battery tools, lock folding blades open only when the design calls for it, and do not disassemble a spring-loaded pruner unless you can keep track of the parts and reassemble it safely.
Vinegar is an acidic household cleaner, not a harmless substitute for all precautions. Protect your eyes and skin, avoid mixing it with bleach or other cleaners, and rinse metal after treatment. The goal is a clean tool, not a chemical experiment.
How to Clean Rust Off Garden Tools Step by Step
Use the following process for hand pruners, loppers, trowels, hori hori knives, shovel heads, and similar tools. Adjust the method to the tool’s construction: keep wood, springs, bearings, and sealed mechanisms as dry as possible.
Brush Away Soil and Sap First
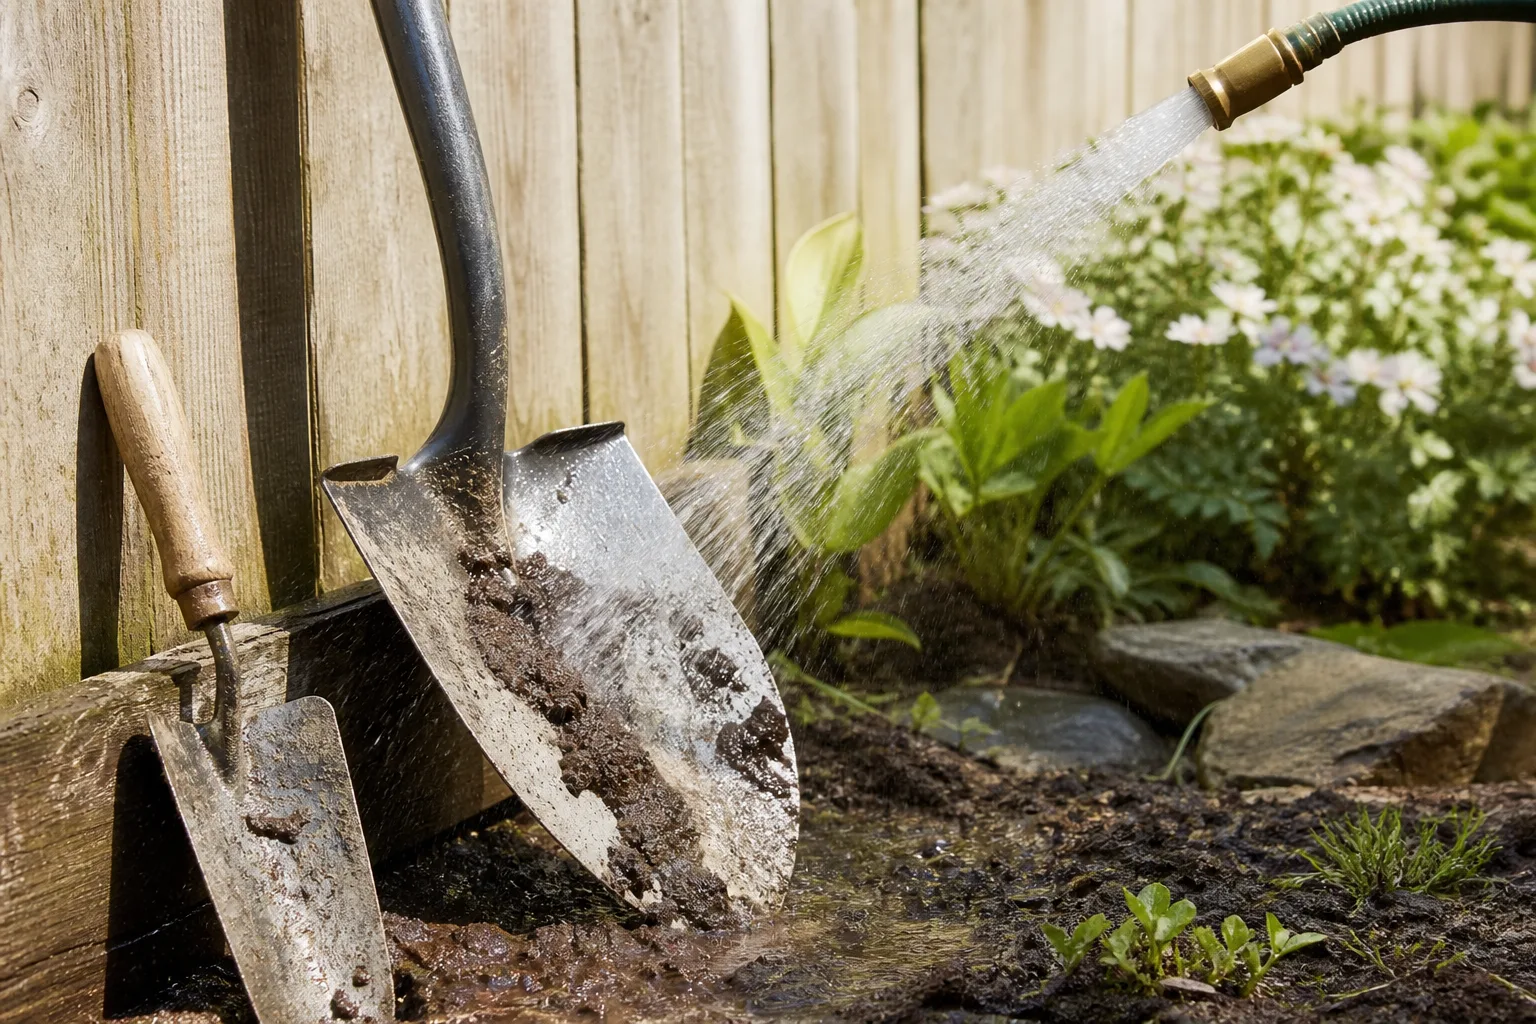
Start with a dry stiff brush. Knock off soil from the blade, shaft, tines, and the underside of a shovel lip before adding water; grit is abrasive and will make every later step harder. If mud is caked on, rinse only as much as necessary, then towel-dry immediately instead of leaving the tool in a bucket.
Cutting tools need extra attention around the pivot and the inside faces of the blades. Dried sap can make pruners stick even when they have little rust. The RHS recommends a nylon scourer or wire wool for dried sap, followed by a penetrating oil to loosen grime, a clean cloth to remove residue, and a few drops of oil at the pivot.
Choose Between a Quick Scrub and a Vinegar Soak
For a few orange spots, begin with a nylon scourer or fine steel wool and work along the metal rather than aggressively grinding across a cutting edge. A stiff brass or nylon brush can remove loose scale from a shovel head or trowel without taking away useful metal. Stop when the remaining mark is stable, shallow, and no longer shedding flakes; polished silver metal is not the objective.
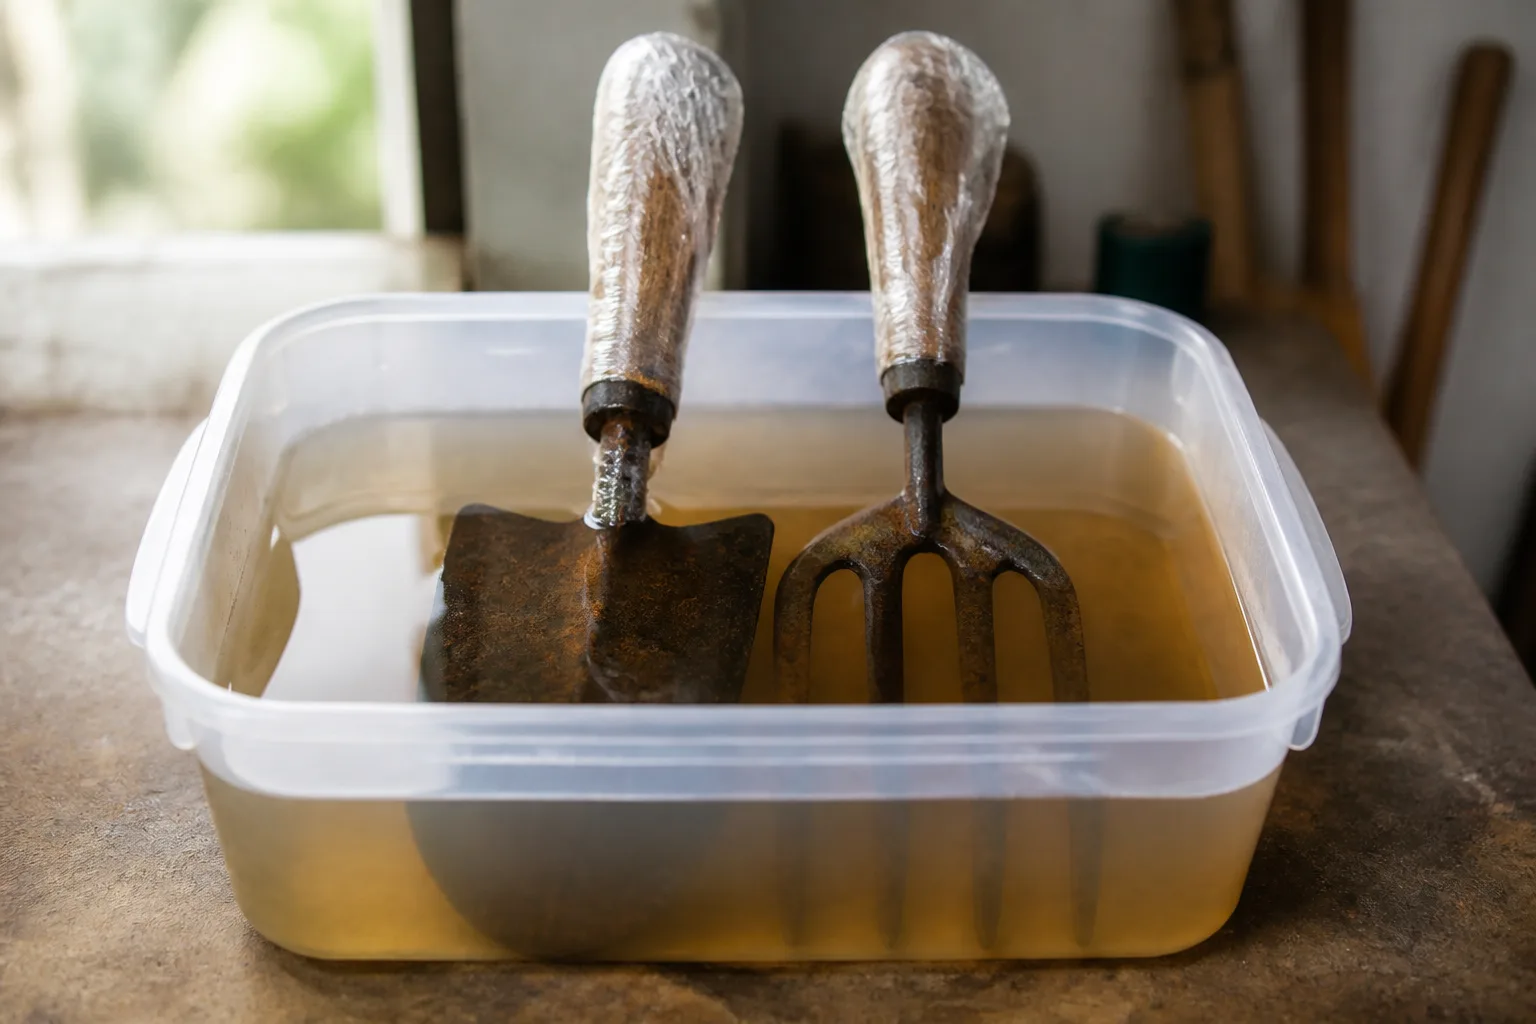
For stubborn surface rust on a removable metal part, place the rusty section in a container and add enough white distilled vinegar to cover it. A practical method described by Garden Betty uses a short soak, a gentle scour, a clear-water rinse, thorough drying, and oil afterward. For light rust, inspect after an hour or two; for heavier surface rust, check at intervals over roughly 12 to 24 hours rather than leaving the tool forgotten.
The soak should touch the rusty metal, not a wooden handle, leather sheath, electrical component, or mechanism that the manufacturer says to keep dry. Cleaning vinegar is often a little more acidic than kitchen white vinegar, but stronger is not automatically better. If the rust is not loosening after a controlled treatment, the issue may be deep pitting rather than a need for an indefinite soak.
Rinse, Dry, and Inspect Before Applying Oil
When the rust has loosened, remove the tool and wipe or scour away the softened residue. Rinse with clean water to remove loose particles and vinegar, then dry immediately with a towel. Open and close pruners while wiping around the pivot, or use a narrow strip of cloth to wick moisture from a joint without placing fingers near the edge.
Inspect the bare metal under good light. Run a cloth over it rather than a fingertip if the edge is sharp. Look for pits, cracks, thinning, a bent profile, loose fasteners, a spring that has lost tension, or blades that no longer meet cleanly. If the metal is sound, put a thin film of general-purpose tool oil on exposed steel and the pivot; wipe away excess so the tool is protected without becoming a dirt magnet.
Do not oil a wet tool and call it finished. Oil can slow fresh moisture from reaching metal, but it does not replace drying, remove grit, or rebuild corrosion. That is why “rinse, dry, then oil” is the important part of the sequence.
Clean a Rusty Shovel or Other Large Tool
A shovel, spade, fork, hoe, or rake rarely needs its entire handle immersed. Stand the tool securely, brush off dry soil, and wash the metal head if needed. Towel-dry the head and the ferrule—the collar where the head meets the handle—because water can sit there unseen.
For light rust, scrub the head with a nylon pad or fine steel wool, then wipe it clean. For a larger area of stubborn surface rust, you can place the head in a bucket of vinegar without submerging the handle, or wrap the affected metal in a vinegar-dampened towel for a controlled period. Use a tray or outdoor surface that can tolerate drips, keep the wrap from drying out, and check the metal instead of treating 24 hours as a mandatory target.
Rinse the head thoroughly, especially around the socket and tines, dry it with an old towel, and leave it in moving air until no cool dampness remains. Finish with a thin wipe of oil on bare steel. For a shovel or hoe that has lost its working edge, use a metal file on the correct bevel; the RHS sharpening guide advises keeping the angle consistent and not thinning a cultivation blade so far that its strength is compromised.
Wood handles need a separate inspection. Sand only rough splinters or raised fibers with fine-grit paper, wipe away the dust, and apply a modest coat of linseed oil to unfinished wood. Let it absorb and wipe off excess; a glossy, sticky handle is not better protected than a clean, dry one.
Restore Pruners, Shears, and Other Cutting Tools
Rust removal alone does not restore a cutting tool. Sap, a dull edge, a misaligned blade, a dry pivot, and a weak spring can each cause a rough cut. The Joe Gardener seasonal tune-up guidance pairs rust and residue removal with sharpening, replaceable parts where available, and wood-handle care; that is the right mindset for an off-season check.
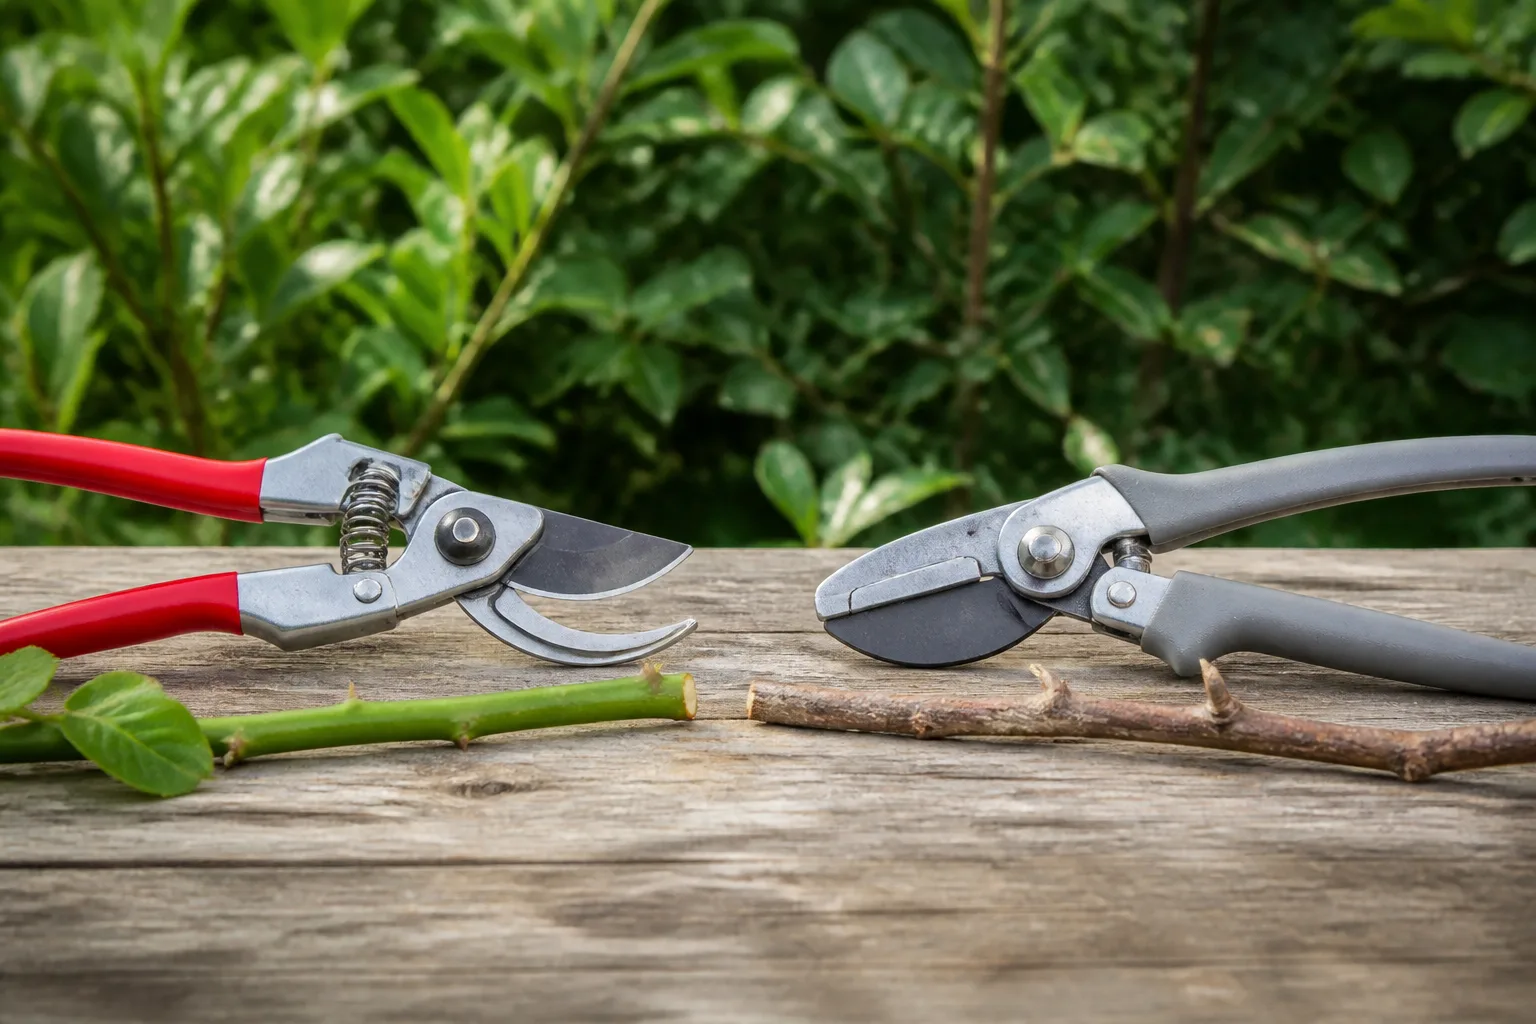
Before sharpening, clean the blade so you can see its existing bevel and any chips. Tighten a loose pivot only enough to remove wobble while keeping the blades able to open and close freely. If the tool cannot be safely aligned, dismantled, or sharpened according to its design, stop and use a repair shop rather than removing metal by guesswork.
Sharpen the Correct Face of the Blade
Bypass pruners and many loppers have one angled cutting face and one flatter face. Work the sharpening tool along the angled face and preserve the original angle; do not turn the flat face into a second bevel. After a few controlled passes, remove the small burr from the flat side with the sharpener held flat, without reshaping the face.
For a spade or hoe, secure the shaft or head so it cannot move, push a metal file away from your body, and follow the existing bevel. The RHS notes that cultivation blades are commonly sharpened once or twice a year depending on use and damage, and that severe damage may be better handled by a professional. A blade that is made thinner and thinner to chase a deep nick can become fragile.
Finish by testing a pruner on a piece of paper or a small sacrificial twig appropriate to the tool. A clean cut with modest pressure is the useful test; crushing, folding, or slipping means the blade needs more inspection. Never test with a thumb, and do not test a large lopper or saw in a cramped position.
Oil the Pivot and Protect the Cutting Edge
Add a few drops of tool oil to the pivot, spring, and other moving points the tool’s instructions identify. Open and close the pruners several times to distribute the oil, then wipe the outside clean. Oil the metal blade lightly for storage, but remove excess before the next cut so it does not collect dust or transfer an oily film onto fresh plant tissue.
If the blade has a sheath, use it after the tool is dry. Store a folding knife or saw closed or locked according to its design, with the edge protected. A sharp tool in a drawer without a guard can injure someone even if it never rusts.
Disinfect Tools When Plant-Disease Risk Makes It Worthwhile
Routine cleaning and disinfection are not the same task. Cleaning removes soil, sap, grit, and many contaminants through brushing, water, soap, or scrubbing. Disinfection uses a product intended to kill remaining pathogens. The CDC explains that surfaces should be cleaned before disinfection and that product labels and bleach instructions should be followed.
For an ordinary soil-covered shovel used in a healthy bed, brushing and drying may be enough. Disinfection is more valuable after cutting visibly diseased tissue, moving between plants where a pathogen may spread, working with propagation material, or handling contaminated soil. The RHS recommends a suitable disinfectant for used blades, allowing the stated contact time before wiping, then drying and oiling the tool.
Use the exact product label for dilution, compatible materials, ventilation, and contact time. Do not improvise a bleach concentration or assume that a quick mist has disinfected a dirty blade. Clean first, disinfect second, rinse only if the label directs you to, dry completely, and protect bare metal. If a disinfectant causes discoloration or corrosion on a particular coating, choose a product approved for that surface or follow the tool manufacturer’s guidance.
Remember the cleaning brush and cloth. A rag that touched diseased sap can transfer what you just removed, so launder, discard, or disinfect those materials as appropriate. Tool hygiene protects plants; it does not mean every tool needs a harsh chemical bath after every use.
Store Garden Tools So Moisture Cannot Undo the Work
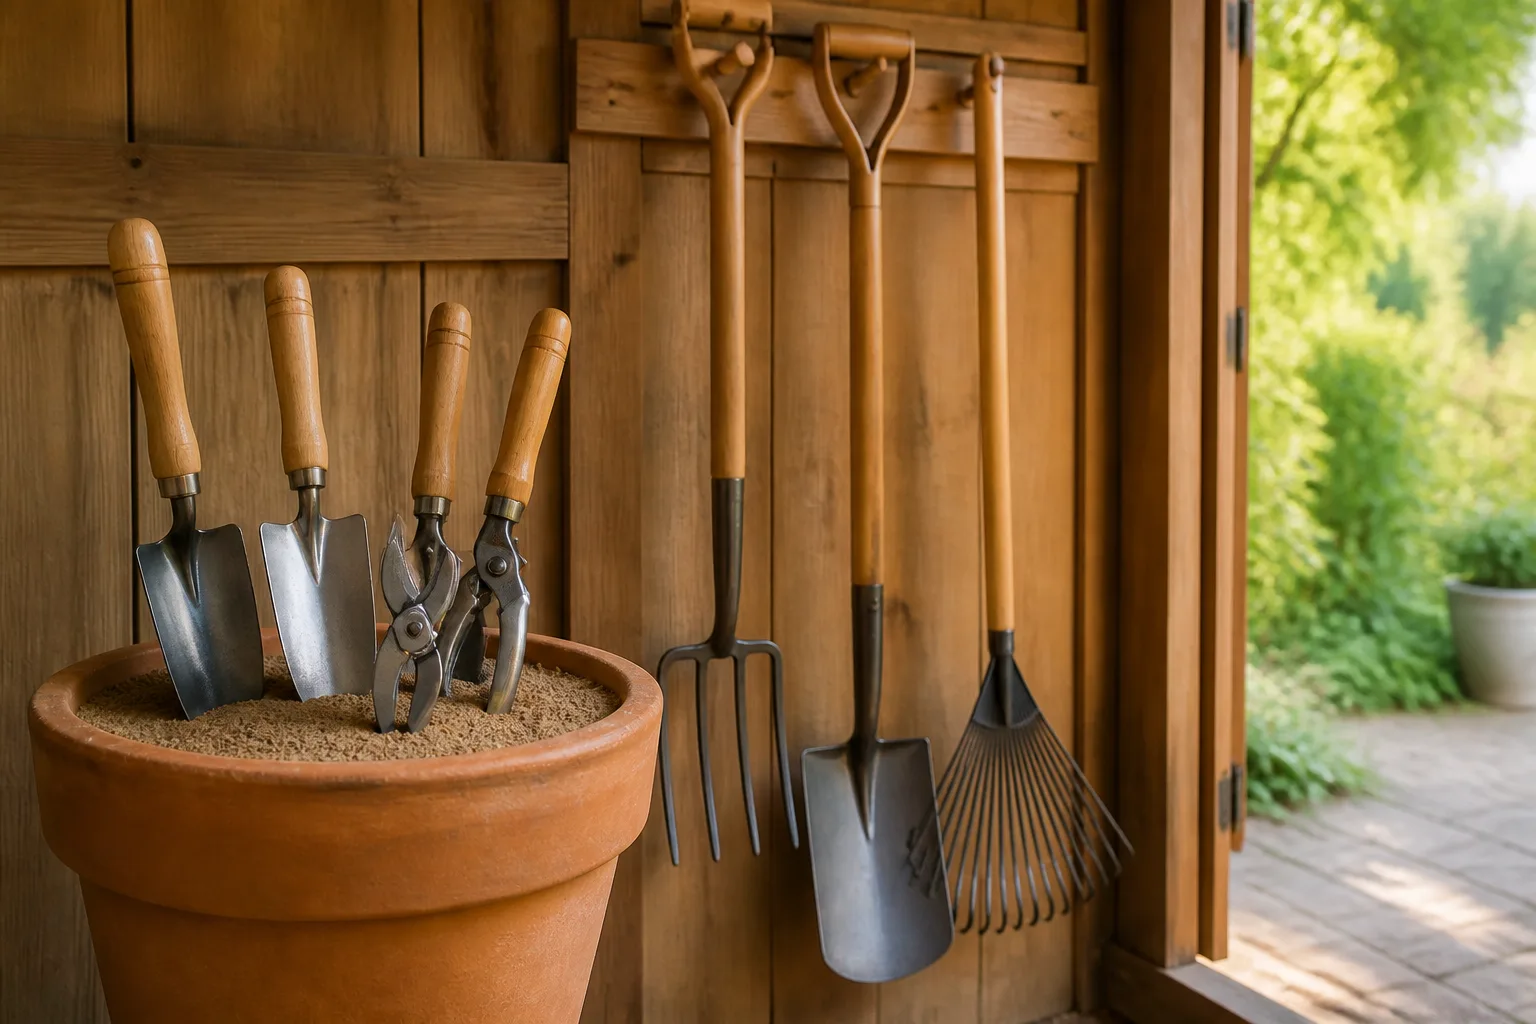
The best storage location is clean, dry, and easy to use. Hang shovels, hoes, rakes, and forks from hooks or a rack so their working ends do not sit in a damp corner. Keep pruners and knives in a dry drawer or sheath, not under wet gloves, muddy kneeling pads, or a leaking hose.
Ventilation matters more than a perfect-looking organizer. A closed metal box in a humid shed can trap condensation; a tool hung on an outside wall can collect wind-driven rain. If the shed is damp, improve airflow, use a raised rack, and check tools periodically rather than assuming a calendar date guarantees safe storage.
Store wheelbarrows and other large tools at an angle or upside down when the design allows it, so rain cannot pool in the tray or frame. Do not leave metal heads resting directly on soil or concrete that stays wet. A thin oil film helps, but it cannot compensate for standing water.
Material affects the routine. Stainless steel is generally more rust-resistant than ordinary carbon steel, but it is not immune to poor-quality alloys, scratches, salt, or damp storage. Galvanized coatings protect only while intact; once scratched, the exposed steel still needs cleaning and protection. The Fine Gardening discussion of soil tools is a useful reminder that construction quality and forged steel affect how a tool handles hard work; maintenance still matters even on a better-made tool.
Know When a Rusty Tool Should Be Replaced
Keep a tool when the rust is mostly surface-level, the metal underneath is full-strength, the edge can be restored, and the handle and fasteners remain sound. A replaceable blade, spring, pivot, or handle can make a quality tool worth repairing instead of discarding. Price the replacement part and your time, but do not let sentimental value override a safety check.
Replace or professionally assess the tool when you find:
- Deep pitting that has removed meaningful metal
- A blade, tine, or shaft that bends under normal hand pressure
- Cracks, holes, broken welds, or a loose head that cannot be secured
- A cutting edge that remains badly notched or will not align after cleaning
- A failed lock, spring, pivot, or handle that cannot be replaced reliably
- Flaking coating or corrosion inside a mechanism you cannot inspect
Do not confuse dark staining with failure, and do not confuse shiny metal with strength. Remove loose rust, inspect the remaining section, and test the tool only in a controlled way. If a shovel head flexes or a pruner closes unevenly, retire it before the first spring job rather than making the plant or your hand absorb the consequence.
Build a Five-Minute After-Use Habit
The easiest winter tune-up is the one you repeat during the growing season. Keep a brush and an old towel near the storage area, as the RHS suggests. Before a tool is put down, knock off soil, wipe sap from cutting blades, let wet tools air-dry in a protected spot, and return them to a hook or rack rather than the ground.
After pruning a diseased plant, pause for the separate sanitation step instead of carrying the same blade to the next plant. After working in wet clay, spend an extra minute cleaning the ferrule and the spaces between fork tines. After cutting resinous stems, wipe the blade before the residue hardens; removing fresh sap is easier than restoring a sticky, rust-speckled pivot in December.
At the end of a busy week, inspect the tools you used most. A few drops of oil on a dry pivot and a thin wipe on bare metal can prevent a small spot from becoming a long soak. Joe Gardener also emphasizes that an off-season tune-up keeps quality tools in service longer, but the same habit works for inexpensive tools: clean after use, dry before storage, and repair small faults while they are still small.
Conclusion
The one task to complete before putting garden tools away is a short tune-up: remove soil and sap, judge the rust, clean or soak only the affected metal, rinse, dry every joint, sharpen when needed, oil the moving and exposed metal, and store the tool off the damp floor. Vinegar can loosen surface rust, but it cannot repair deep pits, bent steel, or a failing handle.
Make the final decision based on the tool’s condition, not how shiny it looks. A sound tool deserves protection; a structurally weak one deserves replacement or professional repair. That honest check, repeated for five minutes after ordinary use, does more to preserve your tools than any single rust-removal shortcut.



