The Proper Compost Ratio of Greens and Browns
Learn a practical greens-to-browns compost ratio, how to measure it by volume, and how to adjust for odors, moisture, and a pile that will not heat.
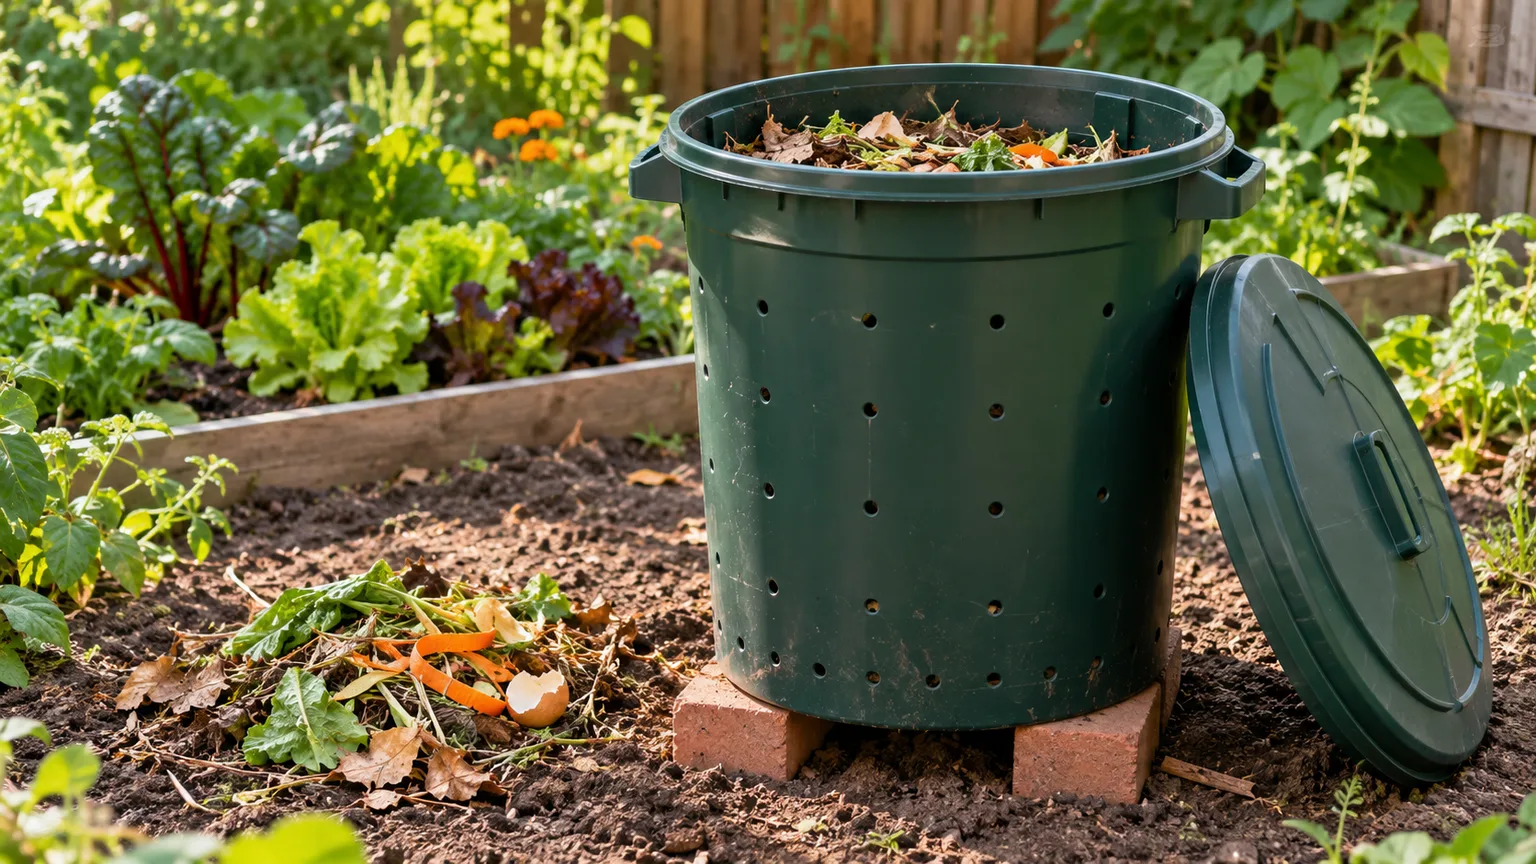
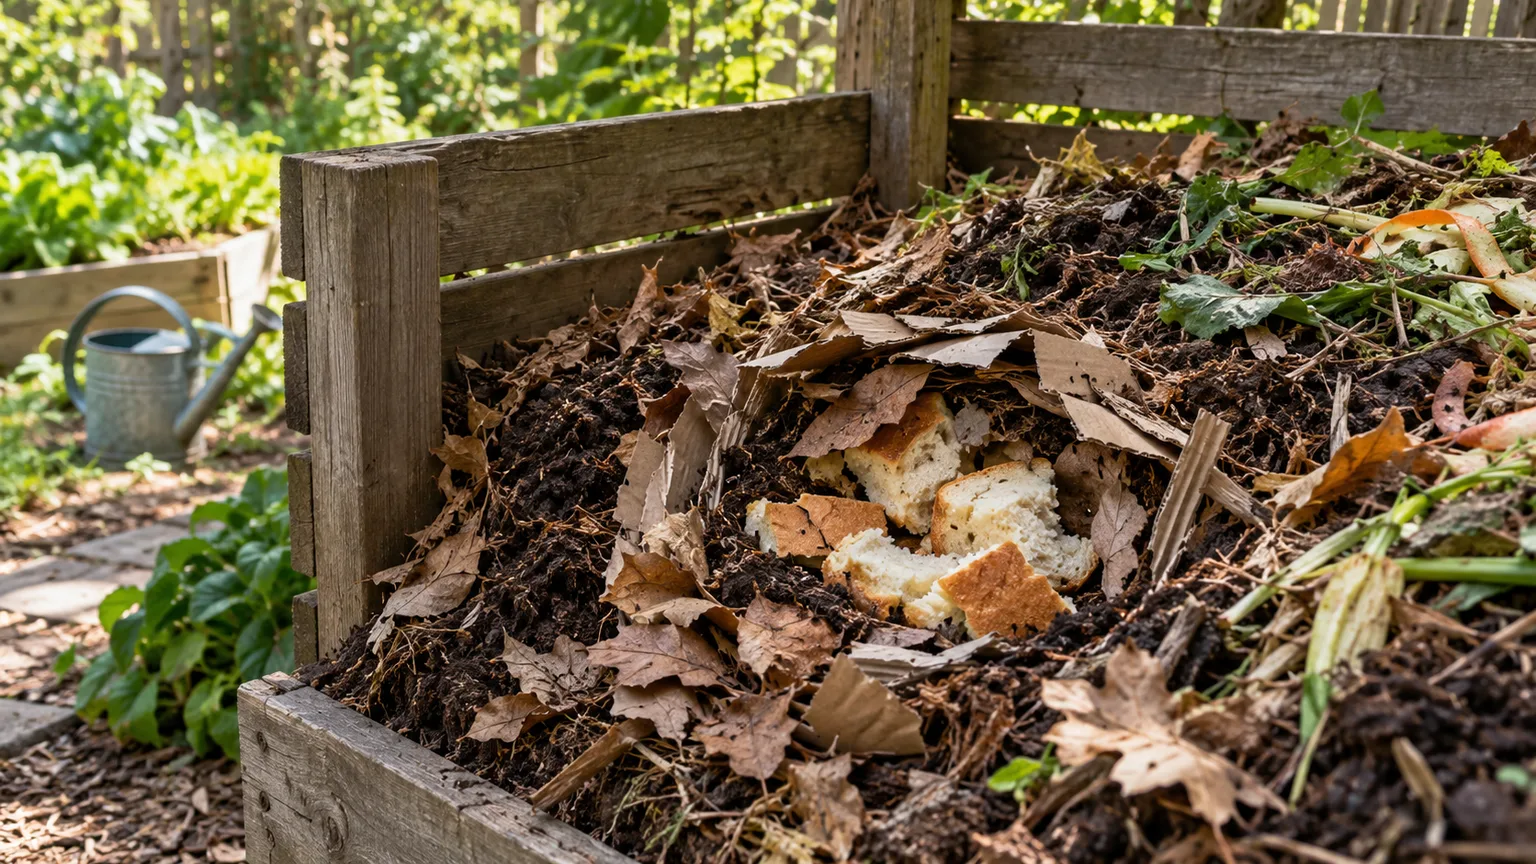
If you want a reliable home-compost recipe, start with about two to three loose volumes of browns for every one volume of greens. For example, add two or three buckets of dry leaves or shredded cardboard for each bucket of fresh food scraps or grass clippings. Treat that as a starting range, then adjust for how wet, compact, or woody the ingredients are.
That answer is more useful than a rigid number because compost materials vary. North Carolina State Extension gives a simple brown-to-green recipe of 2:1, while Better Homes & Gardens recommends 3:1 by volume and Gardening Know How suggests 3 or 4 parts brown to 1 part green. Those are practical recipes rather than exact chemical formulas, and they leave room for differences in the materials and measuring method (NC State Extension’s backyard composting guide; Better Homes & Gardens’ composting guide; Gardening Know How’s composting guide).
The pile itself is the final check. If it is slimy or smells sour, add dry, coarse browns and introduce air. If it is damp but inactive, check its size and airflow before adding more greens. A strong recipe supports decomposition; it cannot compensate for a pile that is waterlogged, packed tight, or too small to retain warmth.
The quick answer: start with two to three parts browns
Measure with the same container for both material groups. A 5-gallon bucket of fresh scraps can be paired with roughly 10 to 15 gallons of loose, dry browns. You do not need to fill a bucket to the rim or tamp the leaves down: the goal is a repeatable visual measure, not laboratory precision.
This range leans toward browns because food scraps and fresh clippings carry water as well as nitrogen. A thick layer of greens can collapse into a dense, wet mass that restricts oxygen. Dry leaves, straw, shredded plain cardboard, and similar browns help absorb some of that moisture and create spaces for air.
If you see a source recommending a slightly different number, check what it means by “part” and what materials it assumes. A ratio may be counted in loose buckets, shovelfuls, or thin layers. The same pile measured by weight would be different because a bucket of dry leaves weighs far less than a bucket of wet grass. Start in the range, mix or layer the materials, and then tune the pile by feel and smell.
Microorganisms break organic materials down, using carbon as an energy source and nitrogen to build proteins and other parts of their cells. Cornell Composting describes a C:N ratio near 30:1 as a common target for active decomposition; that means roughly 30 parts carbon to one part nitrogen by weight, not 30 buckets of brown material to one bucket of green. North Carolina State Extension describes a useful working C:N range of about 25:1 to 35:1 (Cornell Composting’s chemistry guide; NC State Extension).
In everyday gardening, “green” and “brown” are shorthand for ingredient roles. Greens are usually nitrogen-rich and moist; browns are usually carbon-rich and drier. The terms help you balance a pile without testing every ingredient, but they are not strict labels based on what an item looks like.
Carbon and nitrogen are both essential, but neither should be treated as a magic switch. Too many easily decomposed, nitrogen-heavy scraps can contribute to excess moisture and odor, while a mix dominated by dry, woody carbon decomposes more slowly. Water, oxygen, surface area, and pile size also affect how quickly microbes work, so changing the ratio is only one possible fix.
What counts as a green or a brown?
Classify materials by their role in decomposition rather than their literal color. Fresh plant matter generally adds nitrogen and moisture, while dry or woody plant matter generally supplies more carbon and structure. A few familiar ingredients are exceptions to what their color suggests.
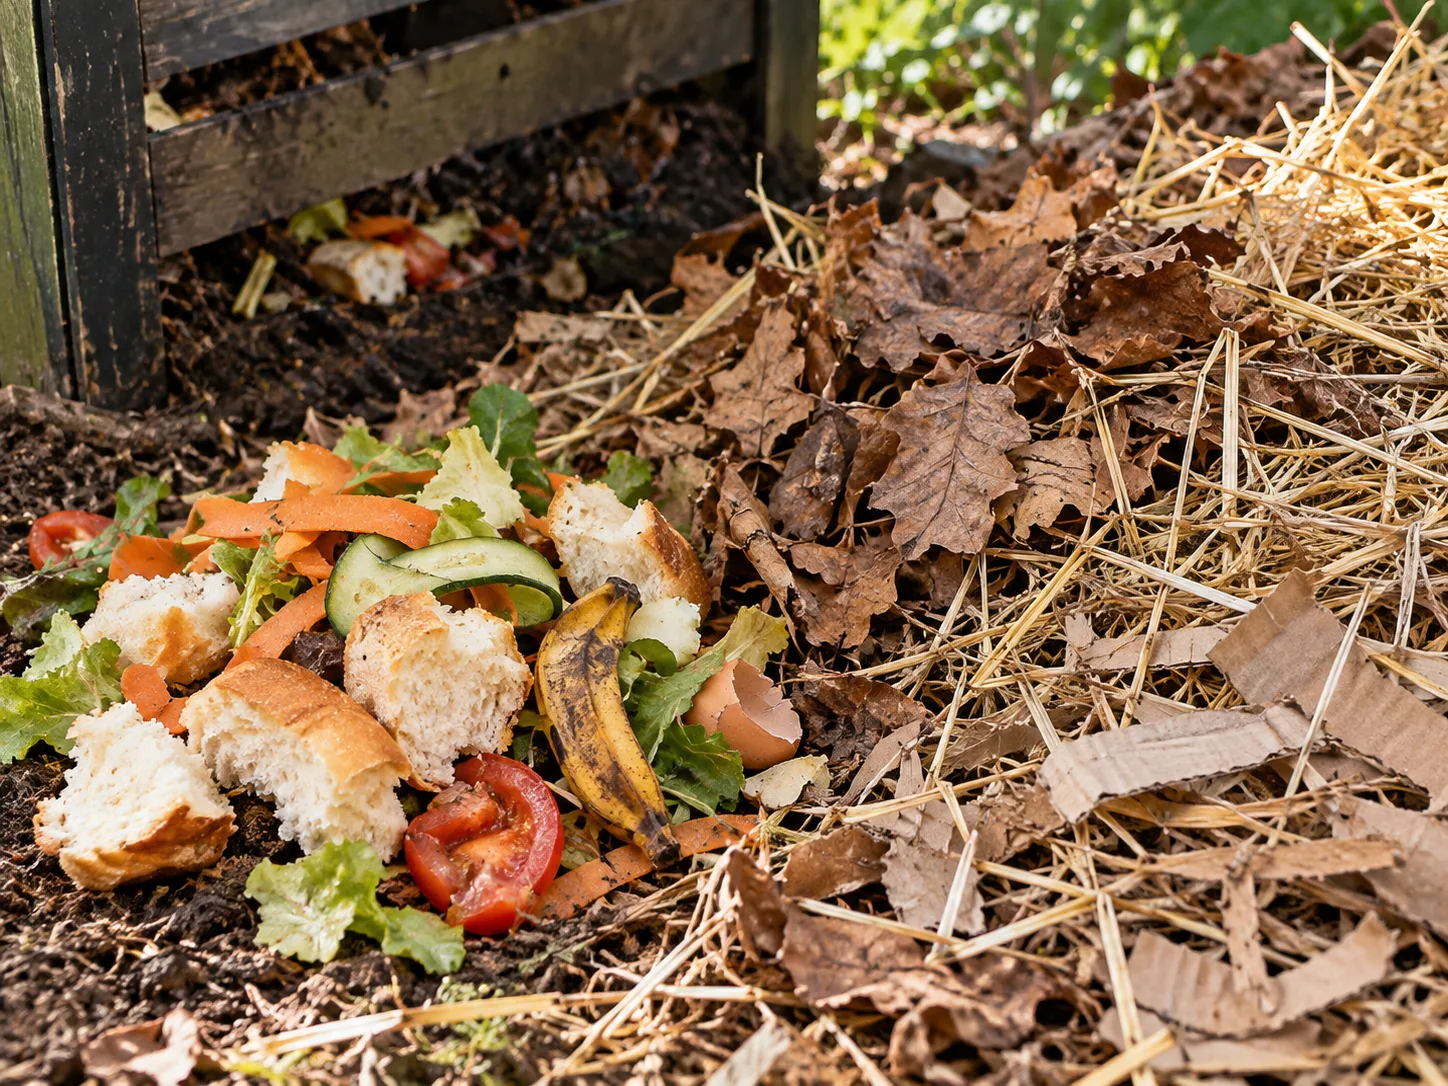
Greens add nitrogen and moisture
Common greens include fruit and vegetable scraps, fresh grass clippings, green garden trimmings, and coffee grounds. Some gardeners also add manure from suitable plant-eating animals, but manure needs careful handling and a properly managed pile; it is not necessary for an ordinary home recipe. NC State’s material chart lists vegetable scraps, grass clippings, coffee grounds, and manure among nitrogen-rich ingredients, while also showing that their C:N values differ.
Add greens in manageable amounts rather than dumping a full kitchen caddy into one spot. Chop large scraps, spread them through the pile, and cover them with browns. That helps keep wet material from forming a sealed layer and makes it less accessible to flies and scavenging animals. If scraps accumulate faster than your pile can use them, store them in a covered container or freeze them until you have enough browns to balance the next addition.
Coffee grounds count as a nitrogen source even though they look brown. Eggshells, by contrast, can go in if crushed, but they do not provide the same nitrogen as fresh scraps or grass. Do not count a handful of shells as your “green” for the day; their main contribution is mineral material, and large shell pieces may remain recognizable for a long time.
Browns add carbon and structure
Dry autumn leaves are among the easiest browns to stockpile. Straw, small dry plant stems, untreated wood chips, plain shredded cardboard, and uncoated paper can also contribute carbon. NC State Extension’s table shows why these materials are not interchangeable: autumn leaves vary widely, while straw and especially wood products can have much higher C:N ratios than vegetable scraps or grass.
Shred or break up bulky browns before adding them. A whole cardboard box or a thick mat of leaves takes longer to wet and decompose than smaller pieces mixed through the pile. Keep some coarse stems or chips in the blend for structure, but avoid making the pile mostly large woody pieces if you expect a quick batch of finished compost.
Store dry browns beside your bin or in bags so they are ready whenever you add kitchen scraps. This “brown reserve” is particularly helpful in summer, when lawns produce frequent clippings, and in winter, when food scraps may continue while the yard supplies fewer fresh ingredients. If cardboard is your main reserve, tear off tape, plastic windows, glossy coatings, and labels that will not break down.
Ingredients that are easy to misclassify
The simplest rule is to classify an item by its contribution, not its color. Used coffee grounds are a green ingredient in the compost sense. Dry leaves are a brown, but green leaves that have just been cut are generally counted with nitrogen-rich fresh trimmings. A cardboard carton may look brown, but its coating, adhesive, and food contamination matter more than its color when you decide whether it belongs in the pile.
Some ingredients do not meaningfully replace either side of the mix. Crushed eggshells can be composted, but they add little nitrogen and should not be counted as a bucket of greens. Soil, finished compost, and a commercial starter are also not substitutes for the carbon and nitrogen feedstocks; they may introduce organisms or small amounts of minerals, but the pile still needs organic materials to decompose.
If you are unsure about a material, leave it out until you check local composting guidance. Home piles vary in size, heat, and management, so do not assume that an ingredient accepted in a municipal or commercial program is appropriate for a backyard bin.
How to measure the ratio by volume
Use one container as your measuring unit and keep the fill loose. If you collect one bucket of kitchen scraps, add two or three buckets of dry leaves or shredded cardboard. If the scraps are especially wet or the brown material is fine and compactable, begin closer to three buckets. If your browns are coarse and airy and the green material is only a small amount of fresh trimmings, closer to two may work.
A “part” does not need to be a bucket. It can be a shovel, a garden trug, or a wheelbarrow load, provided you use the same measure for both sides. Avoid comparing one tightly packed bag of wet clippings with a fluffy armful of leaves; the apparent volume is then inconsistent. The aim is to make a roughly balanced batch that you can adjust after mixing.
For a continuous bin, treat each addition as a mini-batch instead of trying to calculate the entire pile at once. Add a layer of greens, cover it with two or three loose volumes of browns, and check the moisture. If the layer disappears into a wet clump, add more dry material and mix it through; if it stays fluffy and crumbly, continue with your regular routine. A simple note on the bin lid—“one scoop scraps, two or three scoops browns”—can make the routine easy for everyone in the household.
Why the 30:1 carbon-to-nitrogen ratio is different
The technical C:N ratio compares the amount of carbon with the amount of nitrogen in the material, usually by weight. Cornell Composting explains that a ratio around 30:1 can provide a useful balance for microbes, while NC State Extension gives a typical target range of 25:1 to 35:1. Neither source is telling you to measure 30 buckets of leaves for every bucket of scraps.
A bucket recipe is a shortcut because calculating the exact carbon and nitrogen content of a homemade pile would require ingredient data and accurate weights. Even materials within one category vary: NC State lists autumn leaves at roughly 30:1 to 80:1, and wood chips or sawdust at 100:1 to 500:1, while vegetable scraps are closer to 15:1 to 20:1. Those ranges explain why two piles with the same number of buckets can decompose at different speeds.
Cornell also notes that the availability of carbon matters. Some dry materials contain a lot of carbon that microbes break down slowly, so their total carbon number does not tell the whole story about how quickly the pile can use it. For home composting, you usually do not need to calculate a precise C:N ratio. Use the volume recipe to start, and use the pile’s moisture, smell, texture, and progress to decide what to do next.
Build a pile with layers, then mix when needed
You can layer greens and browns as you add them or mix the ingredients as you build a batch. NC State Extension describes alternating layers, with a thicker brown layer followed by a thinner green layer, and also recognizes thoroughly mixing greens and browns as an option. The Gardening Know How guide likewise suggests a layered structure, while Better Homes & Gardens recommends mixing the materials after the pile is assembled to improve air circulation.
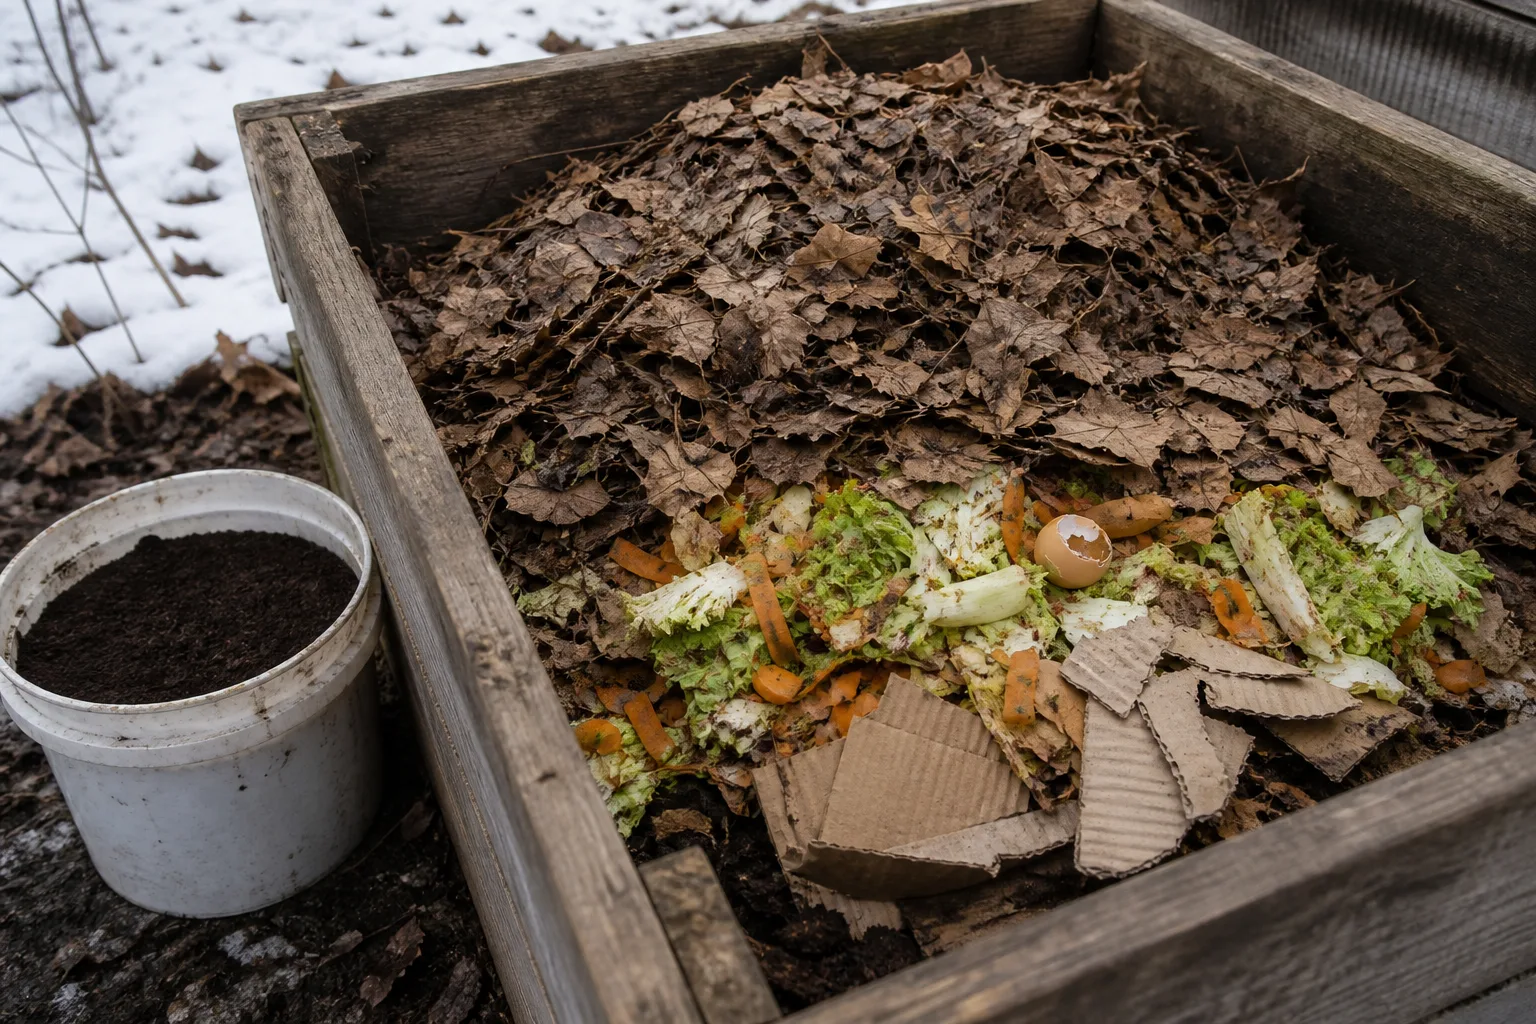
For a new pile, start with a loose base of coarse material such as small twigs so air can move underneath. Add a layer of browns, spread the greens over it rather than dropping them in one heap, then cover them with another layer of browns. Water dry layers as needed, and finish with browns on top to cover food scraps and reduce exposed odors. Keep the pile loose rather than pressing each layer down.
Layers are convenient for a slow, continuous pile because they make it easy to cover each new addition. Mixing is more useful when you build a batch all at once, when an existing pile has developed a wet or compacted pocket, or when you are turning it to add air. The layers do not have to remain separate; decomposition works on the combined materials, not on a decorative lasagna pattern.
Adjust the recipe to the materials you actually have
A 2:1 or 3:1 volume ratio is not a verdict on whether your pile will succeed. It is a manageable place to start. Make the adjustment based on the amount of moisture and structure the actual materials bring, then give the pile time to respond before making several changes at once.
Better Homes & Gardens recommends three volumes of brown material to one of green, while Gardening Know How suggests three or four to one and advises readers not to worry about being too precise. The NC State Extension recipe uses two to one. This difference is a useful reminder that the figure is a rough household guide; it is not evidence that one source has found a universal number for every set of ingredients.
When dry leaves, cardboard, or woody browns dominate
If the pile is mostly dry leaves, shredded cardboard, straw, or small woody material, add greens gradually and moisten the mixture. A pile that is too carbon-heavy may remain cool and break down slowly, but adding a large quantity of scraps all at once can create a wet, compacted center. Fold in a modest amount of grass or vegetable scraps, mix the material, and check whether the handful feels evenly damp.
Woody ingredients need extra patience because they break down more slowly than soft scraps. If you used a lot of chips or twigs, keep them as a structural fraction rather than expecting them to vanish with the same timing as the softer material. You can screen coarse pieces out of finished compost and return them to the next batch; that recycles the slow material without forcing the whole pile to stay in the hot phase longer.
When grass and kitchen scraps dominate
If you have a steady stream of grass clippings or food scraps, keep a separate reserve of leaves, straw, or plain shredded paper. Sprinkle a thin layer of greens through the pile, cover it with a more generous layer of browns, and break up clumps so they do not mat together. A wet, dense pile benefits more from dry structure and turning than from simply adding another green source.
Do not use fresh grass clippings as a solid layer by themselves. They can compact, warm quickly, and develop a sour smell if air cannot move through them. Mix small amounts with leaves or cardboard, let some clippings dry before adding them, or leave healthy clippings on the lawn as mulch. You do not have to compost every green material you produce.
Troubleshoot the pile before changing the ratio
Check three things before you add a large amount of one ingredient: moisture, airflow, and pile size. A pile can smell or stay cool for reasons that have little to do with the green-to-brown ratio alone. If you fix the wrong factor, you may overshoot and create the opposite problem.
Open a small section in the center and look at the material. Is it soaked, dusty, matted, or mostly intact? Does it smell earthy or sour? Is the pile warm at the center or has it never heated at all? These clues tell you whether to add dry browns, add water, loosen the mix, or simply allow a small cool pile more time.
What to do when the pile smells sour or rotten
A sharp sour, rancid, or rotten-egg smell usually points to excess moisture, too little oxygen, or too much nitrogen-rich material. It does not prove that you need to rebuild the whole pile. Loosen the center with a fork, break up compacted clumps, and mix in dry leaves, straw, or shredded cardboard until the texture becomes airy rather than slimy. NC State Extension identifies excess moisture, limited air, and too much nitrogen as common causes of foul odors.
Check the pile again after mixing. If it still feels waterlogged, cover it against heavy rain while leaving room for air, and add more dry browns in small amounts. If food scraps are exposed, bury them under browns and use a secure lid or pest-resistant bin. Keeping meat, dairy, oils, and pet waste out of an ordinary backyard pile also reduces odor and animal problems.
What to do when a damp pile stays cool
A pile can be damp and still fail to heat. It may be too small to retain warmth, too compacted to receive oxygen, or too low in available nitrogen for active decomposition. Before adding greens, check that the pile is large enough to hold heat, fluff it with a fork, and make sure wet material is spread through the browns.
If those basics are in place and the pile remains cool, add a modest amount of a nitrogen-rich material such as fresh grass clippings or vegetable scraps, then mix it through. Do not pour in liquid fertilizer or random household products as a “starter.” Compost activators are not a substitute for a balanced feedstock, moisture, and oxygen; a slow cold pile can still become useful compost over a longer period.
NC State Extension notes that a pile may take one to two years if left mostly alone and several months when it is aerated regularly. That timing is not a promise: cold weather, dry ingredients, particle size, and how often you turn it all affect progress. If a pile is not heating but is otherwise stable and odor-free, you can choose to let it decompose slowly instead of chasing hot-compost temperatures.
What to do when the mix is dry or soggy
A dry pile may simply need water. Sprinkle water as you turn it, then squeeze a handful: it should feel like a wrung-out sponge, with only a drop or two of water coming out. NC State Extension describes roughly 40% to 60% moisture as suitable for decomposition and recommends adding dry leaves, paper, or sawdust if a pile is too wet.
If water streams out of the handful, do not add more greens. Mix in dry browns and open the pile so air can get through. If no moisture can be felt and the ingredients are brittle, add water gradually rather than soaking the outside; a tarp can help keep an open pile from drying out, but do not wrap it so tightly that airflow stops.
Keep moisture, air, and particle size in balance
Ratio is one variable in a living process. NC State Extension explains that microbes need both moisture and oxygen, and that overly wet material can decompose slowly and smell unpleasant. Cornell Composting explains that oxygen supports aerobic decomposition; when oxygen is limited, the pile can shift toward anaerobic conditions and develop objectionable odors.
Smaller pieces usually decompose faster because they expose more surface area, but powdering everything is not the goal. Finely shredded paper and grass can mat into a dense layer, while a few coarse stems or twigs create air spaces. Aim for pieces that mix together without turning the whole pile into a compact paste or a loose heap of unbroken branches.
For a hot pile, size and turning matter as well as recipe. A small bucket of scraps and leaves may compost gradually but may not reach temperatures associated with a managed hot-compost batch. If you are relying on heat to reduce weed seeds or pathogens in material such as manure, follow a reliable extension protocol for the full process; a good volume ratio alone does not prove that every part of the pile received adequate heat.
Inputs a ratio cannot make suitable for a home pile
Do not treat extra browns as a cure-all for every questionable ingredient. An ordinary backyard pile is not designed to manage meat, fish, bones, dairy, fats, oils, dog or cat waste, or contaminated plant and household materials. Those ingredients can attract pests, produce odors, or require controlled temperatures and processes a small pile may not reach. Municipal programs sometimes accept a wider range of food waste, but follow your local program’s list rather than assuming your home pile works the same way.
Likewise, do not add painted, treated, or coated wood, plastic-coated paper, foil-lined packaging, or material contaminated with household chemicals. Remove produce stickers, twist ties, and plastic film from kitchen scraps. A favorable carbon-to-nitrogen ratio cannot make a contaminated ingredient safe or compostable.
Weeds with mature seedheads, invasive roots, and diseased plants also need thoughtful handling. A cool, unmanaged pile may not kill seeds or pathogens. If you are not running and monitoring a hot-compost process, follow local extension guidance for those materials rather than relying on an extra layer of browns to neutralize them.
Stop adjusting when the pile is decomposing steadily
A well-balanced pile does not need to heat dramatically every day or look perfect between turns. Signs that it is working include gradual settling, softer plant material, a mild earthy smell, and no persistent sour odor. In a hot pile, warmth in the center is an encouraging signal; in a cold pile, slower change is normal.
When the pile has stopped heating and much of the original material is dark, crumbly, and difficult to identify, let it cure before using it. Finished compost can still contain larger pieces such as twigs or eggshells; screen those out if you want a fine texture and return them to a new batch. If you can still recognize fresh food scraps, or the pile smells strongly of ammonia or rot, it needs more time or a correction before it is ready.
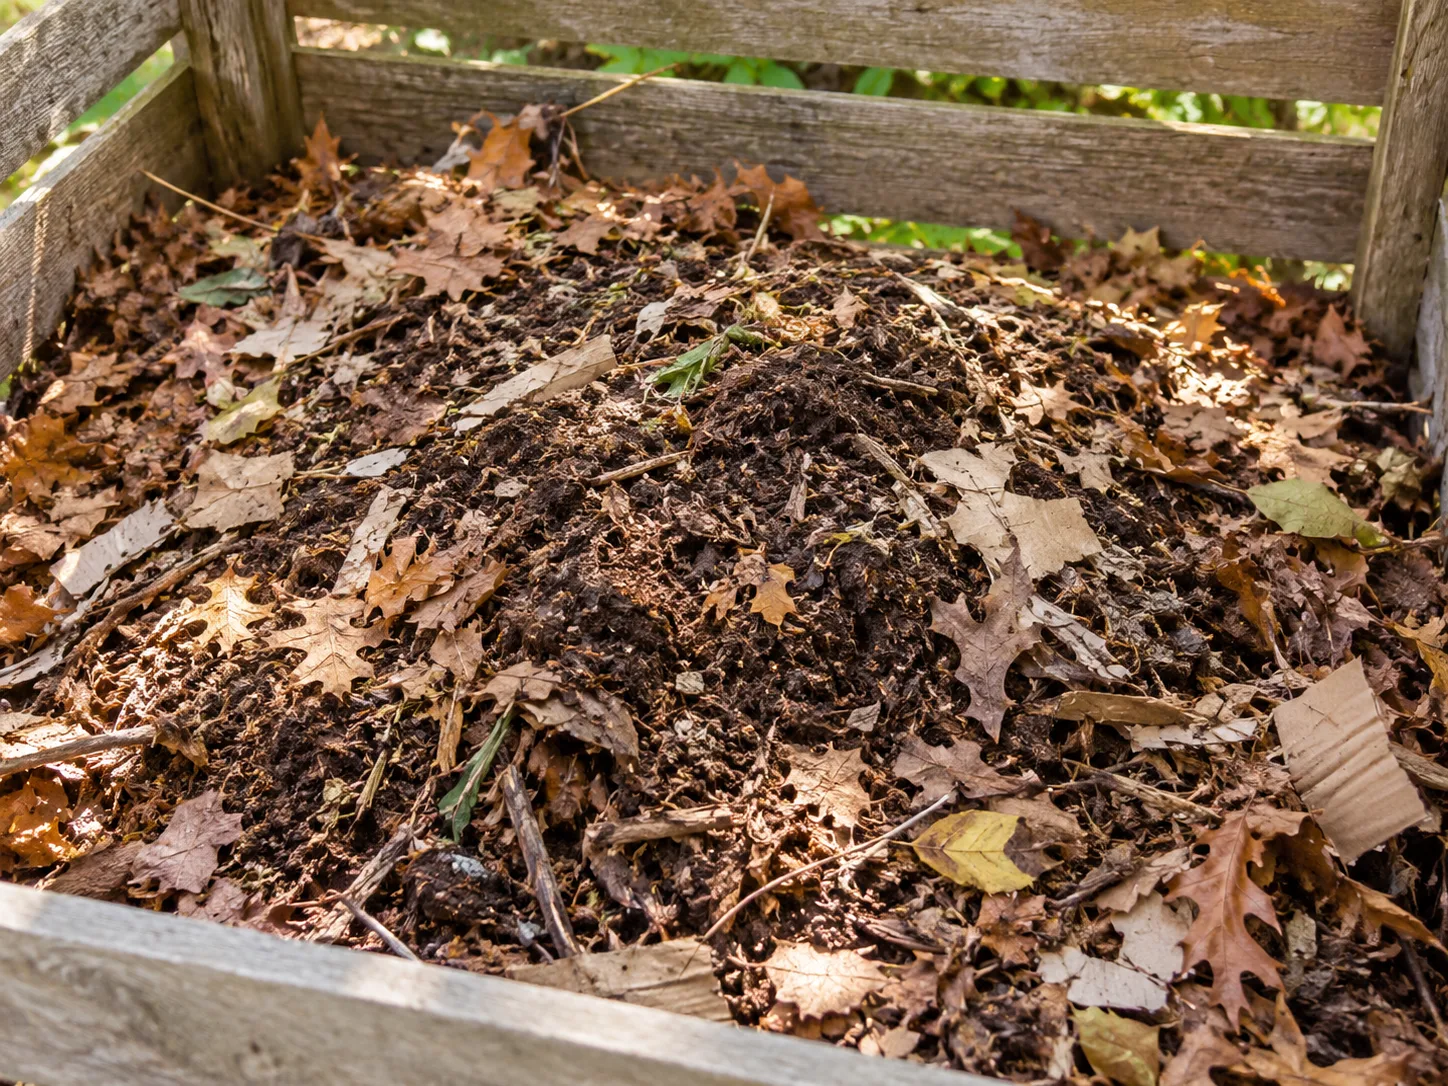
Once the pile is decomposing steadily, resist changing the recipe every few days. Large corrections can swing a wet pile to too dry or turn an inactive pile into an odor problem. Adjust in small steps, give the microbes time, and keep a supply of browns nearby for future additions. If you want a broader setup and maintenance plan, our composting for beginners guide covers pile choice, upkeep, and common problems; our what to compost guide helps sort everyday materials.
Conclusion: use the recipe as a starting point
For many backyard piles, two or three loose volumes of browns to one of greens is a practical place to begin. The sources differ slightly—NC State Extension gives a 2:1 recipe, while Better Homes & Gardens and Gardening Know How recommend about 3:1 or 3–4:1—because the ingredients, moisture, and measuring method all matter. Those are bucket rules, not the same thing as a 25:1 to 35:1 carbon-to-nitrogen target by weight.
Keep the pile damp like a wrung-out sponge, mix in air, and use smaller material when you want faster decomposition. If it smells sour, add dry browns and loosen it. If it stays damp but cool, check the pile size and airflow before adding a little more green material. A consistent starting recipe and careful observation are more dependable than trying to calculate a perfect ratio from every scrap.