How to Loosen Roots Before Planting Without Overdoing It
Learn when to leave roots alone, how to tease a tight rootball, when a clean cut helps, and how to water a newly planted tree, shrub, or houseplant.
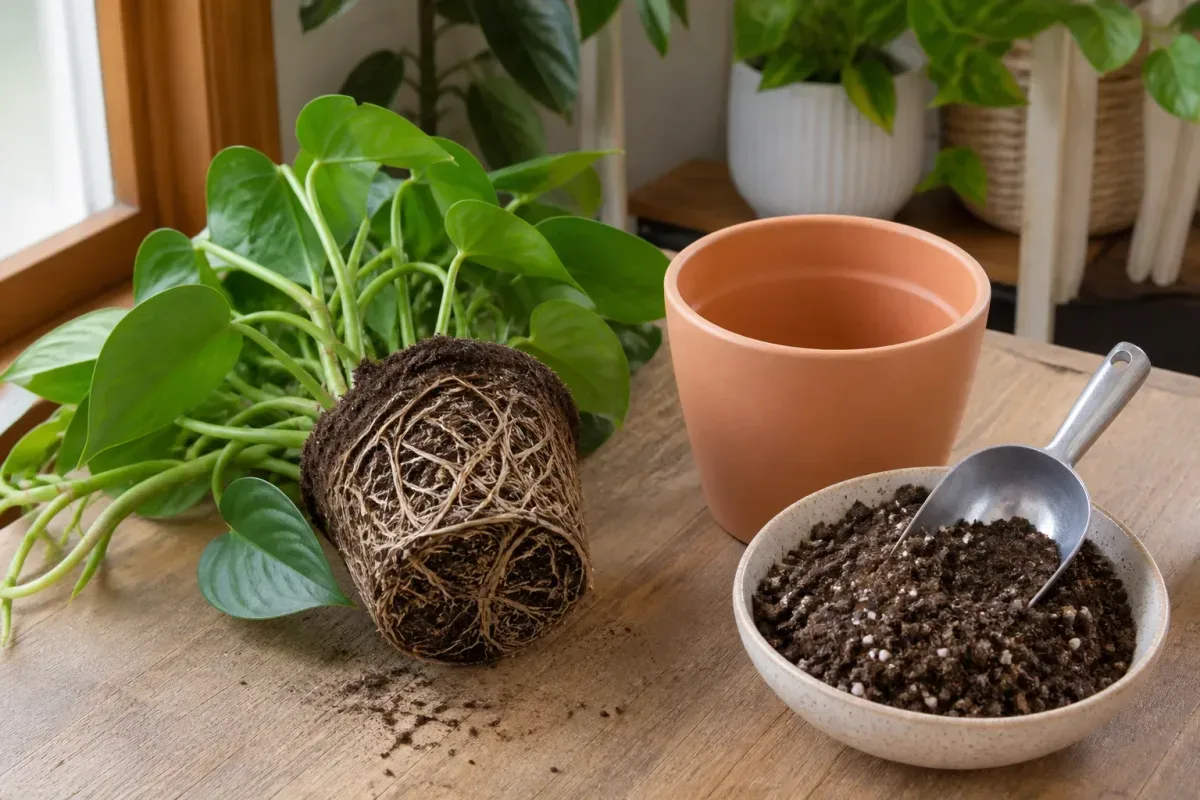
When you slide a nursery plant from its pot, a tight mat of roots can look alarming. The right response is not automatically to pull every strand apart or cut the rootball. First decide whether the roots are actually circling and constricted, then choose the least disruptive treatment that will let healthy roots grow into the new soil.
For a mildly crowded plant with soft, flexible roots, a few minutes of finger-teasing is usually enough. A plant whose roots form a hard spiral may need more deliberate correction, especially if it is a tree or shrub that will remain in the landscape for decades. A plant with a loose, healthy rootball may need no root work at all. Root treatment is a decision, not a ritual.
The most useful distinction is between roots that can be redirected gently and roots whose woody shape is already a structural defect. Fine roots can often be eased outward. Thick roots circling a tree trunk will not straighten just because they are planted in a larger hole; those need to be identified and corrected or the plant may be a poor purchase. In every case, keep the rootball moist, avoid unnecessary damage, and plant at the correct depth.
The short answer: loosen only roots that need it
Do not tease the roots of every plant simply because it came in a pot. Remove the container and inspect the outside and bottom of the rootball. If a few fine roots follow the pot wall but the root mass is still loose, gently open the outer layer and guide those roots outward. If roots are dense and circling, decide whether the plant type and defect justify a stronger correction. If roots are not circling, leave the rootball mostly intact.
For routine garden annuals and many perennials, the evidence does not show that aggressive root cutting reliably improves establishment. A light loosening may help roots contact surrounding soil, but a plant can often be planted with its rootball intact if it is not severely bound. Woody trees and shrubs deserve closer inspection because a thick root that keeps circling the trunk can enlarge and constrict it over time. Penn State Extension and the University of Georgia Extension both emphasize inspecting and correcting root problems in container-grown woody plants, while the methods and amount of removal depend on the condition of the roots.
The aim is not to make the rootball look perfectly untangled. It is to avoid planting a serious defect, preserve healthy fine roots, and create a few outward routes into the new soil.
Rootbound or simply full? Read the rootball first
A rootbound plant is not just a plant with roots visible at the drain holes. It is a plant whose roots have filled the available space and begun growing tightly around the container, often forming a dense mat at the bottom or a sheath along the sides. Gently slide the plant out while supporting the soil around its base; never pull it out by the stem. Turn the rootball so you can inspect the bottom, sides, and the point where major roots emerge.

Signs that call for intervention
Look for multiple roots wrapping around the outside in the same direction, a thick woven mat that hides most of the growing medium, a root mass that keeps the pot’s shape after the container is removed, or woody roots that bend sharply and cross around a trunk or crown. These patterns matter more than one root poking through a drain hole. A few fine roots at the edge can be normal, particularly in a fast-growing plant that is ready to move up a pot size.
For a woody tree or shrub, locate the first substantial roots near the trunk. If they turn around the trunk or run around the outer edge of the rootball, mark where they curve before doing anything else. A long, flexible root can sometimes be redirected; a thick root that has set into a tight circle may need to be cut at the point where it turns. Do not confuse ordinary fine feeder roots with structural roots that will become part of the plant’s support system.
When the rootball should stay intact
Leave roots alone when they radiate naturally, the growing medium falls away without revealing a dense spiral, or the plant is a small seedling with a delicate plug that would be torn apart by combing. Also pause if the plant is wilted, the rootball is bone-dry, or the roots are already damaged. Stabilize and hydrate the plant before deciding whether any further work is necessary.
A full-looking rootball is not proof that it must be cut. Robert Pavlis’s review of root-treatment studies at Garden Myths notes that results differ among woody plants and that evidence for routine pruning of annuals and perennials is limited. That uncertainty supports a conservative default: fix visible defects rather than making cuts just because a general rule says to.
Choose a method for the kind of plant
The same rootball treatment does not suit a seedling, a perennial flower, and a nursery-grown tree. The plant’s expected life span, root texture, and severity of circling all change the risk calculation.
Annuals and fine-rooted perennials
For bedding plants, vegetables, and many herbaceous perennials, start with the least forceful option. Loosen the outer roots with your fingers only if they are visibly circling or packed into a mat. Keep most of the rootball together; the plant’s fine roots and root hairs are delicate, and tearing them off does not guarantee faster establishment. For a short-season annual with only mild circling, planting it intact is often a reasonable choice. The benefit of aggressive cuts is uncertain, while the injury happens immediately.
If a perennial has a dense outer pad, tease it outward in several places so roots are not all pressed into one smooth cylinder. Do not yank long roots until they snap. Instead, separate them a little at a time, working from the edge toward the soil rather than pulling from the crown. If the roots are so tangled that they cannot be opened without destroying most of the rootball, consider whether the plant is worth saving; choose a healthier specimen when possible.
Trees and shrubs with woody roots
Inspect a container tree or shrub more carefully than a small annual. Penn State Extension describes container-grown roots that hit the pot wall, turn, and become circling roots; it recommends corrective cutting or manipulation before planting. UGA Extension likewise advises separating crowded roots and trimming tightly circled or upward-growing roots while preserving as much healthy root mass as possible. These recommendations address a long-lived plant where a single woody root can later girdle a trunk.
If the woody roots bend but remain flexible, ease them outward. If a small number of roots circle the trunk, use a sharp, clean knife or pruning saw to remove the section that cannot be redirected. For a severely matted container root system, extension guidance discusses shaving or removing a thin outer layer rather than leaving a tight cylinder in place. This is a correction for a visible woody defect, not permission to strip away all the roots. If the rootball is dominated by thick circles, the trunk is buried deep in the pot, or the root flare is missing or damaged, returning the plant is safer than trying to repair a badly formed specimen at planting time.
Seedlings and plants sensitive to root disturbance
Small seedlings are easier to transplant before their roots form a hard spiral. If the plug is lightly filled with fine roots, keep it together and plant promptly; handle a seedling by its leaves or root plug rather than squeezing its stem. Root crops such as carrots are usually sown where they will grow because disturbing a developing taproot can deform it. Cucurbits and other plants that dislike root disturbance should be transplanted with the plug intact rather than aggressively teased.
For orchids, cacti, succulents, and other plants with specialized roots or growing media, follow the plant’s repotting needs instead of applying a general soaking-and-cutting routine. Remove dead or rotten tissue with clean tools when necessary, but do not assume that every exposed root should be cut or separated. If you cannot identify whether a thick root is healthy, structural, or damaged, stop and look up species-specific advice before trimming it.
Prepare the plant, workspace, and tools
Gather the new pot or prepare the planting hole before removing the plant from its container. Root tips can dry quickly in sun or wind, so work in shade or on a calm, mild day when practical. Put down a tarp or tray, have water nearby, and keep a clean knife or pruners within reach. A hand fork or blunt wooden stick can help with a dense mat, but fingers give you the best sense of how much force the roots can take.
If the rootball is dry and hard, water it slowly before handling so the growing medium and fine roots become pliable. If water runs down the gap between the potting mix and the container, pause and water again in smaller passes. You can set the bottom of the rootball briefly in shallow water to rewet a very dry plug, then let excess water drain. Do not leave an ordinary nursery plant submerged for hours or overnight as a default; the goal is to moisten the roots, not keep them waterlogged.
For a woody root that must be cut, use a sharp blade suited to its thickness. Clean the blade before starting and between plants, especially if you see disease or rot. Make deliberate cuts rather than sawing repeatedly at a root until it frays. Avoid cutting just to create a symmetrical-looking rootball.
How to tease roots apart with the least damage
Teasing means loosening the outer roots enough that some can grow outward into the surrounding mix or soil. It does not mean combing every root free or washing away all the growing medium. The gentle method is best for small, fine-rooted plants and for roots that bend readily.
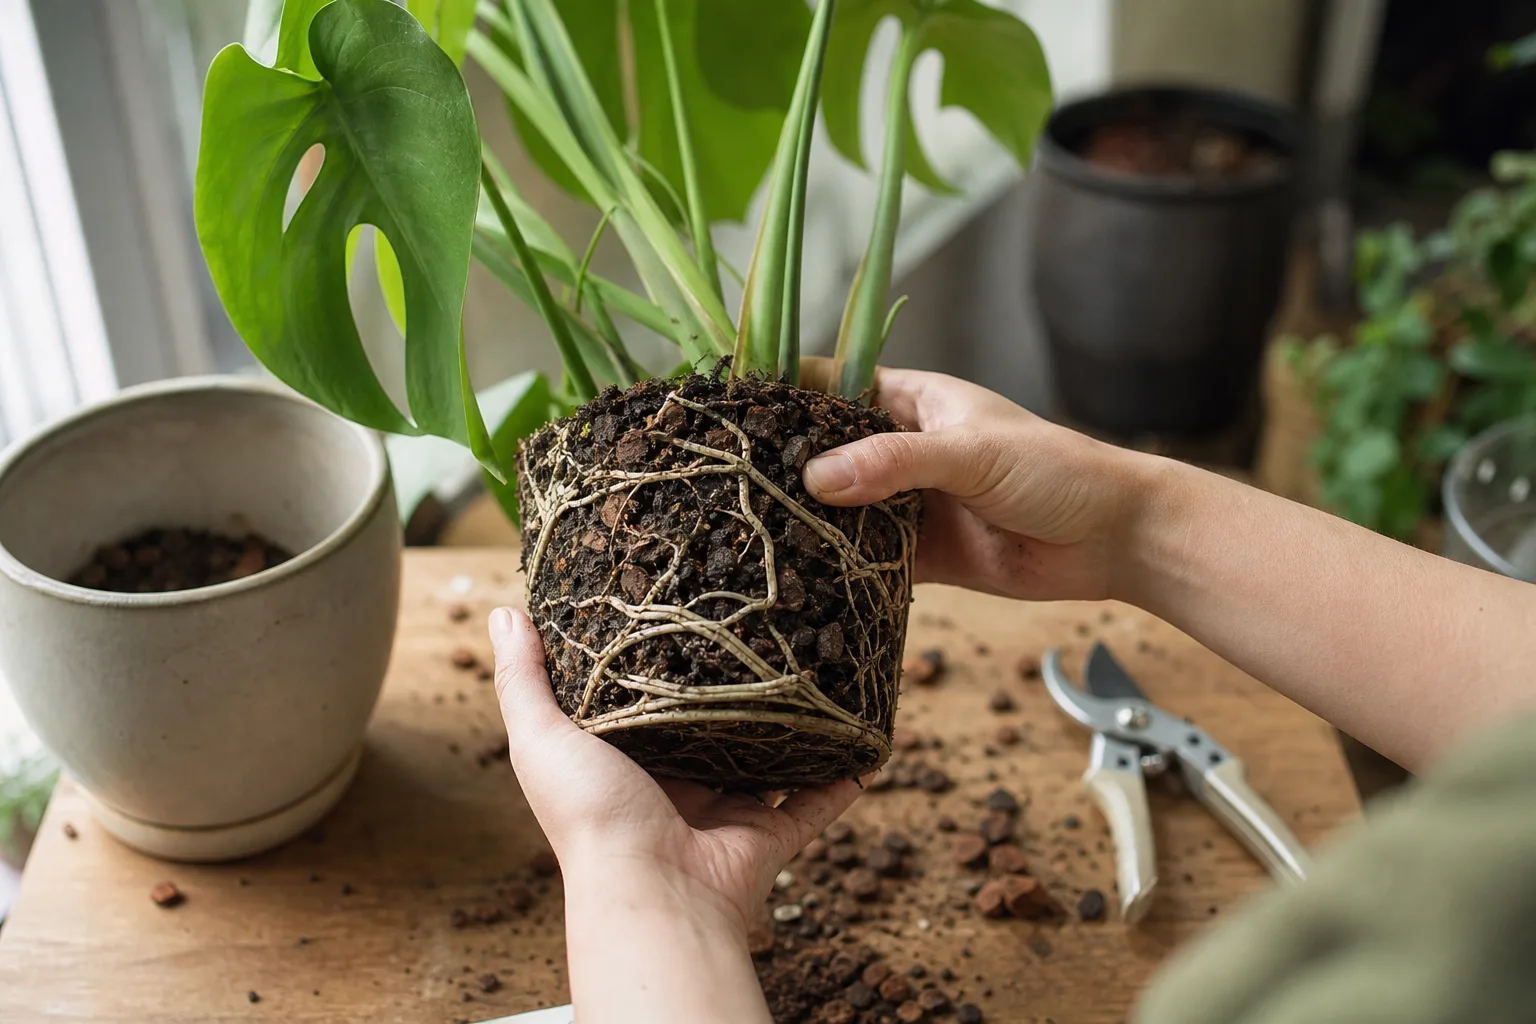
- Remove the pot without pulling the plant. Lay the container on its side, support the rootball at the soil line, and squeeze a flexible pot or tap a rigid pot until the root mass slides free. If a root has grown through a drain hole, cut the pot away rather than tearing the root.
- Inspect before touching. Turn the rootball and look for circling bands, a mat at the bottom, damaged roots, and the first major roots near the crown. Decide whether you need no treatment, light teasing, or a limited cut.
- Start at the outside. Use your fingertips to loosen only the outermost roots. Work around the sides and base, lifting individual fine roots away from the cylinder and pointing them toward the planting area. Stop if the soil begins to collapse or the roots resist enough that they tear.
- Open compacted roots in small sections. If one band of roots is tight, separate a few roots at a time with a finger or blunt tool. Do not rake from the crown to the tip. The pressure should release tangles, not strip the rootball.
- Keep the roots damp and shaded. If the planting hole is not ready, cover the exposed rootball with a damp cloth while you prepare it. Do not let fine roots sit in direct sun or dry wind.
- Spread, position, and backfill. Set the plant at its correct depth, guide the loosened roots away from the center, and fill around them so they contact the surrounding soil. Water thoroughly after planting.
For a mildly bound tomato or perennial in a small nursery pot, this may take less than a minute: open a few outer strands, set the plant, and water. For a larger rootball, inspect slowly and treat only the portions that are actually circling. If you are removing large volumes of soil just to reach a picture-perfect spread, you have gone too far for routine planting.
When roots circle too tightly to tease
Some roots will not bend back into a natural position. That is the point to consider a clean cut—but only after you have distinguished a woody defect from a fine, harmless tangle.
Use a clean cut only to correct a real defect
For a few woody roots that circle the trunk or run around the outside of a tree or shrub’s rootball, cut the offending curve where it changes direction so the remaining root can grow outward. For a dense woody mat, some extension guidance recommends removing or shaving a limited outer layer, then spreading the remaining roots. The University of Georgia Extension describes removing the outer half-inch of a tightly circled root mat during repotting and retaining as much living root mass as possible; that is specific to a strongly bound woody plant, not a universal measurement for every species or pot size.
Research does not support one magic cut pattern for every plant. Pavlis’s review summarizes studies in which root shaving, teasing, boxing, and no treatment produced different results depending on species and setting; some tree trials found fewer girdling roots after more complete correction, while short studies on annuals or perennials showed little benefit from routine cutting. A practical rule is to correct a visible woody circle, preserve healthy roots, and avoid cutting all around the rootball by habit. A plant with a few flexible roots needs a different response from a tree whose structural roots have been trained into a knot.
Do not split a small plant into quarters, butterfly the rootball, or remove the entire bottom simply because those techniques exist. They remove more roots, may add stress, and may not solve the problem you actually found. If pruning seems necessary, make the smallest number of clean cuts that releases the root’s circular path.
When to return the plant or get expert help
Return a nursery plant when major woody roots circle the trunk tightly, the root flare is buried so deeply that it is difficult to locate, several structural roots have already crossed or grown upward, or most of the rootball is a dense knot. A lower-priced plant is not a bargain if the only way to plant it is to remove much of its support system. Choose a specimen with visible, evenly distributed roots and a trunk base that widens naturally.
For a large, valuable tree already established in the landscape, do not dig it up and root-prune it based on this guide. A certified arborist can assess whether girdling roots can be corrected safely and whether cutting one will destabilize the tree. For a newly purchased shrub or small tree, follow regional extension advice and keep the root flare visible. If the plant is rare or particularly sensitive, get species-specific help before using a saw.
Plant at the right depth after root work
Root preparation is only one part of transplanting. A well-loosened rootball can still struggle if it is planted too deep, set into a smooth-sided hole, or left with its roots folded under the stem. BBC Gardeners’ World’s practical planting guidance treats rootball placement, outward root spread, and post-plant watering as connected parts of the job. Complete the planting promptly so exposed roots do not dry while you work.
Find the root flare on trees and shrubs
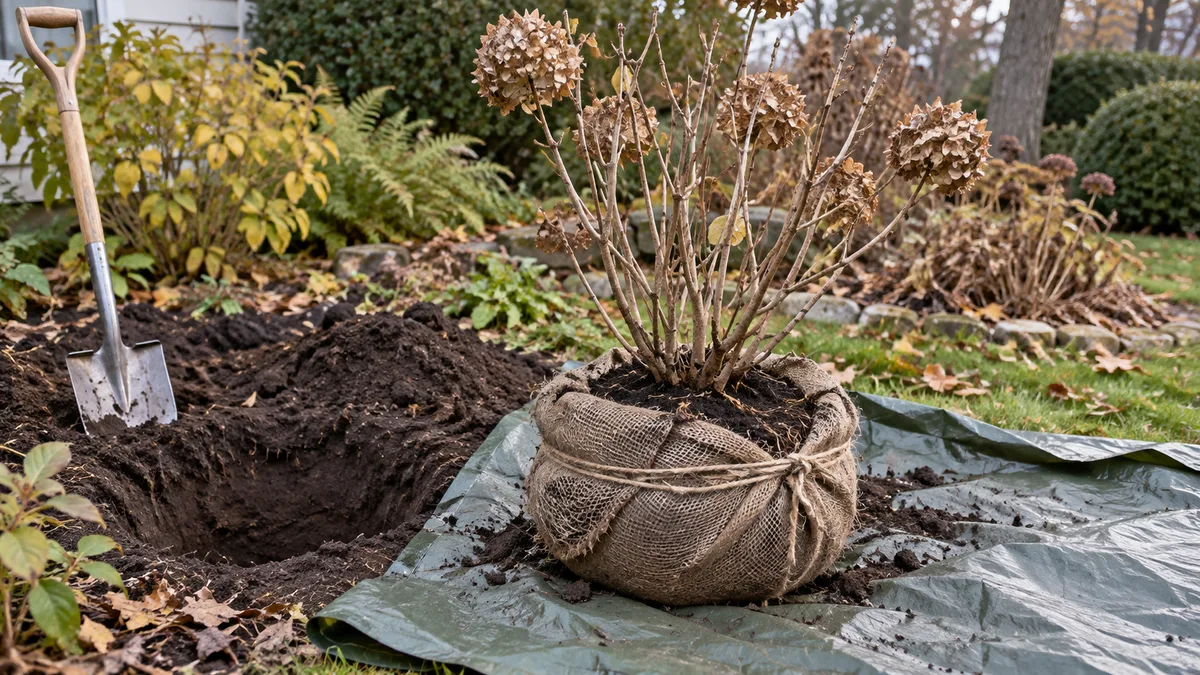
Before planting a container tree or shrub, remove enough loose surface mix to locate where the trunk widens and the first structural roots begin. Nursery media can cover that flare, so the pot’s soil line is not always the right planting-depth reference. Set the first major roots at or slightly above the surrounding grade, according to local extension guidance and site conditions. Do not bury the flare under soil or mulch.
Spread roots into the planting area rather than forcing them into a narrow, smooth-sided hole. Backfill around the roots, firming lightly so there are no large air pockets without compacting the soil into a hard mass. For a potted houseplant or bedding plant, keep the crown at the same depth it grew before; avoid burying stems or crowns that are prone to rot. Recheck the depth after the first watering, because loose soil can settle.
Water and monitor the new planting
Water the rootball and surrounding soil thoroughly after planting. Then monitor the original rootball itself, not just the soil a few inches away. Nursery mix can drain and dry at a different rate from garden soil, so the surrounding ground may feel moist while the plant’s original roots remain dry. Check both zones with a finger or narrow trowel and water according to what the plant actually needs.
Keep newly transplanted roots evenly moist while they establish, but do not leave them sitting in waterlogged soil. The required frequency depends on plant size, soil texture, pot size, weather, and exposure. A small annual in a container may need attention much sooner than a dormant shrub planted into cool, moist soil. In hot, windy weather, inspect more often; in cool or rainy weather, let drainage and soil moisture guide you instead of following a fixed calendar.
Expect some temporary wilting after root disturbance, especially if the plant was already dry or the weather is warm. Give it appropriate light and moisture while it recovers, and avoid stacking stressors such as a hard prune, fertilizer dose, and root cutting on the same day. If it continues to wilt while the soil is wet, check drainage and root condition rather than adding more water. If it wilts in dry soil, rehydrate the rootball slowly and reassess within the next day.
Rootball mistakes that set plants back
Pulling on the stem to remove a pot. This can damage the crown or snap roots. Turn the container, squeeze the sides, and support the rootball instead.
Treating roots at the drain holes as proof of severe root binding. One or two escaping roots may be incidental. Inspect the full rootball before deciding to cut.
Teasing every plant because it is “best practice.” A healthy loose rootball can remain intact. The treatment should match the plant and the pattern you see.
Using a fixed number of slices on every rootball. Four cuts, a butterfly cut, or a bottom shave is not a universal prescription. A cut has a cost; make it only when it corrects an identified defect.
Soaking roots for hours as a routine step. Rewet a dry rootball, then let it drain. Do not turn a transplant into prolonged submersion or leave exposed fine roots to dry while the plant waits.
Cutting healthy roots indiscriminately. Keep the live root mass needed for water uptake and anchorage. Remove only broken, dead, rotten, or clearly circling woody roots that cannot be redirected.
Burying a tree’s root flare. The visible trunk flare and first major roots give you a better depth reference than the top of the nursery mix. Soil or mulch piled against the trunk can hide the problem rather than fix it.
Assuming watering is finished after one soak. A new plant can need follow-up checks as the rootball and surrounding soil settle at different rates. Keep conditions moist but aerated, then adjust as new growth and weather change.
Sources and further reading
- Penn State Extension: Container Grown Trees and Shrubs—Fix Those Roots Before You Plant
- University of Georgia Extension: Repotting Basics—Tips to Ensure Vitality in Woody Container Plants
- Robert Pavlis, Garden Myths: Best Way to Fix Root-Bound Plants Before Planting
- BBC Gardeners’ World Magazine: Planting Guides
Conclusion: match the treatment to the roots
Inspect before you intervene. Leave a loose rootball intact, tease only the outer tangles you can free without tearing healthy roots, and reserve clean cuts for roots that are genuinely circling—especially woody roots on trees and shrubs. For long-lived plants, check the root flare and correct planting depth as carefully as the root pattern. Then water the rootball and surrounding soil, monitor both as they settle, and let the plant establish without adding avoidable stress. The best root work is enough to correct a defect and no more.