Costco Palram Canopia Harmony 6x8 Greenhouse Guide
See what Costco’s 6x8 Palram greenhouse listing confirms, what it leaves unclear, how to prepare a level base, and what one roof vent can and cannot do.
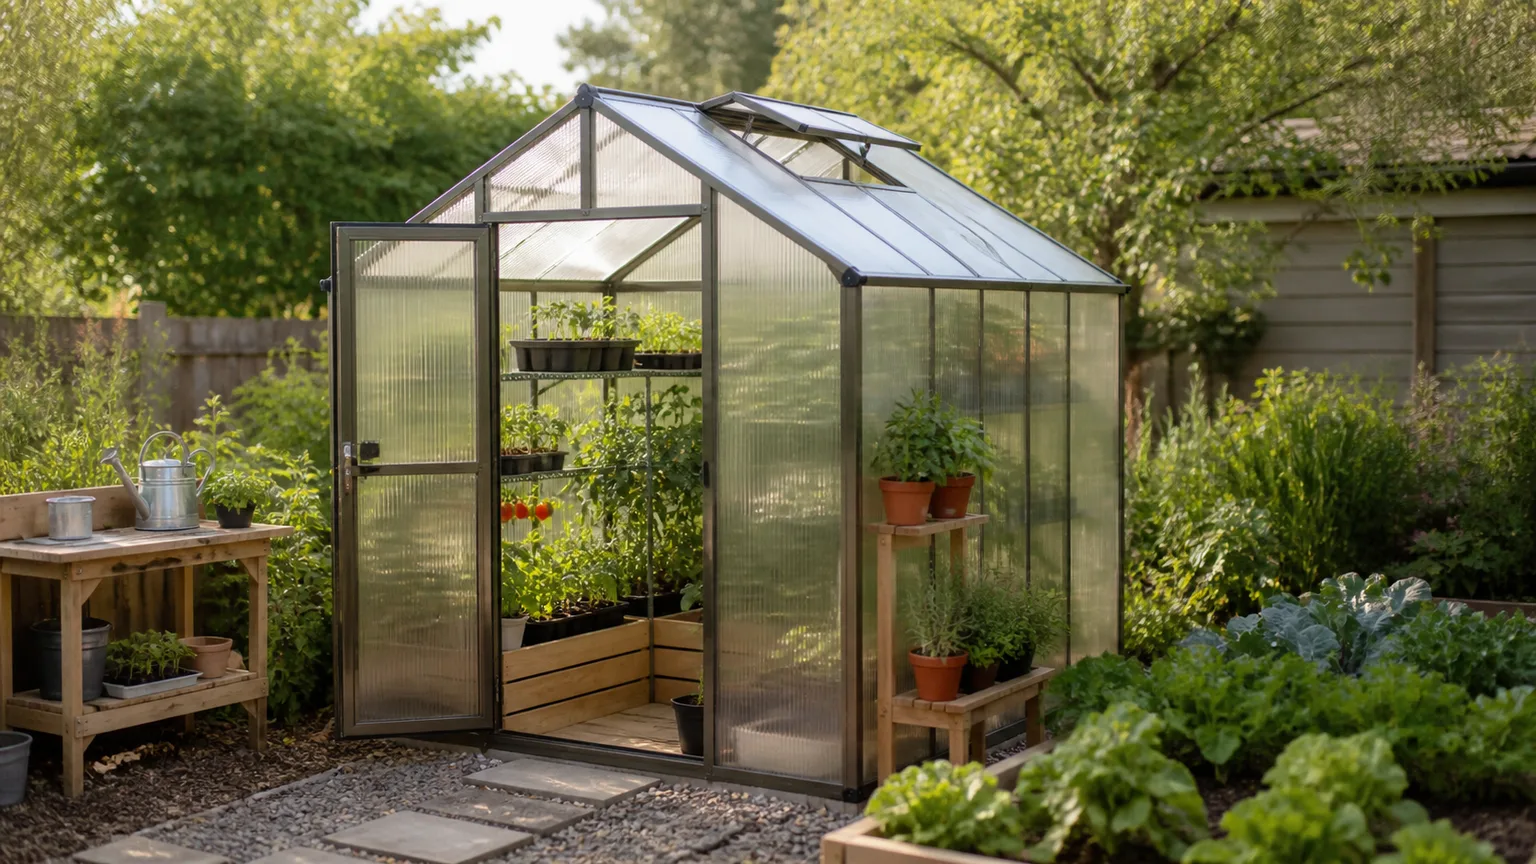
The Costco item to check is the Palram Canopia Harmony 6’ x 8’ Greenhouse with Starter Kit. The product page still identifies the greenhouse, but at the time of review on October 9, 2026, it did not display a usable current price or delivery status. Treat old sale prices and “before it sells out” claims as stale until you confirm the exact item and your local delivery options in Costco’s current listing.
A greenhouse can extend your growing season, but this kit is not a finished growing room you can simply place on lawn and fill with seedlings. Budget and plan for a level foundation, proper anchors, a way to manage hot afternoons, and any accessories the current bundle does not include.
Is Costco selling the Harmony greenhouse right now?
Costco’s listing is for the Palram Canopia Harmony 6’ x 8’ Greenhouse with Starter Kit, shown as online-only item 741353, model 74297. The page gives product specifications, including clear polycarbonate panels, a rust-resistant aluminum frame, a galvanized steel base, a built-in gutter, a roof vent, and an accessory pack. However, a product page being accessible does not confirm that the kit is purchasable in every ZIP code or at a particular price.
When checked on October 9, 2026, Costco’s “How to Get It” area was still loading and the page did not expose a price or an in-stock delivery window. Check while signed in, enter your delivery ZIP code, and look at the exact item number before deciding. If the listing remains unavailable, ask whether Costco can confirm a warehouse item or a seasonal replacement, but do not assume the same model, contents, shipping, or return terms apply.
A 2024 article’s “under $800” figure is not a dependable current price. The cost comparison that matters is the checkout total plus the foundation and anchoring method you need, and any vent opener, shelving, shade cloth, fan, or watering equipment that is not actually in your box. Costco’s Harmony listing is the place to verify current price, bundle details, delivery, and the retailer’s current return conditions.
What the Costco kit appears to include
The Costco page specifically lists clear polycarbonate panels, an aluminum frame, a galvanized steel base, a built-in gutter, a vent window, and an accessory pack. That is enough to identify the basic structure, but the phrase “accessory pack” is not a parts list. The current listing does not identify each accessory in the parsed product details, so do not assume that shelves, a hanger kit, an automatic vent opener, stakes, or foundation fasteners are included.
The standard Canopia Harmony page describes the frame and roof vent, and links to separate greenhouse accessories such as a heater, shade cloth, shelves, plant hangers, and an automatic roof vent opener. A Costco starter bundle can differ from the manufacturer’s base package, so compare the itemized Costco contents with the manual and the manufacturer product page before checkout. If a small accessory is decisive—especially an automatic opener—get confirmation for item 741353 itself rather than relying on a photo, an older review, or a different Harmony size.
There is another useful distinction: the galvanized steel base is the lower structural perimeter that helps support and square the greenhouse. It is not a finished floor. You still need a stable surface below it, an appropriate way to fasten the base, and a walking surface that suits the plants and people using the interior. Canopia’s Harmony 6-by-8 product page is useful for comparing features and checking the manufacturer’s current assembly and foundation guidance.
How much growing space does a 6-by-8 greenhouse give you?
The Costco listing gives overall dimensions of about 8.1 feet by 6.1 feet by 6.83 feet high, with a listed door opening of 24 by 67 inches. The matching Canopia Harmony page describes a footprint of roughly 6 feet 1 inch by 8 feet 1 inch. That works out to about 49 square feet of floor area before you account for benches, an aisle, pots, and the space the outward-opening door needs.
The two listings do not present every measurement in the same way, and bundled products can have their own item details. Use those figures to decide whether the greenhouse belongs in your yard, but use the assembly manual for the exact purchased kit to lay out the foundation and verify the clear door opening. Mark the footprint with stakes or a garden hose first, then stand at the planned entrance with a wheelbarrow or watering can to see whether the opening and approach are practical.
A small greenhouse is easier to heat than a large one, but it is also easier to crowd and can change temperature quickly. If you plan to grow on shelves, sketch one narrow staging bench along a long wall and leave an uninterrupted route from the door to the back. Two deep benches facing each other may look efficient on paper, yet leave no room to carry trays or turn around without brushing foliage.
Who gets the most from this greenhouse—and who should wait?
This size suits a gardener who wants to start vegetables and flowers earlier, harden off seedlings, shelter a few patio plants, or keep tender containers out of cold wind and heavy rain. It gives beginners a protected place to learn seed-starting routines without committing to a large permanent structure. The included gutter can also help collect roof runoff if the current kit has a suitable outlet and you provide a safe route into a water butt or drain.
It is a less convincing choice if you expect to grow tall crops year-round, heat a large collection through a cold winter, or leave the greenhouse unattended in hot weather. The standard Harmony is a compact structure with a single roof vent, not a commercial greenhouse with a powered exhaust system. It also has a narrow door opening by full-size equipment standards, so measure anything bulky you expect to move inside.
The best decision starts with the plants, not the product photo. Write down what you want to grow, when you need the protected space, and the lowest and highest temperatures those plants can tolerate. If the answer is mainly spring seedlings and summer starts, a compact greenhouse can make sense; if it is winter tomatoes or tender subtropicals through severe freezes, plan for heat, energy costs, and a more insulated design before buying.
Choose a site for winter sun, drainage, and daily access
Pick a spot where the greenhouse gets useful sun during the growing season, especially if you want to start plants while days are short. University of New Hampshire Extension recommends looking at how trees, buildings, terrain, and slopes affect the sunlight that reaches a greenhouse. Observe the candidate spot in the morning and afternoon rather than guessing from one sunny visit, and remember that a leafless tree in winter can cast a very different shadow once it is in full leaf.
Full sun is not the only site requirement. Avoid a low point where rainwater ponds, a place where snow sheds from a roof, and a position directly under weak limbs. A hedge or fence may soften wind, but a tight, shaded corner can reduce light and trap damp air. UConn Extension’s greenhouse wind-load guidance explains that exposure, wind direction, and open doors or vents all affect the force on a structure, so do not use a lightweight hobby kit as a substitute for a building rated for an exposed site.
Think about the daily route as well: can you carry water, reach an outdoor outlet safely if you need one, and check plants without stepping through mud? A short hose connection and clear path often matter more than a theoretical ideal orientation. UNH Extension’s greenhouse siting guidance covers light, slope, access, and nearby obstructions; use it as a checklist while you watch the site through the day.
Build a level foundation before opening the panel packs
A greenhouse frame can become difficult to square if its base sits on a slope, soft soil, or a collection of pavers at different heights. Canopia says the Harmony needs a solid, level surface and lists concrete, a pressure-treated wood frame, a deck, or paver blocks among suitable foundation approaches. The right choice depends on local drainage, frost movement, wind exposure, and whether the structure will be temporary or remain in place.
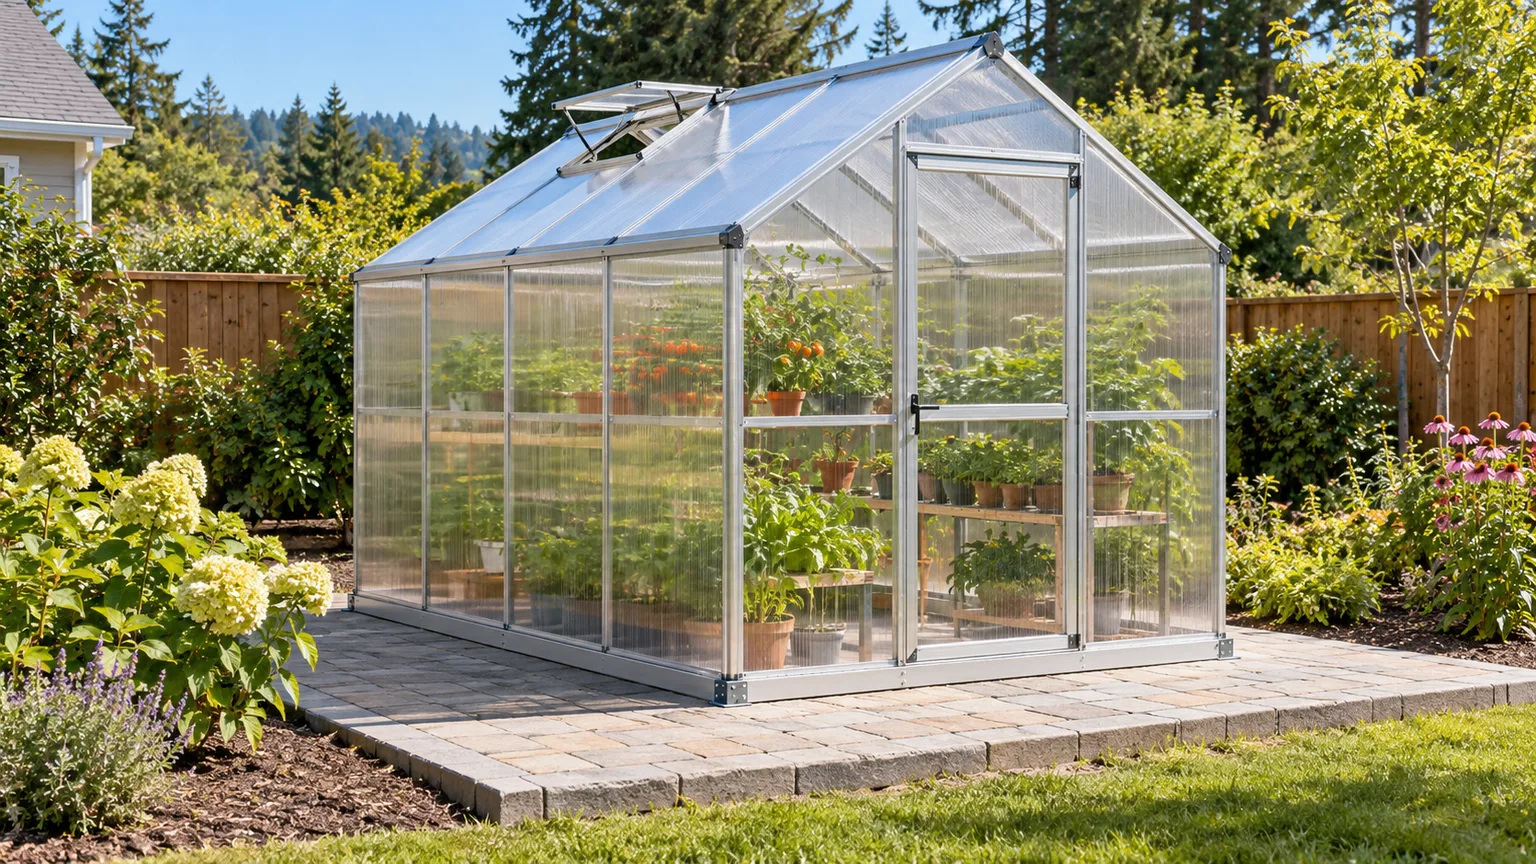
Do the ground work before the kit arrives. Remove turf and roots from the footprint, bring the pad to one level plane, check for runoff paths, and make sure the surface will not settle after the greenhouse is loaded with pots and shelving. A thin layer of gravel can help with drainage around a pad, but loose gravel alone is not automatically a structural foundation; follow the manual’s requirements for the base and the anchors.
Concrete, pavers, wood frame, or soil?
A concrete slab gives a firm, easy-to-clean floor and a direct substrate for suitable masonry anchors, but it is less forgiving if you later want to move the greenhouse. Interlocking pavers can work when they are laid on a properly prepared, compacted base and held level as one footprint; several loose blocks placed directly on uneven lawn can shift independently. A pressure-treated perimeter frame or deck may be practical where timber construction fits the site, provided it is square, level, and secured against uplift.
Canopia’s foundation guidance shows firm ground or grass only with its external anchoring kit, sold separately, and advises using fasteners that suit the actual surface. On a solid foundation, the company specifies a margin beyond the greenhouse base and says anchors are not supplied. Confirm these details in the instructions for Costco’s exact bundle before pouring concrete or buying hardware, because the foundation should match the base rail and connection points rather than a generic “six-by-eight” label.
Check municipal rules, HOA conditions, property setbacks, underground utilities, and drainage rights before building. Costco itself warns that a permit or other local approval may be required. A small footprint does not automatically exempt a permanent accessory structure from local rules.
Anchor the base; do not treat aluminum as ballast
A compact greenhouse has a broad, lightweight surface that wind can push or lift. The panels may be impact-resistant, but that does not make an unanchored frame windproof. Canopia’s Harmony guidance says to connect the finished structure firmly to a level surface and identifies anchoring as essential to stability; the company also ties proper anchoring to its warranty requirements.
Choose anchors for the substrate: masonry fasteners for a suitable concrete base, appropriate structural screws for a timber frame, or the manufacturer’s external kit and ground anchors if the model and soil conditions allow. Do not substitute short deck screws, loose landscape staples, or a few heavy pots inside for a specified connection. If your yard is in a hurricane corridor, a ridge, open field, or other high-wind area, get the exact product’s wind rating and local building guidance before purchasing.
Close doors and vents ahead of forecast high winds, and follow the manufacturer’s instructions for the opener if one is fitted. UConn Extension notes that wind forces depend on exposure and that an open door or vent can allow internal pressure to add to the uplift forces acting outside. Its publication is aimed at greenhouse design generally, not a safety rating for this retail kit, so it supports caution rather than a claim that the Harmony can withstand a particular storm.
What assembly is really like
The kit is a sequence of many light parts, not one prebuilt shell. Before assembly, inventory the boxes against the current manual, lay components on a soft surface, separate fasteners by step, and protect panels from being scratched or mixed up. Canopia’s assembly resources include distinct instructions for different Harmony sizes and packaging formats, so match the manual to the exact product rather than assuming any six-by-eight PDF is interchangeable.
Set aside a calm, dry block of time and have a second adult help position long frame pieces and hold square corners while connections are made. Do not force a panel or connection that seems misaligned; first check the orientation and the step number in the manual. Many greenhouse panels have a marked UV-protected side or a required orientation. Follow the kit’s markings and remove protective film as directed instead of guessing which side faces outward.
The most important assembly checkpoint is squareness. Measure both diagonals of the rectangular base or compare them as the manual instructs; if the base is twisted, doors can bind and sliding panels may not seat correctly. Finish every listed connection and anchor the greenhouse before it becomes a sail in the first strong gust. Do not treat a quick online review’s assembly time as a promise: skill, foundation readiness, missing parts, weather, and the number of helpers all change the job.
One roof vent changes the summer plan
Costco lists a roof vent window, but the current product details do not identify an automatic opener. A manual roof vent helps release hot air because warmer air rises, and opening the door can provide a lower inlet for replacement air. However, a single roof opening and a door are a simpler airflow arrangement than a greenhouse with multiple side vents, ridge vents, or a powered exhaust fan.
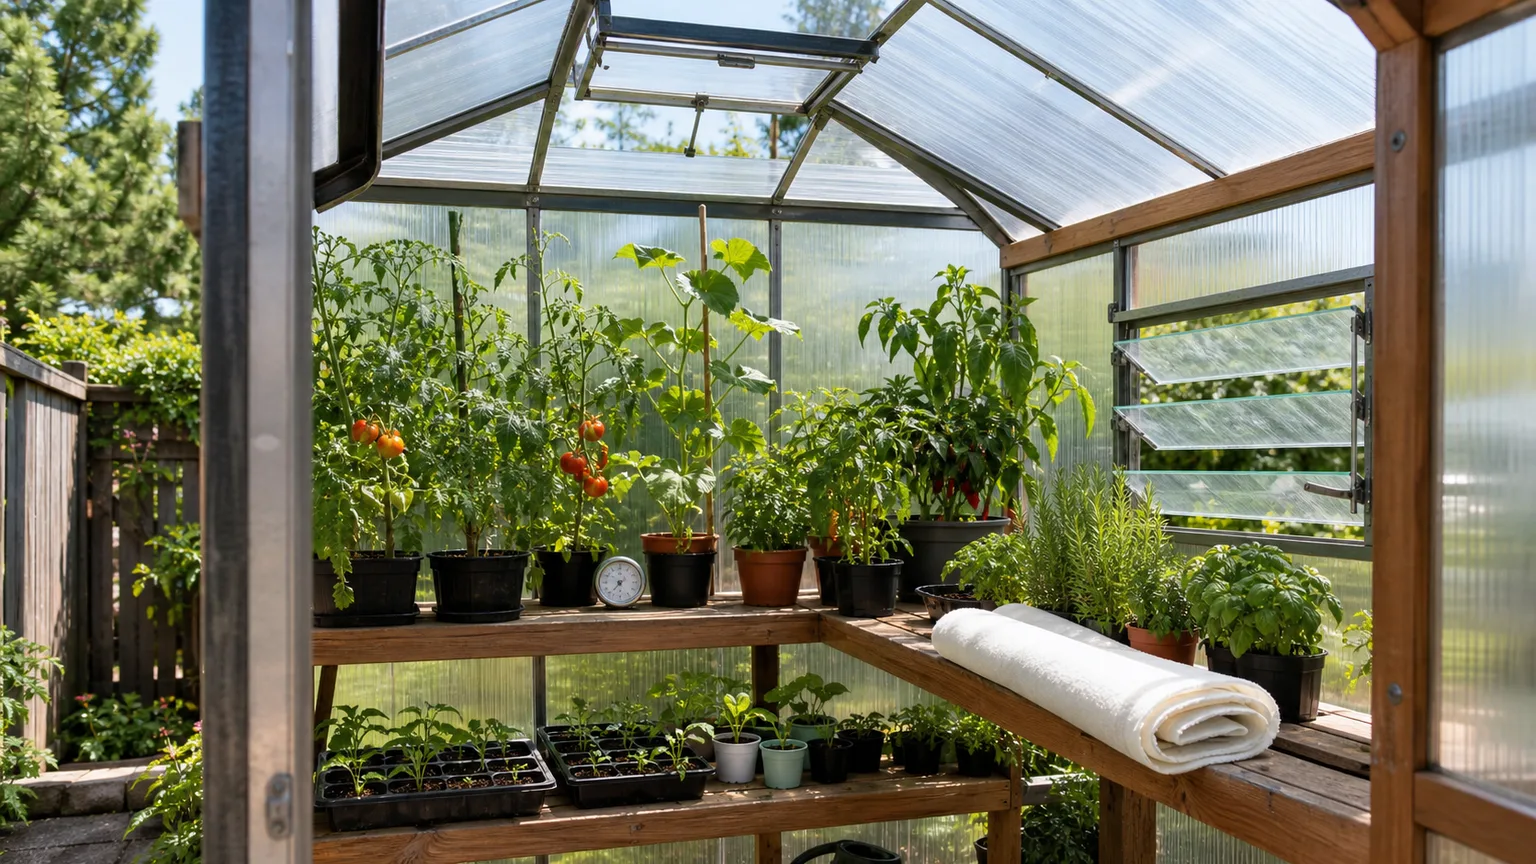
The practical question is whether someone will open and close it at the right times. A closed greenhouse can overheat on a bright cool day because sunlight warms the air and the clear enclosure slows its escape. Gardening Know How’s greenhouse-ventilation guide describes natural ventilation as a combination of high openings, rising warm air, and cooler air entering lower down. BBC Gardeners’ World Magazine likewise recommends opening doors and vents for air circulation and explains how a heat-responsive automatic opener operates in its automatic vent-opener guide.
If you are away during the day, check whether the current Costco pack includes an opener designed for this vent and frame. An opener can reduce the number of manual adjustments, but it controls the roof window only; it does not create a second low opening or guarantee safe temperatures in a heat wave. A small thermometer at plant-canopy height, shaded from direct sun, is more useful than guessing from the outside weather.
Add summer cooling in the right order
Start with observation. On a sunny day, check the thermometer in the morning, around midday, and in late afternoon for several days; record whether the door and vent were open and how the plants responded. There is no single safe maximum for every crop, so use the temperature needs of the plants you are raising rather than relying on a universal greenhouse number.
Open the roof vent early as the interior begins to warm, then use the door as a lower air inlet when conditions allow. On a hot bright day, add shade cloth or removable shading before leaves show scorching, and keep containers spaced so air can move around them. If heat still pools, a small circulation fan can reduce stagnant corners, but a fan that merely stirs trapped hot air does not replace an exhaust path.
Avoid solving every warm day by spraying plants or wetting the floor. High humidity and persistent leaf wetness can encourage disease, while a shallow amount of water does little to offset strong solar gain. Use shading, ventilation, spacing, and monitoring first; add powered exhaust or cooling only if the crop and climate justify the cost and you can install it safely.
Will it protect plants from frost or snow?
A greenhouse is a tool for moderating exposure, not a promise of frost-free conditions. It blocks wind and precipitation and may help soil or containers warm sooner on sunny days, but an unheated structure can lose that stored warmth overnight. Canopia distinguishes the Harmony’s clear single-layer panels from more insulating twin-wall greenhouse designs and notes that heating or cooling may be needed in extreme conditions.
For cool-season seedlings, use the greenhouse to gain daylight and shelter, then harden plants gradually before moving them outdoors. For tender crops, combine the structure with season-appropriate row cover or a safe, thermostatically controlled heat source when forecasts require it. A space heater or heat mat must be rated and installed for the location; keep wiring dry, use an appropriate outdoor circuit, and follow the equipment’s safety instructions.
Snow is a separate structural question. Do not infer a snow-load rating from panel material, from a retailer photo, or from the fact that other people use similar greenhouses in winter. Check the exact manual for permitted wind and snow conditions and local code requirements. In regions with heavy, wet snowfall, a compact seasonal kit may need frequent monitoring or may not be the right structure at all; never climb on the roof to clear snow.
Use gutters, shelves, and the small footprint well
Costco lists an integrated gutter, which can make roof runoff easier to direct than water falling along the entire eave. Plan where that water will go before installation: a downspout or collection container should not block the door, flood the foundation, or create a slippery path. If you want to collect rainwater, confirm which fittings are included and whether the current manual shows a compatible outlet.
Treat staging and shelving as a space plan, not a last-minute purchase. A narrow bench along one side keeps seed trays at a workable height while preserving room for a central path. Place taller crops and plants where they will not shade short seedlings; put heavy pots low; and leave access to the vent, door latch, and gutter for cleaning and adjustment.
One 6-by-8 structure will not provide the same usable area as its footprint suggests once benches are installed. Start with the number of seed trays or containers you actually expect to manage, then assign space for watering, potting, and moving plants in and out. If the intended layout requires multiple rows and a wide central aisle, consider whether a larger model with more vents is a better fit than squeezing more equipment into this one.
First-week greenhouse checklist
Before you pay, use the live Costco page to confirm the price, ZIP-code availability, delivery time, exact accessory list, and return rules. Verify whether the current box has an automatic vent opener, shelving, anchors, and all hardware you expected. If those extras are missing, add their replacement cost rather than comparing only the headline kit price.
Before you build, confirm local permits and setbacks, locate underground services, prepare a solid level foundation, and identify the anchor type that matches it. Check the manual for the exact item, frame orientation, and panel direction. Arrange enough space around the footprint to assemble it and leave a clear route to the door.
During the first week, check the temperature and humidity at plant level, test that the door and roof vent move freely, inspect every anchor, and look for water pooling after rain. Start with a few plants rather than filling all available space on day one. A small first crop lets you learn the site’s heat pattern, shade needs, watering frequency, and cold-night behavior before you rely on the greenhouse for valuable seedlings.
Common buying and setup mistakes
The first mistake is treating an old sale price as a current offer. Retailer inventory, delivery zones, and bundle contents change, and an old promotional price does not tell you what Costco will charge or ship now. Check the exact item page for your ZIP code and save a copy of the included-parts list before purchase.
The second is building the foundation after the greenhouse arrives. Uneven ground makes assembly harder, creates alignment problems, and can leave the door or panels fitting poorly. The third is assuming that the steel base is the foundation or that a greenhouse’s own weight will keep it in place. The manufacturer calls for a level surface and firm anchoring; decide how you will achieve both before opening the cartons.
The fourth mistake is buying the greenhouse for winter use without pricing heat, insulation, and power. Clear single-wall panels can provide a helpful shoulder-season environment, yet do not substitute for an insulated heated greenhouse in a cold climate. The fifth is overlooking summer airflow: a sunny protected place that is easy to heat in April can become an overheating risk by June. Match the model and its venting to the hottest months as well as the earliest planting date.
When a different greenhouse is the better buy
Choose a different setup if the site is consistently windy, receives heavy snow, has no practical way to make a level anchored base, or is shaded for most of the day. A smaller cold frame may suit hardening off and a few trays with less construction; a sturdier greenhouse with tested local load ratings, more ventilation, and better-insulating glazing may make more sense for year-round production. For a balcony or deck, confirm structural load limits and permission rather than assuming this walk-in model can safely sit there.
If your main goal is to extend spring and fall planting for cool-season crops, the Harmony’s footprint and clear panels may be enough, provided you can manage its vent. If you need automated heat, cooling, multiple shelves, and dependable winter operation, compare complete system costs rather than the greenhouse shell alone. The lowest purchase price is not the lowest-cost growing setup if you have to rebuild a base or add essential climate equipment later.
Conclusion
Costco’s Palram Canopia Harmony listing describes a compact six-by-eight greenhouse with clear panels, an aluminum frame, a steel base, a gutter, and a roof vent. Its current price, delivery status, and accessory-pack details were not visible in the product view checked on October 9, 2026, so verify those before treating it as a live bargain. Plan the foundation and anchors first, then decide whether one roof vent and single-wall panels suit your summer and winter conditions. For seed starting and shoulder-season protection in a suitable yard, it can be a useful entry point; for exposed sites or heated winter growing, compare stronger or better-insulated options before you buy.



