43 DIY Christmas Tree Ideas for Any Space
Explore 43 DIY Christmas tree ideas for walls, tables, porches, and small rooms, plus safe materials, fresh greenery tips, and simple build plans.

A Christmas tree does not have to be a full-size evergreen in a stand. A wall outline can keep the floor clear, a branch tree can bring in the scent of the garden, and a tabletop cone can give a small room a focal point without demanding a furniture rearrangement.
The useful question is not “Which idea looks prettiest?” It is “Which structure suits the space, materials, tools, and amount of holiday maintenance I am willing to do?” Use the ideas below as a menu, then use the build notes and safety checks to turn the right one into a finished display.
How to choose a DIY Christmas tree that works in your home
Start with the footprint, not the style. If the tree needs to fit beside a sofa, measure the clear floor area and the door swing. If it will hang on a wall, mark the width with painter’s tape before you cut anything. A design that saves floor space but blocks a thermostat, outlet, window, or hallway is not a successful small-space solution.
Next, decide whether the tree is a frame, a surface, or a collection. A frame supports branches, lights, or ornaments. A surface—such as a painted pallet, a felt tree, or a pegboard—creates the silhouette without much depth. A collection groups several small trees into one display. This distinction tells you whether you need a load-bearing base, a wall anchor, or simply a level shelf.
For the easiest project, choose a material you already know how to handle. Paper, felt, yarn, ribbon, and cardboard need patience but few power tools. Wood, chicken wire, ladders, and drilled bases create stronger statement pieces, but they also add sharp edges, dust, weight, and stability decisions. Reserve fresh branches for a display you can monitor and remove when the foliage starts to dry.
Safety and stability rules before you build
Treat a DIY tree like a piece of furniture with decorations attached. A tall narrow structure needs a wide enough base or a discreet wall tether; a heavy ornament cluster needs a stronger support than a paper silhouette; and a hanging tree needs a rated hook or anchor rather than a random nail in drywall. Test the empty structure before adding the visual weight.
Keep trees and fresh greenery away from fireplaces, radiators, heat vents, and hot lamps. The U.S. Consumer Product Safety Commission advises placing live trees away from heat sources, checking lights for damaged wires or sockets, using lights tested by a recognized laboratory, and turning off lights when leaving or sleeping; its holiday guidance also warns against candles near trees, greenery, and decorations. See the CPSC holiday decorating safety guidance before adding electrical lights to a homemade structure.
Use LED lights that match the indoor or outdoor rating of the display, inspect the cord, and keep the plug and connections dry. Do not attach electric lights directly to a metallic tree or metal frame that could become energized if the lights fail. Instead, light the wall behind it, use non-electric ornaments, or place the lights on a nonconductive support around the form. Never use candles as tree lights.
If children or pets share the room, avoid brittle glass at low height, weighted toppers that can fall, tiny removable parts, exposed wire ends, and food-like decorations that invite chewing. Use a chair only for a low, stable reach; for a tall display, use a properly positioned ladder with another adult keeping the base clear.
Quick materials guide: choose the frame, surface, and lights
For a flat tree: felt, paper, washi tape, ribbon, dowels, driftwood, pallet boards, or a painted canvas create a recognizable outline with little depth. These are the best choices for rentals and narrow rooms, but wall attachment matters more than people expect.
For a tabletop tree: floral foam, poster board, cardboard, yarn, twine, wood blocks, skewers, bottle-brush trees, pinecones, or a potted rosemary plant can make a compact cone. Put the finished piece on a tray if it sheds needles, glitter, food crumbs, or soil.
For a structural tree: cedar shims, scrap wood, a ladder, a dowel, a crate, chicken wire, or a threaded rod can carry more decoration. Sand rough wood, cover cut wire ends, and build the base on a level surface before styling it.
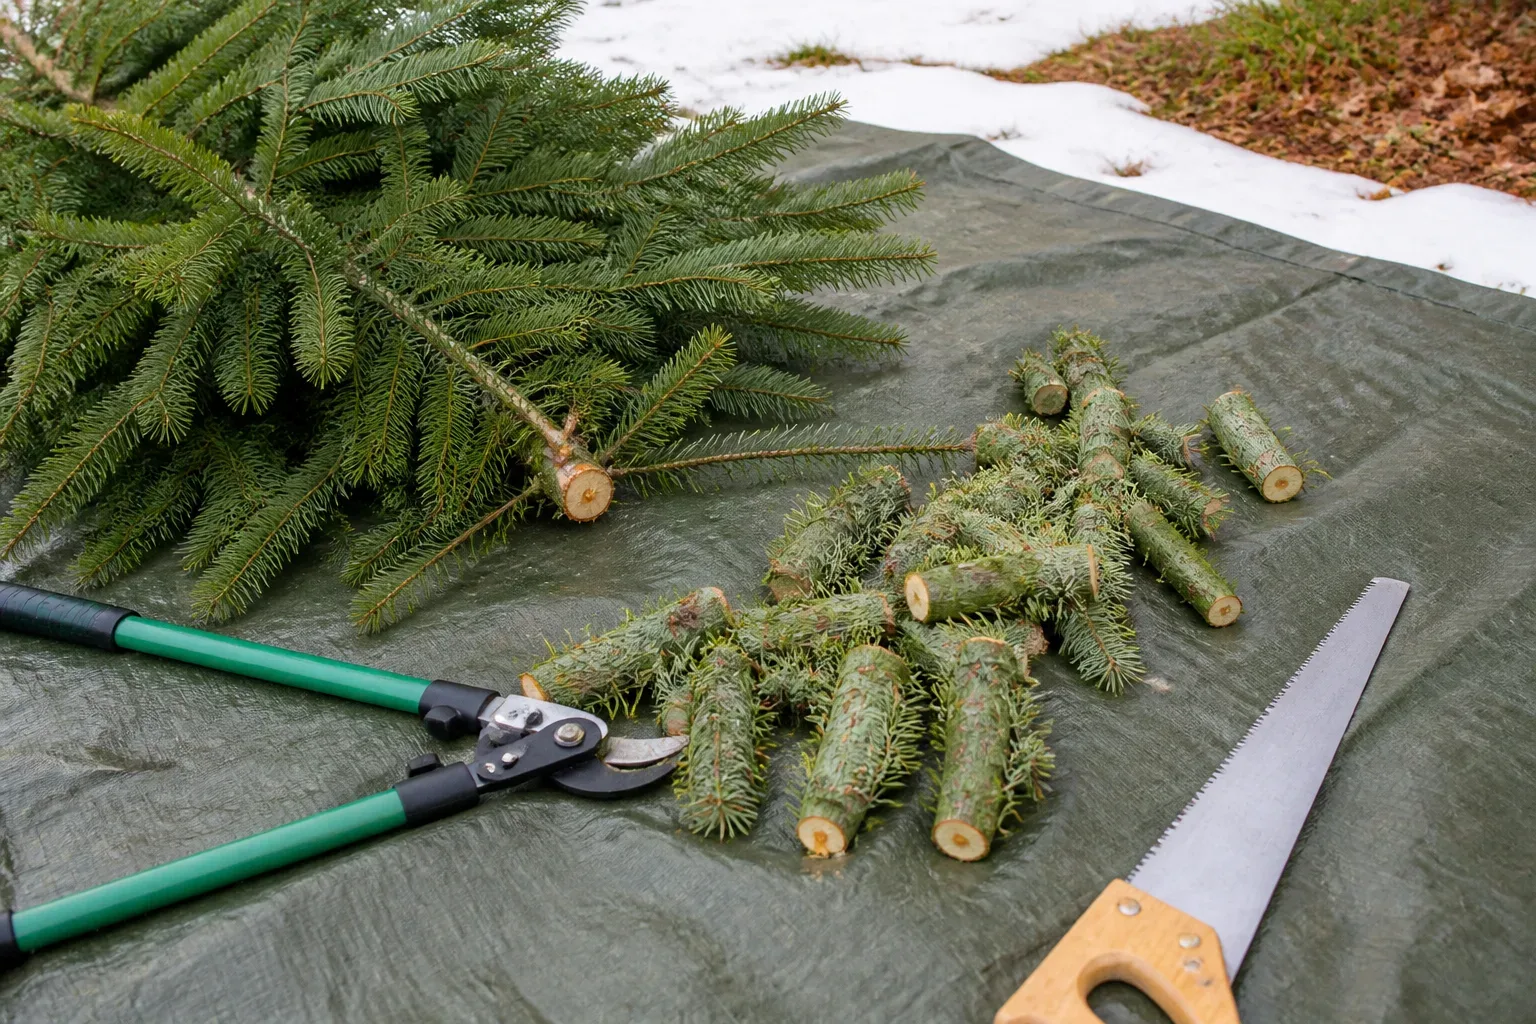
For a natural tree: use fallen branches where possible, or cut only on property where you have permission. Sharp pruners, a bucket, floral wire, and a water-holding container are more useful than a large supply of ornaments. Gardener’s Supply recommends clean cuts, a roughly 45-degree stem cut, and prompt placement in fresh water for cut boughs; its holiday evergreen care guide also recommends keeping greenery cool and away from heat.
43 DIY Christmas tree ideas
The list is grouped by the kind of visual problem it solves. Each idea can be simplified or combined with another, but do not combine heavy materials until the base and anchor have been tested.
Flat and wall-mounted trees
1. A painter’s-tape light outline. Map a triangle with removable painter’s tape, then run a low-heat LED string along the line. Add a star or a few lightweight ornaments only after the outline looks balanced. This is the fastest option for a rental or a room with no floor space.
2. A branch tree on the wall. Arrange short branches from longest at the bottom to shortest at the top, leaving even gaps between tiers. Tie them to a vertical cord or thin dowel, then hang ornaments from the branches instead of gluing them on.
3. A reclaimed pallet tree. Cut or arrange pallet boards in graduating lengths, mount them to a central backer, and paint or stencil the front. Check for splinters, old nails, stains, and unknown finishes before bringing reclaimed wood indoors.
4. A ladder tree. Open a clean wooden ladder and wrap it with garland, ribbon, or lights. The ladder already supplies the triangular silhouette, but it must sit fully open on a level surface and stay out of a walkway.
5. A ribbon cascade. Hang one strong ribbon vertically, then add shorter horizontal ribbons to form a tree shape. Clip greeting cards, paper stars, or small unbreakable ornaments to the bands. It reads as a tree while remaining nearly flat for storage.
6. A paper-fan tree. Fold paper fans in graduated sizes and layer them from large at the bottom to small at the top. Use heavier paper for the lower tiers and attach the display to a rigid backing so the fans do not sag.
7. A pegboard ornament tree. Arrange hooks on a pegboard in a triangle and use them to hold ornaments, cards, bells, or small baskets. The board can be reused as workshop storage after the holidays, which makes the project more useful than a single-season prop.
8. A felt playroom tree. Cut a large felt triangle and add removable felt ornaments with hook-and-loop dots. This is a good child-friendly activity because the decorations can move without glass, needles, or an electrical cord.
9. A driftwood tier tree. Drill or tie weathered sticks to a vertical support, using the widest piece at the bottom. Keep the overall profile shallow, and brush off insects and loose bark before displaying natural wood indoors.
10. A washi-tape tree. Use removable tape in a single color to draw a geometric tree on the wall. Add a paper star and a few card pockets, then remove it slowly at the end of the season to protect paint.
Tabletop and small-space trees
11. A yarn-wrapped cone. Cover a foam or cardboard cone with yarn, working from the base upward and securing each row neatly. Add a wood bead, felt star, or small pom-poms instead of heavy ornaments that pull the yarn loose.
12. A twine-and-cone tree. Wrap twine around a cone with small, consistent overlaps, then finish with a neutral wooden topper. Two or three different heights look more intentional than one cone placed alone on a large table.
13. Cedar-shim mini trees. Overlap cedar shims around a central support to create a faceted evergreen shape, then paint or stain them. Use a heavy wood block as the foot and pre-drill before inserting screws so the thin shims do not split.
14. A scrap-wood triangle group. Cut leftover boards into simple triangular silhouettes and stand them in wood blocks or small crates. Vary the height and finish—one painted, one natural, one stenciled—for a small “forest” that needs no ornaments.
15. A bottle-brush tree village. Group several bottle-brush trees inside a shallow tray, then vary the bases with corks, wooden spools, or wrapped blocks. This is a tree display rather than one tree, so it works well on a mantel or bookshelf.
16. A potted rosemary tree. Shape a small potted rosemary plant as a cone or buy a compact topiary, then add a simple ribbon. Keep the pot where it gets suitable light and water; do not treat a living plant like disposable greenery.
17. A pinecone tree. Glue or wire pinecones around a cone-shaped backing, placing the largest cones at the bottom. Dry cones completely, check for insects, and use a tray because scales and crumbs will eventually fall.
18. A dried citrus cone. Cover a cardboard cone with dried orange slices, cinnamon sticks, and a few small pinecones. This gives fragrance and color without glitter, but keep dried food decorations away from pets and discard them if they mold.
19. A stacked-book tree. Arrange books from largest to smallest in a stable stack, then top them with a lightweight star or plant. Do not build a tall stack where a child can pull it down, and avoid placing it near a heater.
20. A savory crudité tree. Build a cone with broccoli, cherry tomatoes, peppers, and a star-shaped slice of cheese for a party centerpiece. Keep it refrigerated until serving, use food-safe picks, and take it apart promptly rather than treating it as all-season decor.
Wood and upcycled statement trees
21. A herringbone wood tree. Arrange short boards in a herringbone pattern around a center line, then seal or paint the surface. The pattern looks intricate, but a paper template keeps the angles consistent and reduces wasted cuts.
22. A mudcloth-inspired painted tree. Cut a wood triangle or several small tree shapes, then paint simple repeated marks with a brush or paint pen. Call it an inspired geometric pattern rather than trying to reproduce a textile tradition you have not researched.
23. A stenciled porch sign. Use a reclaimed board or fence post, paint a tree silhouette, and add a short greeting. Anchor the sign against a wall or attach a wide foot so wind and wet ground cannot turn it into a falling hazard.
24. Firewood-end trees. Stack or arrange cut log ends into small tree silhouettes, using the natural rings as the decoration. Only use clean, dry wood with no signs of pests, rot, or chemical treatment, and keep the display far from a fireplace.
25. An industrial fence-post tree. Stand a weathered post upright and attach small metal gears or wood offcuts as branches. Sand or cap sharp metal, stabilize the base with a hidden block, and keep the finished piece where it cannot be brushed against.
26. A reclaimed wood tree farm. Make three or more trees from fence scraps, each with a different height and finish, then place them in a crate. The repeated shape creates impact without requiring one large, complicated build.
27. A branch mobile tree. Hang branches from a ceiling hook, longest at the bottom and shortest at the top, then add lightweight ornaments. Use a rated anchor and test the suspension with the empty branches before adding anything that can fall.
28. A painted dowel tree. Cut dowels into graduated lengths and mount them to a vertical backer. Paint each rung one shade lighter than the last, then use the dowels as shelves for tiny decorations.
29. A spool-and-dowel tree. Thread wooden spools or discs onto a central dowel, using wider pieces at the bottom. A large base spool can act as the foot, but glue the stack so it cannot twist when moved.
30. A crate tree. Stack small crates in a tapering arrangement, opening some toward the room for ornaments or wrapped gifts. Secure the crates together if the stack is taller than a tabletop display and avoid overloading the upper openings.
31. A peg-rail tree. Mount short wood pegs at graduated positions on a board to form a tree outline. The pegs can hold stockings, ribbons, and ornaments, and the whole board can become an entryway organizer after the holidays.
32. A wooden-bead tree. Thread large wood beads onto a stiff wire or dowel and shape the line into a spiral cone. Cover the wire end, choose a broad base, and keep the bead size large enough that children cannot mistake loose beads for candy.
Branch and greenery trees
33. Potted branches in a bucket. Fill a galvanized bucket with stones or a removable floral block, then arrange branches in a loose pyramid. The open shape is ideal for large ornaments, but check the bucket daily for water spills and keep fresh greenery cool.
34. A chicken-wire branch tree. Form chicken wire into a cone or flat triangle and push branches through the openings. Wear gloves, fold or cap exposed wire, and use a solid base so the mesh cannot tip when a branch is removed.
35. An alpine branch frame. Make a narrow triangular frame from thick branches, then attach smaller faux stems or evergreen cuttings in layers. The frame does the structural work; the foliage supplies the softness, so it does not need to be densely packed.
36. A single fir-branch wall tree. Hang one strong fir branch horizontally and suspend smaller branches beneath it in a descending sequence. Use floral wire rather than visible tape, and keep the design shallow enough that people will not walk into it.
37. A mossy green tree. Collect clean fallen sticks and branches with naturally green lichen or moss, arrange them into a tiered tree, and add silver or wooden stars. Never bring visibly damp, moldy, or insect-filled material into a warm room.
38. A pampas-grass tree. Attach dried pampas stems to a simple artificial or dowel frame so the plumes create the shape. Dried grasses are highly flammable; keep them away from flames, hot bulbs, and heaters, and remove them when they become brittle.
Ornament, light, and unconventional trees
39. A rainbow ornament tree. Stretch chicken wire over a rectangular frame and fill it with ornaments arranged from warm to cool colors. The frame keeps the display flat, but use lightweight baubles and anchor it before loading one side.
40. An ornament luminary tree. Hang ornaments from a clear acrylic or wire frame and place battery-powered lights behind or inside the outline. Make sure the lights are cool-running, the batteries are enclosed, and the frame cannot swing into a walkway.
41. A zigzag light tree. Run a string of lights from the bottom upward in progressively shorter horizontal lines. The result works on a blank wall or window, but keep the power connection accessible and switch the lights off when the room is unattended.
42. A bottle-brush wreath tree. Arrange miniature bottle-brush trees around a grapevine wreath so the wreath reads as a tree-shaped holiday vignette. Add a ribbon at the top and hang it from a rated hook; this is a good no-floor-space alternative.
43. A gift-wrap tree. Stack wrapped empty boxes in graduated sizes, secure them with removable museum putty or hidden ribbon, and finish with a lightweight topper. Use empty boxes rather than real gifts if the display will stay up around children or pets.
How to make a wall-mounted branch tree
Choose a wall with enough clearance from doors, vents, and radiators. Lay the branches on the floor first, placing the longest at the bottom and trimming only after you like the silhouette. Use dry, clean branches for a long-lasting display, or use fresh cuttings when you want scent and are prepared to monitor them.
Attach a vertical cord, dowel, or narrow wood strip to a sound anchor. Tie each branch at two points so it cannot spin, then tug each tier before adding decorations. A single center tie lets the branch rotate and makes ornaments slide to one side.
Keep the ornaments lightest near the top. Add a few larger pieces low down, repeat one color through the middle, and leave some open wall visible. If the wall is rented, use a removable system rated for the combined load and test it with an empty branch before committing to the full display.
How to build a cone-shaped tabletop tree
Make a cone from poster board or use a foam form, then set it on a flat tray. Wrap yarn, twine, paper, dried slices, or pinecones from the bottom upward. Work in sections so you can check the profile from every side instead of discovering that one edge has become much wider.
The base matters more than the covering. A narrow cone with a heavy topper will wobble, so glue the form to a wood disc, fill the bottom with ballast, or put it inside a larger container. Keep the finished tree below eye level if it will sit where someone can catch it with a sleeve or shoulder.

How to make fresh greenery last
Use fresh branches for projects you can check, water, and remove—not for a display you plan to forget until January. Cut stems cleanly, recut the ends before placing them in water, and condition them in a cool place before arranging. Epic Gardening recommends angled cuts, hydration, and storage in a cool space; its evergreen branch guide also notes that indoor heat and dry air shorten the display life.
Species differ. Fir and some cedar branches generally hold up better than quick-drying foliage, while spruce and pine may shed sooner once cut. Better Homes & Gardens gives different expected vase lives for different evergreens and warns that dried needles become more flammable; use its greenery longevity guide as a planning reference, not a guarantee for every home.
Keep the container topped up without creating a spill hazard, and place the arrangement away from direct sun, vents, radiators, fireplaces, and hot lights. If needles become brittle, foliage turns brown, or the branches stop taking up water, take down the display and move the material outdoors for disposal or composting where local rules allow.
How to decorate a DIY tree without making it look busy
Choose one dominant material, one supporting texture, and one accent color. For example, a branch tree can use natural wood, dried citrus, and burgundy ribbon; a painted wood tree can use matte green, brass-colored ornaments, and warm white lights. Repeating the same accent at three heights makes a simple project feel designed.
Decorate from large shapes to small ones. Start with a topper or main silhouette, place the heaviest ornaments low, add medium pieces through the center, and finish with small accents only where the structure looks empty. Step back often. A DIY tree usually looks better with negative space than with every inch covered.

If the structure is metallic, wood-based, or made from dried grass, let the material be the feature. Avoid hiding it under dense garland. For lighting, use the fewest strands that define the outline, secure slack so no one catches a foot, and keep all electrical connections away from water.
Common DIY Christmas tree mistakes
Choosing a design before measuring. A tree can be narrow but still too deep for a hallway, or short but too wide for a shelf. Tape the outline or place cardboard on the floor before buying materials.
Underbuilding the base. A beautiful cone, branch frame, or ladder will fail if its center of gravity sits outside the foot. Add width, ballast, a wall tether, or a second support before adding decoration.
Treating every evergreen as equally durable. Cut greenery is living material after harvest, and indoor warmth speeds drying. Condition it, choose a display window, and remove it at the first sign of brittleness.
Using heat as decoration. Candles and dry branches do not belong together. Replace flame with battery-operated candles or LED lights, and keep all lighting away from dried grass and paper.
Ignoring sharp edges. Chicken wire, cut dowels, splintered pallets, and drilled metal can injure someone long after the main build is finished. Sand, fold, cap, or cover every reachable edge.
Making a project “easy” by skipping the test. Assemble the empty tree, shake the table gently, open the door nearby, and walk past it with a coat or bag. If it moves, snags, or blocks circulation before decoration, fix it then.
Storage and end-of-season plan
Design for storage while you build. Flat trees should hang from a labeled hook or slide behind a cabinet. Tabletop cones can nest inside a box with tissue around fragile surfaces. Branch structures should separate into bundles, with ties kept in a small envelope so the same profile is easy to rebuild next year.
Photograph the finished arrangement before taking it apart. Mark the back of wood pieces with a simple number sequence, and store the template for a tape, paper, or felt tree with the decorations. Remove batteries from light strings, let any greenery dry completely before disposal, and do not seal damp branches in a plastic bin.
If you used fresh greenery, do not leave it in a warm indoor corner until it is bone-dry. CPSC safety guidance emphasizes heat, light, candle, and traffic hazards; the practical rule is simple: once the branches look dry or shed heavily, the display is finished. Compost or chip untreated plant material according to your local program, or follow municipal collection instructions.
A simple decision guide for your room and budget
Pick a tape, ribbon, felt, or paper tree when you rent, have children, need a fast project, or want almost no storage volume. Pick a yarn cone, bottle-brush village, pinecone tree, or potted rosemary when you need a tabletop display that can be made in an afternoon.
Pick scrap wood, cedar shims, crates, or a ladder when you want a display that can last for years and you have a safe cutting and sanding setup. Pick branches, chicken wire, or greenery when the natural texture is the point and you can monitor moisture, needles, pets, and heat.
Pick ornament, light, or wreath trees when the decorations are more important than the tree form. For the smallest apartment, start with number 1, 2, 5, 8, 10, 40, 41, or 42. For a porch, use number 3, 23, 26, or 33 with weather-appropriate materials and outdoor-rated lights. For a reusable family project, number 7, 14, 28, or 31 gives you a display that can keep working after December.
Conclusion
The best DIY Christmas tree is the one that fits your room before it fits your mood board. Measure first, choose a structure you can stabilize, match the materials to your tools and storage, and let one strong visual idea carry the design.
If you want the fastest result, draw a light outline or make a yarn cone. If you want the most character, use reclaimed wood or clean branches. Whatever you choose, test the empty structure, keep heat and flames away, use sound lighting, remove dry greenery promptly, and leave enough open space for the handmade shape to be the part people notice.



