Drip Irrigation Systems for Home Gardens: Setup Guide
Plan drip irrigation systems around soil, plant roots, and water flow. Compare tubing types, calculate zone demand, and troubleshoot uneven watering.
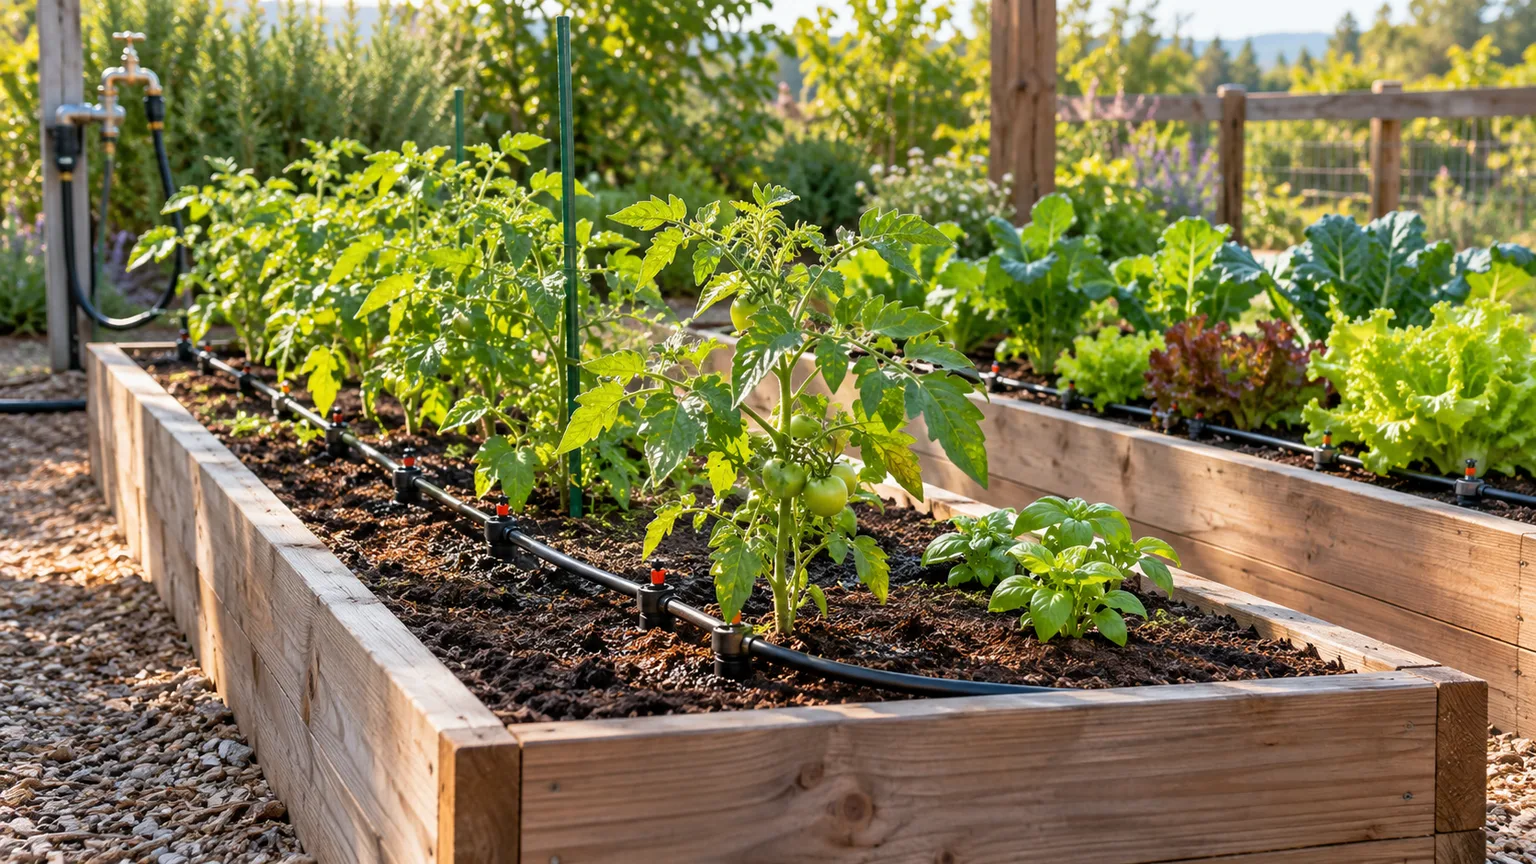
A drip system is a network of low-flow tubing and outlets that puts water at or near plant roots instead of spraying the whole garden. The useful question is not simply whether drip irrigation saves water; it is whether the system can deliver the right amount to the right root zones without exceeding the water source or leaving dry gaps.
A well-planned setup can water raised beds, vegetable rows, containers, shrubs, and irregular borders with less daily hose work. A poorly planned one can run for hours while the end of the line stays dry, or keep clay soil wet long after plants need water. The reliable sequence is to map the plants, check available flow, choose compatible tubing and emitters, then verify moisture after the first runs.
Is drip irrigation right for your garden?
Drip irrigation works especially well where plants grow in defined beds or rows, where foliage should stay dry, or where sprinklers throw water onto paths, walls, or windy areas. It can also handle awkward shapes and slopes because low-flow outlets give water more time to soak into soil. Colorado State University Extension notes in its home-garden drip guide that drip can be highly efficient, but it also stresses that an excessive schedule wastes water with any irrigation system; efficiency comes from both hardware and operation.
It is less compelling for a lawn that needs uniform broad coverage, for a temporary planting you water only once in a while, or for a bed whose plants have sharply different watering needs but only one valve. Tubing remains visible unless you mulch over it, and plastic lines can be cut with a hoe or mower. You trade some upfront layout and inspection for fewer hand-watering sessions and more targeted delivery.
Drip is not automatically “set and forget.” Emitters can clog, plants grow beyond their original root balls, and rain or cool weather changes how much water the garden needs. Plan to check the soil and look at the system regularly, even if a timer runs it.
Choose tubing and emitters by planting pattern
The best type depends on what you are watering and how evenly plants are spaced. A single 20-foot vegetable row, a bed of lettuce, and a young tree do not need the same outlet pattern.
Match the system type to the bed or plant
| System | Best fit | Main trade-off |
|---|---|---|
| Drip tape | Straight vegetable rows or seasonal beds | Low-cost and quick to lay, but the thin wall can be less durable and it works best in orderly runs |
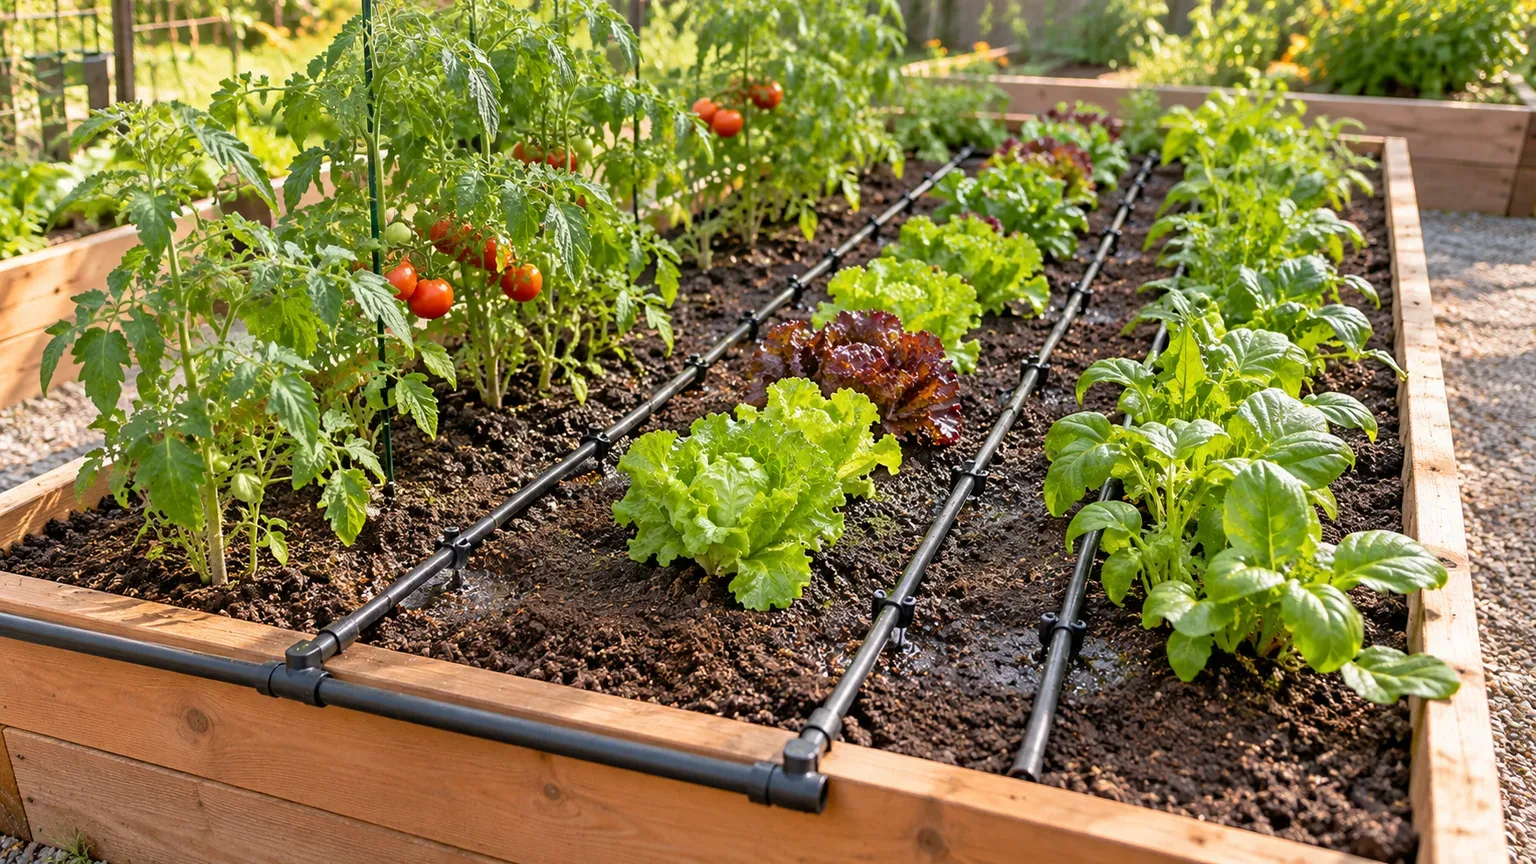
| Emitter tubing | Closely spaced crops in beds or long plantings | Built-in outlets give consistent spacing; choose spacing and flow to suit the soil and crop |
| Point-source emitters | Individual pots, shrubs, or spaced plants | Flexible placement and easy changes; each emitter must be positioned and checked |
| Microtubing | Containers or a branch from a mainline to one plant | Reaches awkward positions, but small tubing can kink or clog |
Drip tape and emitter tubing distribute outlets along a line. Point-source emitters are small fittings installed into larger polyethylene tubing or attached at the end of microtubes. Some emitters respond to pressure and produce more water when pressure rises; pressure-compensating models are designed to deliver a steadier flow across their rated pressure range. Check the product’s operating-pressure and maximum-run specifications rather than assuming all tubing behaves alike.
For a mixed border, a mainline can feed point emitters placed at shrubs and perennial root zones. A vegetable bed with close rows may be simpler to cover with parallel emitter lines. If the layout changes, unused holes can be plugged with compatible goof plugs, and the lines can be moved as roots spread.
Where soaker hoses and micro-sprays fit
Soaker hoses seep water through porous material along their length. They are an easy option for a simple, fairly level row or hedge, but their output may vary with pressure and distance; test the wetting pattern before relying on them for plants with exact needs. They are harder to divide into precisely managed sections than a system with measured emitters.
Micro-sprays wet a circle or fan above the soil. They can cover groundcover or a patch that needs broad wetting, but they evaporate more water and wet leaves compared with ground-level emitters. Colorado State advises keeping microsprays on a separate zone from standard drip emitters because their flow rates can be much higher. Avoid mixing a high-flow spray head into a low-flow line just because the fittings connect.
Map root zones before buying parts
Sketch the bed or border with a few measurements: supply point, line length, plant rows, large shrubs, containers, slope direction, and any paths the tubing must cross. Mark plants with similar water needs together. A sunny vegetable bed that dries quickly and a shaded shrub border should usually be separate zones; otherwise, the timer has to overwater one area or underwater the other. Epic Gardening’s raised-bed irrigation walkthrough starts with a garden sketch for the same reason: line count and emitter spacing depend on crops, soil, and bed layout.
The outlet must wet the root zone, not just the stem. For newly planted perennials, place emitters over or beside the root ball so it does not dry while roots establish. For a shrub or tree that is growing, move outlets outward from the trunk and add them around the expanding root area; keeping one emitter pressed against a mature trunk is not a substitute for watering the broader root zone.
Soil texture changes how far water spreads sideways. Sand drains and wets a narrower band, while finer soils can spread water farther but may accept it more slowly. Utah State University Extension’s backyard drip guide likewise bases outlet count on plant size, texture, and the area each emitter wets. Colorado State Extension’s home-garden guidance offers starting spacings of about 12 inches in sand, 18 inches in loam, and 24 inches in clay, but those are not universal kit settings. Emitter flow, bed mix, slope, plant spacing, and the product’s design all matter. After a test run, dig or use a trowel to check how wide and deep the moist zone actually reaches.
A simple check avoids an expensive mistake: run the system long enough to wet the soil, wait several hours, then inspect at more than one point—near the emitter, between emitters, and at the far end of the line. If the gaps remain dry, add outlets or closer-spaced tubing. If water pools or runs off, lower the flow, split the run, or use shorter cycles with a pause for absorption.
Size the system before shopping
A kit’s “covers up to 100 square feet” claim is a rough marketing guide, not a guarantee that it will supply your plants evenly. Check the actual line lengths, outlet spacing, emitter flow, and number of zones. The simplest design is the one that stays within the source’s available flow and each part’s rated operating limits.
Check the source flow with a bucket
Pressure and flow are different. Pressure pushes water through the pipe; flow is the amount available over time. A hose bib can have strong static pressure but still deliver too little flow for a large system once the water is moving.
To estimate source flow, use a bucket of known size. Open the faucet fully and record how many seconds it takes to fill. Multiply the bucket volume in gallons by 3,600, then divide by the seconds: a 5-gallon bucket that fills in 30 seconds indicates about 600 gallons per hour at the tap. This is a rough source test, not the amount to assign to emitters; allow a margin for pressure loss and other water use. Colorado State Extension’s bucket-flow method uses a conservative portion of measured source flow when planning a zone.
If a zone needs more than the line or supply can deliver, make two smaller zones with separate valves or a multi-outlet timer. Do not solve a capacity problem by removing the pressure regulator or running the faucet wide open. A pressure regulator protects low-pressure components; the exact setting should match the tubing and emitter instructions.
Add up emitter flow and divide zones
Find each outlet’s rated flow, usually shown in gallons per hour (GPH), and multiply it by the number of outlets. For example, 24 emitters rated at 0.5 GPH need a nominal 12 GPH; 40 emitters at 1 GPH need 40 GPH. Add the flow from every line and device that will operate at once, then compare the total with both the supply-flow allowance and the tubing’s maximum capacity.
For inline emitter tubing, count the outlets from its spacing and length. A 12-foot line with emitters every 12 inches has roughly 12 outlets; four such lines have about 48. If the package gives a per-foot flow rather than flow per emitter, use that rating instead. Do not combine the two calculations or you will count water twice.
A useful runtime estimate is total gallons delivered = total zone GPH × run time in hours. If a zone has 12 GPH of outlets and runs for 30 minutes, it applies roughly 6 gallons. That total is a planning figure: how much each plant receives depends on emitter placement, clogging, pressure, and how much of the root area is wetted.
Build the water-source assembly
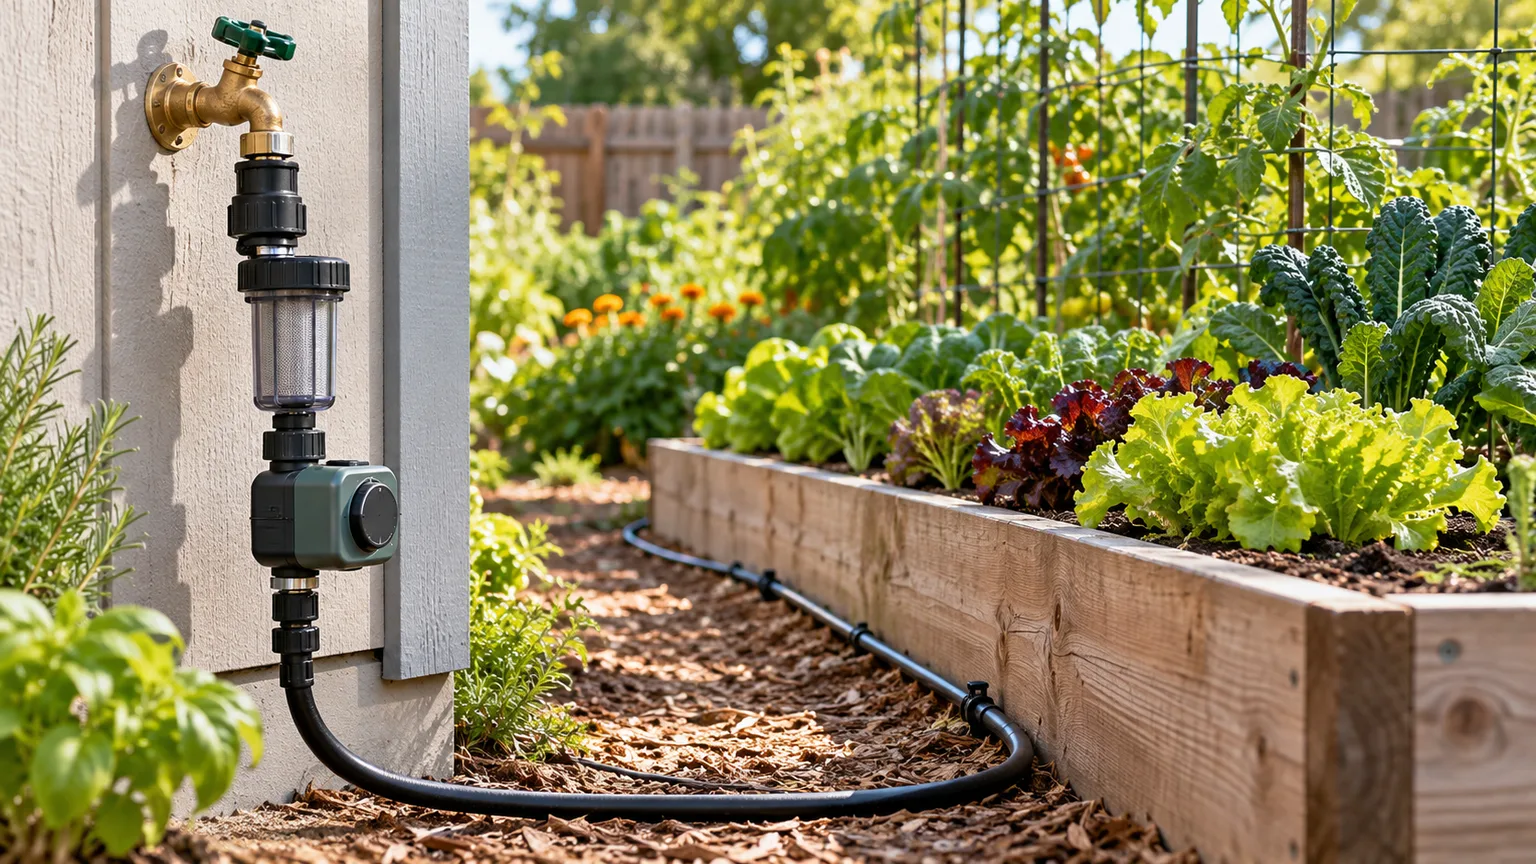
For a hose-bib system, the usual parts are a faucet adapter, backflow-prevention device, filter, pressure regulator, tubing, fittings, and an optional timer. A larger permanent system may also use a control valve, controller, and dedicated supply line. The assembly order can vary by product and local requirements, so follow the manufacturer’s diagram; the important jobs are preventing backflow into drinking-water plumbing, filtering particles before they reach small outlets, and reducing pressure to the level the drip components are built for.
A filter still matters when water looks clean; Utah State University Extension explains that small emitter openings can clog and recommends filtration based on the water source and manufacturer’s requirements. Fine grit or organic particles can block a small emitter. Well or pond water may need more frequent filter cleaning and a filter selected for that source. Check the arrow showing flow direction on the filter and regulator, and leave enough room to unscrew the filter bowl for maintenance.
Use a backflow device that meets local plumbing rules, especially where a hose connects to potable water. Requirements vary by jurisdiction and setup; check with the local water provider or building department rather than guessing. If you attach a timer, make sure its materials and pressure rating are suitable for the assembly and that it does not bypass required protection.
Install the system in a practical order
Before cutting tubing, lay the parts on the ground and dry-fit the route. Keep the tubing accessible for inspection, avoid sharp bends, and route it away from mower wheels and regular foot traffic. If a line must cross a path, secure it and make the crossing visible; burying shallow tubing can make future repairs and emitter checks difficult.
Lay and secure the mainline
Connect the source assembly to the mainline, then run the mainline along a bed edge or landscape route. Branch laterals from it to the rows or plants. A larger-diameter mainline carries more water with less friction loss over a long route, but the size should be chosen from the manufacturer’s flow and length tables. Colorado State Extension’s guide recommends limiting a single zone’s mainline length and highlights long lines and too many emitters as common design errors; use the line-specific capacity rather than stretching a small kit beyond its rating.
Cut tubing squarely so barbed fittings seal. If the tubing is stiff, soften only as directed by the manufacturer; forcing a fitting can split the tube and create a leak that steals pressure from downstream emitters. Use stakes to keep lines in place, especially around turns, and leave a flushable end cap or removable fitting at the end of each run.
Place emitters for young and established plants
For a row crop, align the emitter line with the row and choose outlet spacing that wets the soil continuously or nearly continuously across the planted area. Young seedlings have small root systems; they may need the line close to the plant row, while mature plants may need more than one line or a broader wetting pattern. This is one reason a fixed “one emitter per plant” rule is unreliable.
For isolated shrubs, place multiple emitters around the outer part of the root zone rather than concentrating all water at the crown. As the plant grows, shift and add emitters so the wetted area expands. For containers, secure microtubing so the outlet stays near the potting mix and does not spray the rim or drain directly through one channel.
Do not bury tubing or emitters unless the product is designed for subsurface use. Surface lines are easier to inspect and flush. A thin layer of mulch can hide tubing and reduce light exposure, but keep fittings reachable and do not cover the outlet so deeply that you cannot see whether it is flowing.
Set run time from soil, not the timer
There is no universal number of minutes for every garden. A timer schedules water; it does not know whether the soil is sandy, the bed just received rain, the plants are newly planted, or the emitters are partially clogged. BBC Gardeners’ World’s watering guidance recommends targeting water to the soil above the roots and avoiding saturation, while Colorado State’s drip-tape run-time guide explains why timing must respond to soil, plant demand, and the amount of water already available in the root zone.
Start with the emitter manufacturer’s flow rate and a conservative short run. Check soil moisture below the surface after the water has had time to spread. If the root zone is still dry, increase run time or add emitters; if it is soggy, reduce the amount or frequency. A useful test is to compare the same depth at several points in the bed, not just the wet spot directly under an emitter.
Shorter, more frequent cycles may suit fast-draining soil or shallow-rooted crops, while heavier soil may need a slower application and a pause so water can soak in. A slope may need pulsed cycles to reduce runoff. Newly planted stock needs closer monitoring than established plants, and a heat wave may change demand rapidly. Rain sensors or a manual timer adjustment can prevent an automatic schedule from watering through a wet spell.
Test for dry spots, clogs, and leaks
Run the system while you can watch it. First look for leaks at the faucet, filter bowl, connectors, and end caps. Then check that every outlet is flowing and that the far end of each line is not noticeably weaker than the beginning. Some systems take a short time to pressurize; if an outlet remains dry, inspect the filter, kinked tubing, closed valve, and source capacity before replacing the emitter.
If the first emitters flow strongly but the last ones do not, the run may be too long, have too many outlets, or use tubing with too little capacity. Split the line, feed it from both ends if the product allows it, increase mainline diameter, or reduce zone demand. If one emitter fails while nearby outlets work, remove it and flush the tubing before replacing it; simply adding more runtime can overwater everything else.
After the first cycle, use a trowel to inspect soil between outlets. Dry gaps mean spacing or placement needs attention. A shiny, saturated patch with dry soil nearby means water is concentrated at the outlet rather than reaching the full root area. Adjust line spacing, outlet count, or pulse timing, then recheck after the next run.
Maintain and winterize the system
Inspect filters and visible emitters during the growing season, especially after repairs, dusty work, or a change in water source. Flush the line from its open end after installation and after repairs, then close it and check that all emitters operate. A pressure-compensating emitter can reduce uneven flow across a rated range, but it cannot overcome a clogged filter or a crushed tube.
At the start of the season, open the ends and flush out grit before running the system through its normal schedule. Clean the filter as often as its manufacturer directs; well and pond water may require more attention than treated municipal water. Check tubing for cracks, animal damage, loose fittings, and places where stakes have pulled free. Replace a damaged segment instead of patching a leak with tape that can loosen under pressure.
In freezing climates, drain lines and remove the faucet assembly, timer, filter, and regulator if their instructions call for indoor storage. Water trapped in fittings can freeze and crack them even when polyethylene tubing itself tolerates cold. Before spring use, reinstall the assembly in the correct order, flush the lines, and repeat the leak and emitter check.
Avoid the mistakes that waste water
The most common error is buying by bed area without checking flow. A large number of small emitters may exceed the available supply even when the tubing appears simple. Count every outlet, keep different water needs in separate zones, and leave capacity for the system to run reliably rather than designing exactly at the source limit.
Another mistake is treating all drip devices as interchangeable. Drip tape, point emitters, porous soaker hose, and micro-sprays have different flow, spacing, and pressure requirements. Use compatible parts and avoid joining unrelated components based only on connector size. Sprinklers and low-pressure emitters also need separate schedules and usually separate zones.
Finally, do not bury the system and then assume the timer proves it is working. A quiet leak, clogged outlet, shifted line, or timer battery can leave plants dry while the controller continues its schedule. Keep key fittings accessible and make a quick walk-through part of routine garden care.
Conclusion
A dependable drip irrigation system begins with the garden, not the kit. Group plants by water needs, map the root zones, measure the faucet’s flow, and select tubing and emitters that stay within their pressure and capacity ratings. Then install a filter and suitable backflow protection, run a test, and adjust the wetting pattern before setting a recurring timer.
Treat the first schedule as a starting point. Check moisture where roots grow, change run time as weather shifts, and move outlets as plants mature. With those checks, drip irrigation can make garden watering more targeted and easier to manage without hiding dry spots or turning a timer into a substitute for observation.



