How to Install Landscape Timber Edging That Stays Straight
Learn how to install landscape timber edging with a level base, durable joints, safe anchoring, and the right ground-contact lumber.
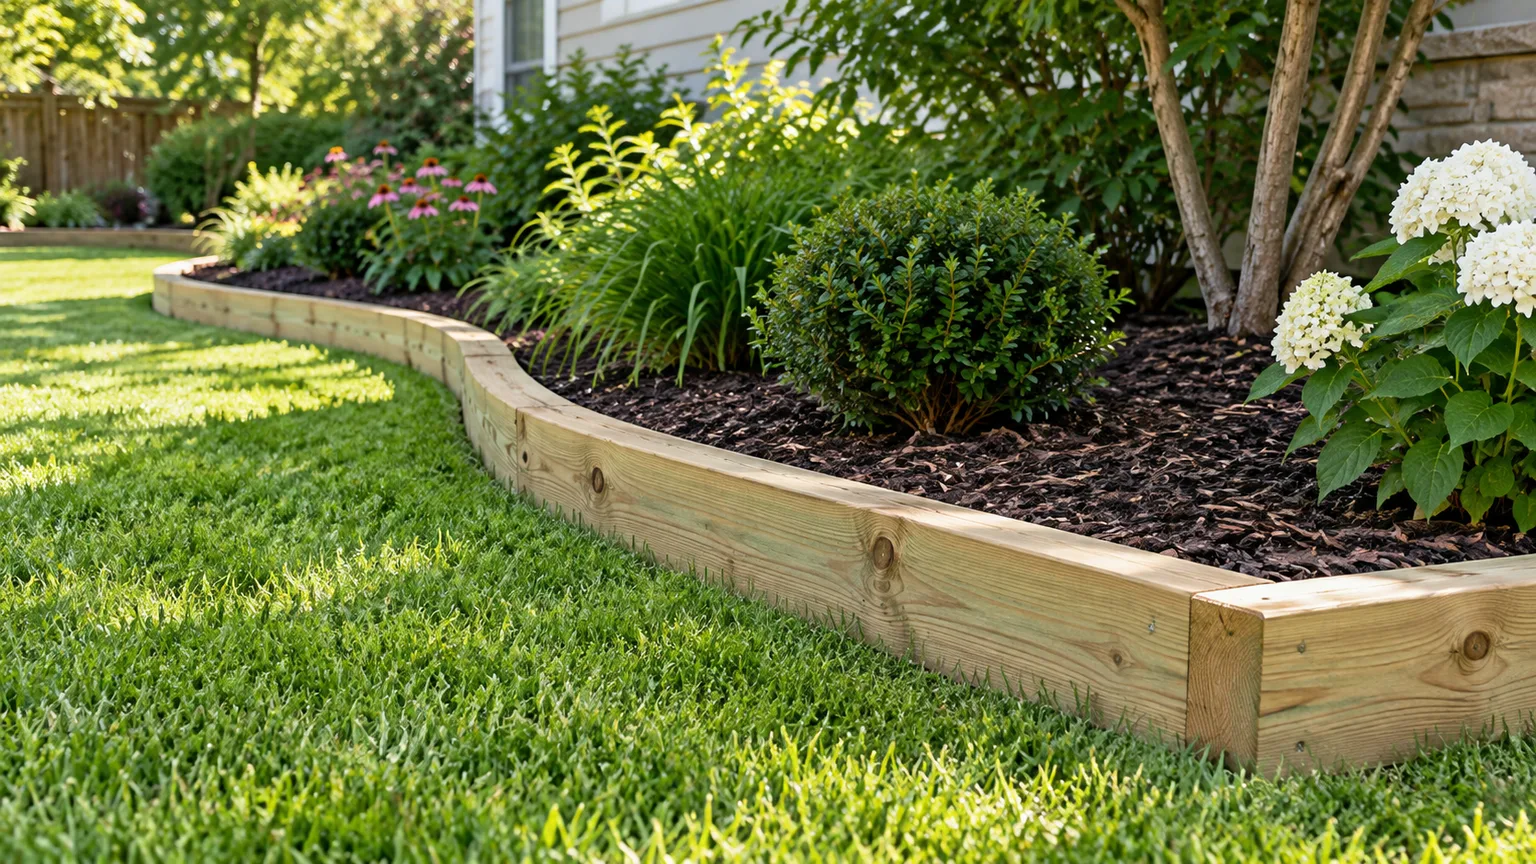
Landscape timber edging is one of the simplest ways to give a lawn, path, or planting bed a crisp boundary without pouring concrete or installing masonry. The job looks straightforward—dig a trench, set the timbers, and fasten them—but most early failures come from decisions made before the first board goes in: using the wrong treatment rating, skipping a stable base, burying lumber in poorly drained soil, or anchoring without checking what is underground.
A good installation should do three things at once. It should hold a clean line, stay reasonably level through seasonal wetting and frost movement, and use materials suited to prolonged outdoor exposure. This guide focuses on a single-course decorative border, not a retaining wall that holds back a meaningful height of soil; once the timber is resisting substantial soil pressure, the structural requirements change.
A single-course timber border works best as a visible divider, not as a structural retaining wall.
What Landscape Timber Edging Is Good For
Landscape timbers work best where you want a visible, slightly raised divider between two surfaces. Common uses include separating lawn from mulch, defining a straight vegetable or flower bed, containing gravel along a path, outlining a play area, or creating a low curb around a planting zone.
They are less suitable when you need tight flowing curves. Timber naturally favors straight runs and broad angles, so a flexible steel, aluminum, plastic, or natural-cut edge can be easier for serpentine beds. Wood is also not the right substitute for an engineered retaining wall: a single timber can hold back a modest grade change, but stacked walls need drainage, reinforcement, and footing details designed for the load.
Before committing to wood, think about maintenance. Timber has a warmer, more natural look than metal, but it eventually weathers and decays. If you value a rigid straight edge and are comfortable replacing individual pieces years down the road, it can be an excellent DIY material.
Before You Dig: Safety, Utilities, and Scope
Do not assume a shallow trench is automatically clear of utilities. Irrigation tubing, low-voltage landscape lighting, invisible-fence wire, and privately installed lines can sit close to the surface, while public utilities may cross the same area at varying depths. In the United States, 811 recommends contacting the local 811 service before digging and waiting for utilities to be marked before you start excavation.
A public locate may not identify every private line on your property. Walk the route and identify sprinkler heads, valve boxes, lighting transformers, downspout drains, septic components, and anything else that suggests buried infrastructure. If you are unsure about a private line, locate it before using stakes, long spikes, or rebar.
Also decide whether the project is truly edging or whether it is retaining soil. A border that simply separates mulch from turf is a straightforward landscape feature. A timber that must restrain a steep bank, support vehicle loads, or prevent a raised area from pushing outward should be redesigned as an appropriately engineered retaining system rather than treated as ordinary edging.
Choose the Right Landscape Timbers
For any timber that will touch soil or sit close enough to stay damp, treatment rating matters more than color or marketing language. The American Wood Protection Association says ground-contact applications require Use Category UC4A or higher, and notes that some thinner treated lumber is rated only for above-ground exposure. Check the end tag rather than assuming every pressure-treated product at the store has the same rating.
Modern residential pressure-treated lumber is not the same as old reclaimed treated wood. The U.S. Environmental Protection Agency lists preservatives such as alkaline copper quaternary and copper azole among systems used for residential treated-wood products. Follow the product label and manufacturer instructions, especially for permitted uses, handling, and fastener compatibility.
For vegetable beds or areas where food crops are a concern, use a current product specifically labeled for the intended application and follow local extension guidance. Avoid old railroad ties and unknown salvaged treated lumber; you often cannot verify the preservative history or whether the product is suitable for a residential garden.
Choose the straightest pieces you can find. Sight down each timber from one end and reject boards with severe bow, twist, splits at fastening locations, or large areas of damage. A small amount of variation can be managed during installation, but starting with badly warped stock makes it much harder to create a clean line.
Materials and Tools
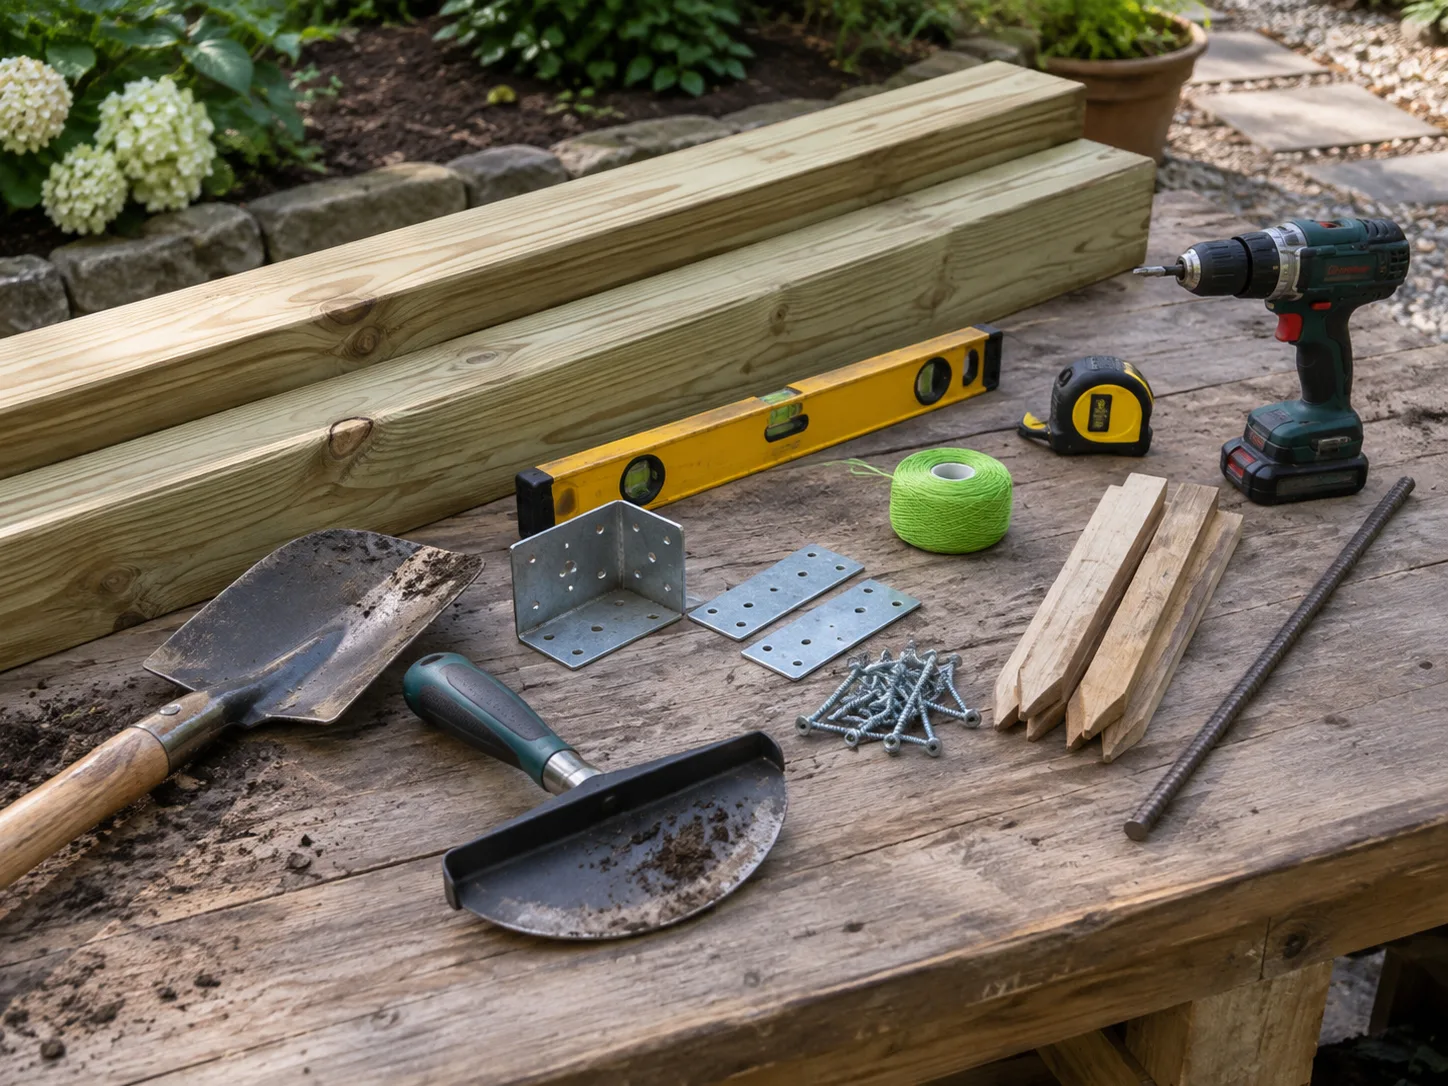
Gather the timber, approved fasteners, measuring tools, and compaction tools before excavation.
For a typical single-course border, plan on ground-contact-rated landscape timbers plus hardware approved for use with treated lumber. You may also need exterior structural screws or connector plates for butt joints, corrosion-resistant angle hardware for corners, and landscape spikes or rebar only where site conditions justify anchoring.
Useful tools include a tape measure, stakes, mason’s line, marking paint, square, shovel or edging spade, hand tamper, rake, level, drill/driver, appropriate bits, and a saw rated for the timber dimensions. Eye protection and work gloves are basic requirements; hearing protection is appropriate when using power saws.
A compacted aggregate base is not mandatory on every perfectly drained sandy site, but a thin layer of crushed stone or similar compactable material makes leveling easier and reduces direct contact with wet soil. Landscape fabric can be useful beneath an adjacent gravel path, but it should not be treated as a substitute for drainage or proper base preparation. If the edging borders a gravel surface, keep the aggregate base beneath the timber distinct from decorative stone that can migrate, settle, or wash away. A firm bearing layer should remain compacted even after the visible landscape material is raked or refreshed.
When cutting treated lumber, preserve the offcuts for proper disposal instead of burning them. If the preservative manufacturer or product instructions require field treatment of cuts or drill holes, use the specified compatible product. Industry guidance based on AWPA M4 also emphasizes protecting exposed cuts in treated wood rather than assuming a freshly sawn end has the same treatment retention as the factory-treated surfaces.
Plan the Layout and Calculate Quantities
Measure the full route before buying material. For a simple rectangle, add the four sides and divide by the actual timber length, then round up. Add at least one extra timber or a modest waste allowance for cuts, defects, and layout adjustments; a project that mathematically needs 9.1 pieces still needs 10, and a damaged corner can quickly consume the margin.
Plan joint locations deliberately. Avoid tiny filler pieces at highly visible ends, and stagger joints if adjacent parallel borders would otherwise line up awkwardly. If you need a clean symmetrical rectangle, determine the corner cuts before cutting the first long run so you do not discover that the final side is one timber width short.
Decide the finished height now. A border set mostly into the soil is easier to mow beside and less likely to become a trip edge, while a more exposed timber creates a stronger visual curb and can contain deeper mulch. Keep the top height consistent along each visual run, even if the surrounding ground undulates slightly.
Step 1: Mark the Edging Line
For straight work, stretch mason’s line tightly between stakes placed beyond the finished corners. The line should represent one consistent face of the timbers rather than their centerline. That gives you a reliable reference while digging and lets you check alignment without repeatedly measuring from the bed.
For a rectangle, verify that opposite sides match and check squareness by comparing diagonal measurements. Equal diagonals are a practical way to confirm a rectangle is square. Do this before excavation, because shifting a string is much easier than widening a finished trench.
Mark the ground with paint or a spade once the layout is right. Keep your utility marks visible, and do not drive layout stakes into marked tolerance zones. Where a route approaches a buried line, follow the locating service’s hand-digging and clearance instructions rather than treating the string layout as permission to spike through the soil.
Step 2: Remove Turf and Excavate the Trench
Cut the turf cleanly along the marked edge, then remove sod and loose organic material from the timber footprint. Dig a trench slightly wider than the timber so you have room to adjust it. The depth should account for the portion of timber you want buried plus any compacted base material.
Do not simply follow every bump in the lawn. The trench bottom should create a deliberate grade, either level for a short horizontal run or smoothly following the planned slope. High spots under one end of a timber create rocking, and soft pockets eventually settle and make the top line wave.
Keep excavated soil nearby if it is suitable for backfill, but separate clumps of turf and roots. If you encounter saturated clay, standing water, or a constantly muddy trench, solve the drainage problem instead of burying the timber and hoping it dries later. Prolonged moisture exposure shortens service life even when lumber is rated for ground contact.
Step 3: Build and Compact a Stable Base
A compacted base is the difference between “looks straight today” and “stays straight after weather.” Add a shallow layer of compactable crushed stone where appropriate, rake it roughly level, then tamp it firmly. You are not building a road base; the goal is a thin, continuous bearing surface that does not squish under the timber.
Check the base with a long level or a straight board and level. Correct low areas with additional aggregate and shave high areas before placing the wood. Trying to level by packing loose soil under one corner after the timber is installed usually creates a temporary shim that settles later.
On free-draining sandy soil, you may choose to set a lightly loaded decorative timber on well-compacted native soil. On clay or sites that stay wet, a granular base is more valuable because it improves leveling and reduces the amount of saturated soil pressed directly against the wood.
Step 4: Set, Level, and Align the First Timbers
Start with the longest and most visible straight run. Lay the first timber on the prepared base with its face just touching the mason’s line without pushing the string sideways. Check both top level across the timber and the intended grade along its length.
Set the next timber end to end. Pull the joint tight, align the faces, and check that the tops meet without a step. If one piece rocks, remove it and correct the base rather than forcing the board into position with fasteners.
Work several timbers ahead before permanently fastening everything. That dry fit lets you see cumulative alignment errors, especially on long borders where a few millimeters at each joint can turn into a visibly crooked final section.
Step 5: Join Straight Runs Securely
For a simple decorative border, butt joints can be connected with exterior-rated mending plates or suitable structural screws arranged so they resist the pieces pulling apart. Use hardware approved for pressure-treated lumber; preservatives containing copper can accelerate corrosion of unsuitable metal.
Position connectors where they will not interfere with mowing or create a sharp exposed edge. Pre-drill where the timber is prone to splitting, and keep screws far enough from the ends to avoid breaking out the grain. Do not rely on drywall screws or generic indoor hardware for a wet, ground-level application.
Where cuts expose untreated interior wood, follow the preservative manufacturer’s field-treatment instructions. This step is easy to skip because the cut end disappears into a joint, but joints also tend to trap moisture, which makes cut-end durability especially important.
Step 6: Build Strong Corners and Turns
For a crisp 90-degree corner, you can use square butt joints or miter the ends at 45 degrees. Butt joints are faster and often stronger for rustic landscape work; miters look refined but must be cut accurately and held securely because seasonal movement can open the seam.
Check the corner with a framing square before fastening. Exterior structural screws driven through one timber into the end of the other can work for low edging, and corrosion-resistant angle brackets can add restraint where movement is likely. Keep hardware hidden on the bed side when appearance matters, provided it remains accessible enough for maintenance.
For angles other than 90 degrees, mock up the turn before cutting. Broad faceted turns usually look better than trying to bend a timber. If the design needs a true curve, switch materials for that section rather than making a chain of tiny timber segments that are difficult to align and maintain.
Step 7: Anchor the Edging Only Where Needed
A well-bedded single-course timber often needs less anchoring than people expect. Its weight, connected joints, and compacted backfill may be enough on level ground. Additional anchoring is useful on slopes, at exposed ends, where frost or foot traffic tends to move the border, or where the timber must resist lateral pressure from gravel or soil.
Common DIY details use long landscape spikes or rebar driven through drilled holes. Before using either, confirm the route is clear of buried utilities and private lines. Never pound a long metal rod blindly into soil just because the timber is already in place.
If you drill treated lumber, follow the same field-treatment guidance that applies to significant cuts where required by the product instructions. Use a drill bit sized for the anchor, keep the hole away from split-prone ends, and drive the anchor until it is flush or slightly recessed so it does not become a snag or tripping hazard.
Step 8: Backfill and Finish Both Sides
Once the entire run is aligned, fastened, and stable, backfill the trench in thin lifts. Tamp soil firmly along the lawn side without pushing the timber off the string line. On the bed side, bring soil or mulch up to the planned height while keeping organic mulch from creating an unnecessarily deep, wet layer against exposed wood.
If the border separates turf from mulch, leave a mowing strategy. A timber flush or nearly flush with the lawn can sometimes be crossed by mower wheels, while a raised timber usually requires string trimming along the edge. Make that tradeoff intentionally rather than discovering it during the first mow.
Rake the surrounding grade so water does not pond against the wood. The edging itself should not act like a tiny dam that traps runoff. Where runoff naturally crosses the border, provide a path for drainage instead of sealing the low point with timber and backfill.
Installing Timber Edging on Slopes
On a gentle slope, decide whether you want the timber to follow the grade or step down in discrete levels. Following the grade creates a smooth top line but can look tilted next to horizontal architecture. Stepping the border keeps sections level but requires clean transitions and better anchoring at each change in elevation.
Do not excavate deeply on the downhill side just to force a long timber level if doing so leaves soil unsupported. For significant grade differences, use a retaining-wall design appropriate to the height and soil conditions. Edging and retaining are different jobs even when both use wood.
Sloped sites are also where drainage and frost movement become more visible. Compact the base thoroughly, avoid soft organic backfill under the timber, and consider more frequent anchoring where the border experiences downhill pressure. Recheck the line after the first wet season; small adjustments are easier before movement becomes severe.
Common Problems and How to Fix Them
The top line became wavy. The usual causes are an uneven base, uncompacted soil, or individual pieces that were forced into place. Lift the affected timber, remove soft material, rebuild the base, and reset it rather than trying to hide the dip with mulch.
Joints opened. Wood changes dimension as moisture changes, and weak connectors can allow pieces to walk apart. Tighten or replace corroded hardware with compatible exterior-rated fasteners, then check whether the border is moving because of poor support or lateral soil pressure.
A timber is twisting. Mild twist can sometimes be restrained by better bedding and anchoring, but severely warped lumber is usually not worth fighting. Replace the piece and correct any uneven support underneath before fastening the new one.
The wood is decaying early. Verify that the installed product was actually rated for ground contact and inspect drainage. Persistent saturation, unprotected cut ends, damaged treatment, and use of above-ground-rated lumber can all shorten service life.
The edging is heaving after winter. Frost-sensitive soil beneath the border may be holding water. Resetting on a compacted, free-draining base can reduce movement, though severe frost-heave sites may need deeper site-specific preparation.
How Long Landscape Timber Edging Lasts
There is no single honest lifespan number for every timber border. Service life varies with wood species, preservative system and retention, whether the product was rated for its exposure, quality of field cuts, drainage, climate, and how often the wood stays saturated.
You can improve longevity by buying the correct use category, keeping the installation well drained, following cut-end treatment instructions, and using compatible fasteners that do not fail before the wood does. Inspect the border once or twice a year for loose joints, exposed anchors, soft spots, and places where soil has washed away from the base.
The advantage of a modular timber edge is that one damaged piece can usually be replaced without rebuilding the whole border. If you plan joints accessibly and avoid burying hardware beneath permanent hardscape, later repairs stay simple.
Conclusion
A durable landscape timber edge depends less on brute-force anchoring than on good material selection, a compacted base, precise alignment, and thoughtful drainage. Start by locating utilities, buy timber rated for ground contact, protect cuts as required, and use hardware compatible with treated wood. Then give yourself time to dry-fit, level, and correct the base before fastening the run permanently.
Done well, the border should look intentional rather than merely buried. It will define the bed, simplify maintenance, and remain serviceable because each part—from the straight run to the corners and anchors—was installed for the actual site conditions rather than copied from a one-size-fits-all detail.



