30 Garden Lighting Ideas for Plants, Paths, and Patios
Plan garden lighting by task with 30 ideas for paths, trees, patios, and plants, plus tips for low-glare fixtures, safe wiring, and limiting light at night.

Good garden lighting makes a path easier to follow, gives a seating area a comfortable pool of light, or reveals one plant’s shape after sunset. It works best when each fixture has a job; a yard filled with equally bright lights can flatten the view, create glare, and leave nowhere for the eye to rest.
Start with the route from the door to the place you actually use, then decide whether you need task light for cooking or steps, softer ambient light for sitting, or a small accent on a tree or bed. Garden Design recommends mapping the areas people use and adding lighting in stages, an approach that also keeps you from buying fixtures before you know where they will help (Garden Design’s landscape-lighting overview).
The ideas below range from simple solar markers to built-in step lights. Treat them as starting points: the right choice depends on the garden’s shape, nearby windows, available power, exposure to rain, and how much darkness you want to preserve.
Before You Choose Fixtures, Decide What Needs to Be Seen
Walk the garden at dusk before shopping. Notice where a step disappears, where the path changes direction, where you prepare food, and which plant or structure you would enjoy seeing from a seat or indoors; those observations reveal more than a daytime product photo.
Use a Three-Zone Walk-Through
Give each light one main job. A fixture can contribute to more than one layer, but separating the jobs makes it easier to see what is missing and to avoid solving every problem with a bright floodlight.
| Lighting job | Start with | Common options |
|---|---|---|
| Guide | Steps, thresholds, turns, and the main route | Shielded path lights, risers, low wall lights |
| Task | A grill, work surface, lock, or outdoor table | Downlight, sconce, focused task fixture |
| Ambient | The place where people sit or dine | Dimmable string lights, pendant, portable lamp |
| Accent | One tree, textured bed, wall, or focal object | Narrow shielded spot, concealed downlight |
Solve guide and task lighting first, then add one ambient layer and only a few accents. Stand in the seat you use most and look back toward the house: if a bare bulb or reflection is the first thing you notice, change the angle or shield before adding another light.
30 Garden Lighting Ideas, Organized by Purpose
The strongest layouts are selective. Use these ideas to solve a real route or highlight a feature, and leave unneeded corners dark so the lit areas feel intentional.
Paths, Entrances, and Level Changes
Use small, shielded pools of light to reveal where people walk and where the ground changes height. A path does not need a fixture at every paving joint; turns, steps, and entrances usually deserve attention before a straight, unobstructed stretch.
1. Stagger low path lights along a planted walk. Place fixtures on alternating sides rather than forming a runway of identical dots. Choose hoods that send light onto the paving, and check the view from seated eye level so the lamp itself is not the brightest point.
2. Mark the gate or front-door threshold. A compact downward-facing sconce near the latch helps visitors find the entrance and see the landing. Keep the beam on the door and paving instead of aiming it toward the street or a neighbor’s window.
3. Recess small lights into stair risers. A low-output riser fixture shows the edge of each tread while keeping the source out of direct sight. Use consistent spacing and test the steps from both directions; a single bright light at the top can leave lower treads in shadow.
4. Build a soft line into a retaining wall. Recessed or shielded fixtures can pick out a wall’s texture and help define a level change. Keep light directed down or across the surface, and avoid a row of exposed bulbs that shines into eyes as people approach.
5. Reveal a curved path with overlapping pools. Put a fixture near the bend and another where the route meets a step, gate, or seating area. The overlapping light helps the path read as one route without outlining every inch of its edge.
6. Tuck a downlight beneath a handrail or eave. A concealed source can make a short stair or landing legible without adding a tall post light. Make sure it illuminates the walking surface rather than creating a bright stripe at eye level.
7. Use solar markers on a sunny entry route. Small solar stakes are easy to try where their panels receive useful daytime sun. Treat them as decorative or low-level guidance until you have checked their output and runtime after a cloudy day; do not depend on an untested fixture for a hazardous step.
Trees, Beds, and Plant Texture
Plants read differently at night: leaves and flowers are not all equally visible, and a single beam can make a textured trunk or grass seedhead more legible than a whole bed washed in light. The RHS suggests choosing plants with interesting form, hiding the source where possible, and using tree lighting sparingly to limit spill toward wildlife and neighboring windows (RHS advice on lighting a garden).
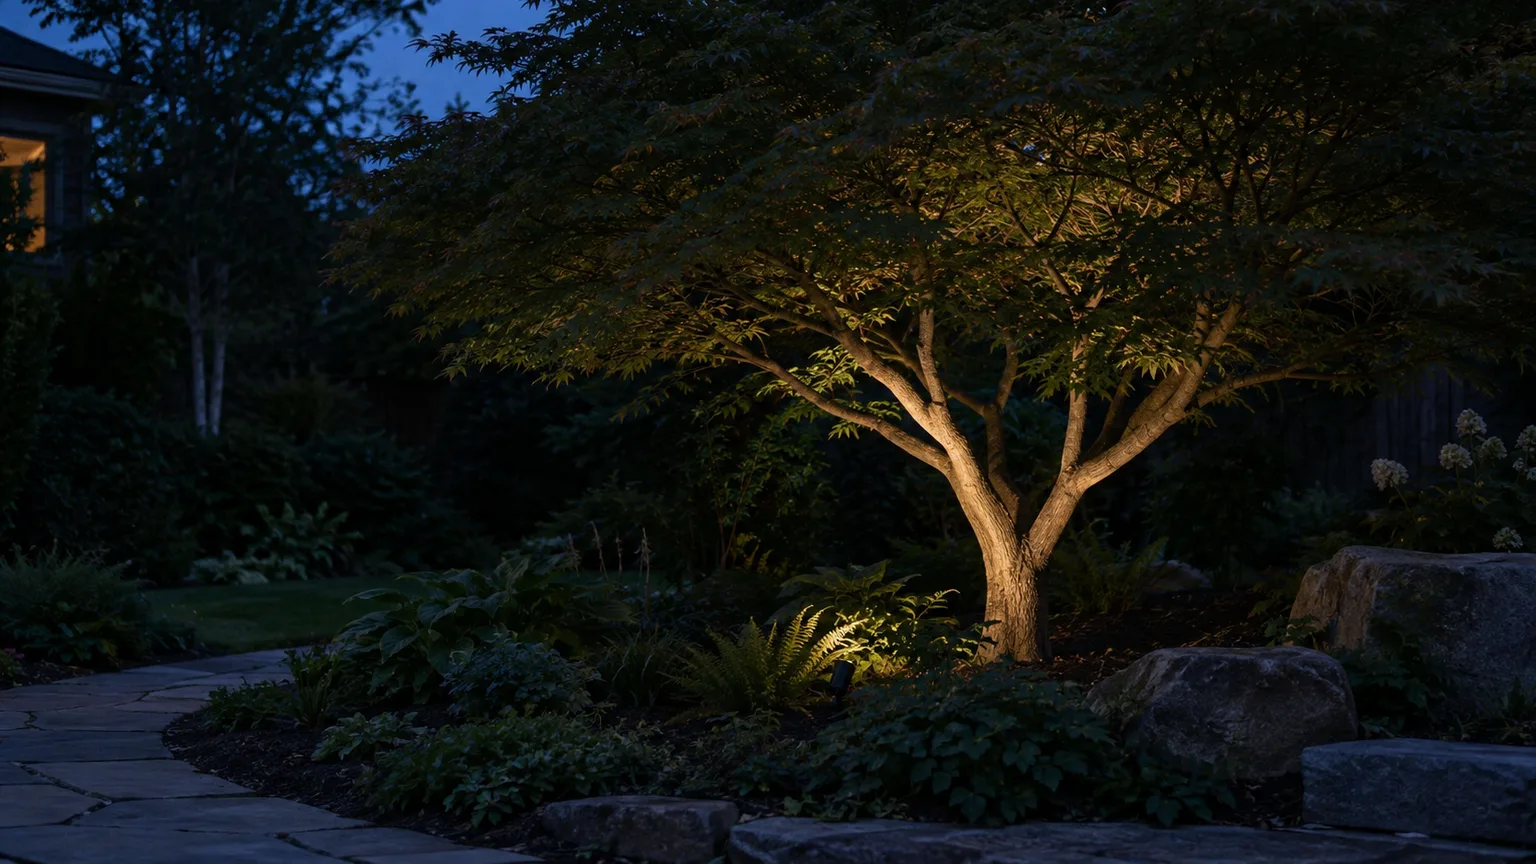
8. Graze one specimen tree from the base. Aim a narrow, low-output beam across the trunk or lower canopy rather than lighting every branch. Hide the fixture among planting, keep the beam contained, and check that it does not shine into the sky or a nearby room.
9. Create a restrained moonlight effect from above. A carefully placed downlight can cast a soft pattern through branches onto a path or lawn. Use a stable mounting point and a qualified installer for permanent wiring; do not attach hardware in a way that injures a tree or requires unsafe climbing to service it.
10. Backlight ornamental grasses. A low, shielded fixture behind a clump can pick up the fine edges of stems and seedheads when they move. Keep the beam low and narrow so the effect stays on the plant rather than turning into a broad glow across the whole bed.
11. Side-light one section of a flower border. Place a fixture at the bed’s edge to rake light across foliage and varied heights. A side angle creates more texture than shining straight down, and leaving gaps between lit sections prevents a long border from looking like a display case.
12. Pick out a tree’s bark instead of its whole crown. A modest grazing beam can reveal peeling or patterned bark with less light than a wide flood. Aim it so the trunk is visible from the patio, then step back and lower the output if the fixture becomes more noticeable than the tree.
13. Repeat a low glow along a short hedge. A few widely spaced, downward-facing fixtures can show the edge of a hedge beside a route or seating area. Avoid lighting the entire property line all night; a timer preserves a darker backdrop after the garden is no longer in use.
14. Light the tiers of a vertical garden from above. Small concealed downlights beneath a trellis rail or shelf can reveal the plants without pointing outward at passersby. Keep wiring and connectors compatible with the outdoor exposure, and leave enough access to maintain the fixtures as the planting grows.
15. Silhouette a trellis or espalier. Put a low source on the near side of a screen or trained plant so branches make a pattern against a wall. This works best with a simple background and one controlled beam; several opposing lights can erase the silhouette.
Seating, Overhead Features, and Garden Rooms
Ambient light should make a seating area feel welcoming without forcing the entire garden to stay bright. Gardenista contributor Sally Kohn describes using separate ambient, task, mood, and accent layers in her own backyard, with a dimmer to adjust string lights for an evening meal; use that as a practical example, not a universal brightness prescription (Gardenista’s backyard lighting account).
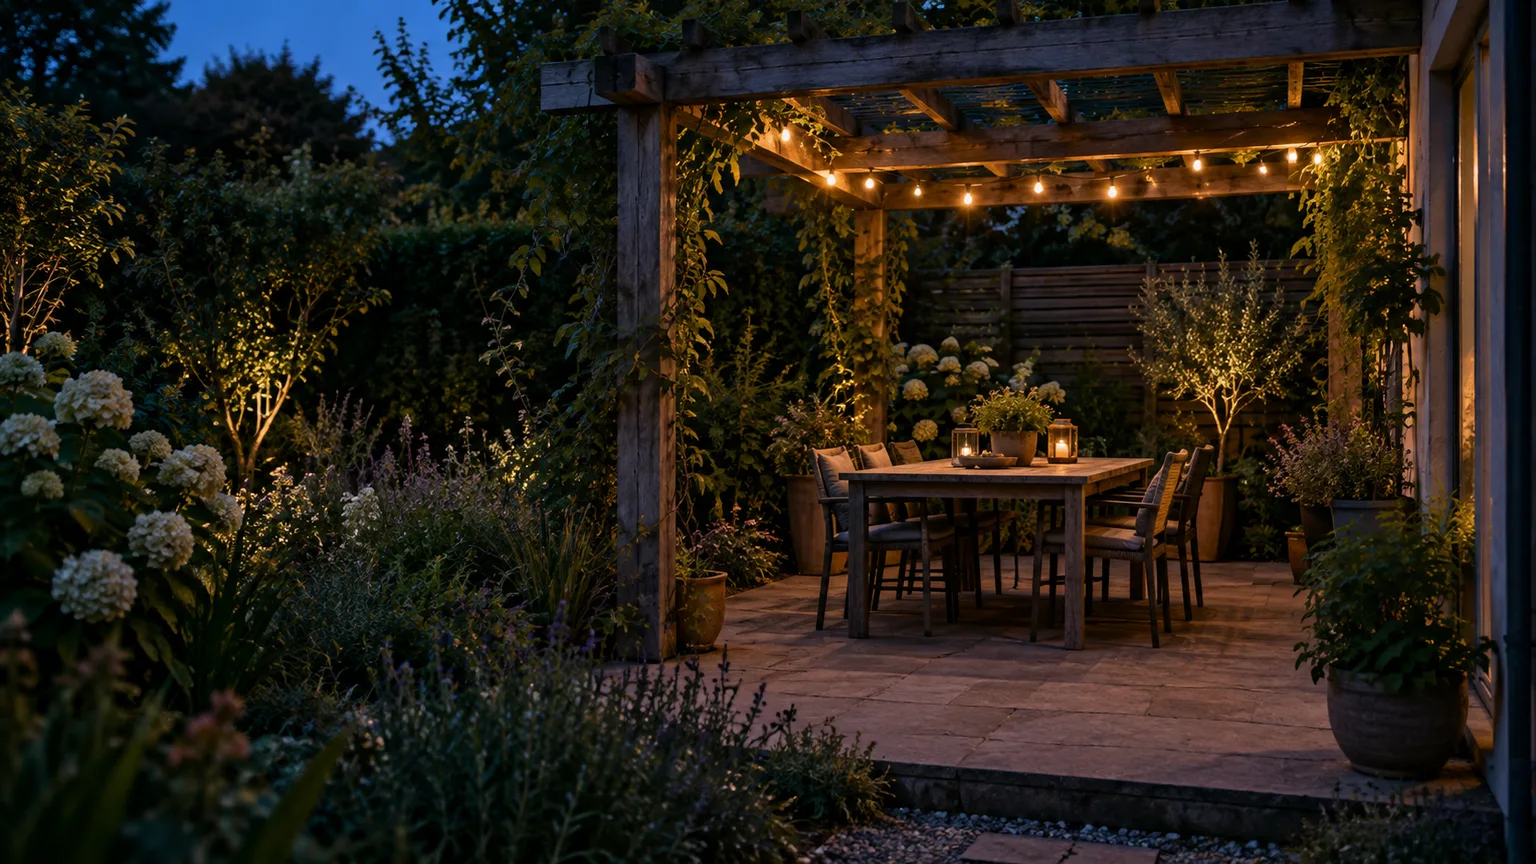
16. Run outdoor string lights over one seating zone. Attach a strand to sound supports above the table or lounge area rather than zigzagging it across the whole yard. Pick a dimmable warm-white set, keep cords clear of walking routes, and switch decorative lights off when the space is empty.
17. Trace one pergola beam with festoon lights. A single line along the frame gives a small patio a ceiling-like edge without filling the sky with bulbs. Keep the line high enough for people to move beneath it and use a separate, focused light for cooking or steps.
18. Hang a pendant over an outdoor dining table. Center a shade over the table, with the lamp screened from seated eye level. Choose a fixture rated for its actual exposure, and keep it on a separate control so dinner light does not have to illuminate the rest of the garden.
19. Add a downlight beneath a pergola crossbeam. A small, shielded fixture can light a tabletop or counter more directly than overhead strings. Aim it at the surface, not toward a neighbor, and avoid a high-output bare source that makes the rest of the yard look unusually dark by comparison.
20. Mount a lantern-style sconce on a garden wall. A downward-facing wall light near a door, bench, or outdoor kitchen adds a vertical point of interest and practical light. Select one with the appropriate weather rating and a shield that hides the lamp from the usual approach.
21. Set stable lanterns on a table or low wall. Battery-powered or flameless lanterns add a movable glow where wiring is inconvenient. Place them away from edges, dry leaves, and paths where someone could knock them over; open flames need extra care around plants, fabric, and children.
22. Use a portable outdoor lamp beside a chair. A rechargeable lamp can move with a reading chair or side table as the layout changes. Check that the product is intended for outdoor use and bring it inside when its weather rating or the forecast calls for it.
23. Define a deck edge with small downward lights. Post-cap or low-mounted fixtures can make the deck boundary easier to read from the garden. Keep them dim and consistent, and light the actual stair treads separately rather than assuming an illuminated railing makes the steps visible.
24. Let a fire feature remain the focal light. Mark the route to the fire pit and keep a lantern or low path light near the approach, but do not surround the flames with competing spotlights. The fire already provides a bright, moving focal point; extra light can make faces and seating feel harsh.
Water, Containers, and Flexible Accents
Reflective surfaces can make a small light feel much brighter, while solar panels need enough exposure to recharge consistently. These ideas work best when you test them in place for a few evenings and keep the garden’s darker areas intact.
25. Graze a fountain wall instead of lighting the water. A shielded beam across stone can reveal the structure without aiming a lamp directly at the water surface. If the feature is also a wildlife pond, the safer choice for nocturnal visitors is to leave it unlit.
26. Keep a wildlife pond dark. It may be tempting to add underwater or perimeter lights, but the RHS advises against lighting ponds because lights can attract flying creatures and contribute to harm. Mark the route nearby instead, directing a low, warm fixture onto the path rather than the water (RHS guidance on garden lighting and wildlife).
27. Cluster a few solar lanterns among containers. Group two or three at different heights near a sunny patio edge instead of placing one at every pot. Their panels need clear daylight, and their glow is usually better for atmosphere than for reading a step or preparing food.
28. Choose a low-voltage kit for a shaded bed or long route. When solar panels will not receive enough sun, a properly selected low-voltage system can provide more predictable lighting. Plan cable routes before planting or digging, protect connections as the maker directs, and use a qualified professional when the installation requires new mains wiring.
29. Put path and accent lights on separate controls. A timer can turn off decorative lights after you go inside while leaving a necessary entry route available. Separate controls also let you use only the layer you need instead of switching on every fixture at once.
30. Make one seasonal vignette with portable lights. Move a lantern or rechargeable lamp beside a container display, hammock, or late-season seating spot rather than adding permanent fixtures everywhere. If the arrangement only works for a few weeks, portability keeps the rest of the garden simpler.
Choose Fixtures by Beam, Brightness, and Power
Look at beam direction and shielding before comparing wattage. The National Park Service explains that lumens describe a lamp’s light output, while watts describe energy use; its outdoor-lighting principles recommend using only the amount needed, aiming light at the task, choosing shielded fixtures, and using controls when light is not needed (NPS outdoor-lighting principles).
| Option | Best fit | Main limitation |
|---|---|---|
| Solar stake or lantern | A sunny bed, container group, or occasional decorative glow | Output and runtime depend on charging conditions and battery condition |
| Low-voltage landscape system | A planned path or several repeatable accents | Needs a transformer, cable layout, and careful installation |
| Mains-voltage fixture | A fixed task area or larger project needing dependable power | Wiring and weather protection require closer attention and may require a qualified electrician |
| Rechargeable portable light | A movable table or seating accent | Must be charged and stored according to its exposure rating |
Warm white is a comfortable starting point for residential paths and seating; the NPS identifies 2700 K as a common warm LED option and notes that lower amber colors may suit sensitive environments. Color temperature alone does not make a light wildlife-safe, so pair a warm lamp with low output, shielding, limited hours, and careful placement.
Check the fixture’s stated outdoor or wet-location rating for where it will sit, and follow the manufacturer’s instructions for cables, connectors, and maintenance. The RHS advises RCD protection for plug-in garden equipment and qualified help for new mains installations in its UK guidance; electrical rules differ by location, so follow local requirements and bring in a qualified electrician for new line-voltage work (RHS advice on electricity in the garden).
Keep Garden Lighting Safer for Wildlife and Neighbors
Night darkness is part of the garden’s habitat. The RHS notes that artificial light can disrupt the behavior of nocturnal insects, bats, birds, and other wildlife; it recommends questioning whether a light is needed, keeping fixtures low and directed, choosing warm hues, and using timers or motion sensors. Even a warm LED can still disturb wildlife if it is bright, exposed, or left on all night.
Use this quick check before fixing a light in place:
- Is the light necessary, or would a reflective marker or handheld torch solve the problem?
- Does the beam land only on the path, step, table, or feature it is meant to serve?
- Can you see the bulb directly from a seat, a neighboring window, or the street?
- Can a timer, dimmer, or motion sensor shorten the time it stays on?
- Can you leave a section of planting, a pond, or the back of the garden completely dark?
Avoid pointing broad floods into trees, across fences, or toward water. The NPS warns that extra brightness does not automatically make an outdoor space safer and can increase glare; a modest, well-aimed light on a tread or lock is usually more useful than lighting the entire yard.
Two Simple Lighting Plans You Can Adapt
Think in routes and focal points, not a fixed number of fixtures. A small test layout lets you notice glare and dark gaps before you commit to permanent wiring or buy a matching set for every corner.
A Small Courtyard
Start with one shielded light at the entrance and low markers at the step or turn. Add a dimmable string or pendant light above the table, then choose one plant or textured wall for a restrained accent; leave the remaining perimeter dark so the space still feels enclosed and calm.
Before buying more, sit at the table and look toward the door and neighboring windows. If the string bulbs are in your direct line of sight, raise them, move the seating, or lower the dimmer; if the threshold remains hard to see, improve that task light rather than brightening the whole courtyard.
A Long Path and Mixed Border
Walk the route and mark only the turns, changes in level, gate, and destination. Use a repeating family of shielded path lights there, then add one tree accent or a short side-lit patch of ornamental grass where it can be seen from the main seat.
For a shaded route, compare a low-voltage system with solar fixtures before installing either. Test the path lighting after dark from both directions, set a timer for the accent layer, and keep pond edges or neighboring windows outside the beams.
Mistakes That Make a Garden Look Worse at Night
The easiest mistake is buying a large kit and spacing every fixture evenly before deciding what needs light. That creates a runway effect and can make the brightest points compete with the plants; start with the entrance and hazards, then add only the accents that improve the view.
Avoid exposed bulbs at seated eye level, cool bright lamps beside warm ones, untested solar lights on stairs, and permanent all-night decorative lighting. Also check the garden after installation from indoors and from the property edge: glare, reflections on glass, and spill toward neighbors are easier to fix by turning or shielding a lamp than by adding another fixture.
Conclusion
The most useful garden lighting plan starts with a visible route, a task that needs light, and one or two features worth highlighting. Choose fixtures for their beam and exposure rating, use the lowest comfortable output, and test the layout after dark before expanding it.
Let some of the garden stay dark. A few well-placed lights can make plants, paths, and patios feel more inviting while giving neighbors and nocturnal wildlife less spill to contend with.



