How to Grow and Care for Alocasia Indoors
Keep Alocasia healthy indoors by matching light, warmth, pot size, and watering. Diagnose yellow leaves, drooping, brown edges, pests, and winter dormancy.
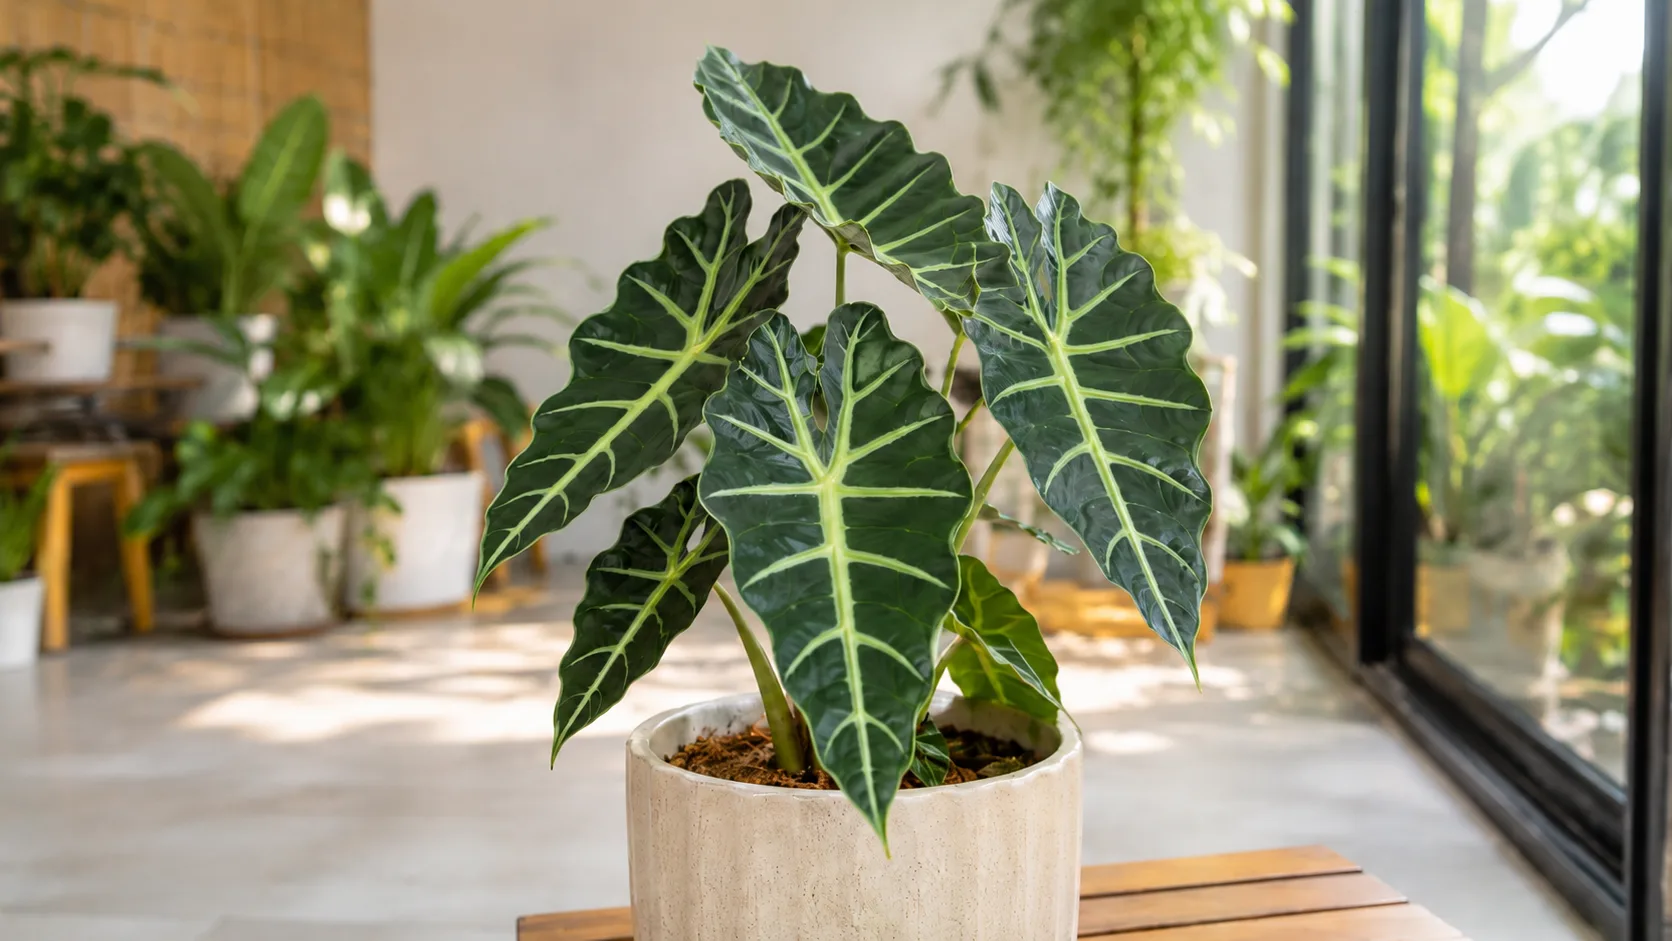
Alocasia is not difficult because it needs a complicated routine. It is difficult when the leaves, roots, light, and temperature are pulling in different directions. A plant in bright filtered light may drink steadily, while the same Alocasia in a cool, dim corner stays wet for days and begins to look thirsty because its roots are failing.
The reliable approach is to build the setup in the right order: give it enough usable light, keep the root zone warm and airy, water when the pot has actually dried to the right depth, and use humidity as support rather than as a substitute for good roots. That framework works for common houseplant forms such as Alocasia amazonica and ‘Polly’, as well as larger or more compact selections.
Alocasia at a glance: a tropical plant with a seasonal rhythm
Alocasia is a genus in the arum family, Araceae. Its large, pointed or shield-shaped leaves are adapted to bright, broken light rather than the deep darkness many people associate with a forest floor. The RHS growing guide for alocasias describes them as warm, humid houseplants that grow actively in brighter months and may slow or go dormant in winter.
Indoors, most Alocasia are grown for foliage, not flowers. Some become imposing floor plants, while compact jewel types stay suitable for a shelf or a small plant stand. The NC State Extension plant profile lists Alocasia as a rapid-growing herbaceous perennial with dappled or partial-shade preferences, but that outdoor description still needs to be translated for a home: bright light through a sheer curtain is usually more useful than a dark corner.
Expect a little seasonal variation. One older leaf turning yellow while a new leaf expands can be normal cycling; several leaves collapsing in quick succession is not a reason to simply water more. The condition of the crown and roots tells you more than the number of leaves on the plant.
Choose the right Alocasia for your room
Start with the room you can provide, not just the leaf pattern you like. If you have a warm, bright window with space for a large pot, a vigorous Alocasia can reward you with fast growth. If your only position is a small shelf with moderate light, a compact cultivar is easier to keep proportionate and easier to dry correctly.
When buying, look beneath the leaves and around the petiole bases. Choose a plant with firm tissue, intact leaves, no fine webbing, no cottony clusters, and no sour smell from the pot. Avoid a specimen that is already leaning dramatically toward the window or sitting in a cachepot full of water. The RHS buying advice also recommends protecting these tropical plants from cold during transport.
Compact jewel types versus vigorous growers
Alocasia ‘Black Velvet’, Alocasia cuprea, and similar jewel types often have thick or velvety leaves and a smaller overall frame. They usually need a warm, controlled root zone and less unused pot volume. A deep decorative container can stay wet around a small root system long after the surface looks dry.
Larger forms such as Alocasia macrorrhizos or Alocasia odora can use more water and may need a heavier pot for stability, but they still need drainage and oxygen around the roots. Alocasia zebrina is especially attractive for its striped petioles, yet a tall, top-heavy plant is more vulnerable to tipping, cold drafts, and a wet, poorly ventilated pot.
If the label is uncertain, care by behavior. A plant with a small crown and slow drying is a compact-root problem even if the leaves look large. A plant that produces leaves quickly in warm light can handle more moisture buffering, but not standing water.
Give Alocasia bright filtered light, then acclimate it
Place Alocasia near a bright east- or west-facing window, or a little back from a brighter south-facing window where direct midday rays are softened. The goal is bright filtered light, not low light. A plant can survive in a dim room for a while, but slower water use makes the pot stay wet and weakens new growth.
Direct sun is not automatically forbidden. A plant that has been gradually acclimated to gentle morning sun may handle it, while a recently shipped plant can scorch within days. Move it closer in stages over one to two weeks, watching for bleached patches, crisp tan edges, or sudden curling. If those appear, step back from the glass or add a sheer curtain; damaged leaf tissue will not turn green again.
Rotate the pot a quarter turn every week or two so the plant does not lean. If the petioles become long, weak, and widely spaced, increase usable light before increasing fertilizer. Grow lights can help in winter, but keep them at a sensible distance and use a timer so the plant receives a stable day rather than a hot lamp inches from its leaves.
Build the root zone: airy mix, right pot, crown at the surface
Alocasia roots need moisture and air at the same time. A mix that drains quickly but becomes bone-dry after one warm afternoon is not automatically better than a heavier mix; the right choice depends on your light, temperature, humidity, and watering habits. What matters is that water spreads through the root ball, excess leaves through the drainage holes, and the mix retains enough structure to keep air spaces after watering.

Use a pot with open drainage holes and a saucer that can be emptied. A nursery pot inside a decorative cachepot is practical because you can lift it to inspect the roots and discard runoff. Terracotta adds evaporation and weight, while glazed ceramic or plastic holds moisture longer. Choose the container for the drying speed and stability you need, not for the width of the foliage.
Keep the crown—the central growing point where leaves emerge—at the surface of the mix. Cover the roots, but do not bury the petiole bases to make a tall plant look more anchored. A damp collar around the crown stays low in oxygen and can soften the tissue. The RHS recommends positioning the top of the root ball just below the compost surface, which is a useful safeguard against planting too deeply.
A practical Alocasia potting mix
For a typical indoor Alocasia, start with a quality peat-free houseplant mix and add a generous portion of fine orchid bark, coco chips, pumice, or perlite. You want a mix that is springy rather than muddy, holds together when squeezed lightly, and still breaks apart when you touch it. If water runs straight down the side of the pot while the center stays dry, the mix has become hydrophobic and needs correcting rather than more frequent shallow watering.
Avoid adding gravel at the bottom of the pot as a drainage layer. It uses up root space and can leave a perched zone of wet soil above it. Instead, use a pot with real drainage holes, a well-structured mix throughout, and enough empty space in the cachepot for runoff.
The pot should be only modestly larger than the active root ball. Oversizing is especially risky after buying a small Alocasia: extra wet mix can stay cold and stagnant while the plant is still recovering from transport. If the plant needs more weight, choose a heavier container with a similar root-zone volume.
Water by the pot, not by the calendar
During active growth, water thoroughly when the upper part of the pot has dried but the root ball is not dust-dry all the way through. For many indoor plants, that means checking the top 2 inches with a finger or wooden skewer, then watering when that zone is dry and the lower mix is only lightly moist. The RHS recommends watering Alocasia when the top 5 cm of compost is dry, but drying speed varies too much for a fixed weekly schedule.
When it is time, pour slowly over the surface until water exits the drainage holes. Wait a few minutes, then empty the saucer or cachepot. This flushes the root zone evenly and prevents salts from concentrating at the surface. Do not leave the pot standing in runoff, and do not solve a slow-drying mix by watering a little every day.
Check three things before each watering: the moisture depth, the pot weight, and the recent conditions. Bright light, warmth, active new leaves, and a small pot can make an Alocasia dry quickly. A dim room, cold window, oversized container, or winter pause can make the same plant stay wet for a week or longer. A moisture meter can help you compare different depths, but it is still worth checking the plant and the drainage path. Practical care guidance from Gardening Know How and Aussie Green Thumb likewise treats even moisture and good drainage as a pair, not as competing goals.
If the mix has dried so hard that water races down the sides, water in two or three passes. Let the first pass absorb, then repeat until the center is wet. If the roots are damaged, do not keep watering just because the leaves droop; damaged roots can create a thirsty-looking plant in a saturated pot.
Balance warmth, humidity, and airflow
Keep Alocasia warm and away from cold drafts, exterior doors, and air-conditioning vents. The RHS advises keeping plants above 16°C (60°F) in the growing season and above 10°C (50°F) in winter. A cooler room can be workable if the plant is allowed to slow down and the soil is kept drier, but cool wet roots are a poor combination.
Medium to high humidity helps Alocasia hold its leaves, especially in a heated winter home. A hygrometer is more useful than guessing from how tropical the plant looks. Grouping plants, moving the pot away from a dry vent, or using a humidifier can help. A pebble tray may modestly improve the air immediately around the foliage, but the pot must sit on pebbles above the waterline, never in standing water.
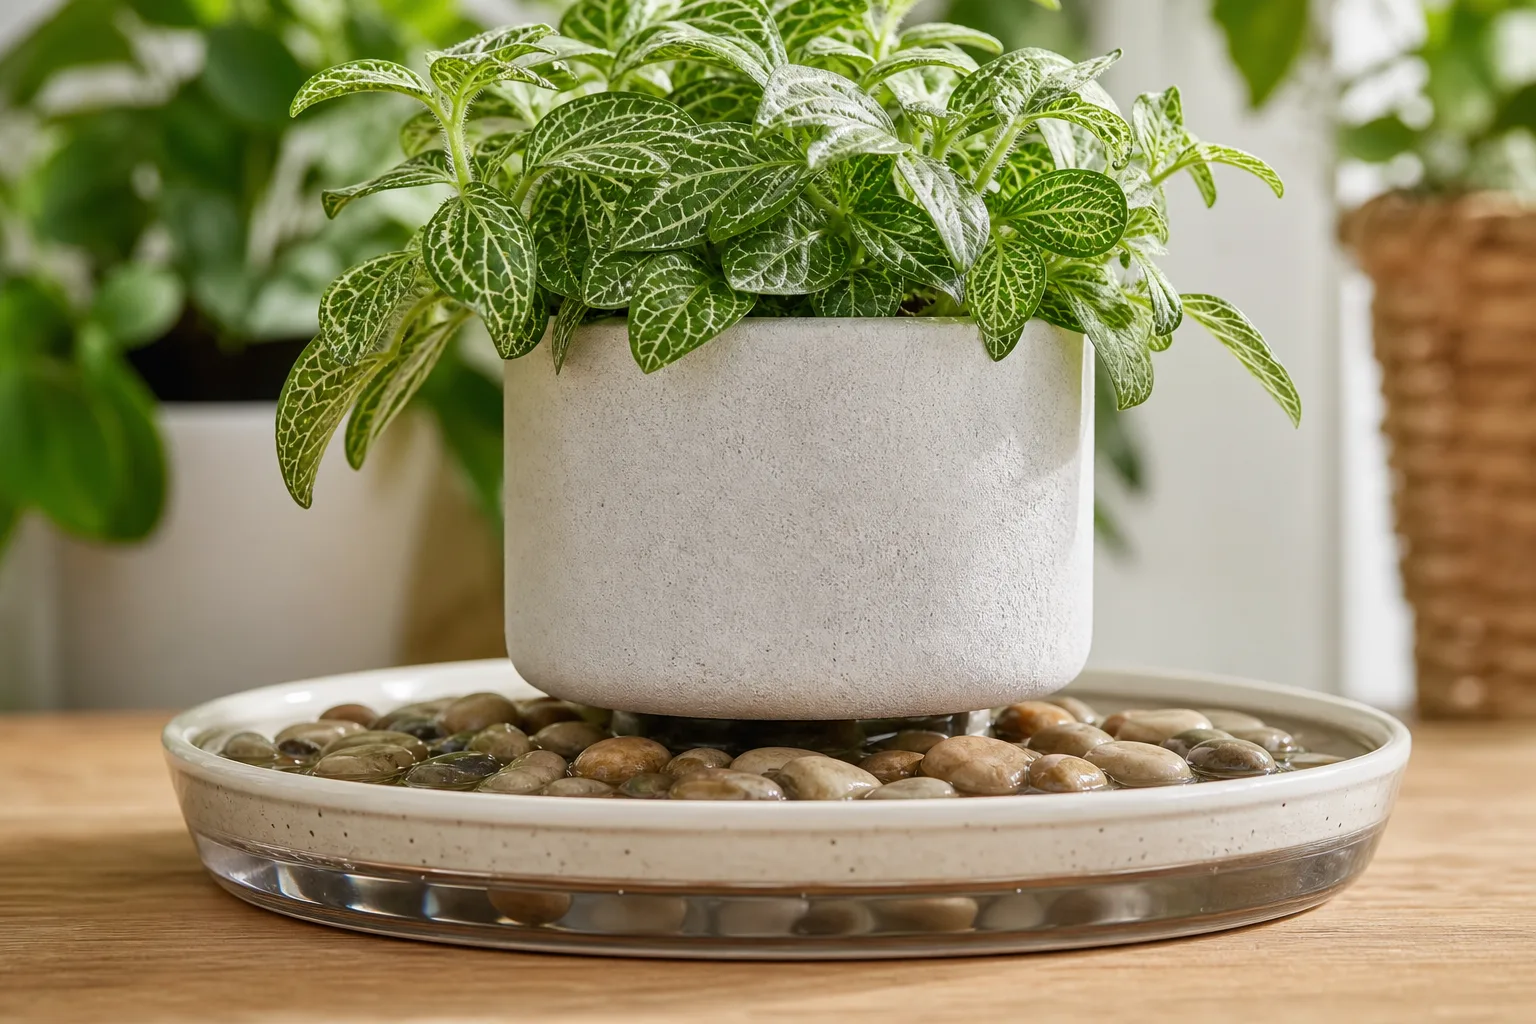
Humidity without airflow can create a different problem. Give the leaves gentle air movement and enough spacing that foliage is not pressed against a cold window or kept wet overnight. Avoid constant drafts from a fan; the goal is circulation, not wind. A ventilated bathroom can work well when it also has bright light, while a dark, steamy room is not a substitute for light.
Feed only when the plant can use it
Fertilize during active growth, when new leaves are forming and the plant is receiving enough light to use the nutrients. A complete liquid houseplant fertilizer applied at the label rate is safer than inventing a concentrated recipe. If you prefer a slow-release product, follow its label and account for the nutrients already present in the potting mix.
Do not feed a cold, recently repotted, dormant, or badly wilted plant. Fertilizer cannot repair dead roots, and excess salts can burn already-stressed roots. If white crust builds on the mix or leaf tips turn brown after repeated feeding, pause fertilizer and flush the pot thoroughly with clean water that drains freely.
Large, fast-growing Alocasia can be heavier feeders than compact jewel types, but more fertilizer does not automatically produce larger leaves. Strong light, warmth, adequate root volume, and a healthy crown establish the ceiling for growth; fertilizer only supports that system.
Repot without triggering a collapse
Repot in spring or during another reliably warm, bright period unless rot or a failing nursery core requires immediate action. A healthy Alocasia can stay slightly snug. Repot when roots circle densely, emerge from drainage holes, the mix has collapsed or become difficult to re-wet, or the pot dries dramatically faster than it used to.
Slide the plant out and inspect before choosing a new container. Healthy roots are firm and light-colored to tan; black, hollow, mushy, or sour-smelling roots need cleanup. Remove only clearly damaged tissue with a clean blade, keep the crown at the same height, and use a pot just one size larger. The RHS guidance suggests increasing diameter by about 5 cm (2 inches) rather than making a dramatic jump.
After repotting, water the new mix evenly but do not keep it saturated as insurance. Put the plant in warm filtered light, keep the crown dry at the surface, and expect a short pause while disturbed roots recover. If it droops temporarily but the crown stays firm and the mix is drying normally, give it stability rather than another repot.
Prune, clean, and support healthy leaves
Alocasia needs little routine pruning. Remove a leaf when it is fully yellow or brown, damaged beyond recovery, or clearly diseased. Cut the petiole near its base with clean, sharp scissors, wear gloves, and avoid getting sap in your eyes or on broken skin.
Do not remove a partly green leaf just because it is older or less attractive. It is still contributing energy to the crown. Wipe dust from broad leaves with a soft damp cloth, supporting the underside as you work. Avoid oily leaf-shine products, particularly on textured or velvety cultivars, because they can mark the surface and interfere with your ability to inspect for pests.
Propagate Alocasia by offsets, division, or cormels
Alocasia does not propagate from a detached leaf. A viable growth point is needed. The easiest method is separating an offset—a small plant with its own roots that develops beside the mother plant. Division of a mature clump is also reliable. Cormels can be sprouted by experienced growers, while seed is uncommon indoors because flowering and pollination are unreliable.
Propagate in active growth, not during a cold winter pause. Water the parent plant normally beforehand so the root ball is workable, but do not divide a plant already struggling with rot or severe pests. A small division with no roots has a much narrower margin for error than one with a firm crown and several healthy roots.
How to divide an established plant
- Cover your hands and clean your tools. Alocasia sap can irritate skin.
- Remove the plant from its pot and brush away enough mix to see where offsets join the main crown.
- Separate a young plant only when it has a firm growth point and, ideally, its own roots. Make one clean cut through connecting tissue rather than tearing the whole root ball apart.
- Pot the division in a small, airy container with the crown at the surface. A large pot full of wet mix is more dangerous than a snug pot that dries predictably.
- Place it in warm, bright filtered light and keep the mix lightly and evenly moist while new roots establish. Do not fertilize until you see active new growth.
Some growers start Alocasia cormels in moist sphagnum or another controlled medium. That can work, but cormels rot easily when sealed, cold, or drenched. Inspect regularly, provide air exchange, and pot up only after roots and a shoot are clearly developing.
Winter dormancy: normal leaf loss versus rot
Many Alocasia slow down when day length and indoor light fall. Some lose several leaves and return from the crown when warmth and light improve. The RHS describes a cooler, drier winter rest, while some plants kept under steady warmth and supplemental light continue growing slowly.
Dormancy is more likely when the crown is firm, the plant has no sour smell, and leaf loss follows a gradual seasonal slowdown. Rot is more likely when the base is soft, the pot stays wet for many days, leaves collapse in sequence, or the roots are black and mushy. Do not diagnose dormancy from leaf loss alone.
During a pause, move the plant away from cold glass, reduce watering to match the slower drying mix, and stop fertilizer. Do not keep the soil bone-dry for months if the crown is still alive, but do not water on the old summer schedule. Resume more frequent watering and feeding only when light, warmth, and new growth return.
Troubleshoot yellow, drooping, and brown Alocasia leaves
Alocasia symptoms overlap. Yellow leaves can mean natural cycling, wet roots, cold, low light, pests, salt buildup, or a nutrient-uptake problem. Drooping can mean thirst, heat, root damage, or a recently disturbed plant. Brown edges can reflect dry air, scorch, fertilizer salts, or root stress.
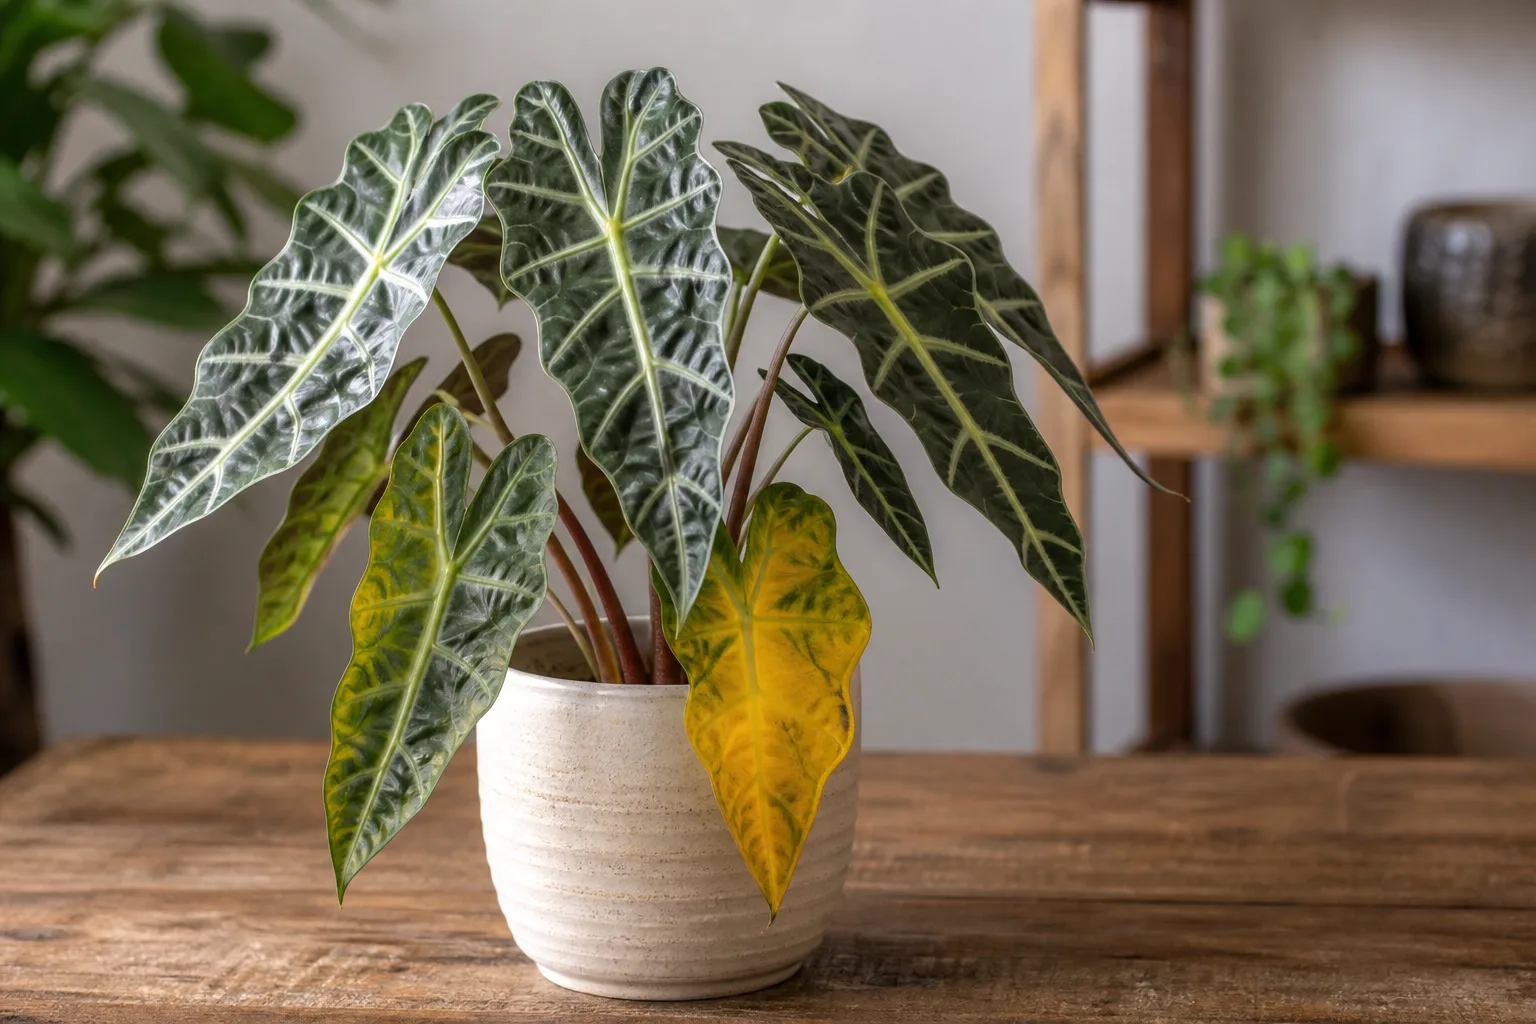
Read the pattern before changing care
Use the pattern and the pot together:
- One oldest leaf yellowing while a new leaf grows: often normal cycling. Check that the crown is firm before pruning.
- Several leaves yellowing while the pot stays wet: inspect drainage, roots, crown depth, and light. Do not add water to a yellowing plant until you know the root zone is usable.
- Drooping with dry mix and a light pot: water thoroughly, then watch for recovery over the next day. A plant that remains limp may have root damage or heat stress.
- Drooping with wet mix: check roots and crown before watering again. More water can accelerate rot.
- Crisp brown patches on the window-facing side: suspect sudden direct sun or heat. Move it to filtered light; the existing mark will remain.
- Brown tips on several leaves after feeding or very dry air: check humidity, salts, and watering consistency. New growth is the best measure of recovery.
- Fine stippling, webbing, or sticky residue: inspect leaf undersides and petiole joints for pests before changing the soil.
For a plant that is wet and declining, unpot it if the crown is soft or the smell is sour. Remove rotted roots, trim away soft tissue with a clean tool, and repot into fresh airy mix in a clean pot. If the crown itself is extensively mushy, recovery is uncertain; preserve only firm tissue with a clear growth point. Do not bury a damaged crown deeper in an attempt to stabilize it.
Manage pests and disease pressure
Spider mites are a common Alocasia nuisance, especially when indoor air is hot and dry. Look for pale stippling, fine webbing under leaves, and a plant that looks dry despite moist soil. Mealybugs appear as white cottony clusters at petiole joints and along sheltered surfaces. Fungus gnats are often a sign that the mix is staying wet, even though the adult flies are the visible nuisance.
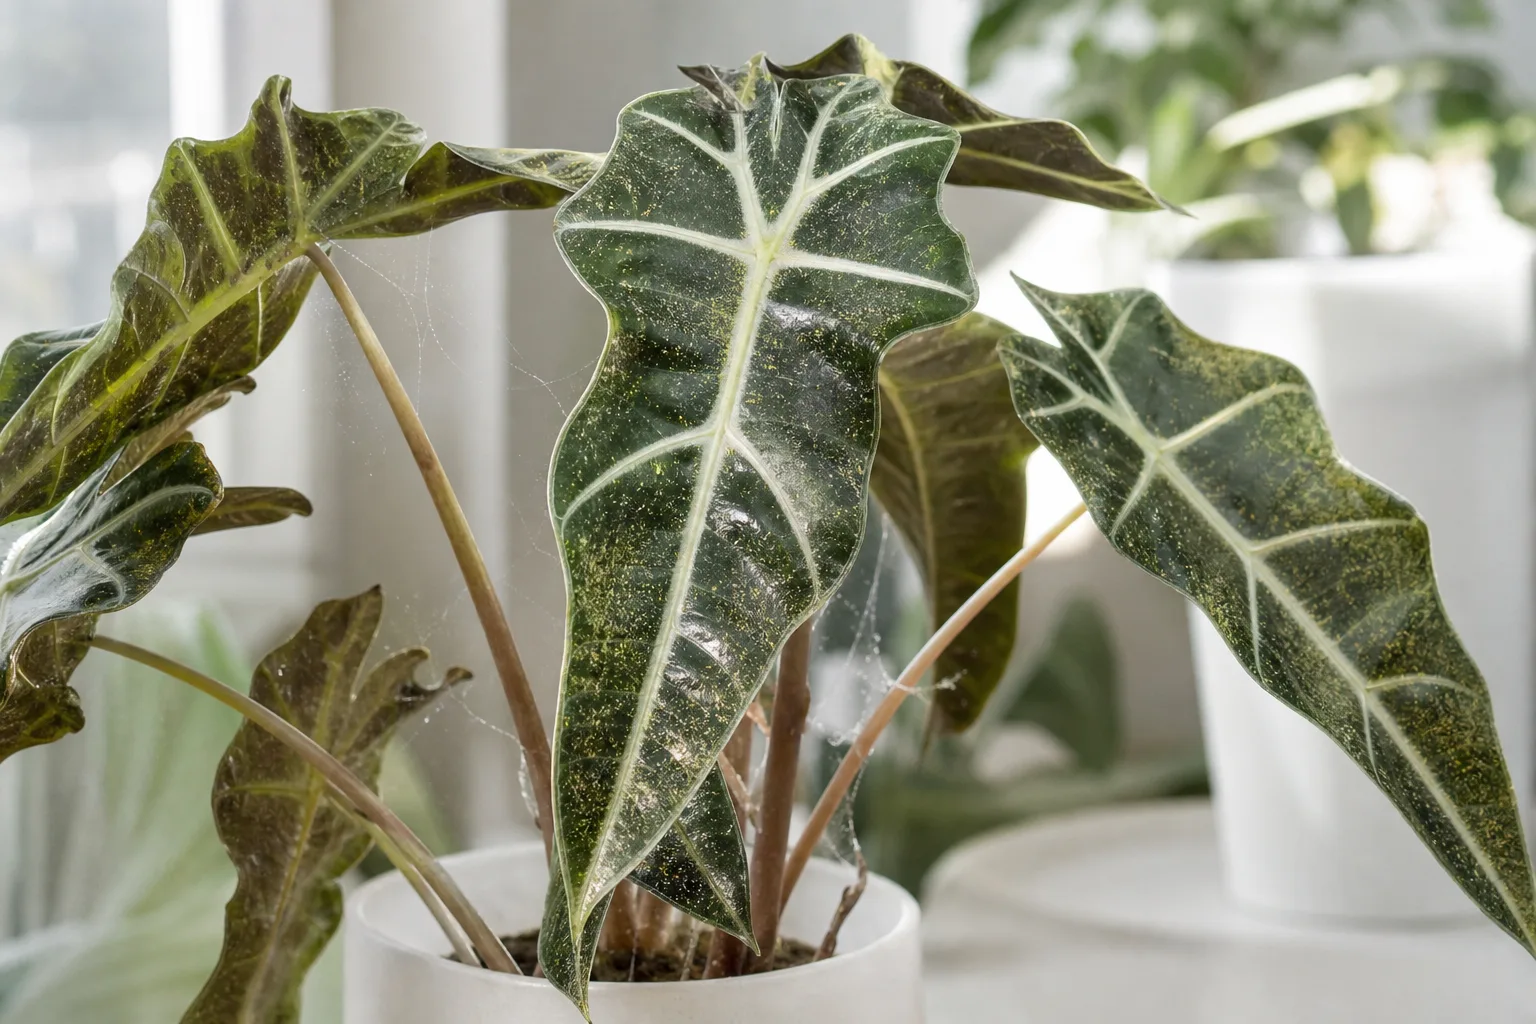
Isolate a suspect plant and inspect neighboring plants. Wipe or rinse accessible pests away, then use only a product labeled for the plant and pest, following its directions and re-treatment interval. Test any spray on a small area first, especially on velvety leaves. Never mix household chemicals or increase the concentration because a treatment seems slow.
Good disease prevention is mostly root-zone and leaf management: use a draining pot, avoid leaving foliage wet in stagnant air, empty runoff, and remove badly damaged tissue. The UF/IFAS elephant-ear guidance also warns gardeners not to plant elephant-ear relatives in or near natural waterways because some can spread aggressively; keep outdoor Alocasia choices within local rules and never treat a houseplant as automatically safe to release outdoors.
Keep Alocasia safe around pets and children
Alocasia is not pet-safe. The National Capital Poison Center explains that all parts contain insoluble calcium oxalate crystals, which can cause painful irritation of the lips, mouth, tongue, and throat if chewed. Nausea, vomiting, and difficulty swallowing can also occur, and sap may irritate skin or eyes.
Keep the plant where pets, infants, and children cannot reach it, including fallen leaves and pruning waste. Wear gloves when pruning, repotting, dividing, or cleaning rot, and wash your hands and tools afterward. Do not rely on a plant being “out of reach” if a cat can climb the shelf or a toddler can pull the pot down.
If someone chews Alocasia, remove visible plant material, have them rinse and spit, and contact a poison center for case-specific advice. For pets, contact a veterinarian or animal poison service promptly if chewing is suspected, especially when swelling, drooling, vomiting, or breathing trouble appears.
Conclusion
Healthy Alocasia care comes down to a stable relationship between light, warmth, air, and moisture. Give the leaves enough filtered light to use water, keep the crown at the surface, use a breathable mix in a correctly sized pot, and adjust watering to how quickly that particular container dries.
When the plant struggles, inspect before reacting. Firm tissue and one aging leaf call for patience; a wet pot, sour smell, soft crown, or rapid multi-leaf collapse calls for root-first triage. With seasonal watering, gentle humidity, clean handling, and the right position for its size, an Alocasia can remain a dramatic and long-lived indoor plant instead of a cycle of emergency repotting.



