How to Grow Asparagus From Seed Like a Pro
Learn how to grow asparagus from seed, from sowing and slow germination to transplanting, first-year care, and the patient path to a healthy harvest.
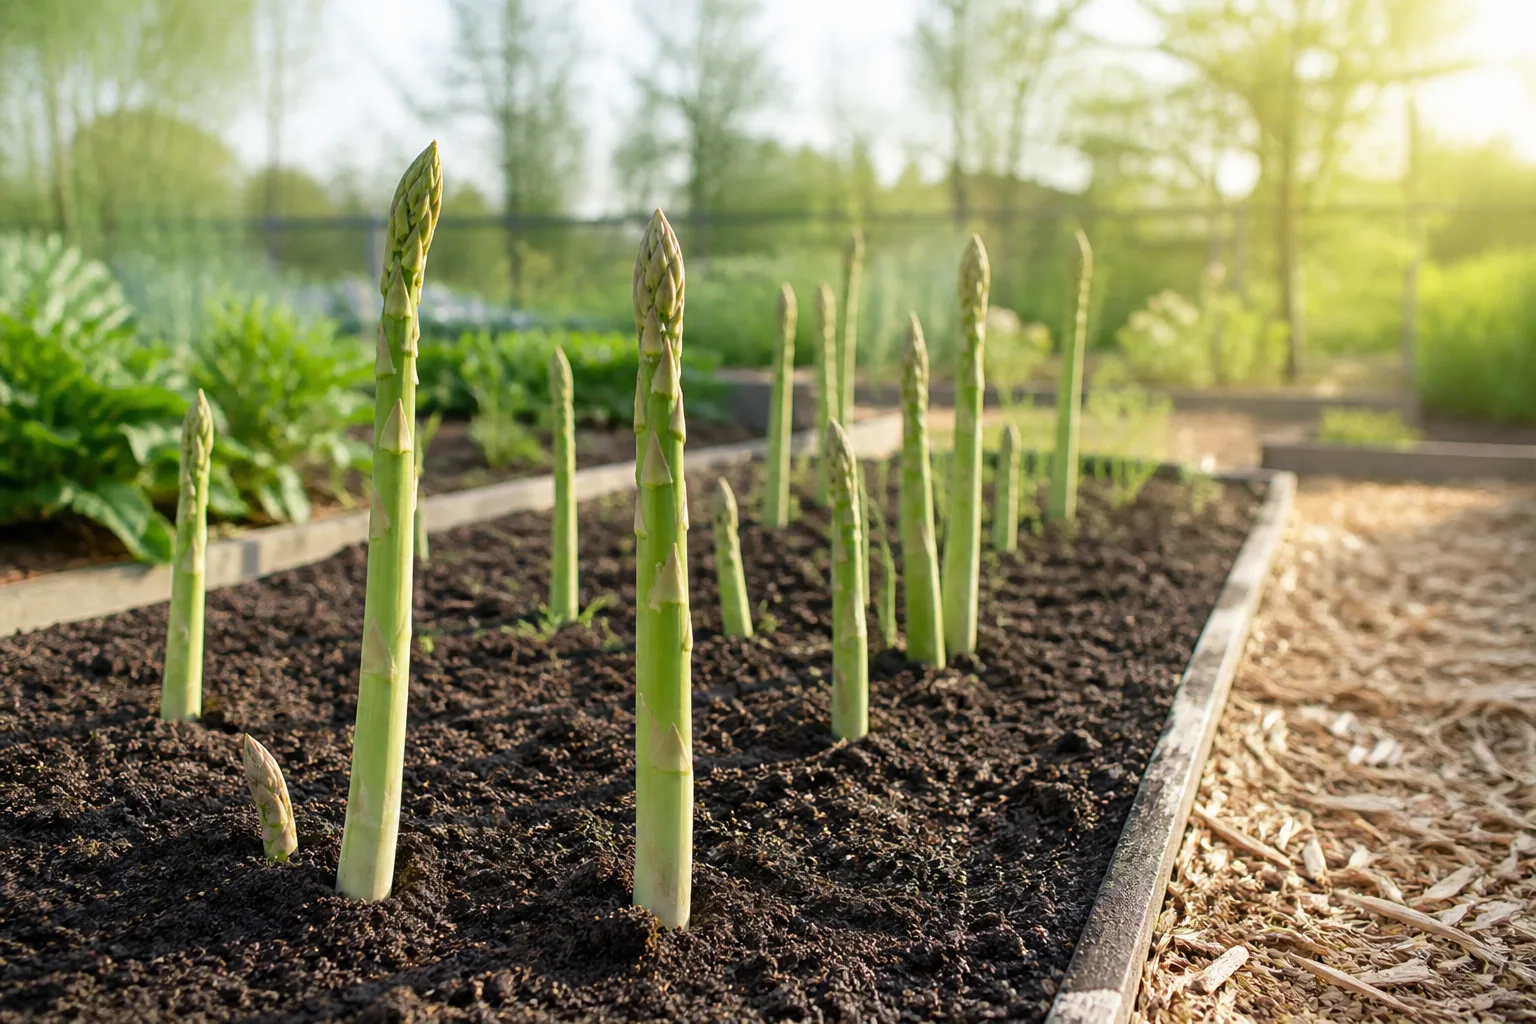
Growing asparagus from seed is a patient way to start a perennial vegetable patch. You trade the faster start of purchased crowns for lower-cost plants, more variety choices, and the satisfaction of raising the crop from its first root. The key is to treat the first year as a nursery stage, give young plants a weed-free place to build fern and roots, and keep your harvest shears away until the crowns are ready.
The calendar below uses seasons rather than fixed months because spring arrives at different times in different places. In a cold climate, sow indoors ahead of your last frost; in a mild region, direct sowing may be easier. Either way, choose the permanent bed before you open the seed packet: asparagus can occupy the same sunny ground for many years.
Is growing asparagus from seed right for you?
Choose seed if you want an economical way to raise several plants, want a particular seed variety, or are happy to wait. A packet can establish more plants than a small bundle of crowns, but seedlings need careful watering and weeding while their roots are small. They also take longer to reach harvest size than an established crown.
Crowns are the better choice when you need a quicker, more predictable start or do not have space for a nursery row. Seed is not a shortcut to an immediate harvest. It is a low-cost way to build a bed over several seasons, and it works best when you already know where those mature plants will stay.
Plan for a crop that takes more than one season
Think of the project as two stages: raise seedlings, then establish permanent crowns. In the first growing season, the plant’s feathery top growth, called a fern, feeds the roots belowground. The roots thicken into a crown that can send up more and stronger spears in later springs. Cutting spears while the plant is still small steals energy from that process.
A useful conservative schedule is: sow and raise seedlings in season one; transplant to a permanent bed when dormant or during the next suitable planting window; let the young bed grow without harvesting for its first two growing seasons; take only a short, light harvest in season three if the plants are vigorous; and move toward a full harvest in season four. University of Maryland Extension advises no harvest in the first two seasons, a light harvest in the third, and a full season in the fourth. The RHS asparagus guide also says to wait three years before harvesting seed-grown plants. Advice can sound inconsistent because writers count from sowing, transplanting, or permanent planting; count your own seasons and judge the ferns, not just the date.
Choose seed and understand what it will produce
Buy seed labeled for edible garden asparagus, Asparagus officinalis. Do not confuse it with ornamental asparagus fern, a different plant grown for foliage. Check the packet for variety, sowing depth, any recommended pre-soak, and a germination-temperature range. The packet’s instructions are the most relevant starting point for that particular seed lot.
Asparagus plants are male or female. Many named seed varieties can produce both sexes, while some modern cultivars are bred to be all-male. The RHS notes that male plants tend to produce more spears; female plants can still make a useful home crop and may form red berries in fall. You do not need to identify or remove plants during the seedling stage. If maximum yield matters, choose a variety sold as all-male or wait until mature plants flower before deciding what to keep. Young fern alone is not a dependable way to tell.
Prepare a nursery bed before sowing
The permanent asparagus bed should get at least six hours of direct sun, have good air movement, and drain well after rain. Avoid a low spot that stays wet. If the native soil is heavy, improve drainage with a raised bed rather than trying to solve waterlogging with extra fertilizer. Asparagus is a long-lived perennial, so avoid a location you expect to dig up for annual vegetables or construction.
For seedlings, prepare a small nursery row or a tray of individual deep cells. Remove perennial weeds before sowing; grass roots and bindweed are especially difficult to remove later without disturbing asparagus roots. Loosen the soil and incorporate mature compost if the bed needs organic matter. A soil test can show whether pH needs adjusting; a near-neutral range around 6.5 to 7.5 is commonly recommended, but use your local lab’s guidance before adding lime or other amendments. Harvest to Table’s asparagus guide also emphasizes full sun, loose soil, and good drainage for a lasting bed.
Keep seed-starting mix for pots and garden soil for outdoor rows. A light, clean seed mix drains evenly and is easier to manage in a small container; rich garden soil can pack down and hold too much water in cells. Pre-moisten the mix so it feels evenly damp, not muddy, before you sow.
Start asparagus seeds indoors for more control
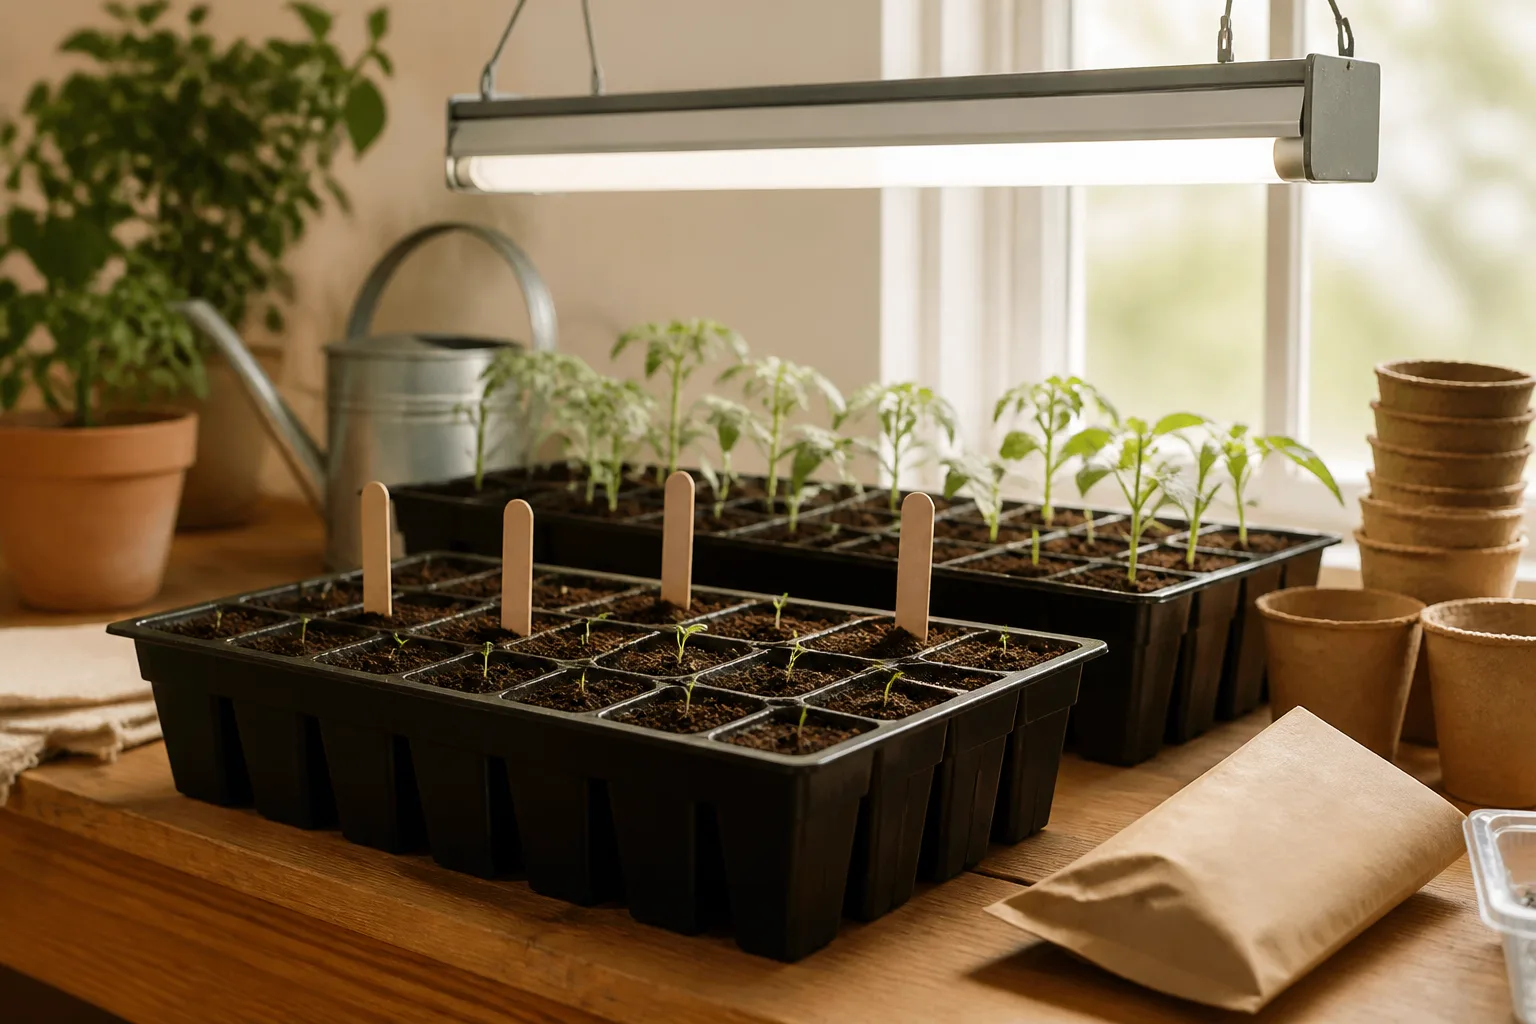
Indoor sowing is useful in short seasons and when you want to protect small seedlings from weeds, heavy rain, or slugs. Count backward from your local last-frost date rather than choosing a universal month. Practical Self Reliance suggests starting about 10 to 12 weeks before the expected last frost; Harvest to Table gives a similar early-start approach. Check the seed packet as varieties and growing conditions differ.
Use one seed per deep cell or small pot if you have enough seed; this makes it easier to separate seedlings without tearing their roots. Sow roughly one-half to one inch deep, following the packet when it gives a specific depth. Cover lightly, label the variety and date, and water gently. Published temperature advice differs: the RHS recommends indoor sowing at 55–61°F (13–16°C), while Practical Self Reliance gives 70–85°F (21–29°C) and Harvest to Table describes germination at about 75°F (24°C). These are source-specific ranges, not a universal threshold. Follow the packet for your seed lot; if it gives no temperature, keep the mix steadily moderate to warm rather than cold or hot, and allow several weeks for emergence.
Asparagus seedlings become tall and fine-textured, so give them strong light as soon as they emerge. A grow light positioned close above the tray prevents stretched, weak stems; a very bright window can work if the seedlings do not lean or become spindly. Remove any humidity cover after emergence so the surface can breathe. Water when the top of the mix begins to dry, and empty water from the tray rather than leaving cells standing in it.
Direct sow outdoors when conditions are reliable
Direct sowing avoids a transplant step, but it asks more of the gardener’s timing and weed control. Wait until the ground is workable and the main risk of hard frost has passed. The soil should be warming, not cold and saturated. In a region with a long growing season, sowing in a prepared nursery row can be simpler than managing indoor lights; in a short, erratic spring, indoor starts are easier to protect.
Mark shallow rows in the nursery bed, sow seeds about one-half to one inch deep, and water the row in. Space seed a few inches apart so seedlings have room to develop; thin the row later to roughly six inches between the plants you keep. Leave enough space between rows to weed without stepping on the bed. The RHS recommends outdoor sowing in spring and thinning seedlings before moving the young plants to their final spacing after they have established for a year. Use your local season rather than copying its UK month names.
Keep the surface evenly moist until emergence. A light mulch can reduce crusting and weeds once seedlings are visible, but do not bury the row under a thick layer that blocks tiny shoots or keeps the soil soggy. Mark the row clearly. Asparagus takes time to emerge, and an unmarked row is easy to hoe by accident.
What to expect while seeds germinate
Do not judge the seed by the first two weeks alone. Under favorable conditions, emergence may take a few weeks; Practical Self Reliance notes that some seed can take as long as eight weeks, while Harvest to Table gives a faster range at warm temperatures. Older seed, cool mix, uneven moisture, or fluctuating temperatures can slow and spread out germination. Keep the sowing medium moist but airy, and resist digging through it every few days to look for roots.
If nothing has emerged after several weeks, check the basics before resowing: is the mix still moist below the surface, has the tray stayed within the packet’s temperature range, and did you cover the seed too deeply? Older seed, cool mix, uneven moisture, or fluctuating temperatures can slow and spread out germination. If the seed was stored for years or conditions were poor, sow a small fresh batch in a separate labeled cell while leaving the original tray undisturbed. That gives you a backup without sacrificing seeds that may still sprout.
Once shoots appear, remove the cover, provide strong light, and keep air moving. A sudden collapse at soil level usually points to overly wet, stagnant conditions rather than a need for more water. Let the mix surface dry slightly between waterings, but do not allow the small root ball to dry completely.
Thin, pot on, and grow sturdy seedlings
When several seedlings emerge in one cell, keep the strongest and snip the extras at soil level with clean scissors. Pulling them out can dislodge the roots of the plant you want to save. If seedlings are crowded in a direct-sown row, thin them in stages so you can identify the strongest plants before removing the rest.
Move a seedling into a deeper pot when roots begin to fill its cell or the top growth repeatedly dries between waterings. Lift it by a leaf, not by the delicate stem, and keep as much of the root ball intact as possible. Set it at about the same depth it was growing, firm the mix gently, and water it in. Asparagus does not need a large dose of fertilizer while it is tiny; a fresh, light seed-starting mix is usually enough until it is growing steadily. If a plant remains pale or stalled, first check light, root space, and watering before feeding.
The goal for the rest of the first season is a compact, healthy root system and a fern that can photosynthesize—not a tall plant forced by rich fertilizer. Rotate trays so seedlings do not lean toward a window, and leave enough room between outdoor plants for air to move. Good spacing also makes hand-weeding less risky.
Harden off seedlings before planting outside
Indoor seedlings need a gradual transition to outdoor sun, wind, and temperature swings. About a week before planting, place them outside in a sheltered, shaded spot for a short period, then bring them back in. Add time outdoors and a little more sun each day. If leaves bleach, curl, or wilt badly, return to gentler conditions and slow the transition.
Plant after hardening when severe frost has passed and the soil is workable. Choose a cool, cloudy day if possible, water the seedlings beforehand, and handle the root ball carefully. For a nursery row, leave about six inches between plants and enough room between rows to reach them. Water at the base after planting. Keep the bed moist while roots settle, then water deeply when the soil begins to dry rather than giving frequent shallow sprinkles.
Care for first-year asparagus ferns
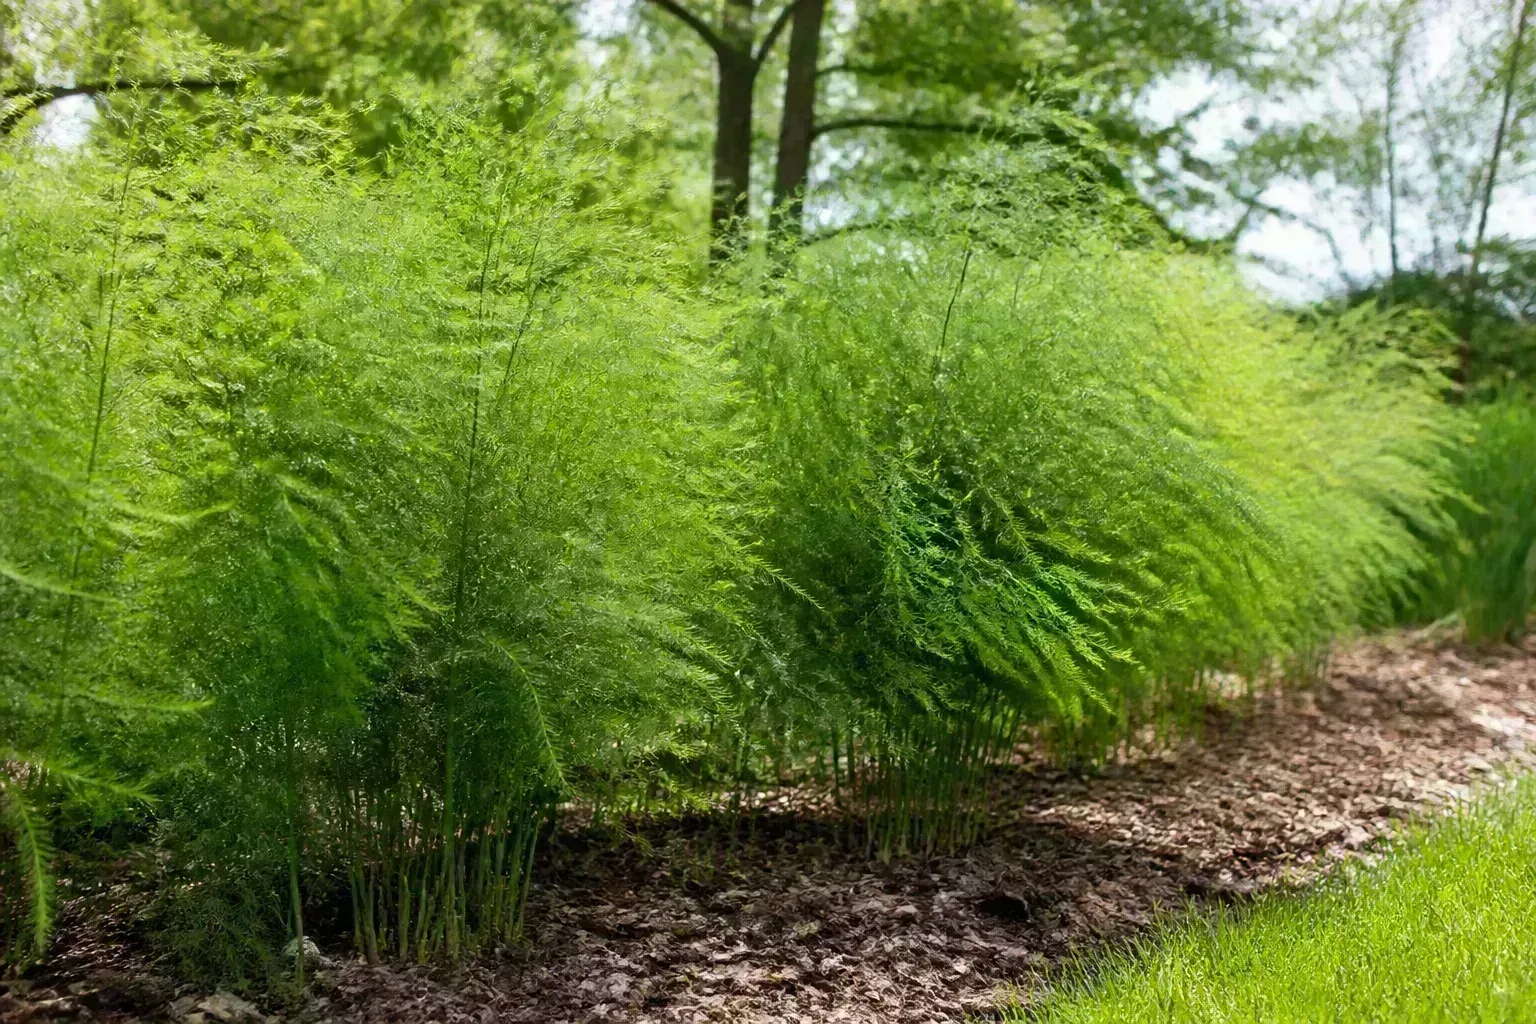
Asparagus may look delicate as a seedling, but once established it makes airy, fern-like stems that can reach several feet tall. Those ferns are the plant’s solar panels. Let them grow through summer and early fall; do not trim them just because the bed looks untidy or because you hoped for edible spears. A loose support line can keep tall stems upright in a windy site without crowding the row.
Weeds are the main competition while the crowns are small. Pull or cut weeds by hand before they seed, working shallowly near the asparagus so you do not slice its roots. A thin layer of clean organic mulch can suppress new weeds and slow moisture loss. Water during prolonged dry spells, especially in the first summer, but do not keep the bed continuously wet. The RHS asparagus guide likewise emphasizes regular watering for new plants, annual mulching, and allowing the summer foliage to mature before cutting it back.
Do not cut green ferns in autumn. Wait until the foliage yellows or browns naturally and the plant has begun to go dormant; then remove it near the soil line with clean pruners. In a mild climate, this may happen later than the calendar suggests. If foliage shows a serious disease problem, remove it from the bed rather than leaving infected debris around the crowns.
Get young plants through winter
In ground, a well-drained nursery bed is safer than a pot left exposed to repeated freeze-thaw cycles. After the tops have died back, cover the row with a light, loose mulch in cold regions. Keep the mulch from forming a dense, wet mat. In a mild winter, a deep cover is unnecessary; the purpose is to buffer temperature swings and protect the soil, not to keep crowns warm enough to keep growing.
If seedlings must overwinter in containers, group pots in a sheltered unheated space or sink the pots into the ground and mulch around them. Check occasionally that the mix has not dried to dust, but water sparingly while plants are dormant. Remove excess mulch as spring growth approaches so new spears are not trapped beneath it.
Move one-year plants to their permanent bed
The cleanest time to move nursery-grown asparagus is when plants are dormant or just before strong spring growth begins, while the soil is workable. Prepare the permanent bed first; do not leave roots exposed while you finish digging. Lift each plant with a generous plug of soil and tease apart only roots that are badly tangled. Keep the roots moist and shaded during the move, then replant promptly.
Set seedlings in a prepared row about 12 to 18 inches apart, with roughly three to four feet between rows if you are making multiple rows. These are long-term plants, so give them room for mature ferns and access for weeding. Set the root mass naturally in the hole and cover it with soil without bending or forcing the roots into a small space. Water thoroughly to settle soil around the roots. Crowns sold dormant are often planted in deeper trenches; do not automatically bury a small seedling as deeply as a mature bare-root crown.
If you have only a few strong seedlings and your final bed is already weed-free, you can raise them at final spacing from the start. That avoids a later move but makes each empty spot and each weed harder to manage. A nursery row is usually the lower-risk choice when seed has produced many small plants or when the permanent bed is not ready yet.
Build strong crowns before harvesting
For the first two growing seasons after sowing, give the plants the whole season to build roots. Keep the row weed-free, water during dry spells, and top-dress lightly with mature compost if the soil needs organic matter. Avoid heavy nitrogen feeding: lush tops do not compensate for poor drainage, weak roots, or a short growing season. If the soil test calls for a nutrient correction, follow the test report and local recommendations rather than guessing at a fertilizer blend.
The foliage may turn yellow and disappear each winter, then send up new shoots in spring. That cycle is normal. Keep the area marked because asparagus rows can look empty before shoots appear. Remove self-sown seedlings outside the intended row so they do not compete with established plants. For ongoing care of the mature bed—watering, weed control, and seasonal maintenance—see our asparagus planting and growing guide.
When seed-grown asparagus is ready to harvest
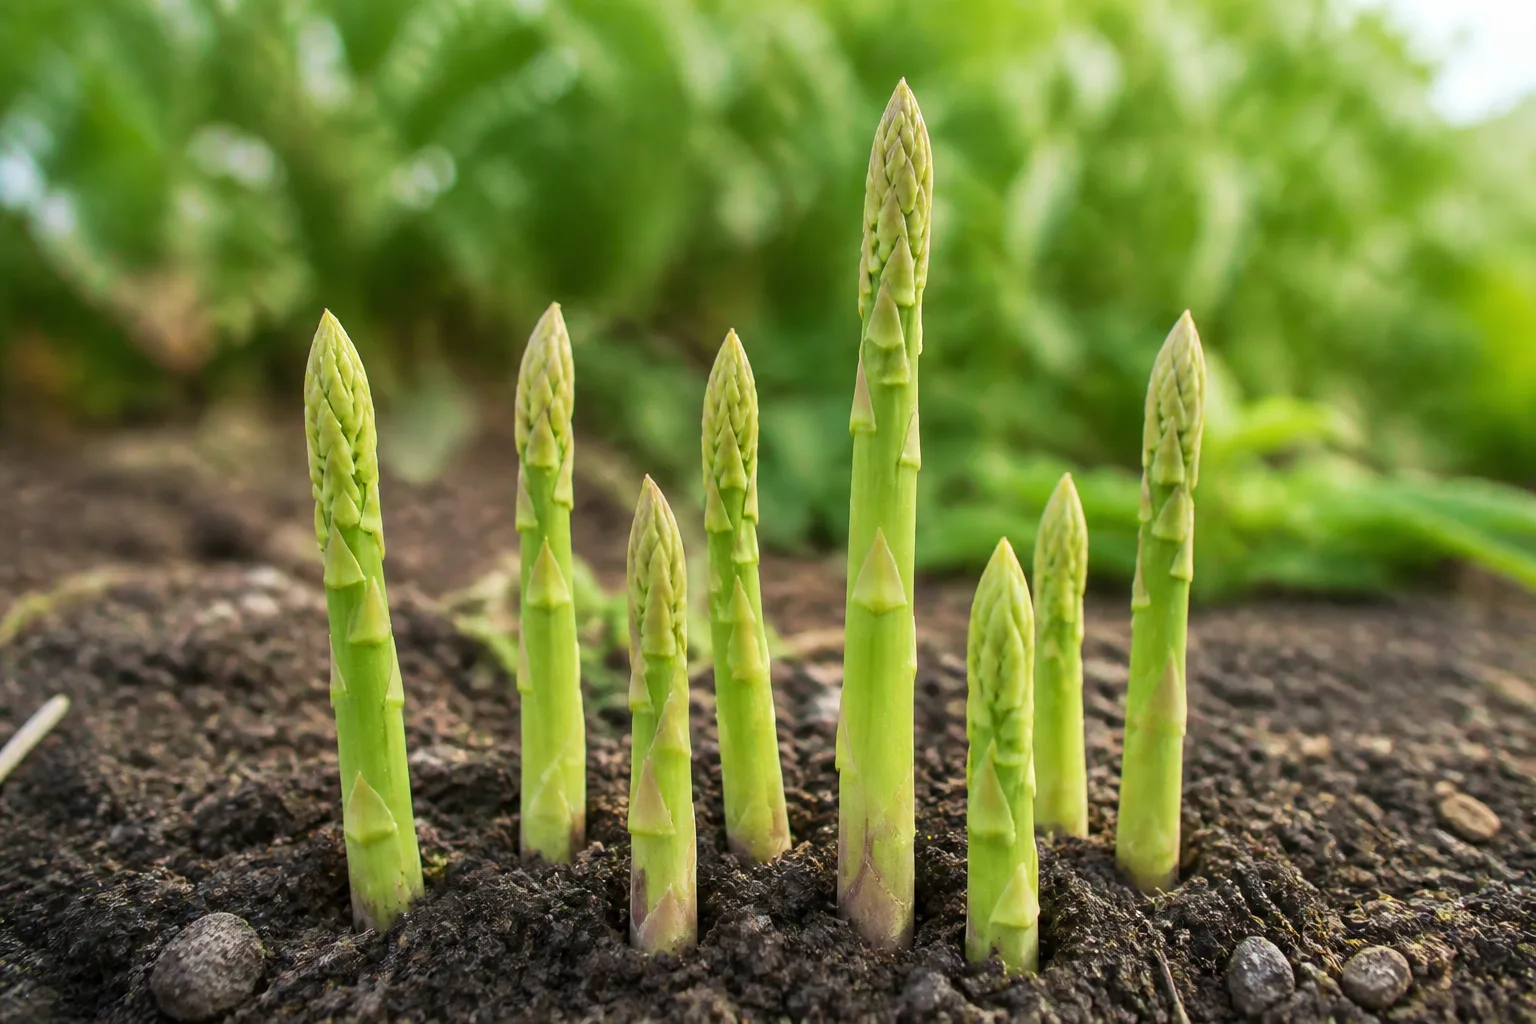
Use plant vigor as the final test. University of Maryland Extension’s conservative schedule is no harvest for the first two seasons, a light harvest in the third, and a full season in the fourth. That is a useful baseline for seed-grown plants. If your seedlings were weak, transplanted late, shaded, or stressed by dry soil, wait another year. A missed early harvest is a small cost compared with permanently weakening a young bed.
For a first light picking, choose only the largest, firm spears and stop after a short window—about one to two weeks is a cautious start. In the next season, extend the harvest only if the bed sent up abundant, thick spears and grew strong ferns the previous summer. Established beds can support a longer spring harvest, but the exact duration varies with climate, plant age, and vigor. Snap or cut spears close to the soil without gouging nearby shoots, and stop when new spears become noticeably thin. Then let every remaining shoot grow into fern so it can replenish the crown.
Harvest in cool parts of the day and use spears promptly for best texture. If weather warms quickly, spears can elongate and open sooner, so check the bed regularly during its mature harvest window. The visual reward comes after years of patience; the season is short compared with the many summers the established bed can produce.
Troubleshoot weak seedlings and empty patches
No seedlings yet: Check the packet date, soil temperature, moisture, and sowing depth. Asparagus may take several weeks to emerge, so wait before disturbing the row. If the mix is cold and wet, move indoor trays to a steadier location and let excess water drain. If you used old seed, start a small backup batch while the first remains in place.
Seedlings collapse at the soil line: This often follows persistently wet mix and stagnant air. Remove collapsed seedlings, improve drainage and airflow, and water less often but thoroughly. Clean containers and fresh seed mix reduce the chance of carrying problems into a new sowing.
Plants are thin or floppy: Increase light, reduce crowding, and avoid feeding before correcting the growing conditions. Tall, weak indoor stems usually need stronger light, not a fan or fertilizer alone. Outdoors, a simple support can help mature ferns in windy sites, but it will not fix a shaded or waterlogged bed.
The nursery row is full of weeds: Hand-weed while plants are small and mulch lightly once the asparagus is easy to see. If a deep-rooted perennial weed has taken over, move healthy seedlings to a clean bed during dormancy rather than repeatedly digging through the roots. Starting over may be faster than trying to rehabilitate a badly infested permanent patch.
A plant fails after transplanting: Some settling is normal. Keep the root zone evenly moist, protect the plant from intense midday sun for a few days if the weather is hot, and do not fertilize a stressed root ball. If the crown is soft, dark, or sitting in waterlogged soil, correct the drainage problem; more irrigation will make it worse.
Save seed from mature female plants
If you want to save seed, first grow the plants to maturity. Female plants form small flowers and later red berries; those berries contain the dark seeds. Let them ripen fully, collect them before they fall, remove the pulp, and dry the seeds thoroughly before storage in a labeled, cool, dry place. Seedlings grown from saved seed may include both sexes, so keep only the number of plants your bed can support.
Seed saving is optional. If your goal is a productive edible patch, buying a packet from a reliable supplier is simpler than waiting several years for a female plant to mature and set berries. Do not leave extra seedlings scattered through the permanent bed; they compete for light, water, and space with the crowns you have deliberately planted.
Conclusion
To grow asparagus from seed successfully, choose your permanent site early, sow into warm-enough conditions without letting the mix stay soggy, and protect seedlings from weeds while their roots develop. Raise them in a nursery row if the final bed is not ready, then move sturdy one-year plants into a sunny, well-drained permanent bed. The ferns are doing important work even when they are not producing spears, so leave them intact and postpone harvest until the crowns have had time to mature. A patient start gives you a better chance of a productive bed that can return each spring for years.