Peacock Plant Care: Light, Water, Soil & Humidity
Grow a healthy peacock plant indoors with a reliable moisture check, low-mineral water, airy soil, division steps, and symptom-first troubleshooting guide.
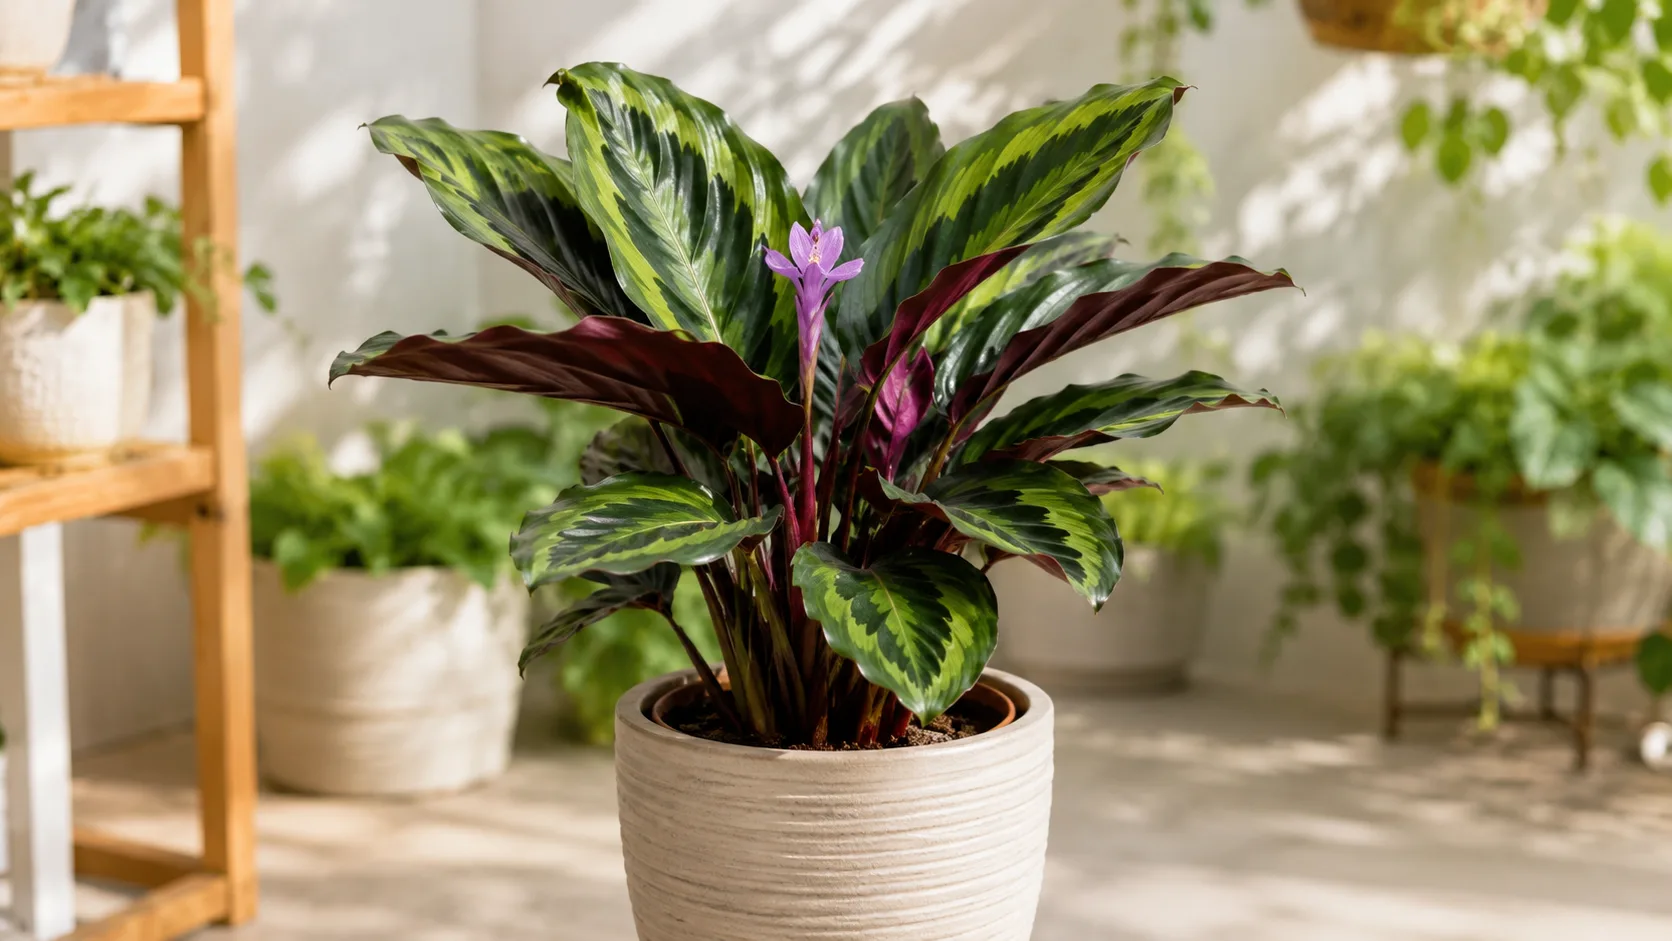
Peacock plant care is less about a secret trick than keeping the root ball moist without letting it stay soggy, and giving its patterned leaves bright, filtered light rather than sun. The plant signals when conditions are off, but brown tips, curling, and drooping can have several causes; checking soil, light, and the room before changing everything is the fastest path to a useful fix.
Meet the peacock plant: Goeppertia makoyana
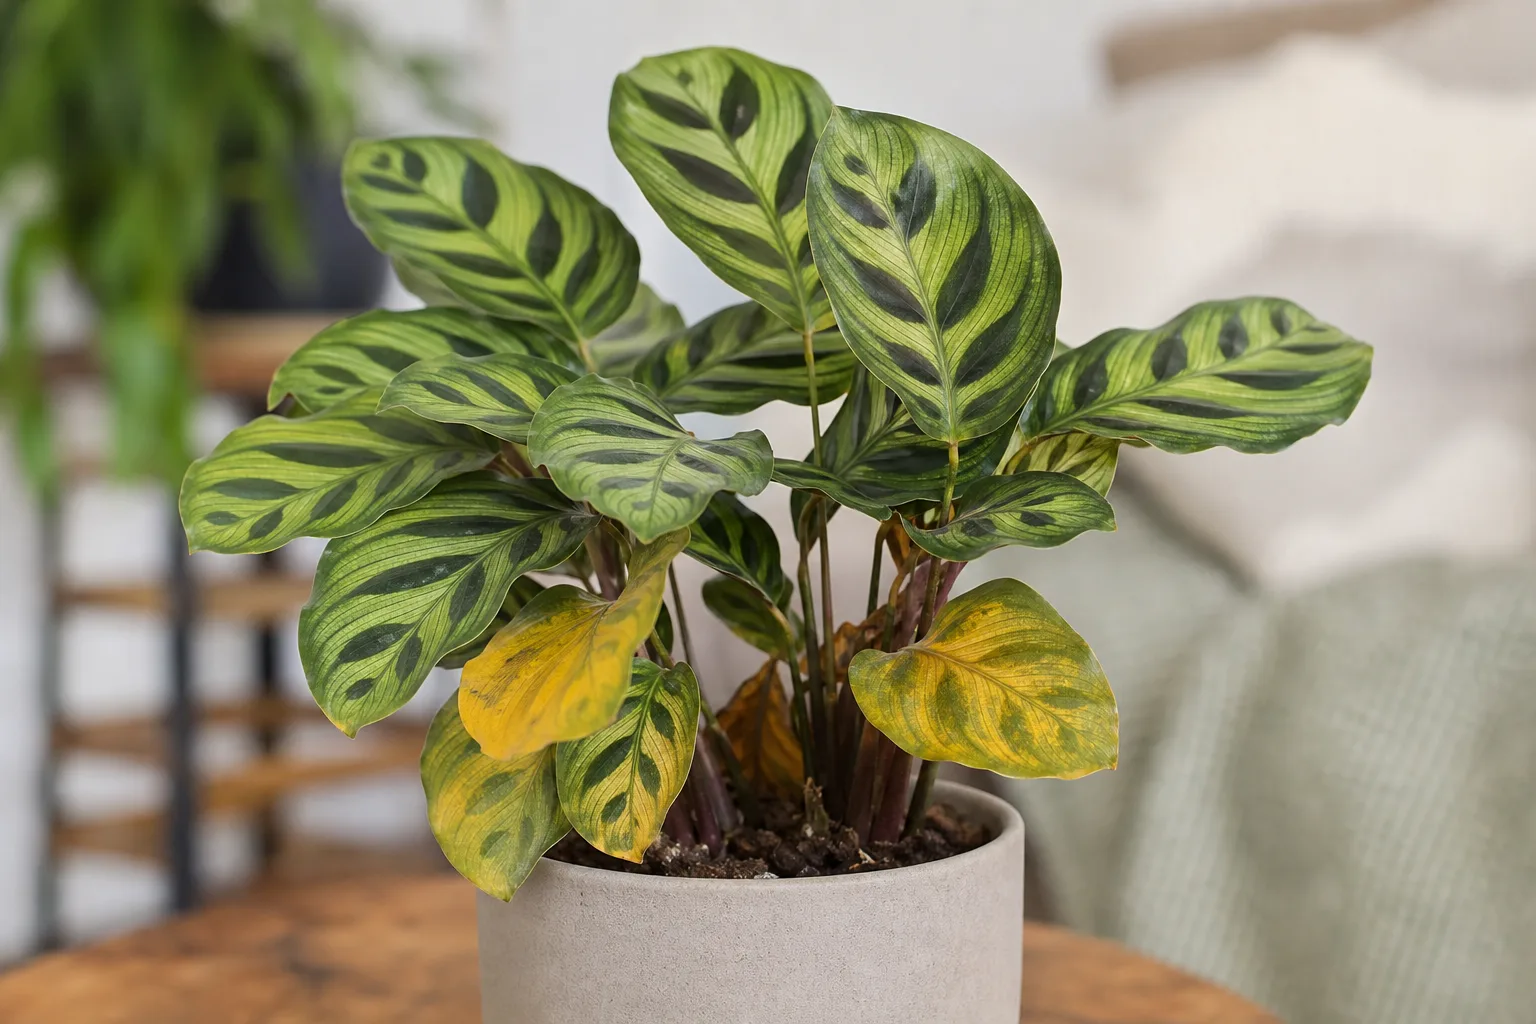
The peacock plant is an evergreen, clump-forming tropical perennial with thin, oval leaves marked in pale green and cream, dark feather-like bands, and burgundy-purple undersides. Its accepted botanical name is Goeppertia makoyana; plant labels and many care references still use the familiar synonym Calathea makoyana. NC State Extension records its origin in southeastern Brazil and notes that the leaves lift and lower over the daily light cycle, a normal movement in this member of the prayer-plant family. (NC State Extension)
A healthy plant makes a compact mound, often around one to two feet tall indoors. It is grown mainly for its foliage: small pale flowers may appear, but indoor plants rarely bloom conspicuously. The leaf undersides and repeating feather marks help distinguish it from other calatheas, which share a family and some care needs but are different species with their own growth habits.
The name “cathedral windows” refers to the translucent patterning, not a preference for a sunny windowsill. Treat this as a shade-grown tropical plant that needs enough indoor brightness to keep growing, but protection from direct heat and intense sun.
Choose filtered light, not a dark corner
Set the plant in a bright room where sunlight is filtered by a sheer curtain, tree canopy, or distance from the window. An east-facing window often works well; a north-facing window can work if the room is genuinely bright, and a south- or west-facing window may be suitable when the plant sits back from the glass or behind a sheer. NC State Extension recommends bright indirect light or partial shade, and UF/IFAS notes that bright light can wash out the foliage color. (NC State Extension, UF/IFAS)
Avoid strong afternoon sun, which can bleach the green pattern or leave dry, tan patches. A few feet from a bright window is often safer than placing the pot directly on a hot sill. Very dim conditions create a different problem: the plant may produce fewer leaves, grow slowly, and use water so slowly that a normally reasonable watering routine keeps the roots wet for too long.
Use the leaves as feedback, but do not move the plant every few days. If new growth is pale or sparse and the mix stays wet, gradually move it closer to bright indirect light. If exposed surfaces develop sharply defined bleached patches, move it out of direct rays. Turn the pot a small amount every few weeks if one side leans toward the window; constant rotation and relocation can make it harder to judge what is helping.
Use a moisture-retentive mix that still breathes
The roots need a mix that holds some moisture while allowing air and excess water to move through it. Start with a quality indoor potting mix or peat-free houseplant compost, then add perlite or fine orchid bark if the mix feels dense. Coir can help retain moisture, but avoid making the blend so fine or compressed that it stays wet and airless. NC State Extension recommends an organic-rich, moist but well-drained medium, while UF/IFAS warns that continuously wet media can lead to damaging root rot. (NC State Extension, UF/IFAS)
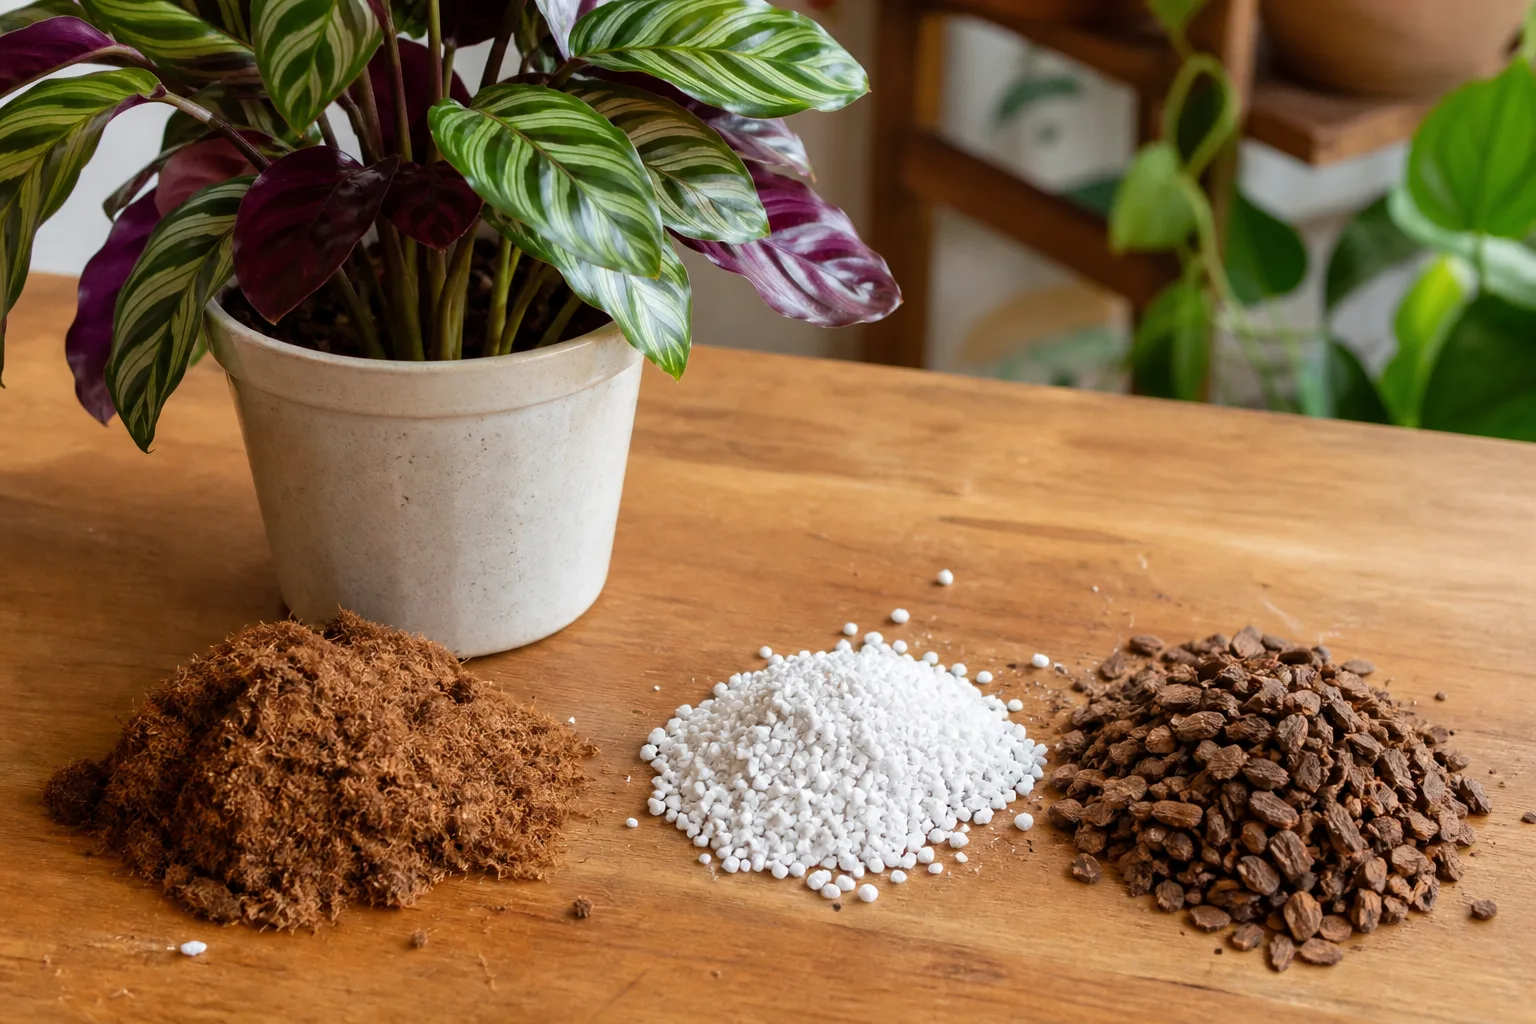
Choose a pot with an open drainage hole and only a modest increase in diameter when repotting. A decorative cachepot is fine if you lift the nursery pot out to water and empty the outer vessel afterward. Do not add gravel to the bottom of a pot as a drainage substitute: a drainage hole, an airy mix, and a container sized for the roots are the useful safeguards.
A simple mix check is more valuable than a precise recipe. After watering, the pot should drain freely; the mix should feel damp and springy rather than muddy, and it should begin drying at the surface between waterings. If it stays saturated for many days, assess light, pot size, drainage, and mix before watering again.
Water by checking the pot, not the calendar
Keep the root zone lightly and evenly moist, but never leave the pot standing in drained water. Check the surface before watering: when the top inch or so has begun to dry while the mix below still feels slightly moist, water slowly until excess runs from the drainage hole. Let the container drain completely, then empty its saucer or cachepot. This gives the full root ball a drink without leaving fine roots in an oxygen-poor puddle.
That soil check is more reliable than “every five days.” A small plastic pot in a warm bright room can dry quickly; a larger pot in a cool, dim room can remain wet much longer. In active spring and summer growth, the plant may need water more often, but in winter lower light and cooler rooms usually slow drying.
The Royal Horticultural Society recommends keeping compost evenly moist during spring and summer, then allowing the surface to dry before rewatering in autumn and winter without letting it dry out completely. A horticulture-reviewed guide to a different calathea species from Epic Gardening makes the same useful distinction between an evenly moist mix and waterlogged roots; its specific timing should not be copied as a schedule for every species. (RHS Calathea growing guide)
If water rushes around the root ball and straight out, the mix may have dried and pulled away from the pot. Apply water in two slow passes a few minutes apart so it can re-wet the medium. If a pot remains heavy and wet well past its normal drying time, do not “fix” drooping by watering again; check the drainage hole, root condition, and amount of light.
Choose water that leaves fewer minerals behind
Some peacock plants develop recurring brown edges when watered with mineral-heavy tap water. NC State Extension specifically recommends rainwater or distilled water because fluoride in tap water can brown leaf tips. The pattern is a clue, not a diagnosis: low humidity, direct sun, fertilizer salts, and a damaged root system can cause similar symptoms. (NC State Extension)
If your tap water is hard or leaf tips keep browning despite stable moisture and placement, try rainwater collected safely or distilled water for several weeks and watch the newest leaves. Letting tap water stand may allow some chlorine to dissipate, but it does not remove dissolved minerals such as fluoride. Do not switch water, fertilizer, pot size, and location all at once; making one change at a time helps reveal the actual cause.
Hold steady warmth and useful humidity
Keep the plant in a room that stays comfortably warm, away from cold drafts, frequently opened exterior doors, heating vents, and radiators. NC State Extension gives 65–75°F (18–24°C) as a preferred range; the RHS recommends 16–21°C (61–70°F). These are practical indoor ranges, not a reason to panic over a brief small variation. Avoid sustained cold and abrupt swings, which can slow growth and make leaf damage harder to distinguish from watering problems. (NC State Extension, RHS Calathea growing guide)
High humidity supports cleaner leaf edges, particularly in a heated home during winter. NC State Extension gives about 60% relative humidity as an appropriate target. Use a small hygrometer near the foliage to learn what the plant actually experiences instead of assuming a bathroom is humid enough or misting has changed the whole room.
Raise humidity without keeping leaves wet
A room humidifier is the most controllable option if indoor air is persistently dry; set it so moisture reaches the plant without creating condensation on cold walls or leaving the leaves constantly wet. A group of plants can create a slightly more humid local area, but spacing still matters because crowded, stagnant foliage is harder to inspect and slower to dry. A pebble tray may modestly affect the air immediately around a small plant, but it does not replace drainage or a humidifier in a very dry room.
Misting briefly wets the leaves and then evaporates; it does not hold a stable humidity level. If you choose to mist, do it lightly and early enough that the foliage can dry, and do not let water sit in the crown. Gardeningetc likewise emphasizes filtered light and avoiding waterlogged compost; its calathea guide treats humid air as part of care, not a substitute for sound watering. (Gardeningetc)
Feed lightly while new leaves are growing
Feed during active growth in spring and summer, not automatically through the darker months. Use a balanced liquid houseplant fertilizer at a conservative dilution—often half the label rate is a reasonable starting point—and apply it to already moist soil. NC State Extension recommends a balanced feed about every four weeks in the growing season; the RHS suggests monthly feeding from April through September. If your plant grows slowly indoors, feeding less often is safer than trying to force new foliage. (NC State Extension, RHS Calathea growing guide)
Pause fertilizer when the plant is newly divided, freshly repotted, dry, waterlogged, or not actively growing. Nutrient salts accumulate when excess fertilizer is applied or water is not allowed to drain. A pale plant can also be responding to weak light, poor roots, or an old compacted mix, so diagnose its growing conditions before increasing the dose.
Prune damaged leaves and keep the plant clean
Pruning is mainly cosmetic and sanitary; peacock plants do not need routine shaping to stay compact. Use clean scissors to cut a fully yellow, dead, or badly damaged leaf stalk close to the soil without nicking neighboring stems. If only the very edge is brown, you can trim the dry tissue along the natural leaf shape, leaving a narrow brown border rather than cutting into healthy green tissue.
Dust can obscure the pattern and reduce the light reaching the leaf surface. Wipe each leaf gently with a soft damp cloth, supporting it from underneath so its thin blade does not crease or tear. Avoid leaf-shine products, harsh rubbing, and repeated trimming of minor tip damage; healthy new growth is a better measure of whether the correction worked.
Repot when the root ball signals it is time
Repot when roots circle densely, emerge through the drainage hole, the mix has broken down, or watering has become unusually difficult to manage. A calendar interval is only a rough guide; a healthy plant in a moderately sized pot may need a new container every few years, while a stressed plant in soggy compacted mix may need attention sooner. The RHS recommends repotting after the clump fills its container, usually in spring or summer, using moisture-retentive but free-draining compost. (RHS Calathea growing guide)
Move up only one pot size, keeping the crown at its previous soil level. Tease loose outer roots gently, remove only roots that are clearly dead or mushy, then refill around the root ball without packing the mix hard. Water once to settle the medium and let excess drain. Do not divide a plant simply because you are repotting; if its roots are healthy and you want a fuller display, moving it intact is less disruptive.
If the plant is newly purchased, resist repotting on the first day unless the container has no drainage, the mix smells sour, roots are visibly rotting, or pests are present. Give it stable light and temperature first, observe how quickly the pot dries, and quarantine it from other houseplants while you check the leaf undersides and stems.
Propagate by dividing a mature clump
Division is the practical home method because each piece needs a portion of the plant’s rhizome and roots. Wait until the peacock plant is healthy, well established, and making several crowns; early active growth in spring or late spring gives it time to recover. Both NC State Extension and the RHS identify division as the preferred approach for this clumping, rhizomatous plant. (NC State Extension, RHS Goeppertia makoyana profile)
Water lightly the day before if the root ball is dry, then slide the plant from its pot and brush away enough mix to see where the clumps naturally separate. Untangle offsets by hand when possible; use a clean sharp knife only where the rhizome is joined too firmly to pull apart. Keep several leaves and a healthy portion of roots attached to each division rather than chopping a small crown into rootless pieces.
Pot each section at its former depth in a small container with drainage and fresh, airy mix. Water to settle the medium, let the pot drain, and place divisions in warm, bright indirect light. Maintain steady moisture and humidity while they establish, but do not seal them in a wet, unventilated bag. Hold fertilizer until new growth confirms the roots are working again; temporary droop or loss of an older leaf can happen after division.
Grow outdoors only in reliably warm places
A peacock plant can grow outdoors in a warm, sheltered, frost-free tropical or subtropical garden, preferably in shade or filtered light. In temperate regions, a shaded patio container can work during reliably warm weather, but bring it indoors before nights turn cool. A patio that is sunny at noon, windy, or exposed to cold rain is a poor location even if the daytime temperature seems pleasant.
Extension sources differ on hardiness-zone listings: NC State gives USDA zones 11–12, while UF/IFAS lists zones 10–11. That variation is a reason to use local conditions rather than a zone number alone. The RHS describes it as suitable for warm sheltered frost-free outdoor positions and as a conservatory or greenhouse plant elsewhere. If you summer it outside, acclimate it gradually, keep it shaded, check for pests before bringing it back in, and do not leave it out through a cold snap. (NC State Extension, UF/IFAS, RHS Goeppertia makoyana profile)
Read symptoms before changing the routine
A single damaged leaf is rarely enough evidence to diagnose the whole plant. Look at the newest growth, how quickly the soil dries, where the pot sits, and whether the stems at the soil line feel firm. Change one condition at a time unless you find an urgent root problem, such as a sour-smelling pot with mushy roots.
Brown tips have more than one possible cause
Crispy tips can follow dry indoor air, repeated underwatering, fluoride or salt accumulation, direct sun, or hot and cold drafts. If damage is mostly on the leaf edges and the room is dry, check humidity with a hygrometer and move the plant away from vents before adding water. If the root zone is dry, water thoroughly and let it drain; if the medium is wet, do not water again to treat a brown edge.
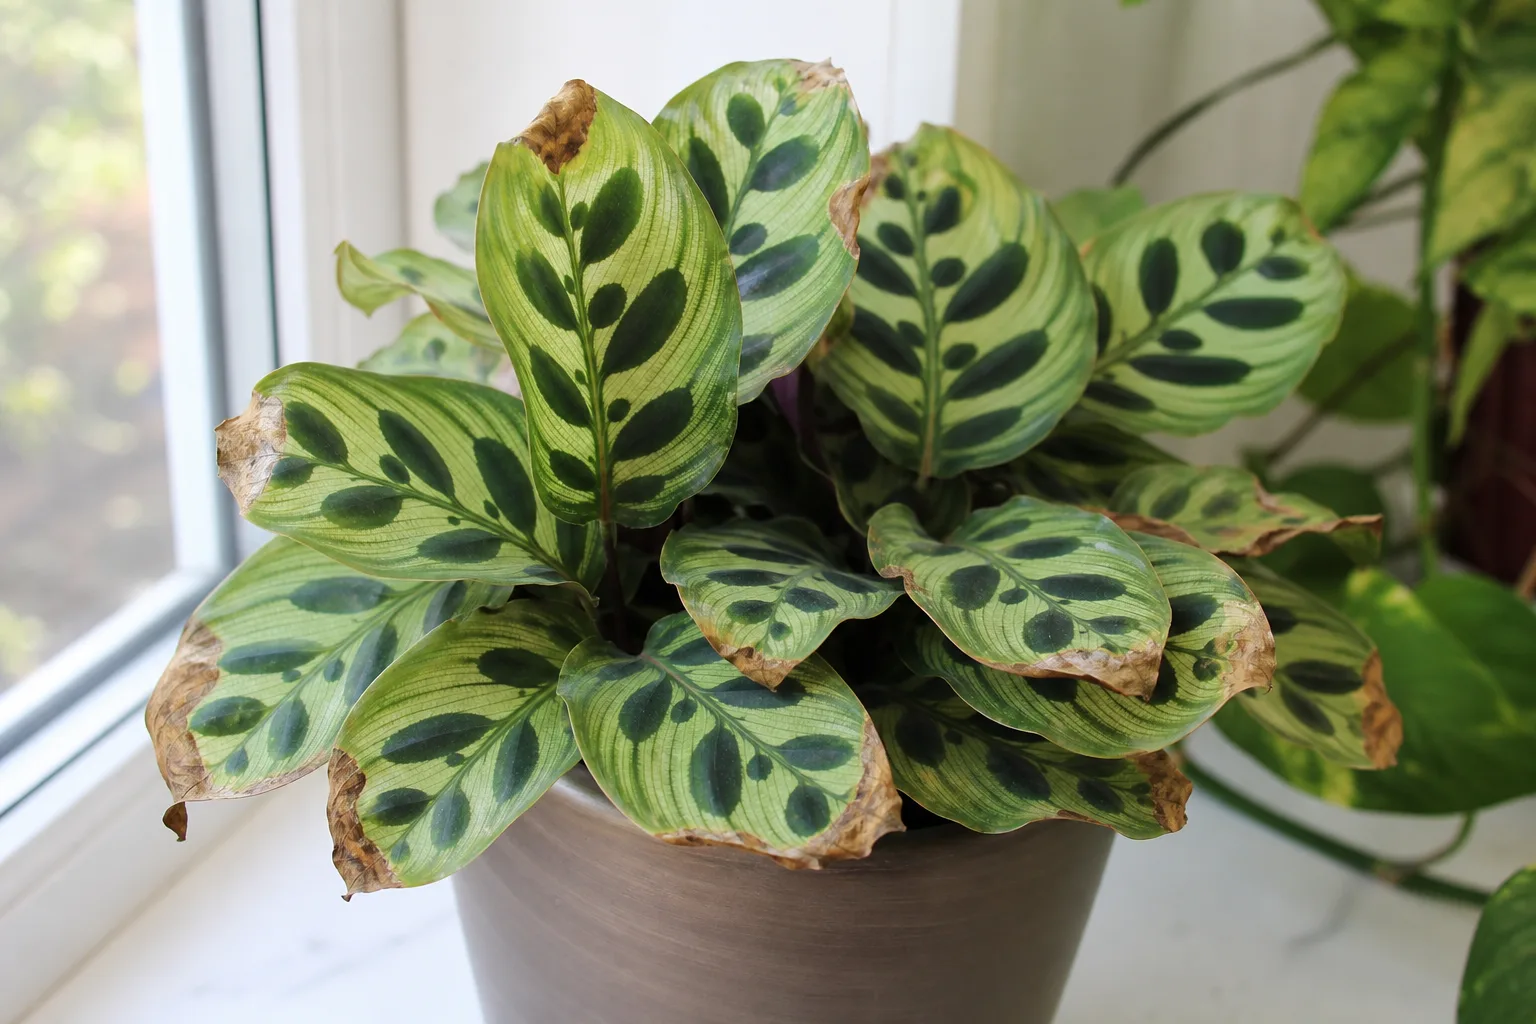
Hard water or excess fertilizer becomes more likely when tip browning returns on successive leaves and you see a pale mineral crust on the soil or pot rim. Try lower-mineral water and pause feeding while the plant stabilizes. Sun scorch usually appears on the side exposed to direct rays, while draft damage clusters near the airflow source. Damaged tissue will not turn green again, so judge the fix by the next leaves.
Curling and drooping point to different checks
Leaves naturally change position over the day, so an evening lift or small overnight movement is not the same as persistent daytime curling. Tight rolling during the day is a stress response; test soil before watering, then check room humidity, temperature, and pests under the leaf edges. Do not assume every curl means thirst, especially when the soil is already wet.
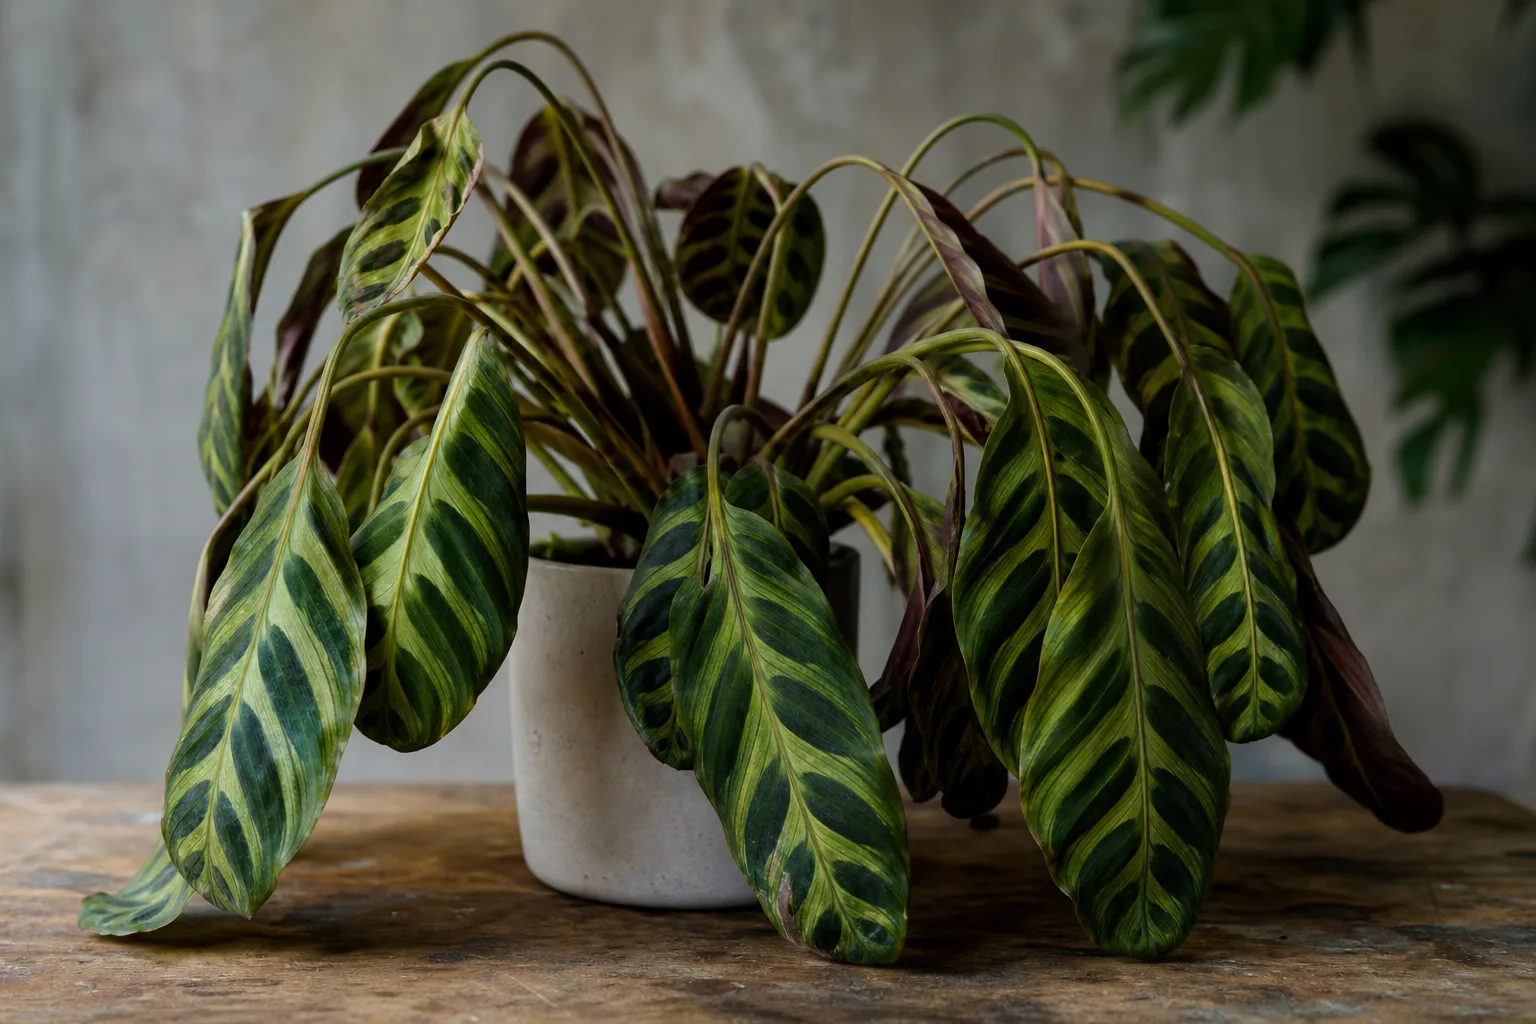
If the soil is dry well below the surface, water slowly and confirm that the root ball absorbs it. If the soil is moist but the leaves stay limp, inspect drainage and the roots rather than adding more water. Check for fine webbing, stippled patches, or moving specks as well; spider mites can worsen leaf stress, particularly in warm dry air.
Yellowing and soft stems call for a root check
One older leaf turning yellow as new leaves emerge may be normal aging. Several leaves yellowing together, especially while the mix stays wet or the stems soften near the soil, suggest that the roots may be short of oxygen or damaged. Slide the root ball out only when these clues persist; healthy roots are firm, while rotting roots tend to be dark, soft, and unpleasant smelling.
Remove mushy roots with a clean tool, repot into fresh airy mix and a pot with drainage, and let excess water escape after each watering. If the root system is mostly sound, correct the mix and drying conditions and wait for new growth before feeding. Do not bury the crown deeper or use a much larger pot as a rescue measure.
Check for pests and know the pet-safety facts
Inspect both sides of the leaves and the stems when you bring the plant home, after moving it outdoors, and whenever new growth looks distorted. Spider mites may leave fine webbing and pale stippling; aphids, scale, and mealybugs can cluster on tender stems and leaf undersides. NC State Extension lists these among pests to monitor on peacock plants. (NC State Extension) Isolate an infested plant, rinse or wipe foliage, and identify the insect before choosing a treatment. Follow any product label exactly, keep treatment residue away from pets, and avoid spraying a stressed plant in direct sun.
The ASPCA lists Calathea as non-toxic to cats, dogs, and horses. That is reassuring for common household pets, but it does not mean the foliage is food: a pet chewing a large amount of any houseplant can still have stomach upset, and the plant itself may be damaged. Keep the plant where you can monitor nibbling and contact a veterinarian if an animal eats a large quantity or shows persistent symptoms. (ASPCA Animal Poison Control)
Conclusion
A peacock plant grows best when its setting stays warm and bright without direct sun, its mix stays lightly moist without becoming waterlogged, and its leaves are protected from prolonged dry air. Start by choosing a filtered-light position and a pot with a drainage hole, then use the soil and pot weight—not a fixed weekday—to decide when it needs water.
When leaves change, inspect the plant before adding more water, fertilizer, or humidity gadgets. Brown tips, curling, yellowing, and drooping do not all mean the same thing; checking the soil, airflow, roots, and newest growth one at a time gives you a clearer answer. If the clump is mature and healthy, divide it during active spring growth and let each section re-establish at its own pace.