Pine Bonsai Care: How to Grow a Healthy Tree Outdoors
Keep pine bonsai healthy outdoors with species-specific watering, soil, feeding, pruning and winter care. Know when decandling helps—and when it can harm.
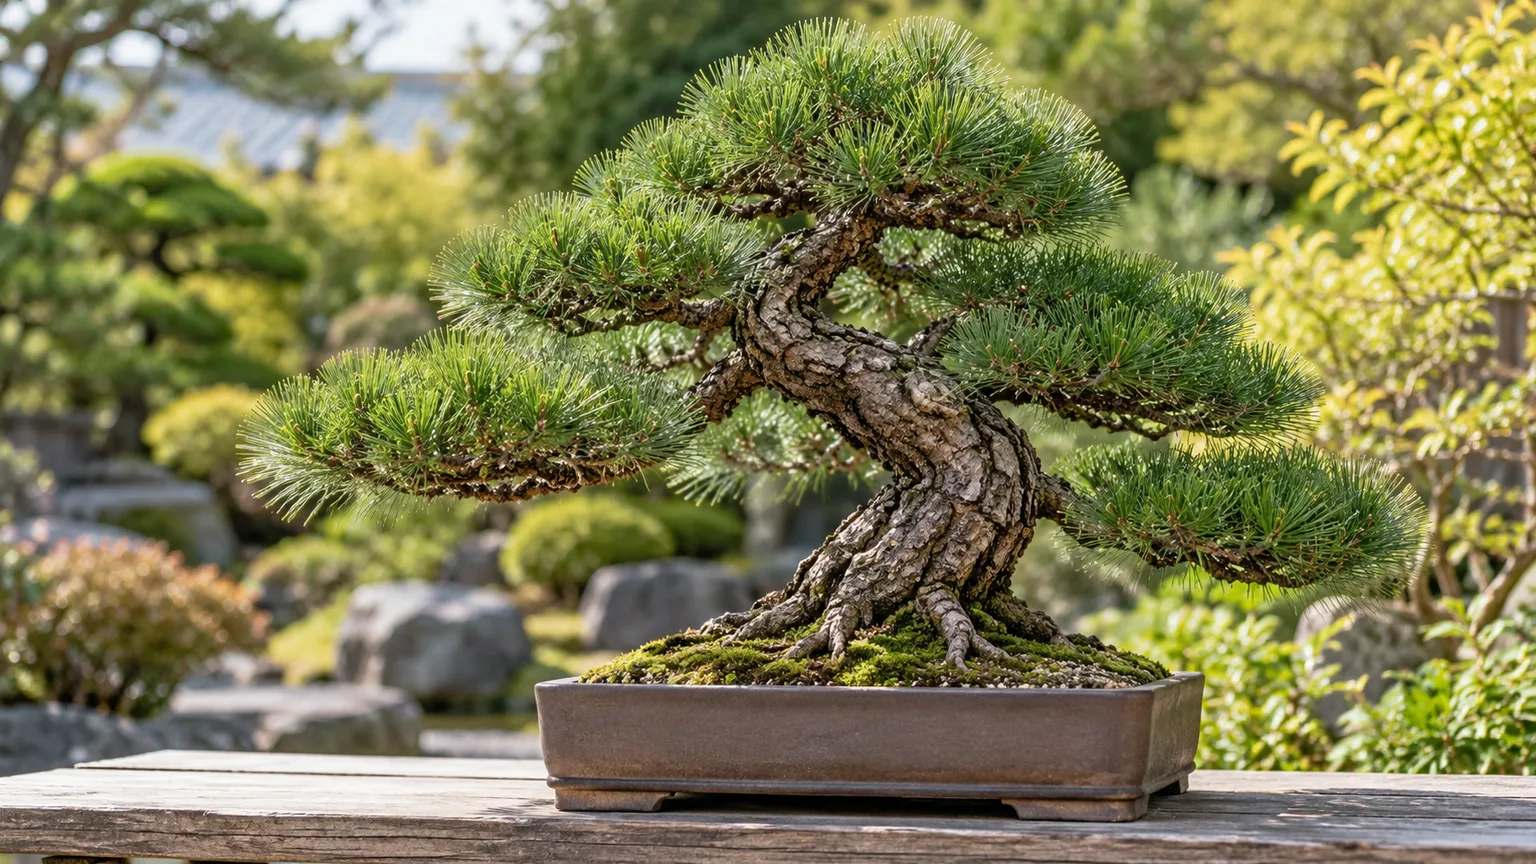
A pine bonsai is a temperate tree in a shallow container, not a houseplant that happens to look like a miniature evergreen. Give it outdoor sun, moving air, seasonal cold, and a free-draining root zone; then make pruning decisions only after you know which pine you have and how it grows. Those basics matter more than any styling trick because the tree has little soil to buffer missed watering, overheated roots, or poorly timed root work.
If you are choosing your first bonsai, consider starting with a healthy, established tree from a specialist nursery and asking for its full species or cultivar name. Pines reward patient observation, but they are less forgiving than beginner favorites such as ficus: candle pruning, needle management, and recovery from repotting depend on species and vigor. The U.S. National Arboretum describes bonsai as living trees shaped to portray natural growth and changing with the seasons; its collection’s continual care and training reflect the long view this art requires (U.S. National Arboretum).
Know which pine you have before pruning
“Pine bonsai” describes many species in the genus Pinus, not one plant with one pruning calendar. Needle length, hardiness, candle behavior, and recovery rate vary, so keep the nursery label and learn the scientific name before you remove growth. If the label has gone missing, take clear photos of the needles, buds, bark, and whole tree to a local bonsai club or extension office rather than identifying it from needle color alone.
The first useful distinction is whether the species makes one or two growth flushes in a growing season. A flush is a wave of new shoots: spring candles extend, then needles emerge and harden.
Bonsai Empire’s species guide identifies Japanese black and Japanese red pine as two-flush examples, while Japanese white pine, Scots pine, mugo pine, and ponderosa pine are treated as one-flush pines. That distinction changes whether complete early-summer decandling is an option at all (Bonsai Empire’s pine species guide).
Common pine species and their growth patterns
| Pine | Typical bonsai trait | Useful care implication |
|---|---|---|
| Japanese black pine (Pinus thunbergii) | Vigorous, rugged bark, paired dark needles; commonly two flushes | An established, vigorous tree may respond to carefully timed decandling |
| Japanese red pine (Pinus densiflora) | Slender paired needles and a lighter, finer look; commonly two flushes | Candle timing and vigor still matter; do not assume every tree is ready |
| Japanese white pine (Pinus parviflora) | Fine texture, usually five needles per bundle; one flush | Avoid black-pine decandling; preserve enough growing tips |
| Scots pine (Pinus sylvestris) | Twisted paired needles and attractive reddish upper bark; one flush | Select and shorten shoots rather than removing the year’s whole flush |
| Mugo or mountain pine (Pinus mugo) | Compact habit and short, paired needles; one flush | Useful for smaller designs, but still needs outdoor light and dormancy |
| Ponderosa pine (Pinus ponderosa) | Long needles in bundles of three and substantial trunk potential | Allow a size that keeps long needles visually proportional |
These are general patterns, not a substitute for a cultivar-specific plan. Bonsai technique can also be affected by where the tree is growing: a long, cool spring and a hot, dry summer will not produce the same candle schedule as a mild maritime climate. When you are unsure, preserve healthy growth for one season and record when buds swell, candles extend, and needles harden.
Keep temperate pine bonsai outdoors
Pine bonsai should live outside year-round in a climate that suits the species. A heated home lacks the combination of direct sun, airflow, and seasonal temperature change that a temperate pine uses to complete its annual cycle. Virginia Cooperative Extension groups pines with full-sun outdoor bonsai and notes that forest-tree bonsai need seasonal outdoor conditions; brief indoor display is different from keeping one beside a window permanently (Virginia Cooperative Extension, “The Art of Bonsai”).
A bright window does not compensate for weak indoor light or missing winter dormancy. If you want a small tree for a desk, choose a tropical species sold for indoor bonsai rather than trying to acclimate a pine to a room. You can bring an outdoor pine in briefly for viewing in cool weather, then return it outside; avoid leaving it in a warm room for days, especially during active growth.
“Outdoor” does not mean exposed to every extreme. Place the tree where rain can reach it but water drains freely, and shield it from punishing wind, reflected afternoon heat, or severe freeze-thaw swings.
The pot and roots are more exposed than a pine planted in the ground. In a cold region, keep the tree cold enough to stay dormant but insulate or shelter the shallow container during prolonged hard freezes; an unheated cold frame or protected outdoor spot is generally more appropriate than a heated room. Match protection to the labeled species, local winter lows, pot size, and how long the cold lasts.
Choose a sunny, airy position
Give a pine bonsai several hours of direct sun, with all-day sun often working well when the species and climate are suited to it. Strong light supports compact growth and helps lower branches receive enough energy.
A shaded interior or dense canopy can stretch new shoots, lengthen needles, and gradually weaken inner foliage. Bonsai Empire’s general pine guidance likewise recommends full sun and notes that insufficient light can contribute to longer needles (Bonsai Empire).
Acclimate a tree gradually if it has spent time in a greenhouse, store, or sheltered porch. Move it into morning sun first and increase exposure over several days, watching for bleaching or scorched tips during a heat wave. A pot on a hot paved surface can cook roots even when the canopy looks comfortable, so use a slatted bench or another surface that allows air to circulate and avoid placing the container against a sun-baked wall.
Air movement dries foliage after rain and helps discourage prolonged dampness around dense needle pads. It should not become constant drying wind, which can pull water from a small rootball faster than roots replace it. Turn the pot periodically if one side gets much more sun; even light can help the tree maintain balanced growth, but do not rotate it every day if it disrupts your own observation of new shoots.
Water to the tree and weather, not a fixed schedule
Water when the upper layer of bonsai substrate begins to dry, then water thoroughly until excess drains from the pot. Check the surface granules and lift the pot to learn how it feels when moist versus nearly dry. A schedule such as “every morning” may be a reminder to check, but it is not a reliable rule: a small pot in hot, windy weather may need water daily, while a cool tree in a larger pot may take longer.
Do not let the rootball dry completely, and do not keep it permanently wet. A useful routine is to check once in the morning and again on unusually hot or windy days, then water only when the substrate shows it needs it.
Direct the water over the whole surface so that the center and edges of the rootball are both wetted. If dry granules repel water, apply it slowly in two passes a minute apart rather than assuming runoff means the interior is moist.
Drainage holes must remain open, and the tree should never sit in a saucer of runoff. Persistent wetness deprives fine roots of air and can lead to root decline; yellowing after repeated watering is not a cue to add more water without checking the soil first.
Conversely, severe drying can kill fine roots and leave needles brittle. Bonsai Empire also emphasizes that there is no fixed watering interval because pot size, substrate, and conditions change drying speed.
In winter, a dormant pine uses less water, but evergreen needles still lose moisture on bright, windy days. Check the mix during mild spells and water when it is approaching dryness; let it drain completely before temperatures fall again. Do not water frozen substrate or leave the pot in standing water that can freeze around the roots.
Use an open, fast-draining bonsai mix
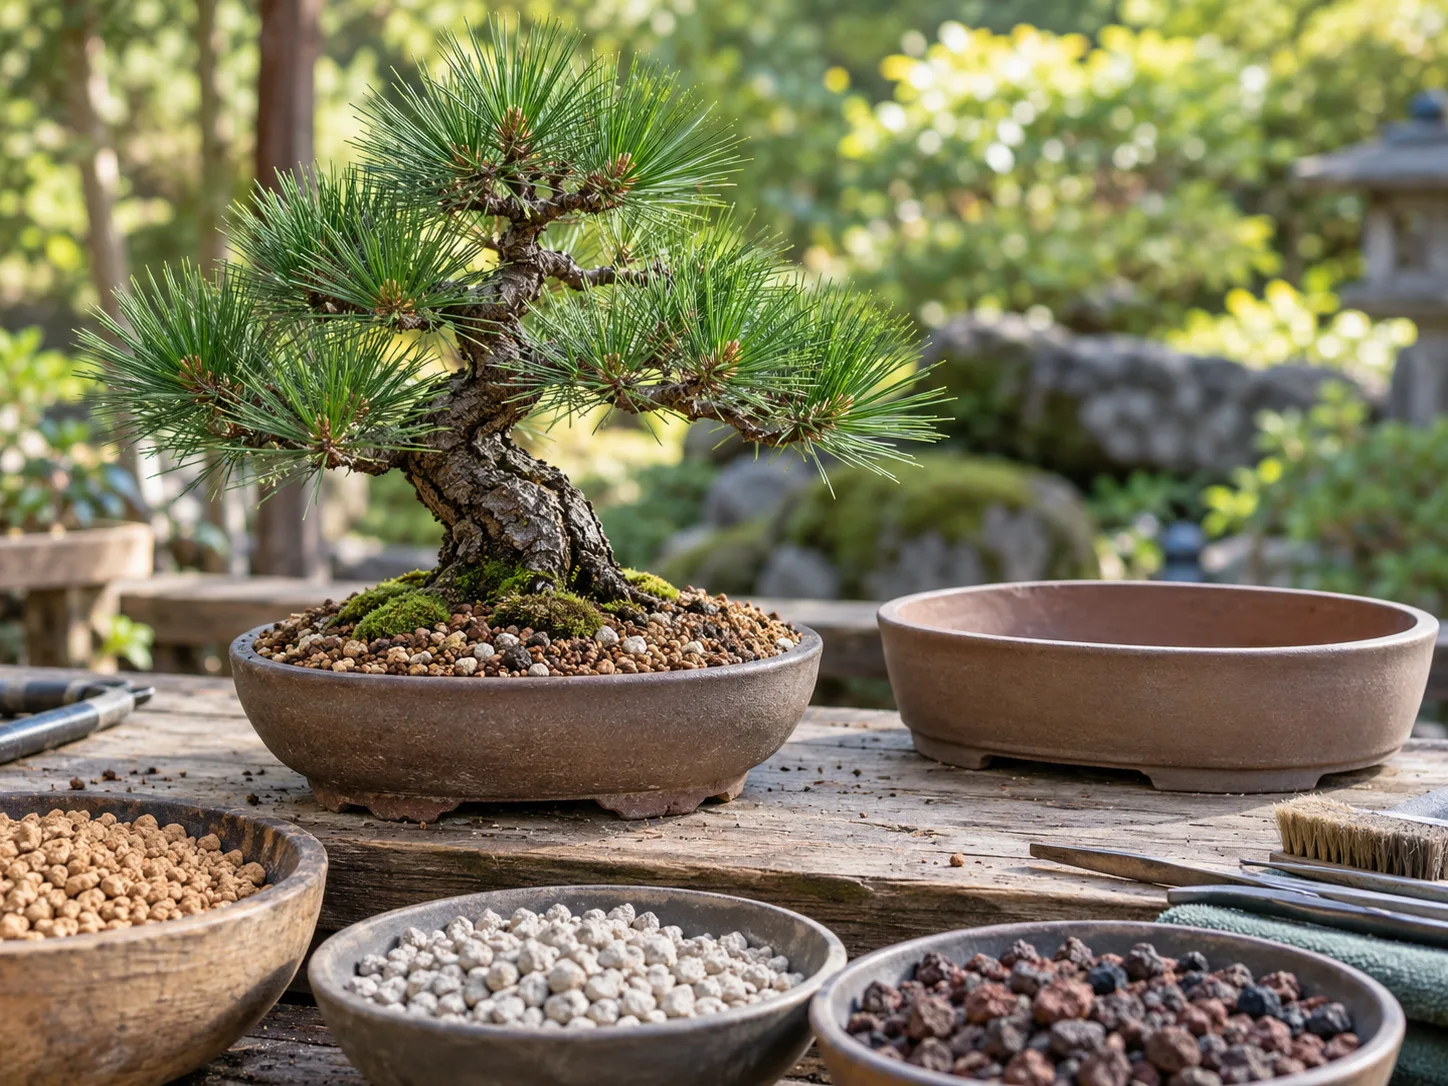
Pines need a porous substrate that holds some moisture while letting extra water and air move through it. A common conifer mix combines granular akadama or another stable clay, pumice, and lava rock in particles suited to the tree and watering conditions. Virginia Cooperative Extension describes coarse, fast-draining soil and containers with large drainage holes as central bonsai requirements; Bonsai Empire’s pine-making demonstration shows a mineral mix of akadama, lava, and pumice (Virginia Cooperative Extension; Bonsai Empire’s pine bonsai tutorial).
Avoid dense garden soil and ordinary peat-heavy potting mix in a shallow display pot. Those mixes can hold too much water, compact as they age, and make it hard to judge whether the center of the rootball has drained.
There is no universal ingredient ratio: particle size, humidity, rainfall, pot depth, and how often you can check the tree all affect the right blend. A coarse mix dries faster but needs more frequent attention; finer particles retain more moisture and require especially careful drainage.
Use a pot with unobstructed drainage holes and secure screening so substrate does not wash out. Covering the entire soil surface with a thick layer of decorative moss can hide drying and make watering decisions harder while the tree is new to you. Check that water runs out freely after each soak; if it pools on the surface or exits only through one corner, the substrate may be compacted or a hole may be blocked.
Fertilize for development or refinement
Feed during active growth with a balanced bonsai fertilizer at the product’s labeled rate, then adjust based on the tree’s stage and response. A young pine being grown for trunk thickness needs steady vigor and time in a training container; a mature tree being refined for short internodes and compact pads is managed more carefully. Fertilizer does not replace sunlight, drainage, or sound pruning, and extra feed cannot repair damaged roots.
Keep simple records of when you fertilize and how the tree responds. If candles are weak, check light, root health, watering, and recent stress before automatically increasing nitrogen.
If growth is already overly vigorous, spreading fertilizer farther apart or lowering the rate within the label’s directions may be part of a refinement plan—but avoid starving a tree to force tiny needles. Healthy growth supplies the energy needed for recovery and future buds.
Pause or reduce feeding when the tree is dormant, during extreme heat if the product guidance calls for it, and after major root work until the pine is showing stable recovery. Different organic pellets and liquid fertilizers release nutrients differently, so follow the specific label rather than converting one schedule to every product. Never combine a heavy feed, hard pruning, and substantial root reduction simply because all three appear on a seasonal checklist.
Prune candles only after identifying the flush pattern
A pine candle is the upright new shoot at a branch tip. It extends first, then its needles open and harden.
That sequence gives you a window to select or shorten growth, but it does not mean every candle should be cut. Pines are often stronger at the top and outer canopy, so a useful pruning plan also protects lower branches and keeps light reaching the interior.
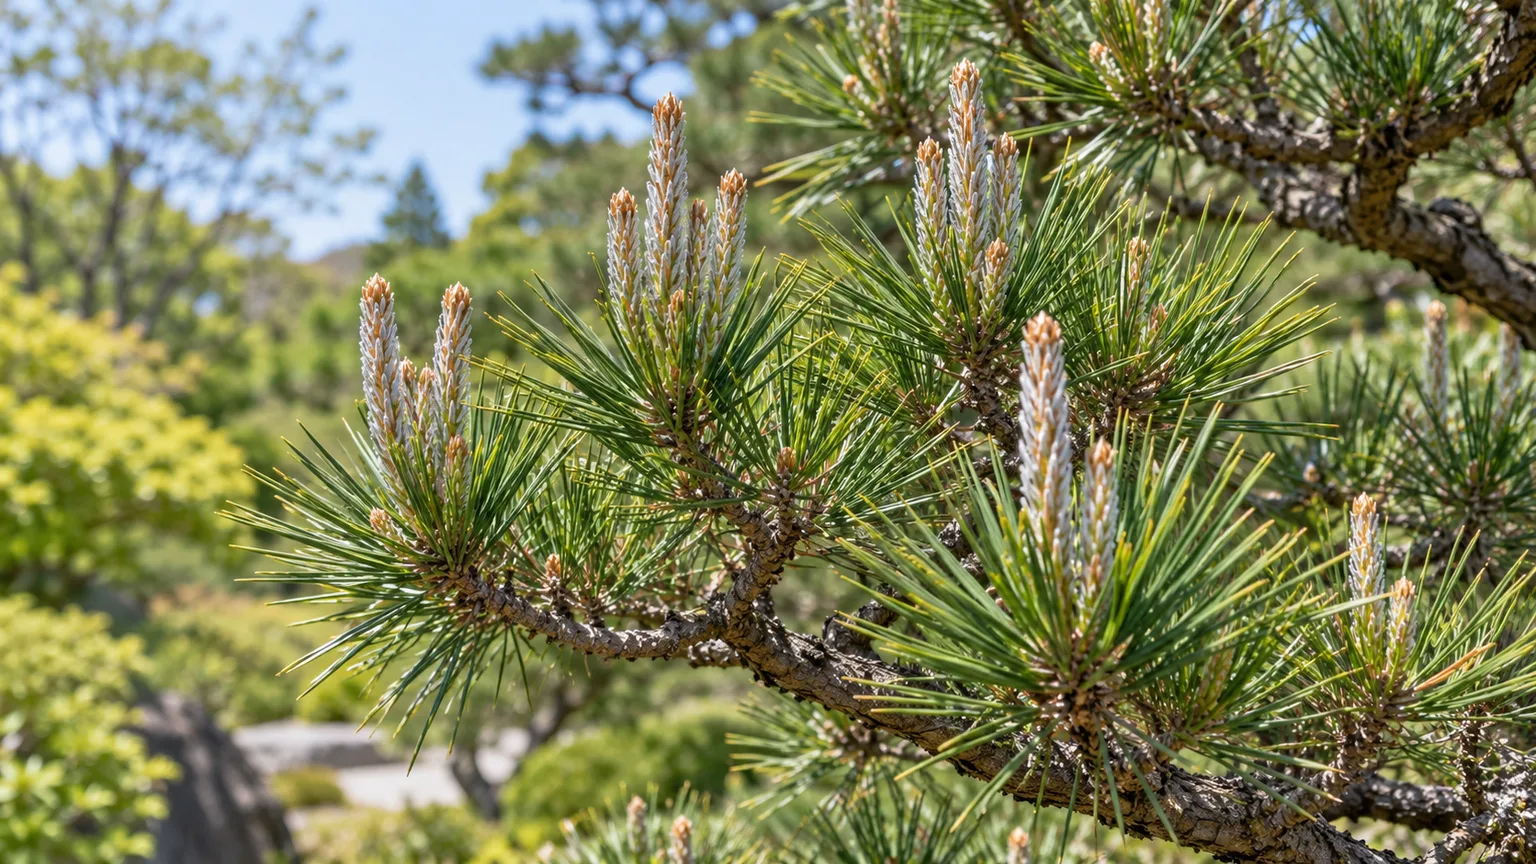
Before pruning, look at the tree’s health and history. A recently purchased pine, a weak tree, a pine recovering from repotting, or one that lost foliage to pests should be allowed to build strength. Remove dead or damaged material carefully, but postpone elective candle work if you cannot identify the species or if its buds and shoots are already weak.
Two-flush pines: decandling is conditional
Japanese black pine and Japanese red pine commonly produce two growth flushes. On a healthy, vigorous tree, a practitioner may remove or shorten the first spring flush so the tree responds with a second, smaller wave of growth.
This technique is called decandling. It is not simply a way to make any pine smaller: it is a deliberate intervention that spends stored energy and can be too stressful for a weak tree, a recently root-pruned tree, or a climate where the second flush will not have time to mature before cold weather.
Do not copy a date from a calendar. The usable window depends on local spring and summer, species, latitude, and how the current candles developed.
Bonsai Empire explains the two-flush pattern and the need to manage the first flush differently from one-flush pines; All Things Bonsai describes staging Japanese black pine candle work across sections of the tree to account for differences in vigor. Those examples are technique references, not universal schedules (Bonsai Empire; All Things Bonsai). Bonsai Plaza also cautions that candle timing changes by species and climate (Bonsai Plaza’s pine candle-pruning guide).
If you are learning, get a species-specific demonstration from a local club or a qualified pine-bonsai teacher before removing an entire flush. Start with a healthy, established tree and make only the planned cuts; do not decandle every branch equally if the top is much stronger than the lower canopy.
Leave weaker shoots and interior growth where needed to preserve branch options and keep the tree balanced. If the response is uncertain, skip the technique for a year and maintain the tree with light, water, and conservative shoot selection.
Single-flush pines: shorten and select
Japanese white, Scots, mugo, and ponderosa pines typically have one main flush. Removing every candle can remove that year’s growth and leave a branch without usable buds.
For these trees, shorten especially strong candles selectively and choose a suitable number of shoots where several emerge from one point. Keep healthy terminal growth on branches you need; do not use black pine’s full decandling method.
The goal is to prevent a few dominant shoots from taking over while preserving enough growth for the branch to keep developing. A small pine or newly established tree may need room to lengthen before it can support a compact design. Resist pruning just because the shoots look oversized in spring; wait until you understand how much they extend and whether the branch needs that energy to thicken.
Thin needles gradually to balance branch strength
Needle selection can help light and air reach crowded branches and reduce excessive strength at the top of a tree, but it should be done gradually. Remove old needles that are yellowing or crowded only when the species and season make that appropriate, and retain enough healthy foliage on each branch to keep it functioning. Do not pluck all needles from a shoot or strip a weak lower branch to make the silhouette look tidy.
Compare the upper and lower parts of the tree before you work. If the apex is dense while lower branches are sparse, repeated hard pruning at the top can worsen the imbalance; instead, preserve lower foliage and give those branches light.
The point is not to make every pad equally dense today. It is to keep each branch alive and direct the next season’s growth toward a more even structure.
Wire slowly and protect the branches
Wiring sets branch position while the tree is healthy and flexible; it does not make a poor branch placement permanent or substitute for a design. Decide which branches form the trunk line and canopy before applying wire. Use bonsai aluminum wire if you are learning because it is easier to bend and adjust; copper is stiffer and can hold a branch with a smaller gauge but demands good technique.
Anchor wire securely and wrap at an even angle without pressing it into bark. Support the branch with your fingers on the inside of a bend and make gradual adjustments rather than forcing a sharp curve all at once. Virginia Cooperative Extension describes wiring at an angle and cautions against tightening it excessively; its general advice for trees is to inspect the wire and remove it before it scars as branches thicken (Virginia Cooperative Extension).
Check wired branches frequently during active growth. Pines can thicken quickly when vigorous, and a wire that seemed loose can begin to bite into bark.
Cut the wire off coil by coil with bonsai wire cutters instead of unwinding it through needles and buds. Avoid heavy wiring, major pruning, and repotting all at once; the tree needs leaves and roots to recover from work.
Repot before growth resumes and keep root work conservative
Repot when the tree is due, not simply because a fixed number of years has passed. Warning signs include a root mass filling the container, water draining unusually slowly, a substrate that has broken down, or roots lifting the tree.
Virginia Cooperative Extension recommends repotting pines and other evergreens in late winter before new growth begins; Bonsai Empire gives spring just after buds start moving as a common window. Read that as a local growth-stage cue: repot while the tree is healthy and before candles extend, not on an arbitrary date (Virginia Cooperative Extension; Bonsai Empire).
Keep root work light enough for the species, tree strength, and your experience. Pines rely on fine roots and their associated growing environment, and drastic bare-rooting or cutting back most of the root mass can cause decline.
Remove only what is necessary to fit the container and refresh the mix, preserve part of the healthy rootball, and secure the tree so it cannot rock while new roots establish. If the tree is weak or it is your first time repotting a pine, ask an experienced grower to demonstrate the process.
After repotting, shelter the tree from harsh wind and scorching midday sun for a short recovery period while keeping it outside and bright. Check moisture daily because fresh substrate and disturbed roots can change how fast the pot dries.
Wait for signs of stable growth before returning to heavy feeding or any optional pruning. The pine should not have to recover from several major stresses at the same time.
Diagnose yellow needles and weak branches
A few older interior needles changing color is not the same as the whole tree turning yellow. Before taking action, note which needles are affected, whether the problem is on one branch or throughout the canopy, what season it is, and whether the soil is wet or dry. Compare the tree with its own recent growth; a pine’s old needles may age out while fresh candles remain firm and green.
The U.S. National Arboretum’s collection emphasizes that bonsai change with the seasons like their wild relatives. That is a useful diagnostic principle: seasonal changes are expected, but a symptom that spreads, reaches new growth, or coincides with persistent wet soil deserves investigation rather than immediate pruning (U.S. National Arboretum).
Read yellowing by location and timing
| What you notice | What to check first | A sensible first response |
|---|---|---|
| A few older needles yellow inside the canopy in autumn | New candles and outer needles remain green and firm | Monitor; avoid stripping healthy growth |
| Many needles yellow while the mix stays wet | Blocked holes, compacted soil, pot standing in water | Restore drainage and assess root health before watering again |
| Tips dry after hot, windy weather | Pot weight and dry substrate, especially at the edges | Water thoroughly if the rootball is dry and shelter from desiccating wind |
| One branch turns brown after wiring or bending | Wire bite, crushed bark, or a snapped connection | Remove constricting wire and inspect the branch; do not prune healthy branches elsewhere |
| Fine pale stippling, webbing, or sticky deposits appear | Needle undersides, branch joints, and new candles | Isolate the tree and identify the pest before choosing treatment |
Yellow needles do not identify one cause by themselves. If the tree has been kept wet, correct the drainage and observe; if it has dried hard, rewet slowly and protect the pot from wind. Avoid combining a full soil change, hard pruning, and pesticide treatment without diagnosing the issue, because each intervention adds stress and makes it harder to see what helped.
Long needles, dieback, and pests need different fixes
Long needles often reflect a mix of species genetics, shade, vigorous growth, and how the tree is being developed. They are not proof that the plant needs less water.
Increase light gradually if the pine is shaded, review feeding, and decide whether the tree is still in a trunk-building phase where longer growth is useful. Severe drought or repeated decandling to force tiny needles can weaken the tree and reduce future options.
If one lower branch declines while the upper canopy stays dense, inspect for shading, old damage, over-pruning, and pests before removing it. Pines are often top-dominant, so thinning the crown gradually and preserving lower foliage can improve light distribution. A branch that is fully dead will not recover, but do not cut into green growth until you know whether the apparent color change is normal needle aging or a true dieback.
Look for aphids on new candles, scale on twigs, fine stippling or webbing from mites, and chewing damage from caterpillars. Fungal disease and root problems can also brown needles, especially when foliage stays wet or the substrate drains poorly.
Remove fallen and clearly diseased material, improve airflow, and identify the problem before using any pesticide; choose only a product labeled for the specific pest and plant in your area and follow its directions. When browning advances quickly or whole branches fail, contact a local extension office or experienced bonsai professional rather than repeatedly spraying or pruning.
Grow new pines with realistic timelines
A pine grown from seed gives you the most control over its early trunk, but the years before it resembles a finished bonsai are part of the process. Virginia Cooperative Extension notes that seedlings may need several years of outdoor growth before moving into a training container. Bonsai Empire’s pine-making tutorial likewise uses nursery stock as a practical starting point and shows why styling, wiring, and repotting should be balanced rather than rushed (Virginia Cooperative Extension; Bonsai Empire’s pine bonsai tutorial).
Rooting branch cuttings is unreliable for many pines, so do not expect a quick cutting to become a styled tree in a few weeks. If you want a faster path, buy a healthy pre-bonsai or nursery-grown pine with a strong root system, an intact label, and branches that suit the design you have in mind. Avoid collecting a wild tree without permission, a species identification, and a plan for preserving roots; digging often causes severe stress and may be restricted in protected places.
Keep a seasonal log for your first two years. Record where the tree lives, when its candles extend and harden, how quickly the soil dries, when older needles shed, and what work you performed. That record will make next year’s watering and pruning decisions more specific than a generic care calendar and help you learn the rhythm of your own pine.
Conclusion
Pine bonsai care starts with recognizing that the tree belongs outdoors and that its species determines how you manage new growth. Keep the substrate open, water according to how quickly it dries, protect the shallow rootball from local extremes, and postpone major work when the tree is weak or recovering.
Before pruning, identify whether your pine has one or two flushes. That single check prevents the most damaging shortcut: applying Japanese black pine decandling to a species that needs its only annual flush. A healthy pine bonsai develops through modest, well-timed decisions repeated across seasons, with room for the tree to recover between them.



