Houseplant Symptom Checker: Yellow, Brown, Droopy, Crispy, or Leggy
Diagnose your houseplant by symptom — yellow leaves, brown tips, drooping, crispy edges, or leggy growth — with a simple visual checklist and fix for each.
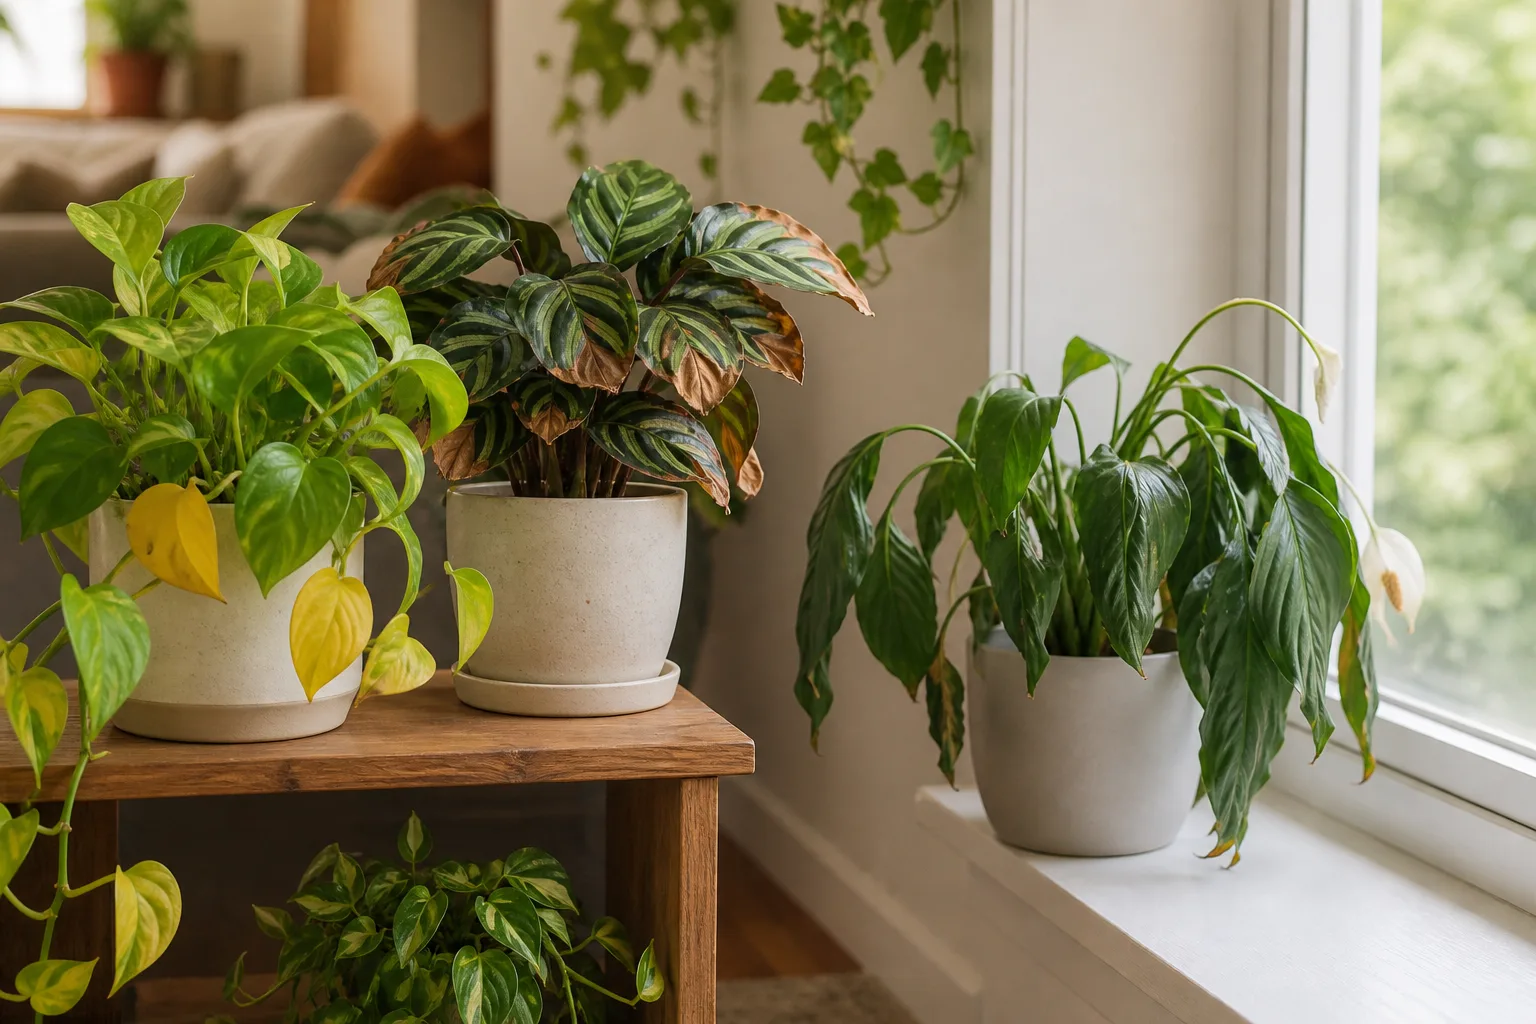
Most houseplant problems show up in the leaves before anywhere else. Yellowing, browning, drooping, crisping, and stretching are not random — each one points toward a specific set of causes. The trick is matching the symptom to the right fix instead of guessing and making things worse.
This guide works as a visual symptom checker. Find the section that matches what your plant is doing, read the quick-diagnosis table, then follow the steps. If the symptom does not match a single clear cause, start with moisture and roots — those are the most common sources of distress indoors.
Before you start: check soil moisture below the surface, lift the pot to feel its weight, and look at both sides of the leaves. A plant can show two symptoms at once — yellow lower leaves plus crispy tips, for example — and that often points to a watering pattern problem, not two separate diseases.
Symptom 1: Yellow Leaves
Yellow leaves are the most common houseplant distress signal, and also the easiest to misread. A single older lower leaf turning yellow can be normal aging. Multiple leaves yellowing at once, or new growth coming in yellow, is a real problem that needs investigation.
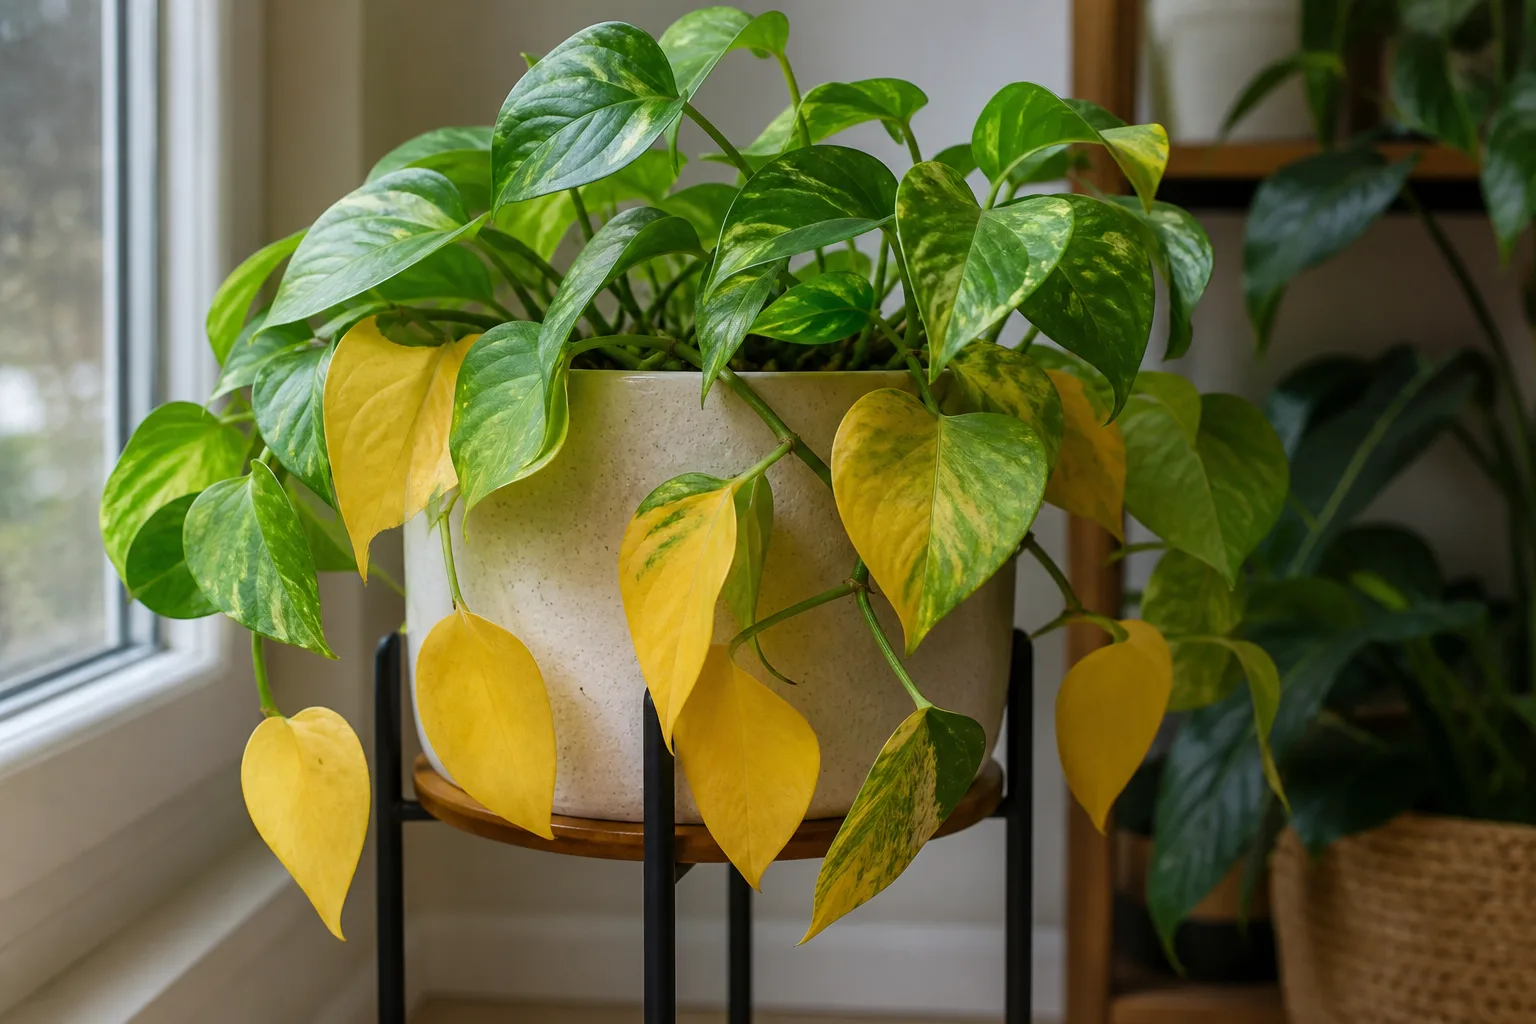
Clemson Extension notes that whole-plant yellowing is most often associated with overwatering, but also lists low light, pests, mites, and nutrient problems as possible causes. (Clemson HGIC) University of Maryland Extension identifies overwatering as the number one reason indoor plants fail and notes that leaf yellowing is often one of the first signs of plant stress. (University of Maryland Extension)
Quick diagnosis table
| What you see | Check next | Most likely direction |
|---|---|---|
| One oldest lower leaf fades slowly; new growth stays green | Confirm moisture is normal | Natural senescence — no action needed |
| Several soft yellow leaves; pot stays heavy for days | Probe the root zone; sniff for sour odor | Overwatering or early root rot |
| Yellow leaves with crisp brown edges; pot is light | Check if root ball is dry or water-repellent | Underwatering or inconsistent watering |
| Pale plant with stretched stems; new leaves are smaller | Review window distance and seasonal light | Too little light |
| Yellow or bronze stippling with fine webbing | Inspect leaf undersides with bright light | Spider mites |
| Yellow between green veins (interveinal chlorosis) | Review feeding history and root health | Nutrient or pH-related uptake issue |
| Yellow halos around brown spots | Check whether spots are dry or wet, spreading | Fungal or bacterial leaf spot |
How to diagnose yellow leaves
Start with soil moisture. Push a finger or wooden skewer 3–5 cm into the potting mix. If it comes out damp and dark, and the pot feels heavy, stop watering. Wet soil with yellow leaves is the classic overwatering signature — roots may be suffocating even though there is water present. University of Maryland Extension explains that excess moisture can cause wilting or yellowing of lower and inner leaves, and that overwatered plants can show symptoms similar to drought stress because root function is impaired. (University of Maryland Extension)
If the soil is bone-dry and the pot feels feather-light, underwatering is likely. Water thoroughly until excess drains, then empty the saucer. A plant that has been dry too long may need a bottom-soak to rehydrate the root ball properly — see how to water indoor plants the right way for the full method.
Check the light. A plant that was fine in summer may struggle in winter when daylight shortens. Low light slows water use, which means soil stays wet longer, which can trigger the same yellowing pattern as overwatering even if your watering habits did not change. Missouri Botanical Garden notes that insufficient light cannot be solved with extra water or fertilizer. (Missouri Botanical Garden)
Inspect for pests. Spider mites, thrips, mealybugs, and scale can all cause yellowing that looks like a care problem. Check leaf undersides, stem joints, and new growth. If you find pests, isolate the plant and use the indoor plant pest guide for species-specific treatment.
Rule out cold damage. A plant near a drafty window, air conditioner, or cold exterior wall may yellow from chill stress. RHS lists cold temperatures, sudden temperature drops, and drafts among yellow-leaf triggers. (RHS)
What to do
- Wet soil + yellow leaves: Stop watering. Move the plant into brighter indirect light to speed drying. If the pot has no drainage, repot into one that does. If yellowing spreads and the pot stays heavy, unpot and inspect roots — see save your dying houseplant for the root-rot rescue sequence.
- Dry soil + yellow leaves: Water slowly and thoroughly until the root ball is evenly moist. If the mix has pulled away from the pot sides, bottom-soak for 20–30 minutes, then drain fully.
- Low light + yellow leaves: Move the plant gradually to brighter indirect light. A sudden jump from a dark corner to direct sun can scorch leaves. See the grow lights guide if natural light is limited.
- Pest damage + yellow leaves: Isolate, identify the pest, and follow the treatment sequence in the pest guide. Do not fertilize a pest-stressed plant until it is stable.
Yellow leaves will not turn green again. Remove fully yellow leaves with clean scissors — they are not helping the plant and can attract pests or decay. Judge recovery by whether new growth comes in healthy and green, not by whether old leaves recover.
Symptom 2: Brown Tips and Edges
Brown tips are probably the most frustrating leaf symptom because they never heal, and the cause is not always obvious. A leaf with brown tips keeps those brown tips forever. The goal is to stop new tips from browning.
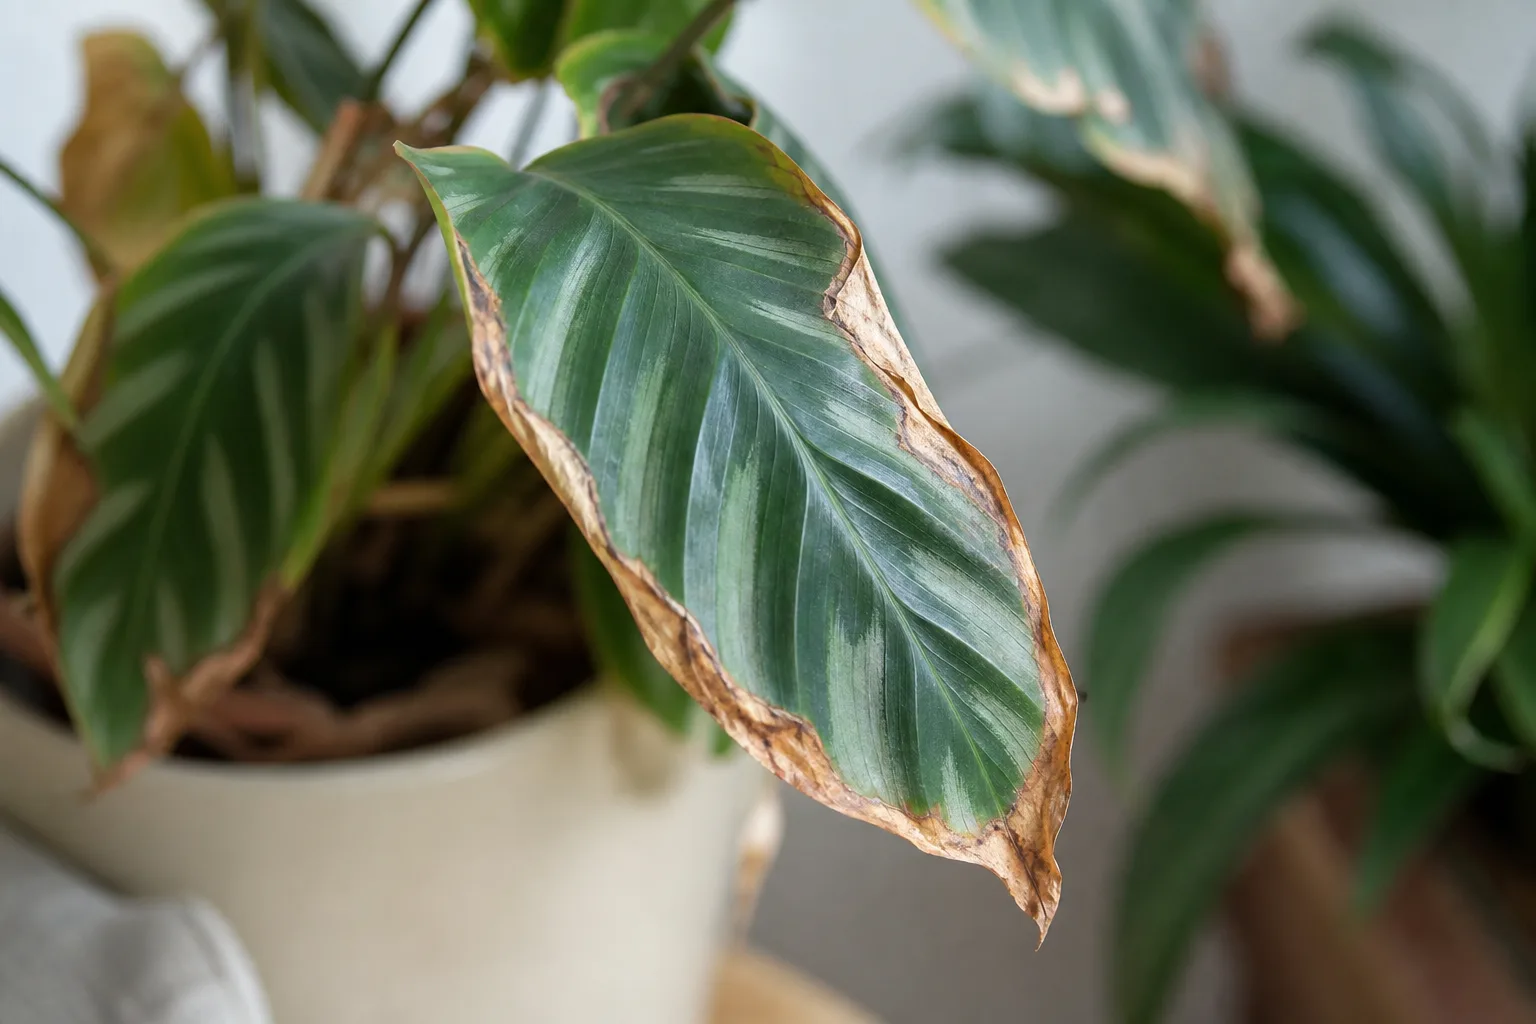
Iowa State Extension identifies inconsistent watering — especially allowing plants to dry out excessively between waterings — as a major cause of brown leaf tips and edges, along with excess fertilizer salts. (Iowa State Extension)
Quick diagnosis table
| What you see | Check next | Most likely direction |
|---|---|---|
| Brown crispy tips on multiple leaves; plant otherwise looks healthy | Review watering consistency; check for white salt crust on soil | Inconsistent watering or fertilizer salt buildup |
| Brown tips worsen in winter or heated rooms | Measure humidity near the plant | Low humidity |
| Brown tips appear after fertilizing | Recall last feeding date and dose | Fertilizer burn or salt accumulation |
| Brown tips on new growth only | Check water quality (hard water, softened water) | Mineral or chemical sensitivity |
| Brown tips on the side facing a window | Check for hot glass or direct afternoon rays | Sun scorch or heat stress |
| Brown tips plus yellow halos | Inspect for spreading spots or lesions | Possible fungal leaf spot disease |
How to diagnose brown tips
Check your watering rhythm. The most common pattern behind brown tips is a boom-bust cycle: the plant gets very dry, then gets flooded, then gets very dry again. Roots stressed by this pattern cannot deliver water evenly to leaf tips, which are the furthest point from the water supply. The fix is not more water — it is more consistent moisture. Check soil before watering and water when the top portion of the mix is dry, not when the entire root ball is parched.
Look for salt buildup. If you see a white or tan crust on the soil surface, pot rim, or through drainage holes, fertilizer salts may be accumulating. These salts pull moisture away from roots through osmosis, burning leaf tips in the process. Flush the pot with plain water — pour slowly until water runs freely from the drainage holes for 30–60 seconds, then let it drain completely. Repeat monthly if you fertilize regularly. For a deeper flush protocol, see how to water indoor plants the right way.
Check humidity. Many tropical houseplants — calatheas, marantas, ferns, anthuriums, and some philodendrons — develop brown tips when indoor air is too dry, especially during heating season. If browning happens mainly in winter, humidity is a likely contributor. Grouping plants, using a humidifier, or placing a pebble tray nearby can help. See the houseplant humidity guide for room-level fixes and the signs your houseplants need more humidity checklist.
Review your water source. Tap water with high mineral content, water softened with sodium, or chlorinated water can cause tip burn in sensitive plants like dracaenas, spider plants, calatheas, and carnivorous plants. If brown tips persist despite good watering habits and adequate humidity, try switching to filtered, distilled, rainwater, or reverse-osmosis water. See RO water for indoor plants for when water quality is the real culprit.
Rule out fertilizer burn. If brown tips appeared shortly after feeding, especially with a liquid fertilizer at full strength, the plant may have taken up more salts than it can process. Hold fertilizer, flush the soil with plain water, and resume feeding at half-strength only after new growth appears healthy.
What to do
- Inconsistent watering: Switch from a calendar schedule to a check-first routine. Water when the top portion of mix is dry, not when the plant is collapsing. Consistency matters more than frequency.
- Fertilizer salt buildup: Flush the pot thoroughly with plain water. Scrape off visible salt crust. Resume fertilizing at half the label rate and only during active growth.
- Low humidity: Use a humidifier near the plant, group plants together, or set up a pebble tray. Misting provides only a few minutes of humidity — it is not a substitute for consistent air moisture.
- Water quality: Let tap water sit overnight to off-gas chlorine, or switch to filtered, distilled, or rainwater for sensitive plants.
Trim brown tips with clean scissors if the appearance bothers you, cutting just inside the brown edge to leave a thin margin. Do not cut into green tissue — the wound may brown again. The trimmed leaf will still function.
For species-specific brown-tip diagnosis, see Monstera brown tips.
Symptom 3: Drooping or Wilting Leaves
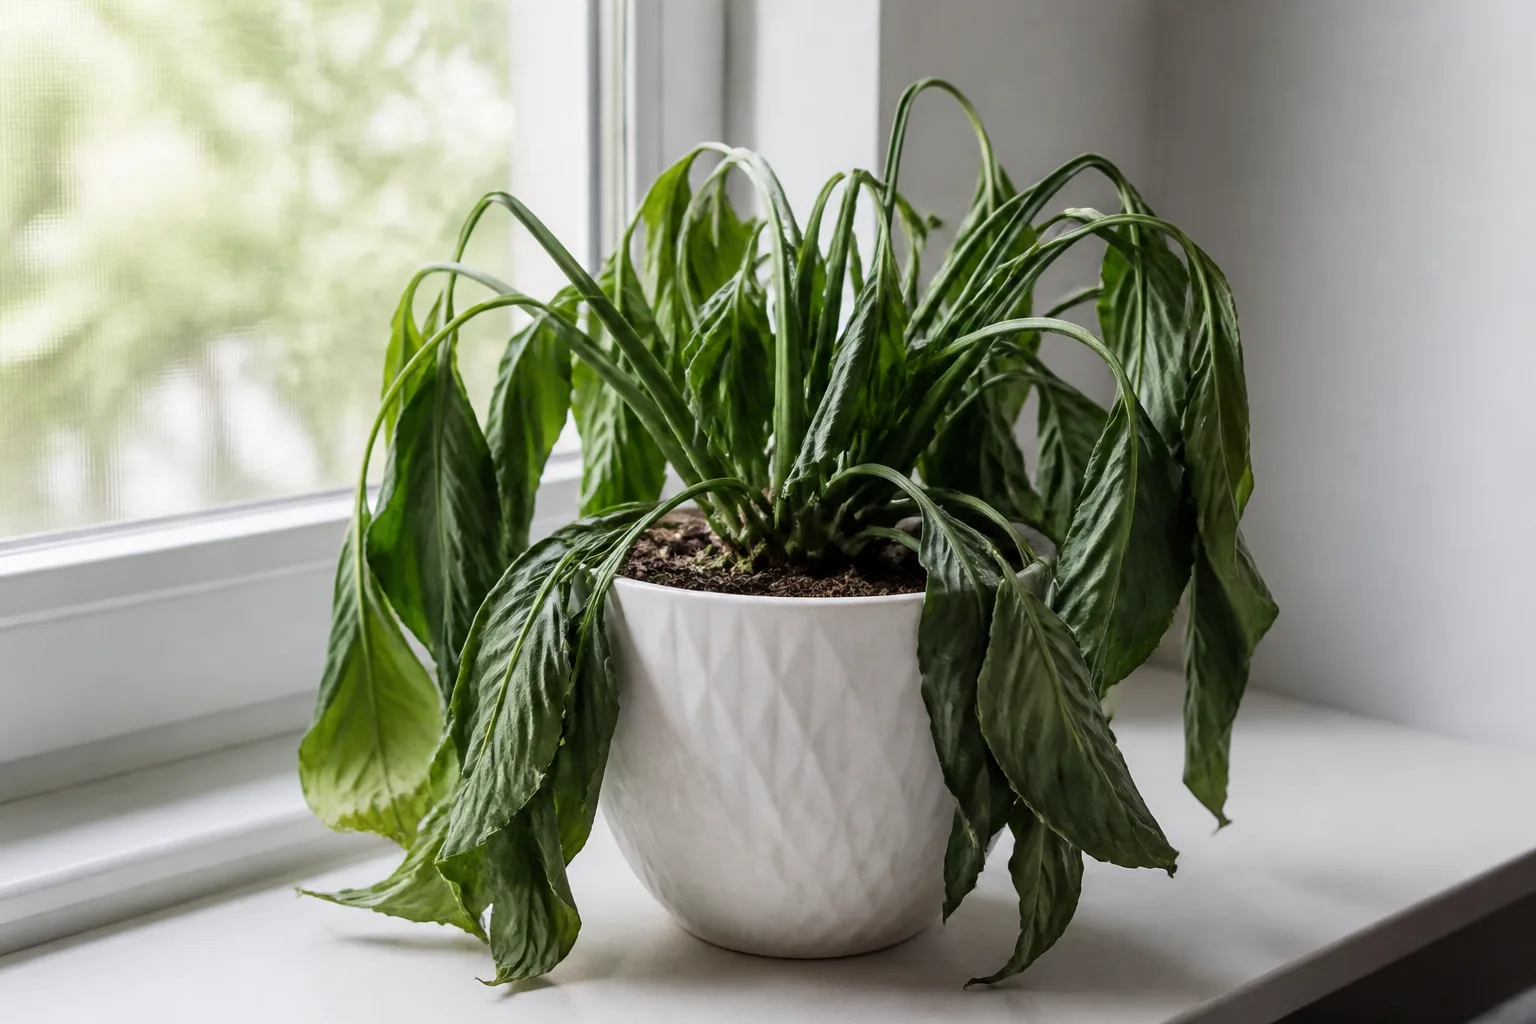
A drooping plant triggers panic because it looks dramatic, but the cause is almost always one of two things: too little water or too much water. The difference is in the soil, not the leaves.
Quick diagnosis table
| What you see | Check next | Most likely direction |
|---|---|---|
| Limp, thin, curled leaves; pot is very light; soil is bone-dry | Water immediately — bottom-soak if mix repels water | Underwatering |
| Soft, limp leaves; pot is heavy; soil is wet below the surface | Stop watering; inspect roots if wilting continues | Overwatering or root rot |
| Wilting despite moist soil; sour smell from drainage holes | Unpot and inspect roots immediately | Root rot — roots cannot take up water |
| Sudden drooping after moving the plant or bringing it home | Check temperature, drafts, and light change | Transplant or environmental shock |
| Drooping on hot afternoons that recovers by evening | Check direct sun exposure and room temperature | Heat stress or too much direct light |
| Wilting with sticky residue, webbing, or visible insects | Inspect leaf undersides and stem joints | Pest infestation stressing the plant |
How to diagnose drooping
Lift the pot. This single action answers the most important question. A light pot with dry soil that has pulled away from the sides means underwatering — water the plant thoroughly. A heavy pot with soil that feels damp below the surface means the roots are sitting in water. Do not add more water. A wilting plant in wet soil is one of the most important diagnostic signals in houseplant care.
If the soil is wet and the plant is wilting, root rot is a real possibility. Wisconsin Horticulture Extension explains that root rot often becomes obvious when a plant wilts even though the soil is wet, and affected plants may show yellow or reddish leaves that can resemble nutrient issues. (Wisconsin Horticulture)
Check recent changes. A plant that was just repotted, moved to a new room, brought home from a store, or exposed to a sudden temperature swing may droop from shock. This is usually temporary if conditions are otherwise good. Keep the plant stable — do not repot again, fertilize, or move it repeatedly while it adjusts.
Inspect for pests. A heavy pest infestation can cause wilting by damaging enough leaf or root tissue that the plant cannot maintain turgor pressure. If wilting comes with sticky leaves, fine webbing, or visible insects, pest control comes before watering adjustments. See the indoor plant pest guide.
What to do
- Underwatered: Water slowly and thoroughly until excess drains. If the soil is hydrophobic (water beads up and runs down the sides), place the pot in a basin with a few inches of water and let it absorb from below for 20–45 minutes. Remove and drain fully. Most plants perk up within hours to a day.
- Overwatered (no rot yet): Stop watering. Move the plant into brighter indirect light to speed evaporation. Tilt the pot to help excess water drain. Empty saucers and cachepots. Wait until the top portion of mix is dry before watering again.
- Root rot suspected: Unpot the plant, rinse roots gently, trim away any that are brown, black, mushy, or smelly. Repot in fresh well-draining mix in a clean pot with drainage holes. Reduce some foliage if many roots were lost. See save your dying houseplant for the full step-by-step rescue.
- Shock: Keep the plant in stable conditions — suitable light, away from drafts and heat sources. Do not fertilize. Water only when the soil actually needs it. Most shock-related drooping resolves in a few days to two weeks.
- Pest-related: Isolate the plant, physically remove visible pests, and apply a treatment matched to the pest type. Wilting should improve as the pest population is brought under control.
Symptom 4: Crispy, Dry, or Scorched Leaves
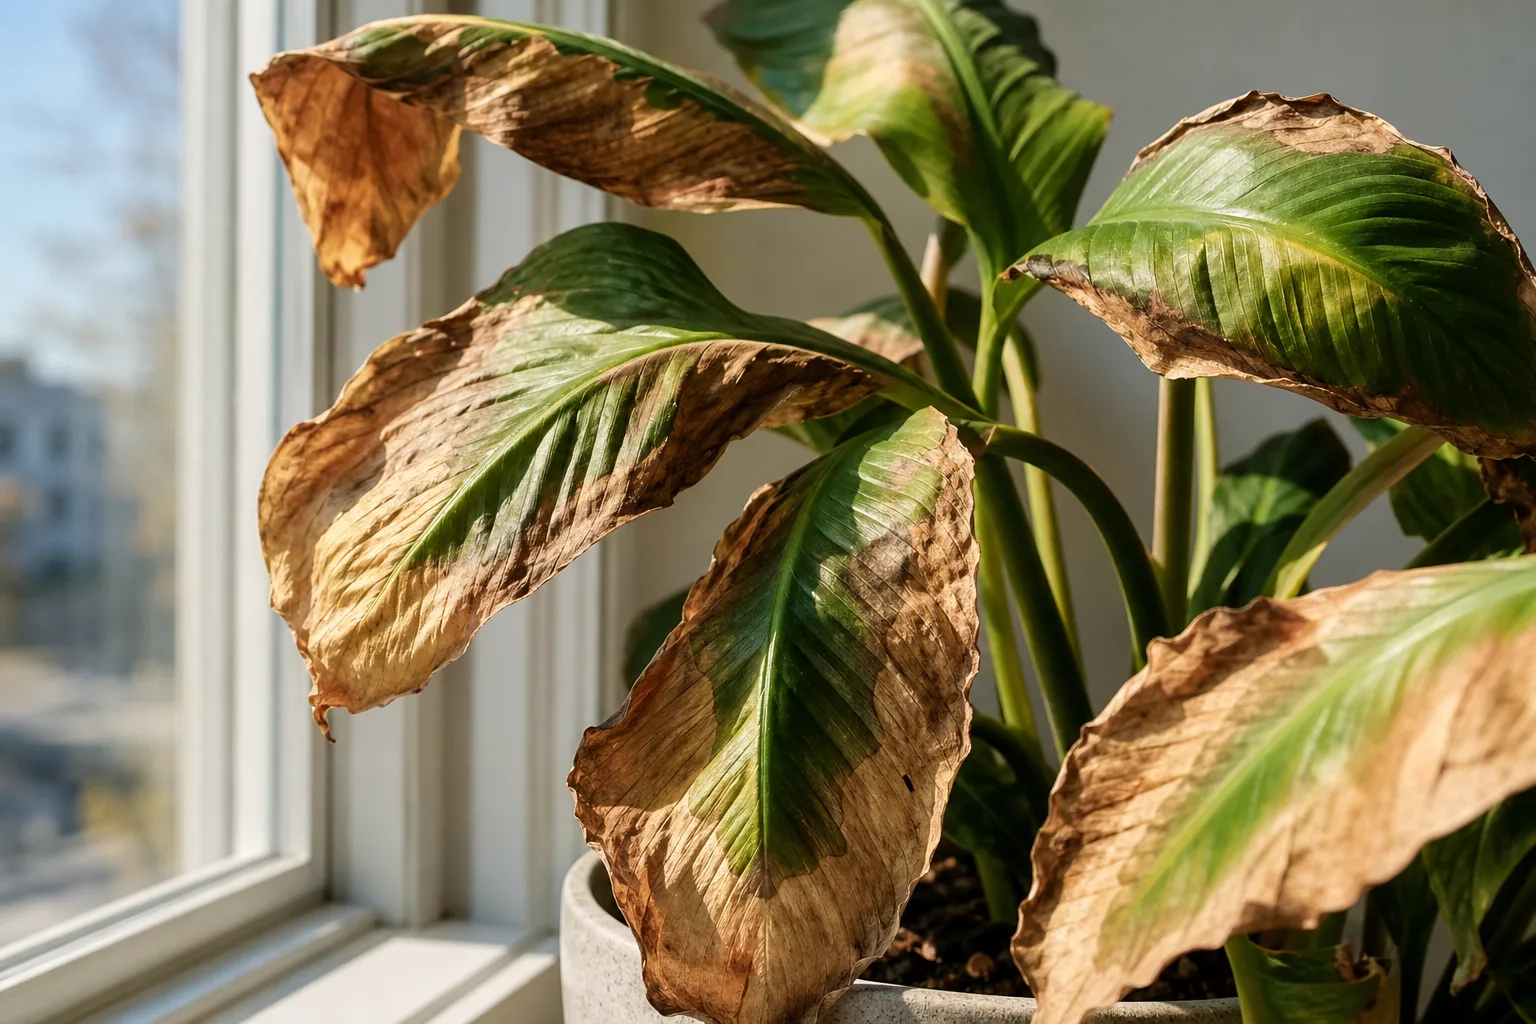
Crispy leaves feel dry, brittle, and papery to the touch — not soft and limp like overwatered leaves. The damage can appear as crispy edges, entire browned sections, or bleached patches. Crispy tissue will not recover, but you can stop it from spreading.
Quick diagnosis table
| What you see | Check next | Most likely direction |
|---|---|---|
| Crispy brown edges on multiple leaves; soil is dry | Check watering consistency and humidity | Underwatering or chronic dry cycles |
| Bleached, tan-yellow, or white crispy patches on one side | Check which side faces the window | Sun scorch |
| Crispy tips and edges; soil has white crust | Review fertilizing frequency and rate | Fertilizer burn or salt accumulation |
| Whole leaves turning crisp and falling; plant near a vent or heater | Check for hot, dry air blowing directly on plant | Heat or HVAC stress |
| Crispy patches with yellow halos that spread | Inspect for disease pattern | Possible fungal or bacterial infection |
How to diagnose crispy leaves
Start with moisture. A severely underwatered plant will crisp from the edges inward. The soil will be dry deep into the pot, and the pot will feel light. Water thoroughly — if the mix is hydrophobic, bottom-soak until it absorbs moisture, then drain.
Check light exposure. Direct sun through glass can scorch leaves, especially on plants that prefer indirect light. The damage is usually on the side facing the window. Move the plant back from the glass or filter the light with a sheer curtain. A plant moved suddenly from low light to direct sun can burn even if the species normally tolerates brighter conditions.
Review humidity and airflow. Low humidity paired with warm, dry air from heating vents can crisp leaf edges, particularly on thin-leaved tropicals. Placing the plant away from vents and boosting local humidity helps — but fix watering first, because low humidity alone rarely crisps an entire leaf.
Rule out fertilizer burn. If crispy edges appeared soon after feeding, excess salts may be the cause. Flush the pot with plain water, hold fertilizer, and resume at half-strength only when new growth appears.
Inspect for disease. Crispy, dry spots that spread and develop yellow halos may be fungal leaf spot rather than environmental damage. Penn State Extension notes that fungal diseases often worsen with prolonged leaf wetness and poor airflow. (Penn State Extension) See houseplant diseases identification and treatment if the pattern looks infectious rather than environmental.
What to do
- Underwatering: Bottom-soak to rehydrate, then adjust your watering routine so the plant never gets bone-dry again. Crispy edges will not heal; watch for healthy new growth.
- Sun scorch: Move the plant further from the window or add a sheer curtain. Trim fully scorched leaves. New growth in the corrected position should be undamaged.
- Fertilizer burn: Flush the soil, hold fertilizer for 4–6 weeks, then resume at half-strength during active growth only.
- Low humidity: Use a humidifier, pebble tray, or plant grouping. See signs your houseplants need more humidity for the full checklist.
- Disease: Isolate, remove affected leaves, improve airflow, and keep foliage dry. Fungicide is only appropriate if the disease is confirmed and the product is labeled for indoor ornamental use.
Symptom 5: Leggy or Stretched Growth
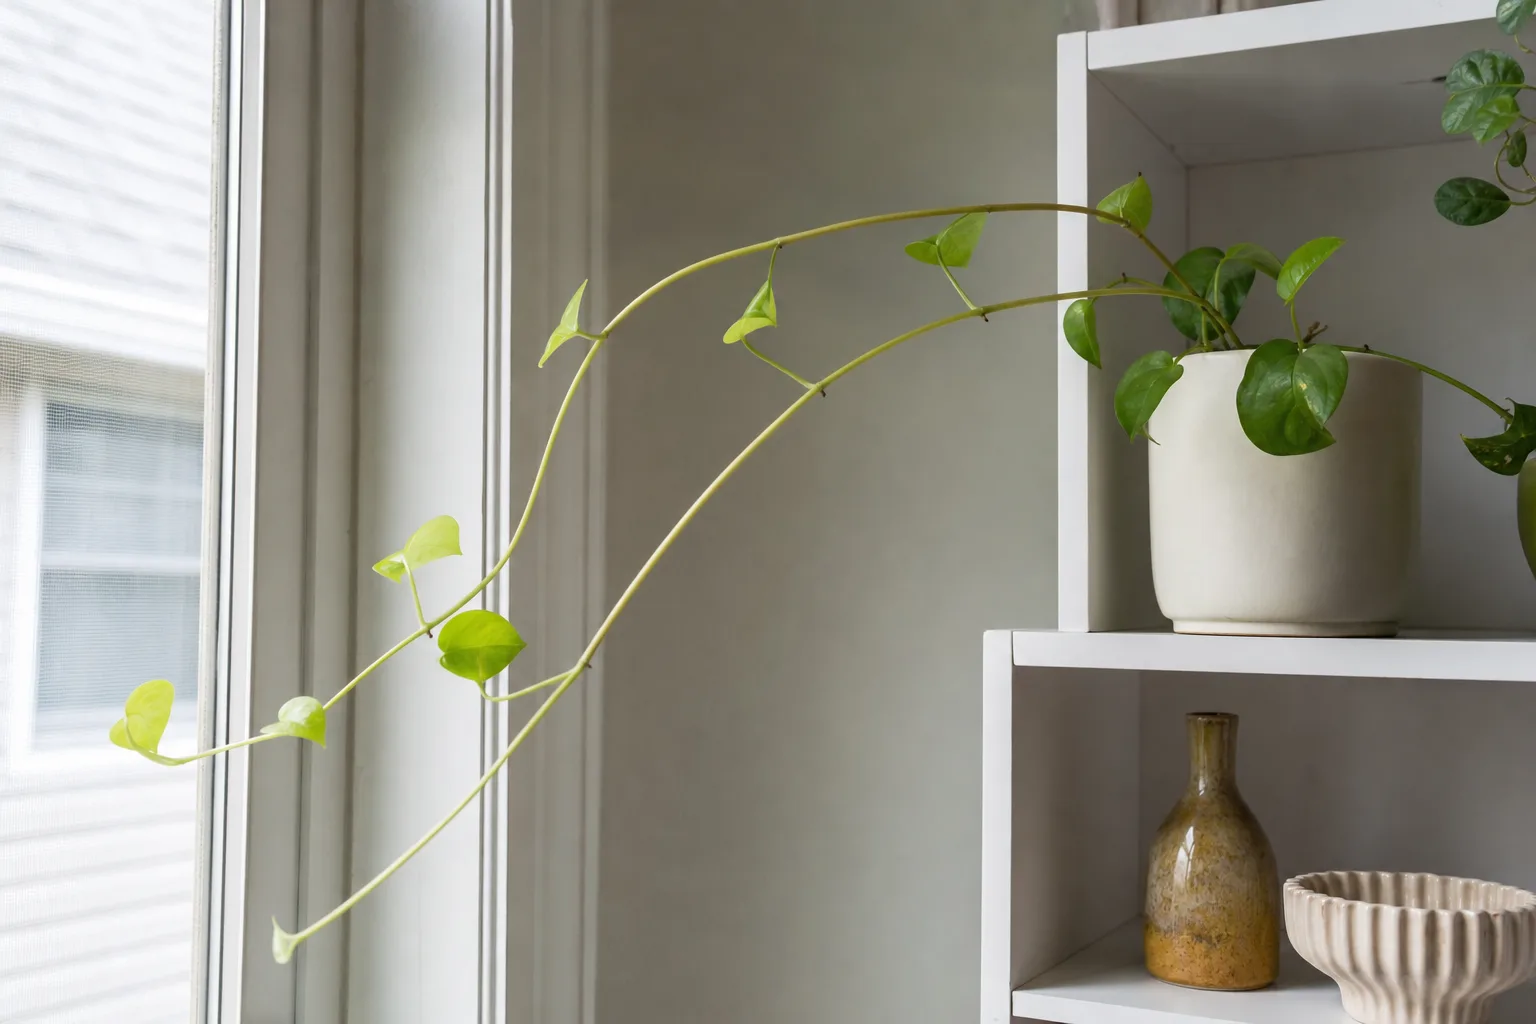
Leggy growth — technically called etiolation — looks like long, thin, weak stems with unusually wide spaces between leaves. Leaves may be smaller and paler than normal. The plant may lean or stretch toward a window. This is almost always a light problem, and it cannot be reversed on existing stems, but it can be corrected going forward.
Quick diagnosis table
| What you see | Check next | Most likely direction |
|---|---|---|
| Long thin stems; wide gaps between leaves | Compare current light to the plant’s preferred level | Insufficient light |
| Plant leaning heavily toward one window | Check whether light is one-directional | Rotate the plant regularly |
| New leaves are smaller and paler than old ones | Review seasonal light change | Low light slowing growth |
| Leggy growth only in winter | Compare light hours and intensity by season | Seasonal light drop — add grow light |
| Leggy despite bright window | Check if window is north-facing or shaded | Insufficient light intensity |
| Leggy with yellowing lower leaves | Check watering and pest status too | May be low light plus overwatering |
How to diagnose leggy growth
Assess the light. The plant is stretching because it is searching for more light. Missouri Botanical Garden states that insufficient light cannot be cured by extra fertilizer, water, or repotting. (Missouri Botanical Garden) Look at the plant’s current position relative to the nearest window. A plant 3 metres from a north-facing window is effectively in deep shade for most of the day, even though the room feels bright to human eyes.
Light intensity drops off sharply with distance. A plant right next to a bright window may receive adequate light, while the same plant two metres back may receive a fraction of that light — enough to survive, but not enough to grow compact. If natural light is limited, a grow light placed close to the plant (typically 15–45 cm depending on the fixture) can make a dramatic difference. See the grow lights complete guide for distance, duration, and fixture selection.
Rule out other stress. Sometimes a plant that is already weak from overwatering or root problems will also stretch because it lacks energy. But in most cases, if the primary symptom is long thin stems with pale leaves, light is the first variable to fix.
What to do
- Improve light immediately. Move the plant closer to a bright window — ideally within 1–2 metres of an east, south, or west-facing window with filtered light. Do it gradually over a few days to avoid shock if the light difference is large.
- Add a grow light if natural light is insufficient. Position it close enough to matter — distance depends on the fixture, but most LED grow lights need to be within 15–45 cm of the foliage to have a meaningful effect.
- Prune leggy stems. Etiolated growth is permanent — those stretched stems will not fill in or compact on their own. Cut leggy stems back to just above a node (the bump where leaves emerge). The plant will usually push new growth from that node, and in better light, that new growth will be compact and healthy. Pruning also triggers branching on many plants, giving you a fuller shape over time.
- Rotate the plant a quarter turn every week or two so all sides get even light exposure. This prevents one-sided stretching.
- Hold fertilizer until the plant is in adequate light. Fertilizing a light-starved plant pushes weak, soft growth that is even more prone to stretching and pest problems.
For species-specific leggy growth, see why your Monstera deliciosa is leggy.
Symptom 6: Falling or Dropping Leaves
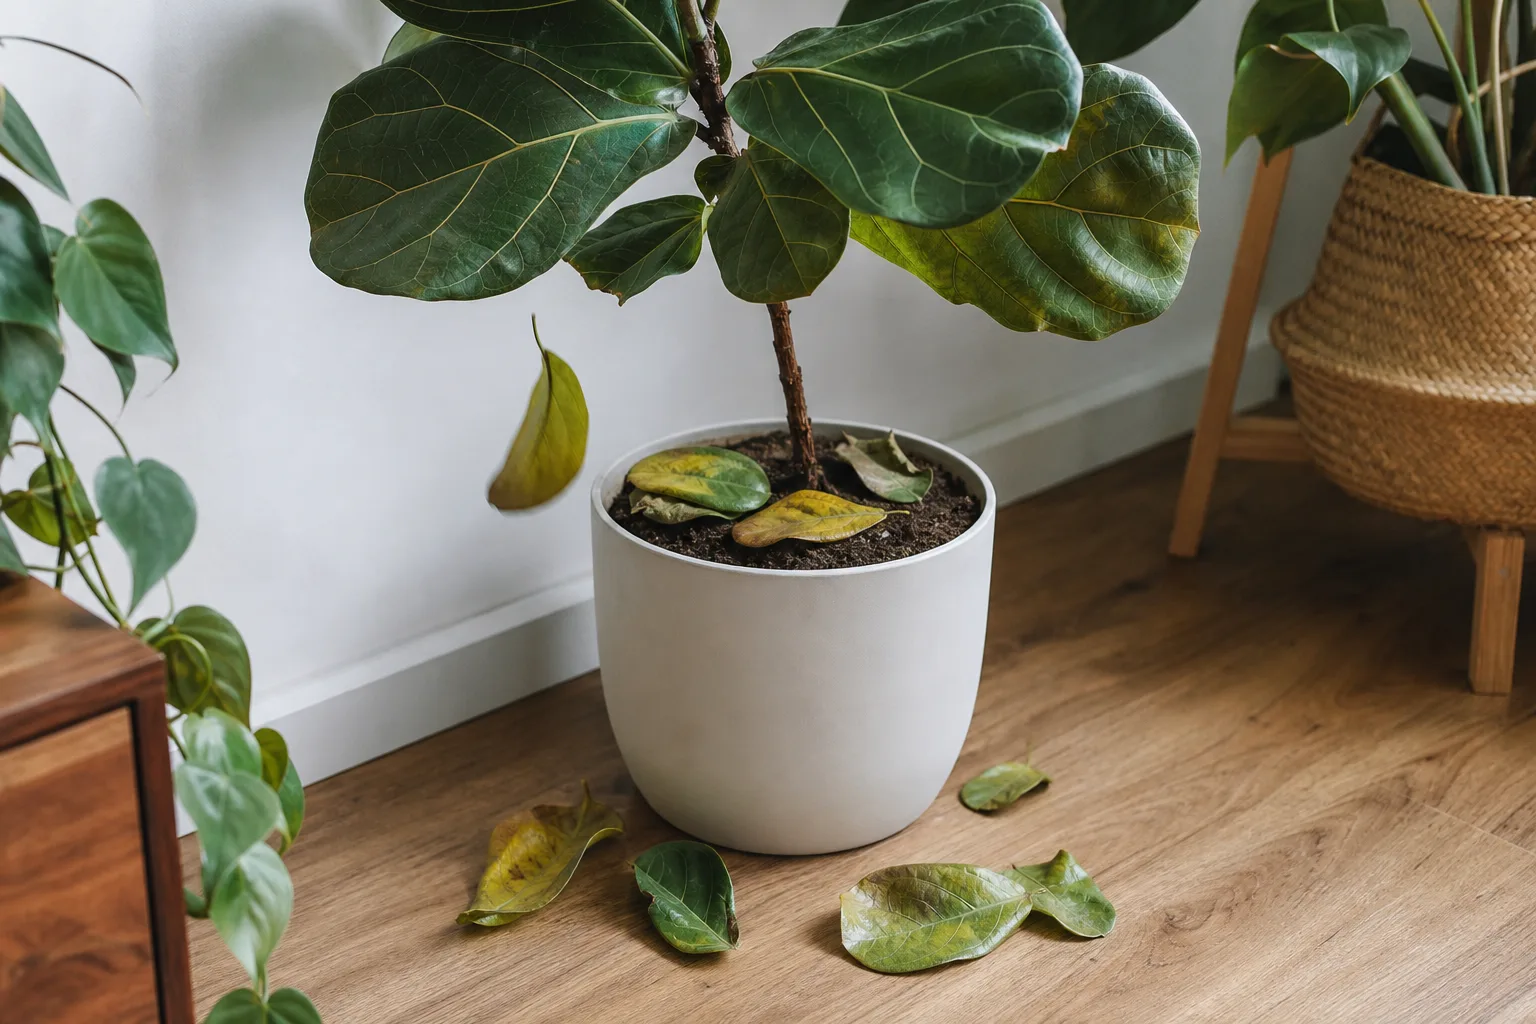
Leaf drop can be alarming, but it is often a stress response rather than a sign the plant is dying. A plant that drops leaves suddenly has usually experienced a sharp change in its environment. Slow, gradual leaf drop over weeks is more often a chronic care issue.
Quick diagnosis table
| What you see | Check next | Most likely direction |
|---|---|---|
| Sudden leaf drop after bringing plant home or moving it | Note recent changes in location or conditions | Environmental shock — give it stability |
| Lower leaves yellow, then drop; soil is wet | Inspect roots for rot | Overwatering |
| Leaves drop without yellowing; plant near draft or vent | Check for temperature swings or cold air | Cold stress or draft |
| Green leaves dropping; soil is dry | Water thoroughly | Underwatering |
| Leaf drop with sticky residue or visible pests | Inspect leaves and stems closely | Pest infestation |
| Leaf drop after repotting | Check pot size, drainage, and root condition | Transplant shock or oversized pot |
What to do
- Shock or recent move: Keep conditions stable — suitable light, consistent temperature, no drafts. Do not repot, fertilize, or overwater. Water only when the soil needs it. Leaf drop should stop within 1–2 weeks as the plant adjusts.
- Overwatering: Stop watering, improve light and airflow, and inspect roots if the decline continues. See save your dying houseplant.
- Cold stress: Move the plant away from drafty windows, exterior doors, air conditioning vents, or cold hallways. Most tropical houseplants prefer temperatures above 15°C (60°F).
- Pests: Isolate and treat. Plants weakened by pests often drop leaves. See the indoor plant pest guide.
The 5-Minute Houseplant Triage Checklist
When you notice a problem but are not sure where to start, run through these five checks in order. This sequence catches the most common causes first and prevents the most damaging mistake — adding water to a plant that is already drowning.
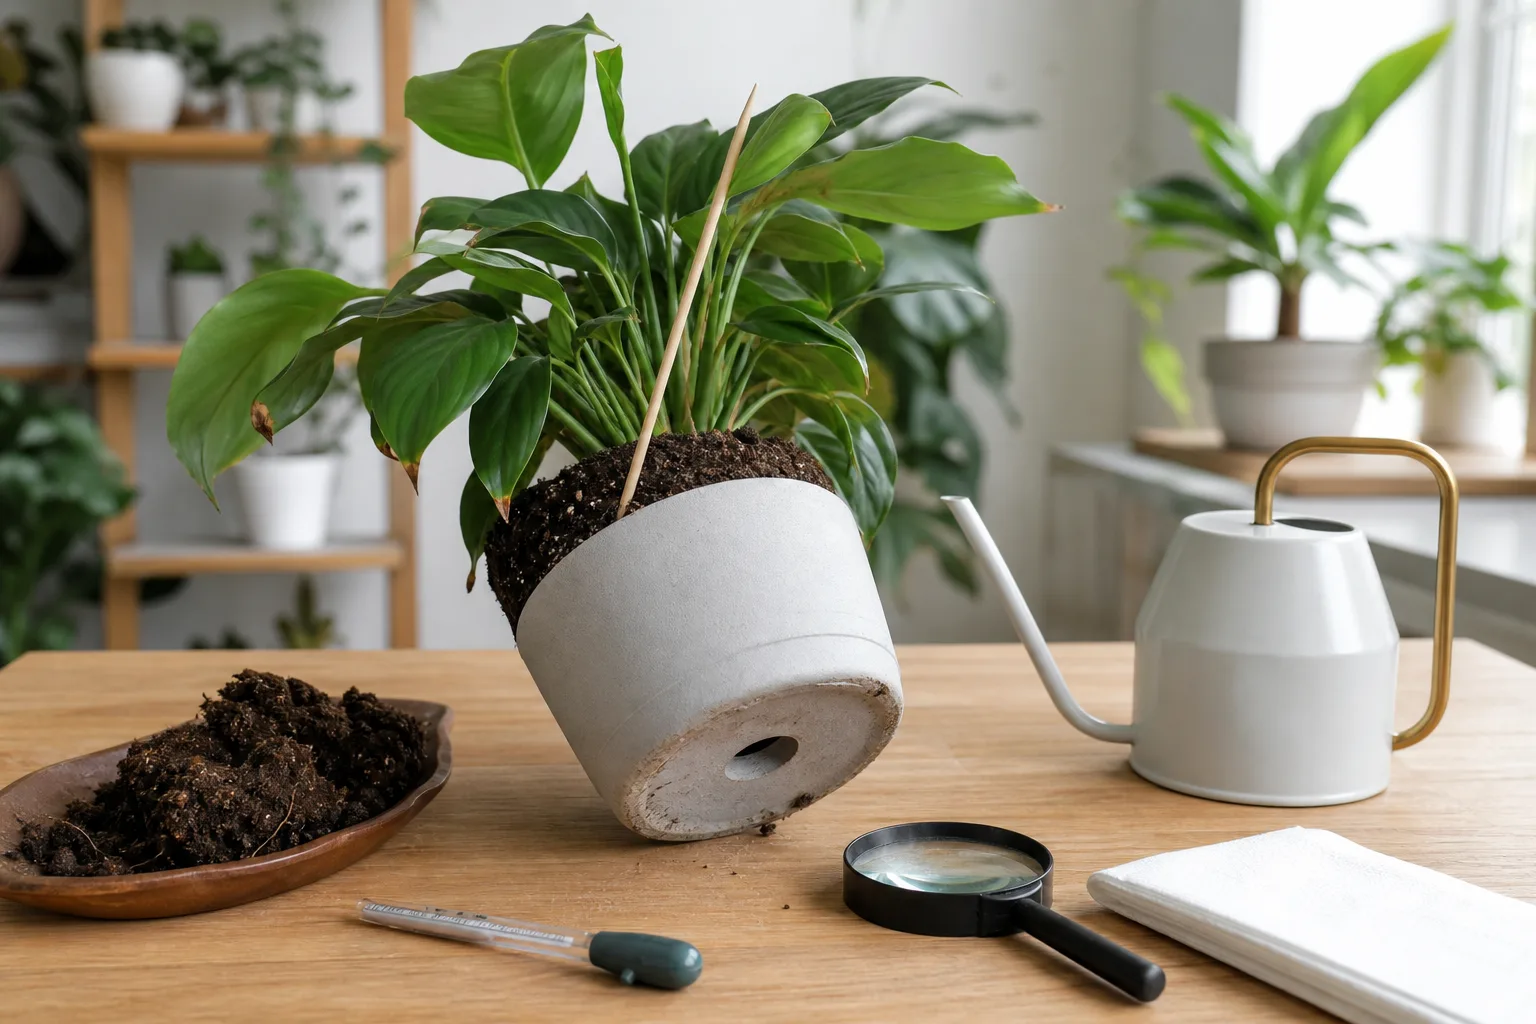
- Lift the pot. Heavy = wet soil; light = dry soil. This alone rules out half of all leaf symptoms.
- Probe the soil with a finger or skewer 3–5 cm deep. The surface lies — the root zone tells the truth.
- Check the light. Has the season changed? Did you move the plant? Is it further from the window than it used to be?
- Inspect leaves and stems on both sides. Look for pests, webbing, sticky residue, spots, or mushy tissue.
- Review recent changes. New pot? New room? Fertilizer? Different watering routine? Cold snap? Plant near a heater?
After these five checks, match your findings to the symptom section above. If the diagnosis is still unclear, see the save your dying houseplant guide for a deeper triage workflow, or houseplant diseases identification and treatment if you suspect a pathogen rather than a care issue.
What Not to Do When Your Plant Looks Sick
Several common panic responses make houseplant problems worse:
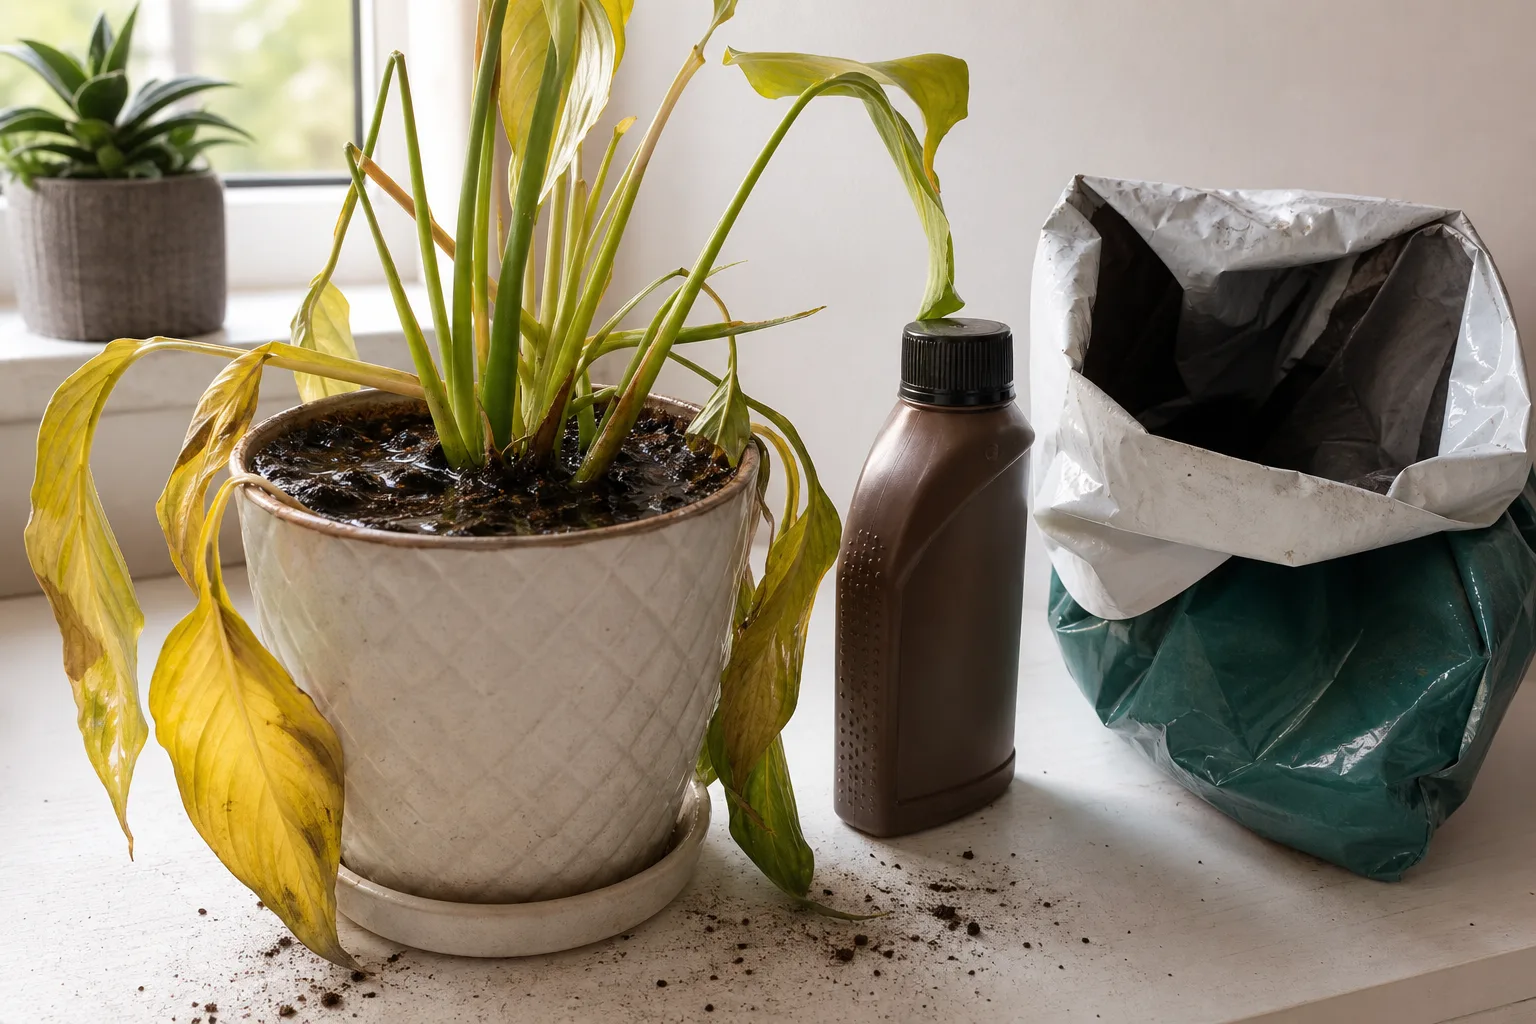
- Do not fertilize a sick plant as your first move. Fertilizer is not medicine. A stressed plant with damaged roots cannot process nutrients, and fertilizer salts can burn already-stressed tissue. Hold fertilizer until the plant is stable and showing new growth.
- Do not repot every sad plant. Repotting is helpful for root rot, compacted soil, or poor drainage. It is harmful when the plant is simply thirsty, light-starved, or in shock. Repotting breaks fine roots and adds stress. Fix the obvious cause first.
- Do not water on a hunch. A drooping plant in wet soil needs less water, not more. Always check moisture before reaching for the watering can.
- Do not cut off every imperfect leaf. Remove leaves that are fully dead, diseased, or pest-infested. Keep partly green leaves — they still produce energy for recovery. A plant with too few leaves and a damaged root system has less energy to rebuild.
- Do not move the plant every day. A stressed plant needs stability, not constant repositioning. Find the right spot, fix the primary issue, and leave it alone to recover.
Species-Specific Next Steps
After diagnosing the symptom, route to the right species page for deeper recovery steps:
| If your plant is… | Common symptoms and next reads |
|---|---|
| Monstera | Yellow leaves, brown tips, leggy growth, root rot |
| Pothos | Yellow leaves, root rot, wilting |
| Peace lily | Wilting, root rot, brown tips |
| Snake plant | Root rot, drooping leaves, yellow leaves |
| Spider plant | Brown tips, yellow leaves, root rot |
| Calathea | Brown tips, wilting, yellow leaves |
| Fiddle leaf fig | Brown spots, leaf drop, yellow leaves |
Related Guides
- Save your dying houseplant — full revival triage when symptoms point to serious decline
- How to water indoor plants the right way — check-drain-adjust routine that prevents most symptoms
- Indoor plant watering basics — quick-reference moisture and method cheat sheet
- Houseplant diseases identification and treatment — when spots, mold, or rot may be infectious
- How to tackle indoor plant pests at home — pest ID and treatment when bugs are the cause
- Houseplant humidity guide — room-level humidity fixes for brown tips and crispy edges
- Signs your houseplants need more humidity — checklist for humidity-related symptoms
- Fertilizing indoor plants complete care guide — when and how to feed, and when to hold back
- Grow lights complete guide for indoor plants — light solutions for leggy growth and winter decline
- Repotting houseplants — when a pot change helps versus adds stress
- RO water for indoor plants — when water quality is behind persistent brown tips
Conclusion
Most leaf symptoms point to a short list of causes, and most fixes are simple: adjust watering, improve light, increase humidity, or treat pests. The key is matching the right symptom to the right cause before you act. Use the triage checklist above — lift, probe, check light, inspect, review changes — and you will solve most houseplant problems without guessing.
When in doubt, start with water and roots. More houseplants die from root trouble than from any leaf problem, and leaf symptoms are often just the visible signal of trouble below the soil.