Why Are My Leaves Crispy? How to Tell Overwatering From Low Humidity
Crispy leaves on your houseplant? Learn how to tell overwatering from low humidity in minutes — plus the exact steps to fix each cause and prevent more damage.
You watered your plant three days ago. The soil still feels damp. But the leaves are going crisp and brown at the edges, and the plant looks worse, not better. So you water it again — because wilt plus crisp must mean thirst, right? That sequence is the most common diagnostic trap in indoor plant care. And it is also the reason so many plants swing from one crisis to another without ever getting the right fix.
Crispy leaves are a water-at-the-leaf-edge problem. The tissue at the leaf tip and margin is the furthest point from the roots, and it is the first to die when something disrupts the plant’s ability to move water from root to leaf. But the disruption can come from two completely opposite directions. Overwatering destroys the roots that are supposed to absorb water, so the plant dehydrates while sitting in a wet pot. Low humidity pulls moisture out of the leaves faster than even healthy roots can replace it, so the foliage desiccates while the soil stays moist. Both end at the same visual destination — brown, crispy, dead leaf edges — which is why they are so persistently confused.
The Royal Horticultural Society notes that brown tips and crispy edges can indicate underwatering, overwatering, or a dry atmosphere, and that overwatering often causes browning in the middle of the leaf rather than strictly at the tips. (RHS) See the brown tips on houseplants guide for a full six-step diagnosis checklist. That distinction — tip versus mid-leaf, crisp versus soft, wet soil versus dry soil — is the thread this guide follows. You need a method for telling them apart, not a list of possible causes.
The Core Difference: How Overwatering and Low Humidity Create Crispy Leaves
The two causes produce crispy leaves through entirely different mechanisms, and understanding those mechanisms makes the diagnosis far easier than memorizing a symptom checklist.
When you overwater, the potting mix stays saturated. Roots need oxygen to function, and waterlogged soil pushes oxygen out. Within days, root cells begin to die. The University of Maryland Extension identifies excess moisture as the most frequent cause of houseplant decline, noting that overwatered plants show the same wilting and yellowing as drought-stressed plants because waterlogged roots cannot function. (University of Maryland Extension) The plant is sitting in water it cannot absorb. Leaf tissue farthest from the damaged roots — the tips and edges — dies first from dehydration even though the pot is full of water. For a full root-zone rescue workflow, see the overwatered plant recovery guide.
Low humidity works from the outside in. When the air is dry, water evaporates from the leaf surface faster than the roots can pull it up from the soil. Iowa State Extension identifies low humidity as the most likely cause of brown leaf tips on houseplants, because leaf tips are the furthest point in the transpiration stream and the first tissue to desiccate. (Iowa State Extension) The roots can be healthy, the watering schedule can be perfect, and the leaves can still crisp if the air is pulling moisture out faster than the plant’s plumbing can deliver it.
The critical difference is where the failure occurs. Overwatering is a root problem that shows up as leaf damage. Low humidity is a leaf problem that needs an air fix. If you treat a root problem with a humidifier, nothing changes. If you treat a humidity problem by watering less, you are only adding drought stress to an already-stressed plant.
The Quick Diagnostic Shortcut
Before you read the detailed sections, use this fast filter. Push a finger or a wooden chopstick two inches into the potting mix. If it comes out wet and dark and the leaves are crispy, overwatering is the leading suspect. If it comes out dry and the plant is crispy, underwatering moves ahead. If it comes out lightly moist — not wet, not bone-dry — and the leaves are still crispy, humidity is where you should look. This one check eliminates the most common misdiagnosis.
Overwatering: How Too Much Water Produces Crispy Leaves
Overwatering does not mean you gave the plant too much water in a single session. It means the root zone stays saturated for too long because watering happens too frequently or drainage is inadequate. The problem is duration, not volume.
When roots sit in oxygen-depleted, waterlogged soil, the fine root hairs that actually absorb water die first. The plant loses its primary water-uptake mechanism. Then larger roots begin to rot, and fungal pathogens such as Pythium and Phytophthora colonize the dying tissue. Wisconsin Horticulture notes that root rot pathogens can begin colonizing roots within days of waterlogged conditions, and once established they spread rapidly. (Wisconsin Horticulture) The plant now has no functioning root system, so even though the pot is wet, the leaves are dehydrating. Crispy edges appear because the plant cannot push water to the furthest leaf tissue. See the root rot guide for a complete inspection protocol.
The Soil Tells the Story
With overwatering, the potting mix is the most reliable witness. It stays wet for days after you last watered. When you lift the pot, it feels heavier than it should for its size — significantly heavier than a pot of dry mix. If you slide the root ball out of the pot, the soil may smell sour or swampy. You may see algae on the surface or fungus gnats hovering nearby, both of which thrive in persistently wet organic matter.
Clemson Cooperative Extension advises checking soil moisture before watering and notes that consistently wet soil leads to root damage and leaf symptoms that mimic drought. (Clemson HGIC) If the mix is wet and the plant looks bad, adding more water is the worst possible next move. For a complete watering routine that prevents both extremes, see how to water indoor plants the right way.
Leaf Texture: Soft Before Crispy
This is the most useful texture clue. Overwatered leaves do not go straight to crisp. They turn soft first. Missouri Botanical Garden explains that roots in overly wet soil die from oxygen deprivation, producing weak growth and yellow foliage that can look identical to drought damage. (Missouri Botanical Garden) The yellowing is often soft and limp, not thin and papery. Lower and inner leaves yellow first because the plant abandons older tissue to conserve resources.
Only later, when the root damage is severe and the leaf tissue has been wilting for an extended period, do the edges begin to crisp. By that point, you will almost certainly have other signals. The soil will be wet. The pot will be heavy. Multiple leaves will have yellowed. The stems at the base may feel soft. The crispness is the late-stage consequence of root failure, not the first symptom.
Other Overwatering Signs That Narrow the Diagnosis
Edema appears as small, corky blisters or bumps on the underside of leaves. It happens when roots absorb more water than the leaves can transpire, and individual leaf cells burst from internal water pressure. Virginia Cooperative Extension notes that edema is a common symptom of overwatering in houseplants. If you see edema alongside crispy edges, the plant has been drowning and drying out in alternation — a classic feast-and-famine watering pattern.
Fungus gnats are another supporting clue. A few gnats do not confirm overwatering, but if the soil surface is consistently damp, the pot is heavy, and gnats are active, the root zone has been wet too long. The gnats are a symptom of the moisture, not the cause of the crisp leaves.
A sour or musty smell from the drainage holes means decomposition is underway in the root zone. At that stage, root inspection is not optional — it is urgent. Slide the plant out of the pot and look at the roots. Healthy roots are firm and white to tan. Rotting roots are brown, black, mushy, or hollow.
Low Humidity: When Dry Air Crisps Your Leaves
Unlike overwatering, low humidity does not damage the roots. The roots can be perfectly healthy and the watering routine exactly right, and the leaves can still crisp if the air is too dry. The problem is transpiration — the movement of water from the roots, through the plant, and out through pores in the leaves called stomata.
The RHS explains that when air humidity is low, plants lose water from leaves faster and can wilt even when roots are still supplying moisture. (RHS) This is why a plant with moist soil and healthy roots can still look desiccated. For species-specific humidity targets, see the houseplant humidity guide. The leaves are losing water to the air faster than the roots can pull it up, and the leaf tips — the endpoint of the transpiration stream — are the first to die.
How Dry Air Damages Leaf Tissue
The Piedmont Master Gardeners, referencing Virginia Cooperative Extension, recommend a relative humidity between 40 and 60 percent for most indoor plants, but note that winter humidity in homes often drops far below that threshold. (Piedmont Master Gardeners) When indoor RH falls below roughly 30 to 35 percent — common in heated homes during winter — the moisture gradient between the leaf interior and the surrounding air becomes steep. Water rushes out through the stomata, and the leaf tips and margins, which are the thinnest and most exposed tissue, desiccate and die. See the signs your houseplants need more humidity guide for the full visual symptom gallery.
Penn State Extension notes that indoor relative humidity is commonly recommended in the 30 to 60 percent range, and that winter heating can push whole rooms below 30 percent. (Penn State Extension) For tropical understory plants adapted to 60 to 80 percent humidity in their native environments, the stress is substantial and cumulative.
The damage pattern from low humidity is usually even and symmetric across multiple leaves. Tips and edges go brown and crisp simultaneously on several leaves, not just one or two. New growth is often affected because developing leaves have the thinnest cuticle and the least protection against water loss. A new leaf that unfurls with brown edges or fails to unfurl completely is a strong humidity signal.
Leaf Texture: Papery From the Start
This is the texture clue that separates low humidity from overwatering. Low-humidity leaves go straight to dry, papery, and crisp. They do not pass through a soft, yellow, limp stage first. The brown is dry and brittle from the moment it appears. If you touch the edge of an affected leaf and it feels thin, crackly, and parchment-like, and the soil is not waterlogged, humidity is the more likely cause.
Iowa State Extension describes the typical low-humidity brown tip as crisp, dry, and appearing across multiple leaves rather than isolated to one or two. (Iowa State Extension) The demarcation between brown and green tissue is usually sharp — a clear line where the living tissue ends and the dead tissue begins. This is different from the blurry, spreading yellow-into-brown pattern that often accompanies overwatering.
Environmental Clues That Point to Humidity
The strongest environmental clue is seasonality. If the crisp leaves emerged or worsened after the heating system started running, humidity moves to the top of the suspect list. Forced-air furnaces push hot, dry air through living spaces and can drop RH near vents into the mid-20s within hours. Radiators and fireplaces create localized hot, moving air that dries foliage on nearby plants long before the rest of the room feels uncomfortable.
The plant’s location is another clue. A plant sitting near a heating vent, above a radiator, or beside a frequently opened exterior door in winter is in a high-transpiration zone. If the crispness is strongest on the side of the plant facing the heat source, placement stress is part of the picture.
Species matters enormously. Calatheas, marantas (prayer plants), ferns, and peace lilies are thin-leaved tropicals that lose water rapidly in dry air. A crispy calathea in a 30 percent RH room is more likely a humidity problem than a watering problem. A crispy snake plant or ZZ plant in the same room is far less likely to be humidity-related because those plants have thick, waxy cuticles that resist water loss. Plant type dramatically shifts the probability.
The Side-by-Side Symptom Comparison
The table below organizes the key differences. Use it alongside the soil check and you will rarely misdiagnose these two problems again.
| What to check | Overwatering | Low humidity |
|---|---|---|
| Soil moisture at 2-inch depth | Wet, clings to finger, may smell sour | Lightly moist or appropriately dry — not the primary clue |
| Pot weight | Heavy, even days after watering | Normal for its size and moisture level |
| Leaf color before crisping | Yellow, often starting with lower, older leaves | Green or slightly dull; yellowing is not a lead symptom |
| Leaf texture | Soft, limp, sometimes mushy before edges crisp | Dry, papery, brittle from the start |
| Crisp pattern | May start at tips but often spreads inward; can appear on random leaves | Even tip and edge crisping across multiple leaves simultaneously |
| Stem condition | May be soft or mushy at the base | Firm |
| New growth | May stall or emerge yellow and weak | Brown tips or edges on unfurling leaves; sometimes fails to unfurl |
| Seasonal pattern | Can happen any time; worse in low light and cool temps when soil dries slowly | Strongly associated with heating season (winter) |
| Pests often present | Fungus gnats | Spider mites (thrive in warm, dry conditions) |
| Root appearance | Brown, black, mushy, sour-smelling | Firm, white to tan, healthy |
| Humidity reading | Irrelevant — the roots are the problem | Usually below 35-40% RH at leaf height |
This table is a diagnostic tool, not a verdict. Two problems can exist at once — a plant can be mildly overwatered and also suffering from low humidity in a heated room. When that happens, fix the more urgent problem first. Root rot can kill a plant in days to weeks. Low humidity causes chronic decline measured in weeks to months. Drainage and root health come first.
Why Winter Makes Both Problems Worse
Winter is the season when crispy leaves complaints spike, and it is not a coincidence. The season amplifies both overwatering risk and low humidity stress simultaneously, often in the same room.
Heating systems are the primary humidity destroyer. Penn State Extension notes that indoor relative humidity commonly drops below 30 percent during winter in heated homes. (Penn State Extension) At the same time, shorter days and lower light levels slow plant growth, which means plants use less water. If you keep the same watering frequency you used in summer, the soil stays wet longer, and overwatering becomes much more likely.
Cold windows add a third stressor. Foliage that touches cold glass at night loses heat rapidly, and cold leaf tissue transpires less efficiently while also being more vulnerable to edge damage. A plant that sits on a winter windowsill may be experiencing low humidity from the heated room on one side, cold stress from the window on the other, and slow-drying soil from reduced light — three simultaneous stressors that all produce crispy leaf edges.
The seasonal fix is not to pick one cause and ignore the others. It is to adjust expectations downward: reduce watering frequency, move sensitive plants away from vents and cold glass, and measure humidity so you know whether the air is actually dry or you are just assuming it is.
The Three-Step Home Diagnosis
You do not need a botany degree to distinguish these two problems. You need three data points, collected in order.
Step 1: Check the soil. Push a finger, chopstick, or moisture meter two inches into the potting mix. If it comes out wet and the plant has crispy leaves, overwatering is the leading hypothesis. If it comes out dry, underwatering is the issue. If it comes out lightly moist — not wet, not bone-dry — and the leaves are crispy, move to Step 2.
University of Maryland Extension recommends testing potting mix with your finger to about two inches; if it feels dry at that depth, the plant probably needs water. If it feels wet and the plant looks unwell, stop watering. (University of Maryland Extension)
Step 2: Feel the leaves. Touch the crispy edges. Are they papery and brittle, with a sharp line between brown and green? That points to humidity or underwatering. Are some leaves soft and yellow before the edges crisped? That points to overwatering. Are the stems at the base firm or soft? Firm stems with crispy leaves and moist soil strongly suggest humidity. Soft stems with crispy leaves and wet soil strongly suggest root rot.
Step 3: Measure the environment. Place a digital hygrometer at leaf height near the affected plant, not on the floor across the room. If the reading is consistently below 35-40 percent, and especially if it is below 30 percent, low humidity is at minimum a contributing factor. If the reading is 45 percent or above, humidity is unlikely to be the primary problem, and you should look harder at watering, roots, or water quality.
The three data points together give you a diagnosis that no single observation can provide. Wet soil plus soft stems plus crisp edges equals overwatering. Moist soil plus firm stems plus papery brown tips in a 28 percent RH room in January equals low humidity. The pattern matters more than any individual sign.
The Overwatering Fix: Stop, Drain, Inspect, Repot
If the diagnosis points to overwatering, the priority is stopping further root damage. The sequence matters.
Stop watering immediately. Do not add a single drop until the soil has dried and the diagnosis is confirmed. Remove any standing water from saucers or cachepots. Move the plant into brighter indirect light — bright enough to speed soil drying, but no direct sun on already-stressed foliage. If the overwatering is mild — the soil is damp but not soggy, only a few lower leaves are yellow, and the stems are firm — stopping water and letting the soil dry may be enough.
If the soil is clearly saturated, the pot is heavy, or there is any sour smell, you need to inspect the roots. Slide the root ball out of the pot and shake off loose, wet soil. See the repotting houseplants guide for pot sizing and soil selection rules. Healthy roots are firm and white to tan. Rotten roots are brown, black, mushy, hollow, or slimy. Trim away every damaged root with clean scissors, cutting back to firm, healthy tissue. Rinse the remaining roots gently under room-temperature water.
Do not rely on home remedies like hydrogen peroxide dips or cinnamon dusting for root rot. Wisconsin Horticulture recommends trimming rotten roots, repotting in fresh pasteurized mix, and correcting moisture — not applying home fungicides. (Wisconsin Horticulture) The most effective treatment is physical removal of rot, a clean pot, and fresh well-draining mix.
Repot into a clean container with at least one drainage hole, using fresh potting mix amended with 20 to 30 percent perlite or orchid bark for improved aeration. Choose a pot only slightly larger than the remaining root mass — an oversized pot holds excess moisture that the reduced root system cannot absorb. Do not water immediately after repotting. Wait 24 to 48 hours so cut root ends can callus, then water sparingly. Resume a normal watering rhythm only when new growth appears.
The Humidity Fix: Measurement Before Action
If the diagnosis points to low humidity, the first step is measurement, not equipment. Place a digital hygrometer at leaf height beside the affected plant and record readings at the same times for several days. You need a baseline before you can evaluate whether any intervention is working.
The quickest and most effective fix is a humidifier placed near the plants, monitored with the hygrometer so you can target a specific range. For most tropical houseplants, aim for 40 to 55 percent RH at leaf height. Exceeding 60 percent in a typical home creates condensation and mold risk, so balance the plant’s needs against building conditions. The EPA recommends keeping indoor relative humidity between 30 and 50 percent for human health and mold prevention; aim for the upper end of that band for tropical foliage. (EPA)
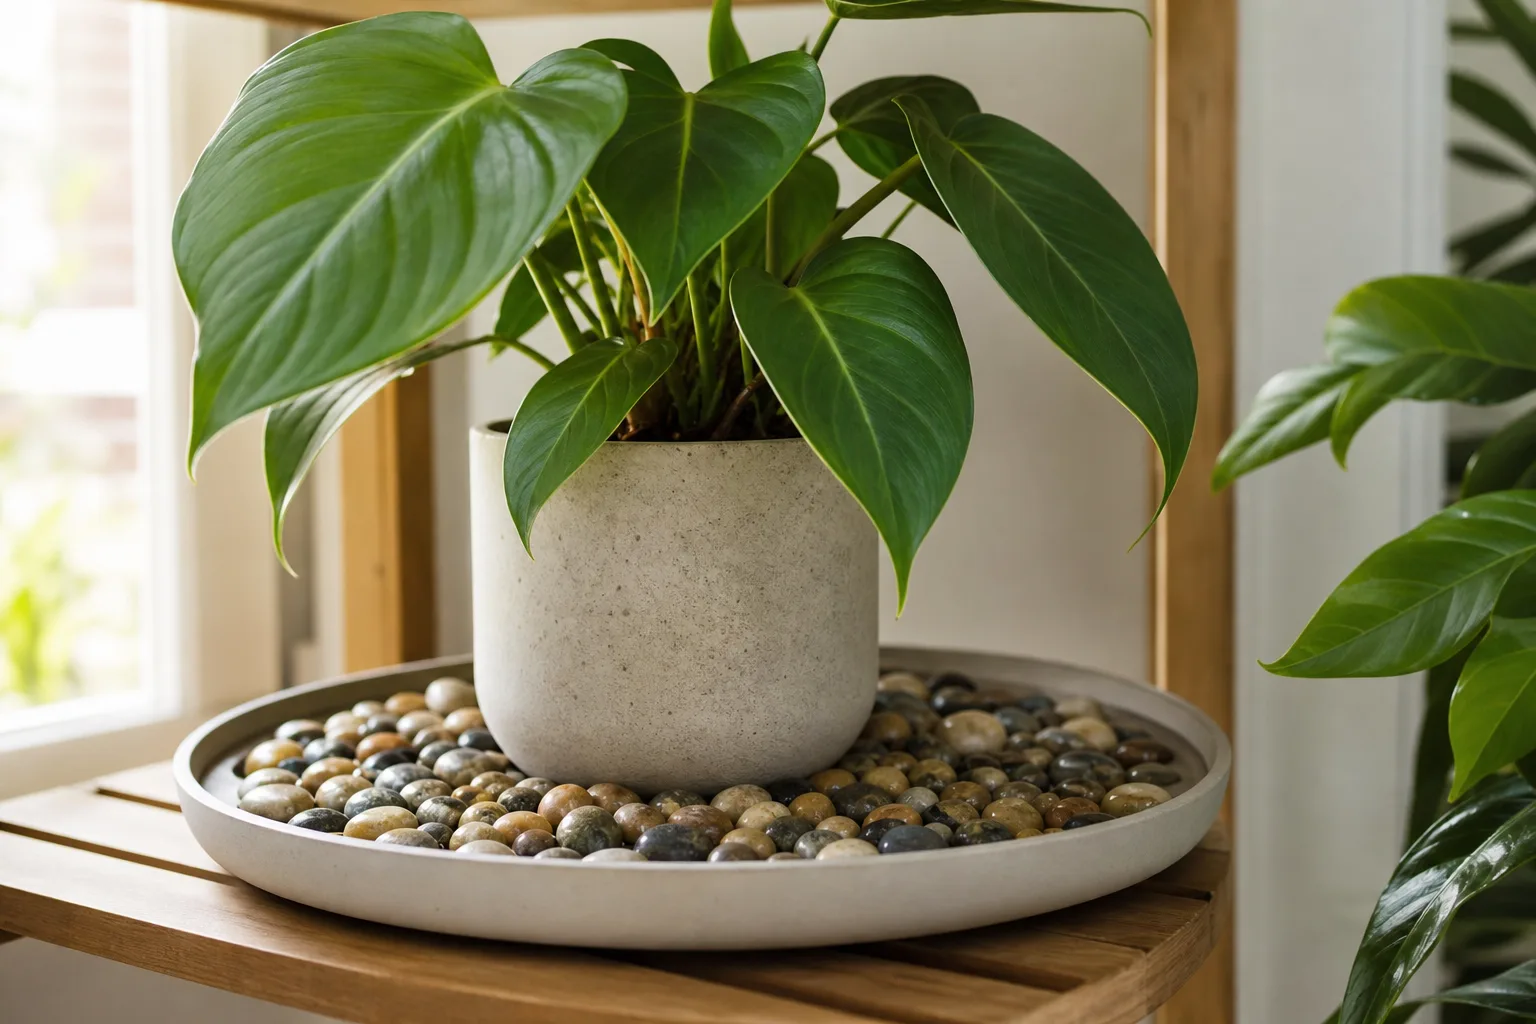
A pebble tray — a shallow tray of pebbles and water placed beneath the pot, with the pot sitting above the water line — can provide a small, localized humidity increase. The pebble tray vs humidifier comparison walks through when each tool makes sense. The effect is modest and decays quickly with distance from the tray. It is most useful for a single humidity-sensitive plant in an otherwise acceptable room. Do not expect a pebble tray to change the humidity in a large, dry living room.
Grouping plants together raises local humidity because each plant releases moisture through transpiration, and the collective leaf area holds that moisture in the immediate vicinity. This works better with multiple plants clustered on a single surface than with widely spaced plants. Combining grouping with a humidifier or pebble tray produces the strongest result.
Misting is rarely effective as a primary humidity fix. Penn State Extension notes that misting raises humidity only until the water evaporates, so it is a temporary bump rather than a durable solution. (Penn State Extension) If misting is the only humidity method you use, you would need to mist multiple times per day to maintain any measurable effect. See the best low-cost humidity solutions for ranked options by effectiveness.
The most important move may be the simplest one: move the plant. Taking a calathea off the mantel above a running radiator and placing it three feet away, out of the direct draft, can reduce leaf damage more than any equipment purchase. Reducing the stress before adding humidity support is more efficient than compensating for a bad location with a humidifier running at maximum output.
When Both Problems Strike at Once
A plant can be dealing with both root stress from overwatering and foliage stress from low humidity at the same time. This situation is more common in winter, when heating drops humidity and reduced light slows water uptake. The plant owner sees crispy leaves, assumes thirst, waters more, and now the roots are drowning while the leaves are still desiccating.
The priority order when both problems are present is clear. Root health comes first. A plant can survive low humidity for weeks or months with cosmetic damage. Root rot can become irreversible in days. Stop watering, confirm drainage, and inspect roots if the soil has been wet for more than a few days. Once the root situation is stable — the soil is drying appropriately and the plant is not actively deteriorating — then address humidity with a humidifier or placement change.
Do not change watering, humidity, fertilizer, and location all on the same day. You lose the ability to tell which intervention worked, and the cumulative stress of multiple changes can push a struggling plant over the edge. Make one change, observe the response in new growth for two to four weeks, then adjust the next variable.
Plant-Specific Notes and Recovery
Not all plants express crispy leaves for the same reasons. A plant’s native environment and leaf structure strongly predict which problem it is more likely to develop.
Plants where overwatering is the more common cause of crispy leaves: Snake plants, ZZ plants, succulents, cacti, and other plants with thick, water-storing leaves rarely crisp from low household humidity. Their waxy cuticles resist water loss. If a snake plant has crispy edges, check the soil first — it has almost certainly been wet too long. These plants evolved for arid conditions and tolerate dry air far better than wet roots.
Plants where low humidity is the more common cause: Calatheas, marantas (prayer plants), maidenhair ferns, and many thin-leaved tropicals crisp readily in dry air even with perfect watering. They are understory plants from humid environments, and their thin leaves have high transpiration rates. A crispy calathea with moist soil and firm stems is a humidity problem until proven otherwise.
Plants that can go either way depending on conditions: Peace lilies, monsteras, pothos, and philodendrons are moderately tolerant of both dry air and occasional overwatering, but they will signal distress through crispy edges when either stress is chronic. For these plants, the soil check and hygrometer reading determine the direction — do not assume based on species alone.
The Missouri Botanical Garden notes that while many indoor plants handle lower household humidity, ferns and some orchids often perform poorly or show drying foliage when humidity drops. (Missouri Botanical Garden) If you grow humidity-sensitive species in a heated home without supplemental humidity, crispy edges are predictable regardless of your watering skill.
Trimming and Recovery: What to Do After Diagnosis
Brown, crispy leaf tissue is dead. It will not turn green again, no matter how perfectly you fix the underlying cause. Iowa State Extension notes that trimming brown portions can improve appearance, but new browning continues unless the cause is addressed. (Iowa State Extension)
Trim crispy edges with clean scissors, following the natural shape of the leaf rather than cutting straight across. For long, narrow leaves like spider plant or dracaena, cut at an angle that mimics the pointed tip. For broad leaves, follow the curve of the leaf margin. Leave a very narrow brown border if cutting into living green tissue would enlarge the wound. Remove the entire leaf only when it is mostly brown or clearly dying.
Recovery is measured in new growth, not in old leaves. If you corrected the cause — the soil is draining properly and roots are recovering, or the humidity around the plant has been raised and stabilized — the next new leaf should emerge clean, green, and undamaged. Existing leaves with trimmed tips stay as they are, serving as photosynthetic surface while the plant rebuilds.
Recovery timelines vary. An overwatered plant with mild root damage may show new growth within two to four weeks after repotting. A humidity-stressed plant moved to better conditions may produce a clean new leaf within two to three weeks during the growing season, and more slowly in winter. A severely overwatered plant with extensive root pruning may take one to two months before new growth appears. Judge progress by the health of emerging leaves, not by the speed of recovery.
Do not fertilize a recovering plant. Damaged roots cannot process fertilizer, and fertilizer salts add stress. Wait until you see healthy new growth before resuming feeding, and start at a diluted concentration.
Preventing Crispy Leaves Long-Term
Prevention is a system of checks, not a single habit. The plants that stay crisp-free are the ones whose owners check before they water, measure before they treat, and adjust with the seasons.
Water based on soil moisture, not the calendar. Push a finger or chopstick into the mix before every watering. If it is damp at two inches, wait. If it is dry, water thoroughly until it drains from the bottom, then empty the saucer. Clemson HGIC advises watering thoroughly until water runs from drainage holes, then emptying saucers so roots are never sitting in standing water. (Clemson HGIC) This single habit — check before watering, drain after watering — prevents the majority of overwatering cases.
Adjust watering frequency seasonally. A plant that needs water every five days in bright summer light may only need water every ten to fourteen days in dim winter conditions. If you keep the same schedule year-round, you are overwatering for at least half the year.
Know your plant’s humidity needs and measure your actual conditions. A hygrometer costs less than most houseplants and eliminates the guesswork. If you grow calatheas, ferns, or other humidity-sensitive plants, measure RH at leaf height. If it is consistently below 35 to 40 percent, add a humidifier or move the plant to a naturally more humid room like a bathroom or kitchen.
Use pots with drainage holes for every plant. A decorative cachepot without drainage is fine as long as the plant sits in a nursery pot inside it, and you empty any collected water after each watering. No drainage hole means overwatering is not a matter of if, but when.
Pay attention to water quality for sensitive species. Spider plants, dracaenas, calatheas, and peace lilies are sensitive to fluoride and chlorine in tap water, and brown tips on these plants can accumulate from water quality even when humidity and watering are perfect. If these species keep crisping despite corrected care, try switching to distilled, rain, or filtered water for several weeks and compare the new growth.
Finally, place plants where they belong. No calathea should sit above a running radiator. No fern should live in the direct blast of a heating vent. No peace lily should have its leaves pressed against a freezing winter window. Placement is not a secondary detail — it is often the difference between a plant that thrives and one that fights the same crispy battle every winter.
Conclusion
Crispy leaves are a symptom, not a diagnosis. The two most common causes — overwatering and low humidity — produce similar visible damage through opposite mechanisms, and treating the wrong one makes the problem worse. Overwatering kills roots, so the plant cannot absorb water even when the soil is wet. Low humidity pulls moisture out of leaves faster than roots can replace it, even when roots are healthy.
The three-step check — soil moisture at depth, leaf texture and pattern, and measured humidity at leaf height — separates the two causes reliably. Wet soil plus soft stems plus crispy edges means overwatering: stop watering, check drainage, and inspect roots. Moist soil plus firm stems plus papery brown tips in dry air means low humidity: measure, move the plant if needed, and add a humidifier or pebble tray for the moisture-sensitive species that need it.
Fix the more urgent problem first. Root rot can become irreversible in days. Low humidity causes chronic cosmetic damage over weeks. If both problems are present, stabilize the roots before addressing the air. Make one change at a time, judge recovery by new growth not old damage, and adjust your care with the seasons. Crispy leaves are a solvable problem — you just need to know which solution to reach for.