How to Build an Herb Spiral for Your Garden
Learn how to size, site, build, fill, and plant an herb spiral, plus how to prevent leaning walls, soggy roots, and overcrowded herbs.
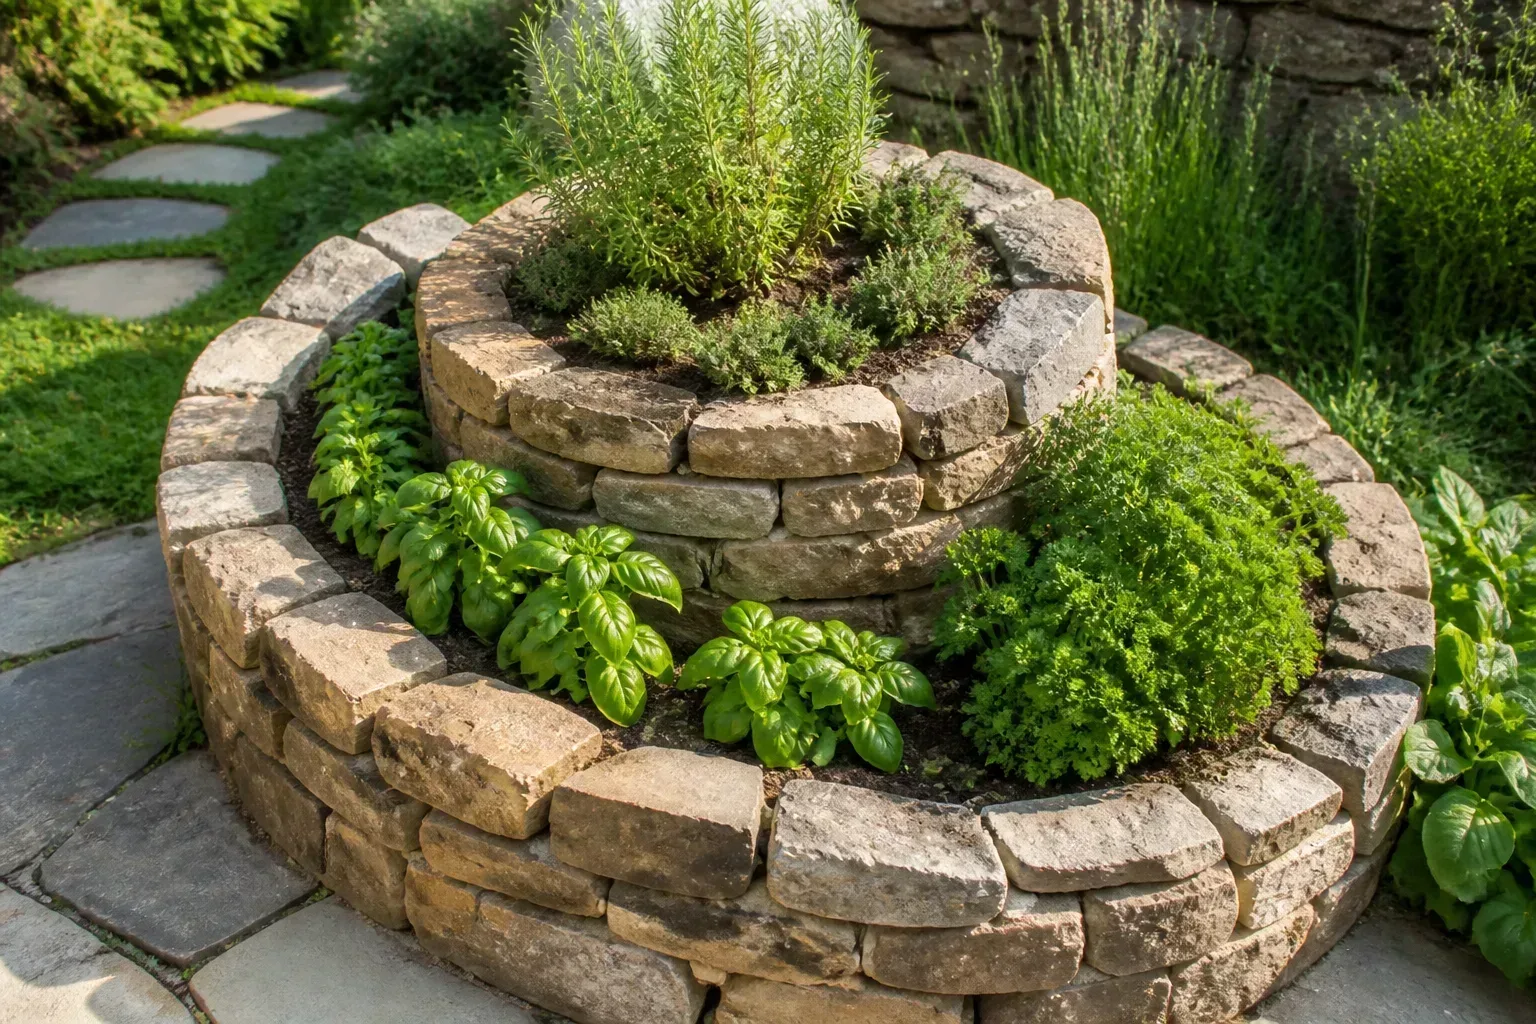
An herb spiral is a compact, raised bed whose low retaining wall curls inward and rises toward the center. The change in height and exposure can create slightly different sun and moisture conditions within one footprint, giving you places to try both dry-soil herbs and herbs that prefer steadier moisture. It is a useful design feature, but it is not a set of separate climates: your site, soil, weather, and watering will determine how pronounced those differences are.
To build one that is easy to use, keep the wall low enough to remain stable, make the planting surface reachable, and choose herbs for conditions you can actually provide. A spiral works best where the soil drains, the bed gets several hours of sun, and you want a small collection of frequently used herbs in one visible place. The University of Florida’s IFAS Extension describes six feet as a typical width while noting that there is no fixed size; the practical choice is the smallest spiral that gives you useful planting room without making the center difficult to reach (UF/IFAS Extension).
Is an herb spiral right for this site?
The spiral’s main advantage is organization: its rising, curved bed uses vertical space and gives you a simple way to separate plants with different preferences. It can also make harvesting convenient if you put it near the kitchen or a path. But a small spiral will not reliably grow every herb, eliminate watering, or turn a shady, soggy corner into a Mediterranean hillside.
Choose another layout if the site stays waterlogged after rain, receives very little direct light, or is too narrow to walk around. A level patch of ordinary soil or a few containers may be easier to weed and water. If bending or reaching is a concern, plan the spiral’s height and the open entry carefully; a tall central mound can look attractive and still be awkward to plant or harvest.
Plan the footprint before laying stone
Sketch the outside diameter, the wall’s route, its open end, and the path you will use to reach it. The wall should form a continuous, gently rising curve rather than a maze of narrow pockets. Leave the spiral open at the low end so you can step close to the inner planting area, and make the inner turn broad enough for soil and roots rather than pinching it into a tiny cone.
Choose a workable diameter and height
For a first build, a footprint around four to six feet across is manageable for many home gardens. A four-foot circle occupies about 12.6 square feet; a six-foot circle occupies about 28 square feet, before accounting for the wall and the path around it. Smaller is often better when you have limited material, want to reach the center, or are working alone. A six-foot width is a common reference point, not a requirement.
Keep the first version modest in height—roughly 18 to 24 inches at the center is a practical starting range for a small dry-stacked wall. A taller spiral holds more soil but pushes harder against the wall, takes more material, and can become difficult to reach. Avoid building a high, near-vertical stack from loose round stones or unreinforced blocks. If you want a structure substantially taller than a low garden bed, use a retaining-wall design suited to the material and site instead of improvising.
Follow sun, slope, and access
Pick ground that is as level as possible and gets several hours of direct sun. The taller center will cast shade, while the spiral’s different sides receive sun at different times. In the Northern Hemisphere, a south-facing slope is often warmer and drier than a north-facing one; in the Southern Hemisphere, the broad pattern is reversed. Nearby walls, trees, buildings, and seasonal sun angles can matter more than the compass alone, so watch the actual site for a day before deciding where to place herbs.
Put the open end where you can reach it without stepping on the bed, and leave enough outside clearance to wheel in soil or carry stones. If runoff from a roof or slope crosses the proposed site, move the spiral or redirect that water before building. Do not rely on a gravel layer inside the bed to correct a location that floods.
Pick a wall material that will stay put
Use material that is heavy enough to hold its position and small enough for you to lift safely. Flat fieldstone, bricks, concrete pavers, and sturdy landscape blocks all work when laid with stable contact and overlapping joints. Reclaimed materials can reduce cost and waste; UF/IFAS lists brick, stone, pavers, and wood as options and notes that reused materials can suit the project.
Flat-sided stone or rectangular bricks are easier to stack than smooth rounded rocks. Irregular pieces can still work, but select each one for a broad, steady seat and fill large voids as you go. Untreated logs or branches create a softer, temporary look but will decay and eventually need replacement. Avoid brittle rubble, loose stacked cobbles, and materials that leave sharp edges in a spot where children or pets play.
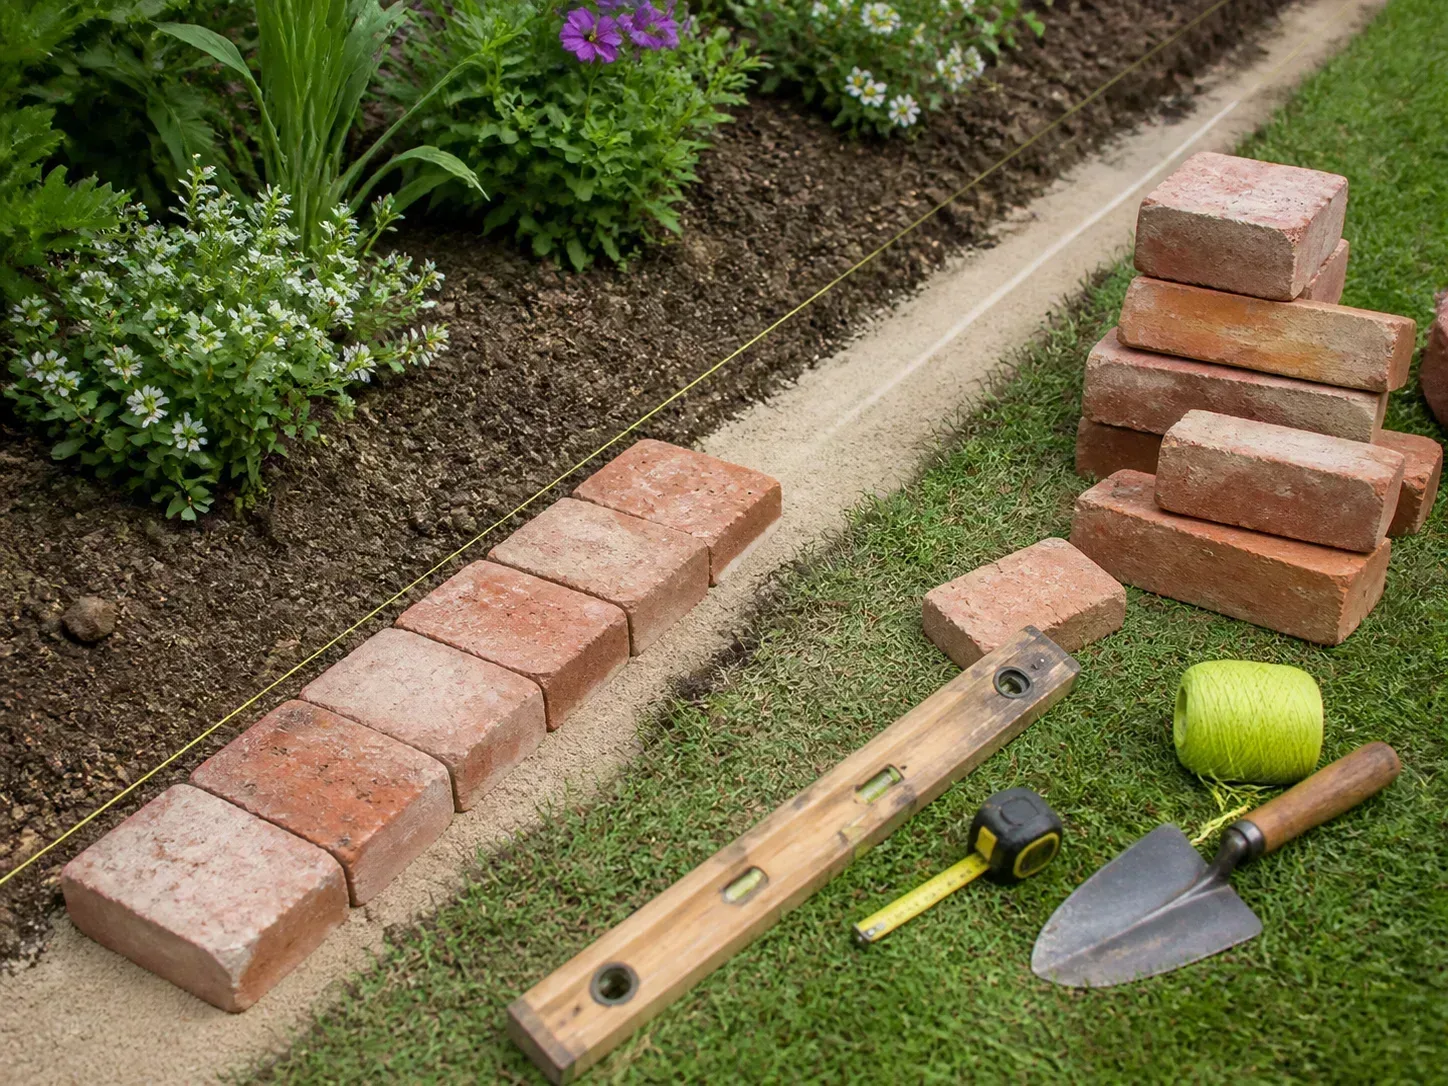
Dry-stacking keeps the build adjustable: you can reposition a stone if it rocks or a course begins to bulge. Make the base wider and the wall face lean slightly inward as it rises. The filled soil supports the inside, but it should not be treated as a substitute for a stable wall. If the wall is tall, retaining a large amount of soil, or close to a structure, use appropriate retaining-wall guidance for the material and local conditions.
Prepare the base and mark the spiral
Remove turf and perennial weeds from the footprint when possible; roots left underneath can return through planting gaps. For a lawn that is free of persistent weeds, you can smother the grass with overlapping, plain corrugated cardboard after mowing it short. Wet the cardboard so it lies flat, overlap seams generously, and cover it with the base course and soil. Avoid glossy, heavily printed, or plastic-coated material. If the site has bindweed, quackgrass, or another persistent perennial weed, remove as much root as practical first rather than assuming a cardboard layer will stop it.
Mark the outer circle with string and a stake or a garden hose. Then mark a broad spiral line that begins at the open low end and winds toward the center. Walk the route before placing stone: check that the entrance is wide enough to work from and that the tight inner turn does not leave a strip too narrow for planting. If you cannot comfortably kneel or stand at the inner area from the entrance, widen the gap or reduce the diameter.
Scrape the base level where the wall will sit and remove soft, loose material. On firm, free-draining ground, a shallow bed of compacted crushed stone can help level individual stones; keep it under the wall, not as a thick layer beneath the entire growing area. On clay or compacted ground, first check how water behaves after rain. A raised spiral may help roots sit above wet ground, but water can still collect at the lowest planting pocket if it has nowhere to drain.
Build the wall in stable courses
Build from the outside and lowest point inward, raising the wall gradually as the curve climbs. UF/IFAS describes a spiral that is tallest near the middle and progressively lower toward the outside. Backfill in stages as the wall rises, rather than stacking the full wall and then dumping soil against it.
- Lay the first course directly on the marked curve. Press and wiggle each unit until it sits without rocking; adjust the base beneath it rather than balancing it on a small stone.
- Close large gaps with smaller, stable pieces. Do not leave holes large enough for soil to pour through when you water.
- Add the next course with joints offset from the course below. Keep the wall’s inner face slightly inclined toward the soil and check that the curve still opens toward the entrance.
- Add a few inches of soil inside the wall, then tamp it lightly with your hand or the back of a rake. The goal is to remove large voids, not to compact the bed hard.
- Repeat the wall and backfill in short sections. As the center rises, keep each new course seated and avoid a sudden jump in height.
- Stop at a low, stable center and make the planting surface broad enough for the herbs you selected. Do not build a narrow peak that sheds water and offers little root room.
- Walk around the spiral and inspect it from several angles. Re-seat any rocking stones, correct bulges, and confirm the entrance and outside path remain clear.
Leave planting gaps and check the curve
The wall is a boundary, not a tightly sealed container. A few small gaps can improve visual texture and offer niches for low-growing plants, but large gaps let fine soil escape and weaken support. If the stone is irregular, place a flat piece behind a visible opening or use smaller stones as a dry backfill.
Keep enough width between the wall and any inner edge for a root ball to sit in soil rather than in a thin crack. The spiral should have a smooth, continuous planting bed, with a low end that does not dam water. Before filling completely, pour a watering-can’s worth of water onto the upper soil and watch where it moves. If it runs straight through a gap or pools against the lowest wall, make the correction now.
Fill it with soil that matches your herbs
Use a friable, well-drained soil with enough organic matter to hold nutrients and moisture. For many garden sites, a blend of existing topsoil and finished compost is a better starting point than pure compost, which can settle markedly and may stay too rich or wet for Mediterranean herbs. If your native soil is heavy clay, do not simply fill the whole spiral with sticky subsoil; use screened topsoil and a modest amount of compost, and make sure the bottom can drain.
You can vary the upper planting pockets with a little coarse mineral material, such as grit or small gravel, if you are growing herbs that prefer lean, sharply drained conditions. Keep that material mixed through the planting soil rather than laying a separate gravel floor under it. A gravel layer below fine soil does not make a poorly drained garden site drain like a pot with an open hole. If you are unsure about the soil’s acidity or nutrient level, a local extension soil test can help you avoid guessing with lime or fertilizer.
Fill the bed in lifts, lightly settling each one as you go. Shape the soil so it follows the wall’s rise and falls gently toward the lower end without creating a deep basin. Water once to settle the mix, let it drain, then top up dips before planting. Leave the finished surface a little below the top of the wall so mulch and rain do not wash soil over the stones.
Place herbs by conditions, not a fixed recipe
Choose a short list based on what you cook with, each plant’s mature size, and the conditions your garden actually offers. Herb placement advice is a starting map, not a rigid formula: sunlight changes around the spiral, and irrigation or heavy rain can erase a small moisture gradient. Penn State Extension emphasizes matching herbs to sun, soil, water, and hardiness needs; it also notes that Mediterranean herbs such as rosemary, oregano, sage, thyme, and lavender prefer full sun and well-drained, relatively dry soil (Penn State Extension).
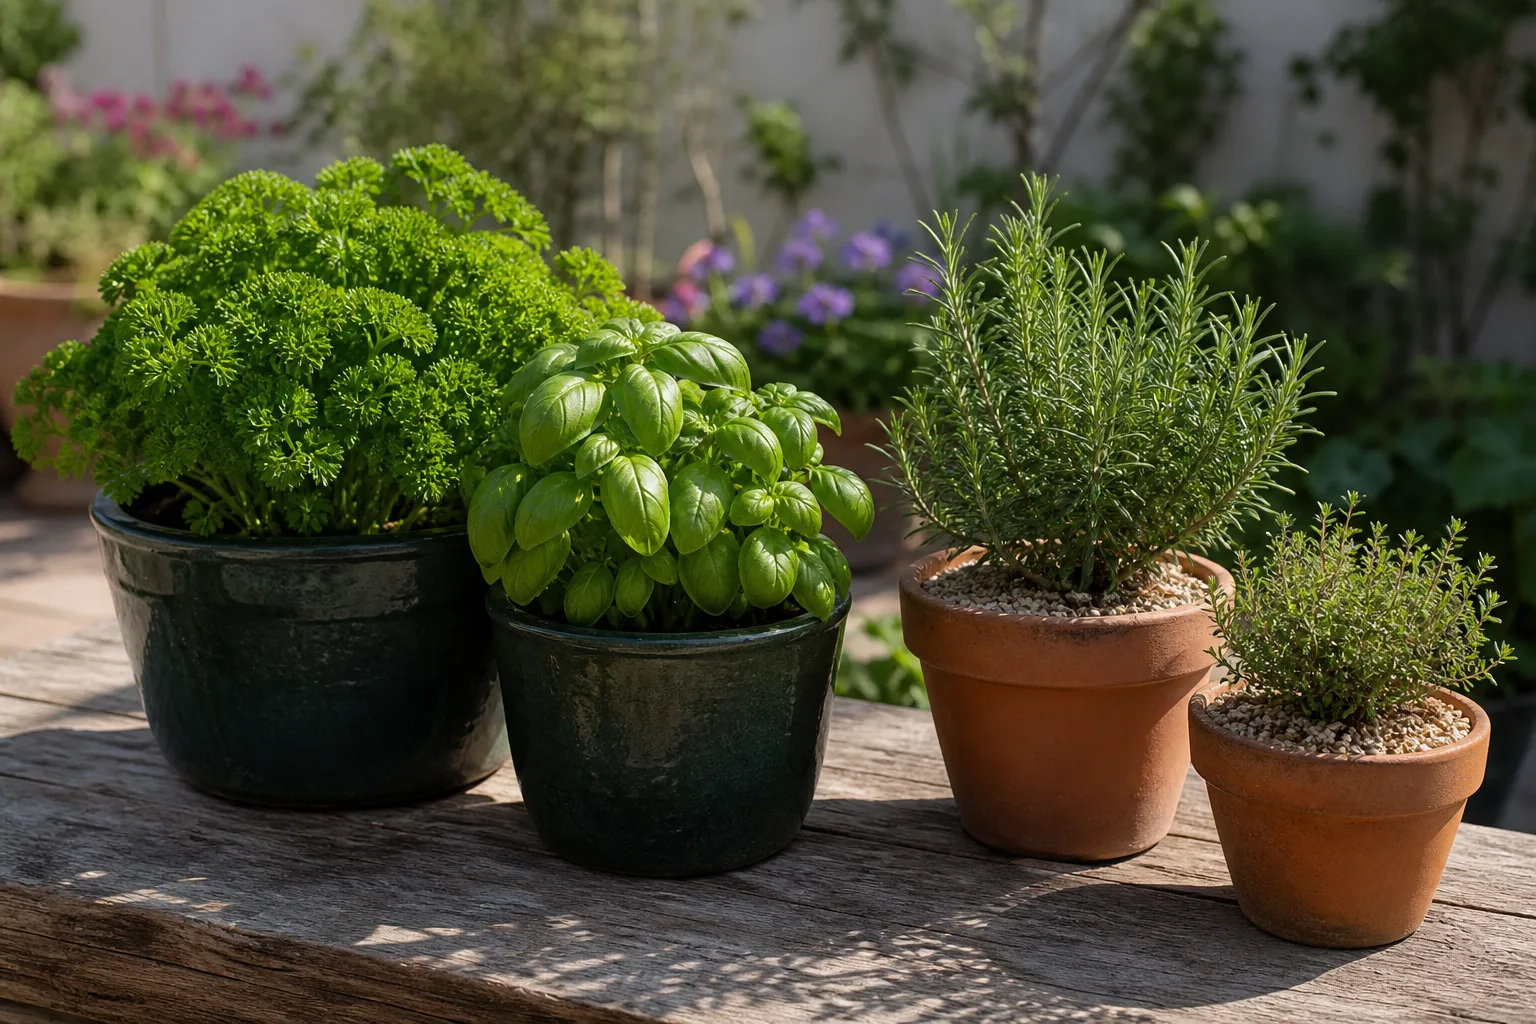
Keep the driest top for compact Mediterranean herbs
The upper, most exposed pockets are usually the fastest to dry. They can suit compact thyme, oregano, marjoram, and some sages where there is good sun and drainage. A small, locally hardy lavender may also fit if the soil is not rich or waterlogged. Choose varieties with a mature size that suits the bed; a tall woody plant can shade the lower herbs and become difficult to prune from a narrow center.
Rosemary is popular in spiral diagrams, but do not automatically put a full-size shrub on the peak. It can become woody and broad, and in cold climates some varieties are not reliably winter-hardy in the ground. Use a compact variety only if the site and local winter conditions suit it, or grow rosemary in a container beside the spiral so you can move it or protect it.
Use the sides and lower curve for herbs needing more moisture
The middle and lower curve can suit parsley, chives, basil, cilantro, or dill when they receive enough light and the soil remains evenly moist without staying saturated. Position plants according to their actual height: dill can become tall, cilantro may bolt when heat arrives, and basil needs warm weather. A tall plant on the sunny side can shade everything behind it, so leave room or move it to the outside edge.
The lowest pocket is not automatically a wetland. If water sits there after irrigation or rain, improve the site’s drainage before planting or reserve that area for a plant that tolerates the observed moisture. Do not add a pond just to complete a design; a pond requires a separate water-holding construction and plants suited to it. Mint is best left out of an open spiral because it spreads by runners and can escape through gaps. If you want it nearby, keep it in a removable pot set on a hard surface or in a contained spot that you can inspect.
For a first season, plant fewer herbs than the bed can technically hold. Space them according to their expected width, not the size of their nursery pots, and label annuals such as basil and cilantro so you can replace them without disturbing perennial neighbors. GrowVeg’s spiral layout likewise separates moisture-loving plants near the base from dry-soil Mediterranean herbs near the top, while its wider herb-garden guidance highlights the value of planning by growth habit and intended use (GrowVeg).
Water and mulch through establishment
After planting, water slowly over the whole root zone so the soil settles around roots instead of channeling through one opening. For the first few weeks, check the soil with a finger or trowel before watering. Newly planted herbs need consistent moisture while roots establish, but roots should not sit in saturated soil. Once plants are established, water according to rainfall, temperature, soil texture, and the particular herbs rather than following a calendar.
The top may need water sooner than the base, especially in hot, windy weather. Water the upper section directly if it dries while the lower part remains moist. If the bottom stays wet for days, stop watering that pocket, open any blocked outlet, and reassess whether the site is suitable. A short soaker hose or drip line can help on a long spiral, but check each zone after installation: one continuous line can deliver too much to one part and too little to another.
Apply a thin layer of clean mulch around plants to slow evaporation and suppress weeds, keeping it away from stems and crowns. Use a lighter layer in the dry upper pockets if the herbs there need fast drainage. Watch the first heavy rain for soil washing over the wall; replace lost soil and close the gap that let it escape. UF/IFAS recommends mulch after planting and notes that drip irrigation can be added, but the right choice depends on the site and the plants in each section.
Harvest so plants stay compact
Harvest lightly and often once a plant is established. Pinch leafy herbs above a pair of leaves or cut whole outer stems cleanly; this encourages branching in many soft-stemmed herbs and prevents one section from turning into a crowded canopy. Do not remove most of a small transplant at once. For woody herbs such as rosemary, take green tips and avoid cutting deeply into bare old wood.
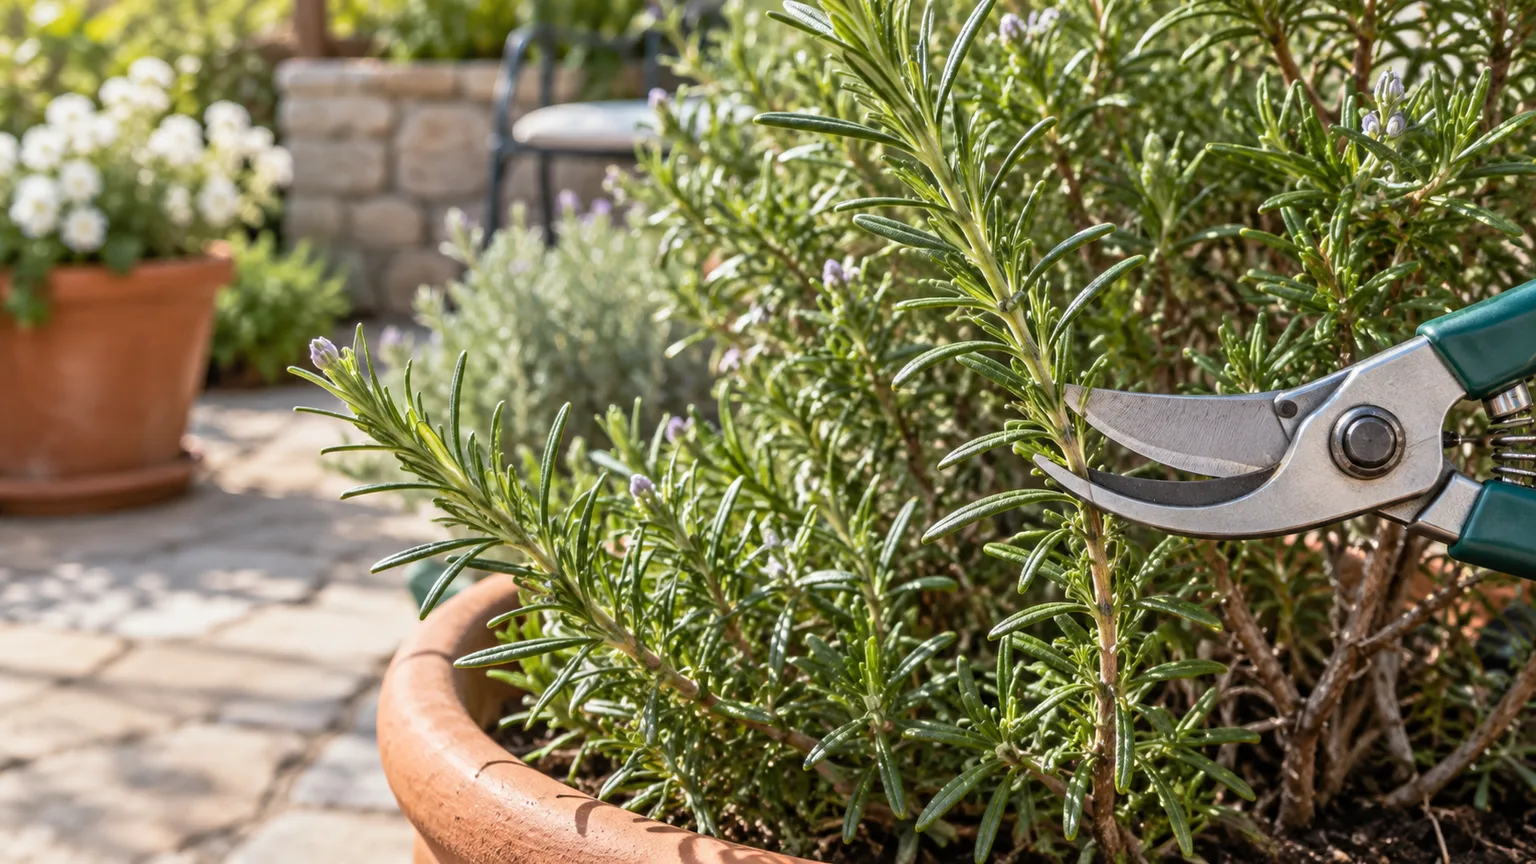
Use clean scissors and harvest when foliage is dry if you plan to store it. Keep flowering herbs if you want their blooms and seeds, but remove flowers from leafy annual herbs when you want to prolong tender leaf growth. BBC Gardeners’ World gives useful crop-specific examples: cut chives near the base, take parsley leaves with their stalks, and pinch basil tips just above a leaf pair so new growth can form (BBC Gardeners’ World).
Once or twice during the growing season, check the spiral for plants leaning across the wall, woody herbs blocking light, and annuals that have finished. Trim selectively, keeping the center open enough for airflow and access. If the herbs start competing, remove or divide one rather than adding more soil and plants into every open space.
Fix a spiral that dries, floods, or crowds itself
The top wilts while the bottom is damp. The upper soil is drying faster than the roots can replace water, or the plant is newly transplanted. Check moisture below the surface, water the top slowly, and add a light mulch. In the next planting season, use a smaller plant or move a moisture-loving herb lower.
The lowest pocket stays soggy. Stop watering that spot and see whether it drains after rain. A blocked outlet, compacted subsoil, or a naturally wet site may be responsible. Do not try to solve persistent saturation by adding more compost or a handful of gravel at the bottom; redirect runoff, open the low edge, or relocate the spiral before root rot and wall pressure become recurring problems.
The wall bulges or stones rock. Remove the soil immediately behind the unstable section until the stones can be reset. Rebuild the course with larger, flatter stones at the base, overlap joints, and backfill gradually. If the whole wall is moving, lower it or rebuild on a properly prepared base. Do not plant over a wall that continues to shift.
Soil washes through the wall. Look for one large opening, an abrupt drop in the inner soil, or water running down a single channel. Re-seat a stone or add a smaller stable piece behind the gap, then reshape the soil so it slopes gently instead of pouring toward one exit. Slow the watering stream and check the next rain before replacing all the lost soil.
Herbs grow tall, weak, or crowded. Compare their actual light and mature spread with the plan. Move tall herbs to the outside or a separate pot, thin crowded seedlings, and avoid overfeeding. If a plant is shaded by the central mound for much of the day, rotate its position next season or choose a more shade-tolerant herb for that pocket.
The spiral does not seem to create different conditions. That can happen in a low structure, a small footprint, or a mild climate. Do not force a plant into a zone based on the design alone. Check how quickly each pocket dries, note the sun it receives, and group herbs by those observations. The microclimate is useful only when you can see a difference in your own bed.
Adapt the build to a patio, clay soil, or cold climate
For a patio or small rental garden, use a broad, stable planter shaped like an open spiral or build a low spiral from lightweight modular blocks. Confirm that the surface can carry the filled weight and that water can drain without staining or damaging the patio. A conventional herb planter may be a better fit if moving the structure or accessing its center would be difficult.
On heavy clay, favor a modest raised profile and a location where runoff can leave freely. Do not dig a deep bowl and fill it with loose soil; that can collect water like a basin. If the entire yard is poorly drained, use containers or a properly designed raised bed instead. In a hot, dry climate, reduce the wall height, use more mulch, and expect to irrigate more often; the top may be too exposed for a newly planted lavender or thyme until it establishes.
In a cold climate, choose herbs rated for your local conditions and treat basil and other frost-sensitive herbs as seasonal plants. Rosemary and lavender vary by species and cultivar, so check local hardiness guidance before committing a large plant to the center. Perennial herbs may need winter protection, but a low stone wall alone does not guarantee root survival. A movable pot beside the spiral is often the safer option for tender or expensive herbs.
If you have limited time, build only the number of courses you can stabilize and maintain. You can add height later after observing drainage and plant growth. A well-used four-foot spiral with six healthy herbs is more successful than a tall, crowded structure that is hard to water and harvest.
Conclusion
Build an herb spiral only after confirming that the site drains, receives enough sun, and leaves room to work around the wall. Start with a reachable footprint, stack heavy materials in stable, overlapping courses, and settle the soil gradually rather than treating the structure as a decorative shell. Then place herbs according to the moisture, sunlight, mature size, and winter hardiness you observe in your own garden. The spiral can organize a useful herb patch; careful siting and simple maintenance are what make it productive.



