How to Cut Back Perennials: Fall or Spring?
Learn when to cut back perennials in fall or spring, which plants should wait, how low to cut, and how to protect next year’s growth.
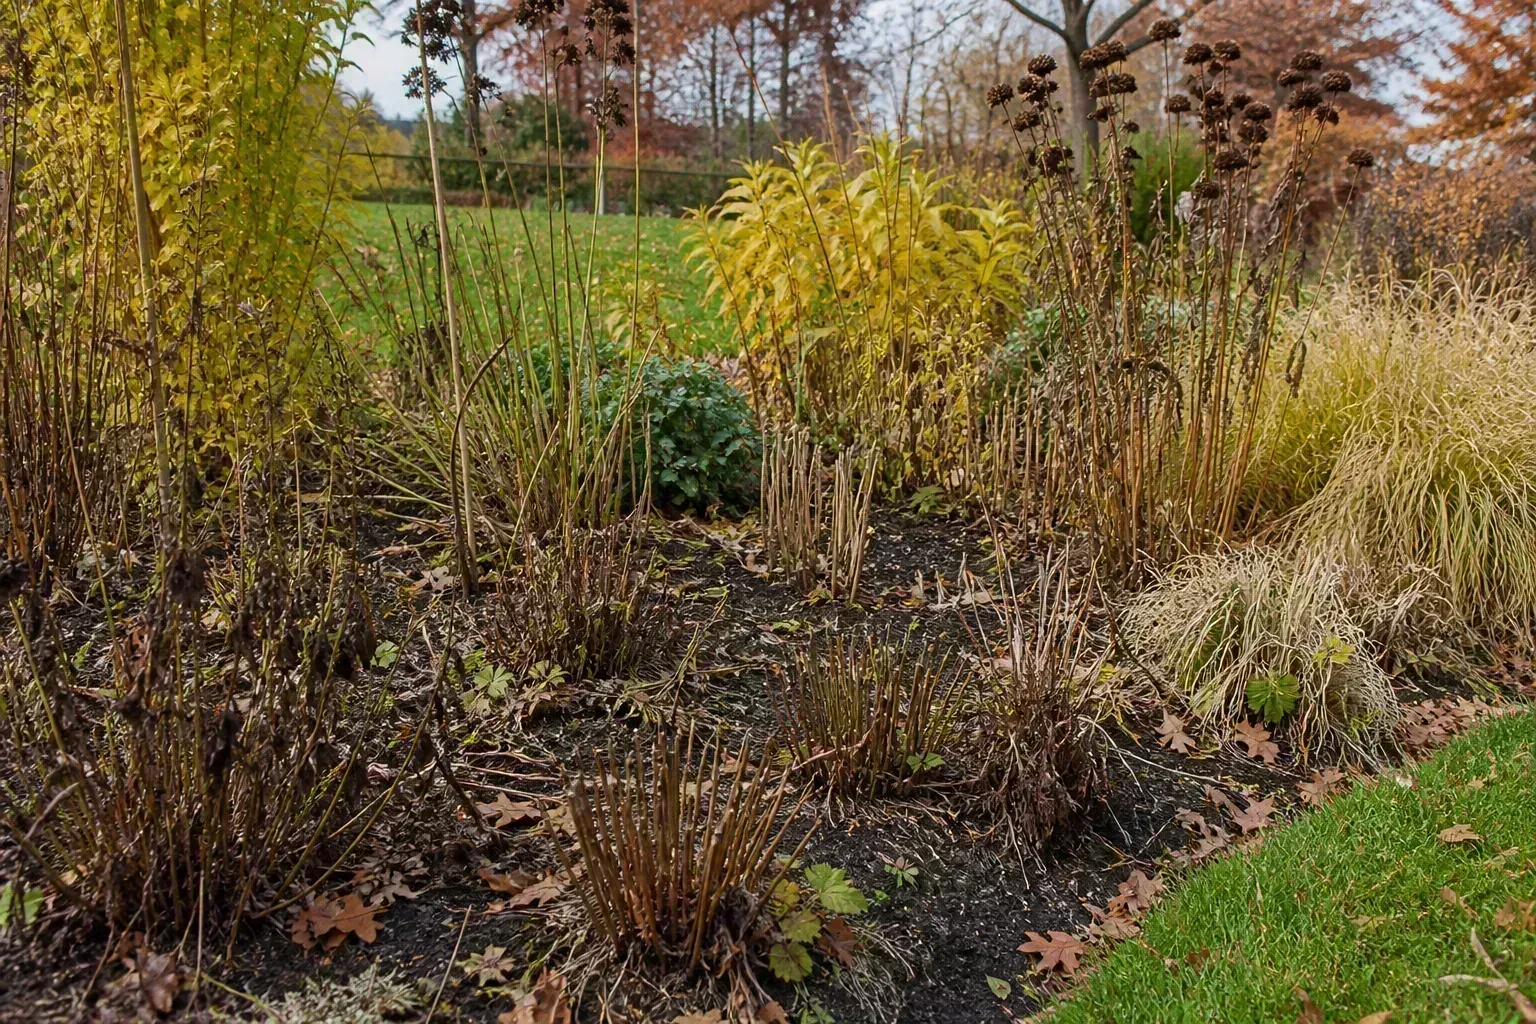
Quick answer: cut by plant condition, not by calendar
The safest way to cut back perennials is to make the timing fit the plant. In general, remove old tops in fall when they are diseased, badly collapsed, pest-ridden, or likely to become a wet mat over the crown. Leave sturdy, healthy stems and seed heads until late winter or early spring when they provide winter structure, catch insulating snow, mark dormant plants, or shelter wildlife. The Royal Horticultural Society’s perennial guidance supports both approaches: autumn cleanup is useful, but delayed cutting preserves winter interest, food, and habitat.
That means “cut everything to two inches after the first frost” is not a complete rule. A hard frost may tell you that a plant has entered dormancy, but it does not tell you whether its stems should come off now, whether the crown needs those stems for protection, or whether seed heads are still feeding birds. Before you cut, identify the plant, inspect its base, and decide what job the old growth is still doing.
If you cannot identify a perennial, do not start with the pruners. Photograph the plant, check its label or a reliable local reference, and look for basal shoots. A few minutes of identification is cheaper than replacing a plant whose crown or overwintering growth you cut away by mistake.
Decide fall or spring with four simple tests
Run these four tests in order. They work better than a month-by-month list because frost dates, rainfall, plant maturity, and climate vary from garden to garden.
Identify the plant’s architecture first
Ask whether the plant is herbaceous, evergreen, or woody at the base. Herbaceous perennials usually send new stems from a crown or underground buds each year and may be cut to the dormant base once the tops are finished. Evergreen perennials keep useful foliage through winter and need selective tidying rather than a wholesale haircut. Borderline-hardy plants with woody or semi-woody stems may need old growth left in place to protect the crown from frost.
The RHS growing guide for perennial plants is a useful reminder that “perennial” describes lifespan, not one pruning pattern. A low evergreen clump, a peony that dies to the ground, a penstemon with woody stems, and a clump-forming grass can all be perennials while responding very differently to a cutback.
Do not confuse a perennial flower with a shrub. Roses, hydrangeas, lavender, and other woody plants often have different bud, stem, and old-wood rules. This article covers herbaceous perennials and ornamental grasses; if a plant has persistent woody stems, use species-specific pruning guidance before making a hard cut.
Look for disease, collapse, and pest residue
Healthy brown stems are not automatically a problem. Dormancy can make foliage look dull, dry, or skeletal. Disease looks different: powdery coatings, spreading leaf spots, rust-colored pustules, blackened tissue, wet rot, or foliage that was clearly declining from infection rather than cold.
Disease changes the decision. A diseased plant is not a good candidate for a wildlife-first “leave it all standing” approach because infected leaves and stems can keep plant debris and spores close to next season’s shoots. The Missouri Botanical Garden’s perennial problem guide emphasizes examining the whole plant and its growing conditions instead of diagnosing from one symptom. That same habit helps you distinguish ordinary dormancy from a sanitation problem.
Also remove plant material that has collapsed into a thick, wet layer over the crown. Hosta, iris, and daylily foliage can flatten under snow and turn slimy. A tidy fall cut can be sensible for these soft-topped plants even when you leave nearby coneflowers or grasses standing.
Weigh winter protection and wildlife value
If stems are upright, dry, attractive, and free of disease, ask what you gain by keeping them. Seed heads can feed birds when fresh food is scarce. Hollow or pithy stems can provide places for native insects to overwinter. Standing tops catch leaves and snow, helping create a more stable layer around the crown, and they make dormant clumps visible before spring growth begins.
N.C. Cooperative Extension’s fall-gardening guidance makes the practical compromise clear: if you do not want stems in the bed, you can cut them and bundle them in an out-of-the-way corner rather than burning or sending all of them to a landfill. You do not need every bed to look wild, and you do not need every bed to be bare. Leave a representative patch where it is useful and clean the high-traffic edge where tidiness matters.
The wildlife benefit is not a reason to ignore disease or create a dense, soggy mat. It is a reason to delay healthy cleanup when the plant can safely stand. Friends of Animals’ account of fall garden habitat describes how seed heads, stems, and leaf litter support birds and insects beyond the bloom period. Think of winter cleanup as selective editing, not a required clear-cut.
Perennials that usually benefit from a fall cutback
Cut back fall candidates after the foliage has naturally declined, or after a hard frost has ended active growth, unless disease requires earlier action. The objective is to remove material that is going to collapse, hold moisture, or carry a known problem while leaving the crown and any fresh basal growth undisturbed.
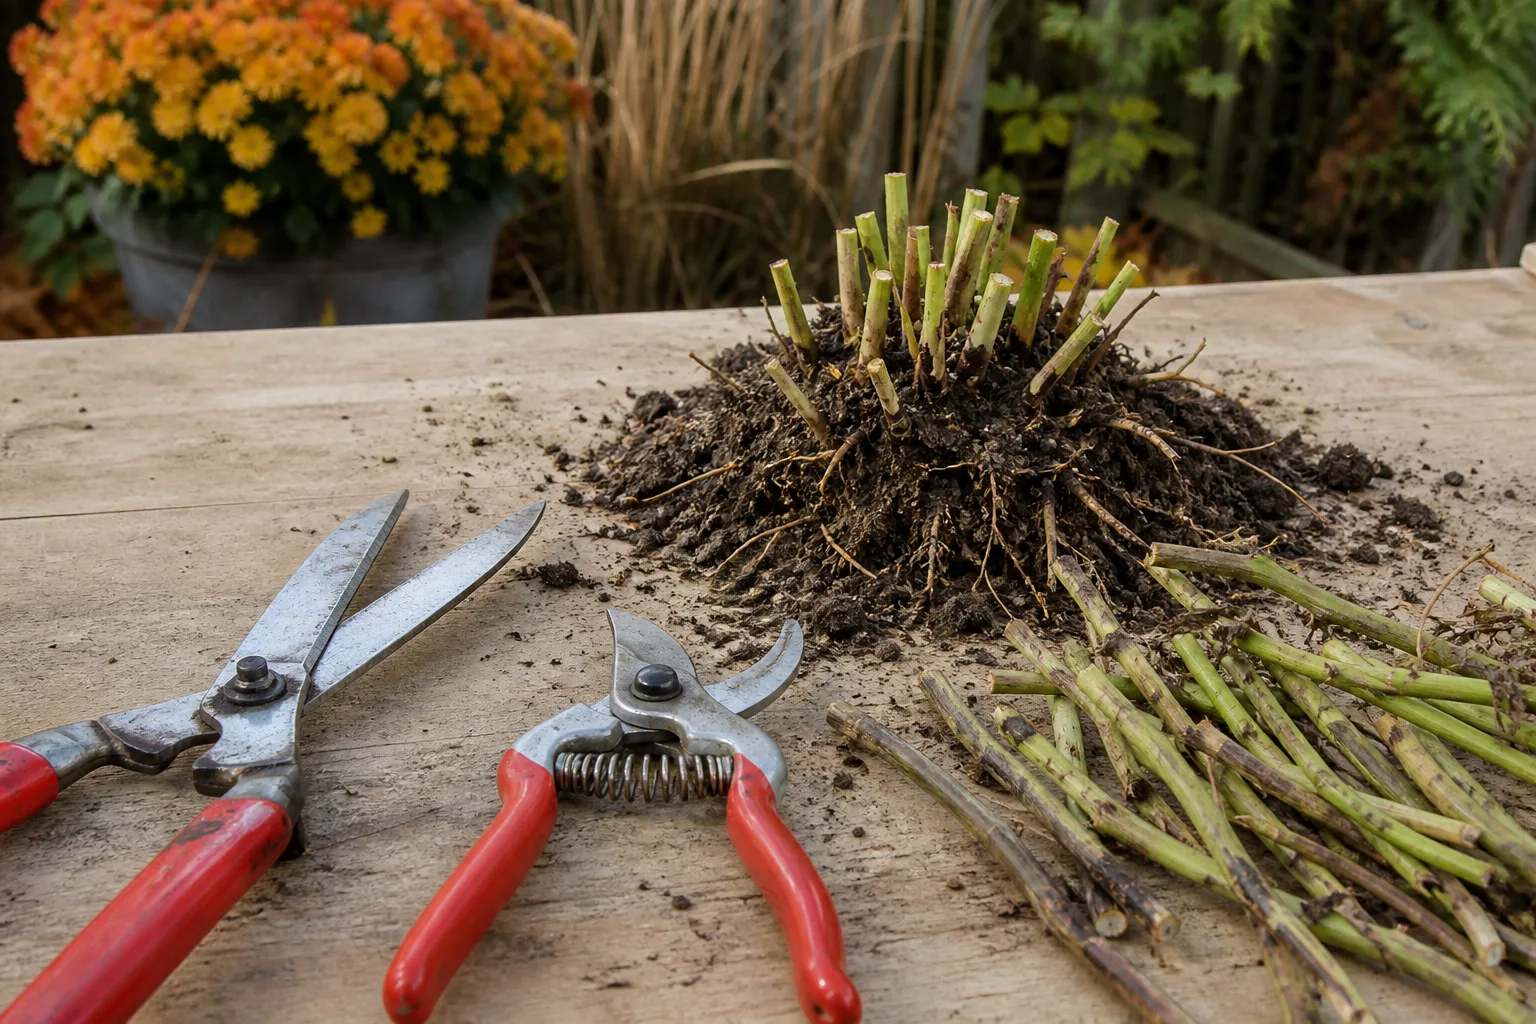
Peonies are a classic sanitation candidate. Once the foliage has yellowed or been blackened by frost, cut stems close to soil level and remove fallen leaves from around the plant, especially if leaf spot or other fungal symptoms appeared. Do not cut green peony foliage early just to make the bed look neat; the plant still needs its leaves while they are functional.
Bee balm and garden phlox often benefit from fall cleanup when powdery mildew or leaf spotting was present. Cut the affected stems at the base after growth has finished, gather the debris rather than shaking it through the bed, and avoid composting material that was clearly diseased. Good air circulation and a less crowded planting next season matter as much as the haircut.
Hostas, iris, and daylilies have foliage that can flatten and become difficult to remove after winter. If the clump is already collapsing, a late-fall cutback makes spring cleanup easier and reduces the amount of wet debris touching the crown. Cut around the base rather than scraping at the soil or pulling hard on stems that are still attached to living tissue.
This is not a claim that every plant in these groups must be cut on one date. A healthy hosta in a sheltered bed can wait; a hosta covered in slimy, diseased foliage should not. The Hearth and Vine discussion of fall versus spring pruning makes the same useful distinction: leave ordinary healthy perennials, but deal promptly with foliage showing fungal trouble.
Perennials that are better left standing until spring
Leave healthy coneflowers, black-eyed Susans, asters, goldenrod, Joe-Pye weed, and many sedums standing when their seed heads are attractive and their stems remain upright. These plants add winter texture and can provide food for birds. Their dried silhouettes also help you find the crown when you begin late-winter work.
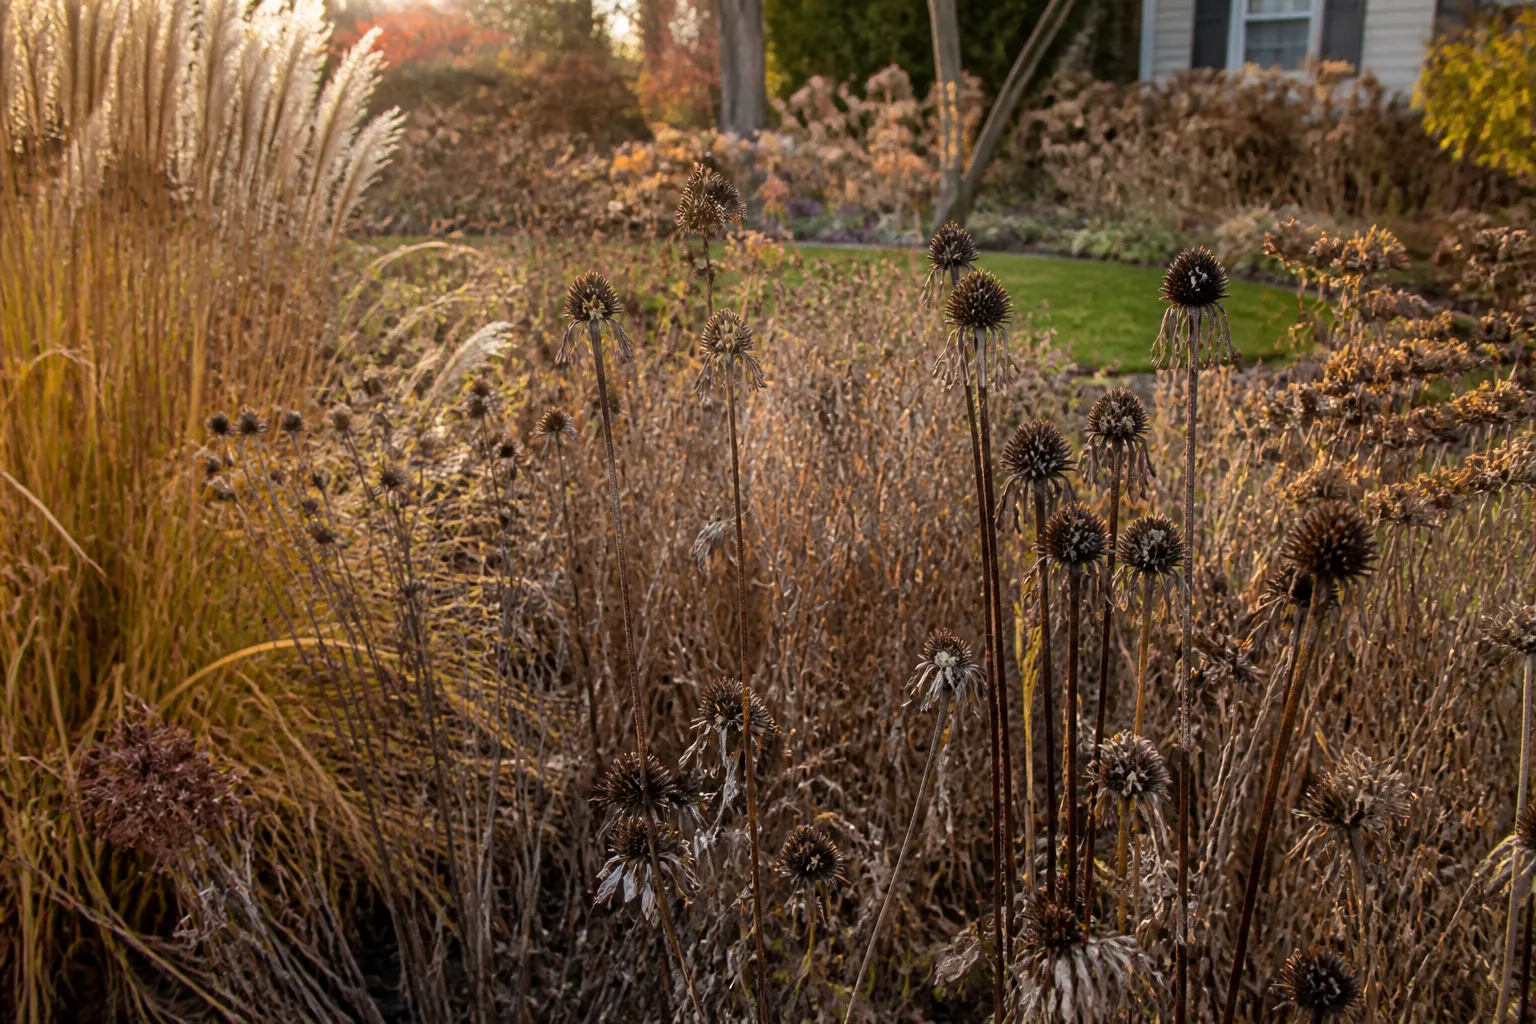
Ornamental grasses are especially valuable to leave through winter when they are healthy and structurally sound. Plumes catch light, movement, and snow, while the clump protects its own base. Cutting too early removes that interest and can leave a crown exposed to wind and repeated freeze-thaw cycles. The Park Rapids Enterprise gardening column describes this practical choice well: leave upright grasses and sturdy stems, but cut plants that flatten, mold, or carry disease.
Milkweed and other native, hollow-stemmed perennials can also wait. If you need a tidier path, cut only the plants that encroach on walkways and leave a less visible portion of the planting intact. You can lay cut, healthy stems loosely in a sheltered corner, but do not bundle them so tightly that they become a wet, rotting mass.
Leaving stems does not mean leaving every leaf exactly where it falls. Keep a light, loose layer of leaf litter when it will not smother crowns or block drainage. Move thick mats away from the base of plants that are prone to rot, and keep paths, drains, and the crown itself clear.
Special cases: tender crowns, evergreen foliage, and ornamental grasses
Tender or borderline-hardy perennials deserve a slower hand. Penstemon, some heucheras, and garden mums may use old stems as a little crown shield in cold weather. In a mild climate they may retain growth higher on the stem; in colder climates they may die back to the base. Leave the old framework until the danger of severe frost has passed, then cut above new shoots rather than guessing at a height in autumn.
Evergreen perennials such as hellebores, some sedges, and certain kniphofias are not treated like plants that die to soil level. Remove yellow, broken, or obviously dead leaves as needed, but do not strip healthy winter foliage. In spring, pull or snip individual leaves that are finished while preserving the rosette and flower buds.
For ornamental grasses, the usual window is late winter or very early spring before new blades become tall enough to hide in the old clump. Tie tall foliage loosely if needed, cut the dormant top in a manageable bundle, and keep the blades away from your face and skin. Some grass leaves are surprisingly sharp. If the grass is evergreen, only comb or trim dead material instead of cutting the whole clump.
How far to cut without damaging the crown
The crown is the plant’s low growing point where roots, dormant buds, and new shoots meet. The correct cut is close enough to remove dead tops but far enough away that you do not gouge the crown or bury the plant in a pile of wet stubs.
For a dormant herbaceous clump with no visible shoots, 1 to 3 inches above soil level is a useful working range, not a law. Leave a short marker when the plant is hard to identify or when you will be working in the bed again before spring. If new basal shoots are already visible, cut around them or just above them. The RHS specifically advises avoiding young growth and cutting close to the crown rather than removing emerging shoots.
Do not pull a stem simply because it is brown. If it resists, it may still be attached to living crown tissue. Snip it cleanly instead. On an evergreen or semi-woody plant, follow the stem to a healthy leaf, branch, or bud and shorten only the dead portion. A low cut that is correct for a peony can be wrong for a penstemon.
Angled cuts are not a magic disease cure, and hollow stems do not need to be sculpted into identical little stubs. What matters most is a sharp blade, a clean cut, and avoiding damage to the crown. For a dense mass, make a few exploratory cuts first so you can see where the living base begins.
Tools and sanitation that prevent avoidable problems
Use bypass pruners for individual stems, hand shears for a soft clump, and loppers only when stems are genuinely too thick for the smaller tool. A hedge trimmer can save time on a large, uniform bed, but it also makes it easier to cut emerging shoots or mix diseased material through healthy plants. Precision is more valuable than speed when plants are mixed together.
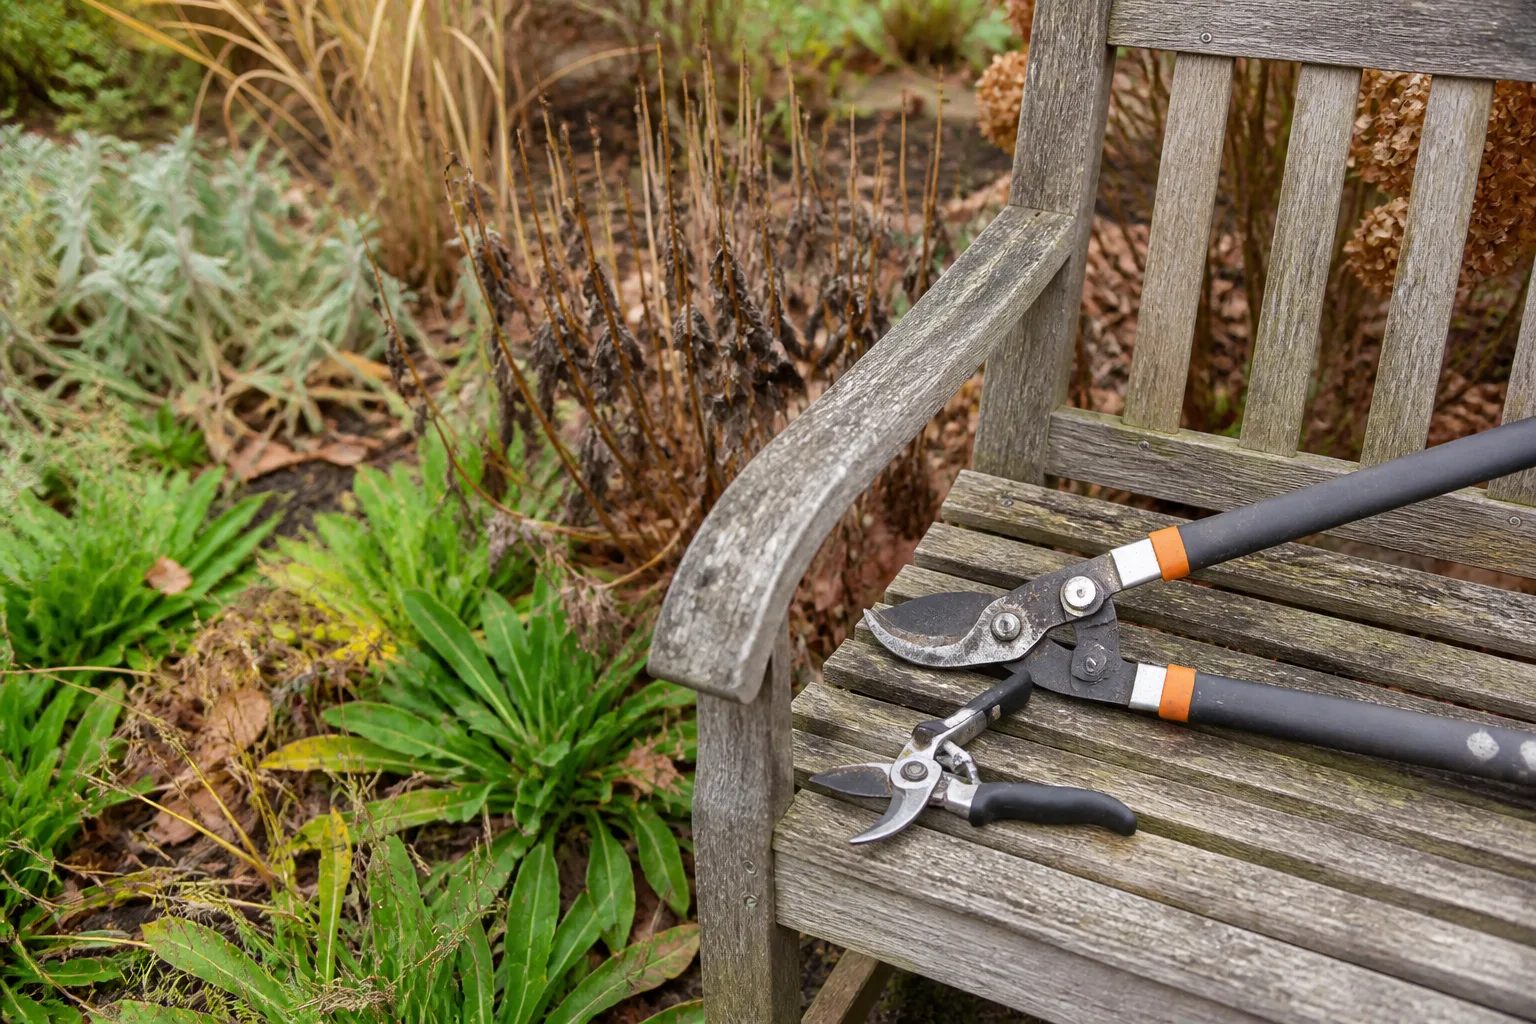
Start with a brush or cloth to remove soil from blades. Disinfect between plants when you are moving from a visibly diseased clump to a healthy one, and always clean tools at the end of the job. Follow the product label for any disinfectant; do not mix household chemicals or use a corrosive solution that will damage the tool.
Wear gloves, eye protection when cutting stiff or brittle stems, and long sleeves around grasses. Keep a bucket, tarp, or paper yard-waste bag beside you so diseased cuttings do not land back in the bed. Park Rapids’ tool-focused perennial cleanup guidance also makes a sensible point: the right sharp tool makes the task lighter, but tool choice should follow stem thickness and the precision the plant needs.
A safe cutback sequence from first inspection to finished bed
-
Walk the bed before touching a plant. Note species, green basal growth, upright seed heads, collapsing foliage, and any signs of disease. Mark plants you cannot identify.
-
Choose the timing by section, not by the whole garden. Schedule diseased or collapsing clumps for fall, leave wildlife-friendly stems where they stand, and reserve tender or evergreen plants for a later inspection.
-
Remove obviously damaged material first. Cut diseased leaves and stems into a bucket. Avoid dragging them across neighboring plants or shaking spores and insects into the crown.
-
Cut healthy fall candidates from the outside inward. Use short, controlled cuts and stop when you reach living basal growth. The cut surface should be clean, and the crown should remain visible.
-
Leave a deliberate winter patch. Keep a group of sturdy seed heads, grasses, and hollow stems standing if your site allows. A purposeful patch looks designed and supplies more value than a rushed, all-or-nothing cleanup.
-
Finish the soil surface without stripping it bare. Remove thick wet mats from crowns and paths, but leave a light layer of healthy leaf litter where it will not cause rot or block drainage.
Sort healthy debris from diseased material
Healthy, dry stems can be chopped into small pieces and used as surface mulch only when they were free of disease and local conditions allow it. N.C. Cooperative Extension recommends keeping cut stems available in a yard corner when possible, because that preserves shelter without forcing the material to remain in a formal bed. This is different from scattering infected leaves across the soil.
Put diseased material in the disposal stream recommended by your municipality, often a green-waste collection that reaches adequate composting conditions. Do not assume a backyard compost pile will destroy every pathogen. If you are uncertain whether a symptom was disease, isolate the material and ask a local extension office rather than spreading it around the garden.
Spring cleanup without cutting new growth
Late winter and early spring cleanup is a race between visibility and growth. Start when the old stems are easy to handle, the soil is firm enough to walk on, and new shoots are still short enough to see. The RHS cutting-back guide notes that many gardeners begin in March, but the right date shifts with climate and the season.
Work on a dry day if possible. Walking on waterlogged soil compacts it, damages structure, and can smear mud into crowns. If the bed is too wet, wait. A few bent stems are less damaging than turning a spring cleanup into a soil-repair project.
Use one hand to gather old stems and the other to cut above the new growth. When shoots arise from the base, remove the dead stalk without shaving the center of the clump. When growth emerges from higher on a semi-woody stem, shorten to just above a healthy leaf or bud. Pulling dead stems can work when they release easily; if they tug the crown, cut them instead.
Mulch and aftercare after the cutback
Cutting back is not the same as feeding. Do not automatically add fertilizer because a plant looks dormant. First make sure the crown is not buried, the soil drains, and the plant has the moisture it needs for the season.
A thin, even layer of finished compost or appropriate mulch can protect soil and add organic matter. Keep mulch off the crown and avoid building a volcano around stems. The RHS recommends organic mulch as a soil-improving and frost-protective layer, but the depth and material should suit the plant and your drainage. Heavy, wet mulch around a low crown can do more harm than a little exposed soil.
After a diseased cutback, monitor the plant next season instead of assuming the problem is solved. Improve spacing and airflow, water at the soil rather than wetting foliage late in the day, and remove new infected leaves promptly. If symptoms return despite reasonable care, seek a diagnosis; a pruning cut cannot correct waterlogging, unsuitable light, or a recurring pathogen by itself.
Common mistakes that cost next year’s blooms
Cutting everything on the first mild fall weekend is the most common mistake. Warm weather does not mean the season is finished, and green foliage may still be contributing to the plant’s reserves. Wait for natural decline unless disease or safety requires earlier removal.
Using one height for every plant causes crown damage on low plants and leaves tender stems exposed. Check the base and look for shoots before deciding where the blade goes.
Removing every seed head trades a few weeks of tidiness for lost winter food and structure. Leave healthy, useful stems in a planned section of the garden, especially when they are upright and free of disease.
Composting infected debris casually can return a problem to the same bed. Separate suspicious material and follow local green-waste guidance.
Working wet soil creates a long-term problem for a short-term chore. Stay on paths, use boards to distribute weight if appropriate, or postpone the job.
Raking bare soil around dormant plants removes cover and can expose crowns to temperature swings. Clear only what is matted, diseased, blocking drainage, or covering the growing point too deeply.
Pruning woody plants as if they were herbaceous perennials can remove the buds that carry next season’s flowers. Stop and identify any plant with persistent woody stems before cutting it to the ground.
Perennial cutback decision chart
| Plant or condition | Typical timing | What to do | Why |
|---|---|---|---|
| Peony with spent, declining foliage | Late fall after natural dieback | Cut near soil level and remove fallen foliage | Reduces a disease-carryover risk and clears soft tops |
| Bee balm or garden phlox with mildew or leaf spots | Fall after growth finishes, or sooner for severe disease | Cut infected tops, gather debris, improve airflow next season | Sanitation matters more than leaving infected stems |
| Hosta, iris, or daylily that collapses into a wet mat | Late fall or early winter | Cut close to the base without gouging the crown | Prevents a spring mass of slimy debris |
| Healthy coneflower, black-eyed Susan, aster, or sedum | Late winter or early spring | Leave seed heads and upright stems, then cut before new growth surges | Protects winter structure and wildlife value |
| Healthy ornamental grass | Late winter or very early spring | Cut dormant tops before fresh blades rise; comb evergreen types instead | Preserves winter form and reduces accidental new-growth cuts |
| Penstemon, some heucheras, or other tender-crown perennial | Spring after severe frost risk | Leave old stems for winter; cut above new shoots | Old growth can shield a vulnerable crown |
| Evergreen perennial or sedge | As needed, mainly spring | Remove dead leaves selectively | Healthy foliage remains functional through winter |
| Unidentified plant with persistent woody stems | Do not use a blanket rule | Identify first and follow species guidance | It may bloom on old wood or have a different pruning cycle |
The chart is a starting point, not a substitute for knowing the plant. When two rules conflict, prioritize the plant’s health: remove active disease, protect a tender crown, avoid emerging shoots, and preserve healthy habitat where it is safe to do so.
Conclusion
Cutting back perennials safely is less about finding the perfect weekend and more about noticing what the plant is telling you. A diseased, collapsing clump may deserve a careful fall cleanup; a healthy coneflower, grass, or seed-bearing stem may be better left standing until late winter. The same garden can use both schedules.
Identify the plant, inspect the crown, look for disease, and decide whether the old growth is still providing protection, food, or shelter. Then use a sharp clean tool, cut above living shoots, separate infected debris, and return in spring before new growth disappears into the old stems. That measured approach keeps the bed manageable without treating every perennial as if it had the same winter strategy.



