How to DIY a Wall Christmas Tree Step by Step
Learn how to DIY a wall Christmas tree with faux garland, fresh branches, or lights. Plan the wall, protect paint, hang it securely, and decorate safely.
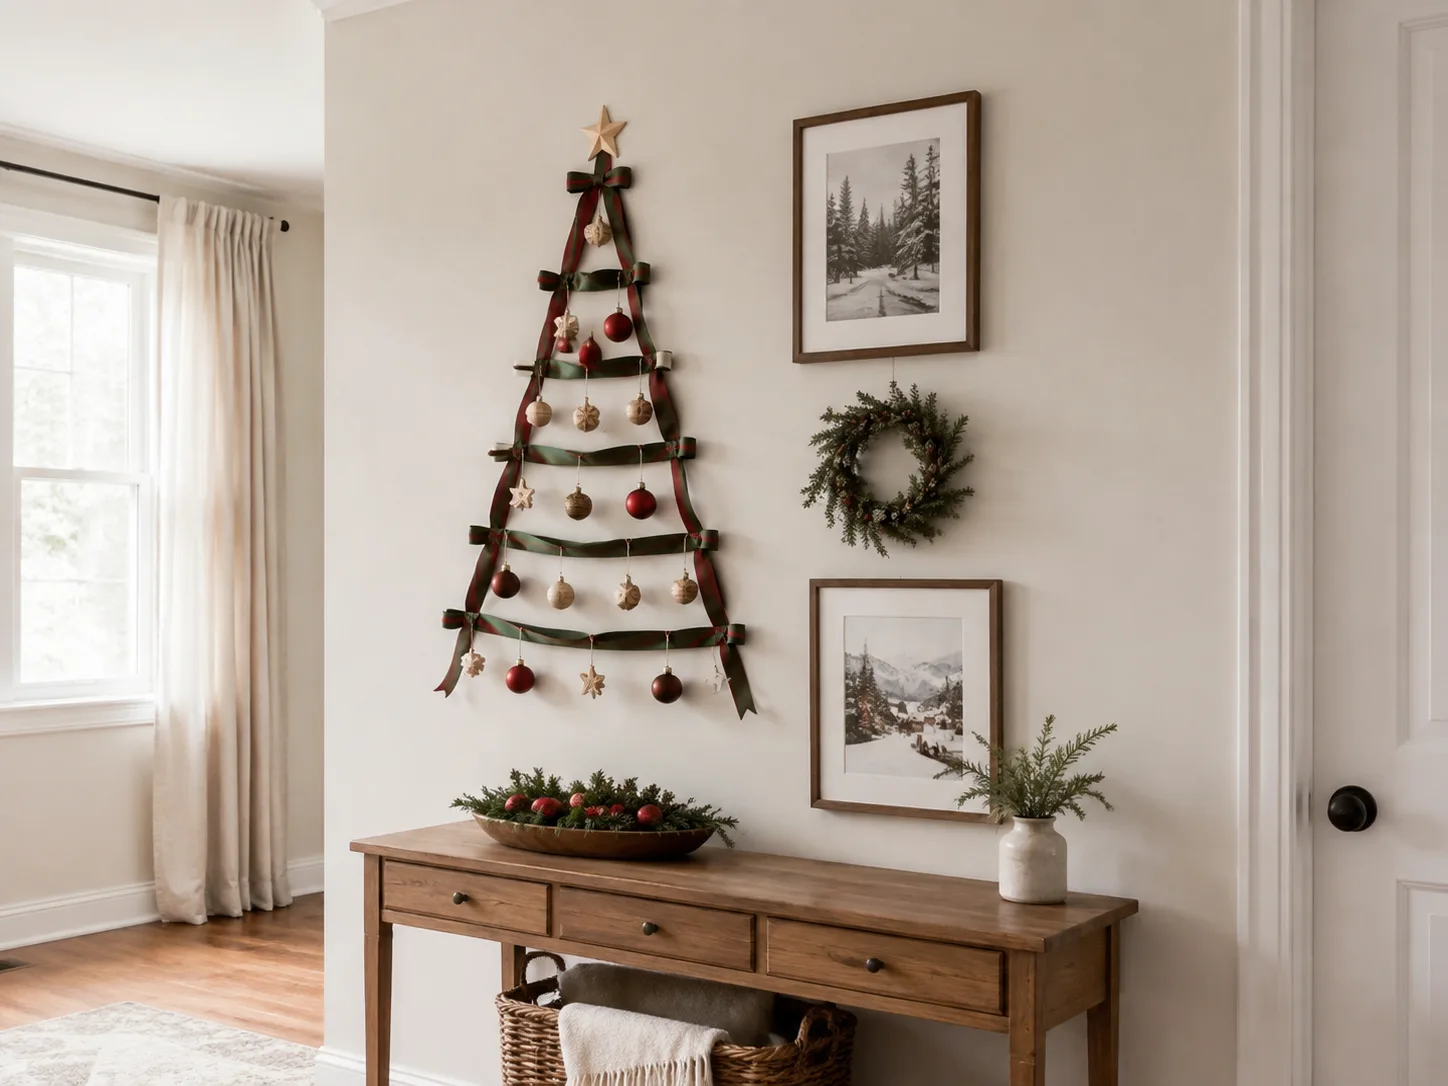
A wall Christmas tree gives you the outline, glow, and decorating ritual of a tree without claiming a whole corner of the room. It works especially well in an apartment, a narrow living room, a playroom, or a home where the best open wall is already doing double duty as a television or gallery wall.
The trick is to treat it as a small suspended installation, not as a floor tree pasted flat against the wall. Choose the material first, give the weight a deliberate route into the wall, keep the display away from heat, and decorate lightly enough that the silhouette stays crisp. The result can look intentional rather than like a last-minute zigzag of garland.
Choose the Right Wall-Tree Style
Start by deciding what you want the display to do. A faux garland tree is the most forgiving all-purpose choice; a fresh-branch tree gives you scent and a more sculptural look; a lights-only tree is the lightest option; and a ribbon or ornament frame can work when even a small amount of greenery would be too heavy.
Faux Garland or Fresh Branches?
Faux garland is the best starting point if you want to install the tree early, reuse it next year, or decorate a wall near a television or upholstered furniture. It does not need water, it will not wilt while you are away, and its wired spine makes it easier to hold a clean zigzag or a series of gently curved rows.
Fresh branches are more beautiful when you want fragrance, variation, and the feeling of bringing the garden indoors, but they change the schedule. BBC Gardeners’ World recommends making fresh greenery displays close to Christmas because branches can wilt and drop over time. Gardening Know How also advises keeping greenery cool, away from windows and heat, checking it every day or two, and removing sections that turn brown or shed needles.
That makes fresh greenery a short-display material, not a set-it-and-forget-it substitute for faux garland. If your room is hot, your family will be away, or your only available wall is above a radiator, choose faux garland or lights instead.
Lights-Only and Ornament-Only Versions
A lights-only tree is the lightest and fastest format. Run one strand in a triangular zigzag, with the widest pass at the bottom and progressively shorter passes above it. It gives you the visual rhythm of a tree while leaving the wall visible, so it suits minimalist rooms and rentals where a bulky garland would need too many supports.
For a no-greenery version, suspend horizontal ribbon, cord, or narrow branches between two vertical side lines, then hang ornaments from the rows. Keep the ornaments small and spread the visual weight across the width. This format is easy to remove and store flat, but it needs more spacing discipline because there is no foliage to hide uneven gaps.
Plan the Wall Before You Hang Anything
Choose a wall with a clear rectangle, a nearby outlet if you need plug-in lights, and enough space below the lowest row for people and pets to pass. Do not let a wall tree narrow a hallway, cover an exit, block a thermostat, or sit where a chair or door can catch it.
Measure Space, Weight, and Clearances
Measure the finished height and width with painter’s tape on the wall. A useful starting proportion is a tree that is about one-and-a-half times as tall as it is wide, but the room should win: a narrow tree looks better beside a doorway, while a wider one can anchor a console or media wall.
Write down the estimated weight of the greenery, the lights, and the ornaments together. Your support plan should be based on that total, not on the weight printed on the garland package alone. Fresh branches are also awkward because their weight is uneven and can increase as moisture or attached decorations shift.
Keep the finished display at least 3 feet from fireplaces, radiators, space heaters, candles, and heat vents whenever the room allows. That is the clearance the U.S. Fire Administration gives for holiday trees and heat sources, and the same caution makes sense for a wall of dry needles. Leave access to plugs, switches, and doorways.
Protect Paint, Plaster, and Electronics
Identify the wall surface before you buy hooks. Removable adhesive hooks can work for light, dry faux garland when the package rating, cure time, temperature range, and surface list all match your wall. They are not a universal promise for textured paint, damp greenery, dusty plaster, wallpaper, or a heavy ornament load.
Clean only the small areas where supports will land, using the method the hook manufacturer allows, and let the wall dry completely. Test one hook in an inconspicuous spot before laying out the whole tree. For plaster, brick, or a display that will be heavy, use a picture rail, existing molding, or properly installed screws into a stud rather than asking tape to do structural work.
If the wall is above a television, keep branches and cords from resting on the screen or covering ventilation openings. A tree that looks good in a photograph can still be a poor choice if it traps heat, hides an outlet, or places ornaments where they can fall onto electronics.
Gather Materials for a Secure Build
For the basic faux-garland version, gather the following:
- Faux evergreen garland with a flexible spine
- Removable hooks or strips rated for the combined load, or a picture-rail solution
- Painter’s tape and a pencil for the temporary outline
- Small clips, green floral wire, or soft ties for local reinforcement
- Cool LED string lights, if you want illumination
- Lightweight ornaments, ribbon, pinecones, or a topper
- A tape measure, scissors, and a step stool
For a fresh-branch version, add sharp bypass pruners, garden twine or floral wire, a tarp or sheet for assembly, and a container or bag for the cuttings. Gardening Know How recommends fresh, supple cuttings for garland and shows how overlapping branches can be secured with floral wire while keeping the smaller needle-bearing twigs free.
Avoid building the main support from ordinary clear tape, string that cuts into stems, or a single top hook. A tree shape is a repeated load: every row pulls outward, and the bottom rows carry the weight of everything above them.
Build a Garland Wall Christmas Tree
The most reliable method is to create the outline first, place supports second, and hang the garland from the bottom upward. That order gives you a chance to correct the proportions before adhesive tabs or hooks are committed to the wall.
Map the Silhouette
Use painter’s tape to mark a center line, a top point, and the two bottom corners. Add a short horizontal tape mark for each row. Keep the bottom row widest and shorten each row by roughly the same amount as you move upward; small irregularities disappear once the garland is fluffed.
Stand back from several angles. A tree that looks balanced from the sofa may lean when viewed from the hallway. Check that the center line is not crossing a vent, outlet, thermostat, picture hook, or the edge of a television. Leave a little breathing room around the outline so the greenery does not read as wall-to-wall clutter.
Install Supports and Hang Bottom to Top
Place supports at both ends of every major row and at the center of any long span. Add a center support sooner rather than later if the garland bows when you hold it against the wall. For a wide tree, a few extra low-profile supports are cheaper and cleaner than trying to hide a sag after decorations are attached.
Start at the bottom. Seat the widest garland row on its supports, then work upward in shorter passes. If you have one continuous strand, turn it back at each side and let the next pass overlap slightly; if you have separate lengths, hide the joins behind the foliage and secure each end independently.
Keep the tail of each row pointing inward or downward rather than outward. Outward tails make the tree look like a stack of disconnected shelves and put extra leverage on the side supports.
Shape Rows and Reinforce the Tree
Fluff each row before deciding whether it needs another hook. Open compressed tips, turn the fuller side toward the room, and hide the spine behind foliage. The goal is not perfect symmetry; it is a recognizable triangle with consistent visual density.
Add lights while the garland is still easy to reach, but do not use the light strand as the structural support. Secure its cord loosely to branches or separate clips so removing the lights later does not pull the greenery off the wall. Finish with only a few ornaments in the open spaces. If the bottom row dips, remove weight before adding more hardware.
Make a Fresh-Branch Wall Tree
A fresh-branch tree can be a set of descending branch lengths or a tied garland built into a triangle. The first approach looks architectural; the second looks fuller and hides its supports better. Either way, assemble it on a tarp on the floor before lifting it onto the wall.

Choose and Condition Greenery
Use permissioned cuttings from your own plants or buy greenery from a reputable garden center. Do not strip one shrub or tree into a lopsided shape; Gardening Know How advises selective trimming and cautions against removing more than one-third of a plant or a single branch.
Choose pliable, green branches with flexible tips and no obvious browning. Pine, fir, cedar, spruce, and juniper are common greenery choices, but identify anything you cut before bringing it inside. If a household includes pets or small children who chew, skip unknown berries and plant material and keep all fresh cuttings out of reach.
Keep purchased greenery in a cool place until installation, then make the display as close to the day you plan to use it as practical. Unlike a cut tree in a water-holding stand, a wall branch display has no dependable reservoir. Do not spray water onto a wall-mounted arrangement or electrical connections; a cool location and prompt removal are safer ways to slow drying.
Tie Layers and Check for Hazards
Lay the longest branches at the bottom, with their cut ends facing the center or a concealed side support. Add shorter branches above, overlapping the previous layer enough to hide the wall and the tying points. Secure the main stems with floral wire or garden twine, but leave the small foliage-bearing twigs free so the display does not look cinched.
Lift the assembled layer briefly before mounting it. If stems slide, twist, or pull the wire loose, rebuild it on the floor. Once on the wall, check every branch for a sharp cut end, brittle twig, loose wire, and protruding ornament hook. Keep dried greenery away from candles; use only cool LED lights, and do not let bulbs pinch or press into a drying branch.
Add Lights and Decorations
Install lights before the ornaments. LEDs are the sensible choice for a greenery display because they produce less heat than older incandescent strands, but they still need inspection. The Cambridge Fire Department recommends listed lights, following the manufacturer’s directions, checking for frayed wires, keeping bulbs away from combustible decorations, and turning lights off when leaving or going to bed. The USFA likewise says to discard strands with frayed or pinched wires and follow connection limits.

Run the strand in a loose zigzag that echoes the tree, rather than pulling it tight across the points. Secure the battery pack or plug where it can be reached without climbing through the display. Do not connect more strands than the label allows, and do not tuck a power adapter behind a branch bundle where you cannot inspect it.
Use the lightest decorations on the highest rows. Small unbreakable ornaments, ribbon bows, paper shapes, pinecones, and dried orange slices can add texture without pulling a row down. Put heavier ornaments near supports or on the lowest row, and avoid anything with a sharp point in a walkway or at a child’s eye level.
Keep Live Greenery Fresh and Safe
Check a fresh wall tree every day or two. Look for browning, brittle needles, sagging stems, loose wire, and any branch that has shifted toward a heat source. A few fallen needles are normal; a branch that showers needles when touched is a signal to remove it, not to mist more aggressively.
RHS guidance for indoor conifers stresses keeping displays away from fires and radiators because heat drives moisture loss and needle drop. For a branch display with no trunk in water, use that advice conservatively: choose the coolest practical wall, close curtains during harsh sun, and remove the greenery when it becomes dry or brittle. Do not rely on a humidifier to make dried branches safe.
Never add candles to a wall tree. Keep it clear of fireplaces, cooking heat, heat vents, and exposed bulbs. The USFA says decorations should not block exits and that dry trees can burn very quickly; a dry branch wall deserves the same respect even though it is not standing in a tree stand.
Teardown, Storage, and Wall Repair
Take the display down before the greenery becomes brittle and before the support system starts failing. Turn off and unplug the lights, remove ornaments from the bottom upward, then take down the garland or branches in the reverse order of installation. Have a bag or sheet ready for needles so you are not dragging dry foliage across the floor.
For removable adhesive hooks, pull the release tab slowly in the direction shown on the package instead of yanking the hook straight off the wall. If a support resists, stop and warm the adhesive only if its instructions allow it; scraping paint is usually worse than taking a few extra minutes. Wipe away sap with a method suited to the wall finish, and do not rub a glossy painted surface with a rough sponge.
Store faux garland loosely in a labeled bin rather than compressing it under heavy boxes. Keep the lights dry and untangled, and test them before the next holiday. Compost clean, undecorated natural branches where local rules allow; remove wire, fishing line, plastic ties, and ornaments first.
Common Problems and Quick Fixes
The tree is sagging. Remove ornaments first and look at the row that is bending. Add a center support or split one long garland pass into two shorter pieces; more tape at the end will not fix a span that is overloaded.
The adhesive keeps releasing. The wall may be dusty, textured, damp, too cold, or carrying more weight than the hook rating. Remove the load, allow the surface to dry, and move to a compatible support system such as a picture rail or stud. Do not keep adding hooks to a failing surface.
The triangle looks lopsided. Re-mark the center line and compare the left and right row lengths before decorating. Fluffing can correct density, but it cannot correct a crooked support pattern.
Fresh branches are browning early. Move the display farther from heat and sun, remove brittle sections, and turn off any light strand that warms the foliage. If the remaining branches are dry, dismantle the display rather than trying to revive it with a spray bottle.
The lights are too bright or the cord is messy. Use fewer bulbs, shorten the visual run, or switch to a battery-powered strand. Keep the power source accessible and follow the connection limit printed on the strand.
Ornaments keep falling. Replace heavy or glass ornaments with lightweight pieces, shorten the hanging loops, and attach decorations to the garland’s stronger spine or a separate support cord. A wall tree should look layered, not overloaded.
Conclusion
The easiest wall Christmas tree is a measured faux-garland triangle supported row by row, decorated with cool LED lights and a small number of lightweight ornaments. Choose fresh branches when you can install close to Christmas and inspect them every day or two; choose lights-only or ribbon when the wall cannot carry much weight.
Measure first, protect the surface, keep the display at least 3 feet from heat when possible, and leave exits and cords accessible. When the season ends, remove the decorations before greenery dries, release adhesive tabs slowly, and store or compost the materials separately. That small amount of planning is what turns a wall Christmas tree from a clever idea into a display you can actually live with.



