How to Fluff an Artificial Christmas Tree Step by Step
Make a fake Christmas tree look fuller with a bottom-to-top method, smart branch angles, pre-lit safety checks, and storage tips that preserve its shape.

An artificial Christmas tree usually looks its worst during the first ten minutes after you assemble it. Its branches have been folded, bundled, or compressed for a box, so the finished shape is hidden inside a very flat-looking shell. The fix is not more ornaments. It is to restore the space between the branches before you decorate.
The reliable method is to work from the bottom up, but the important detail is to work from the trunk outward within each layer. Open the inner foliage first, spread the main branches second, and set the smallest tips last. That sequence gives the tree depth instead of simply making its outer edge wider.
What Fluffing Actually Fixes
Fluffing means manually separating and repositioning the branch tips of an artificial tree so they recover a fuller, more natural silhouette. It corrects compression from shipping and storage, hides some of the center pole, and creates the little pockets of shadow that make a faux tree look less like a row of folded plastic fans.
It does not create foliage that is missing. A broken hinged branch, a snapped tip, a stripped connector, or years of needle loss will leave a gap that hands cannot repair. Good fluffing helps you tell the difference between a branch that is merely folded inward and a tree that has a genuine structural or age-related problem.
The visual target is not perfect symmetry. Real evergreens have a rhythm of outward, upward, and slightly drooping growth. A convincing artificial tree has a stable triangular outline, but its individual tips should not all point in the same direction or end at the same distance from the pole.
Check the Tree Before You Shape It
Give the tree a quick inspection while it is still easy to reach. Confirm that the stand is complete, each section belongs in the right position, the pole connections seat fully, and no branch hinge or hook is visibly bent. If the tree leaned in its storage bag, correct the base before trying to correct the silhouette.
Run your eyes along the wiring on a pre-lit model before you start moving branches. Look for a pinched section, exposed conductor, cracked socket, loose connection, or a cord pulled tight around a hinge. Do not try to hide a damaged light strand with fluffing; unplug it, follow the manufacturer’s repair or replacement instructions, and do not use it if the damage is not clearly safe to repair.
The U.S. Fire Administration advises inspecting holiday lights each year, discarding strands with frayed or pinched wires, and following the manufacturer’s instructions for how many strands may be connected. Its holiday guidance also recommends keeping a tree at least three feet from heat sources and clear of exits, two placement rules that matter just as much for artificial trees as for live ones. USFA holiday fire-safety guidance
Gather the Right Tools and Protect Yourself
You need less than you might expect: work gloves, a vacuum or soft brush for shed needles and dust, and a sturdy step ladder only if the top cannot be shaped safely from the floor. A long-sleeved shirt is useful on scratchy wire tips, and a second person is safer than stretching sideways to reach the crown of a tall tree.
Clear enough floor space to walk around the tree. Put down a washable sheet if you are working indoors on a flocked tree, and keep pets and small children out of the work area until the stand is secure and the decorations are on. Work with light strings unplugged while your hands are deep in the branches unless the product instructions specifically require a different test procedure.
Avoid hair dryers, heat guns, steam, and hot water as reshaping tools. Artificial needles and coatings can deform, shed, or discolor when heated, and extra heat is a poor trade for a cosmetic job that should be done by hand.
Build a Stable Base Before Working Upward
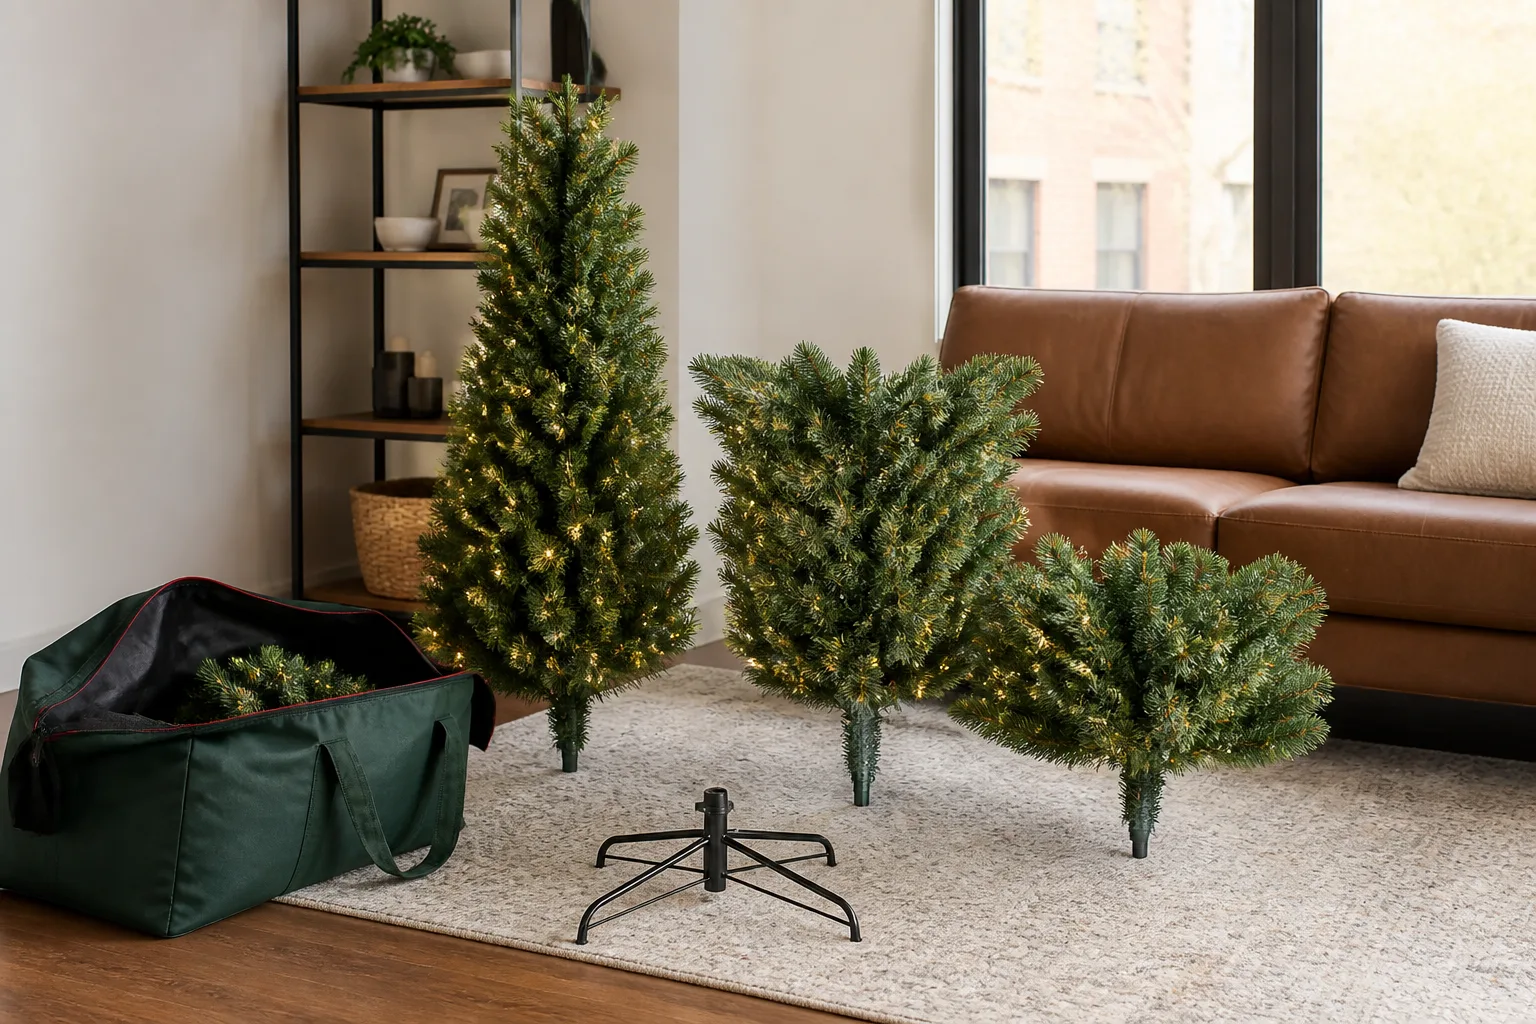
Set the stand on a level floor, then assemble the lowest tree section and check it from two directions before you touch the branches. The center pole should be vertical, the feet should sit flat, and the section should not wobble when you gently press the trunk. A tree that is crooked at the base will look uneven no matter how carefully you spread its tips.
If your tree has hook-on branches, keep the next sections on the floor until the bottom is stable and shaped. Lay each section with its connector protected, identify the top and bottom of the branch bundle, and open it while you can see the hinge or hook. For a hinged tree, you can usually assemble all sections first, but do not add the crown until you can reach it without an unsafe climb.
Build the outline before chasing individual needles. Start by opening the major branches far enough to establish the intended width of the lowest tier, leaving a little clearance around walkways and furniture. This gives you a reference for the layers above it and prevents the common mistake of making the middle of the tree wide while the base remains pinched.
Use the Inside-Out Fluffing Sequence
Treat each section like a wheel with spokes. Move around the tree in small arcs rather than finishing the entire front first, and use the same three passes on every layer: open the inner foliage, spread the primary branches, then place the outer tips. Working in a repeatable order is more important than moving quickly.
Begin at the lowest visible tier and finish it before moving up. A bottom-to-top sequence keeps upper branches from blocking your view, lets you compare one layer with the next, and reduces the chance that you lean into a finished section and flatten it again. A practical account in Homes & Gardens found that a six-foot tree took about 45 minutes to fluff; your time will vary with height, density, storage pressure, and whether the tree is new or well used. Homes & Gardens’ tree-fluffing method
Use the tree’s product photos or assembly diagram as a reference for its intended profile, not as a demand for identical branches. A slim pencil tree is supposed to leave more vertical air; a full-profile fir should have broader, layered shelves. If you force a narrow model into a wide, drooping shape, you may put stress on the hinges and make it harder to decorate without tipping.
Open the Inner Branches First
Reach through the outer tips until your fingers are close to the center pole. Separate the short inner sprigs and any foliage that has been pressed into a flat bundle, lifting some slightly upward and pulling others toward the open spaces between the main branches. This hidden layer is what covers the metal pole and creates the dark-to-light depth behind the outer edge.
Do not grab a whole bundle and yank it away from the trunk. Hold the thicker branch near its base, then move its tips one small group at a time. If the branch feels rigid or the hinge resists, stop at its natural range; force does not make a tree fuller, it turns a cosmetic job into a repair.
After the interior is open, look through the tree from the side. You should see several layers of foliage rather than a hollow tunnel straight to the pole. If you can see daylight through a large central opening, correct that now, before you spend time arranging the outside.
Fan Out the Outer Tips
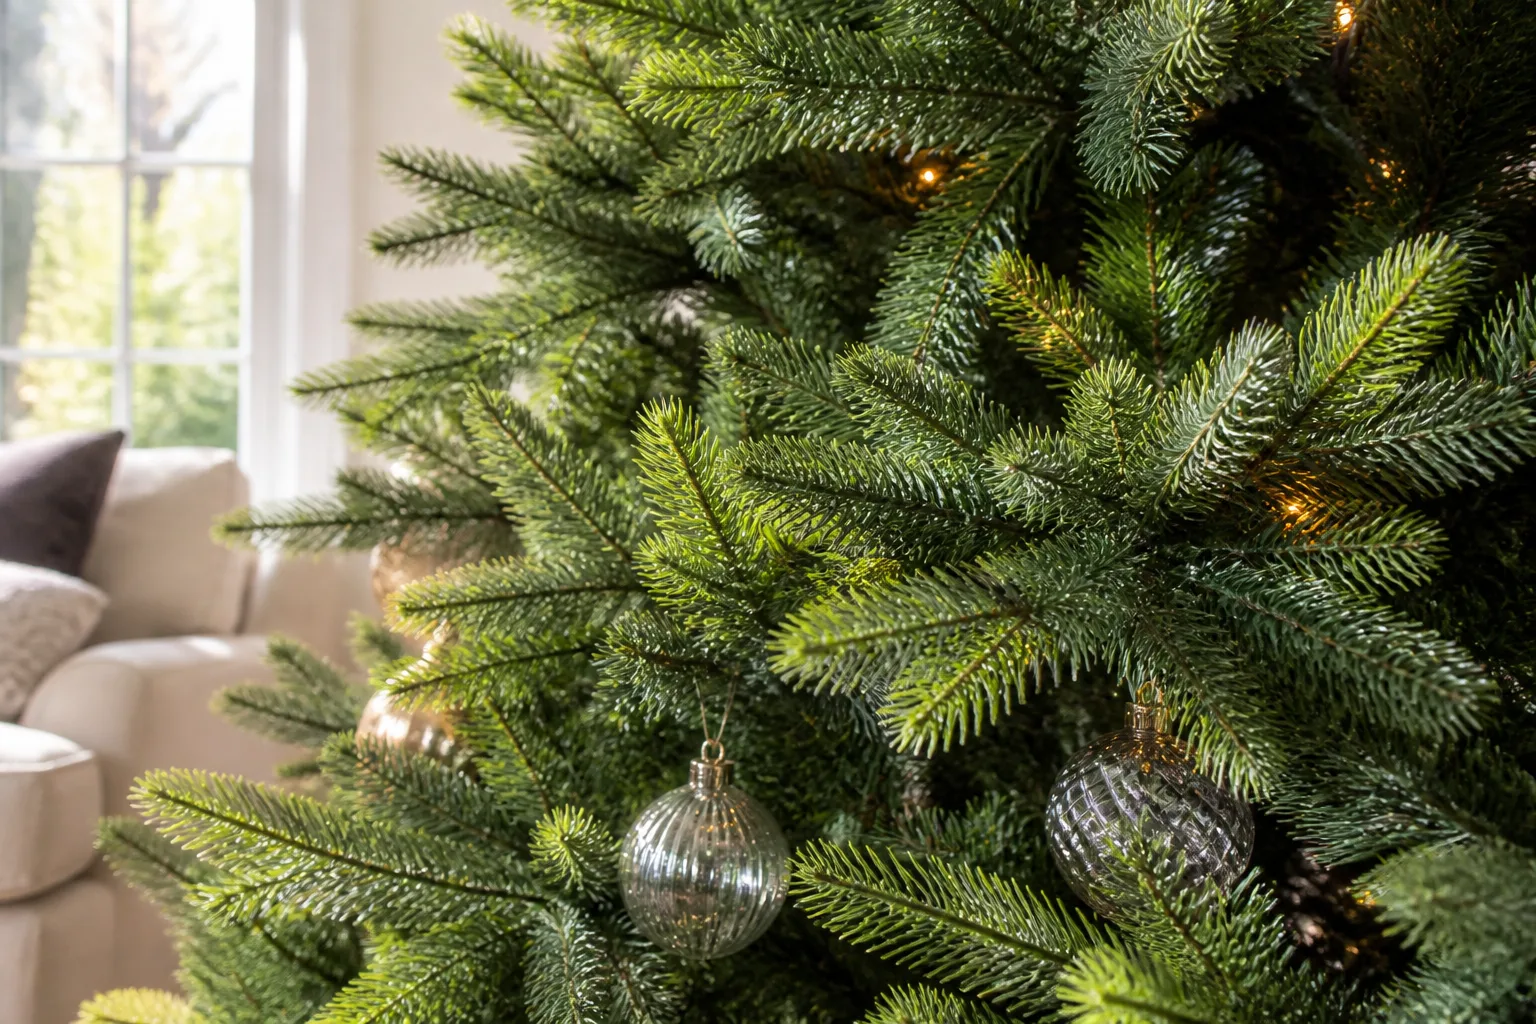
Once the interior has volume, spread the branch tips that define the outline. On a typical branch, send some tips toward the open space on either side, some slightly upward, and a few gently downward. Think of filling the gaps between neighboring branch tiers, not drawing a perfect starburst from the trunk.
Work clockwise around the section, then walk back in the opposite direction to catch the tips you missed. If a tip is folded tightly against another, separate it at the point where it joins the branch instead of bending the end sharply. A soft curve looks more natural and is less likely to stress the wire.
Leave a little variation in length. If every outer tip ends on one smooth line, the tree can look clipped; if every tip points randomly, it looks untidy. The best compromise is a consistent layer width with small, intentional differences at the edges.
Shape Each Layer for a Natural Silhouette
Step back after you finish each tier and judge the tree from several feet away. Close-up work makes a single branch feel important, but distance shows whether the section is too flat, too wide, or heavier on one side. Rotate the tree as you work if it will be seen from all angles; if it will sit against a wall, still open the back enough to keep the weight balanced and the center pole concealed.
Compare the left and right sides of the same layer before comparing the whole tree. If one side projects much farther, first look for a compressed inner branch on the shorter side rather than bending the long side inward. Releasing hidden volume usually fixes an apparent asymmetry more cleanly than trimming the outline by force.
The crown deserves a slower final pass. Its tips are shorter and often more delicate, so spread them evenly without pulling the leader off center. Leave room above the highest branch for a topper and do not use a chair or unstable furniture to reach it; the CPSC identifies falls as a major share of holiday decorating injuries and specifically advises caution on ladders and chairs. CPSC holiday decorating safety guidance
Vary Tip Direction Without Making a Mess
Use a simple direction pattern when a tree looks unnaturally uniform. On one small group, place two tips outward and one up; on the next, place one outward, one slightly down, and one to the side. Repeat the idea loosely rather than mechanically. The goal is to break parallel lines and make the branches overlap visually.
Let heavier lower branches angle down a little and keep the lighter upper branches more upright. This mirrors the way a real tree broadens toward its base, gives ornaments different hanging depths, and prevents every bauble from sitting on the same flat front plane. Large ornaments are also easier to support when they hang near a thicker branch or closer to the trunk.
Do not bend every tip downward to hide a gap at eye level. A drooping section can make the whole tree look tired, and it may push the decoration load toward the floor. Correct the branch underneath the gap first, then use a small change in tip direction only if it improves the silhouette from across the room.
Fluff Pre-Lit Trees Without Damaging the Wiring
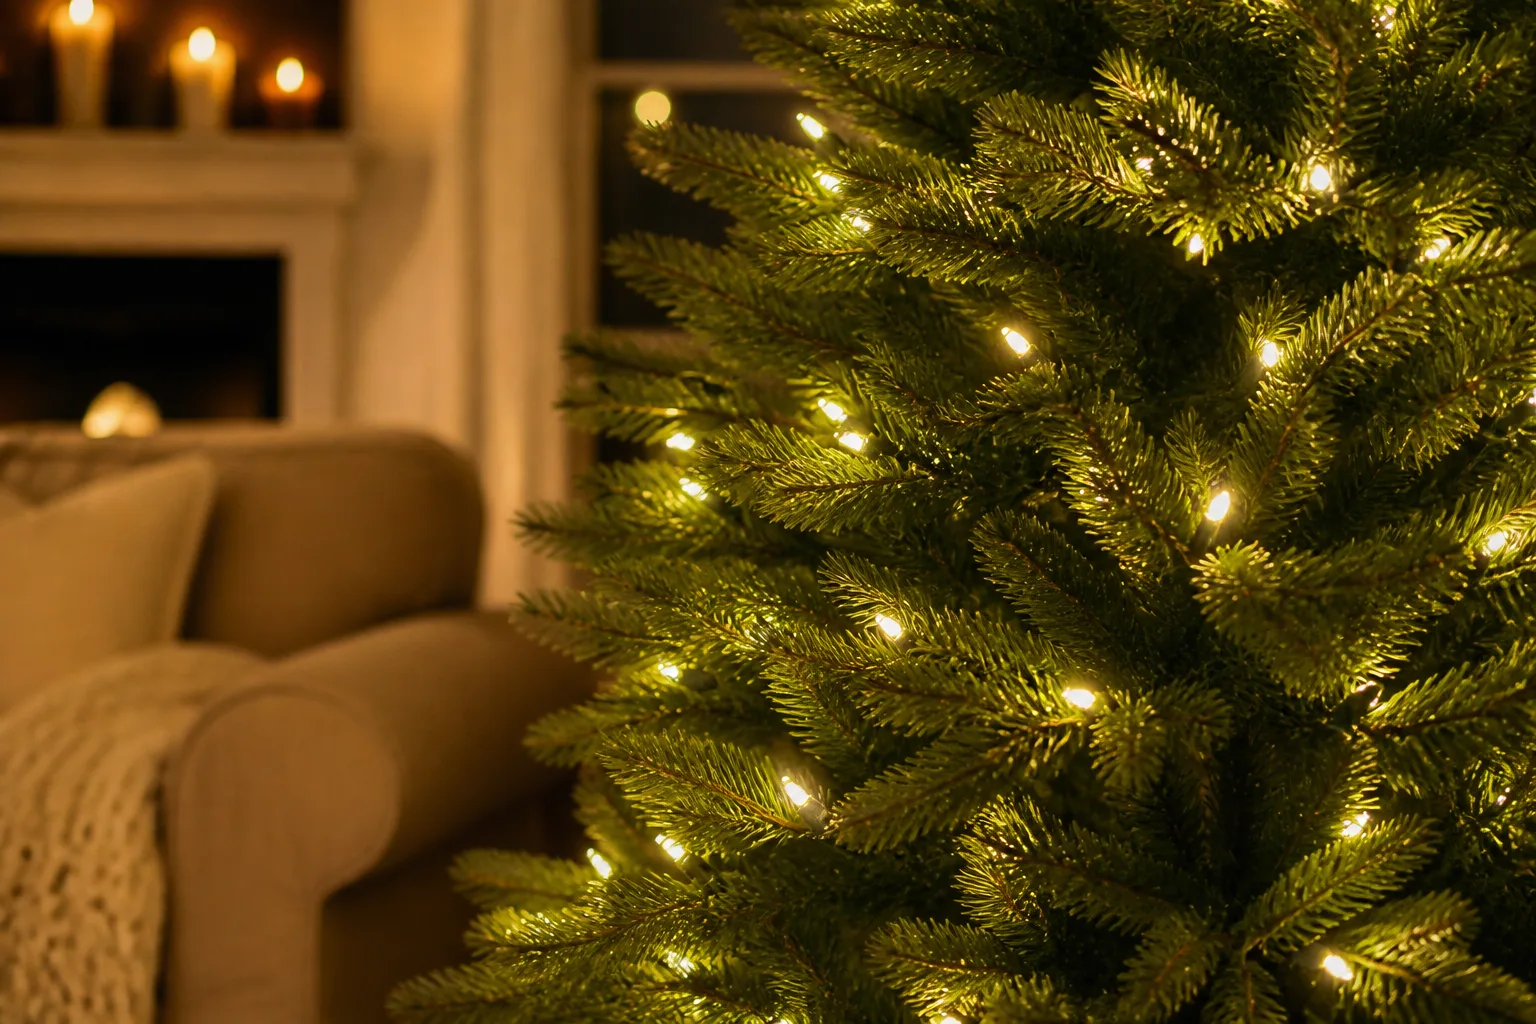
Pre-lit trees need the same branch technique with one additional rule: move the foliage, not the light strand. Test the lights before shaping, then unplug them while you work closely around the sockets and wiring. If the tree uses section-to-section electrical connectors, make sure each connection is fully seated and not trapped between metal parts before you continue.
As you open each tier, trace the wire visually. Keep it resting in the channel or position intended by the manufacturer, and free it from any branch that has wrapped around it. Never use the cord as a handle, pull a socket to bring a branch forward, or bend a light strand into a tight kink to fill a dark spot.
For an unlit tree, establish most of the shape before adding lights. For a pre-lit tree, the sensible order is slightly different: inspect and test the lights, open the branches, then make a final light-placement pass while the gaps are visible. Homes & Gardens describes positioning lights from the bottom upward and tucking them deeper into the tree so the glow comes through the foliage; use that as a placement idea, but follow the light and tree manufacturer’s instructions first. Homes & Gardens on shaping and light placement
Use only light sets appropriate to the product and discard damaged ones. CPSC recommends lights tested for safety by a nationally recognized testing laboratory, checking sockets and wires, and following connection limits rather than assuming that every strand can be added to every tree. An artificial tree marked “fire resistant” is more resistant to ignition, not fireproof; keep candles and other open flames away from it. CPSC guidance for artificial trees and holiday lights
Treat the lighting label and the tree’s material as part of the design brief. UL research summarized by IAEI Magazine notes that pre-lit artificial trees can contribute significant fuel in a room fire and that testing considers tree design, branch arrangement, lights, and decorations. That does not mean you should leave the tree flat; it means a safer-looking display starts with listed, intact equipment, sensible spacing from heat, and decorations that do not overload or crush the wiring. IAEI Magazine summary of UL artificial-tree fire research
Diagnose Gaps After the First Pass
Do not decide that a tree is sparse until you have shaped one complete section and viewed it from normal room distance. A compressed center, a mis-seated branch, and an actually missing branch can look identical when you are standing six inches away. Give every gap a cause before you reach for ribbon or extra foliage.
| What you see | Most likely cause | First fix |
|---|---|---|
| A long vertical opening near the trunk | Inner sprigs are still bundled | Reach inward and fan the hidden layer toward the opening |
| A flat patch on the outside | Several tips point in one direction | Separate the tips and redirect two or three sideways |
| One tier is wider than the next | Main branches were opened unevenly | Compare both sides and reset the shorter side before touching the outline |
| A gap stays open after several angles | Broken, missing, or badly aged foliage | Inspect the hinge or connector; then repair, fill, or replace |
| A dark pocket appears only when lights are on | Wire or socket is trapped or poorly routed | Unplug, free the wire, and recheck the light strand |
If the tree looks better from the front than the side, rotate it and find out why. Often the front was given more attention while the back remained compressed, which creates a lopsided load and makes the tree look flat whenever someone walks past it. When the tree is intentionally against a wall, concentrate detail on the visible three-quarter view, but do not neglect the base or the side that controls stability.
When to Reposition Branches
Reposition a branch when it is healthy, attached, and simply occupying the wrong visual space. Move the whole branch first, then separate its tips. A branch that is too high can leave a shelf-like void beneath it; lowering it slightly may fill that void more naturally than adding a new decoration.
Use small corrections and reassess from a distance after each one. If a branch must be twisted hard, the hinge is cracked, the hook will not seat, or the wire insulation moves with it, stop and inspect the part. A cosmetic improvement is not worth weakening the connection or creating an electrical hazard.
When to Add Filler or Retire a Tree
Use filler only after the tree’s own structure has been opened. A garland, ribbon, greenery pick, or extra faux stem can bridge a stubborn gap, but it should support the design rather than disguise a tree that is failing across multiple layers. Choose filler in a similar green or use a deliberate contrasting material; a single bright patch usually draws attention to the hole it was meant to hide.
Place the largest filler elements deeper in the tree and secure them to a strong interior branch, not to a fragile tip. Keep additions light enough that the branch does not sag, and do not block ventilation around light sockets or trap a cord under a tightly wrapped garland. For a family tree with a few sentimental thin spots, larger ornaments and ribbon can be kind, practical camouflage; spread them across the silhouette so the eye is not sent to one “repair” zone.
There is a point where replacement or professional repair is the honest answer. Retire the tree or seek a compatible replacement section if the stand is unstable, the pole or connector is damaged, the branches are brittle, the plastic has melted, the flocking is shedding heavily, or the pre-lit wiring repeatedly fails. Fluffing is a shaping technique, not a structural repair or a way to make unsafe equipment usable.
Decorate in an Order That Preserves Fullness
Finish the fluffing pass before you hang anything heavy. Once the shape is stable, add lights or complete the final pass on pre-lit lights, then place ribbon or garland, followed by large ornaments, medium ornaments, and small accents. This order lets you see the tree’s framework and keeps the biggest visual elements from hiding a gap you should have corrected.
Tuck ribbon into the depth of the tree instead of laying it only on the outer surface. Let it dip behind one branch and reappear in front of the next, using the existing layers to hold its shape. Hang heavy ornaments closer to the trunk or on thicker branches, and reserve delicate tips for lightweight ornaments that will not pull them out of position.
Keep the lower edge accessible until the end. A tree skirt or collar can make the base feel finished, but it cannot compensate for a stand that wobbles or a bottom tier that has never been opened. The CPSC also recommends keeping decorations with sharp edges or small removable parts away from young children, so the final decorating pass should account for who can reach the lower branches.
If you use outdoor lights or place the tree in a porch or enclosed outdoor area, use products labeled for outdoor use and the appropriate protected receptacle. For an indoor tree, keep it out of doorways and away from fireplaces, radiators, space heaters, vents, and candles. A fuller tree is more attractive, but it should not be fuller because cords, heat sources, or exits have been hidden from view.
Store the Tree So Next Year Is Easier
The last fluffing decision happens when you take the tree down. Photograph the finished shape from the front and side, note which section is the bottom, and remove decorations before you compress anything. If you leave lights attached, secure plugs and connectors so they cannot snag or get crushed; never yank a light string out by its cord.
Let the tree cool and dry completely, then remove large pieces of garland and filler before the branches are folded. Loosen tips in the same general direction as the branch rather than bending every one sharply against the wire. If the manufacturer’s instructions specify a particular fold or storage direction, use that over a generic packing method.
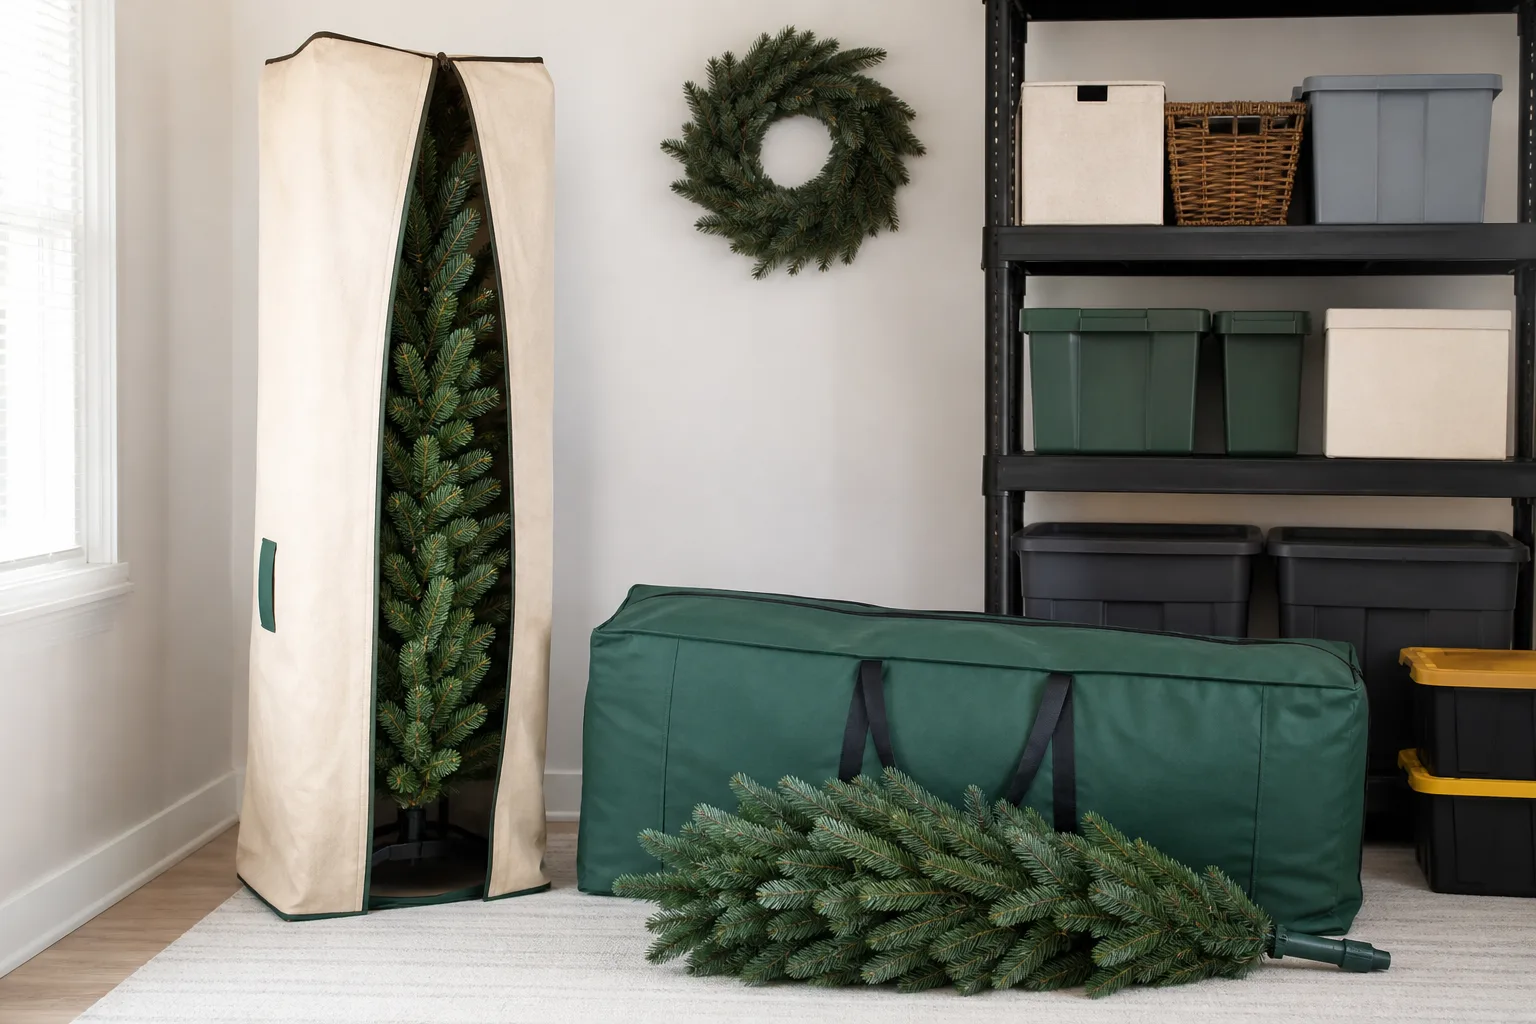
Use a tree storage bag or a container large enough that the sections slide in without being forced. The goal is protection from dust, light, moisture, and impacts—not the smallest possible package. Christmas World emphasizes inspecting damage before fluffing and treating storage as part of preserving the tree’s shape; its practical guide also notes that upright storage can reduce the reshaping work when space allows. Christmas World on fluffing and storage
Store the bag in a dry, reasonably cool place and keep it off a damp floor. Avoid stacking heavy boxes on top of the foliage, tying the sections so tightly that the tips stay crushed, or leaving the tree in direct sun for months. An upright bag is useful when the tree can stand securely without blocking a walkway; horizontal storage is fine when each section is protected and the bag is not overloaded.
Before closing the bag, put the stand hardware, gloves, and the tree’s assembly instructions in a labeled pouch. That small bit of organization prevents next year’s first step from becoming a hunt for missing screws, and it makes it easier to inspect the same high-wear points—hinges, connectors, sockets, and cords—before the tree goes up again.
Conclusion
To fluff an artificial Christmas tree well, open each layer from the trunk outward, move around the whole tree, and make small corrections only after stepping back to judge the silhouette. A full-looking tree comes from depth, varied tip direction, and a stable base—not from forcing every branch wide or covering every gap with decorations.
Inspect pre-lit wiring before you shape, keep the finished tree away from heat and exits, and treat genuinely broken or sparse sections as repair or replacement decisions. Then pack the tree without crushing it. The result is a tree that is easier to decorate this season and easier to make beautiful next season.



