How to Get Rid of Flour Mites in Your Pantry Safely
Find flour mites, decide what to discard, clean pantry shelves and crevices safely, then prevent a return with tight containers and dry storage for food.

If flour or pantry dust seems to move, treat it as a possible stored-food mite problem: close the suspect package, keep it away from other food, and inspect the dry goods stored beside it. The safest fix is to remove contaminated food, vacuum crumbs and mites from cracks, wipe shelves after the loose debris is gone, and let every surface dry before putting sealed food back.
Flour mites are small enough that a quick glance rarely identifies a species, and pale specks in a pantry are not always mites. Protect food first, remove the likely source, reduce dampness, and ask for an identification if specks continue after a complete inspection.
The fastest safe way to remove flour mites
Start with the food, not a spray. Grain mites can build up in a stored product and then disperse onto nearby shelves, packages, and counters; extension guidance consistently prioritizes finding and removing the infested material, cleaning cracks, and sealing the remaining goods. Purdue Extension describes a moving dust-like layer as a sign that an infested item is nearby and recommends sanitation and sealed storage instead of routine kitchen insecticide use.
Use this sequence:
- Stop using the suspect package. Close it or place it inside a second bag or lidded container while you clear the shelf.
- Remove visible contamination. Seal the suspect food and put it in an outdoor trash bin; do not pour it into a compost pile or pet-food bin.
- Inspect nearby dry goods and feed. Check both open packages and the seams of unopened paper or thin plastic packs.
- Empty the storage area and vacuum first. Use a crevice tool around shelf pins, joints, corners, and cabinet seams; then empty the vacuum outdoors.
- Wipe, rinse the cloth, and dry. A lightly damp, soapy cloth removes residue after loose flour has been vacuumed. Do not leave wet shelves or cloths in the cabinet.
- Return only clean, dry, sealed products. Recheck for moving specks and damp packaging over the next few weeks.
Cleaning around a live source wastes effort, while washing loose flour first can smear it into seams. Closed containers and source removal also reach the problem inside packages where a general insecticide treatment cannot.
What flour mites look like—and what they are not
In agricultural references, “grain mite” commonly refers to Acarus siro; people also use “flour mite” broadly for tiny mites found in stored foods. The Canadian Grain Commission describes A. siro as a soft-bodied, white mite under 1 millimeter long; adults have eight legs, while their larvae have six. The Canadian Grain Commission grain-mite identification page cautions that other mites and some psocids can look similar.
The clearest clue is a patch of fine dust that appears to crawl on flour, a bag, a shelf, or a counter. Heavy infestations can leave tan or brownish dust from mites, shed skins, and waste, sometimes with a stale, sweet, or mint-like odor. These clues point toward a nearby source but do not confirm a species.
Flour mites vs. booklice, flour beetles, and dust
At home, compare the setting and shape before choosing a control step. A simple magnifying lens can help you see whether you are looking at a moving, pale speck, a defined beetle, or a small insect with a more distinct head and body. You may not be able to count legs reliably without stronger magnification; use the pattern as a clue, not a home microscope diagnosis.
| Possible pest | What is useful to notice | Typical clue |
|---|---|---|
| Flour or grain mite | Tiny, pale, soft-bodied; may look like moving dust. Adults have eight legs. | Often associated with flour, grain, pet food, damp goods, or mold. |
| Booklouse (psocid) | A small insect with a distinct head and body, not an eight-legged mite. | More likely around damp, mold-prone paper, walls, or stored food; flour can be involved when mold is present. |
| Flour beetle | A clearly shaped reddish-brown beetle, usually several millimeters long—much bigger than a mite. | Adults crawl through flour or cereal; the species may require magnification to distinguish. |
| Household dust | Does not move by itself. | If “movement” is uncertain, watch one speck under a lens or take a clear photo before treating. |
The University of Minnesota Extension pantry-pest guide describes flour beetles as elongated, reddish-brown insects about 3/16 inch long—several times larger than a grain mite. Canada’s grain-mite guide notes that some booklice overlap mites in size, so the food and moisture context matters as much as the silhouette.
Do not diagnose an insect from one pale speck alone. If the movement is uncertain, watch a spot with a magnifying lens or take a close photo beside a familiar object for scale; if the specks occur in several rooms without a stored-food source, ask an extension office or pest professional to identify them before treating the home.
Why flour mites show up in a kitchen
Flour mites usually arrive with an infested food or feed product, but the source can also be a package that has been sitting open, a damp spill in a cabinet joint, or another stored good that has developed mold. They feed on stored food and may also feed on fungi growing on it. That means a musty product or a pantry with a leak, condensation, poor airflow, or humid storage deserves special attention. Washington State University PestSense explains that stored-food mites prefer moist areas and often hide in cracks near their food source.
The source is not always obvious. A damaged or damp bag is a warning sign, but an infestation can arrive in a package or develop later if a food product sits in a warm, humid cabinet. Finding mites does not prove that your kitchen is dirty or point to one store; it means you should search for accessible food and check storage conditions. Stored foods can be infested before purchase or later in the home, and packages of many ages can be affected, according to University of Minnesota Extension.
A practical guide from Anchor Pest Services, written by a New Hampshire-licensed pesticide applicator, likewise frames the fix as removing contaminated goods and improving dry, sealed storage rather than treating the pantry as a general cleanliness problem.
Step-by-step: clean a flour mite infestation
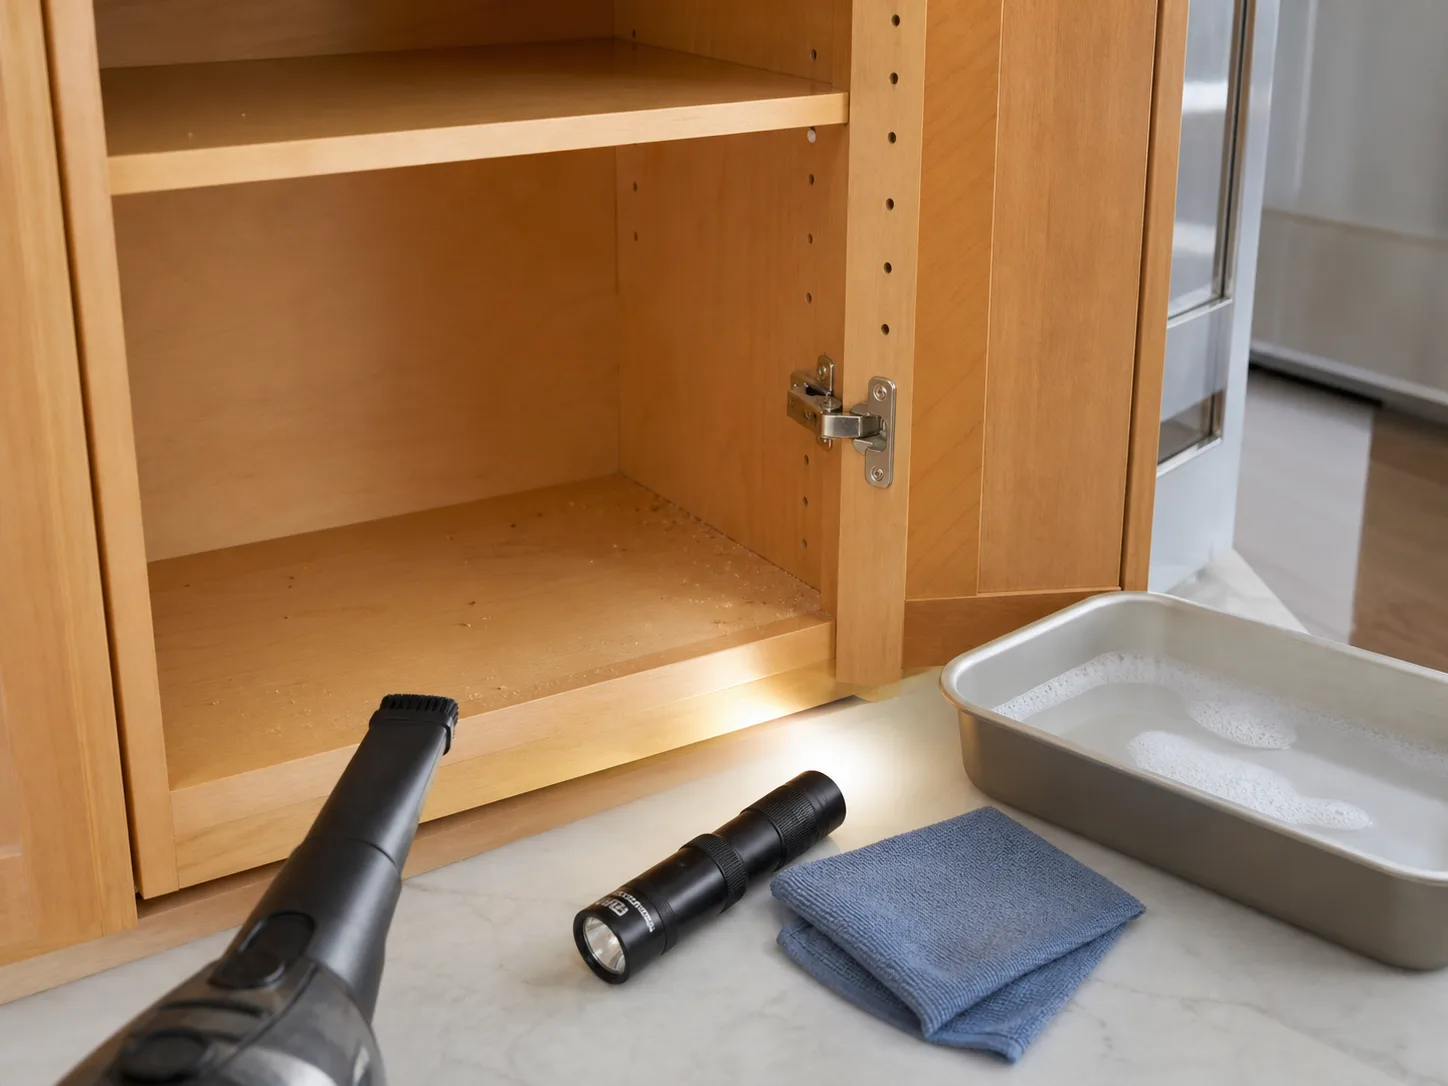
Empty the affected cupboard or pantry bay rather than moving packages one at a time. Work over a washable surface, keep a trash bag nearby, and do not shake open bags. If you have a known mite allergy or asthma triggered by dust, minimize disturbance and ask someone else to handle a heavy infestation; Purdue Extension notes that material from heavy infestations can become airborne and that grain mites can be allergenic.
Bag and remove infested foods
Place any visibly infested package directly into a sealable trash bag. If its wrapper is dusty, enclose it before carrying it outside, then put the bag in household trash rather than moving it to an animal-feed bin, compost pile, or another food-storage area. This contains loose mites and contaminated dust during disposal.
Do not try to rescue clearly infested flour by sifting out the visible particles, freezing it, or baking it. Mites and their fragments may be too small to remove fully, and a food product that smells musty, looks damp or clumped, or has visible mite dust is not a good candidate for eating. Washington State University PestSense and Purdue Extension both advise discarding contaminated home food or feed; sealing and discarding one affected package is a smaller loss than repeatedly cleaning around a source you have kept.
Search beyond the obvious flour bag
Inspect every susceptible product on the same shelf and any similar item stored nearby. Include flour, cornmeal, pancake or cake mixes, oats, cereal, rice, pasta, wheat germ, dried fruit, nuts, seeds, spices, powdered foods, birdseed, dry dog or cat food, and treats. Check the bottoms and folded seams of bags, cardboard flaps, jar shoulders, lids, and the shelf directly beneath the product; tiny mites may be easier to see on a dark surface than in pale flour.
Look for movement, fine tan dust, stale or sweet odors, dampness, mold, clumping, or a damaged seal. If a package shows any of those signs, bag and discard it. If it is dry, intact, and has no signs of infestation, wipe its outside and move it temporarily into a clean, sealed container while you finish the inspection. A product already protected in a clean, tightly closed glass or metal jar can usually stay if its contents and lid rim are clean; inspect the outside before returning it.
Also check a nearby pet-food bin, birdseed, backup baking ingredients, and dried seeds or food-based decor. The University of Minnesota Extension recommends inspecting susceptible foods broadly because more than one package can be involved.
Vacuum dry debris, then wash and dry
With the shelf empty, vacuum the loose flour, mites, dead skins, and crumbs first. Use the crevice attachment along cabinet corners, shelf-support holes, drawer slides, hinge plates, trim, and the joint where a shelf meets the back wall. A small hand vacuum or a vacuum with a narrow tool is useful; move slowly enough to reach fine debris rather than just the open shelf surface.
Empty the vacuum canister outdoors into a sealed bag, or remove and discard the vacuum bag. Follow the manufacturer’s directions for washable bins or filters and let them dry fully. Do not blow dust into a neighboring cupboard.
After the dry debris is gone, wipe the shelf and cabinet surfaces with a clean cloth and warm, soapy water. Rinse the cloth often and change the water if it becomes floury; do not scrub a dry mound of flour into a paste before vacuuming. Purdue Extension’s grain-mite guidance recommends wiping flat surfaces with hot soapy water and using a crevice tool for cracks that hold mites and food particles.
Rinse away soap if the surface is intended to contact unwrapped food or containers, and then dry it completely with a clean towel or by leaving the cupboard open. Never mix cleaning products, and do not assume bleach, ammonia, vinegar, or a disinfectant will prevent mites from returning; removing the food source and reducing dampness are the important controls. Wash reusable jars and bins with dish detergent, rinse, and let them dry completely before refilling.
Which foods should you discard?
Discard food or feed if you find live mites, mite dust, shed skins, visible webbing or insects, mold, an off odor, damp clumping, or an opened package that has been directly contaminated. Do not taste a suspect product to decide whether it is safe. Keep the sealed bag away from children and pets until it is outside in the trash.
You do not need to throw out every item in the kitchen automatically. A clean, intact can or tightly sealed jar is less exposed than an open sack; wipe its exterior and inspect the lid before it returns. Check nearby packages at the seams, and discard a product if the seal is questionable or residue is inside.
For pet food and birdseed, follow the same rule as human food: discard material that is visibly contaminated or damp. WSU PestSense advises promptly discarding contaminated human or animal food and cleaning the storage area. It notes that mites themselves are not considered a health hazard to animals, but molds associated with infested feed may produce toxins; visible mold or moisture in feed is therefore a reason to discard it and ask a veterinarian for case-specific advice if an animal ate it or seems unwell. WSU’s stored-food mite guidance is especially relevant when the source is pet food or feed.
Can freezing or heating infested flour save it?
Freezing or heating may kill some pest stages under tested conditions, but that does not make visibly contaminated flour clean or appropriate to eat. Freezing does not remove mite bodies, waste, or mold, and sifting may leave microscopic fragments. Discard flour with visible mites or mite dust instead of trying a home salvage treatment.
Stored-product guidance is not perfectly uniform. The Pacific Northwest Insect Management Handbook lists temperature-based treatment as one option for suspected mite-infested food, while WSU PestSense and Purdue Extension advise discarding infested home food. These approaches address pest mortality, not the same question: freezing or heating may kill mites, but it does not remove mite bodies, waste, or mold. For visibly contaminated flour, sealed disposal is the more dependable household choice.
Avoid using a microwave, warm windowsill, oven, or hot car as a quick fix. Uneven heating can damage food or packaging without reliably treating every stage. If a food-storage business or a large commercial feed store has a mite problem, it needs a product- and facility-specific plan from a qualified pest professional; home pantry advice should not be scaled up to bulk grain or food processing.
Are flour mites dangerous to people or pets?
Stored-food grain mites are not the parasitic mite species associated with bites. A pantry sighting does not show that mites are living on a person or pet, but contact with the mites or their debris can irritate skin—a reaction often called grocer’s itch—and sensitized people may react. Washington State University PestSense describes this irritation, and Purdue Extension notes that grain mites can be allergenic.
Limit exposure while cleaning. Avoid dry sweeping or shaking an infested bag, wash your hands after handling contaminated packaging, and launder clothes that picked up visible dust. If you have persistent itching, a widespread rash, wheezing, swelling, or another concerning reaction, stop the cleanup and contact a healthcare professional; do not assume every skin symptom is caused by pantry mites. If a child or pet has eaten a contaminated product and develops symptoms, contact a medical professional or veterinarian for case-specific advice.
Why sprays are the wrong first response
Do not spray flour, food packages, dishes, shelves, drawers, or a food-preparation surface with a pesticide. A household spray cannot reach mites inside a sealed package, and a chemical residue can create a second problem if it contacts food or surfaces that touch food. The University of Minnesota Extension says insecticides are not recommended for stored-food cupboards and that food exposed to insecticide should be discarded; WSU PestSense likewise advises against pesticide use in or near food-preparation and storage areas.
“Natural” powders and oils are not automatically safe around food. Do not dust pantry shelves with diatomaceous earth, boric acid, essential oils, or other pest products unless the exact product label expressly allows the exact site and use; even then, follow all restrictions and food-contact cleanup directions. Never treat a food item itself unless the pesticide label explicitly identifies that use, which ordinary household pest products do not.
The National Pesticide Information Center’s label guide explains that a pesticide label states which sites and uses are permitted, the precautions, and any cleanup or re-entry instructions. If an unusual or severe infestation persists after source removal, speak with a licensed pest-management professional and ask for pest identification and source-finding before any treatment. A professional should explain how food and food-contact surfaces will be protected and follow the exact product label.
How to prevent flour mites from returning
Prevention is mostly about denying mites a damp, accessible food source. Keep dry foods closed, buy amounts you will use within a reasonable period, and clean spills as soon as they happen. In a pantry that has had mites, make storage containers and a quick weekly shelf check part of the routine until the source has been gone for several weeks.
Make sealed storage your default
Transfer opened flour, cereal, grains, nuts, seeds, dried fruit, and pet food into clean containers with tight-fitting lids. Glass, metal, or sturdy plastic with a sound gasket or close-fitting lid works better than a folded bag or thin clip because a sealed container limits both access and spread. Do not pour a new bag into an old container before washing and drying it; leftover crumbs can carry a hidden food source into the next batch.
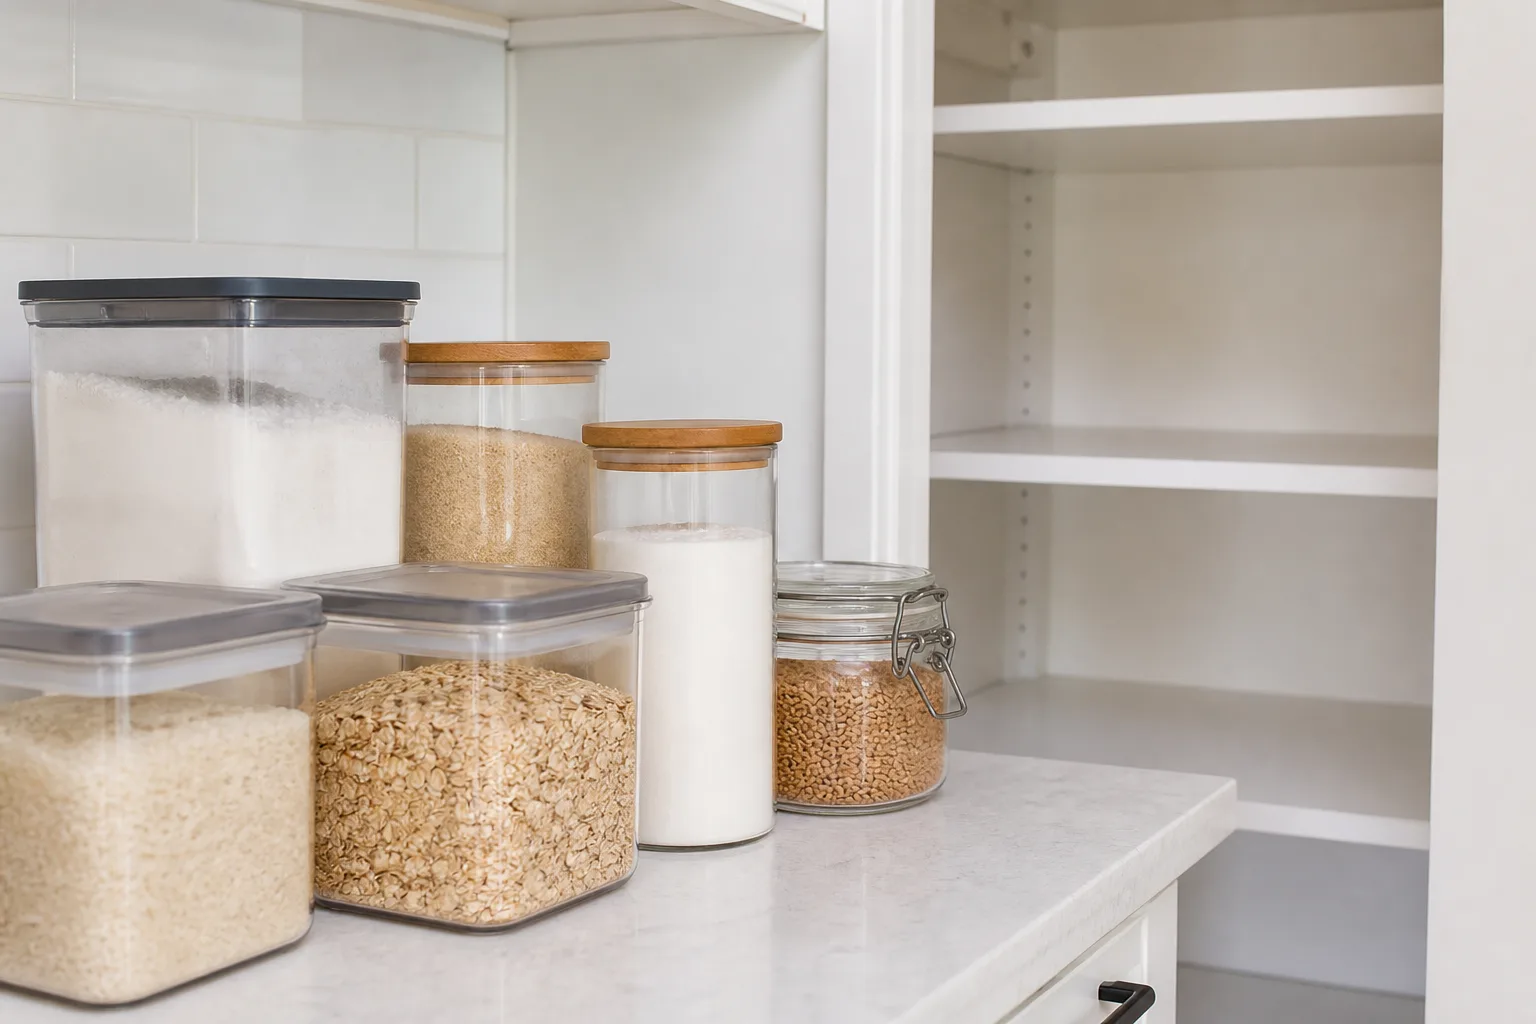
Buy manageable quantities and use older products first. University of Minnesota Extension suggests buying dried foods in quantities that can be used in a few months and rotating older packages forward. Check packaging before purchase, avoid wet or damaged bags, and mark the date on a container if you tend to keep whole grains or specialty flours for a long time. For ingredients used rarely, keep a smaller amount on hand and inspect older stock before you use it.
Keep the storage area dry and usable
Look for the conditions that make stored food less stable: a leaking pipe, damp wall, condensation under a sink, a spill beneath a bin, poor air movement, or a bag stored against a cool exterior wall. Repair the moisture source where possible, move dry goods away from damp areas, and leave enough room for air to circulate between packages. A dehumidifier may help a persistently damp room, but it does not replace removing a leaky product or spilled food.
Do not rely on bay leaves, mint, or scented sachets to keep mites out. A smell is not a sealed barrier and does not remove an infestation inside food. The practical barrier is a clean, dry shelf and a lid that closes fully. Keep birdseed and pet food in a separate, sealed bin if they are stored near human food, and clean their scoop and bin before refilling.
How long cleanup takes and what to monitor
One thorough source removal and cabinet cleanup may stop the visible activity, but it is reasonable to inspect the area more than once. Purdue Extension notes that immature grain mites can enter a resting stage and survive for several weeks when conditions are unfavorable. That does not mean every pantry problem lasts that long; it explains why one clean shelf and one pest-free day are not proof that the source is gone.
For the next few weeks, check the original shelf, adjacent packages, and nearby pet food or seed. Scan clean surfaces with a flashlight and inspect suspect seams with a magnifying lens. If moving dust returns, search again for dampness, residue behind a shelf, or a forgotten package rather than increasing sprays or fragrances.
If no new signs appear and foods stay dry and sealed, return to your normal routine. One speck outside the cabinet does not prove a new infestation, but repeated sightings near dry goods deserve another inspection. Note which package was discarded and which cupboard was cleaned to spot a recurring moisture or storage pattern.
When to seek an expert ID or pest professional
Ask a local cooperative extension office or pest professional to identify a specimen if specks keep appearing after you inspect dry foods and clean the area. Save a close-up photo or sealed sample and note where it appeared, what food was nearby, and whether the area is damp.
Get professional help if the mites spread to several rooms, repeatedly return from an unknown source, come from a wall cavity or animal nest, or involve a large quantity of feed or food stock. The British Pest Control Association’s flour-mite advice also recommends professional assistance for a heavy infestation. Ask any provider to identify the pest and source, explain why a treatment is needed, and show how food and food-contact surfaces will be protected. If the problem is confined to a pantry and the source is found, disposal, thorough cleaning, dry storage, and monitoring are usually the first-line steps.
Common mistakes that make pantry mite problems linger
The most common setback is removing only the first obvious bag. Check the whole shelf and nearby pet food, birdseed, and backup ingredients, because one forgotten package can continue to seed the area. A second mistake is cleaning only the flat shelf and skipping the holes, seams, and corners where flour dust can remain.
Do not wipe a pile of loose flour into cabinet cracks before vacuuming it, but do not avoid water altogether. Vacuuming first and then using a clean soapy cloth is the supported sequence; let the surface dry before storage resumes. Do not assume an airtight-looking lid is sealed if it does not close flush, and do not reuse a damp bin immediately after washing.
Finally, avoid choosing a control method before you know what the specks are. Flour mites, booklice, and flour beetles differ in appearance and may point to different food or moisture sources. If the observation is uncertain or sightings continue, get an identification; indiscriminate pesticide application can add exposure without reaching the source.
Conclusion
To get rid of flour mites, remove the contaminated food, inspect every nearby dry good and feed product, vacuum cracks before wiping, dry the pantry fully, and seal the remaining food. Pay particular attention to damp or mold-prone storage, since mites can feed on fungi as well as stored foods. Do not try to save visibly infested flour by sifting, heating, or freezing it, and do not spray food or food-contact surfaces outside the exact directions on a product label.
If the moving specks return, search again for a missed package or moisture source and get help identifying them if the pantry looks clean. Once the source is gone, a dry shelf, tight containers, and periodic inspection are the controls that keep the problem from restarting.



