How to Grow Mushrooms at Home With 3 Simple Methods
Grow mushrooms at home with a kit, an oyster bucket, or an outdoor log or wood-chip bed. Compare setup, timelines, moisture needs, and the best beginner route.
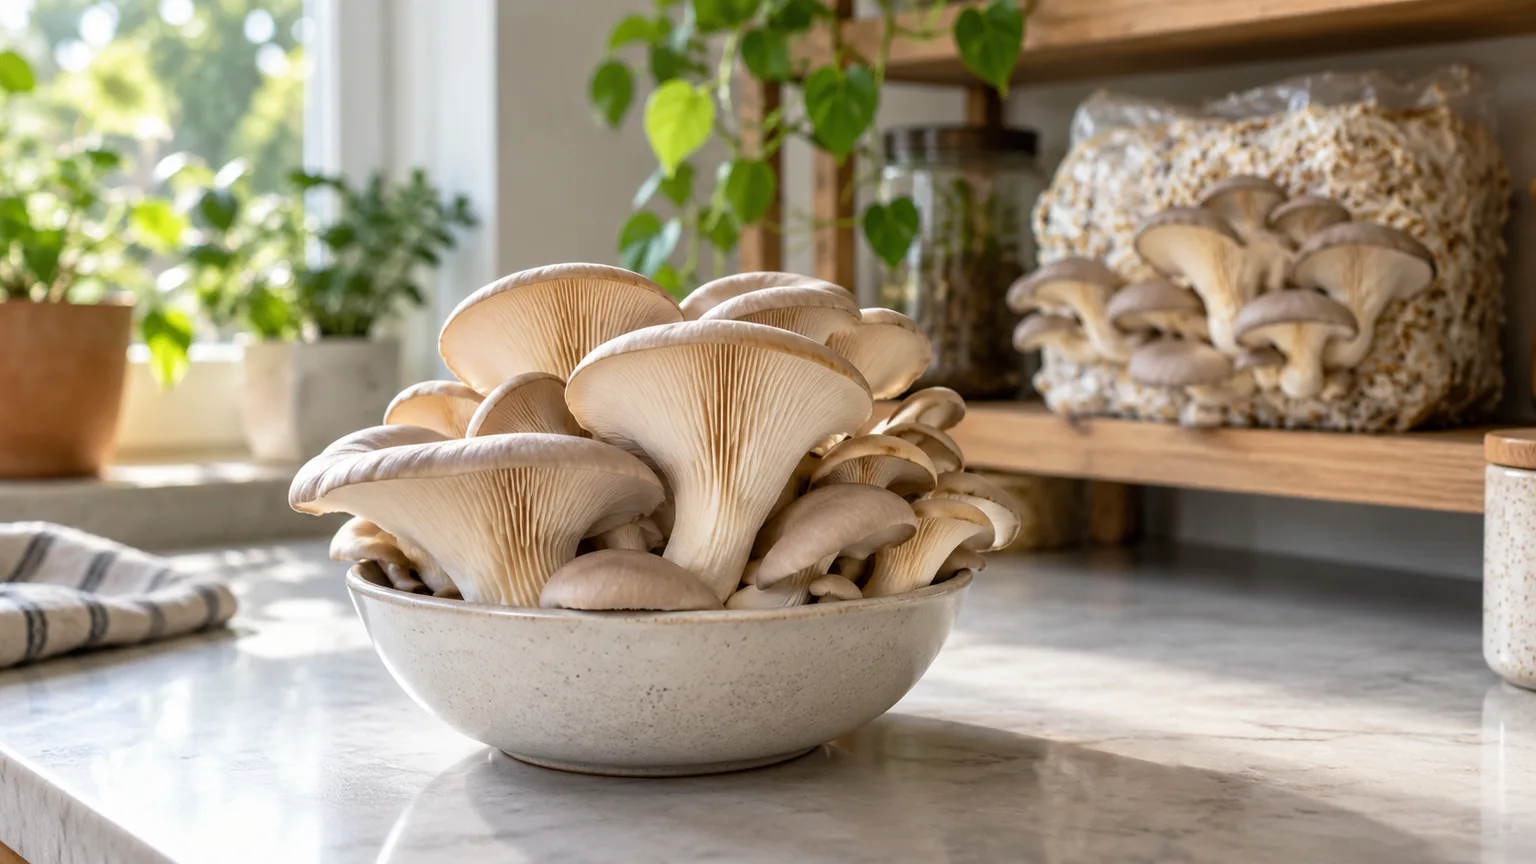
Growing mushrooms is less like planting a vegetable and more like managing a living culture. The edible cap is only the brief fruiting stage; most of the organism is hidden as mycelium, a network of fine fungal threads that spreads through a food source called the substrate. You introduce it with spawn, which is material already colonized by the mushroom you want to grow.
That distinction makes the first decision easier: buy a colonized kit for the quickest, least technical start; use oyster spawn and pasteurized straw for a lower-cost bucket grow; or inoculate a hardwood log or shaded wood-chip bed for a slower outdoor crop. Each route has a different species match and timeline, so the right method depends more on your space and patience than on a single “best” mushroom.
Match the Method to Your Time, Space, and Goal
| Method | Good beginner match | Typical timeline after setup | Best fit |
|---|---|---|---|
| Ready-to-fruit kit | Oyster or lion’s mane | Often days to a few weeks after activation, depending on the kit | First harvest indoors with minimal equipment |
| Oyster bucket | Oyster mushrooms on straw | Several weeks after inoculation, including colonization | A reusable container and hands-on preparation |
| Outdoor wood | Shiitake logs or wine-cap beds | Months to a year or longer for logs; wine caps may fruit in a suitable season | Shade, outdoor space, and patience |
These are planning ranges, not guarantees. A kit is already colonized, while a bucket or log must first be colonized by mycelium; species, strain, temperature, spawn quality, and the grower’s handling all change the clock. Cornell Small Farms distinguishes those incubation and fruiting stages and notes that the preferred wood and production method vary by mushroom species. (Cornell Small Farms Program’s indoor-production guide)
For a first harvest soon, start with a kit
A ready-to-fruit block removes the hardest beginner variables: choosing a substrate recipe, pasteurizing it, and distributing spawn evenly. You still need to follow the supplier’s species-specific directions and provide fresh air and humidity, but a kit makes it much easier to see how pins develop into a harvestable cluster.
Choose a seller that identifies the species and strain, gives a fruiting temperature range, and explains how to trigger the block and encourage later flushes. Oyster mushrooms are a forgiving first crop because they grow on several prepared plant-based substrates; lion’s mane can also be a good kit choice, but it has its own preferred conditions. A button mushroom kit is a different system, usually based on prepared compost and a casing layer, so it is not interchangeable with an oyster bucket recipe.
For a longer-term outdoor crop, use wood
If you have a shaded yard and want a crop that can return over more than one season, choose a log or bed matched to the species. Shiitake are commonly grown on hardwood bolts, while wine-cap mushrooms colonize wood-chip beds; oysters can grow on straw or certain hardwoods. Cornell Small Farms lists different preferred woods and methods for each, which is why you should check the spawn supplier’s species guidance before buying logs or chips. (Cornell Small Farms’ outdoor-production guide)
This route uses less indoor equipment but offers less control. A log may take many months before its first flush and fruit only when seasonal conditions line up; a wine-cap bed can establish more quickly in a suitable warm season, but weather and moisture still decide when it fruits. Do not choose an outdoor method if you need a predictable harvest date.
Method 1: Use a Ready-to-Fruit Mushroom Kit
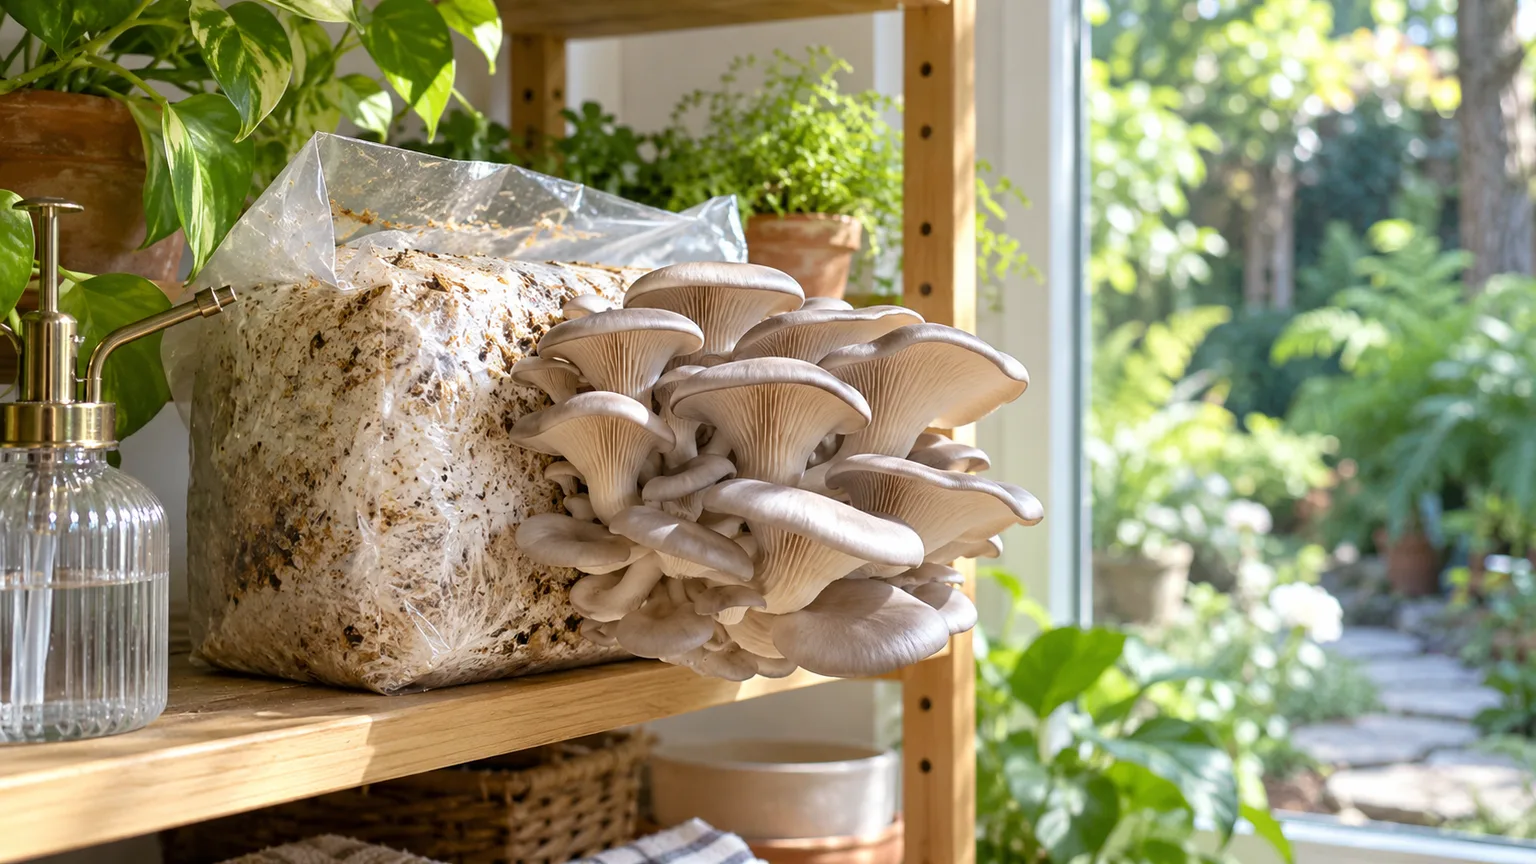
A kit typically arrives as a block of substrate already colonized with white mycelium and sealed in a grow bag. Some are designed to fruit from one cut, while others need a corner opened, a slit cut, or a humidity tent assembled. Read the directions before cutting: unnecessary openings dry a block and can make it harder to manage contamination.
Set up the block for humidity and fresh air
Place the block where the temperature stays within the maker’s range, away from direct sun, heaters, cold drafts, and cooking steam. A bright room with indirect light is usually easier to manage than a sealed dark cupboard. Mushrooms do not use light the way leafy plants do, but many fruiting species use some light as a developmental cue; the kit maker’s instructions should determine how much.
After making the specified opening, keep the exposed surface humid without leaving it soaked. Mist the air around the fruiting site or follow the kit’s method for a humidity tent; avoid spraying so hard that water pools in the cut. The goal is a moist surface and humid air, not a block sitting in standing water. If pins dry, they may stop growing; if the block remains saturated and airless, it can rot or invite unwanted organisms.
Fresh air matters just as much as humidity. Oyster mushrooms that stretch into thin stems with small caps often need more air exchange, not more water. Keep the kit in a ventilated room, but do not aim a fan directly at it or place it beside an exhaust vent that dries it out. If you are growing in a compact apartment, a small open shelf is generally more practical than a closed closet.
Harvest a flush, then decide whether to rest the block
A flush is one wave of mushrooms. Harvest when the caps have reached a useful size but are still firm and their edges have not curled upward or begun releasing a heavy spore cloud; the ideal cue varies by species, so use the supplier’s photos and timing as your reference. Twist the whole cluster gently at its base or cut it cleanly with a sharp knife, then remove loose substrate from the base before cooking.
After the first harvest, let the block rest according to the kit instructions. Some blocks benefit from a short recovery period or a controlled soak; others only need a humid, ventilated rest. Do not automatically submerge every kit. The block’s recipe, bag design, and species determine whether it can produce another flush and how it should be rehydrated. A second flush is usually smaller or slower than the first, and a clean-looking block is not guaranteed to fruit again.
Method 2: Grow Oyster Mushrooms in a Bucket
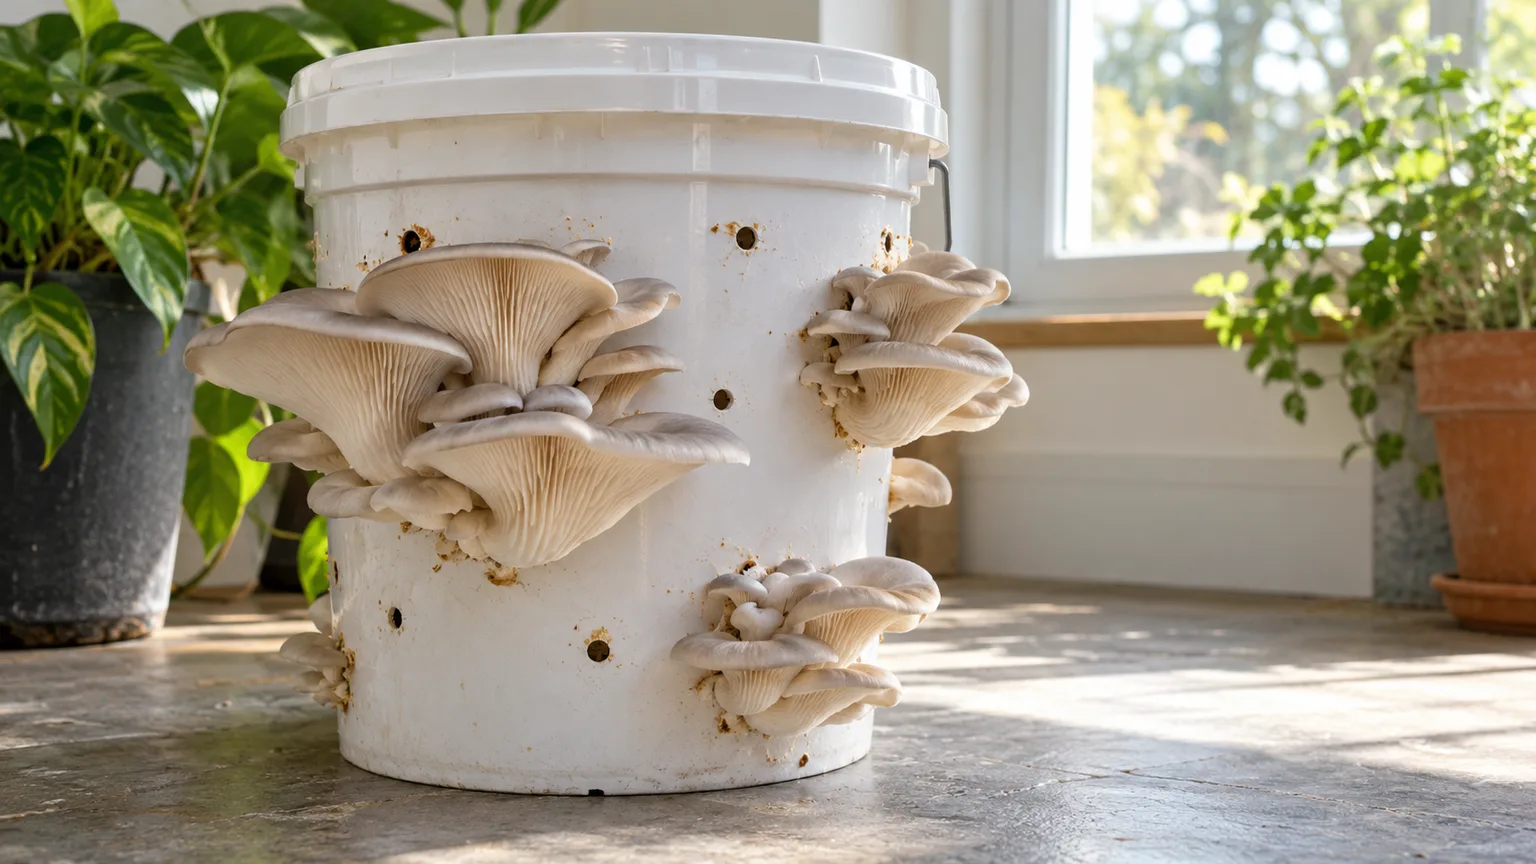
An oyster bucket is a good middle step between a kit and a full grow room. You control the substrate and sanitation, but the project can still use a food-grade bucket, chopped straw, and purchased spawn. Oyster is the usual match because it colonizes straw reliably; a species that prefers sawdust or compost will not become a good straw grow just because the bucket is convenient.
Choose straw and prepare it cleanly
Use clean, dry straw without visible mold or a musty smell, and buy spawn labeled for oyster mushrooms on straw. Do not use hay as a casual substitute: hay contains more leaf and seed material and can introduce a heavier microbial load. Cut long straw into shorter pieces so the spawn can spread through it more evenly. A clean food-grade bucket with a lid, a drill, a mesh bag for soaking, a thermometer if using hot water, and clean gloves or washed hands are enough for a small batch.
Straw needs pasteurization before inoculation. Pasteurization reduces many competing microbes so oyster mycelium has a better chance to colonize; it is not the same as sterilizing every organism, and it does not make dirty equipment safe. GroCycle’s practical straw guide describes a hot-water method that holds soaked straw around 140–167°F for about 90 minutes, followed by draining and cooling; the exact recipe should match the spawn supplier’s instructions. (GroCycle’s guide to growing mushrooms on straw)
Once the straw has cooled completely, drain it until a firm squeeze releases only a few drops. Too much water removes air from the substrate and encourages a sour, oxygen-poor core; too little leaves the mycelium without enough moisture to spread. From this point on, keep the bucket, work surface, and tools clean. You do not need a sterile laboratory for a simple bucket grow, but letting dirty water, soil, or old substrate touch the cooled straw can give competitors an easy start.
Inoculate, incubate, and fruit the bucket
Drill small, evenly spaced holes around the sides of a clean bucket, then mix or layer the cooled straw with spawn at the ratio on the spawn package. Spread the spawn through the substrate rather than leaving it in one thick band. Put the lid on loosely or use a design that allows the gas exchange specified by the supplier; a sealed bucket is not a useful incubation chamber because growing mycelium and oyster mushrooms need air.
Keep the filled bucket at a steady, species-appropriate temperature out of direct sun while the mycelium colonizes. Do not mist it every day during incubation: the hydrated straw is already the water reservoir, and repeated watering through the holes can make it soggy. Check the bucket every few days for an even white growth and for off-colors, slimy patches, or sour odors. When the substrate is mostly colonized and the supplier’s directions indicate it is ready, move it to a humid spot with gentle light and fresh air.
Pins typically form around the holes where the mushroom can reach fresh air. Mist the fruiting area lightly when it begins to dry, and increase ventilation if stems grow long while caps stay small. Harvest a whole cluster when it is firm and well formed. If a bucket develops a strong sour smell or spreading green or black growth, isolate it and discard the contents rather than trying to rescue it with bleach or fertilizer. Cornell’s recent work on indoor substrates also emphasizes clean tools and the risk that competing organisms can take over before spawn colonizes the material. (Cornell Small Farms Program’s research on DIY mushroom substrates)
Method 3: Grow Mushrooms Outdoors on Logs or Wood Chips
Outdoor cultivation is not one method with one universal substrate. Choose a mushroom first, then buy compatible spawn and a substrate that matches its biology. Hardwood logs suit shiitake; fresh wood chips or straw can support wine caps in a bed; some oyster strains grow on logs, stumps, or straw. The North Carolina digital archive’s small-scale shiitake guide and Cornell’s species table both stress matching spawn to suitable wood. (North Carolina’s small-scale shiitake cultivation guide)
Grow shiitake on fresh hardwood logs
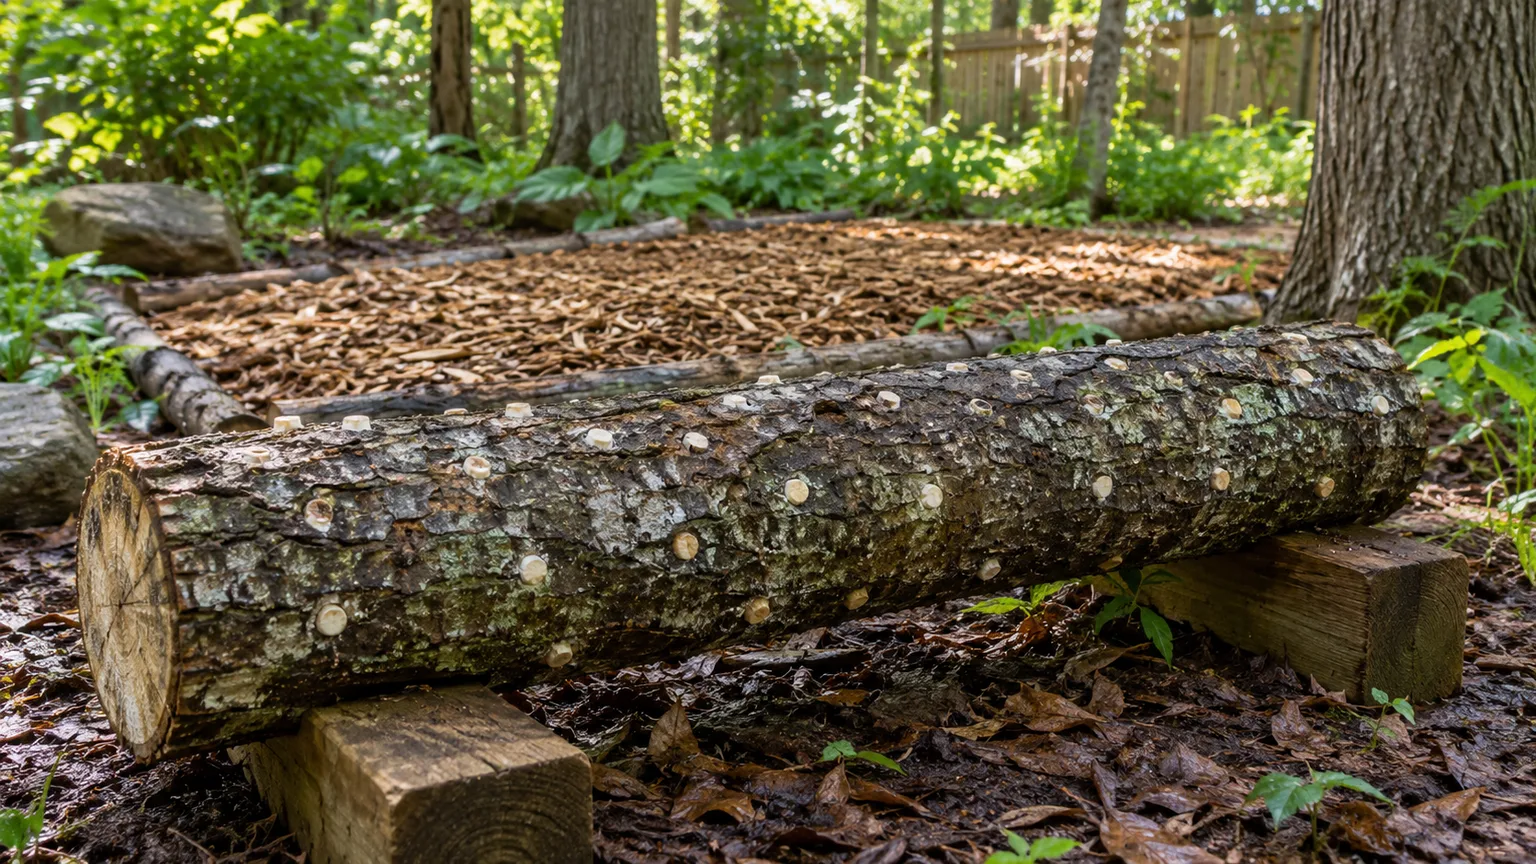
Buy shiitake spawn and logs from the same supplier when possible so the strain, wood species, and inoculation timing are compatible. Oak, sugar maple, beech, and birch are common hardwood choices in the Cornell guidance; avoid painted, pressure-treated, or chemically treated wood, and do not assume a random firewood log is fresh enough. Bark should be mostly intact because spawn colonizes the log beneath it, and excessively dry or damaged wood is a poor starting point.
Cut the log to the length and diameter your supplier recommends, then allow the wood to rest for the interval in the grower’s directions before inoculating. This rest helps the wood’s natural defenses decline while the log is still fresh; waiting too long lets the log dry or become colonized by wild fungi. Drill holes in staggered rows using the supplier’s spacing, fill them with plug spawn or sawdust spawn, and seal the openings with food-grade wax if that method is recommended for your spawn.
Stack or lean the inoculated logs in shade where air can move around them. Keep them moist through rain or occasional soaking during a dry spell, but do not leave the log submerged or in a stagnant puddle. Expect a long incubation period: many home growers wait months and sometimes a year or longer before the first flush. Once established, a log may fruit in seasonal waves over multiple years, but its lifespan and yield depend on log size, species, weather, and how quickly the wood is consumed. A practical shiitake-growing account from Gardening Channel similarly emphasizes fresh hardwood, intact moisture, shade, and patience rather than a quick crop. (Gardening Channel’s shiitake log guide)
Grow wine caps in a shaded wood-chip bed
Wine caps, also called garden giants, are one of the more approachable species for an outdoor bed. Cornell Small Farms describes them as a beginner-friendly choice for hardwood chips or straw, with fruiting possible a few months after inoculation when the season stays warm enough; an established patch can persist across more than one season. They can also grow in trays or large containers, so you do not need a dedicated garden plot. (Cornell Small Farms’ wine-cap and outdoor methods overview)
Choose a shaded or partly shaded site that drains after rain. Loosen the top few inches of soil, wet the ground, then layer clean hardwood chips with spawn, keeping each layer evenly moist; finish with a thin cap of chips. A shallow bed around 6–8 inches deep is easier to hydrate than a tall mound, and the chips should feel damp rather than waterlogged. Avoid treated landscape mulch, dyed chips, and freshly chipped conifers. If you already have a wood-chip path under trees, inoculating a small section can be simpler than building a separate bed.
Water the bed during dry weather, especially while the spawn is establishing, then let rainfall and seasonality do most of the work. Mushrooms may not appear on a precise schedule, even if the mycelium has spread. A profile of Bengaluru home grower Namrata Goenka illustrates why climate and species matter: she reported oyster mushrooms as a faster, lower-cost crop than shiitake in her own setup, but her experience is not a yield or timing promise for another home or region. (The Better India’s profile of a terrace mushroom grower)
Control Moisture, Temperature, and Airflow
Mushrooms need water, but humidity and substrate moisture are different controls. The substrate supplies water to the mycelium; humid air slows the exposed pins and caps from drying. A dry surface can be misted lightly, while a saturated substrate needs more drainage and air rather than another spray. If water beads and pools on the block or straw stays glossy and compressed, pause watering and improve airflow.
There is no single perfect temperature for every mushroom. Even within one species, a strain may be selected for warmer or cooler fruiting. Cornell’s indoor-production guidance separates incubation from fruiting and shows that species-specific conditions change between these stages, so use the supplier’s range instead of treating a general 60–75°F rule as universal. Keep colonizing containers stable and avoid direct sun or a heater that can create a sharp temperature swing.
Give fruiting mushrooms some indirect light and regular fresh-air exchange. A completely dark closet may limit development, while direct midday sun can dry or overheat the grow. Stems that stretch while caps stay small are a useful sign of excess carbon dioxide; move the crop to a more ventilated place or increase gentle air exchange. A fan should circulate room air, not blow directly across the fruiting surface. A small thermometer and hygrometer can help diagnose conditions, but your eyes and touch are often enough to spot drying, pooling, or stalled pins.
Diagnose Common Mushroom-Growing Problems
A slow grow does not always mean the setup has failed. Mycelium may take longer to colonize when the room is cool, spawn is old, the container is too large, or the species naturally develops slowly. Change one condition at a time and compare it with the supplier’s directions; changing substrate, water, temperature, and airflow all at once makes the cause harder to identify.
Mold or slow colonization
Healthy colonization usually looks like a spreading white network, though color can vary by species and substrate. A sudden patch of green, black, or bright orange growth, sliminess, or a sour or rotten smell is a stronger warning than a few tan bits of straw. If the material looks contaminated, keep it away from other blocks, avoid breathing dust or spores, and seal it for disposal or compost it outdoors only if the supplier says that is appropriate. Wash the bucket and tools before reusing them.
If the block is slow but still smells clean and shows gradual white growth, check temperature and moisture before throwing it away. A cold basement can slow colonization; an overpacked, waterlogged bucket can restrict oxygen; and spawn stored too long may have lost vigor. Do not add more spawn to an already colonizing container unless the supplier’s troubleshooting instructions recommend it. The best fix for a beginner’s next batch is often a smaller container, fresher spawn, more careful drainage, and a cleaner work surface.
Pins form, but mushrooms stop
Tiny pins that dry, darken, or shrivel often need more humidity around the fruiting site, but first rule out direct airflow or a hot window. Mist the air and nearby surface lightly, then observe whether the pins recover; avoid soaking the cluster. If the pins are staying moist but becoming long-stemmed with small caps, increase fresh air instead. This distinction matters: adding water will not fix a carbon-dioxide buildup.
A bucket or kit can also pause between flushes while the mycelium recovers. Give the block the rest period in its directions, keep it out of standing water, and wait before forcing another fruiting cycle. Outdoor logs and beds are less predictable: a colonized log may wait for seasonal temperature and moisture changes, and a wine-cap bed may fruit only when its substrate, shade, and weather align. Patience is better than repeatedly digging into an outdoor bed or flooding it to provoke mushrooms.
Harvest and Store Your Homegrown Mushrooms
Harvest cultivated mushrooms when they are firm and well formed, before caps become soft or overmature. Oyster clusters are usually cut or twisted off together; shiitake caps are ready when they have opened but remain in good condition; wine caps should be firm and not decaying. Check the species-specific harvest cue supplied with your spawn, because a universal “pick when large” rule can leave some mushrooms past their best texture.
Use a clean knife or gentle twist so you do not tear up a kit or block. Brush away loose substrate and refrigerate the harvest promptly in a breathable container; keep it unwashed until you are ready to cook so extra surface moisture does not shorten its storage life. Cook mushrooms thoroughly, and eat only mushrooms you know came from your identified, cultivated spawn. If an unknown fungus appears in a pot, bed, or log, do not add it to your harvest because it grew beside an edible crop.
Conclusion
For a first home harvest with the fewest variables, start with a ready-to-fruit kit and follow its species-specific instructions. Choose an oyster bucket when you want to learn how spawn colonizes a prepared substrate, or choose a shiitake log or wine-cap bed when you have outdoor shade and are comfortable waiting for natural conditions.
Keep the species, substrate, moisture, and airflow matched from the start. A clean setup and a realistic timeline will do more for your first crop than extra misting or a complicated homemade recipe; if the first flush is modest, use what you observed to make the next batch more reliable.