How to Grow Wildflowers From Seed: Step by Step
Learn how to grow wildflowers from seed with a regional mix, careful site preparation, even sowing, and first-year watering and weed control.
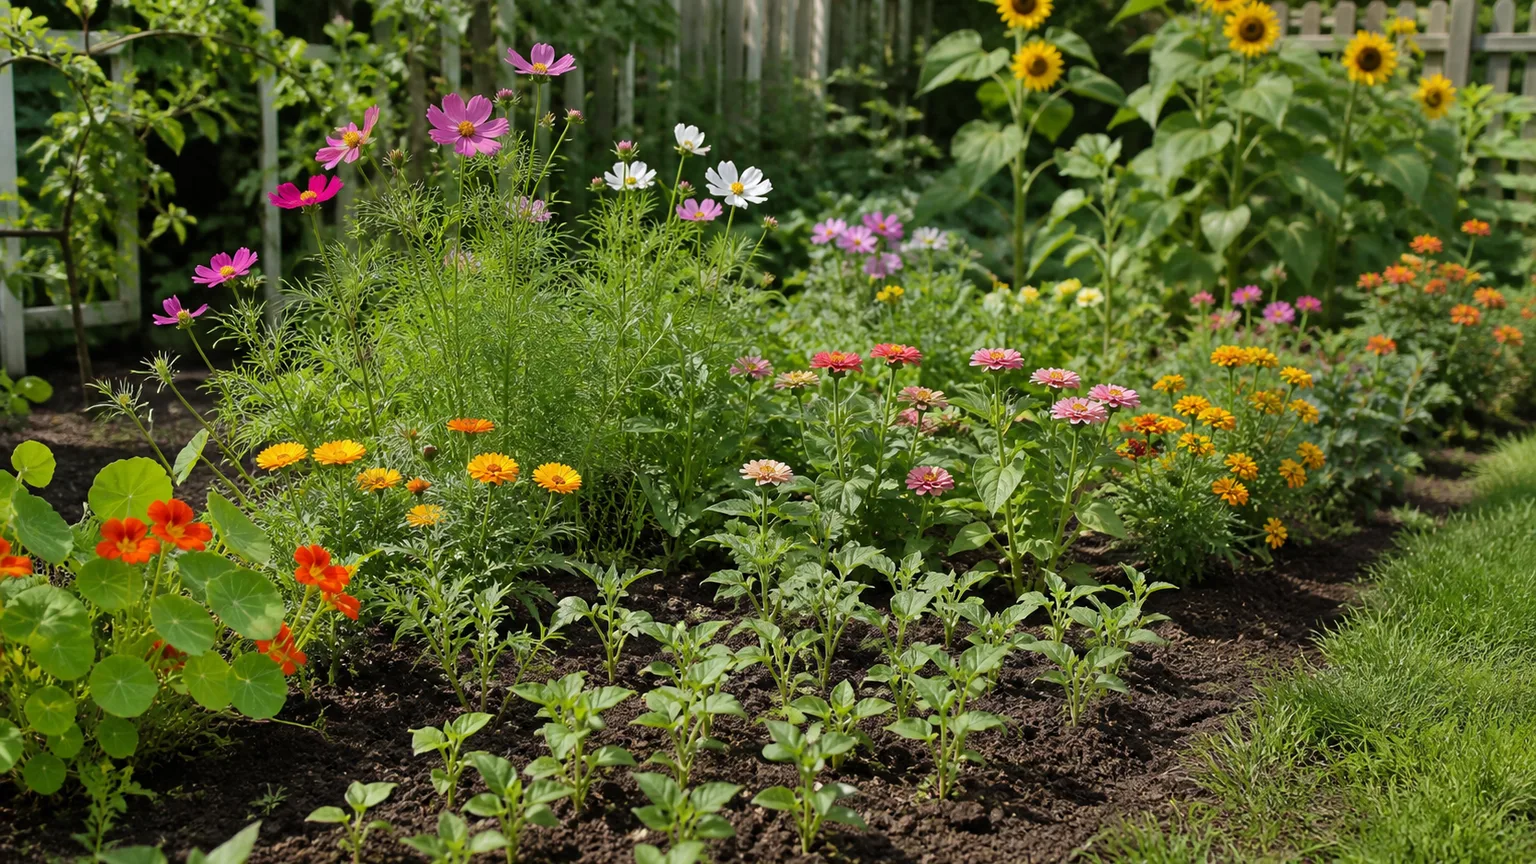
To grow wildflowers from seed, choose a mix suited to your region and site, clear competing grass and weeds, sow at the package rate, press the seed into contact with soil, and keep the seedbed evenly moist while it germinates. The work that most often decides success happens before sowing: seed scattered over living turf usually has to compete with established roots for light, water, and space.
Timing and care depend on the species in the packet. Some seeds benefit from a cold, moist winter; others are ready for spring sowing. Annuals may flower in their first season, while many biennials and perennials spend that season building roots and leaves. Plan for the planting you want, prepare the ground carefully, and give the seedlings time to establish before judging the result.
Decide What Kind of Wildflower Planting You Want
“Wildflower garden” can mean a bright annual bed that flowers quickly, a meadow-style planting of mixed garden flowers, or a longer-lived community of native species. Those options can look similar in a seed catalog, but they differ in cost, bloom timing, reseeding, mowing, and which plants belong in your area. The Irish Times describes the difference between a naturalistic native meadow and a more decorative, designed planting; make that choice before buying a mix.
For a quick seasonal display, an annual-heavy mix may be the simplest choice. Many annuals can flower in their first growing season, then need reseeding unless they drop viable seed and return on their own. A native perennial mix is a longer project: it may look sparse early on, but established perennial roots can return over multiple years. A blend of annuals, biennials, and perennials can combine first-year color with longer-term structure, though the balance depends on the species and conditions.
Be realistic about the word “low-maintenance.” Once established, a meadow may need less routine watering and replanting than a formal flower bed, but new seedlings need attention. You will still need to recognize weeds, manage the edges, water during dry spells, and decide when to cut the planting back.
Choose a Seed Mix for Your Region and Site
Start with the list of species on the packet, not just the picture on its front. Look for a mix intended for your region or ecoregion, then check that its flowers suit your soil moisture, sunlight, and the look you want. A broad “national” mix may include plants that do poorly in your climate or that are not appropriate near natural areas. When you are unsure about a species, check its native range and invasive status with a local extension service or native-plant organization.
Read whether the mix is mostly annual, biennial, perennial, or a combination. Check its recommended sowing season, seed rate, planting depth, and any pretreatment such as cold-moist stratification. Seed suppliers may sell mixes that have already been stratified; untreated seed may need a winter outdoors or a species-specific period in moist cold storage. Oklahoma State University Extension notes that many native species have dormancy requirements and that cold, moist refrigeration can be appropriate for some seeds, but the needed treatment varies.
If supporting local wildlife is a priority, favor locally appropriate native species and a mix with flowers that open across more than one part of the growing season. “Native” is regional: a species native to one state or habitat is not automatically right for a different one. Avoid assuming that a pollinator label guarantees the mix is locally suitable; the species list is the useful information.
Match Species to Sun, Moisture, and Soil
Observe the site for a full day before choosing seed. Note how many hours of direct sun it gets, whether water stands after rain, whether the area dries quickly, and if a slope may wash seed downhill. Most meadow mixes are designed for open, sunny ground, but some species tolerate partial shade or prefer consistently moist soil. Buy for the site you actually have rather than trying to make a mismatched mix work.
Existing plants offer clues. Grass growing well suggests the location can support vegetation, but it does not tell you whether the soil drains well enough for a particular mix or whether aggressive turf will overwhelm seedlings. If the site is soggy, deeply shaded, or very dry, choose species for those conditions or select another location. Amending the soil with fertilizer or rich compost is not a default fix: vigorous fertility can favor weeds and tall grasses over the slower flowers you want. Oklahoma State Extension notes that amendments are usually unnecessary for species adapted to local soils.
Choose Fall or Spring Sowing
There is no single best month across the country. Choose the season by combining your local climate, the seed packet’s instructions, the species’ dormancy needs, and the time you can provide follow-up water. “Fall” in a cold-winter region may mean sowing dormant seed shortly before winter; in a mild region, fall seed may still have time to germinate and establish.
Fall Sowing for Natural Cold Stratification
Fall sowing works well for species that need a cold, moist period before germination. In places with freezing winters, sow after the soil has cooled enough that seed is unlikely to sprout during a warm spell, but while the ground is still workable. The seed remains in place through winter and can germinate when spring conditions meet its needs. Oklahoma State University Extension describes late fall as a way to provide natural stratification for many species.
Do not assume every mix should be sown early in autumn. If seed germinates before a hard freeze, tender seedlings may not survive winter. Conversely, waiting until the soil is frozen solid can make it difficult to get good seed-to-soil contact. Use regional guidance and the mix’s instructions to place dormant seed in the right window. In mild-winter climates, sowing timing may instead depend on the start of reliable rains or the coolest growing period.
Fall is also useful when spring is busy or irrigation is difficult, because winter and early-spring precipitation may help keep the soil moist. That is an advantage, not a guarantee: exposed slopes, dry winters, and heavy runoff can move seed or leave it parched.
Spring Sowing for Species Ready to Germinate
Spring is a good option for species that do not require winter stratification and for mixes labeled for spring planting. Sow when the ground is workable and the temperature and frost conditions suit the flowers in the mix. Some seed can be sown before the last frost, while warm-season annuals generally need warmer soil; follow the packet rather than applying one frost-date rule to every species.
If the mix contains seeds that need cold stratification, check whether the supplier has already treated them. If not, follow the species-specific directions for moist refrigeration or use fall sowing instead. A refrigerator treatment is not simply keeping a dry packet cold: many seeds need moisture as well as cold, and different species need different durations. Oklahoma State Extension gives four to eight weeks as a general example for some seed, not a universal recipe for every wildflower.
Spring sowing lets you watch germination and respond to drying weather, but it also means seedlings may face heat as the season advances. If you cannot water regularly, sow ahead of a reliably wet period where the species and your climate allow it. Avoid planting right before a forecast downpour on bare or sloping soil, when runoff can carry the seed away.
Prepare the Ground Before You Open the Seed Packet
Clear ground gives new seedlings a fair chance. Wildflower seed scattered into dense turf or weeds may germinate, but established plants can shade it, capture moisture, and occupy the root space first. For a small bed, hand removal and shallow surface preparation may be enough; converting a lawn or weed-filled area takes more planning.
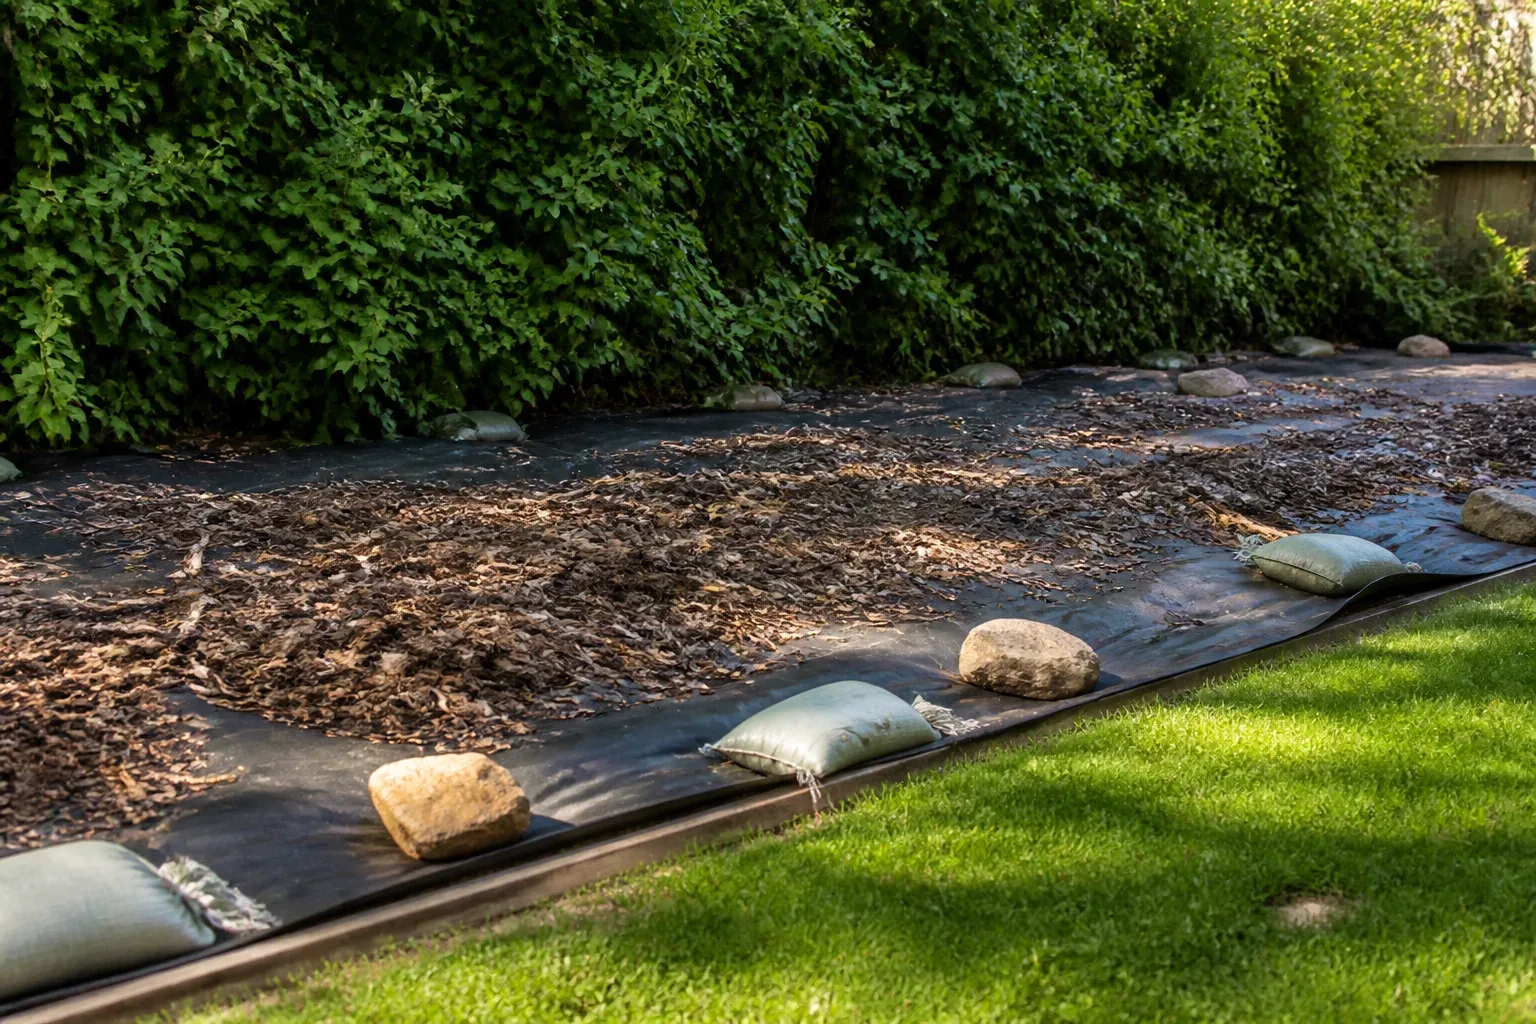
If the lawn is extensive or full of persistent weeds, begin well ahead of your intended sowing date. Removing sod, smothering vegetation, or solarizing during a hot period can all take time, and each method has limits. Do not rush the process by scattering seed over partly living turf; waiting for a clean seedbed is usually more productive than buying extra seed to compensate.
Remove Grass and Persistent Weeds
For a small patch, cut out the turf and roots, then remove as much plant material as practical. If you are using cardboard or another smothering cover, overlap it so light does not reach gaps and leave it long enough for the vegetation underneath to die. A thick cover is temporary: remove or open it before sowing, then prepare the exposed surface so seed can contact soil. Keep the outline of the future meadow clear; a narrow mown border can make a naturalistic planting look intentional and reduce creeping grass at the edge.
Tilling is not automatically the best way to clear a site. It can break up sod quickly, but it may also bring buried weed seeds to the surface; when a weed spreads from rhizomes or fragments, cutting those roots into pieces can make the problem harder. Oklahoma State Extension cautions that tillage can multiply some persistent weeds and expose dormant seeds. On a slope, deep cultivation can also leave loose soil vulnerable to erosion. N.C. Cooperative Extension describes using core aeration rather than tilling across a sloped lawn in one home meadow conversion.
Once the old growth is removed, do not add a deep layer of compost, bark mulch, or rich topsoil. Many wildflower seeds are small and need direct contact with the prepared soil, while a thick mulch can block light and make it harder for seedlings to emerge. If a soil test or local recommendations call for a specific amendment, incorporate only what is needed before sowing.
Measure the Site and Follow the Seed Rate
Measure the planting area and calculate its square footage before opening the packet. Multiply length by width for a rectangle; for an irregular bed, divide it into simple shapes and add their areas. Then use the coverage rate for that exact mix. There is no universal number of ounces per square foot because seed size, species composition, purity, and the amount of carrier in a packet all vary.
Using too little seed can leave bare openings for weeds. Using too much can crowd seedlings so they compete for light and water and flower poorly. The seed retailer American Meadows also warns that over-seeding can reduce growth and flowering, which is why the label rate matters more than a generic internet formula. If the packet gives a range, choose within that range based on the site and the effect you want; do not exceed it just to make the bed look full immediately.
For tiny seed, blend it with a small amount of clean, dry sand or another suitable dry carrier so you can see where it lands. Divide the total mixture into two portions. Broadcast the first portion while walking one direction, then sow the second while walking across the area at a right angle. That pattern helps fill gaps and avoids dumping most of the packet in the first few steps.
Sow Evenly and Make Firm Seed-to-Soil Contact
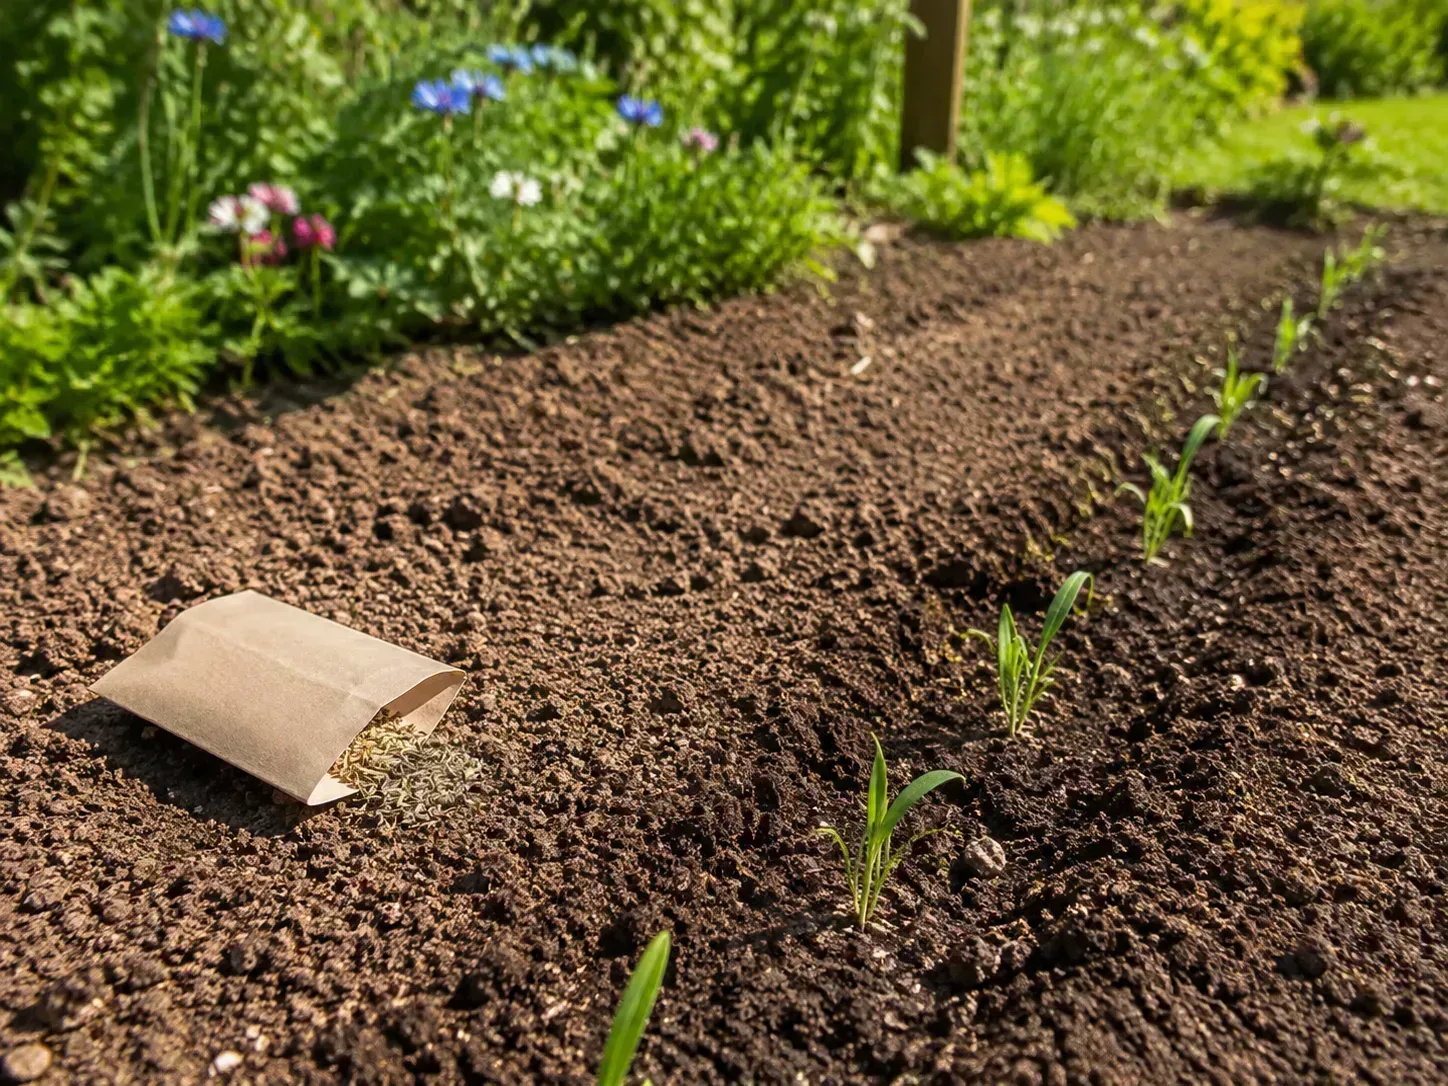
Prepare a level, crumbly surface that is firm rather than fluffy. Scatter the measured seed on a calm day so wind does not carry it beyond the bed. For very small seeds, sow on the surface if the packet says they need light; for larger seeds or species that require covering, follow the depth instructions. A mixed packet can contain seed of different sizes, so one blanket rule about burial may not fit every component.
After sowing, press the seed gently against the soil with a lawn roller, the back of a rake, or a board. This firms seed-to-soil contact without burying tiny seed deeply. Oklahoma State Extension describes lightly tamping seed rather than covering it too deep. If the packet recommends a cover for an exposed or sloping location, use the thinnest suitable layer and avoid materials that can smother the seed or introduce weed seed.
Do not rake vigorously after broadcasting. Raking can bury seed too deep, concentrate it in rows, or move it into low spots. Mark the edges or add a simple label at the bed boundary so you do not accidentally sow the same area twice or mistake the new planting for a neglected lawn.
Keep the Seedbed Moist Through Germination
Water with a gentle spray immediately after sowing, stopping before water puddles or runs downhill. The goal is to moisten the seed zone without washing seed into clumps. During germination, keep the soil surface consistently damp; repeated drying can interrupt germination, while saturated ground can deprive roots of air and encourage seed or seedlings to rot.
Check the bed often in warm, windy, or dry weather. A short, light shower may wet the surface without soaking the soil beneath it, so look at the seedbed instead of relying only on a weather app. If you have a large planting, split irrigation into gentle passes so the water has time to soak in. A sprinkler that produces fine droplets can be easier on seed than a hard hose stream.
Once seedlings are several inches tall and rooted into the surrounding soil, gradually reduce watering frequency. Water more deeply when you do irrigate, then let the upper surface begin to dry between sessions. The exact transition depends on soil, weather, and species. N.C. Cooperative Extension used about an inch of water per week as a guide for one newly seeded meadow and advises monitoring local rain; treat that as a starting reference, not a fixed quota for every site.
If regular watering is impossible, sow when seasonal rainfall is likely and choose species adapted to your natural moisture regime. Do not rely on “drought-tolerant” on a packet to mean that seeds can germinate without water. Drought tolerance helps an established plant survive dry conditions; germination still requires suitable moisture.
Manage Weeds During the First Growing Season
Expect weeds. The first season is an establishment period, and a young meadow is not yet dense enough to suppress every competitor. Walk the area regularly, especially after rain, and remove weeds you can confidently identify before they flower or set seed. If you are not sure whether a small plant is a wildflower or weed, leave it until you can identify it; pulling a desirable seedling is an easy way to create the gap a weed will occupy.
Keep the seed packet or a species list where you can refer to it. Learn what the early leaves of the mix’s main species look like, not only the flowers pictured on the label. If possible, sow a small sample in a pot or mark a short row at the edge of the bed so you have known seedlings to compare. Cut an obvious tall weed at the base if pulling it would uproot nearby flowers.
Avoid using a broadleaf lawn weed killer over a mixed wildflower patch: many flowers are broadleaf plants too. If you are considering any herbicide for site preparation or a specific weed, check the product label, local rules, and extension guidance before applying it. A product that kills grass or weeds may also injure the wildflowers you are trying to establish.
Do not mow automatically just because the planting looks untidy. If weeds are overtopping tiny seedlings, a high cut before the weeds form seed may reduce their advantage, but only if the desired plants are short enough to escape the blades. For a small bed, selective clipping is safer. For a larger meadow, use the species list and local guidance to decide whether and when mowing is appropriate.
What to Expect in Year One and After
The first growing season can look uneven. Annual flowers often provide the earliest color, but a packet of perennials may produce mostly low foliage while roots develop. Biennials commonly grow leaves in their first season and flower later. A mixed planting may therefore have blooms in year one and still look much fuller in later seasons.
Use the species list to interpret what you see. The American Meadows guide distinguishes the first-year flowering of many annuals from the later bloom of biennials and perennials; its specific timing varies with the mix and growing conditions. Lack of flowers in the first year is not, by itself, proof that the seed failed. Look for healthy seedlings, new leaves, and roots before deciding whether to reseed.
A few bare patches can be normal, especially where seed washed away or the surface dried. Let the established plants grow before filling small gaps; late reseeding into a dense bed can bury seedlings or create crowded clumps. If large areas remain empty after the normal germination window for the species, diagnose the cause first, then prepare and reseed only the failed areas.
Troubleshoot Gaps, Weeds, and Slow Blooming
Check the seed packet for the expected germination window before assuming a problem. Different species in the same mix can germinate at different times, and seeds requiring stratification may wait until after winter. Use the pattern of failure to decide what to change rather than adding more seed across the entire area.
| What you see | Likely cause to check | First useful response |
|---|---|---|
| Almost no seedlings | Seed was buried too deeply, the surface dried, seed is old, or required pretreatment was missed | Check sowing depth and germination guidance; correct moisture, stratify remaining seed if appropriate, and reseed a small test area |
| Seedlings appear in streaks or piles | Uneven broadcasting, wind, or runoff moved the seed | Leave healthy seedlings in place; reseed only open patches after stabilizing the surface |
| Flowers emerge but grass quickly returns | Living turf or persistent grassy weeds were not controlled before sowing | Identify the grass and use a targeted local control plan; broadleaf flowers can be harmed by lawn herbicides |
| Many leaves but few blooms | The mix is perennial, the site is too shady, or fertility favors leafy growth | Check the species’ expected bloom year and sunlight before adding fertilizer or buying more seed |
| A strong first-year display fades the next year | Annuals dominated and did not reseed well, or the mix was not designed as a perennial meadow | Review the species list; add suitable perennials or resow annuals where continued color is the goal |
For a failed germination patch, check seed depth first. Small seeds can disappear under a thick layer of soil, while seeds requiring cold treatment may remain dormant even when the bed is moist. Next, consider whether the surface dried, whether rain carried seed away, or whether turf and weeds were still actively growing. Repeating the same sowing method without correcting the limiting factor usually repeats the same result.
If weeds dominate, identify what they are before disturbing the whole planting. Annual weeds can often be pulled or clipped before they set seed. Rhizomatous or creeping weeds may need control before reseeding; digging them through a bed can spread fragments, and blanket spraying can injure desirable flowers. If you cannot identify a persistent weed, ask a local extension service to identify it and advise on a control method that fits the meadow.
If Few Seedlings Appear
Wait through the packet’s full germination period, especially for a mixed or stratification-requiring seed lot. Check a few small spots by gently brushing away soil to see whether seeds remain; avoid excavating broad areas, which can damage slow seedlings. If seed is still present but dry, restore gentle moisture. If it is buried, washed away, or nonviable, make a small correction and resow at the labeled depth.
When conditions remain poor, test the next batch in a small tray or short marked strip before investing in more seed. Use the same soil exposure, season, and watering pattern intended for the main area. A small trial can reveal whether the issue is seed quality, dormancy, or the site itself.
If Grass or Weeds Dominate
Grass returning through the flowers usually means the original turf survived or moved in from the edges. Mow the border regularly to create a visible boundary, then deal with the grass inside the planting according to its identity and the flowers present. A dense flower mix cannot outcompete every aggressive grass or perennial weed, particularly where the ground was never fully cleared.
If the weed problem is widespread and persistent, it may be better to stop and reset a section than to scatter seed over it again. Remove or suppress the competitor, allow the surface to settle, and sow the cleared area at the proper rate. A phased renovation also lets you keep some flowers while rebuilding the worst patch.
Maintain the Established Patch Without Flattening It
Once the planting is established, maintain it according to its species and purpose. Let flowers set seed if you want self-sowing, but remember that not every annual will return reliably and volunteers may land outside the planned area. Thin or remove plants that crowd out the mix or spread where they are not wanted.
Do not cut every stem as soon as flowers fade. Seedheads can feed birds, and standing stems can provide winter structure and habitat. N.C. Cooperative Extension recommends leaving as many stems as practical through the season and, when tidying is necessary, keeping cut material in an out-of-the-way place where it can still provide cover. The right mowing date varies with species, climate, wildlife use, and local rules, so use regional guidance instead of one calendar date.
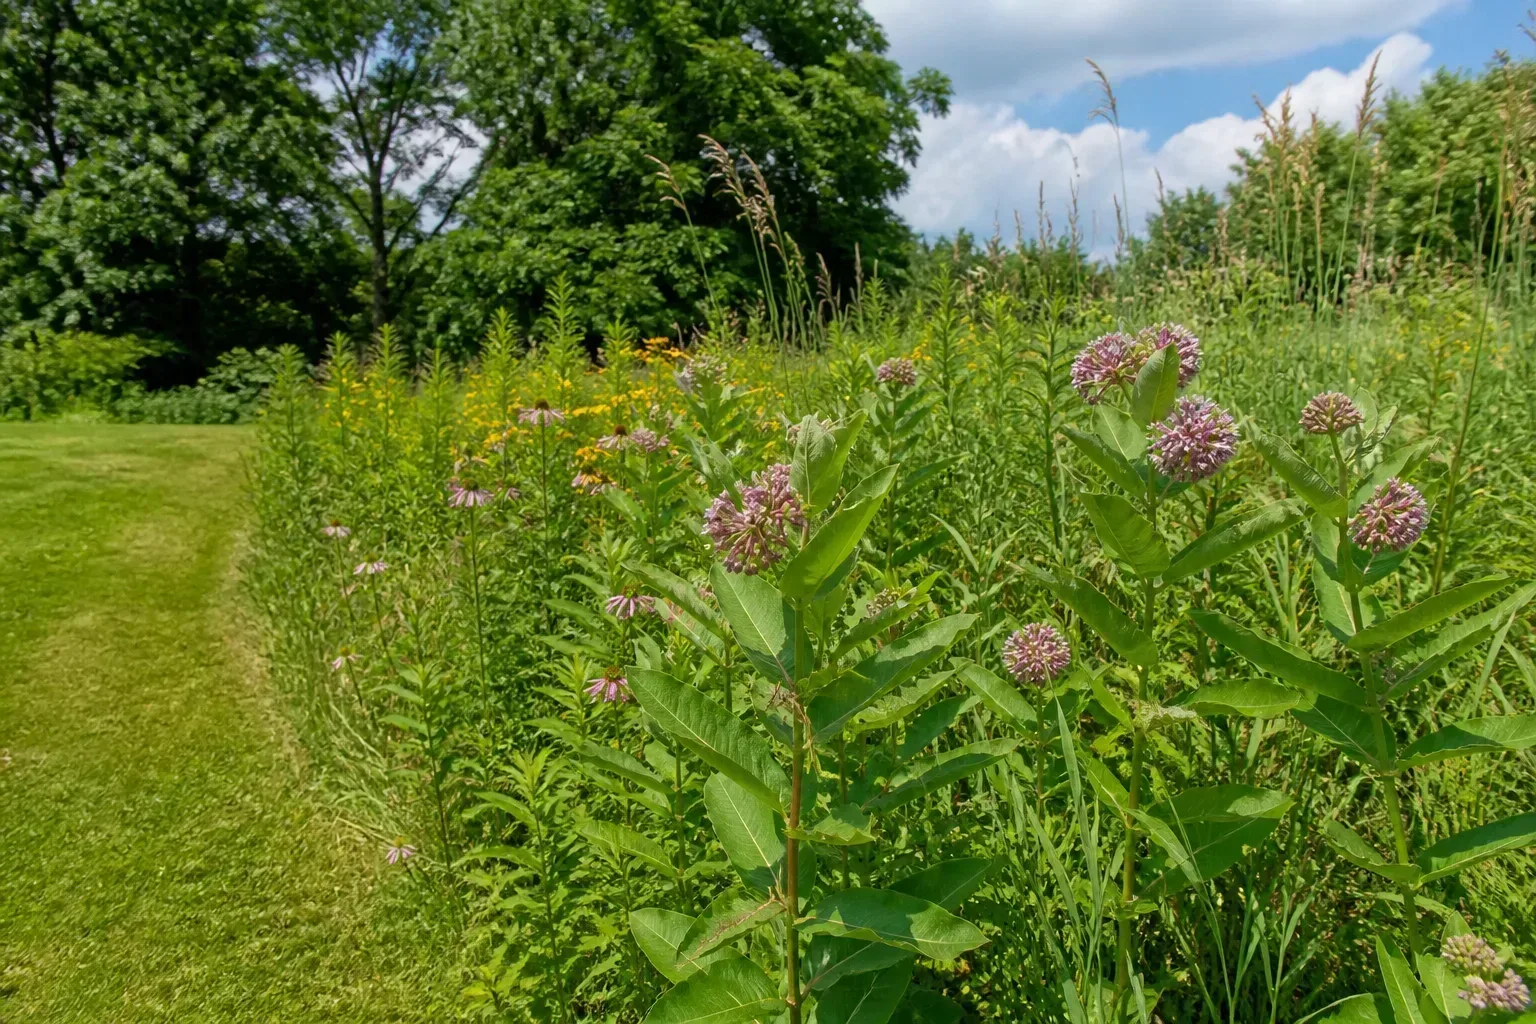
Keep a mown or clearly edged path if you want the planting to read as intentional. Remove unwanted invasive plants before they set seed, and avoid routine fertilizer unless a soil test or species-specific recommendation calls for it. If the meadow becomes dominated by one aggressive plant, reseed gaps with a more suitable mix only after addressing the cause. Maintenance is mostly observation and selective correction, not leaving the area unattended.
Conclusion
Successful wildflowers start with the right seed for the place, not a packet promising instant color. Clear the ground, sow at the labeled rate and depth, press seed into contact with soil, and keep it moist until seedlings establish. Then give the mix the time its life cycle requires: annuals may flower quickly, while many native perennials need a season or more to build a lasting patch.



