How to Mulch Flower Beds Over Winter
Winter mulch protects roots from temperature swings, but timing and depth matter. Follow this flower-bed checklist for mulch choice, placement, and spring cleanup.
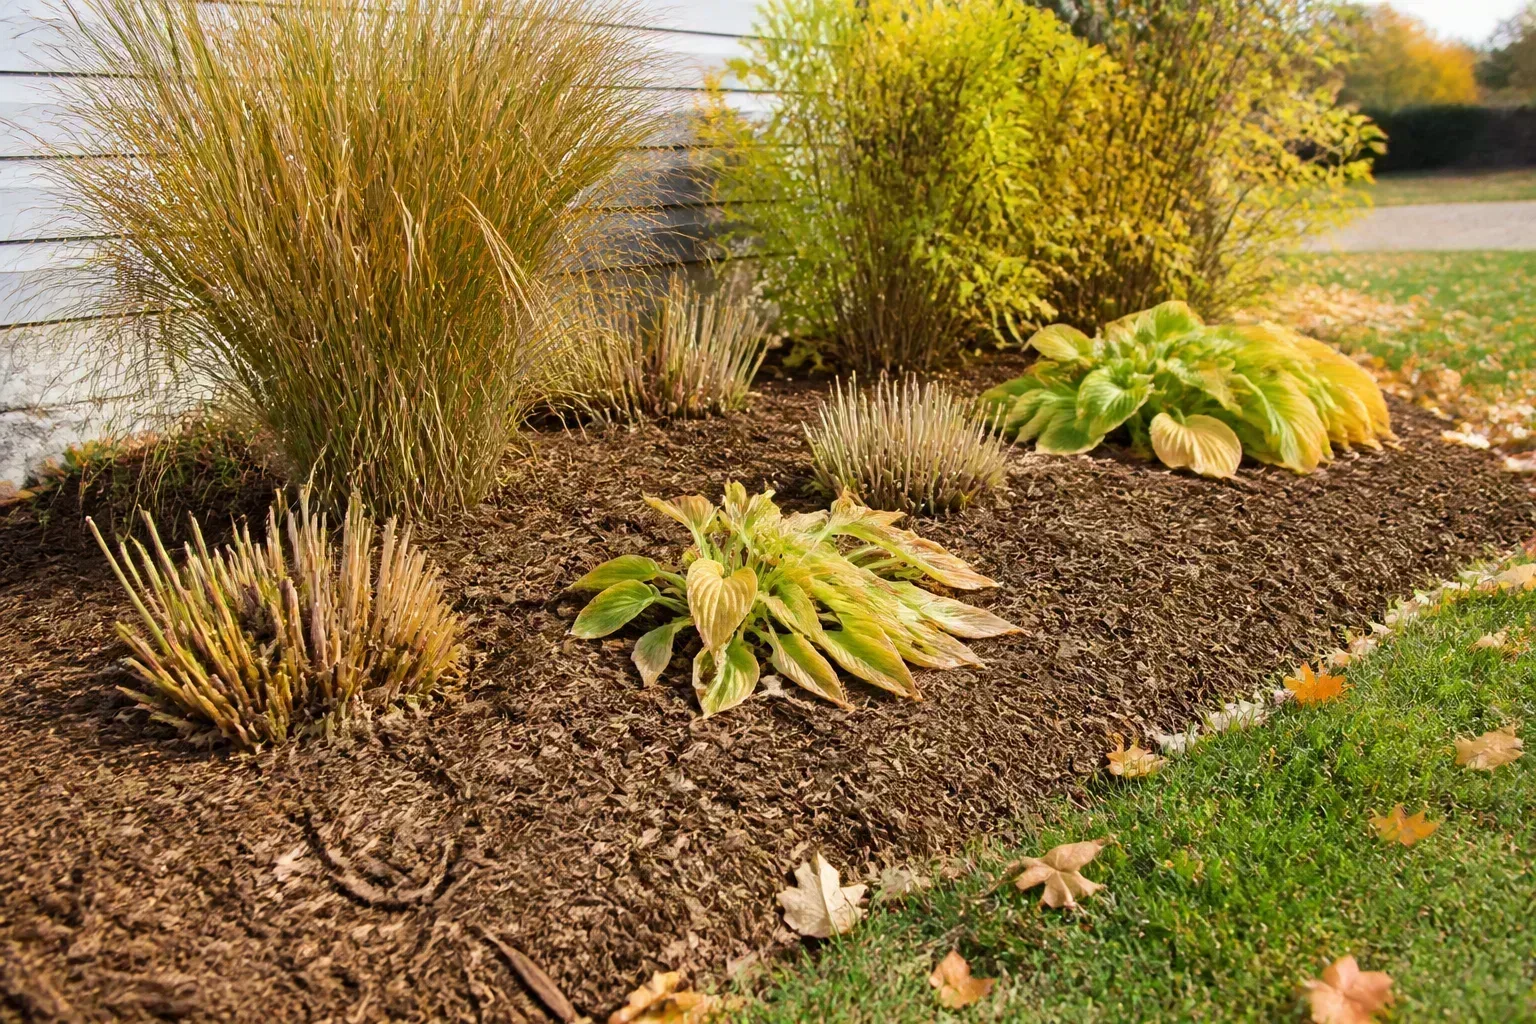
Winter mulch is a protective layer, not a blanket you throw over every plant at the same time. Applied well, it slows rapid soil temperature swings, reduces erosion, limits winter weeds, and helps exposed roots ride out freeze-thaw cycles. Applied too early, too deeply, or against a crown, it can keep a bed wet, shelter rodents, delay spring growth, or encourage rot.
The reliable method is to match the mulch to the bed. Look at the plants, wait for the right weather cue, remove problems before covering the soil, choose a material that will not mat, and spread enough to buffer the roots without burying the plants. The steps below work for perennial borders, mixed shrub beds, and ornamental beds, with separate cautions for bulbs, dry-site plants, and newly planted specimens.
Start by deciding whether the bed needs winter mulch
Start with exposure rather than a bag of mulch. A sheltered, well-drained bed with established hardy perennials may need only a modest top-up, while a new planting, shallow-rooted perennial, wind-exposed border, or bed in a climate with repeated thawing and refreezing may benefit from more protection. The goal is to reduce stress at the root zone, not to keep the soil warm at all costs.
Winter mulch is most useful where roots could heave as water in the soil freezes and expands, where late-fall temperature drops are abrupt, or where a plant is being grown near the edge of its normal hardiness. It also protects bare soil from pounding rain and drifting weed seed. Wisconsin Horticulture lists weed suppression, moisture retention, temperature regulation, erosion reduction, and winter protection among mulch’s main functions (Wisconsin Horticulture).
Do not use mulch to solve a site problem it cannot fix. If water already pools around a crown, a thick layer will not improve drainage. If a plant is poorly matched to the climate, mulch may reduce damage in one winter without making the planting reliably hardy. If the bed is covered with healthy leaf litter that is already doing the job, disturbing it just to make the surface look freshly installed may create more work and more weed germination.
Use the plant, climate, and soil as your test
Ask three questions before you spread anything. First, is the plant established and winter-hardy in your area, or is it a new, tender, shallow-rooted, or marginal planting? Second, does the bed drain freely after rain and snowmelt? Third, will the plant need to emerge early in spring, self-sow, or stay dry through winter?
A “yes” to the first question and a “no” to the other two usually justifies a normal layer. A wet bed, a dry-loving plant, or a direct-sown patch calls for a thinner layer or no additional mulch. This simple triage keeps the useful insulating effect while avoiding the common mistake of treating every square foot of a mixed bed alike.
Time winter mulching around dormancy and weather
For most established perennials and woody plants, the best timing is late fall after growth has slowed and the plants are entering dormancy, but before the ground freezes solid. You do not need to wait for a dramatic snowstorm. You do need to avoid covering actively growing plants during a prolonged mild spell or sealing a wet bed under a dense layer.
A practical cue is a sequence of cold nights that has finished the season’s soft growth, followed by a cool period in which the soil is still workable. Homes & Gardens similarly recommends applying fall mulch before the soil hardens with frost and when the soil is damp rather than waterlogged (Homes & Gardens). In mild climates, that window may come later; in colder climates, it may arrive earlier. Watch the forecast and the plant, not a fixed date on the calendar.
Mulching after the first light frost is not a universal rule. A light frost may not have put a perennial fully to sleep, while a hard freeze can arrive before a gardener has time to work. If the bed contains a plant that needs winter cover, use a loose temporary layer of clean leaves or straw rather than waiting so long that the soil is frozen and impossible to prepare.
Annuals, perennials, bulbs, and woody plants follow different cues
Most annuals are removed at the end of the season, so winter mulch belongs around the perennials, bulbs, shrubs, and other plants that will actually return. An overwintering annual or a tender crown may need a specific cover, but the plant’s care instructions should take precedence over a generic flower-bed layer.
Herbaceous perennials can usually be mulched once their top growth has died back or gone fully dormant. Newly planted perennials deserve closer attention because their roots have not yet occupied the surrounding soil. Shrubs and trees do not need a mound against the trunk; mulch the root zone broadly and keep the bark dry at the base. Wisconsin Extension’s wood-mulch guidance recommends a moderate layer and a clear gap around trunks because wet bark and excessive depth can contribute to decay and root problems (Wisconsin Horticulture).
Spring bulbs are a special case. A thin, loose layer can moderate temperature swings in an exposed bed, but a heavy, compacted layer can slow shoots as they emerge. If bulbs are planted in well-drained soil and already have a stable cover of leaves, do not add a deep second blanket simply because winter is approaching.
Clear weeds and diseased debris before covering soil
Mulch suppresses small weed seedlings; it does not erase established roots, rhizomes, or a bed full of seed heads. Pull or hoe perennial weeds while the soil is workable, and remove mature seed heads before they can drop through the new layer. Do not turn the bed deeply just to make it look clean. Deep disturbance can bring buried weed seed to the surface.
Remove annuals and any collapsed foliage that is clearly diseased, slimy, or heavily infested. Healthy stems and leaves can remain where they provide winter habitat or can go into a properly managed compost pile, but diseased plant material should not be spread back through a home bed. Old World Garden Farms makes the practical fall point that clearing weeds and decaying annual debris before mulching reduces the problems carried into the next season (Old World Garden Farms).
Inspect the bed edges, downspouts, gutters, and paths at the same time. A blocked drain or a low spot beside a border can make an otherwise sensible mulch plan fail. Fix water movement first, then rake the soil surface level enough that the mulch layer will be even. Leave visible crowns and low-growing stems easy to find; hiding them makes the final placement check harder.
Choose a mulch that fits the bed
Choose by texture, cleanliness, wind, and spring timing rather than by color alone. Organic materials are generally the most useful winter mulches for flower beds because they buffer the soil and add organic matter over time, but each behaves differently once it becomes wet. A material that works in a sheltered shrub border may blow away from an exposed perennial bed or mat over a damp crown.
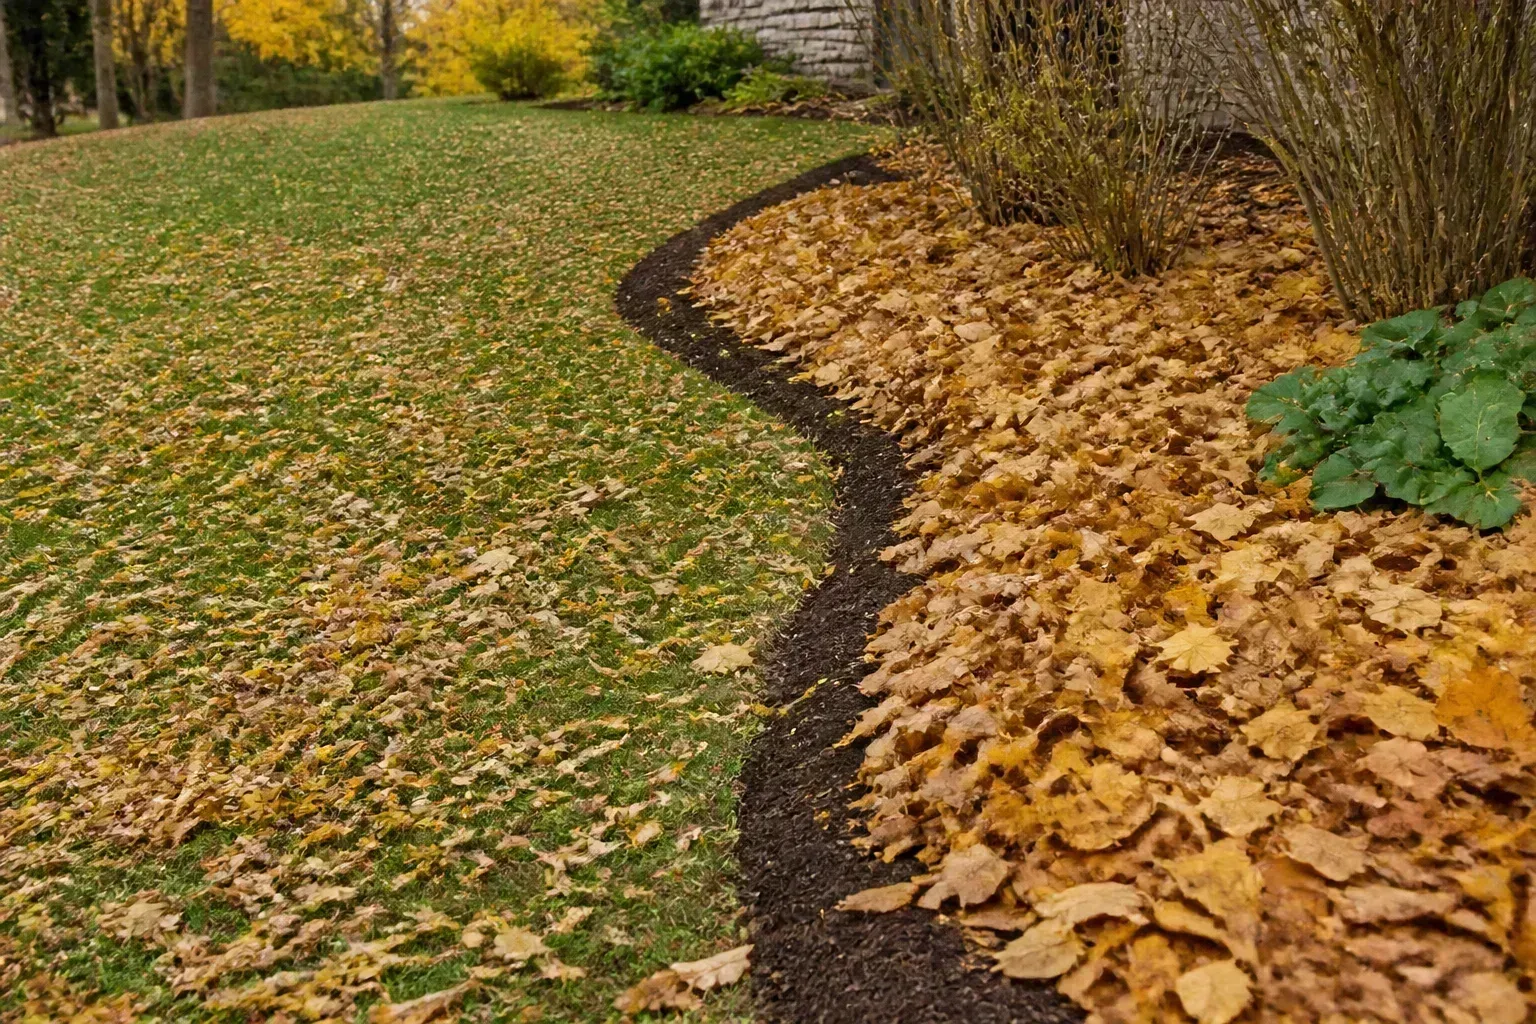
Compare bark, shredded leaves, straw, compost, and grass clippings
Bark or chipped wood is tidy, durable, and useful in permanent borders. Use a quality product without a sour vinegar, ammonia, or sulfur odor. Keep it away from crowns and trunks, and do not keep adding new layers until the total depth becomes excessive. Wood mulch is a good choice where you want the bed to look finished through winter and do not plan to expose a large area for spring seed sowing.
Shredded leaves are inexpensive and return organic matter to the soil. Shred them so they do not form a slick, wind-resistant mat, then apply them loosely. Whole leaves can be useful as a temporary blanket for tender crowns, but check after rain: a thick, matted leaf layer may shed water instead of letting it reach the soil.
Clean straw is airy and insulating, especially around tender perennials or a bed exposed to repeated freezing and thawing. Use weed-free straw, not hay, because hay commonly contains viable grass and broadleaf seed. Straw is bulky and may blow into paths, so secure it with a light layer of branches or check it after the first windy storm.
Finished compost is best as a thin surface dressing where the soil needs organic matter, not as a deep winter blanket around every crown. It is fine-textured, so thick applications can compact and stay wet. Compost should smell earthy and look dark and crumbly; avoid fresh manure and unfinished material in a flower bed with sensitive crowns.
Grass clippings can work only when they are dry, clean, and applied very loosely. A wet pile of clippings forms a dense mat that excludes air and can heat as it decomposes. Do not use clippings from a lawn recently treated with a herbicide unless the product label explicitly permits the use you have in mind.
Set the right depth for the material
Depth is a function of particle size and the plant beneath it. The same three-inch measurement behaves differently when it is screened compost, fluffy straw, or a wet layer of whole leaves. The purpose is to cover exposed soil and moderate temperature, not to bury crowns, create a warm compost pile, or build a mound against a trunk.
| Material | Practical winter starting depth | Main caution |
|---|---|---|
| Finished compost or fine mulch | 1 to 2 inches | Thick layers can compact and hold excess moisture |
| Bark or chipped wood | 2 to 3 inches | Keep it off crowns and trunks; do not stack year after year |
| Shredded leaves | 2 to 4 inches loose | Shred or fluff if the layer mats after rain |
| Clean straw | 4 to 6 inches loose | It settles and blows; keep it away from crowns |
For most mixed flower beds, start near the lower end of the range and add only where the site is exposed or the plant genuinely needs extra insulation. Wisconsin Extension describes about three inches as a common organic-mulch layer for landscape plantings and recommends deeper straw or similar material because it packs down (Wisconsin Horticulture). Around woody plants, stay conservative: the wood-mulch guidance advises about two to four inches depending on soil and keeping the mulch several inches away from the trunk (Wisconsin Horticulture).
Calculate how much mulch you need
Measure the bed’s length and width, or divide an irregular bed into rectangles and triangles. Multiply the area in square feet by the desired depth in inches, then divide by 324 to estimate cubic yards. For example, a 100-square-foot bed at two inches needs about 0.62 cubic yard; at three inches, it needs about 0.93 cubic yard.
Bagged mulch is often sold by cubic feet. Divide the required cubic yards by 0.037 to estimate cubic feet, then round up slightly for settling and uneven edges. Buying too much is not a reason to make the layer deeper. Store the extra under cover and use it for a spring top-up after you inspect the bed.
Water and inspect the soil before spreading
Mulch helps preserve moisture, but it should not be used to trap water in a saturated bed. After a dry fall, water established plants and the surrounding soil deeply enough to moisten the root zone, then let the surface drain before spreading. If the soil is shiny, sticky, or puddled, wait for a drying window instead of covering it.
Use your hand and a trowel to inspect more than the top inch. If the soil holds together in a soft ball but crumbles when pressed, it is usually workable. If it smears across the trowel, drips, or has a sour smell under existing mulch, address the drainage or old-mulch problem first. Wet conditions plus a deep, fine layer are more likely to create airless pockets than winter protection.
Check the planting depth of new perennials and the flare of shrubs before you cover the bed. Mark small crowns with a short stake if they are hard to see after dormancy. That tiny bit of preparation prevents a wheelbarrow load of mulch from becoming a guessing exercise later.
Apply winter mulch in five careful passes
Spread winter mulch in a sequence so the final layer is even and the plants remain visible. First, rake the existing surface without turning it over. Break up only obvious clumps, remove trash and weed roots, and leave healthy, settled mulch in place if it is clean and at the right depth. Topping up disturbed soil is generally safer than repeatedly mixing old mulch into the surface.
Second, place the material in small piles around the bed rather than dumping one large heap in the middle. This makes it easier to protect paths and keeps the layer from becoming deepest at the center. Third, pull the material outward with a rake or gloved hand, working around each plant instead of dragging mulch across its crown.
Fourth, check depth in several locations with a ruler or your fingers. Measure at the soil surface, not from the top of a raised edging. Correct thin patches along windward edges and remove excess from low spots where it has collected against stems.
Fifth, walk the perimeter and inspect after watering or the first heavy rain. Look for exposed soil, displaced straw, a blocked drain, mulch touching bark, and a layer that has flattened into a wet mat. Winter mulch is not finished when the wheelbarrow is empty; it is finished when the bed still has air, drainage, and visible plant structure.
Keep crowns, stems, and trunks uncovered
Leave a small collar of bare soil around perennial crowns and woody stems. The exact width depends on the plant, but a few inches is a useful visual rule: the mulch should slope away rather than form a volcano. For shrubs and trees, keep mulch at least four inches from the trunk flare and never pile it against the bark.
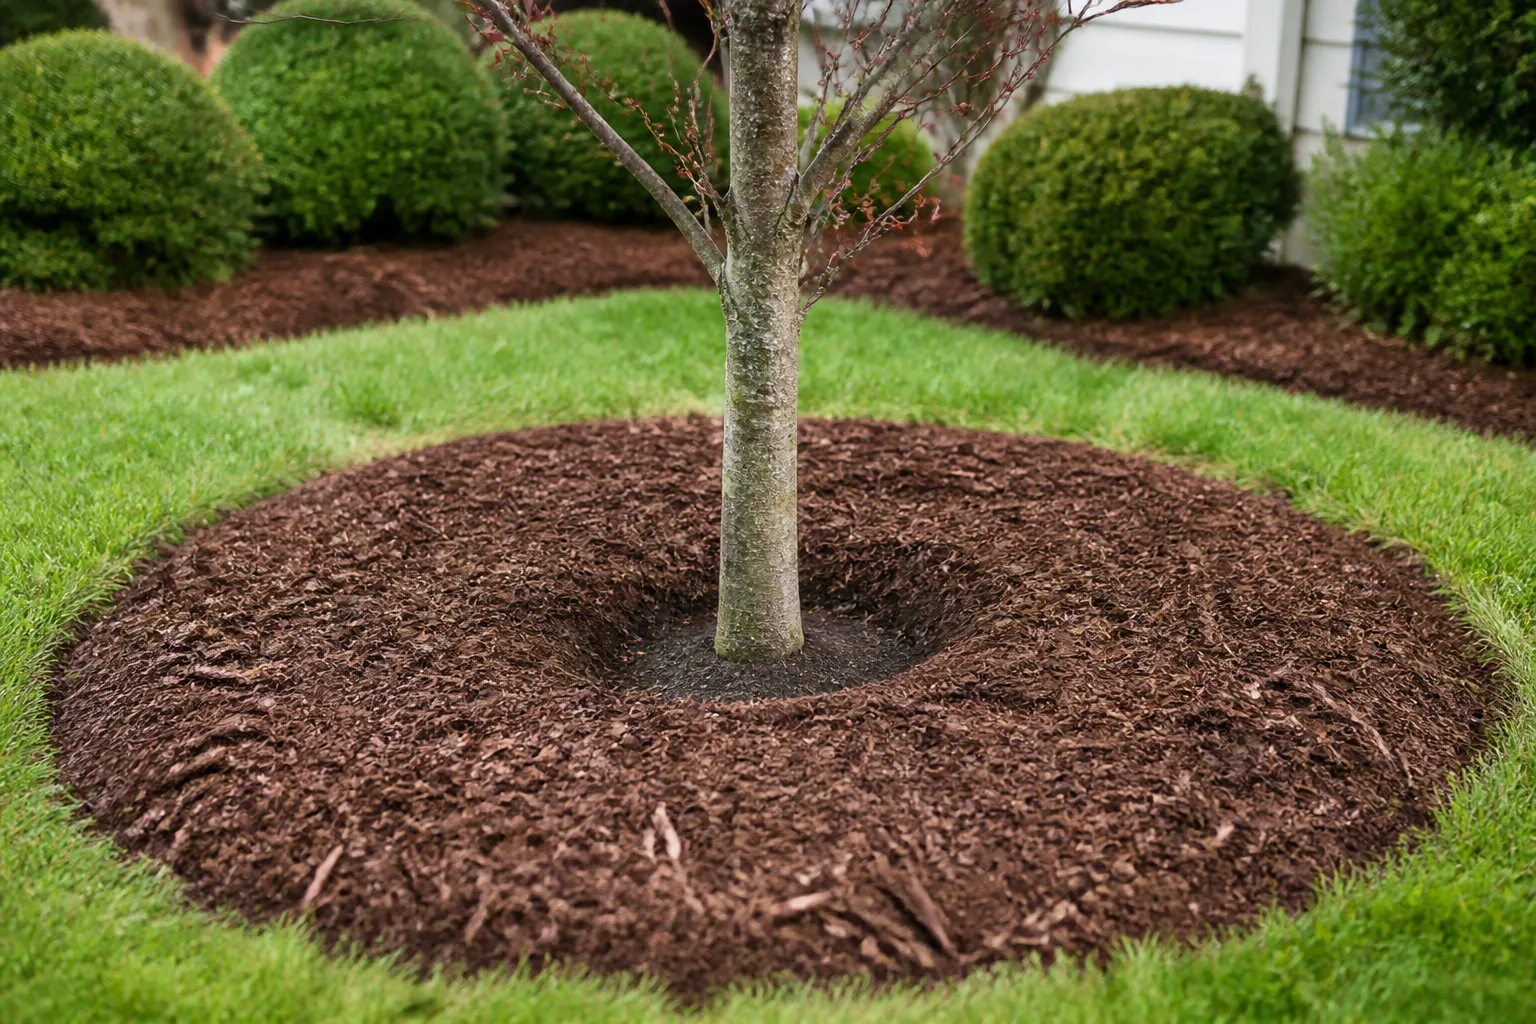
The uncovered collar improves airflow and gives you a place to inspect for soft tissue, rodents, bark damage, or water that refuses to drain. It also prevents the classic “mulch volcano,” where repeated top-dressing buries bark and keeps the base of a plant continuously damp. A smooth, broad layer over the root zone is protective; a narrow, tall mound around the stem is not.
Protect beds without creating rot or rodent shelter
The safest winter layer is clean, airy, and proportionate to the bed. Thick piles of loose straw, whole leaves, or wood chips can make attractive shelter for mice and voles, especially when the cover reaches right up to a shrub or perennial crown. Keep mulch a little back from stems, avoid covering the entire base of a dense evergreen, and check for tunnels or gnawing where rodents are already active.
Rot is more likely when three conditions combine: the bed drains poorly, the mulch is fine or matted, and the layer is pressed against living tissue. If you see standing water, a sour smell, blackened crown tissue, or a slimy mat, pull mulch back on a dry day and improve drainage before adding anything else. Wisconsin Extension notes that overly thick wood mulch can leave soils too wet for healthy roots and that poorly composted “sour” mulch can damage plants (Wisconsin Horticulture).
Do not use diseased wood chips from an uncertain source around susceptible plants. The safest choice is a clean, properly aged product from a supplier who can identify how it was processed. Mulch does not sterilize a bed, and winter is a poor time to discover that a cheap material carries persistent weeds, an odor problem, or an incompatible plant residue.
Know when not to mulch or when to use a lighter layer
Some plants and situations call for restraint. Lavender, creeping thyme, many salvias, veronicas, and succulents generally prefer excellent drainage and a drier crown. They may benefit from a thin layer over nearby soil while the center of the plant remains open, or from no added mulch if the existing bed cover is already adequate.
Avoid heavy mulch over direct-sown areas where seeds still need light, air, or an unobstructed path to the surface. If self-sowing coneflowers, black-eyed Susans, or similar plants are part of the design, a thick cover can reduce the volunteers you want. Likewise, do not bury spring-bulb shoots or use a wet, compacted layer to “protect” bulbs planted in a bed that already drains poorly.
Newly planted perennials are not automatically safer under a deep blanket. Their crowns may sit higher or lower than expected, and a plant set too deeply can fail even when the mulch is correct. Confirm the planting depth, leave the crown visible, and use a loose outer layer that reduces temperature swings without pressing on the plant.
Adjust winter mulch for your climate and bed type
In cold regions with repeated freeze-thaw cycles, the main job is to reduce abrupt temperature changes around shallow roots. A loose leaf or straw layer is often more useful than a thin decorative bark layer, especially for marginal perennials and newly divided plants. Secure airy materials where winter wind is strong, and check after storms rather than adding a heavy layer at the first sign of drift.
In mild, wet regions, winter mulch is more about erosion and weeds than deep insulation. Use a moderate, coarse layer and prioritize drainage. In dry climates, mulch can conserve soil moisture, but do not place a moisture-holding blanket around plants adapted to sharply drained soil. A bed beside a downspout needs water redirected before it needs more mulch.
Raised beds warm and drain differently from in-ground borders. They may need protection from wind and rapid temperature changes but can also dry out quickly during a dry winter. Permanent shrub borders can carry a slower-decaying bark layer, while a bed planned for spring bulb emergence or annual seed should use a material that is easy to pull aside.
Check the bed through winter and remove mulch in spring
Inspect the bed after the first major rain, windstorm, freeze-thaw cycle, and heavy snowfall. You are not trying to maintain a perfect surface; you are checking whether the mulch still covers soil without blocking drainage or burying the plants. Rake material back from crowns if it shifts, replace a thin windward patch, and remove any mulch that has developed a sour odor or persistent wet mat.
Spring removal should be gradual and based on plant emergence and weather. As days lengthen and new shoots begin to push, pull heavy straw or leaf cover to the side of the bed on a mild, dry day. Do not strip every protective layer before a forecast freeze; keep a light reserve nearby so you can cover tender growth overnight and uncover it again when temperatures rise.
For bark or chipped-wood mulch in a permanent border, you may not need to remove it. Rake it to an even depth, restore the bare collar around crowns and trunks, and top up only if the layer has settled below the bed’s useful range. For fine compost, avoid piling new material on top of a damp, compacted layer. Spring is the time to correct depth and drainage, not to hide them under another coat.
Conclusion
The best winter mulch plan is selective. Wait until plants are dormant or nearly dormant and the soil is cool but not waterlogged, clear weeds and diseased debris, choose a clean material, spread the right depth, and keep every crown, stem, and trunk visible. In a mixed bed, the plants that need protection may not be the same plants that tolerate a wet blanket.
Think of mulch as a seasonal tool with an inspection schedule. A loose layer can soften winter extremes, preserve soil, and reduce spring cleanup, while a deep or misplaced layer can create the very rot, weeds, and rodent problems you were trying to avoid. Check the bed after weather changes, pull mulch back as spring growth starts, and let the actual condition of the soil and plants guide the next adjustment.



