How to Pot a Germinated Date Seed the Right Way
Learn when a germinated date seed is ready to pot, how to fit its long root in a deep container, and how to water and settle the seedling safely.
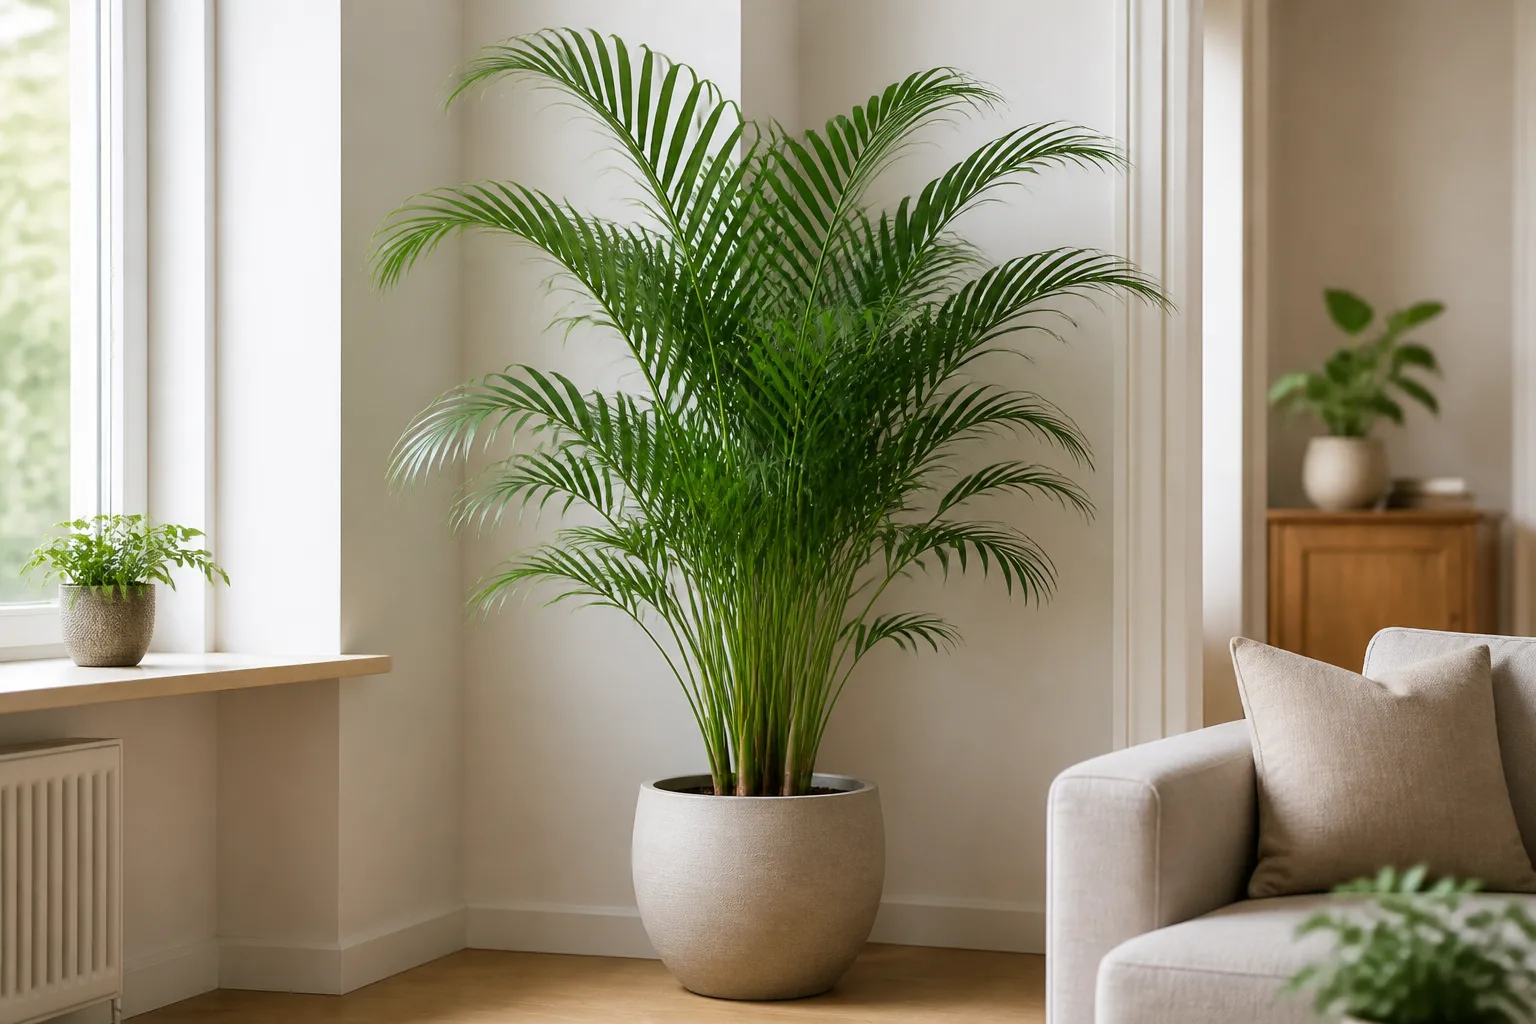
Pot a germinated date seed in a tall, narrow container that accommodates its long early root, using a loose mix that drains freely. Keep the seed attached, guide the pale root-forming structure down without pulling or trimming it, and set the root-to-stem junction at the soil line. Water once until excess runs out, empty the saucer, then keep the mix lightly moist while the seedling adjusts in warm, bright filtered light.
The best pot is not automatically a four-inch nursery pot or the largest container you own. Date palms germinate in an unusual way: the first pale growth can travel downward before a green leaf appears, so root length and the location of the seedling’s base matter more than its height. If you protect those parts, the rest of the job is straightforward.
One identity detail helps when you look up later care. A seed from an edible grocery-store date is associated with the true date palm, Phoenix dactylifera; it is not the Canary Island date palm, Phoenix canariensis. The University of Florida IFAS palm-germination guide describes date palms as remote germinators, while NC State Extension’s profile covers the separate Canary Island species.
The short answer: fit the pot to the root
Choose a small pot with unobstructed drainage holes, but make it deep enough for the longest intact root to sit comfortably in the mix. Use a light, airy potting medium, plant at the same depth the seedling was growing before, and do not bury the stem base to make a short root fit. If the root will not fit, change the pot; do not cut the root to suit the pot.
If your seedling is already growing in a deep germination container and its roots are not circling or tangled, it may not need to be moved yet. Palms can be transplanted soon after germination or after one or two leaves form. The decision is about reducing root disturbance: wait while the current container gives the root room, but move the plant before roots wind around the pot or become entangled with neighboring seedlings. UF/IFAS discusses both options in its palm-seedling transplant guidance.
Decide whether the seedling is ready to move
There is no universal height at which a date seed must be potted. A seedling raised in a paper towel can be planted once it has a firm, healthy sprout and an intact root that can be positioned in a suitable pot. One started in a seed tray is usually easier to handle after at least one leaf appears, unless the root is already reaching the bottom, circling, or growing into another seedling.
Do not wait for a specific number of inches or a set of mature-looking fronds. Young date palms begin with simple, narrow leaves, not the feathered crown people picture on an adult tree. A small seedling with one emerging leaf can be ready; a taller one may be safer left alone if its roots are still in a stable, roomy container.
Read the first date-palm sprout correctly
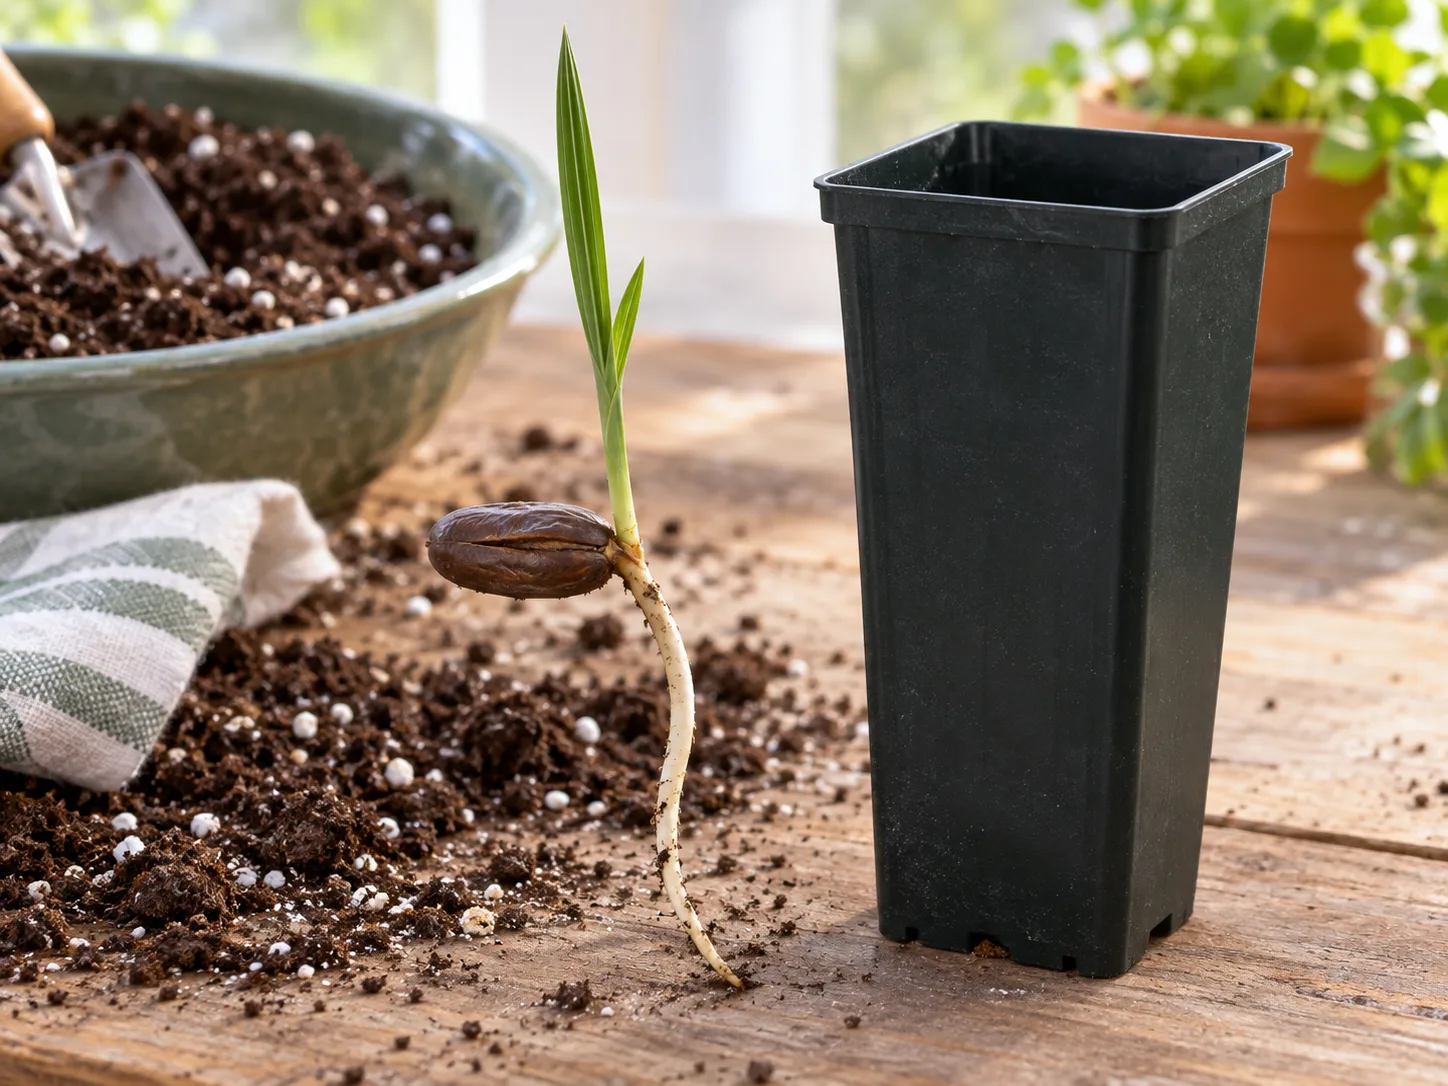
The pale projection from a germinating date seed can be mistaken for an ordinary root. In remote-germinating palms, the first structure is the cotyledonary petiole: it grows away from the seed, often downward into the medium, and its swelling is where the first root and shoot develop. UF/IFAS illustrates this sequence for Phoenix dactylifera in its palm-seed germination bulletin.
For potting, follow the direction of growth rather than trying to turn the seed so a guessed “top” points upward. The long pale part should have a direct path into the mix; the green shoot, when present, should remain above it. The seed itself can rest at the surface or partly above it while still attached. Do not tug on the pale structure to test whether it is a root, and do not peel away the seed coat or the seedling’s attachment.
Choose a pot that fits the root, not just the leaves
Palm seedlings often have one long root at their first transplant. UF/IFAS recommends moving them into a small liner pot that accommodates the root and leaves room for some further growth. That leads to a useful home rule: prioritize usable depth, keep the diameter modest, and choose a pot in which the root can lie naturally rather than being folded sharply against the base.
A deep nursery pot or palm liner is often more suitable than a wide, shallow decorative pot. The pot needs at least one open drainage hole; several are better if the container is large enough for them. A saucer is fine for catching runoff, but empty it after watering so the pot never sits in standing water.
Avoid overpotting. A much wider pot holds a larger volume of wet mix around a very small root system, and that unused mix can stay damp longer than the seedling can use it. A pot only a little wider than the root zone gives the plant room to establish while making moisture easier to judge. The UF/IFAS container-palm guide describes the trade-off: small shifts reduce overwatering risk, while larger pots require closer irrigation monitoring.
If the root is longer than the container, first find a taller one. If no practical pot can hold its full length, UF/IFAS says a slight curve along the inside perimeter or a gentle upward bend is preferable to root pruning. Keep the curve broad and loose; never crease, coil, or push the root into a tight loop.
Use a loose mix that drains but does not dry instantly
Use a commercial palm or cactus-and-palm mix, or improve a quality indoor potting mix with coarse perlite, pumice, or fine bark so water can pass through and air can reach the roots. The goal is not a bone-dry, gritty medium. A small seedling still needs moisture around its root; the mix should hold some water while releasing the excess quickly.
UF/IFAS recommends palm substrates that are well-drained, well-aerated, and stable, with enough water-holding capacity to avoid constant drying. Its nursery blends use materials such as peat, bark, wood shavings, and sand. At home, you do not need to copy a commercial formula exactly: a labeled palm mix or a standard potting mix opened up with perlite or bark is easier to source and manage. Epic Gardening’s palm-care guide also emphasizes a well-draining medium for container palms.
Do not use garden soil by itself in a small indoor pot. It can compact, drain slowly, and leave too little air around the young root. Avoid packing the mix down firmly as you fill the container. Lightly pre-moisten it so it is evenly damp before planting, but not dripping wet; very dry mix can be difficult to wet evenly, while saturated mix makes a delicate transplant harder to manage.
The drainage hole matters more than a layer of stones at the bottom. A gravel layer does not make a pot with no outlet drain; keep the hole open and use a suitable mix throughout the container. If the mix runs straight through before it wets, pour more slowly and in stages rather than adding a thick layer of compacting material at the base.
Prepare the seedling and work area first
Set out the filled pot, pre-moistened mix, a spoon or narrow dibber, and a small saucer before lifting the seedling. The move should take minutes, not leave the root exposed on a sunny windowsill while you search for a container. Keep the plant out of direct sun during the transfer and handle it by the seed or surrounding mix, never by the new leaf or the long pale growth.
If the seedling is in a cell or shallow tray, water the medium lightly beforehand if it is dry. Ease the mix away from the sides with a spoon and lift from beneath the root zone. Do not pull the seedling straight up by its shoot. If it comes from a damp paper towel, wet the towel so it releases more easily; tease away fibers only when they separate without resistance. A fiber firmly caught around the root is less harmful left in place than removed by force.
Inspect once, then leave the roots alone. A healthy young root is usually firm, not mushy; a little discoloration from the growing medium does not by itself prove rot. Remove any loose fragments of fruit flesh that remain on the seed, because they can decay, but do not scrape the seed coat or cut away the seed to make the plant look tidy. The seed remains attached while it supplies stored reserves.
Pot the germinated date seed step by step
Fill the pot loosely to a level that leaves room for the root and the correct planting line. Use a pencil, chopstick, or dibber to make a narrow channel deep enough for the pale growth. A preformed channel is gentler than pushing the seedling into dense mix, especially when the root has already lengthened in a bag or paper towel.
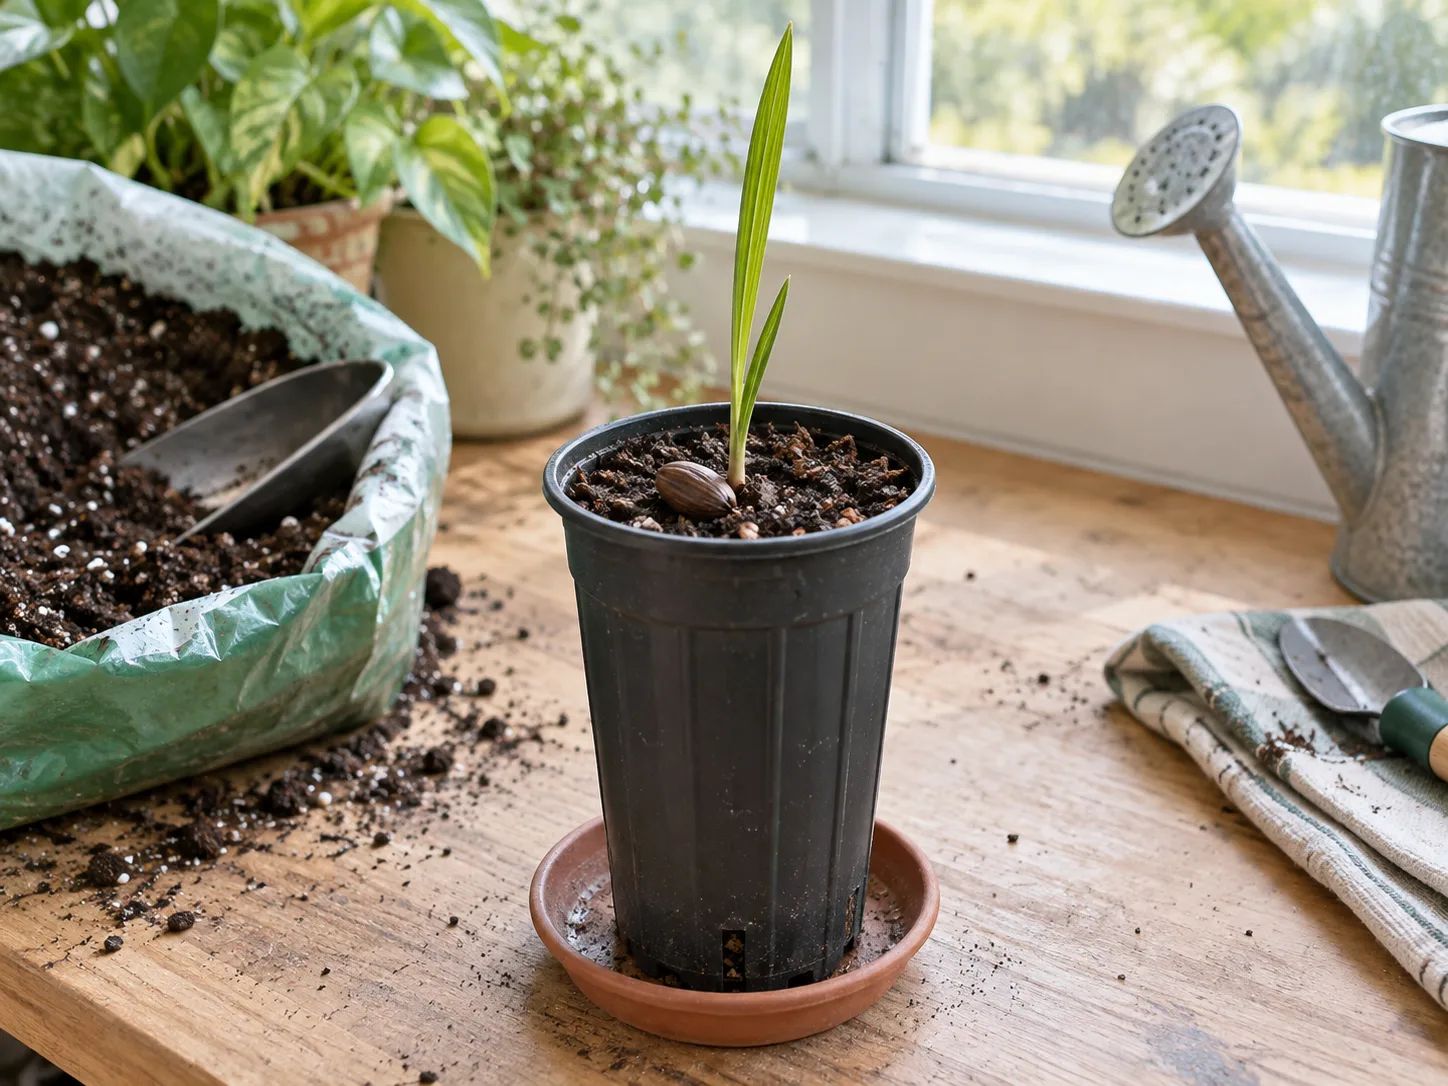
Guide the pale growth downward without forcing it
Lower the root-forming structure into the channel with the seed near the surface. Let the root follow its natural curve; do not stretch it straight, scrape it along the pot, or press it down with a tool. If the root bends, widen the channel and reposition the mix rather than using pressure to make it fit.
Backfill in small pinches and gently tap the outside of the pot to settle the mix around the root. Do not tamp hard. The seedling should stand without being buried, but a light touch around the root is enough to close large air gaps. If the shoot leans, adjust the loose mix around its base; do not use a deep mound over the seedling to prop it upright.
Keep the seed connection and stem base at the right level
Use the point where the stem begins above the root system as your depth reference. Set that root-to-stem junction at the soil surface or just slightly below it, covering the first roots while leaving the stem base and seed connection unburied. UF/IFAS warns that palm seedlings are especially sensitive to being planted too deeply; even a small excess can set growth back or kill a seedling.
Keep the date seed attached. If its connection leaves it sitting awkwardly, let the seed rest at the edge of the pot or on the surface instead of burying the stem to hide it. Do not sever the seedling from the seed during transplanting. The seed’s stored food continues to support early growth, and the attachment is part of the normal seedling structure rather than packaging to remove.
Water once, then let the container drain fully
After backfilling, water slowly over the mix until a small amount flows from the drainage hole. This settles the medium around the root and wets the full depth of the pot. Let it drain completely, then empty the saucer or cachepot. Do not leave the pot standing in runoff, and do not keep adding water simply because the top looks lighter after the first soak.
For the next watering, use the medium as your guide rather than a weekly calendar. A small pot in a warm bright room can dry sooner than a larger one in a cool corner. Check the surface and feel the mix just below it; water when it has begun to dry, before the entire root zone becomes dusty and hard. Keep it evenly moist during establishment, not saturated. UF/IFAS advises that palm containers should remain moist but never waterlogged, and Gardeners’ World’s seed-sowing guidance similarly treats moisture as something to manage at the growing medium rather than by a fixed cup measurement.
Give the seedling warm light while it re-establishes
Place the pot in a warm spot with bright, filtered light. A bright window with a sheer curtain or a position a short distance from a sunny window is a reasonable first location indoors. Keep the new seedling away from cold glass, air-conditioning blasts, and hot radiators, which can cause the small pot to swing between temperature and moisture extremes.
Do not move a freshly potted seedling straight into hours of harsh midday sun. Mature date palms are sun-loving, but a seedling raised in a bag, tray, or indoor corner has not been acclimated to direct outdoor light. UF/IFAS recommends light shade for newly transplanted palm seedlings until new growth appears. Once it is growing steadily, increase direct sun gradually over a week or two, watching for bleaching or dry patches.
Warmth helps a palm keep growing, but extra heat is not a substitute for a healthy root. The UF/IFAS container guide notes that tropical palm root activity declines in cool media. Keep the plant comfortably warm and postpone an outdoor move if nights remain cold. If your home is dim, a grow light can supplement the window; position it according to the fixture instructions and give the seedling a dark period rather than leaving a lamp on around the clock.
Follow a simple first-month care routine
During the first week, avoid rotating the pot repeatedly, changing the mix, or pulling the seedling up to inspect the root. Check that the pot drains and that no water is collecting beneath it. If the shoot remains firm and the seed is not soft or foul-smelling, a pause in visible growth after moving is not a reason to disturb it again.
For the next several weeks, check the medium every day or two, but water only when it is beginning to dry. Small pots can change quickly, especially near a sunny window, so a glance at the surface is not enough. If the pot feels light and the mix is dry below the surface, water thoroughly; if it still feels cool and damp, wait. The Gardeners’ World seed-sowing guide offers practical general advice for maintaining even moisture during early growth, while the palm-specific moisture rule comes from UF/IFAS.
Skip fertilizer during the first weeks. Palm-seed endosperm provides the seedling’s early nutrients, and UF/IFAS says seedlings generally do not need supplemental fertilizer for the first two to three months after germination. Fertilizer cannot repair a damaged root or force a dormant seedling to grow faster; unnecessary salts can add stress. After that early period, wait until the palm is established and producing growth, then use a fertilizer labeled for palms or container plants at the label rate.
You do not need to seal a potted sprout under a plastic bag once it has leaves and is growing in potting mix. A humidity cover can keep the surface wet for too long and limit air movement. The priority now is a warm root zone, gentle light, and a cycle of moisture followed by modest drying at the surface.
Know when the next pot-up is necessary
Do not repot because the seedling has reached a particular height. Look for roots circling the bottom, emerging repeatedly through the drainage holes, or filling the pot so that the mix dries unusually fast. One root at a hole is not an emergency if the plant is otherwise growing well and the container still holds moisture for a reasonable interval.
When the root system has outgrown its liner, move the palm during warm active growth into a pot only modestly larger and deep enough to hold the root. Slide out the root ball with minimal disturbance, keep the seed attached if it remains, and preserve the original soil line. UF/IFAS recommends transplanting before roots become greatly entangled and cautions against pruning palm seedling roots; a slightly curved root is preferable to cutting it.
If the plant is in a large pot that stays wet for many days, do not automatically move it to an even bigger one. First check drainage and the mix. A pot that is too large for the root system or a dense medium can keep moisture around the root too long. Repotting is useful when the root needs room or the medium has failed; it is not a general cure for slow growth.
Troubleshoot a date seedling after potting
A new container changes how quickly the root zone dries, so symptoms need a check of the mix before you change the care routine. Look at the seedling’s firmness, the moisture at root depth, drainage, and the base of the stem. One yellowing leaf or a brief pause does not identify the cause on its own.
Wilting, yellowing, or a stalled leaf
If the leaves soften while the mix is dry and the pot is light, water once thoroughly and let it drain. If the mix is wet, heavy, or sour-smelling, adding more water can make root stress worse. Move the plant to bright filtered light, keep it warm, and let the medium approach a moist-but-not-saturated state before watering again.
After transplanting, a seedling may pause while it re-establishes. If the center leaf remains firm and the seed is solid, leave it in place and continue steady care for several weeks. If the base turns soft, the seed becomes mushy, or the root darkens and collapses, suspect rot or damage. At that point, remove the seedling carefully, trim only tissue that is clearly dead with a clean tool, and repot the remaining firm growth in fresh, airy mix. Do not unpot it repeatedly to check for progress.
Mold, a soft seed, or a darkening root
A small patch of surface mold can grow on leftover fruit residue or on potting mix that stays constantly damp. Wipe or lift away loose residue from the soil surface, improve airflow, and let the top begin to dry between waterings. Avoid scraping the seed coat or removing a healthy seed just because the mix has a little harmless surface growth.
A seed that is soft throughout, leaking, or strongly foul-smelling is different from a firm seed with a bit of surface fuzz. Those signs suggest decay and a low chance of recovery. Check that the drainage hole is open, reduce watering, and use fresh mix if the container has become sour or waterlogged. Do not add fungicide or household chemicals to a young edible-date seedling without a product labeled for that use.
Set realistic expectations for a seed-grown palm
A date seed can make a rewarding long-term foliage plant, but it does not promise a compact palm or a crop of dates. The seedling may grow slowly at first, and its juvenile leaves look unlike the mature fronds pictured in landscapes. A grocery-store pit is useful for an experiment; it is not a reliable way to reproduce a named fruit cultivar or predict the eventual size of the plant.
The species distinction matters here too. A true date palm is a different plant from a Canary Island date palm, and both can become substantial landscape palms. A container can keep a young palm manageable for a while, but it will not permanently turn a large tree species into a dwarf houseplant. If you want an indoor palm that stays smaller, choose a species sold for that purpose rather than expecting the date seed to remain tiny.
Avoid the mistakes that cause preventable setbacks
The most damaging errors happen while the root is exposed or after it is buried. Do not pull the seedling by its leaf, bend its root sharply, cut a root to fit a shallow pot, or plant the stem deeply to make it stand upright. Use a taller container and a loose channel, then backfill gently around the root.
Do not use a giant pot “for room to grow,” compact garden soil, or a pebble layer as a substitute for a real drainage hole. Those choices make the moisture balance harder to manage. Choose a modest liner with good depth, an aerated mix, and a saucer that you empty after the first watering.
Finally, resist the urge to fix normal adjustment with more water, fertilizer, sun, or repotting. Keep the seed attached, provide warm filtered light, and judge watering by the mix and pot weight. If the seed remains firm and the central shoot is alive, patience is often safer than another intervention.
Conclusion
Pot a germinated date seed by giving its long early root room, keeping the seed attached, and setting the root-to-stem junction at the original soil level. Use a small but deep pot with open drainage and an airy mix; water fully once, drain the saucer, and keep the seedling warm in filtered light while it settles.
The root system—not a generic height rule—should determine when and where you transplant. Avoid cutting roots or burying the stem, and wait to repot until the root actually needs more room. Those simple choices give a young date palm the best chance to establish without turning a careful potting job into a cycle of stress.