How to Grow Rice at Home: Planting to Harvest
Learn how to grow rice at home with a suitable upland variety, a realistic planting calendar, steady watering, and practical steps for drying and hulling a small harvest.
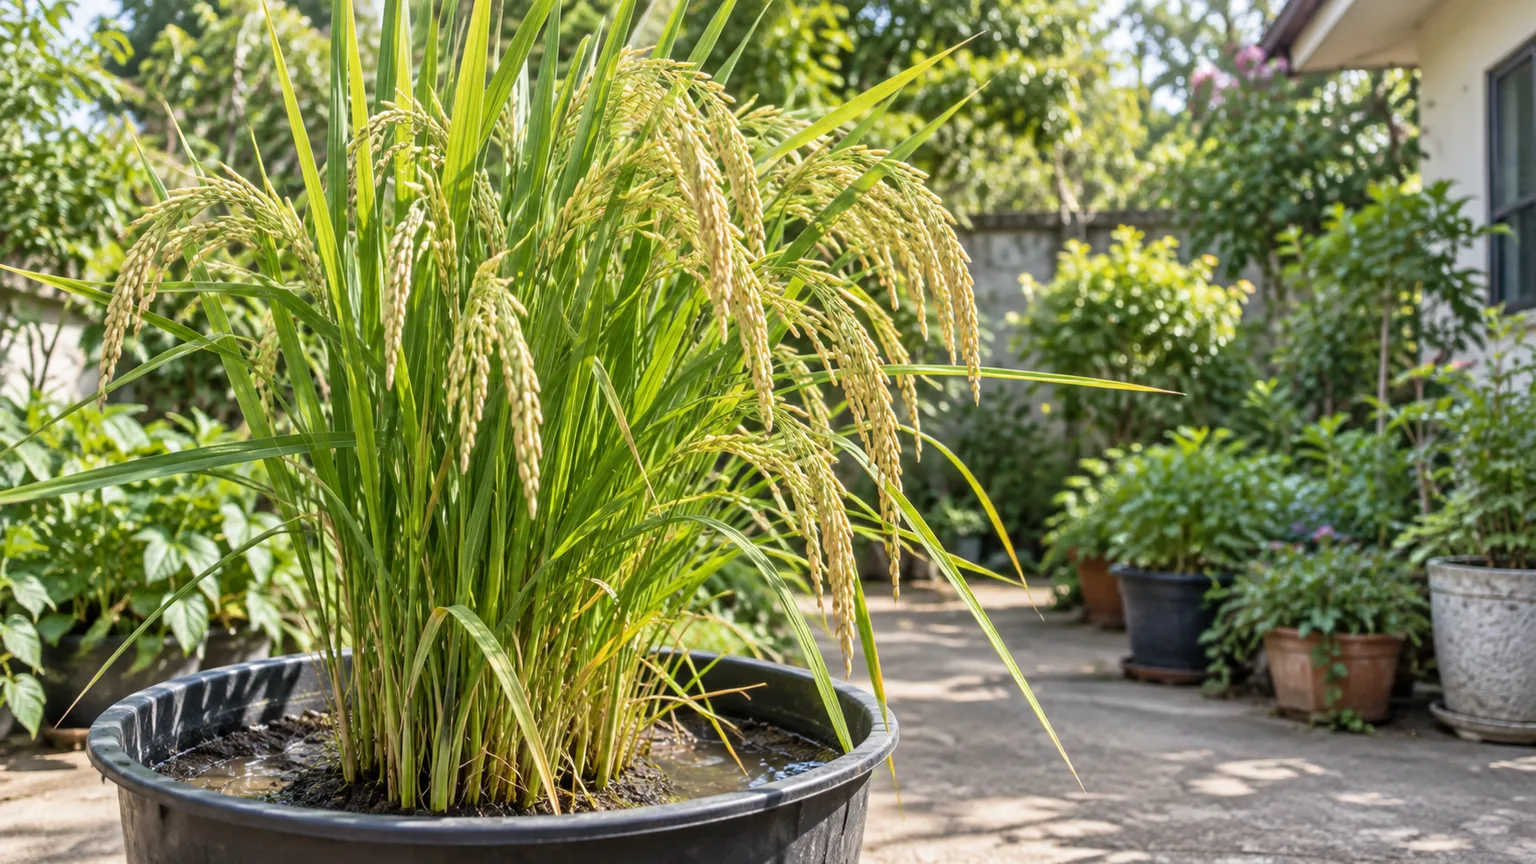
Rice can grow in a backyard without a flooded field, but the crop asks for more than a sunny corner and a handful of grocery-store grains. You need a rice type suited to your water setup, a long enough warm season for its variety, and a plan for turning mature seed heads into edible grain.
For most first-time gardeners, the manageable route is upland rice started indoors and transplanted into a sunny bed or broad container. That approach avoids building a paddy, gives seedlings a head start, and makes it easier to protect the crop from weeds and birds. It is still a small-scale experiment: the plants may be attractive and educational, but hand processing is slow and the harvest is usually modest.
Is rice a practical home-garden crop?
Rice, or Oryza sativa, is an annual grass grown for the grains carried in its flower clusters, called panicles. The crop is often associated with flooded paddies, but rice varieties differ in how they are cultivated. Upland types can grow in ordinary garden soil as long as their root zone receives reliable moisture; lowland or paddy types are adapted to wet fields. Epic Gardening describes both methods, while Savvy Gardening’s backyard trial shows that an upland type can grow in a raised bed without a paddy. (Epic Gardening’s rice-growing guide; Savvy Gardening’s backyard rice trial)
The practical question is not simply whether rice can grow in your climate. Ask whether you have enough warm, sunny days for the cultivar to mature, a way to keep its roots from drying out, and patience for drying and dehulling the grain. If you want a dependable staple crop from a small space, rice is a poor shortcut. If you want to learn a crop’s full life cycle or try a distinctive summer project, a few plants can be worthwhile.
Upland and lowland rice are different growing jobs
Upland rice grows without standing water. It still needs consistent soil moisture, especially while establishing and forming grain, but you manage it more like a thirsty garden crop than a pond plant. This is generally the easier type for a backyard bed, because you can use familiar soil, mulch, and irrigation practices.
Lowland rice is grown in wet conditions, often with a shallow water layer. Flooding can suppress weeds in production fields, but a home grower must maintain a watertight bed or container and monitor water carefully. Do not choose a lowland cultivar just because it sounds more traditional; first decide whether you can actually manage that water system. “Short-grain” and “long-grain” describe the grain’s culinary type, not whether the plant is upland or lowland.
Choose a rice variety for your season and goal
Buy seed sold for planting and look for the words upland, dryland, or a clear description of the variety’s growing requirements. For a first garden trial, an upland cultivar such as ‘Duborskian’ is a sensible starting point: it is repeatedly described as a home-garden option, and Savvy Gardening reports growing it in a raised bed. Its stated maturity period varies with the seed source and how the clock is counted, so use the packet or supplier’s estimate rather than treating any number as universal. (Savvy Gardening; Epic Gardening)
| Growing type | What it means in practice | Best fit |
|---|---|---|
| Upland or dryland | Moist, aerated garden soil; no standing water required | A sunny bed or container, especially where water can be supplied regularly |
| Lowland or paddy | A wet-growing system that may use shallow standing water | A warm, long-season site with a container or bed that can safely hold water |
Other names may appear in seed catalogs, including ‘Carolina Gold’ and ‘Blue Bonnet’. Do not select a cultivar by name alone: check whether it is upland or lowland, the expected days to maturity, grain type, and the seller’s regional advice. A variety that performs well in a warm southern climate may not finish before autumn in a short-season garden. If you are unsure, contact the seed supplier with your location and the number of frost-free days you usually get.
Pick a garden bed or container
A sunny in-ground bed is straightforward for upland rice if the soil holds moisture without staying waterlogged. Choose a level area where irrigation is easy and rainwater does not run off immediately. A raised bed can work, but it may dry faster than ground-level soil, so plan to check it more often during hot, windy weather.
A container is useful when you have limited ground space or want to contain a wet-growing cultivar. For upland rice, use a broad pot or tub with drainage holes and enough surface area for several plants; a narrow decorative pot may hold soil but gives little room for a useful stand. For a lowland type, use a sturdy, watertight vessel only if you can manage its water level and prevent leaks. A small container also dries and warms quickly, so it can require more frequent attention than a bed.
Do not begin by filling a small bucket with deep water unless your seed supplier recommends that method for the variety. A paddy-style setup is not a universal requirement, and standing water is not a substitute for choosing the right rice type. If this is your first crop, an upland variety in a bed or drained container keeps the experiment simpler.
Count your warm growing days before planting
Rice needs warmth and a long enough season to pass from seedling growth to mature grain. Gardening Know How notes that home growers in cooler regions may need to start plants under lights, while Savvy Gardening describes starting seedlings about six weeks before the last expected frost and transplanting after the weather settles. Some upland varieties can be ready in roughly three to four months from transplanting, but cultivar, temperature, and the supplier’s method for counting days all matter. (Gardening Know How’s rice guide; Savvy Gardening)
Use your local frost calendar as a planning tool, not as a universal planting date. Check the number of frost-free days between the last spring frost and the first likely autumn frost, then compare that window with the cultivar’s maturity estimate. Add a buffer for slow early growth, cool nights, cloudy spells, or an unexpectedly early frost. If the crop would need to ripen after your growing season ends, choose an earlier upland variety, start indoors to gain time, or save rice for a warmer year.
Warmth matters at both ends of the season. Do not rush seedlings outside while nights are still cold just because the calendar says spring has arrived. Conversely, indoor starts only help if seedlings receive strong light and are moved outdoors gradually once frost danger has passed and conditions are suitable.
Start with viable seed, not pantry rice
The most reliable starting material is untreated rice seed intended for planting. Polished white rice has had its outer layers removed and is not a dependable seed. Whole brown rice may sometimes sprout, but the variety, processing, storage, and viability are uncertain; treat it as a curiosity rather than a crop plan. Gardening Know How also describes using unpolished grain as an experiment, while Epic Gardening recommends intact, unprocessed seed for propagation. (Gardening Know How; Epic Gardening)
If you have a short season or only a small packet, test a sample before committing the whole bed. Place several seeds in a moist paper towel or seed-starting mix, keep them warm, and check them over the period stated by the seed supplier. Count how many produce a root and shoot. This is a practical home check, not a laboratory germination test, but it flags an old or poorly stored packet before you spend weeks caring for it. Rice research describes rapid, uniform germination and seedling emergence as important to establishing a consistent crop stand. (Review of rice seed germination research)
Use clean water and a clean tray, and do not leave seeds submerged after a root tip appears. If the seed packet recommends soaking or pre-germination, follow its timing; different seed lots and methods do not all need the same treatment. A seed that swells but does not send out a root is not ready to transplant, and a brittle root is easy to damage during handling.
Prepare a sunny, moisture-retentive site
Choose the sunniest practical spot you have. Rice needs strong light to build sturdy leaves and fill its panicles, so avoid a location shaded for much of the day by a fence, tree, or building. Epic Gardening recommends full sun and notes that rice is a high-water crop; a consistently bright position also helps the foliage dry after rain and keeps dense plants from staying damp for long periods. (Epic Gardening)
For upland rice, aim for fertile soil that holds moisture but still drains. Work in mature compost before planting if the bed needs organic matter, then level and water the area so you can see how quickly it dries or puddles. Rice is not a reason to turn an ordinary garden bed into sticky, anaerobic mud. If water stands for days in a poorly drained site, use a different bed or a container better suited to the cultivar.
For a paddy container, make sure it is food-safe, stable, and genuinely watertight before filling it. Position it where it gets full sun and where excess water will not damage a deck, foundation, or neighboring plants. A large container is heavy once filled, so set it in its final place before adding soil or water. For any setup, make access to a hose or watering can part of the site choice.
Start indoors or direct-sow
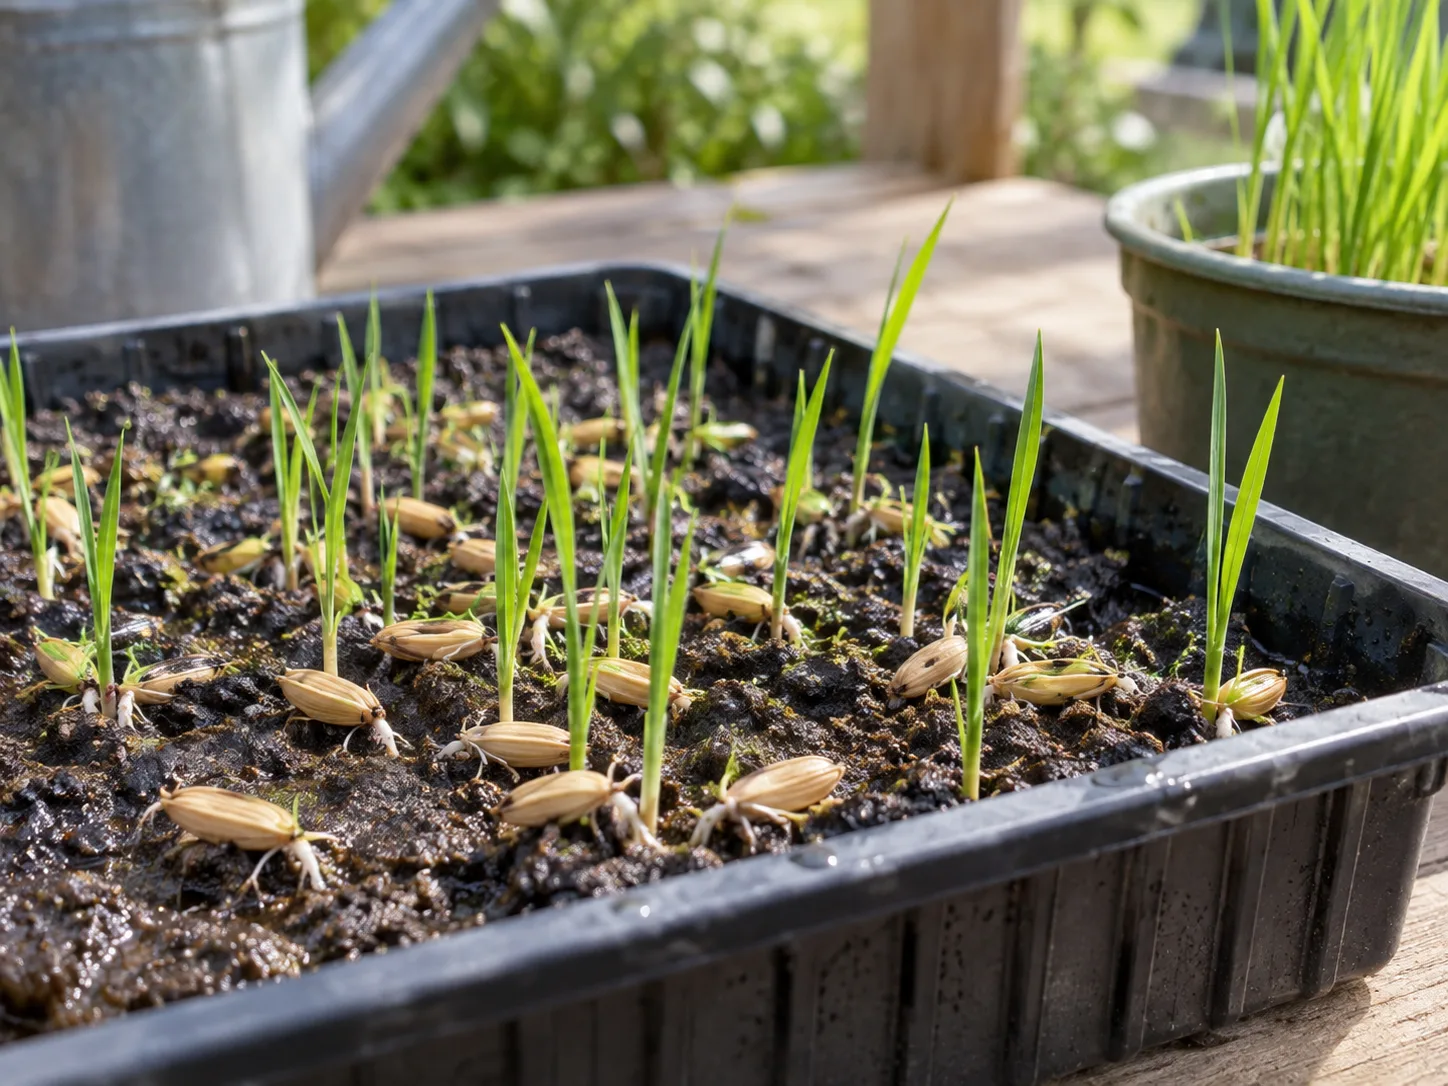
Starting indoors is the safer option when the outdoor season is short or spring warms slowly. Sow into a clean tray or small cells using a seed-starting mix that stays evenly moist but not soupy. Keep the tray warm and bright; a sunny windowsill may work in a bright room, but a grow light gives seedlings steadier light if the window is dim. Start roughly six weeks before the date you expect to transplant, then adjust to the variety’s instructions and your local weather.
Direct sowing can make sense where the warm season is long and the soil is warm enough for quick emergence. Sow into a prepared, moist bed after frost danger has passed, following the packet for depth and spacing. Mark the row so you can tell the rice seedlings from weeds during the first weeks. Keep the seed zone from drying out while it germinates, but do not flood upland seed unless the cultivar’s directions call for it.
The tradeoff is control versus labor. Indoor sowing gives you a visible, established seedling before outdoor planting, but adds a tray, light, watering, and transplant step. Direct sowing is simpler, yet cool soil, hard rain, birds, or weeds can create gaps that are difficult to correct late in the season.
Transplant carefully and set spacing
Move seedlings outdoors only after frost danger has passed and temperatures are reliably warm. Harden them off over about a week by gradually increasing their exposure to outdoor sun and breeze; a tray moved directly from a sheltered room into hot afternoon sun can suffer leaf scorch or wind stress. Water the seedlings before transplanting so the root plugs hold together.
Set each plant at the same depth it grew in its cell, firm the soil gently around the roots, and water it in. Leave enough room for the clumps to expand and for air to move between them. Home-growing sources vary in their spacing recommendations, from roughly eight inches to about a foot, so use the variety’s packet as the final guide. As a practical starting range for a garden bed, space transplants about 8 to 12 inches apart, with rows wide enough to reach in and weed.
If a tray produces more seedlings than you need, keep the strongest ones rather than crowding every plant into the bed. A dense stand can compete for light and water, become difficult to weed, and hold humidity around leaves. For a container, leave room for the mature clumps rather than planting as densely as a field; a few vigorous plants are easier to care for and harvest by hand.
Keep water steady without flooding upland rice
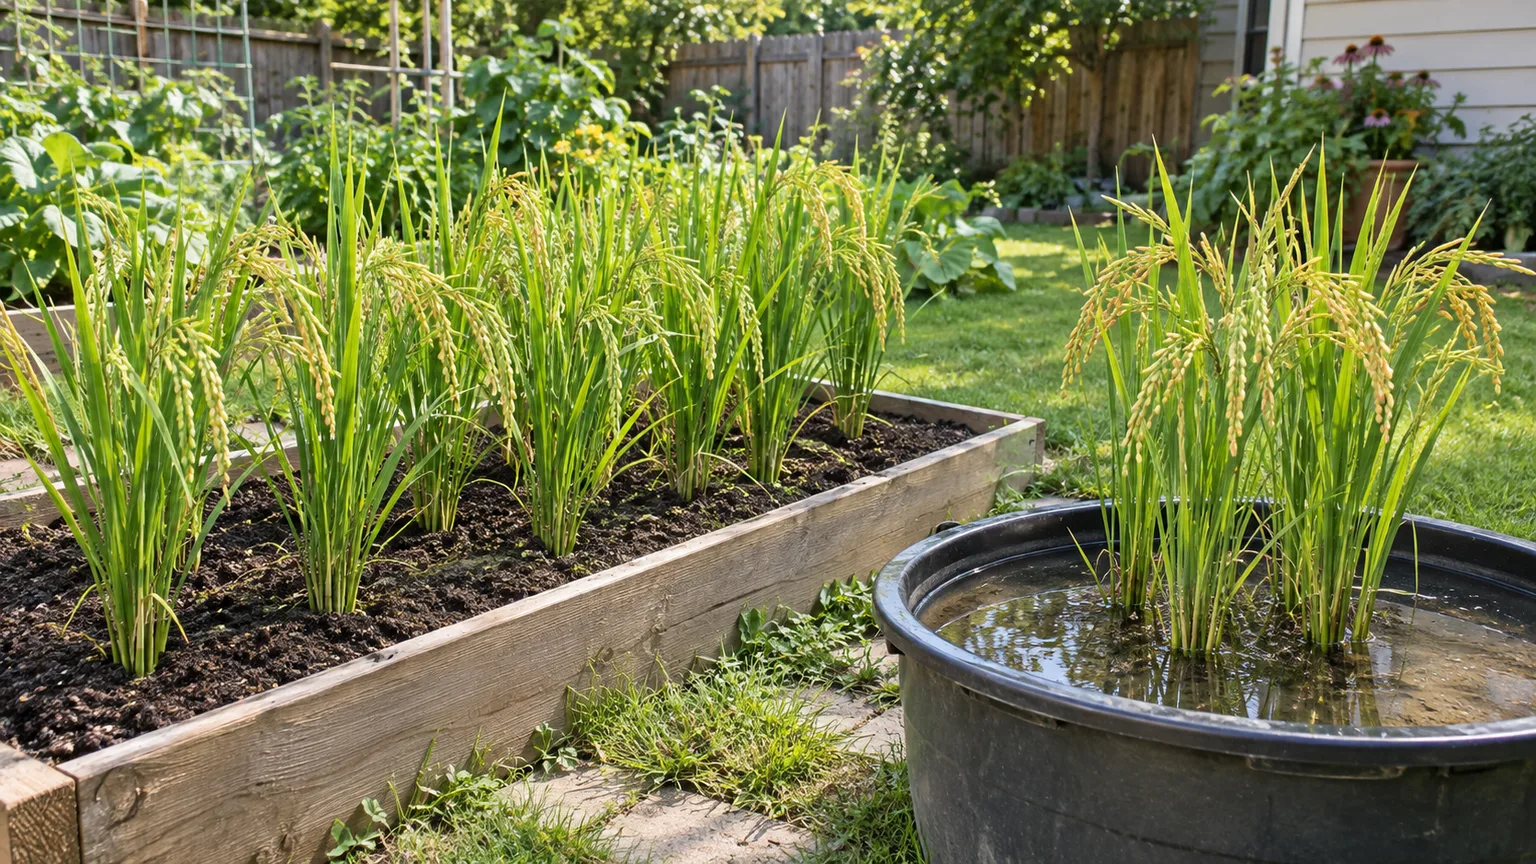
For upland rice, the goal is a reliably moist root zone, not permanent standing water. Rainfall, soil texture, container size, wind, and heat all change how often you need to irrigate. Epic Gardening gives about an inch of water per week as a starting point for upland rice, and Savvy Gardening reports using roughly that amount during a dry summer. Treat those figures as a reference, not a rigid schedule: check the soil and the weather before watering. (Epic Gardening; Savvy Gardening)
Water slowly enough to soak the root zone instead of running off the surface. In a bed, mulch can reduce evaporation once seedlings are established. In containers, lift or probe the soil near the edge to judge moisture; the surface can look dry while the center remains wet, or the reverse can happen after hot sun. During a heat wave, a small pot may need water more often than a larger bed.
Do not interpret “rice likes water” as permission to let an upland plant sit in stagnant water. Constant saturation deprives roots of the air they need and can encourage weak growth. Lowland rice is a different case: use a container designed to hold water and follow the supplier’s directions for that cultivar rather than improvising a deep flood. If you cannot monitor water levels, stick with upland rice.
Weed early and feed conservatively
Young rice competes poorly with fast weeds, so begin with a clean bed and inspect it regularly while plants are small. Pull weeds before they set seed, loosening the soil carefully so you do not disturb shallow rice roots. A light mulch of clean straw or shredded leaves can conserve moisture and reduce new weeds once seedlings are large enough to emerge above it; keep mulch away from the plant crowns and do not smother small shoots.
Rice is a grass and responds to nitrogen, but that does not mean more fertilizer automatically means more grain. Excessive nitrogen can push soft leafy growth, increase lodging risk, and create runoff. If possible, base fertilizer decisions on a soil test. Compost incorporated before planting may be enough in a fertile bed; if you use a packaged fertilizer, follow its label for edible crops and avoid copying commercial rice rates into a small garden container.
Watch the plants before adding anything. Pale growth can come from several causes, including poor light, cold roots, water stress, or nutrient shortage; fertilizer will not fix a cold, flooded, or drought-stressed plant. Correct the growing condition first, then make a measured nutrient adjustment only if the evidence points that way.
Read the crop’s growth stages
At first, rice looks like a clump of narrow grass blades. As it enters the vegetative phase, new stems called tillers arise from the base. Later, each productive tiller may form a branched flower cluster called a panicle, which carries the grains. The progression from seedling to tillering, heading, flowering, and grain filling explains why a plant can look lush for weeks before the edible crop becomes visible. (Epic Gardening; Morning Chores’ upland rice guide)
Use those stages to diagnose timing rather than relying only on a calendar. If a plant is still making leaves and tillers, it has not reached the grain-filling stage. When panicles emerge, they flower and then begin filling; keep moisture steady through this period because stress can reduce the number of full grains. As panicles mature, the grain color shifts from green toward straw or gold and the seed becomes firmer.
The plant may look uneven because tillers and panicles do not all develop on the same day. That is normal to a degree. Inspect several panicles across the bed instead of judging readiness from one early head or from the color of the leaves alone.
Solve the problems that threaten a home crop
Few or no seedlings: test seed viability before sowing the whole packet. If the seed was viable, review soil warmth, moisture, and sowing depth; cold, dry, or waterlogged seed can emerge slowly or unevenly. Thin or replace gaps early if there is enough season left, but avoid disturbing neighboring roots.
Thin or pale plants: check sunlight first, then inspect moisture below the surface. A shaded or water-stressed plant may look weak even when fertilizer is present. If several plants show the same pattern in a well-lit, evenly moist bed, a soil test can help distinguish a nutrient issue from a root or drainage problem.
Leaning stems: wind, dense spacing, overly rich nitrogen, or heavy panicles can contribute. Do not cut off grain-bearing stems to make the bed look tidy. Give plants airflow from the start, avoid overfeeding, and use a discreet stake or support only if a small patch is repeatedly blown over.
Birds taking grain: protect ripening panicles with bird netting secured so birds cannot become trapped. Inspect the net regularly and keep it taut rather than draped loosely over plants. Rice-specific insects and diseases are possible, but the priorities in a small garden are clean seed, sensible spacing, steady care, and close observation; do not spray a food crop with a product unless its label explicitly permits that use.
Harvest when the grains—not just stems—are ready
Harvest readiness is about the grain on the panicles, not simply a plant turning yellow. Rice harvested too early can contain many immature, poorly filled grains; waiting too long increases the chance of shattering, birds, or weather damage. The International Rice Research Institute’s harvest guidance uses the proportion of straw-colored grains on a panicle as one maturity signal, with about 80 to 85 percent straw-colored grains as a general field benchmark. At home, inspect several panicles and look for firm grains that have shifted from green toward straw or gold. (IRRI Rice Knowledge Bank’s harvesting guidance)
Varieties mature at different rates, and a cool spell can slow the finish. If autumn frost or prolonged rain is approaching, weigh the risk of waiting against the number of immature grains still present. Harvest on a dry day when the heads are not wet with rain or dew, and handle the panicles gently so mature grains do not fall before they reach your tray.
Dry, thresh, hull, and winnow the crop
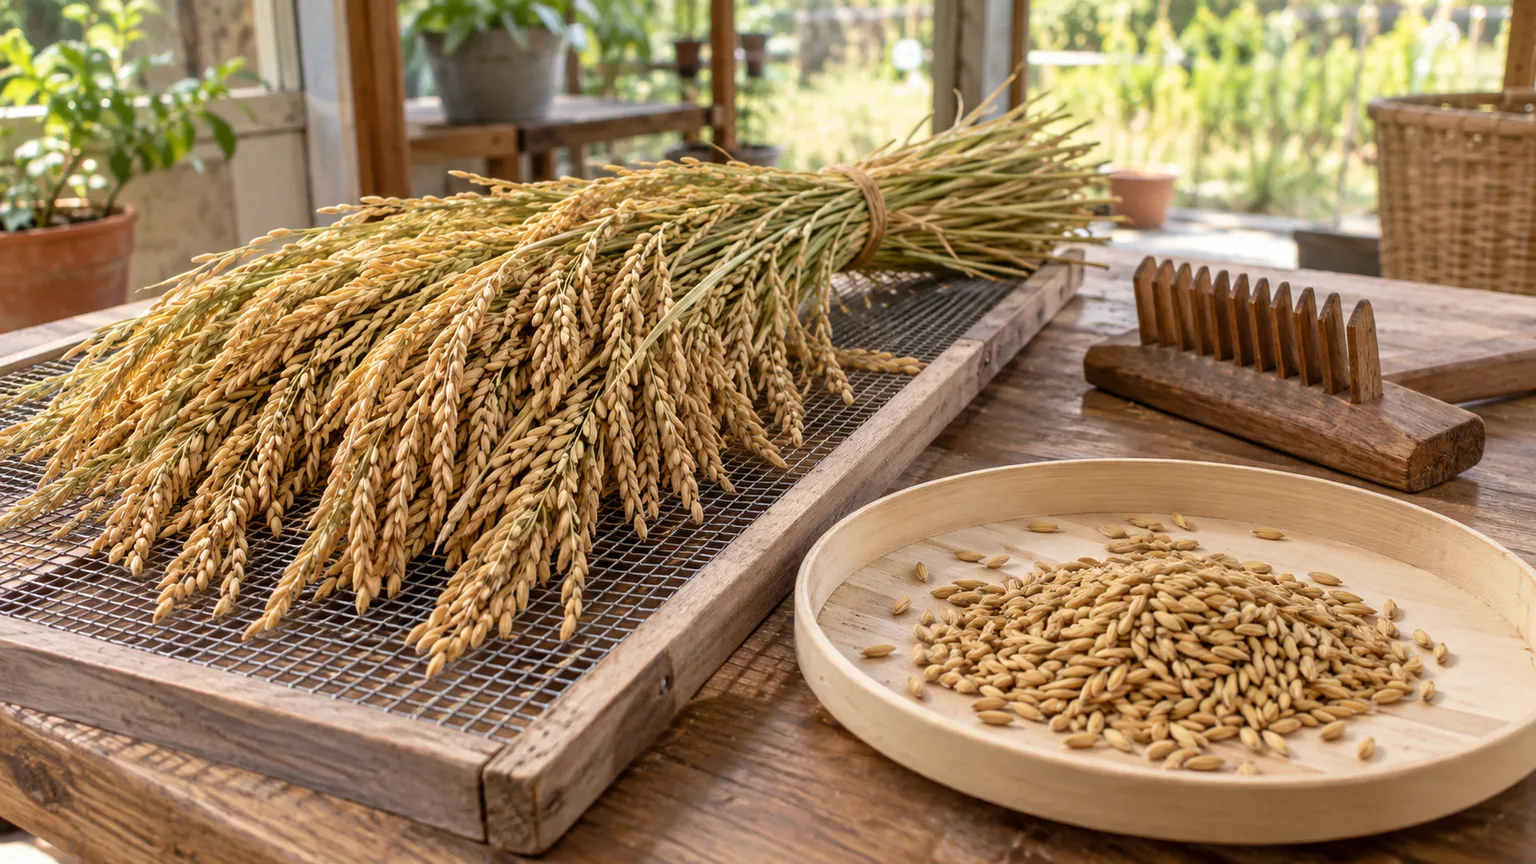
Post-harvest work has several distinct stages. Cutting removes mature stems; threshing separates paddy grains from the panicles; winnowing removes light chaff; dehulling removes the hard outer husk; and polishing removes more of the bran to make white rice. The first edible form after dehulling is brown rice, not white rice. A home crop can be cut with clean shears, but processing it takes patience.
For a small harvest, cut stems with enough length to bundle or lay them on a clean screen. Dry them under cover with good airflow, away from rain, dew, and damp ground. Once the heads are thoroughly dry and the grains feel firm, rub or gently beat them over a wide, clean tray to thresh. Work in small batches and use light pressure: crushing the grains makes later cleaning harder and reduces the amount of whole rice.
Pour the threshed grain between two shallow bowls in a gentle breeze or in front of a fan set low. The lighter chaff should blow aside while the heavier paddy grains fall into the receiving bowl; use a screen or work inside a large bin so a gust does not scatter the harvest. Then remove the husks with a small rice dehuller if you have one, or try a gentle mortar-and-pestle method on a few grains first. Home dehulling takes more care than threshing, and aggressive pounding can break the kernels.
Large-scale rice guidance emphasizes prompt threshing and drying because delays and poor handling can damage grain quality. A home grower may need to dry small bundles before hand threshing, but keep them loose and ventilated and do not leave cut rice in a damp pile or exposed to repeated wetting. (IRRI Rice Knowledge Bank; Savvy Gardening)
Store the grain and know what “brown rice” means
After hulling, make sure the grain is fully dry before sealing it for storage. Damp kernels in an airtight jar can spoil; if you are not sure, spread them out in a clean, dry place for additional airflow and inspect for any musty odor or discoloration. Store clean, dry rice in a sealed food-safe container in a cool, dry cupboard, and label the harvest year and variety.
The hull is not edible and must be removed. The bran layer remains on brown rice; producing white rice requires further milling or polishing, equipment that usually makes little sense for a handful of backyard grain. This is one reason to treat homegrown rice as a tasting or learning crop: getting a few clean brown kernels is already a successful harvest, even if you do not mill them to white rice.
Set a realistic harvest goal
Do not calculate a pantry supply from plant height or the number of tillers alone. The harvest depends on how many tillers form panicles, how many grains fill, weather during flowering and grain fill, bird pressure, and how much you lose during threshing and dehulling. A gardening article can offer a useful example, but not a promise for your bed: Savvy Gardening’s author reported that eight plants in one trial yielded about three-quarters of a cup. Your variety, spacing, season, and hand-processing skill may produce more or less. (Savvy Gardening)
For a first attempt, define success as learning whether rice matures in your season and bringing a small quantity of clean grain through every processing step. Start with a small patch, keep notes on sowing and transplant dates, and record when panicles appear and turn straw-colored. Those observations will tell you far more than a generic yield estimate when you decide whether to expand next year.
Conclusion
To grow rice at home, choose a variety that matches your climate and water setup, then count backward from the end of your frost-free season. An upland type in a sunny bed or broad drained container is usually the simplest first trial; start it indoors if your season is short, transplant only in warm conditions, and keep the root zone consistently moist without flooding it.
The crop is not finished when the stems turn gold. Check the grains on several panicles, dry the cut material carefully, then thresh, winnow, and dehull only as much as you plan to use. With realistic expectations and a few notes for next season, even a small rice harvest can teach you how much cultivation, timing, and handwork sit behind a bowl of rice.