How to Grow Garlic Indoors for Greens or Bulbs
Grow garlic indoors for fresh shoots or bulbs. Get practical guidance on cloves, chilling, containers, watering, light, harvest timing, and common failures.
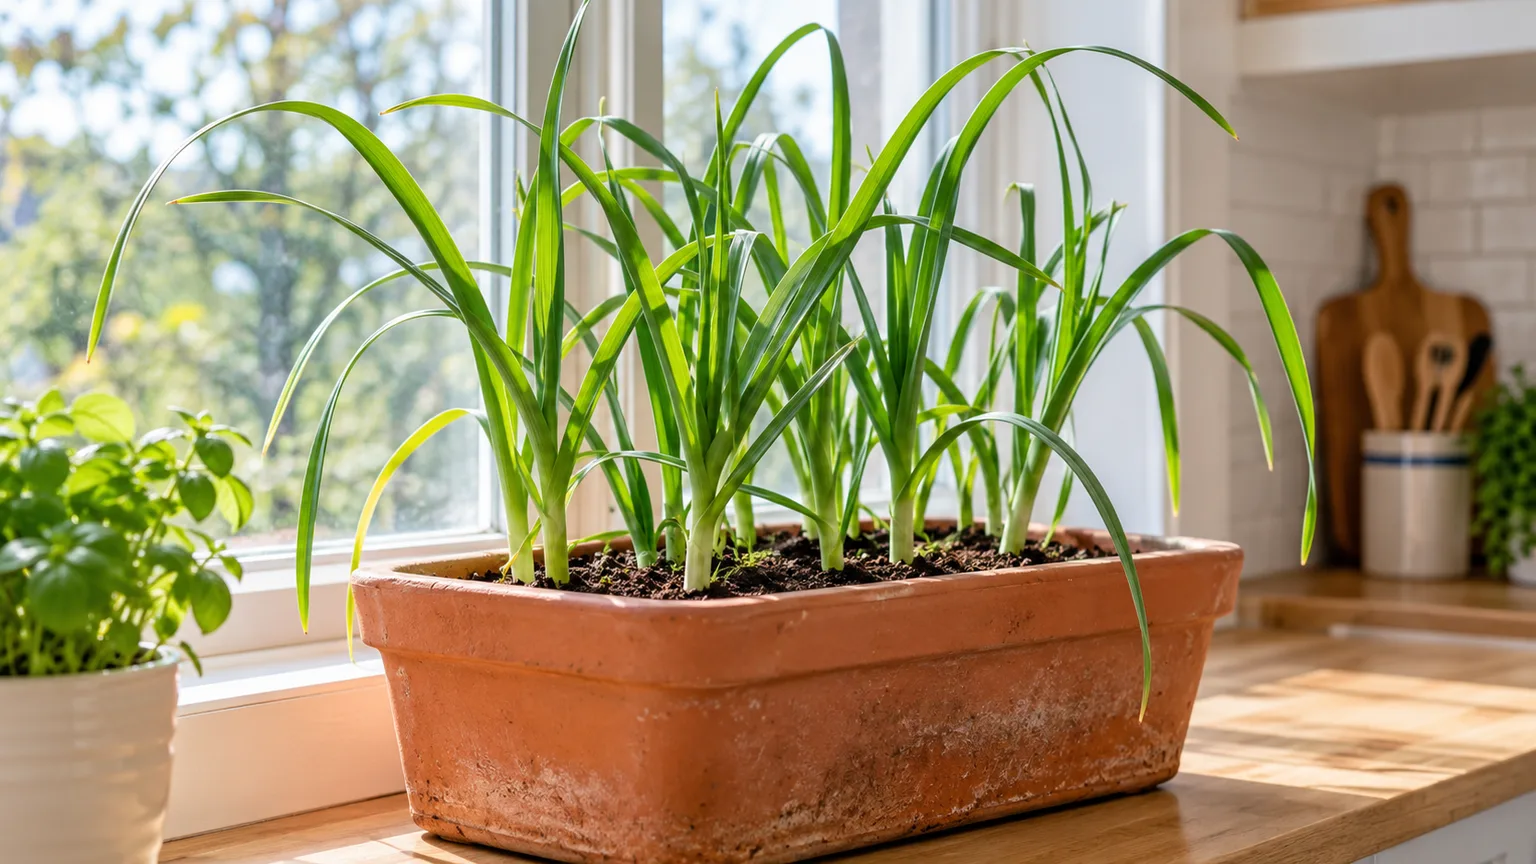
You can grow garlic indoors in a pot, but your harvest goal changes the plan. A clove planted close together with others can produce tender garlic greens for cooking; a plant expected to form a mature, divided bulb needs more room, strong light, a long growing season, and usually a cold period before or during early growth.
For most homes, garlic greens are the dependable indoor crop. They grow from the food stored in each clove, need less space than a full bulb, and can be cut while young. Growing storage-size heads indoors is possible in some setups, but a warm room and a dim winter window often produce leaves without a well-developed bulb. Choose the harvest you want before you fill a pot.
Choose your harvest goal before you plant
Garlic greens are the leaves that emerge from a clove. They taste like a mild garlic-scented scallion and can be snipped into eggs, soups, sauces, salads, or stir-fries. Plant several cloves in one pot if you want regular small cuts, or start a new pot every couple of weeks so all your leaves do not mature at once.
A mature garlic bulb is a different crop. The plant must grow for months and develop a larger underground storage structure divided into cloves. For many garlic varieties, that process depends on a period of cool temperatures; it also needs enough sustained light for leaves to support bulb growth. If you have only a north-facing window and want a quick edible harvest, grow greens and skip the promise of full heads.
You can also grow “green garlic” as an intermediate harvest: pull a whole young plant while the base is still a small, mild bulb. It is not the same as a cured garlic head, and it will not keep for months. This is a useful kitchen crop when you want the entire plant rather than repeated leaf cuttings.
Select sound cloves and a suitable garlic type
Start with a firm, healthy garlic bulb. Separate it into individual cloves just before planting, keeping the papery covering intact and leaving the flat basal plate undamaged. Avoid cloves that are soft, shriveled, moldy, or bruised; they are more likely to fail or rot in the consistently moist environment of a pot.
If you are buying garlic specifically for planting, choose seed garlic from a reputable grower or garden supplier, ideally a variety suited to your region. The RHS garlic guide recommends named varieties and notes that supermarket bulbs may be poorly suited to the local climate in its growing region. A named cultivar gives you a better idea of its cold needs, expected size, and time to maturity.
Grocery-store cloves can work for greens
A grocery-store clove is a reasonable low-cost experiment for leaves if it is fresh-looking and firm. Its variety and storage history may be unknown, so it is less predictable if your goal is a storage bulb. The point is not that kitchen garlic can never grow; it is that you cannot reliably know whether that cultivar matches your climate or has received the season it needs to divide well.
Hardneck and softneck garlic are the two broad types. Hardneck varieties usually make a central flower stalk called a scape and are often associated with colder growing regions; softnecks tend to store longer and may be better adapted to milder areas. Indoors, local adaptation and the specific variety matter more than the label alone. The RHS species profile for garlic describes garlic as a full-sun bulbous perennial grown as an annual and distinguishes the hardneck and softneck forms.
Choose a container for the crop you want
For repeated greens, a pot about 6 inches deep with drainage holes is generally a practical starting point. The width matters more than the pot’s overall volume: it determines how many cloves you can fit without crowding. A rectangular planter makes it easier to cut greens from one side while younger shoots grow elsewhere.
If you want full bulbs, use a wider, deeper container. The RHS recommends pots at least 25 centimeters (about 10 inches) deep for container-grown garlic and says to use the same spacing as for an outdoor planting. In practice, allow roughly 6 inches between cloves, so a small pot may hold only one or two bulb-producing plants. The RHS container guide also emphasizes drainage holes because excess water has nowhere to escape in a pot.
A drainage hole is essential; a layer of gravel at the bottom does not replace it. Set the pot on a saucer to protect the sill, but empty standing water after it drains. If you are using a decorative cachepot without holes, keep the planted pot inside it only if you can lift it out to water and drain fully.
Use a light, well-drained potting mix
Fill the pot with a fresh, free-draining container mix rather than garden soil. Garden soil compacts in a pot and can hold water around the clove, while a loose potting mix leaves enough air for roots and allows extra water to pass through. A standard all-purpose potting mix is sufficient; you do not need a special “garlic soil” or a precise homemade recipe.
Moisten the mix before planting so it is evenly damp but not dripping. If water pools on top or the mix feels heavy and sticky, blend in a modest amount of perlite or fine horticultural grit, or choose a better-draining potting mix. Do not fill the container with compost alone: it can shrink or stay too wet, and its nutrient content may be stronger or less predictable than a balanced potting medium.
Keep the soil line about an inch below the rim so you can water without spilling. That small headspace also makes it easier to see whether water drains freely. Once the cloves are planted, avoid pressing the mix into a hard, dense surface; settle it gently with your fingertips.
Chill garlic only when you want to grow bulbs
Garlic greens do not need a simulated winter. A clove can sprout and make leaves without a pre-plant chilling period, so there is no reason to take over refrigerator space if your goal is only a short run of shoots.
Bulb production is more demanding. The RHS notes that most garlic varieties need roughly one to two months at 0–10°C (32–50°F) for good bulb development. If your home stays warm and your variety needs a cold period, follow the seed supplier’s instructions about chilling before planting. Keep the bulbs dry and intact while chilling, then separate the cloves immediately before you plant them.
Chilling does not make an unsuitable indoor setup ideal. It addresses one part of garlic’s seasonal cycle; the plant still needs a strong light source, enough room for roots and bulb expansion, and months of growth. If you cannot provide those conditions, you can still get a worthwhile greens crop from the same cloves.
Plant cloves at the right depth and spacing
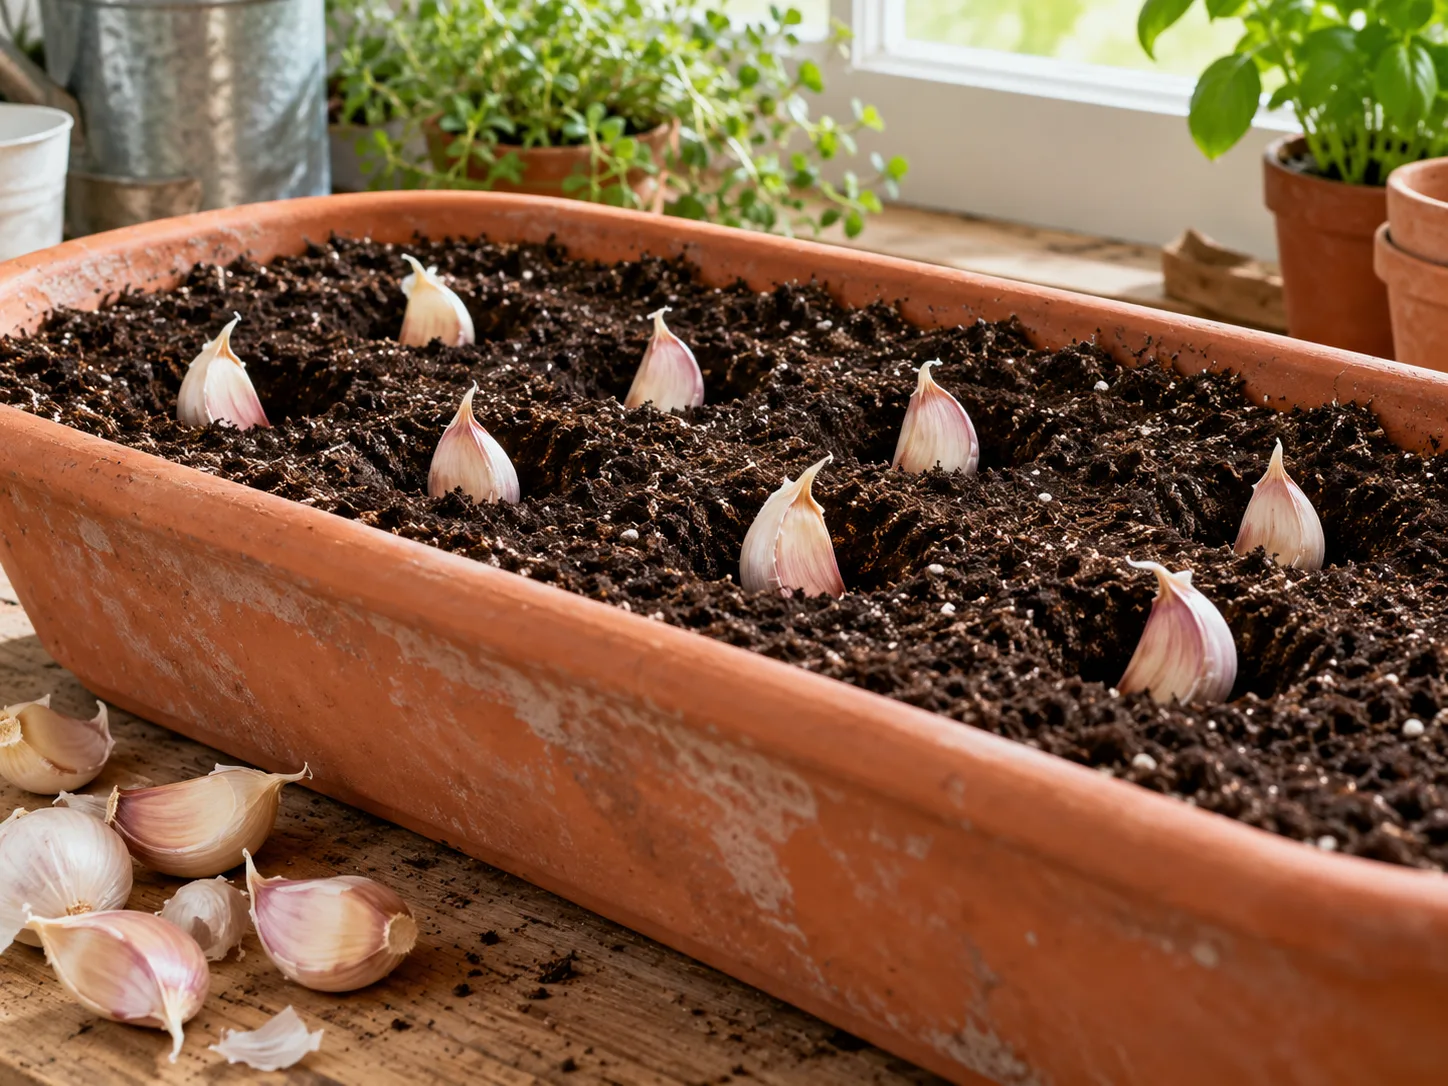
Set each clove with its pointed end up and its flat root plate down. Cover it with about an inch of mix. If the clove is planted sideways, it can still sprout, but the shoot may bend as it works toward the surface; planting point-up avoids that detour.
For greens, space cloves about 1 to 2 inches apart, close enough to use the pot efficiently but not packed tightly together. For bulbs, allow about 6 inches between cloves so each plant has room to form a larger head. The RHS uses approximately 15 centimeters (6 inches) between cloves in its standard garlic planting guidance. Keep the spacing goal clear: the close arrangement that is convenient for shoots is too crowded for storage bulbs.
Water gently after planting, until a little drains from the bottom, and let the pot finish draining. Write the planting date on a label or in your phone. A date helps you tell whether a clove is genuinely slow or whether it has simply not had enough time to emerge.
Put the pot where the light is strongest
Garlic needs bright light. For greens, start with the sunniest available window, usually one that receives several hours of direct sun. Turn the pot every few days so shoots do not lean toward the glass, and move it back slightly if leaves touch a cold pane overnight.
A dim windowsill can still produce shoots, but they may be thin, pale, and floppy. Those leaves are stretching toward light; they will not become sturdy simply because you keep the mix wet or add fertilizer. If the room gets little direct sun, place a full-spectrum grow light above the foliage and use a timer for a consistent daily cycle. Follow the fixture’s distance guidance, since a weak lamp held too far away may not add enough light.
For full bulbs, light is a greater constraint than it is for a quick leaf harvest. A window that looks bright to your eyes may still provide only a few useful hours for a sun-loving crop, especially in winter. The RHS garlic profile recommends full sun, and Rural Sprout’s garlic-growing advice also stresses choosing a genuinely sunny location. A grow light can improve leaf growth, but it cannot guarantee a large indoor bulb.
Keep temperature moderate and air moving
A cool-to-moderate room is usually more forgiving than a hot kitchen ledge beside an oven or radiator. Avoid placing the pot over a heat vent, where the mix can dry rapidly and leaf tips may scorch. A stable indoor temperature also makes watering easier because the pot loses moisture at a more predictable rate.
Good air movement helps the soil surface and foliage dry between waterings. You do not need a fan pointed directly at the plant; simply avoid wedging the container into a stagnant, crowded corner. If condensation repeatedly forms on the leaves or the top of the mix stays wet for days, move the pot to a brighter, better-ventilated spot and hold off on watering.
For bulb production, separate the cool-treatment phase from the growing phase. Cold exposure is not a reason to leave a newly planted pot in a freezing room or to expose the leaves to repeated temperature shocks. Follow the variety supplier’s guidance, then grow the plant in the brightest sheltered location you can provide.
Water when the upper mix begins to dry
Check the pot with a finger rather than watering on a fixed calendar. When the top inch of mix begins to feel dry, water slowly until the entire root zone is damp and excess water comes through the drainage holes. Then empty the saucer. In a small pot near a sunny window, this may mean checking daily during active growth; in a cool room, it may be much less frequent.
The target is evenly moist soil, not a constantly wet clove. If the mix stays glossy or smells sour, the pot may be draining poorly or receiving too much water. Garlic cloves can soften and rot before the leaves show a clear warning, so check the drainage and moisture first rather than trying to correct a failing plant with fertilizer.
Containers lose moisture faster than garden beds, but winter windowsills can also be cool and slow-drying. Always use the pot’s weight and the feel of the mix as your guide. A light pot with dry mix needs water; a heavy pot with cool, damp soil does not.
Feed lightly if you plan to cut greens repeatedly
A single greens harvest usually needs little extra fertilizer because the clove itself supplies stored energy for the first shoots. If you are growing in fresh potting mix and plan to make repeated cuts over several weeks, use a balanced liquid fertilizer at a conservative dilution according to its label. Apply it to already moist mix rather than pouring concentrated feed onto a dry root zone.
More fertilizer is not a shortcut to more flavorful leaves. Heavy feeding can build soft, fast growth that needs even more light and water, while adding salts to a small container. If the leaves are pale, first confirm that the pot receives enough light and that the roots are healthy; yellow foliage in soggy mix is not a cue to add nitrogen.
Skip fertilizer if you plan to harvest the whole young plant soon or if the potting mix already contains a controlled-release feed. If you are growing garlic for bulbs, follow the variety supplier’s or local extension service’s schedule rather than using a generic houseplant fertilizer routine.
Harvest garlic greens without exhausting the clove
Let shoots reach several inches tall before cutting. Use clean scissors to snip the longest outer leaves, leaving the central growing point and a few inches of green attached. Taking only part of the foliage at once gives a clove a chance to push another flush; cutting every leaf to the soil line turns a repeat-harvest setup into a one-time harvest.
Harvest a small amount from each clove instead of stripping one plant completely. When the shoots become thin, the clove starts to shrivel, or growth stops despite good light and watering, use the remaining leaves and replace that clove with a fresh one. Garlic greens are a short-cycle crop, so planting a few cloves every couple of weeks is usually more reliable than expecting one clove to produce indefinitely.
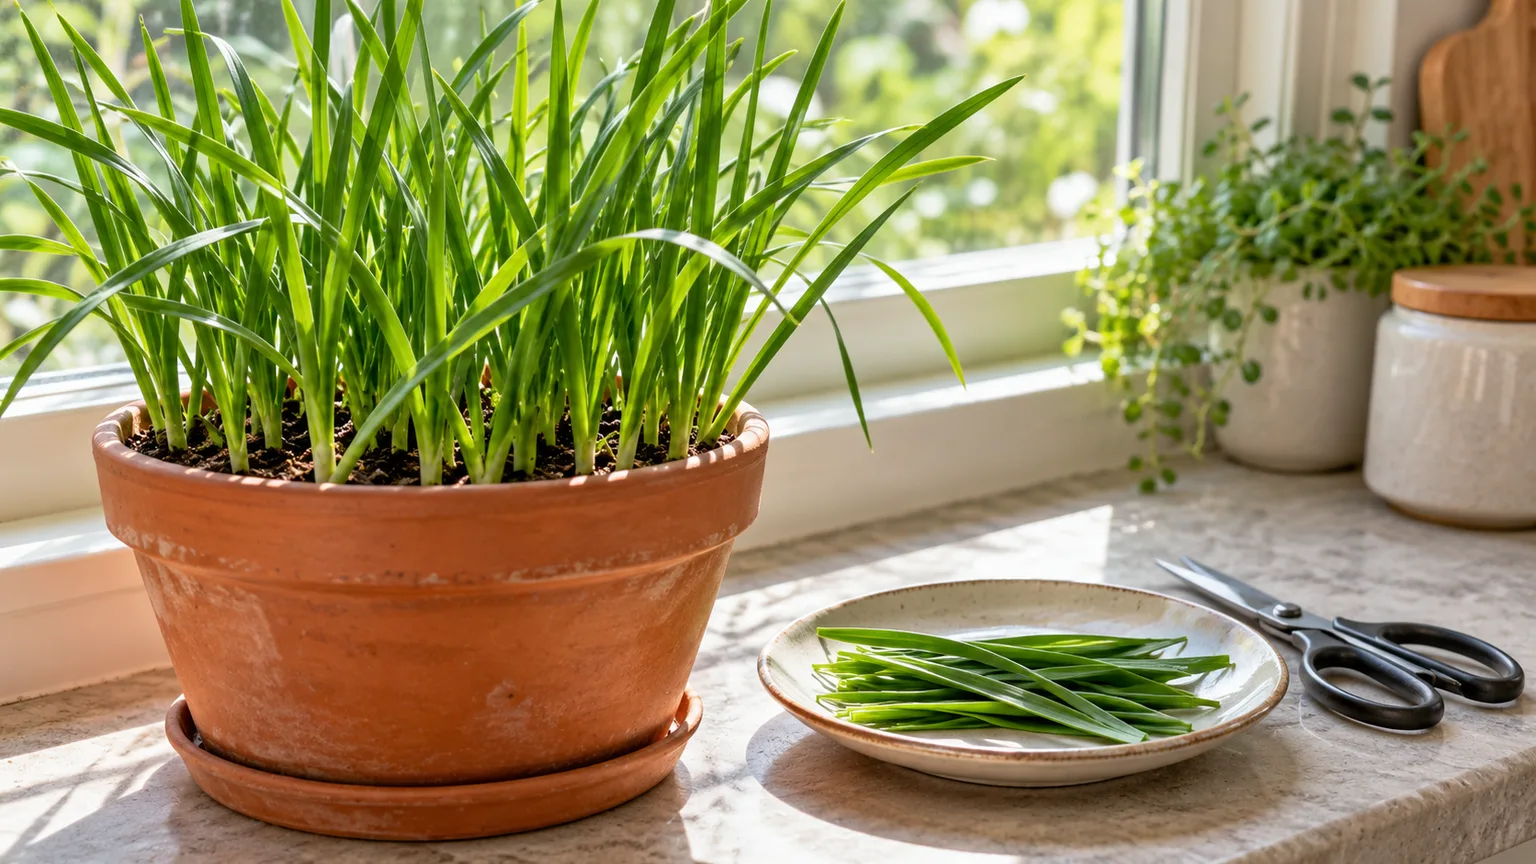
Rinse the cut leaves under running water and chop them just before using. They are best treated like a fresh herb, not stored like dry garlic bulbs. If a leaf is yellow, slimy, or has an unpleasant odor, discard it and check the pot for excess moisture or decay.
Can garlic make a full bulb indoors?
It can, but a container on a warm windowsill is not a dependable way to produce a large storage head. Garlic is a bulb crop with a long growth cycle; many varieties need cool exposure, and the leaves need strong light for months to supply the energy that fills the bulb. Indoors, one weak factor can limit the result even when the plant produces attractive green shoots.
Give each bulb-producing clove a deep pot, generous spacing, reliable drainage, and the brightest light possible. Treat the first attempt as an experiment and expect a smaller head than a well-grown outdoor crop. If bulb size and storage life matter more than having a plant on the windowsill, use an outdoor container or garden bed where the plant can receive natural light and seasonal temperature changes.
A realistic timeline for indoor garlic
Green shoots may appear within a couple of weeks, depending on clove freshness, temperature, and how actively it had begun to sprout. You can often start light clipping once leaves are several inches long, commonly within a few weeks rather than a full season. The timing will be slower in cool, dim conditions.
A mature bulb takes many months. The RHS describes garlic as a crop planted in autumn and harvested the following year, and its cold requirement explains why a clove pushed straight into a heated indoor pot may make leaves without dividing well. Give the bulb crop a season, not a month; if it has not formed a proper head, you can still use the plant as green garlic.
Move a bulb crop outdoors when your space allows
A balcony, patio, or doorstep can solve two of the biggest indoor limitations: natural sun and seasonal temperature. Place the container outdoors in a sheltered, sunny spot after acclimating the plant over about a week. Start with a few hours of outdoor light and gradually increase exposure, protecting the leaves from strong wind and sudden temperature extremes.
A 10-inch-deep pot with drainage is still important outside. Container mix can dry quickly in sun and wind, so check moisture more often than you would indoors; at the same time, make sure rain cannot leave the pot sitting in a full saucer. If winter freezes are severe in your area, move the container to a protected cold frame or sheltered wall rather than letting the root ball freeze solid.
If you have no outdoor option, keep the goal modest: grow greens under a bright window or grow light, and do not judge success by the size of an indoor bulb. You can also plant garlic outdoors in the next suitable season and use the indoor pot for quick leaves between garden crops.
Diagnose slow growth, yellowing, or rot
A garlic pot is simple to troubleshoot when you check light, moisture, and the clove itself in that order. Those three factors explain more indoor failures than a lack of specialized fertilizer. Look at several plants together: if every clove is pale and stretched, light is likely the common problem; if just one plant is collapsing, inspect that clove and its roots.
No sprout, mold, pale leaves, or browning tips
| What you see | Likely first check | What to do |
|---|---|---|
| No shoot after several weeks | Clove condition and mix temperature | Check one clove for firmness; replace soft or decayed cloves and keep the mix lightly moist |
| Pale, stretched leaves | Insufficient light | Move the pot to a brighter window or closer to a suitable grow light |
| Yellow leaves with wet mix | Drainage or overwatering | Empty the saucer, let the upper mix dry slightly, and check whether the clove is soft |
| Brown, dry leaf tips | Fast drying, hot air, or irregular watering | Move away from a radiator or vent and water thoroughly when the mix begins to dry |
| Fuzzy growth on the soil surface | Poor airflow and persistent moisture | Remove the affected surface material, improve airflow, and water less often |
Do not assume every yellow leaf means the garlic is ready to harvest. Natural yellowing is a late-season signal for a mature bulb crop; in a young indoor pot, it more often points to moisture stress, weak light, or a failing clove. If the base is mushy, smells rotten, or the plant pulls out with no healthy roots, discard that clove and refresh the potting mix before replanting.
A green shoot that grows but never develops into a large bulb may simply have been planted in a warm, low-light room without the right cold history. That is a crop limitation, not necessarily a disease. Harvest it as green garlic, then change the season, variety, or outdoor conditions if you try again for bulbs.
Harvest and cure bulbs for the kitchen
For a bulb crop, stop watering as the leaves begin to yellow and dry down. When several lower leaves have turned brown but upper leaves remain green, tip the pot on its side and loosen the mix around the bulb rather than pulling hard on the stem. A mature bulb should feel firm and have cloves filling the wrapper; if it is small but sound, use it fresh rather than expecting long storage.
Brush away loose mix and let the bulb dry in a shaded, airy place. The RHS recommends curing garlic for several weeks before storage; the foliage and roots should be dry and the outer skin papery before you trim them. Do not wash a bulb you intend to store, and do not seal a damp bulb in plastic. A small indoor-grown head can still be useful, but it is best eaten sooner if its wrapper is thin or its cloves are not fully divided.
The leaves are not a reliable bulb-size gauge by themselves. If you are unsure, sacrifice one test plant before harvesting the rest. That small check helps you avoid pulling every plant too early, when the bulb is still swelling, or leaving mature bulbs in wet mix until the wrappers start to break down.
Conclusion
For a sunny kitchen window or shelf, grow garlic for its leaves: plant firm cloves in a draining pot, keep the mix lightly moist, and snip only part of the foliage at a time. This is the quick, space-saving route and does not require a winter chill.
Treat full bulbs as a longer experiment. Choose a named variety, provide the cold exposure it needs, give each clove room in a deep pot, and supply strong light for months. If you can move that pot outdoors, your odds improve; if not, a steady harvest of fresh garlic greens is still a practical success.