How to Grow and Care for Dymondia Groundcover
Learn how to plant and care for Dymondia groundcover, including spacing, sun, drainage, establishment watering, propagation, and where it can replace lawn.
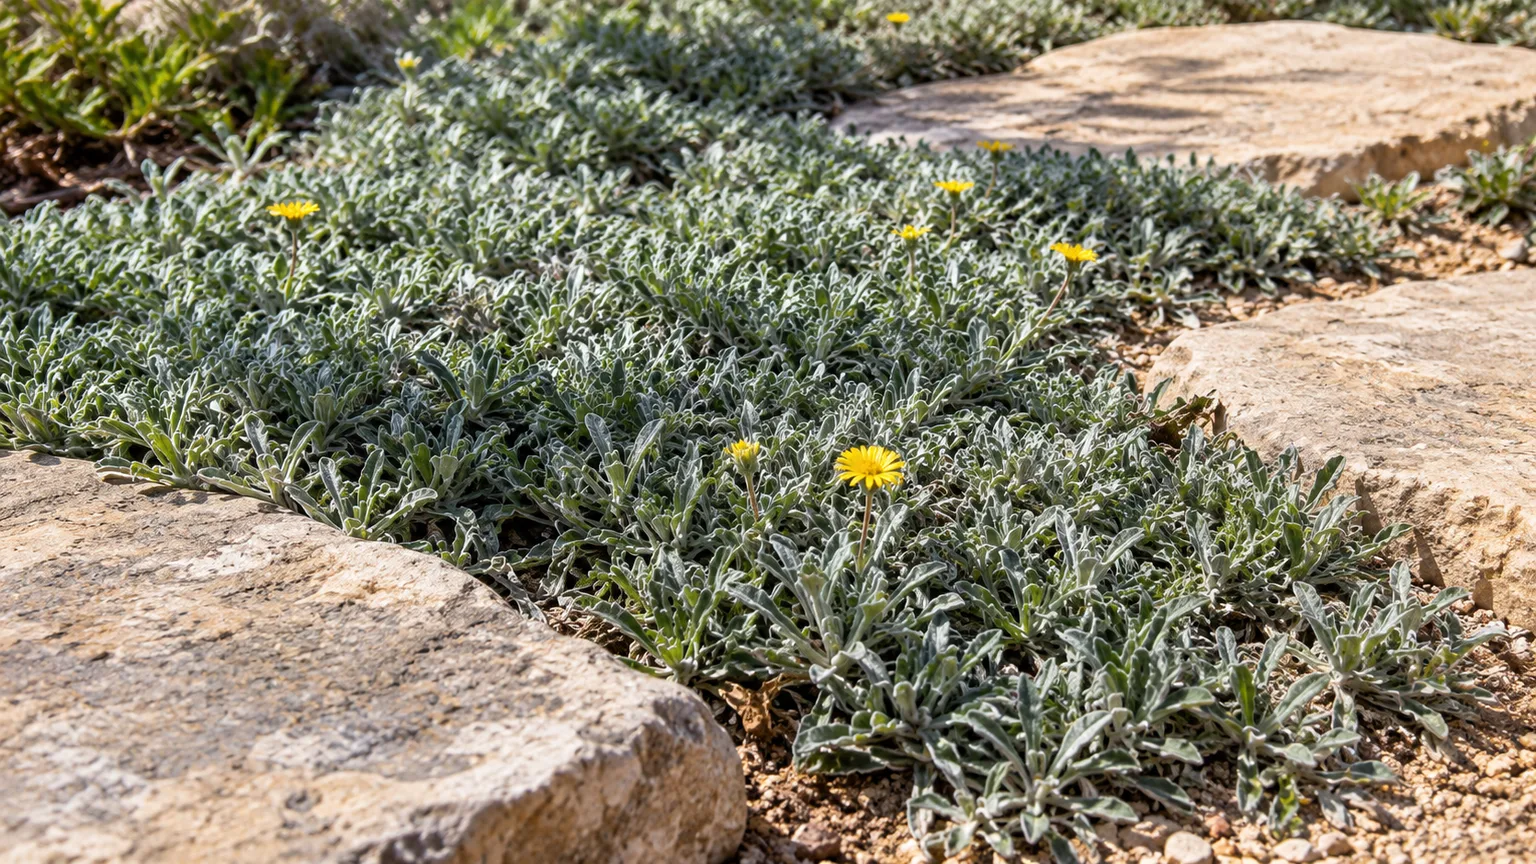
Dymondia (Dymondia margaretae), often called silver carpet or carpet daisy, is a very low evergreen perennial that spreads into a dense mat of narrow gray-green leaves. It is at its best in a sunny, sharply drained courtyard, rock garden, slope, or the spaces between stepping stones. It can replace grass in a small ornamental area, but it will not tolerate the running, ball games, or frequent shortcuts that a family lawn handles.
The care decision that matters most is water in the soil, not just water from a hose. Dymondia is drought tolerant after its roots settle in, yet it needs regular moisture during establishment; at the same time, saturated ground can make a mature mat die back in ugly patches. The South African National Biodiversity Institute’s PlantZAfrica profile recommends drainage improvement on high-rainfall sites and notes that overwatering can cause dieback. Start by checking your soil and foot traffic, then decide whether the plant fits before buying enough plugs to cover the whole area.
Is Dymondia Right for Your Garden?
Dymondia is a member of the daisy family, Asteraceae, and is native to the Southern Overberg of South Africa’s Western Cape. Its creeping, branched rhizomes stay at or near the soil surface, producing a tight carpet only a few centimeters tall. Random Harvest’s horticultural profile lists a mature height of about 5 centimeters, a useful scale for planning beside pavers. The leaves look silvery because their edges curl slightly to expose pale, felt-like undersides; small yellow daisies rise just above the foliage.
That growth habit solves a particular landscaping problem: covering sunny ground without introducing a tall, shaggy plant. Dymondia works especially well in narrow joints between pavers, around stepping stones, along a dry garden edge, or on a well-drained slope where a low mat can soften hard surfaces. The PlantZAfrica profile from SANBI also describes it as useful in coastal gardens and sunny courtyards.
Where silver carpet earns its place
Choose Dymondia when the design calls for a low, neat texture and you can give the roots both sun and drainage. In a courtyard, it can visually link stones while leaving a stable walking surface; on a modest slope, its spreading roots help hold the topsoil in place. In a rock garden, it contrasts with upright succulents or architectural plants without competing for height.
It also suits gardeners who want less mowing than a lawn requires. “Less mowing” does not mean “no maintenance”: the first season still involves watering, hand-weeding, and checking that the mat is not being smothered by mulch or nearby plants. Once filled, the bed needs occasional boundary trimming and spot weeding rather than weekly turf care.
When another groundcover is the better choice
Do not choose Dymondia for a soggy low spot, a compacted clay basin that stays wet, or a path people cross repeatedly. It tolerates only light or limited pedestrian traffic; Gardening Know How recommends paving heavily used routes through a Dymondia lawn alternative. If children play, pets sprint, or delivery workers cut across the area, put a path where the feet will land rather than asking the foliage to recover.
It is also a poor bargain for a large lawn-sized area if you need quick, seamless coverage. Dymondia’s reputation for drought tolerance often leads people to expect a fast, no-water carpet, but sparse planting can leave open soil exposed to weeds for a long time. Use it where its distinctive look earns the cost and the slower fill is acceptable; choose a tougher surface or a faster cover when those constraints do not match.
Light, Climate, and Frost Limits
Give Dymondia full sun for its tightest growth and best flowering. It tolerates light dry shade, but shade is not an invitation to plant it under a dense, irrigated canopy: low light slows drying, roots compete for moisture, and the mat may thin. If the site receives only a few hours of sun, test a small section first rather than installing the entire bed.
The climate guidance depends on where the plant is grown. Gardening Know How lists Dymondia as a lawn substitute for USDA zones 9b through 11, while SANBI says it tolerates light frost in its South African horticultural zones. These are useful boundaries, not a guarantee for every garden: a brief frost in a sheltered, well-drained bed is different from repeated hard freezes in wet soil. In colder regions, treat it as a tender perennial or grow it in a container that can be moved to shelter.
Heat and reflected sun are usually manageable when the roots have room to spread and the soil drains. A wall or pavement can intensify heat, though, so watch young plugs closely during the first hot spell. If foliage curls upward and the soil beneath the plug is dry, water thoroughly; if the bed is wet, adding more water is the wrong response.
Soil and Drainage: The Make-or-Break Conditions
Dymondia is most dependable in sandy or otherwise fast-draining soil. It can grow in more than one soil texture, but texture is less important than how long water remains around the roots after irrigation or rain. SANBI notes that in areas with high rainfall, it should be planted on a generous slope or raised rockery; in one profile it warns that overwatering can cause large, unsightly dieback patches.
Before planting, dig a hole about as deep and wide as a nursery pot, fill it with water, and see how quickly the water disappears. This is a screening check, not a laboratory soil test: if the hole still holds water several hours later or the spot is routinely puddled, improve the grade or choose another location. Do not try to fix heavy clay by mixing in a token handful of sand. A raised strip, a broad shallow mound, or a different planting area is usually more reliable than a tiny amended pocket that traps water at its edges.
Loosen compacted soil across the bed so roots can spread, and remove perennial weeds before planting. If the soil is very poor, incorporate modest, well-rotted compost into the planting area rather than creating a rich, soggy pocket around each root ball. Keep the finished surface slightly graded so water moves away instead of collecting in the center of the mat. In paver joints, confirm that the base layer drains; a stone surface can shed water into a narrow planting slot and leave roots wetter than the surrounding garden.
When and How to Plant Dymondia
Plant during a mild stretch when roots can establish without scorching summer heat or a hard freeze. In much of the United States, spring after the last severe frost is a practical window; early fall can also work in warm climates if the soil remains warm long enough for rooting. The southern-hemisphere advice to propagate in late winter or early spring should be translated to your own growing season, not copied by calendar month.
Prepare the whole site before placing a plug. Remove turf, roots, and perennial weeds, decide where the edges will stop, and set stepping stones first so you do not trample new plants while adjusting the layout. Water nursery pots before planting, slide each root ball out carefully, and loosen only circling roots that will not naturally grow into the bed. Set the crown level with the soil surface; burying it can hold moisture against the plant, while leaving roots exposed can dry the plug.
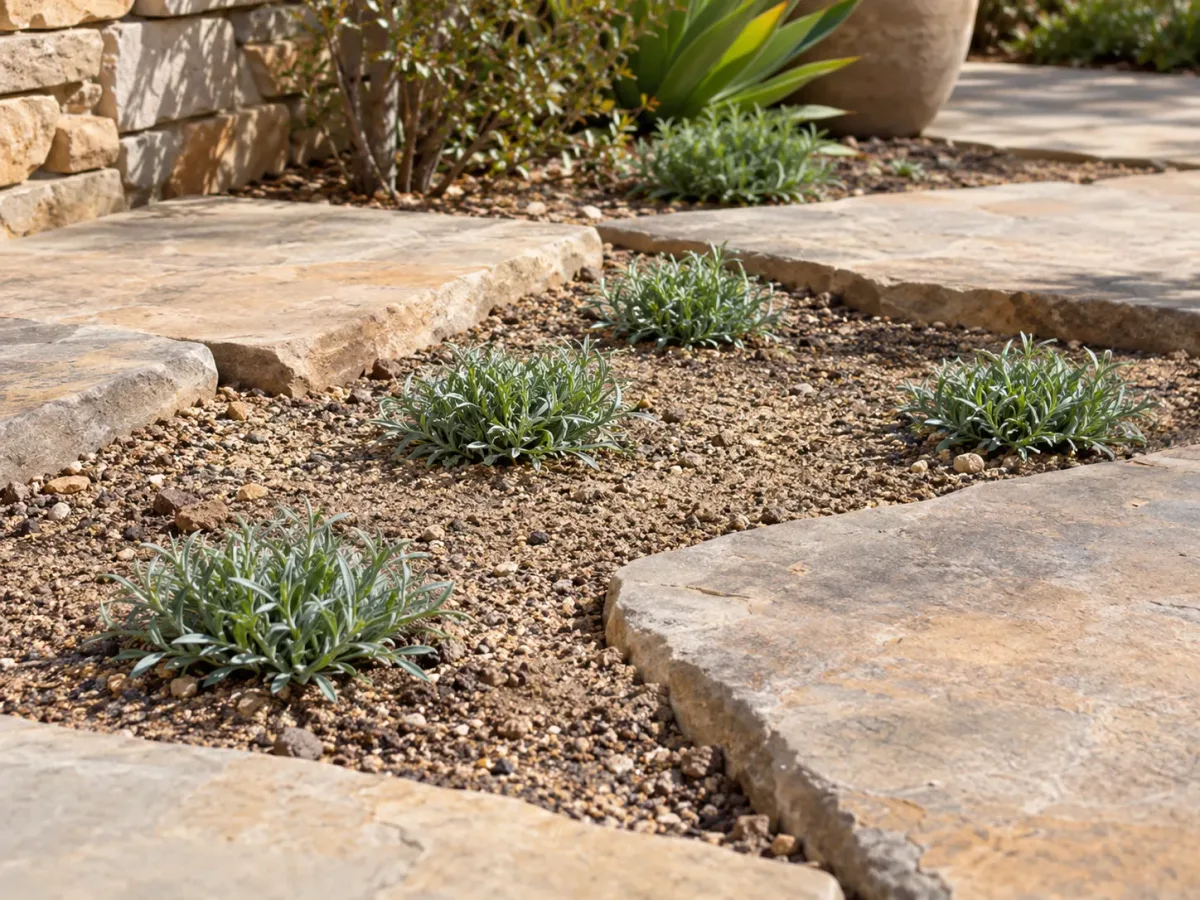
Place plugs, backfill around the roots, and press soil gently enough to remove large air gaps without compacting it hard. Water each plug to settle the root zone, then add a thin layer of mulch only between plants if weeds are likely; keep it off the crowns and avoid a moisture-trapping blanket. For a large bed, install a short trial strip first and check drainage, sun, and traffic before repeating the layout.
Choose spacing by budget and fill time
Published recommendations differ because plant size and the goal differ. SANBI suggests plants about 20 centimeters (roughly 8 inches) apart for quick cover, while Gardening Know How describes planting small divisions about 12 inches apart. Neither distance is a universal rule. Smaller plugs, exposed sites, and weed pressure favor closer spacing; larger, vigorous divisions and a tight budget can be placed farther apart if you accept a longer open-ground period.
For a home bed, measure from the center of one plug to the center of the next and choose based on how quickly you want the spaces closed. At 8-inch spacing, you buy more plants and reduce the size of bare gaps; at around 12 inches, the initial cost falls but you must weed and monitor the spaces longer. A quick estimate for a square layout is bed area in square inches divided by spacing squared, then add a small reserve for corners and replacements. Avoid planting so tightly that plugs overlap immediately or so loosely that weeds gain a full season’s head start.
Watering During Establishment and Afterward
Water regularly while new roots are spreading. Gardening Know How gives the first six months as a practical establishment period; local weather, plug size, season, and soil can make that period shorter or longer. The goal is evenly moist soil around the root ball, not soil that stays saturated. Check beneath the surface with a finger or trowel instead of watering by a fixed weekday schedule.
When the upper inch or two begins to dry and the root zone feels only slightly moist, water deeply enough to wet the plug and nearby soil. Then let excess drain before watering again. In hot, windy weather or fast-draining sand, checks may be needed more often; during cool spells or rain, a scheduled irrigation can be skipped. In clay or a low spot, shorten the irrigation only after verifying drainage—frequent light watering can still keep the crown chronically wet.
As the mat knits together and starts pushing new growth beyond the original root balls, gradually lengthen the interval between waterings. Established plants tolerate drought, but they are not immune to an unusually long heat wave, container dryness, or competition from nearby roots. Curling leaves expose more of the pale underside and can signal stress; confirm the soil is actually dry before watering, because similar leaf posture over wet soil points to a different problem.
Ongoing Care, Mulch, and Fertilizer
Keep the bed weeded until the carpet closes. Young Dymondia does not smother weeds quickly, and lifting a weed tangled through shallow runners can tear out the groundcover along with it. Pull small weeds by hand while the soil is slightly moist, use a narrow tool rather than a hoe near the mat, and replace any disturbed plugs promptly. A light mulch between young plants can reduce weed seed germination, but coarse layers that bury leaves or hold water at the crown create more trouble than they solve.
Dymondia does not need mowing to stay low. Trim only shoots that cross a path or escape a defined edge, using hand shears to preserve the dense outline. Remove dead leaves and debris trapped on the mat, especially in persistently damp climates where covered foliage dries slowly. If a mature area becomes crowded or loses vigor, SANBI recommends dividing sections every few years; use that as a response to decline, not an automatic annual chore.
Fertilizer is optional rather than a cure-all. SANBI notes that an organic slow-release fertilizer can keep plants growing vigorously, but a plant in suitable soil may need little feeding. If growth is pale and slow despite enough light and healthy drainage, check roots and soil first. A light, label-rate slow-release feed at the start of active growth is reasonable in lean soil; avoid repeated high-nitrogen applications that encourage soft growth without fixing the underlying site problem.
Flowers, Foliage, and Pollinators
The foliage is the main show: low rosettes of narrow leaves create a green-gray surface that flashes silver where the leaf margins curl. The texture works especially well beside warm stone, gravel, or dark-leaved plants. Small, yellow, daisy-like flowers appear above the mat; timing varies with local climate, and the SANBI profile reports flowering through the year with a spring and early-summer peak in the plant’s native hemisphere.
In a northern-hemisphere garden, do not assume those South African months map directly onto your calendar. Watch your own planting for bloom instead of treating October-to-December nursery listings from South Africa as a local forecast. The flowers attract bees and other insects; SANBI lists bees, beetles, and butterflies among visitors while noting that the specific pollination roles are not fully known. Avoid insecticide use on open flowers unless a verified pest problem makes treatment necessary and the label permits it.
Spent blooms can be left in place or clipped for a tidier look. Dymondia is not a plant that needs a hard annual haircut to flower again. If flowers are sparse, check sun exposure and establishment health before adding fertilizer: too much shade or an overwatered root zone is more likely to limit performance than a lack of bloom feed.
Foot Traffic and Lawn-Alternative Reality
Dymondia can take light, occasional foot traffic, especially when people step on pavers laid through the planting. It is not a durable turf grass. Repeated pressure crushes the low foliage, and traffic on wet soil can compact the root zone or leave muddy gaps where the mat is already thin.
Design the walking pattern before planting. Put flat stones where people naturally cross, then use Dymondia to fill the protected spaces between or beside them. If you want a green surface for children to run on or for pets to chase a ball, select a tougher lawn alternative or build a path-and-lawn layout that keeps feet off the planting. Gardening Know How’s lawn-alternative guide makes the same practical distinction: Dymondia is an option for light to moderate use, but not the best choice for a high-activity yard.
Its advantage over turf is reduced mowing and lower irrigation once mature, not zero care or instant weed control. It can be a better fit for a small sunny courtyard or decorative strip than for a large open play area. If you need to cover a broad lawn-sized space, price the number of plugs and the time spent weeding between them before committing; the long-term water savings do not erase installation cost or slow establishment.
Propagating Dymondia by Division, Cuttings, or Seed
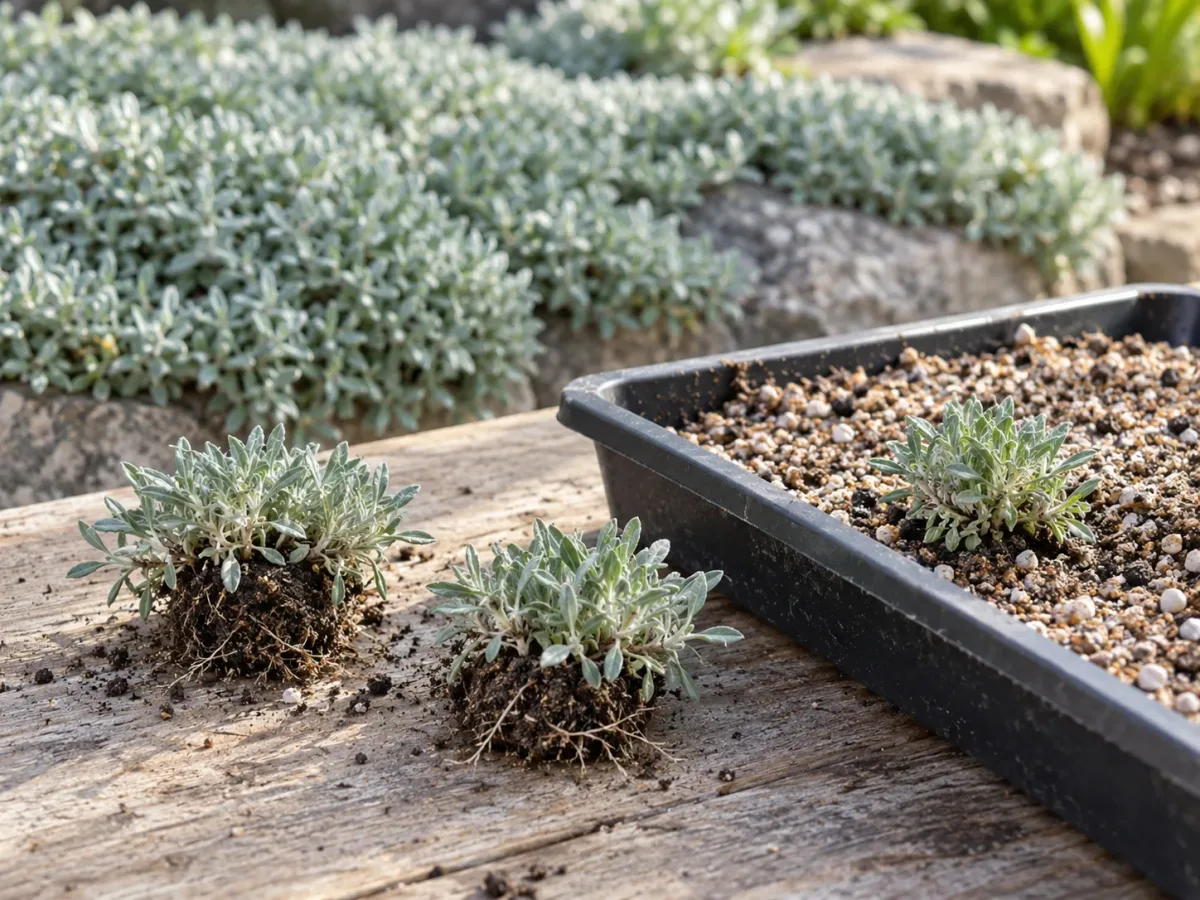
The simplest home method is division: lift a small rooted section from a healthy, established mat and replant it promptly. Dymondia also grows from tip cuttings taken from rhizome shoots, and it can be grown from seed. SANBI describes division as the usual easiest method, followed by tip cuttings; the profile says rooted cuttings can take around three to four weeks under suitable conditions. Seed is possible but is usually a less direct way to fill a landscape bed when an existing plant can provide rooted divisions.
Propagate near the start of active growth, during a mild season. Water the donor plant the day before if soil is dry, then use a clean spade or knife to lift a small piece with leaves, rhizome, and roots attached. Replant immediately into well-drained soil, water it in, and keep it lightly moist while it re-establishes. Do not leave bare roots exposed in sun or wind while preparing the next hole; SANBI notes that runners are less likely to survive the longer they remain out of soil.
For tip cuttings, take healthy shoots and use a clean blade. A rooting hormone is optional but is mentioned in the SANBI propagation guidance; follow the product label if you choose to use one. Set cuttings into sandy, fast-draining medium and keep it moist, not wet, while roots form. Once a cutting resists a gentle tug and shows fresh growth, harden it gradually to outdoor light before planting it into the bed.
Divide rooted runners with minimal transplant shock
Select a vigorous patch, not a section that is already yellow, waterlogged, or thinning. Lift a shallow square of mat with several rooted nodes attached, separate it into manageable pieces, and preserve as much root and rhizome as possible. Replant at the same depth and water once to settle the soil; do not bury the crown beneath compost or mulch.
During the first few weeks, check moisture more often than you would for a mature carpet. A division can wilt even though the parent planting is drought tolerant because the roots have been disturbed and have not yet reconnected with surrounding soil. Keep it out of concentrated foot traffic and avoid adding fertilizer to a stressed transplant. If the foliage stays limp while the soil is wet, improve drainage rather than increasing irrigation.
Containers, Slopes, and Coastal Gardens
Dymondia can trail over the edge of a wide container, but a pot changes the water equation. Choose a broad container with unobstructed drainage holes and a gritty mix that does not remain waterlogged. Water when the root zone begins to dry, then empty any saucer; containers heat and dry faster than garden beds, but a pot left standing in water can still rot. Bring container-grown plants into a bright, protected place if your winter brings freezes beyond the plant’s proven local tolerance.
On slopes, plant across the contour rather than in a single straight line down the grade, and water gently so new plugs do not wash out before rooting. Dymondia can help cover exposed soil, but it should not be treated as a structural erosion-control system for a steep or unstable bank. Use appropriate retaining or drainage work where runoff is severe, then plant after the slope is stable.
Coastal gardens can be a good match: SANBI lists coastal use and wind-erosion reduction among its landscape roles, and its natural habitat includes sandy coastal flats. Salt spray tolerance does not make every seaside site suitable. A wind-exposed bed still needs secure plugs, soil that drains, and protection from foot traffic during establishment; a salt-saturated, compacted, or waterlogged pocket can defeat the plant’s other strengths.
Troubleshooting Thin, Curled, or Dying Patches
Look at both the leaves and the soil before changing care. Dymondia’s leaves naturally show a pale underside at the margins, so silvering alone is not a disease diagnosis. A patch that changes quickly, loses density, or feels soft at the crown deserves closer inspection.
Distinguish water stress from waterlogging
If leaves turn upward and the soil beneath the plant is dry several inches down, give a slow, thorough drink and recheck the next day. SANBI describes upward-turned leaves as a stress response, while its profile also warns that overwatering can produce large dead patches. Do not treat the leaf posture as a standalone irrigation signal: feel the root zone first. If the ground is damp or smells sour, stop watering and redirect runoff, raise the planting, or remove a small test plug to inspect roots.
Brown, mushy crowns or expanding bare areas in a consistently wet bed point toward drainage trouble more than thirst. Water can also collect in individual paver pockets, so check the exact failed location instead of changing irrigation for the entire yard. Let the surface dry, open a drainage route if possible, and replant only after the soil no longer stays saturated.
Check light, weeds, cold, and root disturbance
If a mat is green but barely spreading, review the basics in this order: sunlight, root competition, weed pressure, and establishment water. A deeply shaded bed or a strip beneath thirsty shrubs may not provide enough light and moisture for quick fill. Pull competing weeds carefully and compare a struggling area with a healthier section of the same planting before changing fertilizer.
Thin patches after a hard freeze may recover as temperatures warm if the crowns and roots remain alive; repeated freeze-thaw, wet winter soil, and exposed containers raise the risk. Wait for new growth before digging out a dormant-looking area, but replace sections that are clearly rotted or uprooted. If plants vanish in small clusters while the surrounding bed is healthy, inspect for root disturbance or locally common burrowing animals before treating the whole bed for an insect or disease that may not be present.
Weeds in open spaces usually mean the planting has not closed yet, the spacing was wide, or the site does not suit the plant. Remove weeds while their roots are small and add healthy plugs to persistent gaps. Do not lay thick mulch over the living carpet to hide bare soil; solve the cause, preserve airflow around the crowns, and use a compatible faster cover if quick weed suppression is essential.
Conclusion
Dymondia is a strong groundcover when you need a low silver-green mat for sunny, well-drained ground and can protect it from heavy traffic. Use it between pavers, in a small courtyard, along a moderate slope, or in a coastal-style planting; choose another plant or a hard surface when the site stays wet, gets deep shade, or functions as an active lawn.
For reliable establishment, prepare the entire bed, set plugs about 8 to 12 inches apart according to budget and desired fill speed, and water through the rooting period without keeping soil soggy. Weed patiently, put stepping stones where people walk, and diagnose patch loss by checking drainage before reaching for fertilizer or more water. When the site fits, silver carpet rewards that careful start with a distinctive, low-care planting that does not need regular mowing.