How to Grow and Care for a Century Plant: Complete Guide
Learn century plant care: choose a sunny, fast-draining site, water by conditions, manage cold, divide pups, and plan for its mature size and sharp spines.
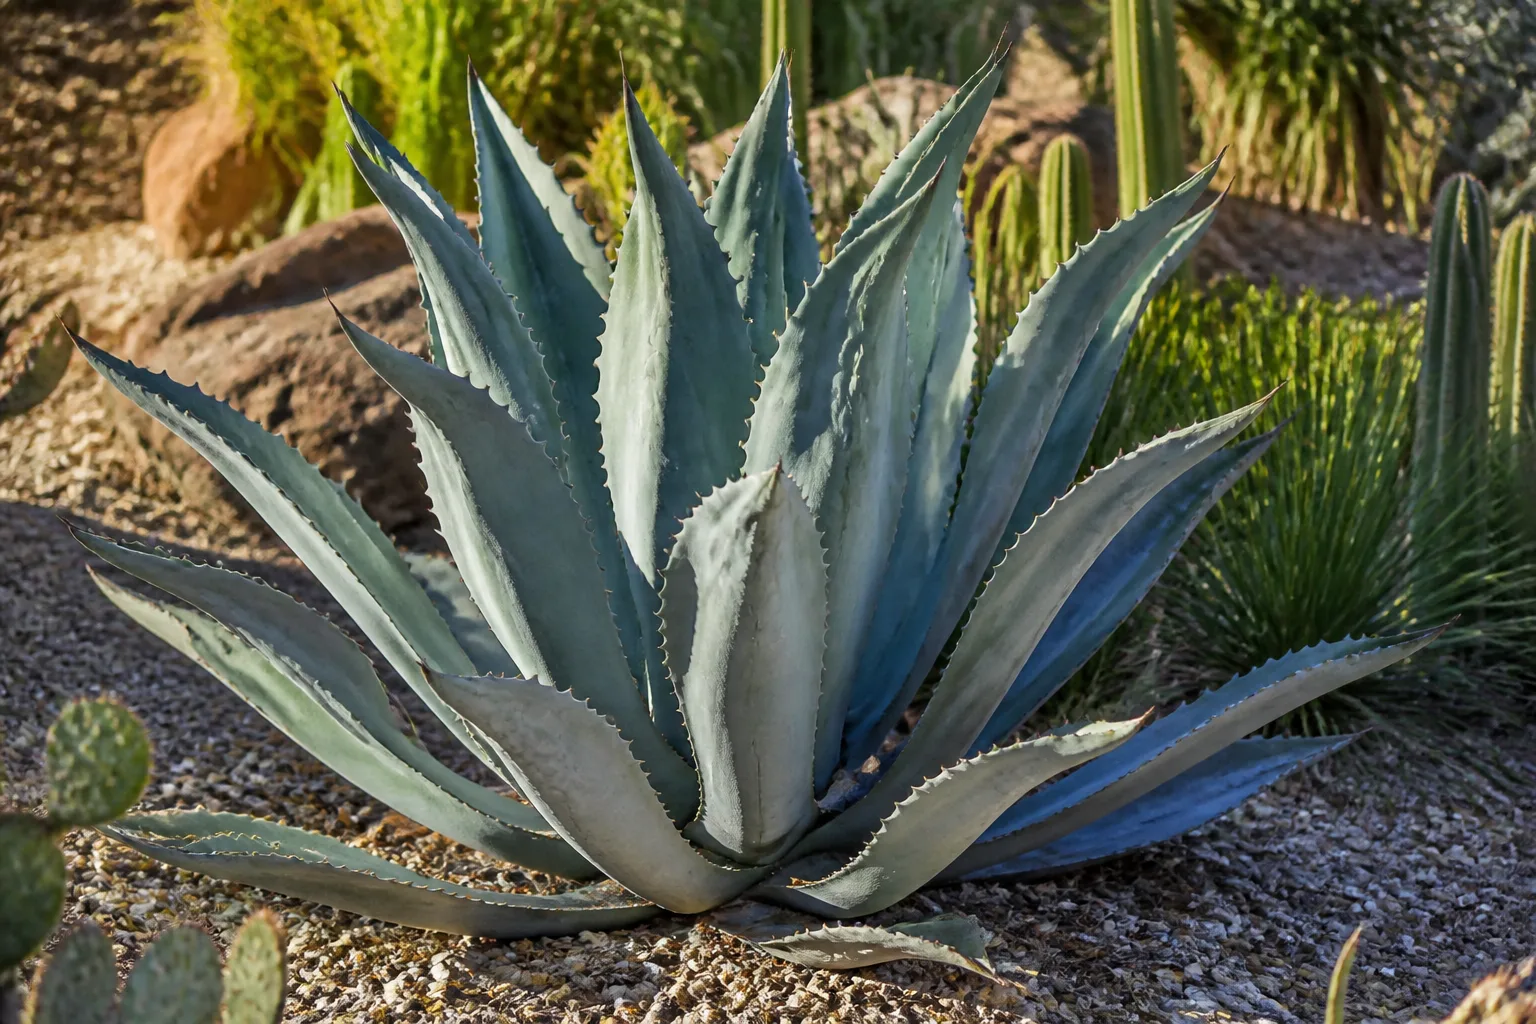
Century plant care is mostly about getting the planting site right. Agave americana handles drought and lean soil well, but it becomes a difficult neighbor when planted beside a path, in a wet bed, or where its mature rosette has no room to spread. Choose its position before you plant; moving an established specimen means working around sharp leaves and a heavy root system.
This guide focuses on the common century plant, Agave americana. It is a slow-growing, architectural succulent rather than a plant that needs frequent feeding or scheduled watering. Give it sun, quick drainage, enough space, and a plan for winter and its sharp spines, and most routine care becomes simple.
Century Plant Care at a Glance
| Need | Practical target |
|---|---|
| Light | Full sun in most settings; acclimate container plants to stronger sun gradually |
| Soil | Sandy or gritty and sharply drained; avoid a site that stays wet |
| Water | Water thoroughly, then wait until the root zone has dried before watering again |
| Space | Plan for roughly 6 feet of height and 8 to 10 feet of spread outdoors |
| Cold | Missouri Botanical Garden lists it as hardy in USDA Zones 8–10; local exposure and winter wet still matter |
| Propagation | Use rooted offsets, or pups, for the simplest home method |
| Safety | Keep it away from walkways and play areas; its leaf margins and tips are sharp |
The plant profile from the Missouri Botanical Garden describes century plant as a full-sun succulent for dry to medium moisture and well-drained soil. The Royal Horticultural Society profile likewise lists full sun and well-drained soil, and notes that its sap can irritate skin. Those points—sun, drainage, and careful placement—matter more than a fertilizer routine.
Identify Agave americana and Plan for Its Size
Agave americana forms a broad, evergreen rosette of thick gray-green leaves. Each leaf has sharp teeth along its margins and a stiff spine at the tip. It is often called American aloe, but it is not an Aloe vera; the similar common name can cause confusion when buying a plant or looking up care.
A mature outdoor specimen can reach about 6 feet tall and 8 to 10 feet wide, according to the Missouri Botanical Garden. Some plants are smaller, especially in a container, but a small nursery specimen is not a reliable guide to its eventual footprint. Leave room for the whole rosette plus a safe approach route so no one has to brush against the leaf tips to weed, mow, or reach a gate.
Several forms add color without changing the basic care. ‘Marginata’ has pale bands along the leaf edges, while ‘Mediopicta Alba’ and ‘Mediopicta Aurea’ have light-colored central stripes. The RHS recommends growing Agave americana in a sheltered position and notes that it can be grown in a container; compare the cultivar label and mature dimensions before choosing one for a small patio.
Choose a Safe, Sunny Site
Pick an open position with strong light, fast runoff, and enough clearance from paths, doors, play spaces, and places where pets run. A century plant works best as a deliberate focal point, not as a filler beside a narrow walkway. If the location would force people to squeeze past its leaves, choose another spot or grow a smaller agave in a movable container.
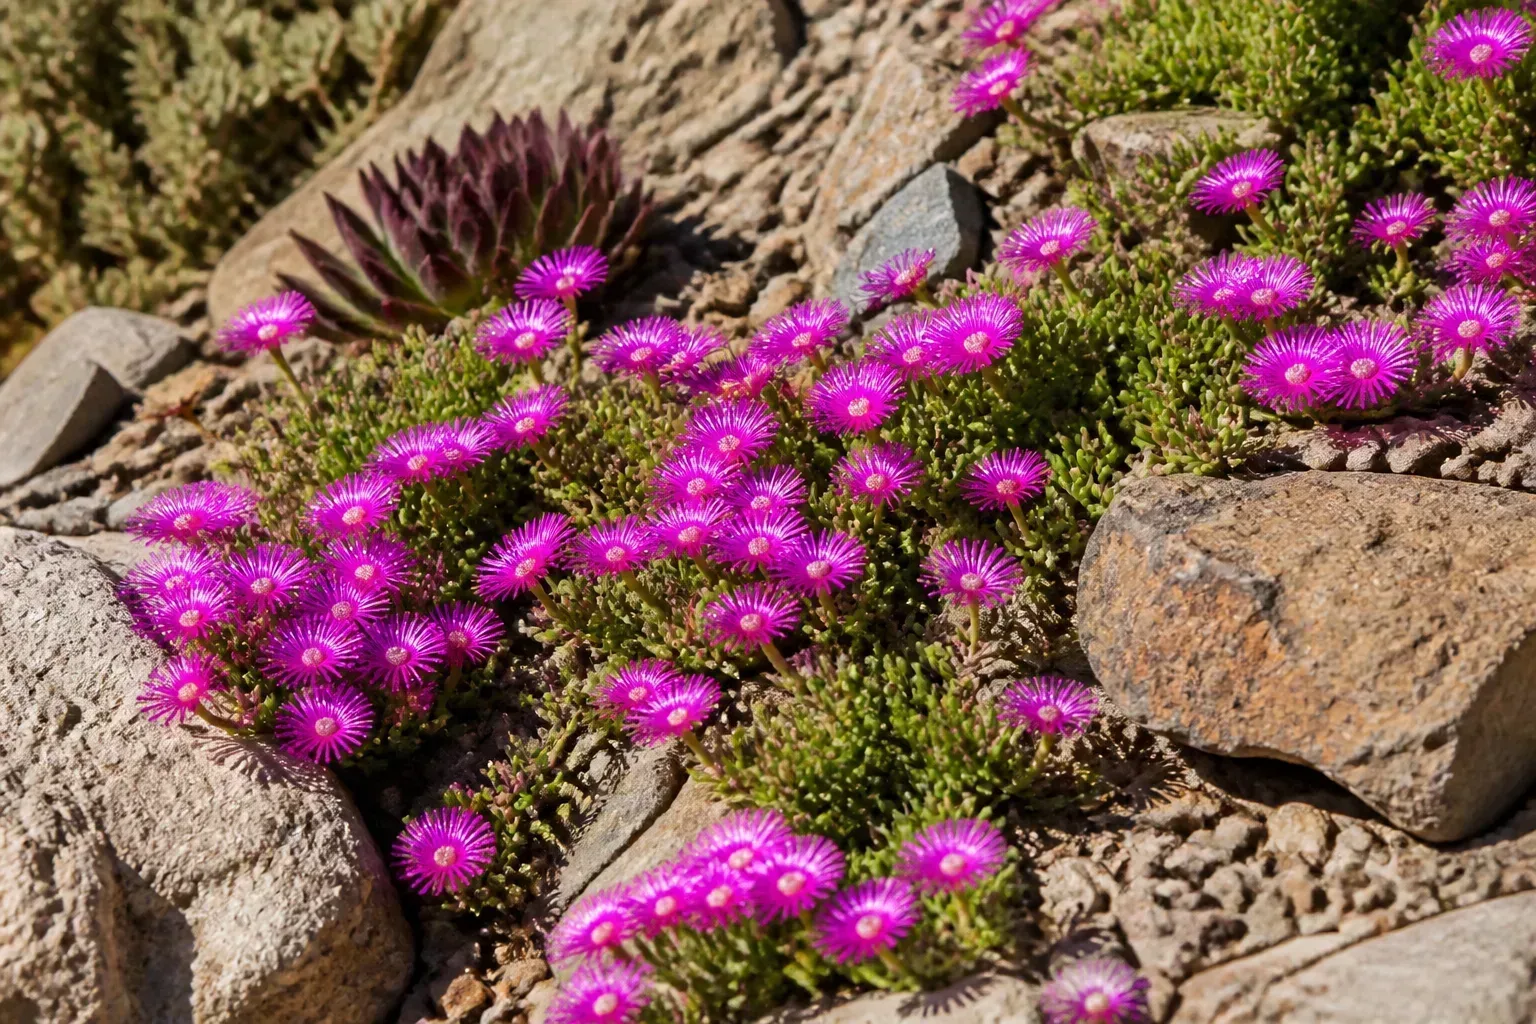
A sunny rock garden or raised, gravelly bed can provide the dry setting this plant prefers. In a flat yard with dense soil, the higher, open position is often more useful than trying to make one small planting hole behave like a desert.
Adjust Sunlight for Heat and Acclimation
Full sun supports a compact rosette and strong growth. In very hot inland climates, especially where reflected heat comes off paving or a south-facing wall, some afternoon protection can reduce scorch; the goal is bright exposure without cooking a newly planted or recently moved specimen. A little shade is a response to local heat, not a reason to tuck the plant into deep shade.
A nursery plant or indoor container may have grown under shade cloth or filtered glass. Move it into stronger light in stages over one to two weeks, starting with morning sun and lengthening exposure as the leaves adjust. This gradual transition is also recommended in practical container guidance from UK Houseplants; sudden changes can leave lasting bleached or brown patches even when the final site is suitable.
Plant for Fast Drainage
Drainage is the make-or-break condition. The Missouri Botanical Garden describes sandy or gritty, well-drained soil as the best setting and warns that poor drainage can lead to root rot. If water regularly pools after rain, a more frequent watering schedule will not solve the underlying problem.
For a garden bed, inspect the area after a strong rain before planting. If the ground remains saturated or the spot sits at the bottom of a slope, use a raised mound or berm that lets water run away from the crown, or choose a different location. Do not try to fix a heavy, wet bed by sprinkling a little sand into the planting hole; the whole root zone needs to drain.
Set an In-Ground Plant High in Its Bed
Plant when the soil is workable and the weather is mild enough for roots to re-establish before heat or cold extremes. Dig a hole about as deep as the root ball and wider than it, then position the plant so the base of the rosette stays at or slightly above the surrounding soil line. Burying the crown or leaving a basin that collects water around it increases the chance of decay.
Backfill with the excavated soil if it drains well, or with a suitable gritty mix if the native soil needs improvement. Firm the soil enough to steady the root ball without packing it into a hard pan. Water once to settle the soil, then use the root-zone dryness—not a weekly reminder—to decide when to water again.
Use a Stable Pot with a Drain Hole
In a container, use a heavy pot with an open drainage hole and a gritty cactus or succulent mix. A wide, stable vessel is less likely to tip as the leaves spread. Choose a pot only modestly wider than the root ball; excess wet mix around a small root system can stay damp long after the plant has used the water.
Do not let the pot sit in a saucer of runoff. If you use a decorative outer container, empty it after watering. General succulent potting guidance from GardenersHQ also emphasizes gritty, well-drained mix and warns that root rot follows persistently wet soil. For more container handling detail, see our succulent repotting guide.
Water Deeply, Then Let the Root Zone Dry
A century plant stores water in its leaves, so it tolerates dry spells better than repeated shallow watering. When the plant is actively growing and the soil has dried through the root zone, water slowly enough to wet the full root ball, then let excess drain away. The interval changes with pot size, soil, sun, rainfall, and temperature; “once a week” is not a reliable rule.
For a new planting, give the roots a chance to settle with a thorough initial watering, then check the soil before watering again. A newly rooted pup needs more observation than an established in-ground plant, but it still should not sit in wet soil. In a pot, test below the surface rather than judging by a dry crust on top; a large container can stay moist deeper down.
During warm, dry weather, a container may need water sooner than an in-ground plant because its limited soil dries faster. During cool, cloudy weather or winter dormancy, the same pot may need very little. In a rainy climate, established outdoor plants may get all the water they need from rainfall, while a roof overhang or rain shadow can leave a potted plant dry even when the garden is wet.
If the leaves look wrinkled but the soil is still moist, do not add more water. Check the root zone and plant base first; damaged roots cannot take up water normally, so extra irrigation can deepen the problem. If the soil is dry and the plant is otherwise firm, give it one deep soak and watch for normal recovery rather than repeating the dose every day.
Seasonal Care: Heat, Rain, and Growth
Spring is a good time to plant, repot, or separate pups because the plant has a growing season ahead to rebuild roots. As temperatures rise, check container soil more often, but water only when the root zone has dried. If the plant spent winter indoors or in a sheltered spot, acclimate it before leaving it in direct summer sun all day.
In summer, remove standing water from containers and pay attention to drainage after monsoon-like storms or prolonged rain. A plant in sandy soil can tolerate summer heat; a plant in a shaded, waterlogged bed cannot. Do not interpret heat alone as a signal to water—check the soil and the plant’s firmness.
In autumn, stop feeding if you have been feeding a container plant and reduce watering as growth slows. Before winter, move a pot to a bright, protected, dry place if your climate regularly freezes. Established outdoor plants in suitable zones need little intervention, but cold wet soil is more dangerous than a short dry spell.
Skip Routine Fertilizer
A century plant does not need routine fertilizer in a garden bed. The Missouri Botanical Garden lists it for dry to medium soil and notes its tolerance of drought and dry soil; the plant’s natural growth habit is compatible with lean conditions. Fertilizer is not a shortcut to a faster flower stalk, and trying to rush a monocarpic plant is not a useful care goal.
For a container that has been in the same mix for years, refresh the soil at repotting rather than repeatedly adding nutrients. If growth is unusually weak despite adequate light and healthy, dry roots, a dilute cactus fertilizer during active spring growth is an option, but it is not essential. Avoid feeding a stressed, cold, recently repotted, or waterlogged plant.
Propagate Century Plant from Offsets
The easiest way to make another century plant is to separate a rooted offset, often called a pup, growing near the parent. The Missouri Botanical Garden and RHS both list offsets as a propagation method. A pup is a clone of the parent, so it preserves the leaf color of a named cultivar more reliably than seed.
Seed is possible but slower and less predictable for a home gardener. A plant must flower and set viable seed first, which may take many years; seedlings also will not necessarily match a variegated parent. If your goal is another plant like the one you own, wait for a pup with its own roots instead.
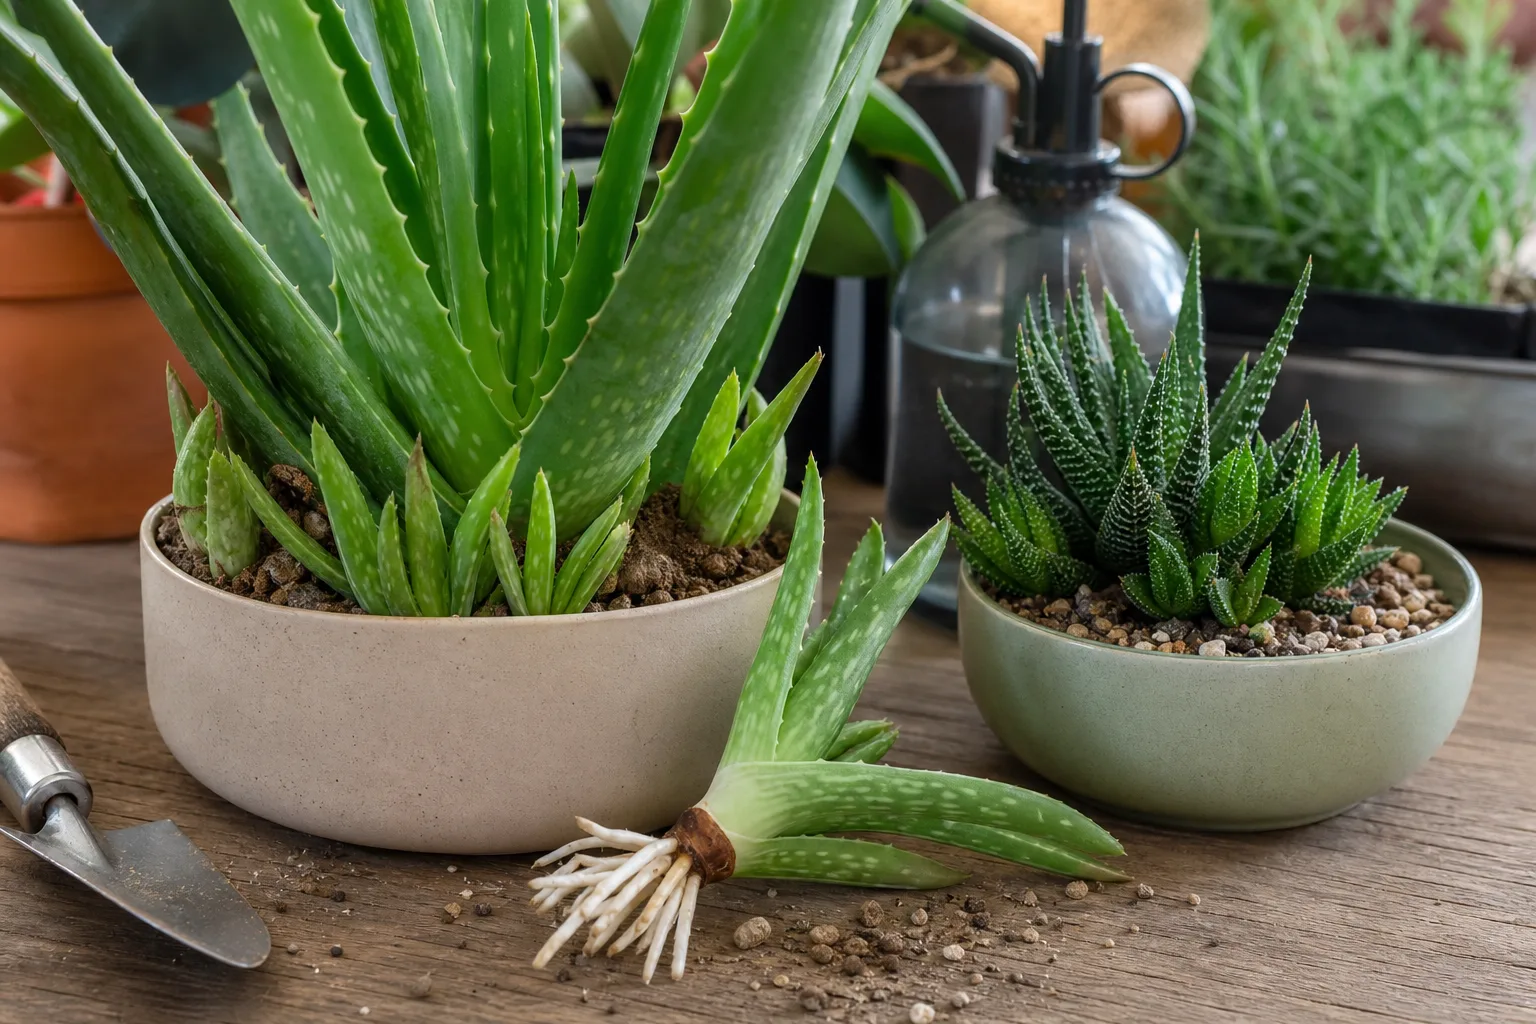
A young rosette and a separated offset are shown in this general succulent-propagation example; Agave americana produces similar basal pups, though its leaves are much larger and sharper.
Separate and Establish a Pup
Work in mild weather, preferably spring or early summer, and prepare the new bed or pot before cutting. Wear thick gloves, long sleeves, long pants, closed shoes, and eye protection. A piece of cardboard or a folded blanket can shield nearby leaves, but do not grip a leaf by its spine or put your face above the rosette.
- Expose the connection between the pup and parent by carefully brushing away soil. Choose an offset with several leaves and, ideally, roots of its own.
- Use a clean, sharp spade or knife to cut the connecting stem or roots. Avoid tearing the pup away, which can leave a larger wound and damage its roots.
- Lift the pup from below, keeping as much of its root bundle as possible. Set it in a shaded, airy place until the cut surface is dry, then plant it in gritty soil at the same depth it was growing before.
- Keep the new plant out of harsh afternoon sun while it establishes. Let the cut area dry before the first watering, then water only when the mix has dried through.
The approach is similar to the offset method described in the RHS growing profile and the practical propagation overview from GardenersHQ. If a pup has no roots and the attachment is deeply buried, wait until it is larger or ask a local nursery to help; forcing a small offset can cost both it and the parent plant.
Protect It from Winter Wet and Cold
The Missouri Botanical Garden lists Agave americana for USDA Zones 8–10. Treat that range as a planning guide, not a promise: a sheltered, dry site may handle cold differently from an exposed garden with wet soil, wind, or repeated freeze-thaw cycles. The RHS profile is more cautious for UK gardens, describing it as a plant for sheltered positions and recommending container culture under glass in its climate.
If you are near the cold edge of the plant’s range, prioritize a raised, sharply drained site protected from cold wind. A breathable frost cloth can reduce exposure during a brief cold snap, but it cannot turn a wet bed or a severe freeze into a safe climate. Do not wrap the plant in plastic or leave a cover pressing against the spiny leaves.
A potted plant is easier to protect. Move it to a bright, frost-free garage, greenhouse, or sheltered porch before a hard freeze, and keep the mix on the dry side while growth slows. A cool, bright, dry rest is safer than a warm, dim room where the soil stays wet and the rosette weakens.
Understand the Flowering Stalk and What Follows
“Century plant” does not mean the plant waits exactly 100 years to bloom. The Missouri Botanical Garden reports that outdoor plants often flower between their 10th and 25th years, though age varies with growing conditions and the plant itself. The RHS describes a flower panicle that can reach about 8 meters; the Missouri Botanical Garden notes stalks of 15 to 30 feet or more.
Agave americana is monocarpic: each rosette flowers once and then dies. The flowering stalk rises from the center of the rosette, and the plant’s leaves gradually decline after the bloom. That is a normal life-cycle event, not a reason to fertilize more or treat a healthy mature rosette as diseased.
Offsets around the base can continue growing after the parent rosette dies. Before the stalk appears, decide whether the pups will stay as a colony or be removed later. Also check for overhead wires, roofs, and nearby structures because the stalk can become very tall and awkward to remove; do not climb or cut a heavy stalk without the right equipment.
Troubleshoot Root Rot and Agave Weevil Damage
Soft or discolored lower leaves can point to too much moisture, but one damaged leaf does not prove root rot. Look at the soil, drainage, and center of the plant before changing care. If only an older outer leaf is drying while the rosette stays firm, remove nothing until you confirm it is dead; a collapsing center or soft base deserves more urgent attention.
For a potted plant with wet soil and a softening base, unpot it carefully and inspect the roots. Healthy roots should not be black and mushy; remove only clearly decayed roots with a clean blade, then repot into a fresh, dry, well-draining mix. If the crown itself is soft, foul-smelling, or the whole rosette is losing its structure, the damage may be too advanced to reverse.
Agave weevil can also cause rapid collapse. The Missouri Botanical Garden lists agave weevil as a possible pest, and Gardening Know How describes warning signs such as a mushy, foul-smelling crown and leaves that pull away easily. Those symptoms overlap with advanced rot, so do not guess at a pesticide; photograph the plant and ask your local extension office or an experienced nursery to identify the cause and advise on safe disposal or protection for nearby agaves.
Scale insects may appear as small, fixed bumps on leaves. Check both leaf surfaces and the bases of older leaves before treating. For any pesticide, follow the product label and local extension guidance; do not apply a broad-spectrum product on a hunch.
Prune and Handle a Century Plant Safely
Do not prune a healthy century plant into a smaller shape. Removing green leaves reduces the rosette’s working foliage and leaves a collection of cut surfaces around a plant that is already difficult to handle. Remove only a fully dead, loose outer leaf when it can be done without reaching over the central spines; leave green or partly green leaves in place.
The spines can puncture skin, and the sap can irritate it. The RHS lists Agave americana as a skin irritant and harmful if eaten by dogs or cats, and recommends protective equipment when handling it. Keep the plant out of pet paths and children’s play areas, and wash skin promptly if sap contacts it; seek medical or veterinary advice if irritation is severe or someone has chewed the plant.
For planting, repotting, pup removal, or cleanup, use eye protection, thick gloves, long sleeves, long pants, and sturdy shoes. Keep a clear route to carry the plant and set tools down before moving it. If the specimen is large enough that you cannot reach the root ball without leaning across the leaf tips, hire help rather than trying to muscle it out.
Conclusion
Give a century plant a sunny, open position with soil that drains quickly, and it can thrive with little routine attention. The most useful care rule is to check the root zone before watering and to avoid planting where future size or sharp leaves create a hazard.
Plan for a plant that may live for decades, eventually flower once, and leave pups that carry on around it. When the site, winter exposure, and handling risks are considered before planting, Agave americana becomes a manageable landscape feature instead of a difficult plant to move later.