How to Find and Fix Chimney Rust Before It Spreads
Learn what causes chimney rust, how to trace orange stains, which repairs are safe to DIY, and when a chimney pro or roofer should inspect it.
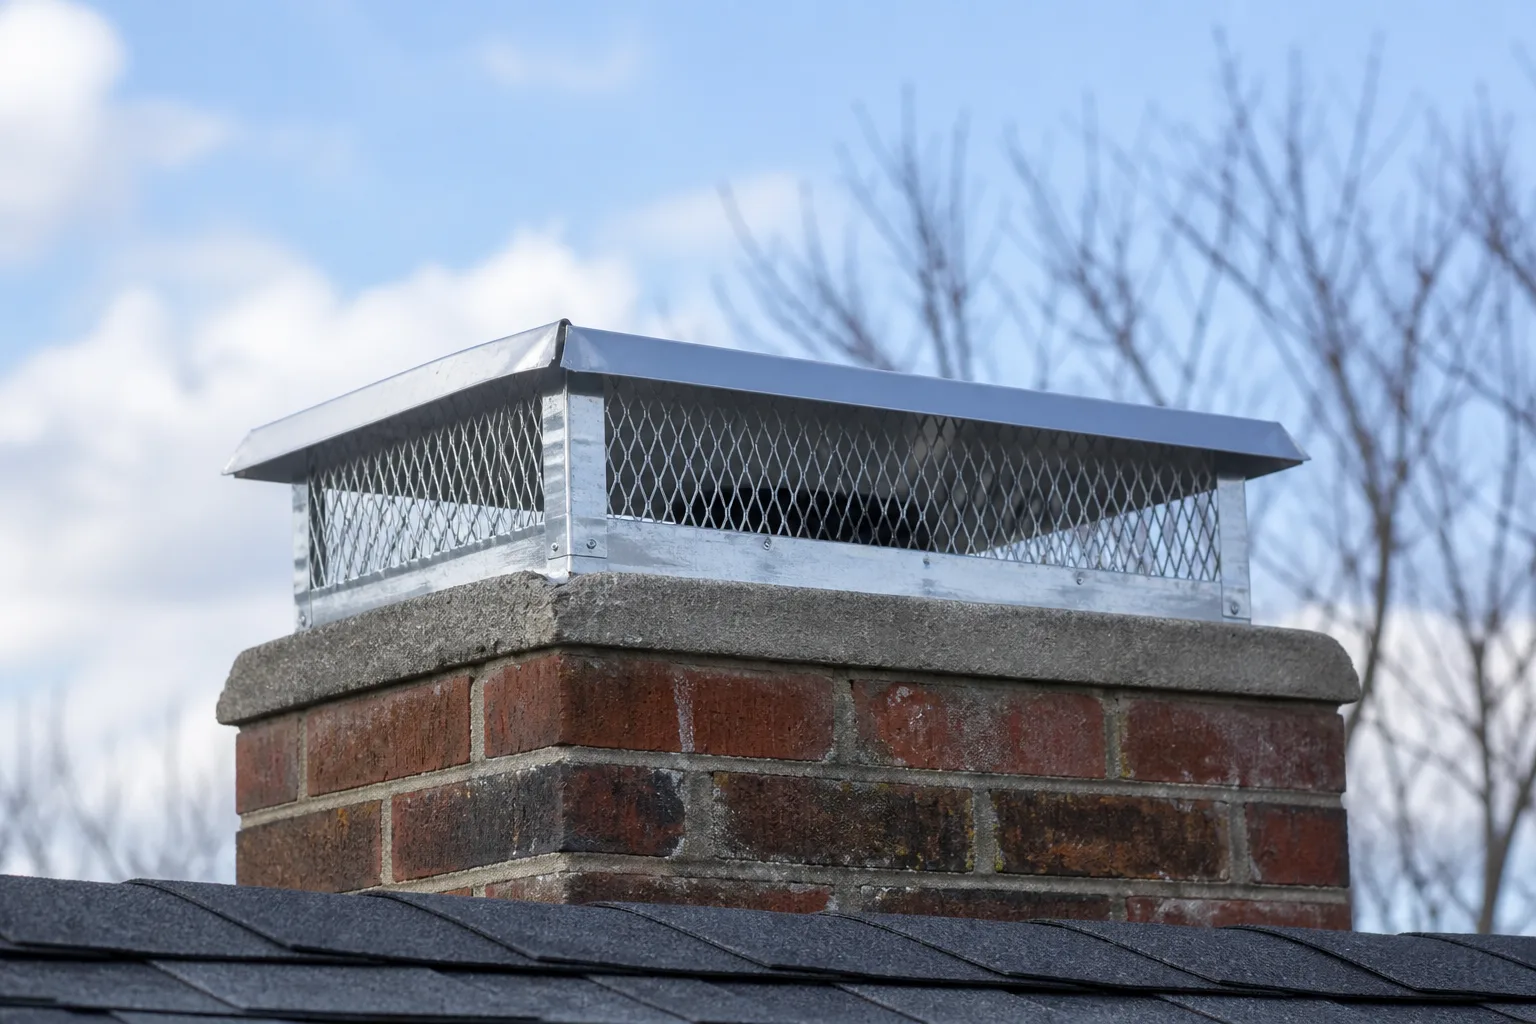
Orange or reddish streaks on a brick chimney are a message from the metal above, not proof that the brick is rusting. Rain dissolves and carries iron corrosion down porous masonry, where the stain can look far more dramatic than the original failure.
That does not make it harmless. A corroding cap may admit water, a rusted chase cover may leak into a factory-built chimney, and deteriorated flashing can turn a small roof-junction defect into wet sheathing, damaged insulation, or interior ceiling stains. The right sequence is simple: locate the metal source, decide whether the part is still sound, repair the water path, and only then clean the brick.
The short answer: follow the rust uphill
Start at the highest point where the orange trail begins and trace upward, using binoculars or a phone camera from the ground. A streak descending from the top edge usually points toward the cap, spark-arrestor mesh, fasteners, or a metal chase cover; a streak concentrated where the chimney meets the roof deserves a flashing and roof inspection.
Do not climb onto a wet, steep, icy, or unfamiliar roof to confirm the diagnosis. A ground-level inspection can tell you where to ask questions, but it cannot certify a flue, reveal concealed flashing, or establish that a fireplace is safe to use.
Why brick itself does not rust
Rust is the familiar family of iron oxides produced when iron or steel reacts with oxygen and moisture. Fired brick and mortar can absorb that water and become stained, but they do not oxidize into rust in the same way an iron component does.
The distinction matters because scrubbing the face of the chimney before fixing the metal treats the evidence rather than the cause. The stain may lighten for a while, then return after the next wet period. If moisture keeps moving through the masonry, it can also contribute to mortar deterioration and freeze-thaw damage in cold climates.
What chimney components commonly corrode
Chimneys are assemblies, not just stacks of brick. The visible orange trail may come from one small piece, while the repair decision depends on the type of chimney and how water is supposed to move around it.
Cap, spark arrestor, and fasteners
A masonry chimney often has a metal cap or hood over the flue openings. Its job is to shed rain, keep leaves and animals out, and sometimes provide a spark-arrestor mesh. Look for orange scale along seams, rust bleeding from screw heads, mesh that is thinning or breaking, and low spots where water can sit.
Thin galvanized steel can eventually lose its protective zinc coating, especially at cut edges, drilled holes, scratches, and joints. Stainless steel generally offers better corrosion resistance, but “stainless” is not a guarantee against every failure: poor fabrication, trapped debris, salt exposure, dissimilar-metal contact, and an incorrectly sloped design still deserve attention.
Chase cover, crown, and rain control
A factory-built chimney may terminate with a metal chase cover, while a masonry chimney usually has a masonry crown or wash around its flue. These parts are easy to confuse from the yard. A chase cover is a metal lid over the top of a framed chase; a crown is the sloped masonry cap around a masonry stack.
Corrosion along a chase-cover edge, especially where water pools, is a strong reason to call a chimney professional. A patched pinhole is not equivalent to a properly sloped, drip-edged replacement. On a masonry crown, cracks, open joints, missing overhang, and ponding can send water into the brick even if the visible rust originates from a cap or liner.
Flashing and hidden interior metal
Chimney flashing seals the roof-to-chimney junction. It typically includes step flashing on the roof sides and counterflashing or another upper termination against the masonry. Rust streaks at the lower corners, lifted metal, failed sealant, or ceiling stains that appear after heavy rain suggest a water-management problem rather than a cosmetic one.
Inside the flue, a metal liner, damper, or other steel component can corrode when moisture enters from above or when condensation forms. Clay tile liners do not rust, but they can crack or deteriorate for different reasons. A flashlight view from the fireplace is not a substitute for a professional inspection of the entire venting system.
What orange streaks can tell you
The pattern is useful, but it is not a diagnosis by itself. A narrow trail starting below a fastener suggests one source; broad staining beneath a cap edge suggests water spreading across a larger metal surface; staining at the roof intersection raises the priority because the roof assembly is nearby.
Rust versus efflorescence, soot, and algae
Rust is usually orange, red-brown, or tea-colored and often follows a vertical water path. Efflorescence is usually white or pale gray and forms when dissolved salts move through masonry and remain as water evaporates. Black staining can be soot or creosote, but exterior black marks can also indicate water damage or combustion by-products and should not be casually washed away.
Green staining may be algae or another biological growth. A masonry cleaner can change the appearance of any of these deposits, so photograph the pattern first and inspect the likely source before applying chemicals. The National Park Service masonry-cleaning guidance notes that metallic masonry stains often recur when the water entry or corroding metal behind them is not repaired; its cleaning guidance also emphasizes matching the treatment to the masonry and testing an inconspicuous area.
A safe inspection from the ground
Choose a dry day with good light. Walk around the house and photograph all four chimney faces, the roofline, gutters, downspouts, and any nearby wall or ceiling where water could appear. Compare old photos if you have them; a stain that lengthens after each storm is more informative than one snapshot.
Use binoculars to check for a missing cap, loose mesh, pooled water, peeling coating, rust flakes, cracked crown, open mortar joints, or metal that appears to curl away from the roof. Do not pull on parts, probe from a ladder, walk on the roof, or reach into the flue. Falling rust scale is also a clue that the component may have lost more material than you can see.
Check the roofline and the rooms below
From the attic, if you can enter safely without disturbing insulation or walking on unsupported surfaces, look for damp sheathing, darkened wood, rusty nail tips, or a water trail near the chimney. Inside the living space, check ceilings and walls around the chimney for yellow-brown marks, peeling paint, soft drywall, or a musty smell after rain.
The absence of an interior stain does not clear the flashing. Water can travel along framing before it becomes visible, and a cap or crown problem may wet the chimney assembly without immediately reaching the room below. Treat visual inspection as triage, not a warranty.
How to decide whether the metal needs cleaning, coating, or replacement
The most useful decision rule is the hole-and-edge test. If the metal is merely discolored, firmly attached, and still has intact edges and fastener holes, a professional or experienced homeowner may be able to remove loose corrosion, prime compatible bare metal, and apply a product rated for the location. If it is perforated, paper-thin, warped, detached, badly pitted, or rusting around seams and fasteners, replacement is usually more durable than paint.
Do not paint over loose scale or use a generic interior metal paint. Coatings need a clean, sound surface and must tolerate weather, temperature swings, and—where applicable—high temperatures. Never coat a flue interior or damper with an exterior product, and follow the component manufacturer’s instructions for a factory-built chimney.
The hole-and-edge test
From a safe viewing position, look for daylight through the part, curled edges, swollen seams, missing screws, and rust that has spread beyond a surface film. A small surface spot on a cap may be maintainable; a hole over a flue opening, a missing drip edge, or a failed chase-cover seam is a water-entry problem.
Material compatibility matters too. Direct contact between dissimilar metals in a wet environment can accelerate galvanic corrosion. When a replacement is quoted, ask what metal will be used, how it will be isolated from adjacent metals, how water will drip away, and whether the design includes a proper overhang and slope.
How to remove rust stains from chimney masonry

Clean the masonry only after the metal source and water path are addressed. Protect nearby plants, roof materials, painted siding, and metal gutters from runoff, and wear eye and skin protection required by the product label. A small test patch in an inconspicuous area is essential because brick, mortar, stone, and manufactured veneers react differently.
Begin with the least aggressive method that has a reasonable chance of working: dry-brush loose deposits with a non-metallic masonry brush, then use a cleaner specifically labeled for rust on the surface you have. Work in manageable sections, keep the masonry wet as the label directs, and rinse without forcing water into open joints or the chimney top.
Avoid pressure-washing a chimney as a default stain-removal step. High pressure can erode soft mortar, drive water into cracks, and spread contaminated runoff. Avoid mixing acids, bleach, ammonia, or other cleaners; chemical reactions and fumes can be dangerous. Never use muriatic acid casually on a chimney, and do not assume lemon juice or vinegar is automatically safe for every brick or mortar.
If staining is old, deep, widespread, or returns after repair, hire a masonry or chimney-cleaning professional who can identify the masonry and select a compatible treatment. The realistic goal may be substantial improvement, not a perfectly uniform color; some iron staining penetrates deeply.
Why painting and waterproofing are not first fixes
Paint can hide a streak while corrosion continues under the film. Masonry sealer can reduce absorption in some situations, but it cannot rebuild missing flashing, close a hole in a chase cover, correct ponding, or make a cracked crown sound. Sealing wet masonry can also trap moisture and make later diagnosis harder.
Water-repellent treatment should be a considered maintenance step after repairs, not a substitute for them. Use a vapor-permeable product specifically intended for the masonry, test it first, and keep it off flue openings and metal surfaces unless the manufacturer says otherwise. If the chimney is historic or made from soft, highly porous brick, get specialist advice before applying any coating.
DIY jobs versus professional chimney work

Homeowners can safely do useful preparation: photograph the chimney, clear leaves from accessible gutters, note when stains appear, and read the appliance and chimney manuals. Replacing a readily accessible cap may be within an experienced DIYer’s abilities only when the roof access is genuinely safe and the replacement is compatible with the system.
Flashing repair, chase-cover replacement, liner work, damper repair, crown reconstruction, and any work that requires walking the roof should generally go to the appropriate professional. A roofer understands roof flashing; a mason understands brick, mortar, and crowns; a chimney professional understands the venting system and inspection requirements. For a complicated leak, you may need more than one trade.
Stop using a wood-burning fireplace or stove and arrange prompt professional advice if you smell smoke indoors, see smoke leakage, find a blocked or damaged flue, hear falling material, see severe spalling, or suspect a chimney fire. Install and maintain carbon monoxide alarms according to local guidance, but remember that an alarm is a backup—not permission to use a compromised vent.
The inspection and maintenance schedule that prevents repeat damage
For fuel-burning appliances, CSIA’s homeowner guidance follows NFPA 211’s principle that chimneys, fireplaces, and vents should be inspected at least once a year for soundness, deposits, and proper clearances, with maintenance or repairs performed when necessary. EPA maintenance materials are useful background, but local codes, appliance type, use, weather, and a chimney event can change the timing. An annual inspection is not a substitute for evaluating a visible leak or damaged metal promptly.
Burning dry, seasoned wood helps reduce smoke and creosote. The EPA’s Burn Wise firewood-moisture materials are now historical program materials, but their below-20-percent target remains useful background when applicable to the appliance and fuel. That advice does not prevent exterior metal rust, but it addresses a separate interior chimney hazard that a stain-only inspection can miss.
Add a quick visual check after major storms, roof work, strong winds, or a chimney fire. Keep gutters and downspouts functioning, trim branches that scrape the cap, and record repairs with the metal type, date, photographs, and any warranty. Documentation makes it easier to tell new corrosion from an old stain and gives the next inspector useful history.
Common mistakes that make chimney rust worse
The most expensive mistake is cleaning the orange mark before finding the source. Other common failures include smearing roof cement over a complicated flashing joint, adding a second layer of caulk over a failed first layer, painting over flaky metal, choosing a cap by size alone, and using pressure or acid strong enough to damage the masonry.
Another mistake is treating every stain as a chimney-cap problem. A stain at the roof junction may be flashing; a stain inside the firebox may point to condensation, rain entry, or a venting issue; and a black stain may be combustion-related rather than rust. When the pattern does not match the obvious metal part, stop guessing and arrange a proper inspection.
A practical 30-day chimney-rust action plan
In the first 48 hours, photograph the stains, check for recent interior water marks, and stop any unsafe roof access. If you smell smoke, see water actively entering, or notice a damaged flue, move straight to professional help rather than starting a cleaning project.
During the first week, identify the likely component from the ground and collect the appliance type, chimney age if known, roof age, previous repair records, and dates of storms when the stain worsened. Ask for an inspection that addresses the cap or chase cover, crown, flashing, masonry, and venting system—not just a quote to wash the brick.
Before approving work, compare the proposed repair with the failure: a replacement for perforated metal, a properly designed flashing repair for a roof junction, masonry repair for damaged joints, and cleaning only after the source is stable. Request the metal specification, scope, photos of concealed conditions, and a plan for protecting adjacent materials.
After repair, wait for the masonry to dry before judging the final appearance. Keep the inspection report and receipts, check the area after the next few substantial rains, and schedule the recurring inspection and cleaning appropriate to your appliance. A stain that returns is useful evidence that the water path or corroding part has not actually been resolved.
Conclusion: fix the water path, then the stain
Chimney rust is easiest to manage when you read it as a map. Find where the orange trail begins, inspect the cap, chase cover, crown, flashing, and other metal in that area, and distinguish a sound surface that needs maintenance from metal that has lost its weather barrier.
Once the source is repaired, clean the masonry gently and selectively. Keep roof and flue work within professional scope, follow the annual inspection guidance for fuel-burning systems, and treat recurring stains, interior water marks, smoke odors, and damaged masonry as reasons to investigate further—not as problems that paint can make disappear.



