How to Propagate Basil and Keep It Growing
How to propagate basil step by step: choose the right node, root cuttings, prevent rot, move them to soil, and keep the new plant bushy.
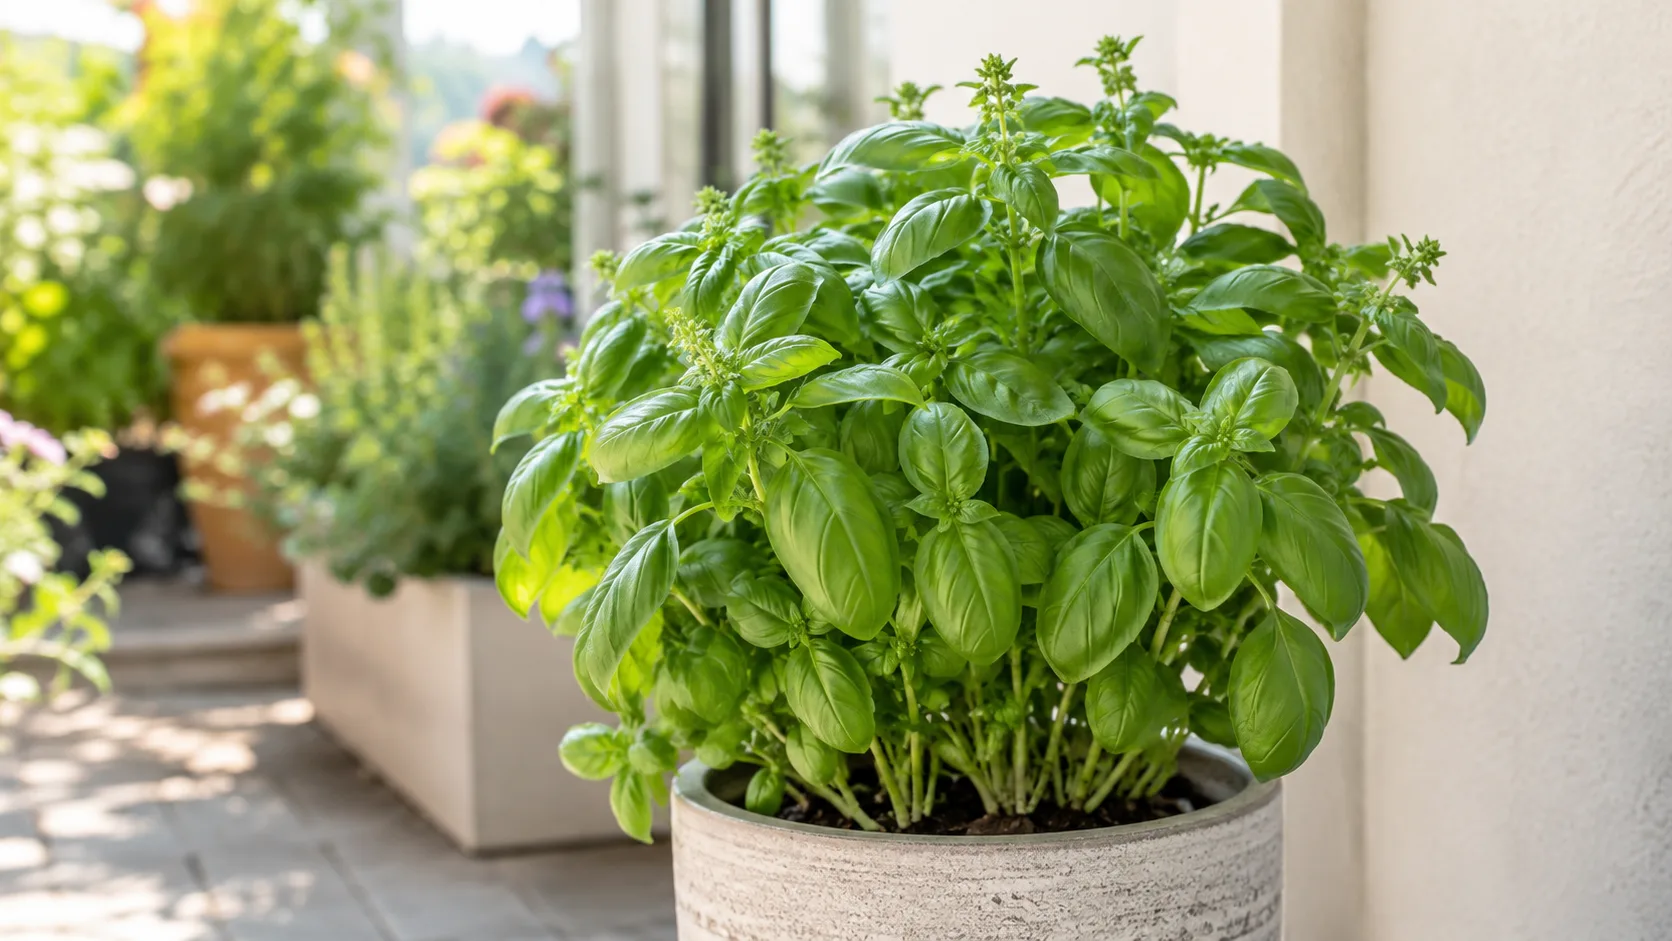
If you have one healthy basil plant, you already have the material for several more. The most dependable approach is to take a nonflowering stem cutting with at least one leaf node, root it in water or a loose propagation medium, and then keep the new plant in strong light so it can branch instead of stretching.
The important detail is that propagation is a two-part job. First, the cutting has to form roots without drying out or rotting. Then it has to become a balanced plant with enough light, nutrients, and regular pinching to replace the leaves you harvest. The steps below cover both phases, including the point where many otherwise successful attempts fail: moving a water-rooted cutting into soil.
The short answer: start with a healthy nonflowering stem
Choose a vigorous basil stem about 4 to 6 inches long. Cut just below a leaf node, remove the lower leaves, and place the bare stem in water or a moist, airy medium. Keep the top leaves above the rooting medium, give the cutting warmth and bright filtered light, and expect roots in roughly two to four weeks, with water cuttings often showing earlier signs.
Take the material from a plant that is actively growing, well hydrated, and free of pests or disease. A cutting is a genetic copy of its parent, so cloning a weak, infested, or flavorless plant simply gives you more of the same problem. Texas A&M AgriLife’s guide on growing basil faster with cuttings supports using stem cuttings as a practical way to multiply basil; University of Minnesota Extension’s basil growing guidance also emphasizes warmth, light, and consistent moisture for productive basil.
Timing is flexible indoors. Outdoors, the easiest window is during warm weather before the parent has spent much energy on flowers and seed. If nights are cool, take cuttings before bringing a plant inside rather than asking a tiny cutting to cope with cold soil and short days.
Choose water or soil before you cut
Both methods work, but they solve different problems. Water is the most transparent option for a first attempt because you can see whether the base is staying firm and whether roots are forming. Soil or a soilless mix is the better default if you already have a clean pot and want roots that are immediately adapted to their growing medium.
| Method | Best for | Main advantage | Main risk |
|---|---|---|---|
| Water | Beginners and small experiments | Roots are visible and moisture is easy to check | Stale water, low oxygen, and transition shock |
| Soil or soilless mix | Cuttings you want to pot up once | Roots form in their eventual medium | Too much water or low humidity causes failure |
| Seed | Growing many plants or trying new varieties | Inexpensive and scalable | Plants may vary from the parent and take longer to size up |
Water rooting is easiest to monitor
Use water when you want a visual progress check or when you are already trimming basil for the kitchen. A clear jar also makes it easier to notice a bad sign early: cloudy water, a sour smell, or a stem base that turns tan, gray, or soft. The trade-off is that roots formed in water are not automatically ready for potting; they need to be moved gradually into a moist, airy mix.
Do not assume distilled water is required. Clean tap water is usually a reasonable starting point if it is drinkable and does not have an unusual odor. The more important variables are a clean vessel, a stem that is not submerged above the lower node, and regular water changes before the jar becomes cloudy.
Soil rooting makes the simplest transition
Direct rooting avoids a separate water-to-soil adjustment. Use fresh seed-starting mix, a commercial cutting medium, or a loose blend that holds moisture without staying muddy. A small amount of perlite can improve air space; the goal is not a particular recipe but a medium that lets the buried node remain damp while oxygen reaches the developing roots.
Rooting hormone is optional for basil. This herb usually roots readily when the cutting is fresh and the conditions are warm, so hormone is not a substitute for a good node or clean moisture. The RHS propagation overview likewise treats rooting media, moisture, and technique as the foundation of successful propagation. If you use hormone, follow the product label and do not pour unused powder back into the container after it has touched plant tissue.
Take cuttings from the right part of the plant
Look for a stem with several pairs of healthy leaves and no flower cluster. The stem should be firm and green, not the soft floppy tip and not a tough, woody section. A slight bend is fine; a stem that collapses, has black marks, or carries insects is a poor candidate.
Find the node
A node is the joint where a leaf or pair of leaves attaches to the stem. It is the critical landmark for propagation because the tissues around it can produce new roots. The internode—the bare length between leaf joints—helps you position the cutting, but burying an internode while leaving every node above the water or soil removes the cutting’s best rooting sites.
Make the lowest cut about a quarter inch below a node. Leave at least one node to sit below the water line or medium, and keep one or two pairs of leaves above it. If the stem has long spaces between leaves, use a slightly longer cutting rather than burying a large amount of bare stem.
Prepare the cutting without exhausting the parent
Water the parent plant a few hours before cutting, or take cuttings in the morning when stems are naturally turgid. Use clean, sharp snips and make one decisive cut rather than crushing the stem. Wipe the blade between plants if you are working with more than one source.
Strip off the lower leaves that would touch water or soil. Leave the top leaves intact when they are small, but halve oversized leaves with clean scissors if the cutting wilts repeatedly. This reduces the amount of leaf surface losing water while the cutting has no roots to replace it.
Do not remove every leaf. The remaining leaves provide energy for root formation, and a completely leafless stem has fewer resources. Do not take so much material that the parent plant is left bare; removing about a third of a lush plant at one time is a sensible ceiling, followed by time for new growth.
Propagate basil in water step by step
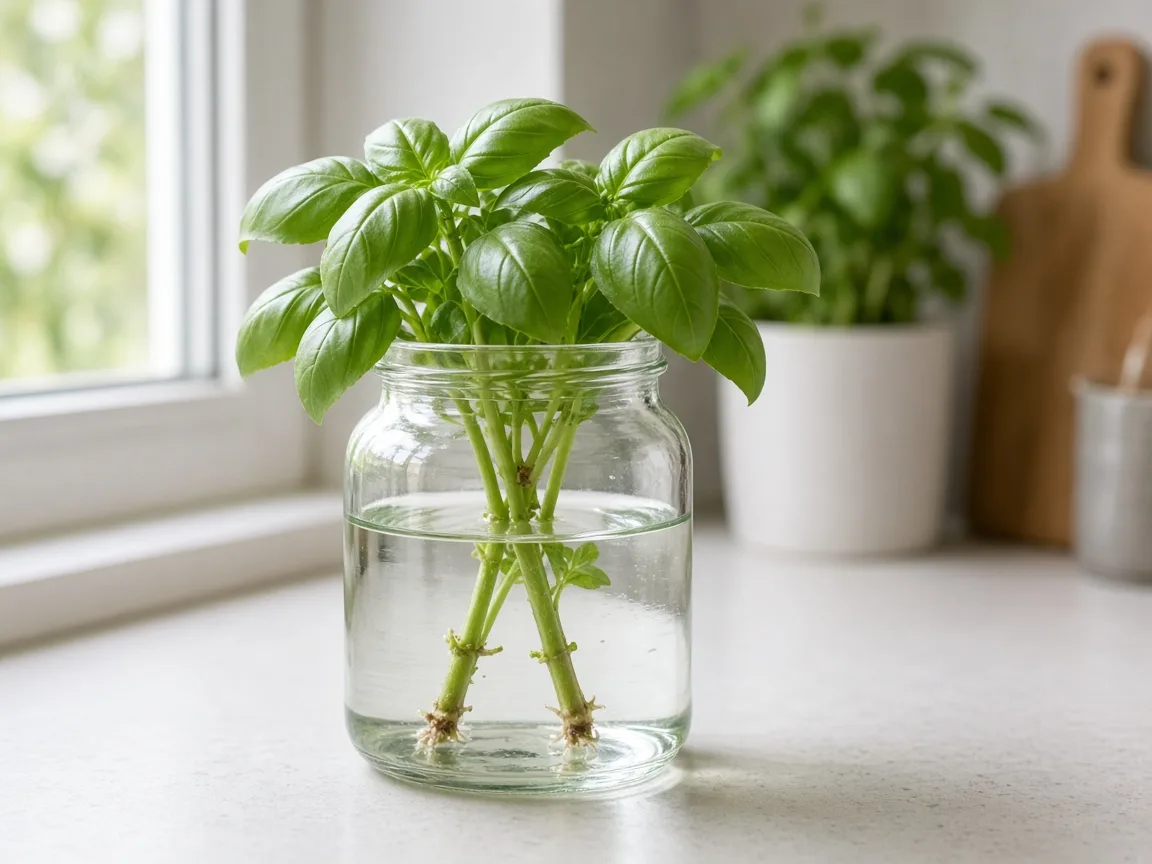
- Fill a clean, narrow glass or jar with room-temperature water.
- Place the prepared stem in the jar so the lowest node is submerged and all leaves remain dry and above the water.
- Set the jar in a warm spot with bright indirect light. A sunny window is useful if the glass does not heat the water or scorch the leaves; a few inches back from intense afternoon sun is safer.
- Check the water every day or two. Top it up when the level drops, and replace it whenever it turns cloudy or develops an odor.
- Rotate the jar if one side of the cutting leans toward the light. This is a small step, but it helps prevent a weak, one-sided plant.
- Wait for several pale roots to form before potting. A single threadlike root is a beginning, not a well-established root system.
Maintain the jar until roots form
Roots may appear in about 10 to 20 days under warm, bright conditions, but the calendar is less useful than the cutting’s condition. If the stem stays green and firm, leave it alone and keep the water clean. If the base becomes mushy, cut back to firm green tissue with a clean blade and move the cutting to fresh water; if rot has traveled upward, discard it.
Keep only the stem base in water. Submerging leaves creates decaying tissue and encourages a bad smell. Avoid crowding many cuttings into one tiny jar because tangled stems are harder to inspect and the water becomes fouled faster.
Water-rooted basil can remain alive in a jar for a while, but it is not a complete long-term growing system. Once the plant has roots, it still needs a nutrient source and room for the root system. Potting it into fresh mix is the simplest route for a continuing harvest.
Propagate basil in soil step by step
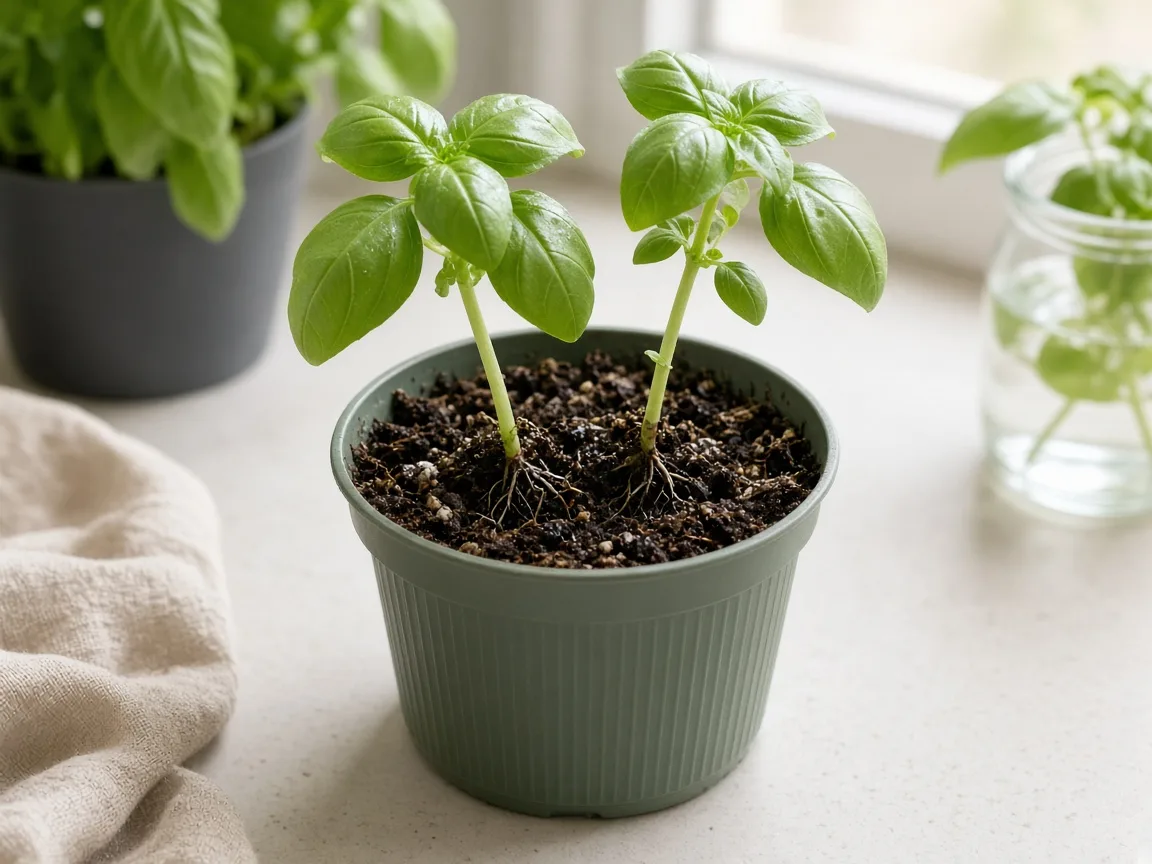
- Moisten a fresh, well-draining propagation medium and let excess water drain.
- Fill a small pot or cell with drainage holes. One cutting per small pot makes later transplanting easy; several can share a larger pot if they are labeled and spaced.
- Make a narrow hole with a pencil or dibber. The hole keeps the medium from scraping the fresh cut as you insert it.
- Place the cutting so at least one node is below the surface and the leaves are clear of the mix.
- Firm the medium gently around the stem so it stands upright.
- Cover the pot loosely with a clear bag or dome held above the leaves. The cover should slow moisture loss without trapping the foliage against wet plastic.
- Set the pot in bright filtered light and warmth, away from a hot window, fan, or draft.
- Check the medium daily. Keep it evenly moist, never saturated, and empty any saucer that holds runoff.
Balance humidity with air movement
An unrooted cutting loses water through its leaves faster than it can replace it. A loose cover helps bridge that gap, but sealed, dripping humidity is not the goal. Vent the cover daily at first, and open it longer if condensation is constant or the medium smells sour.
New leaves are encouraging but do not prove that roots exist; a cutting can spend stored energy on a small flush before the root system is strong. Test after two to four weeks by giving the stem a gentle tug. Resistance suggests roots are anchoring it, while a stem that slides out with a bare, dark base needs more time or a fresh start.
Know when a cutting has rooted
Look for a combination of signs: visible white roots in water, resistance when a soil cutting is gently lifted, and new growth that continues rather than appearing once and stopping. A rooted cutting should also recover from mild midday droop more quickly because roots can replace lost water.
Do not pull repeatedly to check. Every tug can break new roots. Instead, inspect a water cutting through the glass and use the resistance test only once the expected rooting window has passed. For soil cuttings, you can also lift the root ball from a flexible cell or look for roots at the drainage hole.
Rooting speed varies with basil type, stem maturity, warmth, light, and the health of the parent. Cold rooms, dark windows, overlarge leaves, and wet stagnant medium all slow the process or turn it into rot. Treat two to four weeks as a useful checkpoint, not a promise.
Move water-rooted basil into soil
Pot a water cutting when it has several roots roughly an inch or two long, not when one tiny root has just appeared. Use a small container with a drainage hole and fresh potting mix. Make a hole wide enough for the roots, lower them without bending sharply, fill around them, and water just enough to settle the mix.
For the first week, keep the new plant in bright indirect light and protect it from hot sun and wind. Water-rooted roots are accustomed to constant contact with water, so the potting mix should not be allowed to become bone dry immediately after transplanting. At the same time, do not leave the container sitting in water; the roots still need air.
Increase light gradually over several days. Some leaf droop is possible during the transition, but persistent collapse, a sour mix, or a blackening stem points to a root problem rather than ordinary transplant adjustment. Once the plant is holding itself upright and producing new leaves, move it to the strongest light available.
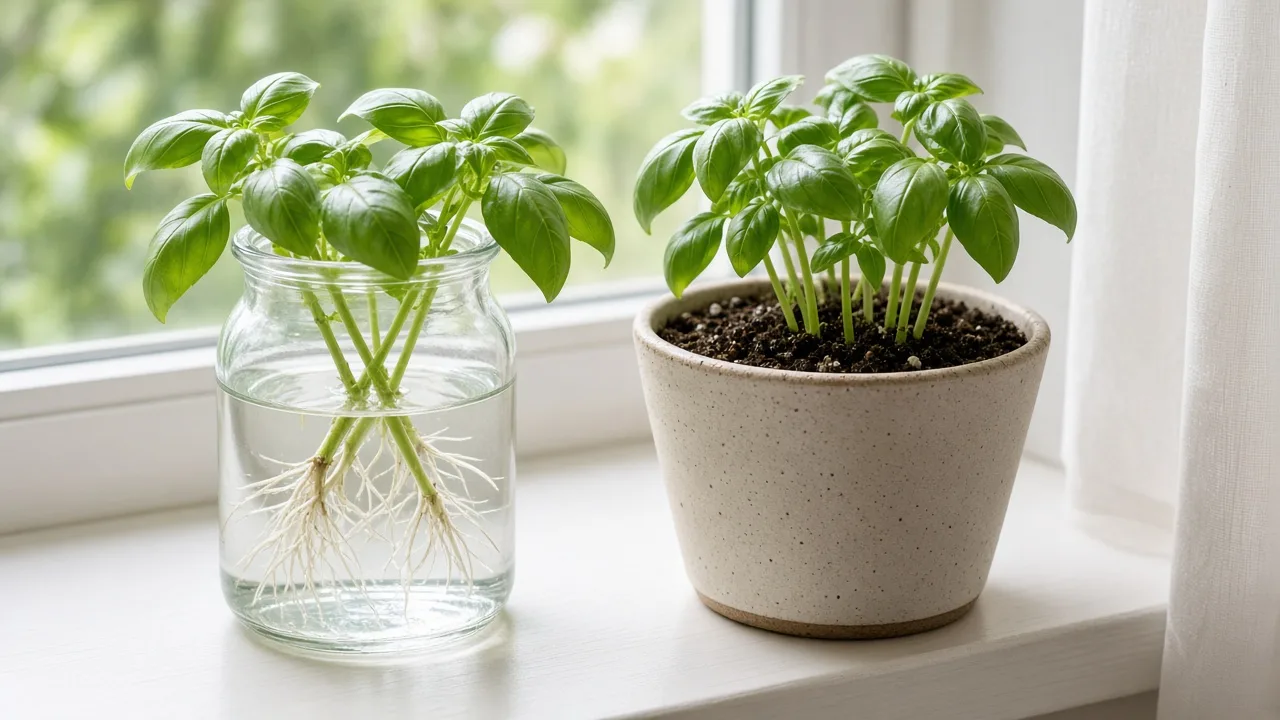
Keep propagated basil growing and harvestable
Light, warmth, moisture, and feeding
Basil grows best in warmth and strong light. Indoors, a bright south- or west-facing window may work, but a grow light can make the result more predictable in winter or in a dim room. Keep the light close enough to prevent a long, thin stem, while following the fixture’s instructions so foliage does not overheat.
Water when the surface begins to dry and the pot feels lighter, then water thoroughly until a little drains out. Basil dislikes the extremes of a constantly flooded pot and a repeatedly bone-dry root ball. Touch the medium rather than watering by a fixed weekly schedule because temperature, pot size, and light change how quickly it dries.
Once the cutting is rooted and growing, use a balanced, mild fertilizer according to its label if the potting mix is not already feeding it. More fertilizer does not compensate for low light and can create lush, weak growth or salt buildup. A modest feeding routine paired with adequate light is more useful than a strong dose.
Pinch before flowering
When the young plant has several pairs of leaves, pinch or cut just above a leaf pair. Two side shoots usually develop from the leaf axils below the cut, creating a bushier plant. Keep harvesting the tips in this way rather than stripping leaves from the base one at a time.
Flowering is natural, but it shifts the plant toward reproduction and often changes leaf texture and flavor. Remove flower buds if your goal is tender culinary leaves, and take fresh propagation cuttings from leafy side shoots before the plant becomes dominated by flowers. Gardening Know How’s basil propagation guidance also favors fresh, nonflowering material when available. A flowering stem may root, but it is a less dependable choice than vigorous vegetative growth.
Never remove all the growing tips at once. Leave enough active foliage for photosynthesis, and avoid taking more than about a third of the plant during one harvest. Regular light pinching is less stressful and gives you a steady supply of cuttings.
Troubleshoot wilt, rot, and slow roots
The cutting wilts immediately. The leaves are losing water faster than the stem can replace it. Reduce leaf area, move the cutting out of direct sun and wind, increase humidity with a loose cover, and start with a well-hydrated parent.
The stem turns black or mushy. This is usually rot caused by damaged tissue, stale water, a saturated medium, or leaves sitting below the surface. Cuttings with rot traveling up the stem are not worth rescuing; discard them, clean the jar or pot, and restart with fresh material.
The water becomes cloudy. Replace it and rinse the vessel. If the stem remains firm, it may recover. If it smells sour or feels soft, cut above the damaged section only if healthy green tissue remains.
There are leaves but no roots. New leaves can come from stored energy, so do not use them as the only test. Improve warmth and light, verify that a node is actually submerged or buried, and wait another week; if the base is drying or rotting, restart.
The soil cutting collapses. Check whether the mix is waterlogged. If it is, improve drainage and ventilation. If it is dry and the leaves are limp, water the medium thoroughly, drain it, and restore a loose cover for a short period.
The rooted plant is tall and weak. It needs more light or more frequent pinching. Move it closer to a suitable light source, rotate the pot, and cut above a leaf pair once it is actively growing.
Seeds, grocery-store basil, and flowering stems
Seeds are useful when you want many plants, a particular seed packet variety, or a fresh start each season. They are not the best choice when the goal is to preserve the exact flavor and growth habit of a favorite parent; a cutting is a clone, while a seed-grown plant is the result of sexual reproduction and may differ.
Grocery-store basil can sometimes root, but success depends on freshness and how the stems were handled. Choose a firm, green stem with an intact node and no slimy base, remove damaged tissue, and treat it like any other cutting. Packaged bunches may be chilled, dehydrated, or already bruised, so a living potted plant is a more reliable source.
You can try a flowering stem, but select a leafy side shoot when available. Flowering material may be older, less vigorous, or more prone to spending its remaining energy on blooms. If you only have flowering stems, remove the flower head, leave healthy leaves at the top, and run several cuttings so the experiment has a fair chance.
Conclusion: repeat the cycle while the plant is vigorous
The repeatable basil-propagation cycle is simple: grow a healthy parent in strong light, pinch it before flowering, take clean cuttings below a node, root them in water or airy soil, and give rooted plants a gradual transition and regular harvest. Water is the clearest beginner method; direct soil is the cleanest long-term workflow.
The biggest improvements come from small decisions rather than special products: choose firm vegetative growth, keep leaves out of water and soil, maintain moisture without saturation, and do not mistake a new leaf for a complete root system. Once a rooted cutting begins branching, it becomes the next parent—and one basil plant can keep supplying both dinner and the next round of plants.



