How to Propagate Cilantro Stem Cuttings in Water
Learn how to propagate cilantro stems in water, choose fresh cuttings, keep leaves above the waterline, refresh the jar, and know when to pot or restart.
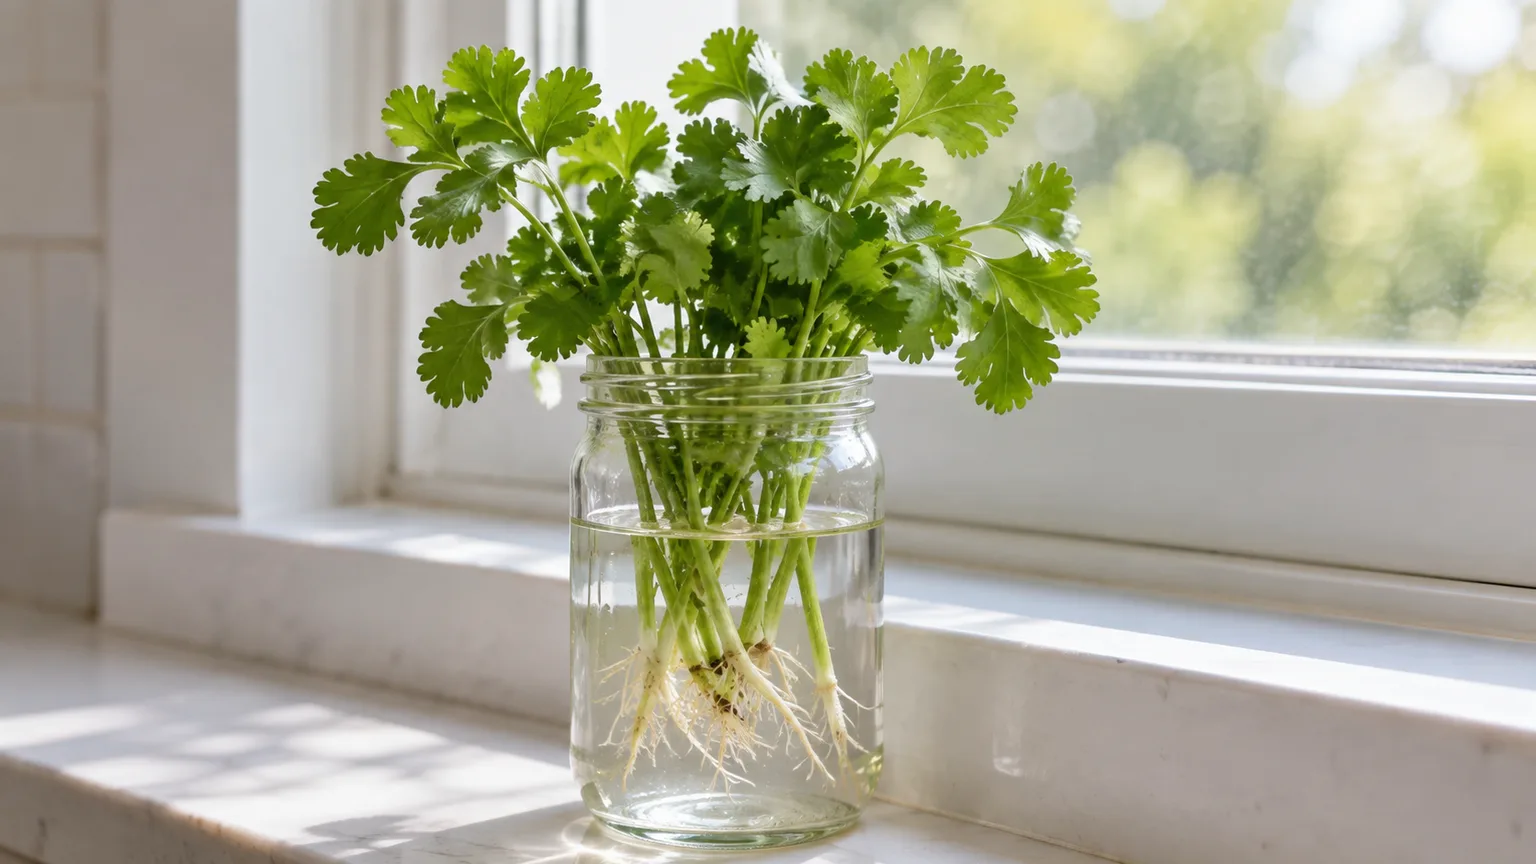
Can cilantro grow from stem cuttings in water?
Yes, fresh cilantro stems can be kept in water and may produce new leaves and roots, but rooting is not dependable. University of Nevada, Reno Extension describes rooting herb cuttings, including cilantro, in water as a way to regrow a small amount of foliage (UNR Extension); however, Gardening Know How cautions that cilantro cuttings do not always form roots (Gardening Know How). Illinois Extension recommends direct sowing because cilantro is difficult to transplant due to its taproot and has a short garden life with a tendency to bolt (Illinois Extension). Treat water propagation as a short-term experiment rather than a reliable way to create an endless supply. A grocery bunch with healthy stems—and especially one with some white roots still attached—gives you a better starting point than a wilted bunch with damaged or spotted stems.
The practical goal is modest: keep sound cuttings hydrated, encourage any viable roots to continue growing, and pick a little fresh foliage while the stems remain vigorous. The result is not the same as a robust cilantro plant raised in a proper growing medium. Water-grown stems tend to produce less vigorous growth, and their leaves may be less aromatic than leaves from soil-grown cilantro.
That distinction helps set expectations. New leaves appearing after a few days are encouraging, but they do not guarantee that every stem will root or keep producing. If the cuttings develop a healthy root system, you can try moving them into a pot; if growth fades after a few weeks, use the remaining stems for cooking and begin again with a fresh bunch.
Choose the freshest, strongest stems
Start with cilantro that looks fresh enough to use at the table. The leaves should not be limp throughout, and the stems should not show spots or other visible signs of disease. Separate the bunch and sort it before cutting: use the weakest or most damaged pieces in a meal rather than asking them to recover in a jar.
Look for stems that feel firm and still carry healthy foliage near the top. A bunch with white roots attached is especially useful because those roots are already present; keep them intact rather than trimming them away. The more sound root material a stem retains, the more promising it is as a candidate for potting later, though it still needs to stay clean and show continued vitality.
Do not choose stems only because they are the longest. A long, tired stem with drooping leaves is a poorer starting point than a shorter, fresh one. A few carefully selected stems are also easier to arrange in a jar without crushing the leaves or crowding the water.
Keep attached roots when a bunch has them
Some grocery bunches arrive with roots; others have been trimmed back to bare stem ends. Either can be placed in water, but a rooted stem starts with a visible advantage: you can monitor existing roots instead of waiting to see whether a bare cutting forms them. Keep those roots attached, rinse away any loose debris, and place them gently in the water without bending or packing them tightly into the jar.
If the bunch has no roots, do not assume that leaf growth alone means the cutting has established. Keep the same routine and watch the stem base for roots. If it never develops them and the foliage begins to weaken, use it as a short-lived leafy cutting rather than repeatedly extending its time in the jar.
Gather a clean jar and simple supplies
You need a clean jar, fresh room-temperature tap water, and sharp scissors. Choose a jar that holds the stems upright without squeezing them together; a narrow opening can help support a small number of cuttings, while a wider vessel gives a crowded bunch more room. Cleanliness matters more than the shape or price of the container.
Wipe the scissors with rubbing alcohol before cutting, and start with a clean jar rather than one that has residue from food or an old plant cutting. Set the jar somewhere you can easily see and refresh it. A setup that is easy to check tends to make the daily-or-every-other-day water change straightforward.
Skip additions such as sugar. The cutting needs plain water for this method; adding sugar does not speed root growth and can make the jar less clean. You also do not need a special propagation station or fertilizer to try the basic method described here.
Prepare the stems before they go in water
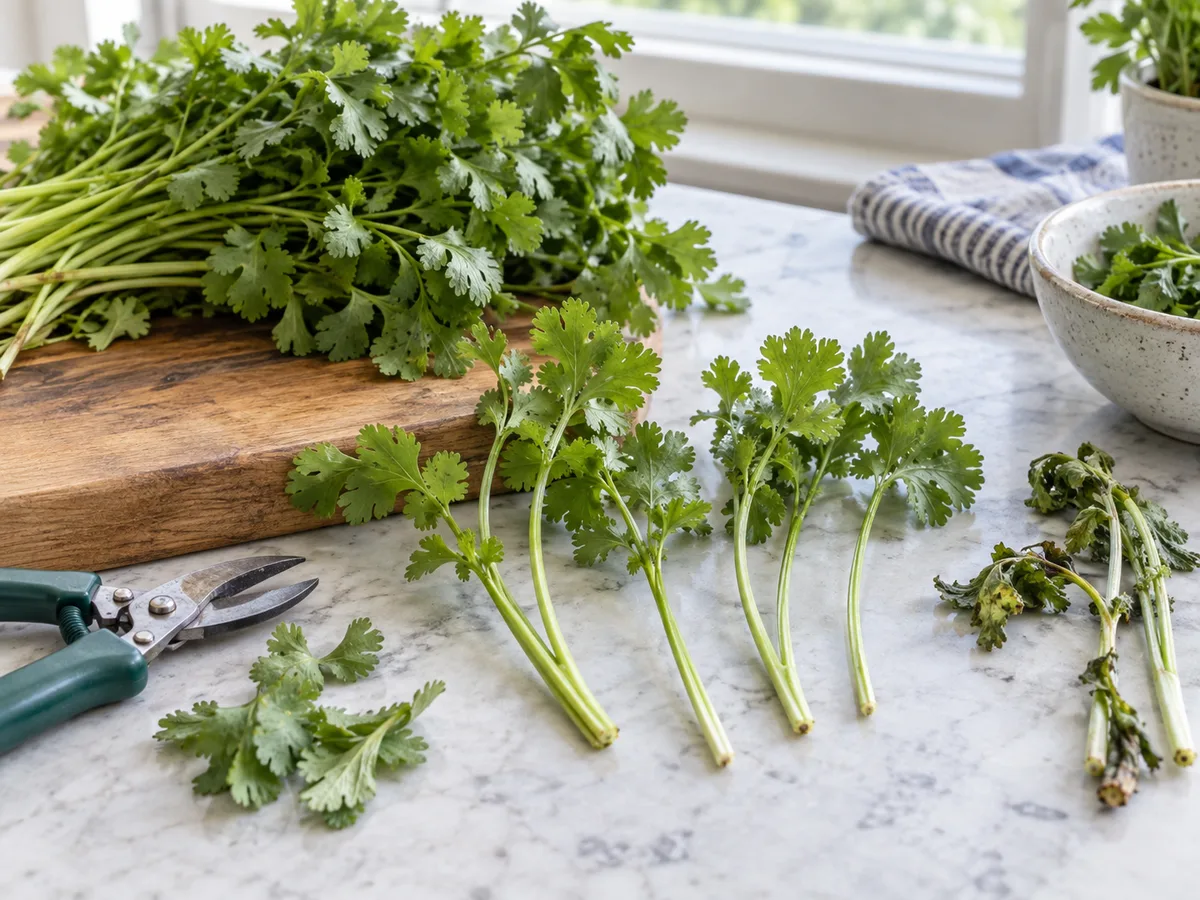
After sorting the bunch, make clean cuts with the prepared scissors and remove the leaves that would otherwise sit below the waterline. Keep the cutting simple: the aim is to leave a healthy leafy top above the water and a bare lower section that can sit in the jar without foliage soaking in it.
Avoid stripping every leaf from the stem. Preserve the small center leaves and growing point, along with enough healthy foliage above the jar to tell whether the cutting stays lively. If roots are already attached, handle them gently and do not cut them off while preparing the stem.
The prepared stems should be easy to place in the jar without forcing them through a narrow opening. If leaves would be trapped against the glass or folded into the water, reduce the number of cuttings in that jar. Starting with fewer stems gives each one room and makes it easier to spot a problem before it affects the whole bunch.
Remove outer leaves but preserve the center growth
Trim the outer leaves from the lower portion of each stem, but leave the tiny leaves at the center intact. Those central leaves are the growth you want to keep above water; removing them in an attempt to make a “cleaner” cutting can leave the stem with little visible foliage to sustain the trial.
As you work, set aside any stem that is spotted, badly wilted, or broken. Do not place questionable material in the same jar as healthy cuttings. A careful sort at the beginning makes later troubleshooting easier because you will know which stems started in good condition.
Set the right water level
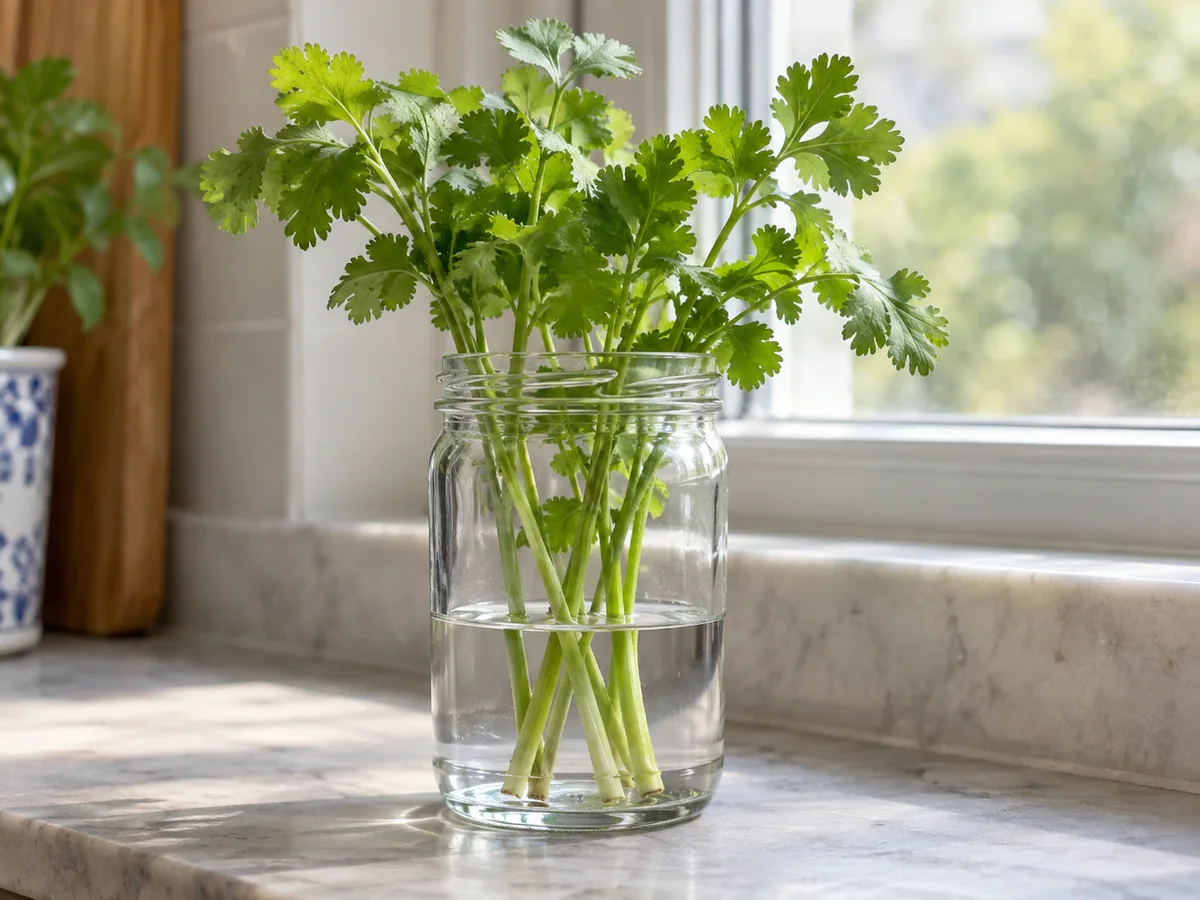
Add about two to three inches of room-temperature water to the clean jar—enough to cover the stem bases, not the leaves. Stand the cuttings in the jar so only the bottom portion of each stem is immersed. If you retained roots, they can sit in the water as well, but keep the foliage and leafy growing tips above the surface.
This waterline is the key setup detail. Submerged leaves soften and break down, while stems crowded deep in water are more likely to become a cleaning problem. Check the jar from the side after arranging the cuttings: if a leaf is touching the water, lift it clear or remove that lower leaf. If the stems cannot stand without leaning into the water, use fewer stems or a more supportive jar.
Do not fill the vessel to the top. A shallow level is easier to monitor and replace, and it keeps the foliage dry. Top up only enough to restore the lower stems when the level drops; the intended setup remains a jar of plain water with the stem bases immersed.
Choose bright indirect light and steady temperatures
Put the jar in bright, indirect light in a spot that stays around 60–70°F. A bright kitchen area near a window can work if direct midday or afternoon sun does not beat onto the glass. Strong direct sun can heat the water and stress the delicate foliage, so move the jar a couple of feet back from a hot window when necessary.
Keep the cuttings away from heat sources. A location that feels comfortable and steady is more useful than chasing the sun across the room. If the leaves begin to look tired in a sunny spot, first check whether the jar is receiving harsh direct light and move it into brighter shade before changing several parts of the setup at once.
Light supports new leaf growth, but more light is not automatically better. Cilantro cuttings need a bright location, not a hot jar. Choose the brightest place that keeps the stems and water out of harsh sun, then leave the jar there consistently so you can judge how the cuttings respond.
Refresh the water and keep the jar clean
Change the water every day or two. Empty the jar, rinse it, and refill it with fresh room-temperature water; as you do, check that the stems remain firm and the leaves are still above the waterline. A quick routine is easier than waiting until the water looks unpleasant, especially when the jar sits in a warm or bright kitchen.
Use the water change as a short inspection rather than treating it as a refill-only chore. Check each stem separately: note whether it still looks firm, whether any leaf has slipped below the water, and whether the base or attached roots feel slimy. Remove a deteriorating cutting instead of assuming that all the stems in the jar will respond the same way.
Clean handling matters throughout the trial, not just on planting day. Rinse any attached roots or stem bases if they develop slime, and wash the jar before refilling it. Do not add sugar or other kitchen ingredients to compensate for weak growth; plain water and clean equipment are the basic method.
If a stem becomes slimy again after cleaning, changing the water once is not a reason to keep it indefinitely. Persistent slime is a sign to remove that cutting and start with fresh cilantro if the problem continues. Keeping one questionable stem in the jar can turn a small, manageable issue into a reason to discard the whole setup.
What to expect as the cutting develops
Leaf growth may begin after a few days, but the pace will vary from stem to stem. A cutting can stay green for a while without producing enough roots to become a lasting plant, so judge progress by more than the appearance of the top leaves. Keep the daily routine going, note which stems remain firm, and give the roots time to show whether they are developing.
Think in terms of three different checkpoints, not one promised finish date: new leaves may appear after a few days, roots around an inch long create a possible potting opportunity, and weak or stopped leaf growth after a few weeks signals that a cutting may be spent. Those milestones describe different things. A leafy top does not prove that roots are forming, and a rooted stem can still be too tired to keep producing useful foliage.
For a short period, the jar may provide a few leaves for cooking. The stems will not necessarily grow into a full, vigorous plant in water, and the flavor may be weaker than that of cilantro grown in a proper medium. Think of the jar as a temporary holding and rooting setup, not a self-sustaining hydroponic garden.
The cutting has reached the end of its useful run when leaf growth weakens or stops after a few weeks, or when the leaves turn yellow and stunted. At that point, do not keep waiting for a permanent comeback. Harvest any sound foliage and replace the tired stems with fresh ones, or pot a cutting that has developed substantial roots.
Read leaves and roots as different signals
New leaves tell you that some growth is happening; roots tell you more about whether a cutting may be ready to move into a pot. Watch the stem base closely during water changes. If roots appear and reach about an inch long, the cutting has a useful next-step cue; a stem with no roots and fading foliage does not.
Use that distinction to avoid two common mistakes: potting a stem simply because a leaf appeared, and leaving a rooted cutting in the jar long after it has a clear opportunity to move into potting mix. The one-inch mark is a practical signal from the method, not a guarantee that the cutting will establish after transplanting. Move it gently and keep expectations realistic.
When and how to move rooted cuttings into potting mix
When the stems have developed several roots about an inch long, you can try planting them in a pot filled with well-draining all-purpose potting mix. Handle the cutting by the stem rather than pulling on the roots, and settle the roots into the mix without forcing them into a tight bundle. The pot is the next stage for a rooted cutting; it is not a promise that every grocery-store stem will become a vigorous plant.
Use the root length together with the cutting’s condition. A stem with roots near that length and healthy leaves is a reasonable candidate to try; a cutting with yellow, stunted foliage or recurring slime is already showing signs of decline. If the roots are still short but the stem remains firm, continue the clean-water routine and check again at the next water change rather than pulling it out to inspect repeatedly.
If the bunch has several rooted stems, you can pot more than one together if the container gives them room. If you have only one promising stem, a smaller pot can keep the setup manageable. The important choice is to avoid damaging the new roots and to use a mix that drains well, as the original method recommends.
After planting, watch whether the cutting remains upright and whether its leaves stay in reasonable condition. If a cutting declines, do not assume that adding sugar or returning it to the same jar will solve the problem. A rooted cutting may still fail to settle into its new medium; keep the next step simple and begin again with fresh material when the stem is exhausted.
Harvest leaves without exhausting the cutting
Use sharp scissors to take only the leaves you need while the stems remain vigorous. Treat the jar as a small source of fresh garnish, not as a bushy plant that can supply a large harvest. The amount of new foliage is limited, and taking too much at once can leave little healthy growth above the water to continue the trial.
Check the cuttings before each harvest. Choose sound leaves, leave the small center growth in place, and avoid taking foliage from a stem that is already yellowing or losing strength. If the stems stop producing leaves after a few weeks, use what remains and replace the batch instead of cutting harder in the hope that it will restart.
For anyone who cooks with cilantro frequently, this method is best treated as a stopgap between fresh bunches. It can make a small amount of greenery available without soil at first, but it does not remove the need to start over or move a rooted cutting into potting mix if you want to try for a longer-lived plant.
Troubleshoot common cilantro cutting problems
When a cutting looks poor, check the basics in order: was the original stem fresh, are its leaves above the water, is the jar clean, has the water been changed recently, and is the jar out of harsh sun and heat? These checks target the conditions this method depends on without changing everything at once.
Separate a temporary droop from a clear decline. A stem that was weak at the start may never recover, while repeated yellowing, stunted leaves, or stalled growth after a few weeks signals that the cutting has likely given what it can. Remove damaged stems rather than letting them crowd the healthy ones, and restart with fresher material when the whole bunch loses vigor.
Slimy stems or cloudy water
Slime around a stem or its roots is a warning sign. Take the cutting out, rinse the stem and roots under running water, wash the jar, and refill it with fresh water. If the slime returns or the stem continues to deteriorate, discard that cutting and start again with fresh cilantro instead of repeatedly trying to rescue it in the same water.
Keep the other stems under observation after removing one that has become slimy. Refresh their water and make sure no leaves are submerged. A clean jar and frequent water changes are preventive habits; they are more useful than adding an unneeded ingredient to the water.
Wilting, yellowing, or stalled growth
Start by looking at the cutting itself. If it was already wilted or spotted when selected, replace it with a fresh, firm stem. If a formerly healthy stem droops, confirm that its base is still in water, its leaves are not submerged, and the jar is not sitting in direct, hot sunlight or near a heat source.
Yellow or stunted leaves and growth that weakens or stops after a few weeks are signs that the cutting may be exhausted. If it has developed roots about an inch long, try potting it in well-draining all-purpose mix; if it has not rooted and keeps declining, use any healthy leaves and restart. Do not interpret the lack of roots as a cue to leave an unhealthy stem in water forever.
Water cuttings versus hydroponic cilantro
Putting cut stems in a jar and growing cilantro hydroponically are different methods. A jar cutting relies on existing stems and plain water for a limited period; hydroponic growing starts with seeds and uses nutrient-rich water as the growing medium. The two approaches may both involve water, but they do not have the same starting material or purpose.
Choose a jar cutting when you have a fresh bunch and want to see whether sound stems will stay productive, form roots, or provide a few leaves before they fade. Choose seed-grown or hydroponic growing when the goal is to raise a planned crop rather than preserve a handful of cut stems. The seed route takes longer to get started; the scraped article gives 40–70 days as its comparison, which should be treated as a reported estimate rather than a schedule for every growing setup.
| Approach | Starting material | Role of water | Best fit |
|---|---|---|---|
| Jar cutting | Fresh cut stems, sometimes with roots attached | Plain water holds the lower stems while you watch for growth | A short trial or a few leaves from a grocery bunch |
| Potting a rooted cutting | A stem with roots about an inch long | Water is replaced by well-draining potting mix | Trying to continue a promising cutting as a potted plant |
| Hydroponic growing | Seeds | Nutrient-rich water is the growing medium | Starting a planned crop without growing it in soil |
This comparison also helps avoid a common misunderstanding: a jar of cut stems is not a small hydroponic system simply because both methods use water. The jar does not turn every bunch into a productive plant, while seed-started hydroponics is a separate growing approach with a different starting point.
The main trade-off is simple: water cuttings are quick to set up and require little equipment, but the supply is brief and the resulting growth may be weaker. A planted or seed-started crop takes a different commitment, but it is the better fit when you want a more substantial, ongoing source of cilantro.
Conclusion
To try cilantro stem cuttings in water, begin with the freshest stems you can find, preserve any attached roots and center leaves, and use a clean jar with only the lower stems submerged. Keep it in bright indirect light around 60–70°F, change the water every day or two, and remove any stem that becomes slimy or keeps declining.
Expect a short harvest, not an endless supply. If roots grow to about an inch, try moving the cutting into well-draining potting mix; if the leaves weaken or stop growing after a few weeks, start with fresh cilantro. That gives the method a clear purpose and a clear stopping point.



