How to Propagate Mint From Cuttings or Rooted Sprigs
Learn how to propagate mint from water cuttings or rooted runners, when to pot up new roots, how to help cuttings settle, and how to keep new plants contained.
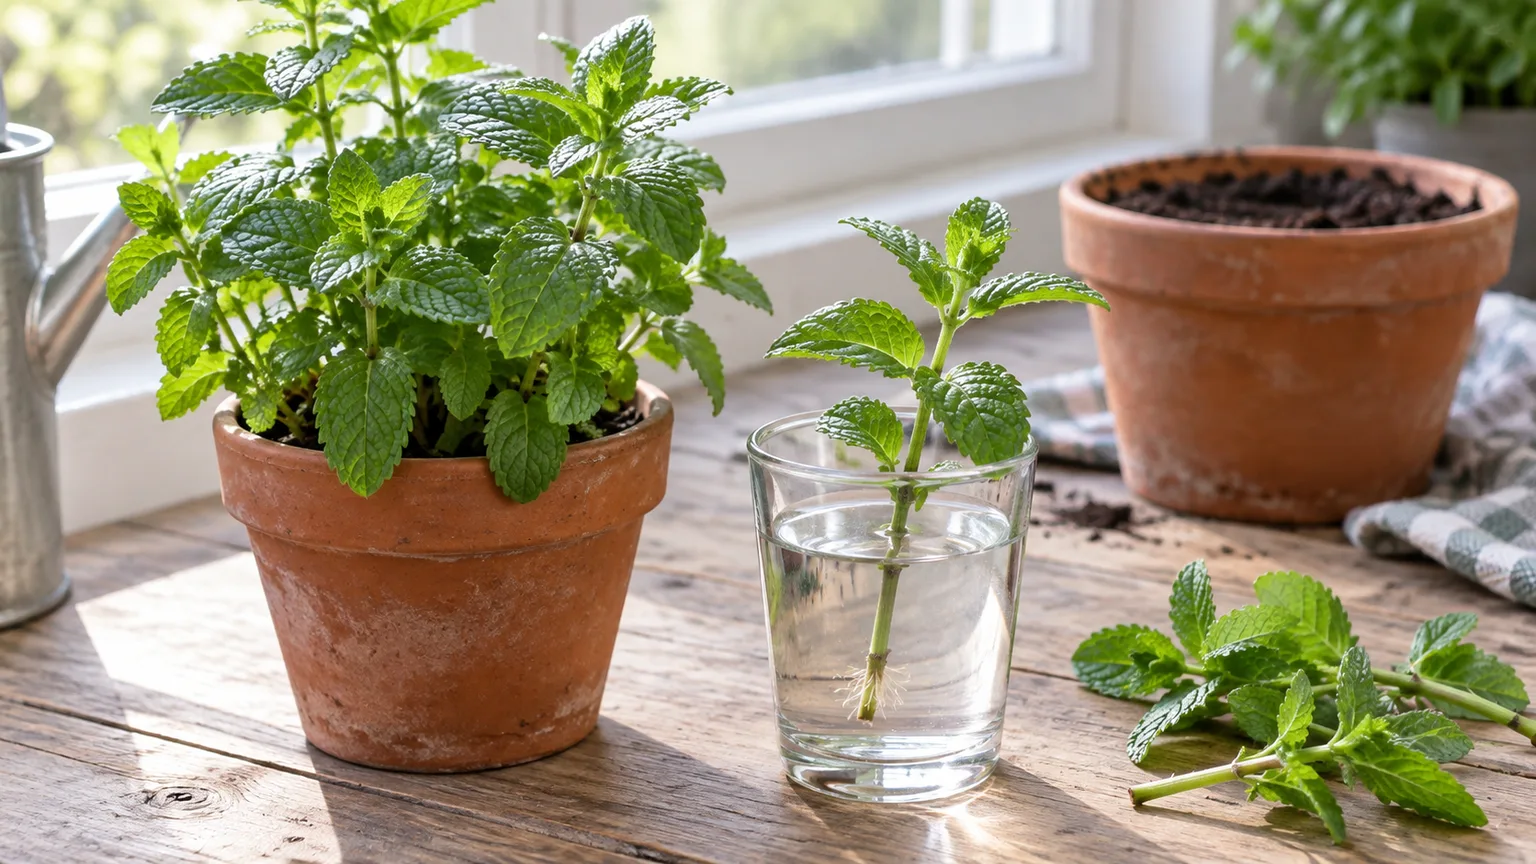
One healthy mint stem can become a new plant without seed trays or special equipment. The simplest route is to place a freshly cut stem in water, keep its leaves above the waterline, and wait for roots to appear; a piece that already has roots can go straight into moist potting soil.
The detail that makes the process work is the leaf node: the joint where a leaf pair attaches to the stem. Choose a sound stem with at least one node, make the cut just below it, and keep the lower leaves out of the water. Some gardening guides report visible roots in one to two weeks (Gardenary’s mint propagation guide), but timing varies; the condition of the cutting matters more than a date on the calendar.
Decide how to start: water cutting or rooted piece
Use a water cutting when you have a healthy sprig but no roots. This method is easy to set up and lets you see whether roots are forming, so it suits a first attempt or a cutting from a friend’s plant. Its main drawback is that the new roots still need to be transferred into soil later.
If you can lift a small mint sprig with roots or root hairs still attached, plant that piece directly in a pot. It skips the waiting stage and has a head start, though it is less tidy to separate from an established plant and you need to keep the root material intact. Ren Elizabeth, a gardener and blogger at Eco Friendly Homestead, recommends looking for a stem with root material when choosing this faster start (Eco Friendly Homestead profile).
Water cuttings make root growth easy to see
Water is the clearest method when you want to watch a stem develop roots before committing it to a pot. It also makes it easier to notice a submerged leaf or a stem beginning to soften. You can prepare several cuttings in one clean glass, but keep enough room between them to see each stem and remove a cutting if it starts to deteriorate.
Rooted runners skip the water stage
An established mint plant may have a stem that has touched soil and formed roots. A small rooted section can be separated and potted on its own, provided it carries both a healthy stem and live root material. This is different from taking a bare stem cutting: the rooted piece is already functioning as a small plant, so the goal is to preserve its roots while moving it. Utah State University Extension also recommends dividing established mint as a way to propagate named varieties (USU Extension).
Grocery-store mint can be tried the same way
Store-bought mint can also be tried with the same cutting method. Choose a firm, fresh stem rather than one that is crushed, limp, or already decaying; then remove the leaves from the portion that will sit under water. A bunch may contain stems at different stages, so prepare more than one if you want a backup, but treat each stem as an experiment rather than assuming every grocery sprig will root.
Find the leaf node before you cut
A node is the small joint on a mint stem where a pair of leaves emerges. It is easy to spot: follow the stem upward and look for the place where the leaf stalks meet it. The space between two nodes is an internode; the node is the useful landmark for preparing the cutting.
Make the cut just below a node so that the node remains on the piece you plan to root. The stem segment below the leaves will sit in the water, while the leafy upper growth stays dry. If you cut through the node or strip every leaf from the top, you lose the simple reference points that help you place and monitor the cutting.
Choose and prepare a healthy mint stem
Start with a sprig that looks lush and healthy, with firm green growth and good leaves near the tip. Avoid a stem that is crushed, limp, badly discolored, or carrying damaged foliage. A vigorous tip gives the cutting leaves that can remain above water while the lower stem rests in the jar.
Use clean, sharp scissors to cut just below a leaf node. Remove the leaves from roughly the lower third of the stem, including any that would touch the water. Leave the top leaves in place; they show whether the cutting remains fresh and keep the growing tip intact. Rooting hormone is optional for mint and is not required for this straightforward cutting.
Before setting the cutting aside, identify which part will go into the water and which leaves must stay above it. That quick check prevents the most avoidable setup mistake: letting foliage sit in water and break down while the stem is trying to root. If you are collecting cuttings from someone else’s plant, ask for a healthy sprig and avoid taking a large amount from a small or struggling plant.
Root mint in water step by step
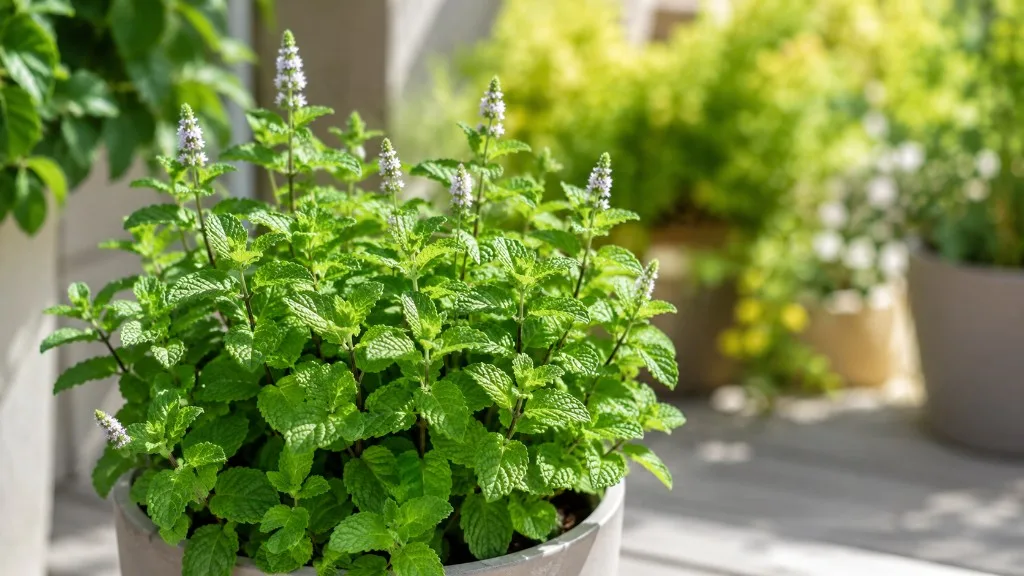
- Fill a small, clean glass or jar with fresh water. Use a container that holds the stem upright without crushing it; a narrow opening can support a light cutting, while a wider glass makes it easier to monitor several stems.
- Set the cutting so a bare lower section and at least one node are under water. Keep every leaf above the waterline. If the cutting tips sideways, reposition it rather than allowing the foliage to sit submerged.
- Place the jar in a bright, sunny window. Keep the cutting where you can see it and check the water level as it roots.
- Watch the stem and water. The water should remain fresh and cover the lower stem. Top it up when the level drops; if it becomes cloudy or the submerged part looks soft, replace the water and inspect the cutting before returning it to the jar.
- Wait for visible root hairs. Small pale roots begin at the submerged stem; Gardenary reports one to two weeks as a common window, but use the roots themselves—not a promised date—as your signal. Give the cutting time to form several roots rather than potting it as soon as you see the first tiny bump.
The method does not need a complicated rooting mix, fertilizer, or a hormone treatment. Its success depends on the cutting staying firm, the node staying in contact with water, and the foliage remaining above it. If you prepare several named varieties, keep their cuttings in separate jars so you can identify them after potting.
Know when roots are ready for potting
Rooting time varies, so use the roots as your signal. Several pale roots around an inch long are a practical point for planting. Look for more than one short nub at the base of the stem, and make sure the cutting still has healthy leaves above them.
There is no benefit in waiting for an enormous tangle of roots before moving the plant. A small but visible group is easier to guide into a pot without bending or breaking it. If the roots are only just appearing, leave the cutting in the jar and check again later; if they are established, prepare the pot before lifting the stem so its roots do not dry while you search for supplies.
Start a mint cutting in potting mix
You can also place a prepared mint cutting directly into moist potting soil instead of rooting it in water first. A piece with intact root material has a head start; a bare stem gives you less visible feedback while it establishes. For a bare cutting, use a small pot of fresh, adequately moist soil and set the lower stem in the mix while keeping the leaves above the surface.
The trade-off is visibility. In water, you can see the first roots and know when they appear; in soil, the stem is hidden and you must judge progress by whether it remains firm and begins to grow. Keep the mix evenly moist rather than letting it dry out completely, and avoid turning it into a saturated, airless mass. If you have a root-bearing piece, plant the roots into the mix and let the leaves remain above the soil.
For a first propagation, water is a useful choice when you want a visible checkpoint. Direct planting makes sense when you already have a rooted sprig or want to avoid the transfer from jar to pot. Either way, the new plant needs a container that can hold fresh soil and be watered without leaving it sitting in excess water.
Pot up a rooted cutting with minimal disturbance
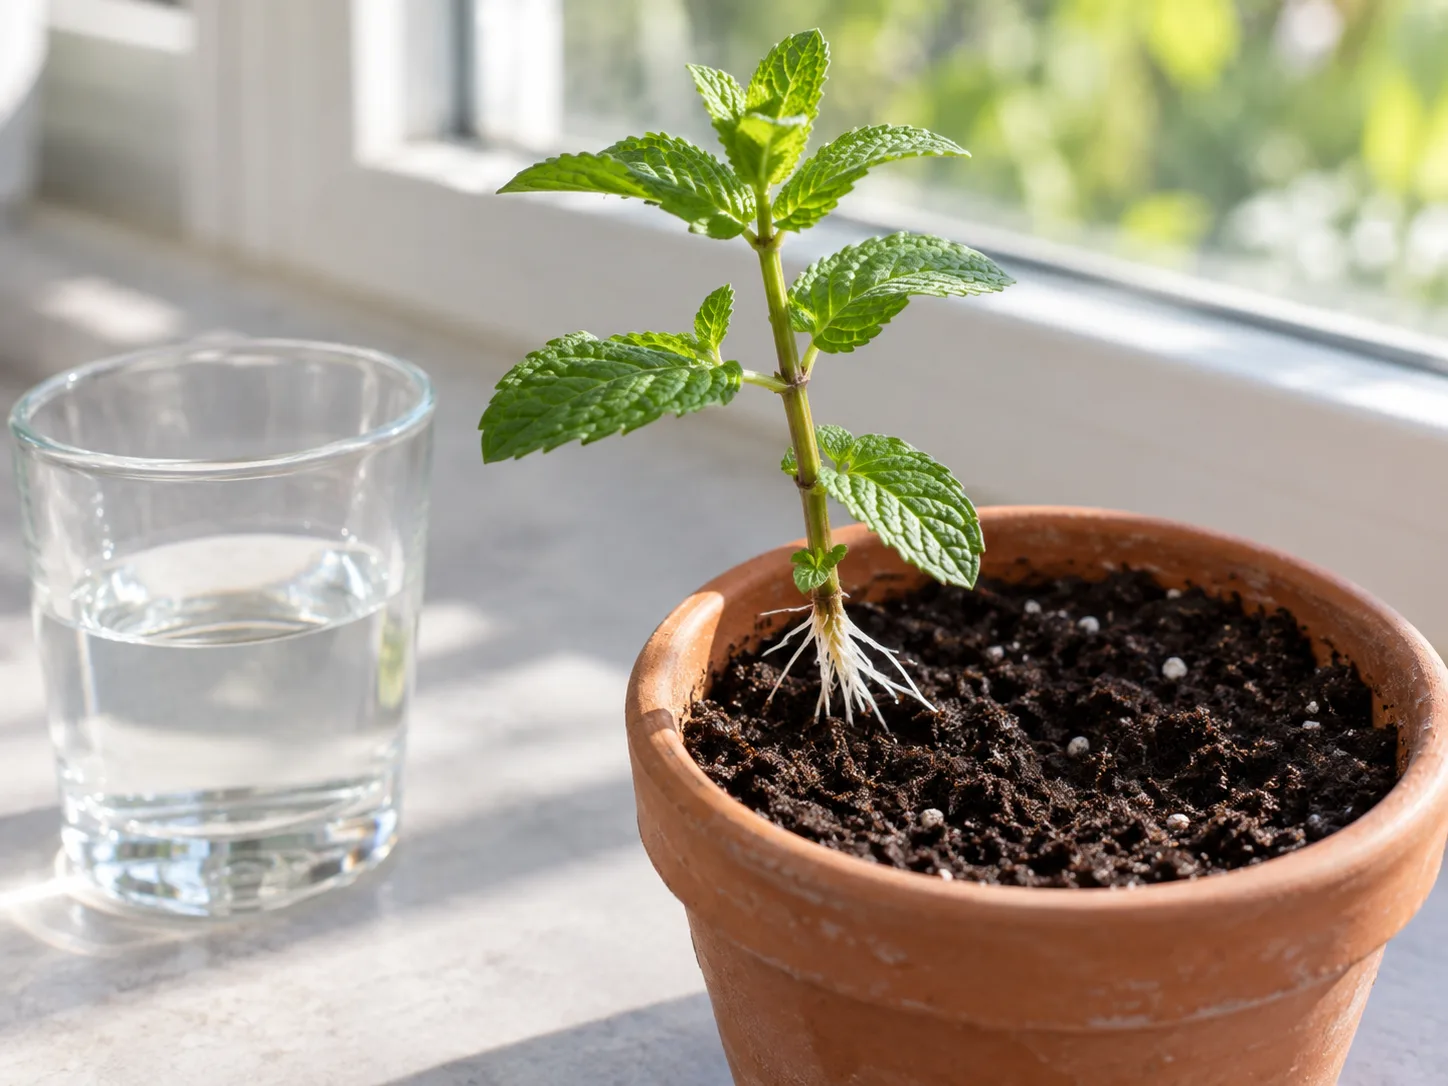
Choose a container with room for the cutting and fresh potting soil that is already lightly moist. Make a small opening, guide the roots downward, and settle the stem into the soil up to the point just below its top leaves. The roots should be covered, while the leaves remain above the surface and the stem stands upright.
Backfill gently so the cutting stays in place, then water the soil enough to settle it around the roots. Do not pull on the stem to test whether it has anchored; that can disturb the very roots you are trying to establish. If you are moving a root-bearing runner rather than a water cutting, keep as much of its existing root material together as you can while setting it into the pot.
Keep newly planted mint in indirect sunlight for the first several weeks as it adjusts. That is a useful transition after the brighter rooting spot: the leaves can remain above the soil while the roots begin working in their new medium. Keep the soil consistently moist during this period, but do not leave the pot standing in water.
Help new mint settle after planting
For the first days, check both the leaves and the soil instead of watering by a fixed schedule. Mint can look droopy when its roots are disturbed, but a cutting that has just been planted should not be left in dry mix. If the surface begins to dry and the pot feels lighter, water thoroughly and let excess drain away; if the soil is still wet, wait and check again rather than adding more.
Keep the new plant in a steady place while it adjusts. Frequent moving, pulling at the stem, or repeatedly lifting the cutting to inspect the roots can set it back. Once it is holding itself upright and producing fresh growth, it has made the transition from cutting to potted plant; continue normal watering and harvest only lightly until the plant has filled out.
Mint grows readily once established, so the small cutting does not need an aggressive feeding routine to prove that it has rooted. The near-term goal is a firm stem, living leaves, and roots that hold the plant in the mix. If growth pauses briefly after potting but the stem stays firm, give it time and keep the moisture steady rather than discarding it immediately.
Troubleshoot a cutting that wilts or fails
When a cutting looks poor, check the stem and the part below the water or soil before changing several things at once. A wilted leaf can reflect a cutting that is still adjusting, while a soft or decaying submerged stem points to a different problem. Make one correction, then watch for a clear response.
Leaves wilt while the stem stays firm
First check whether the lower node is still in water and whether the leaves have stayed above it. Refill the jar if the level has fallen, and move any leaves that have dipped into the water. If the cutting is in soil, check whether the mix has dried; moisten it evenly if it has, then give the stem time rather than repeatedly pulling it out to look for roots.
A cutting with no roots yet has limited ability to recover water after being separated from its parent plant. Keep the setup simple and stable: firm stem, fresh water at the lower node, leaves out of the water, and bright window light. If the stem is still green and firm, it may need more time; if the stem has collapsed or turned soft, start again with a healthier section.
The stem softens or the water turns cloudy
Remove the cutting and inspect the submerged portion. If it is soft or visibly breaking down, trim away the damaged section with clean scissors and reset the remaining firm stem only if a healthy node remains. Replace cloudy water with fresh water and clean the glass before using it again.
If decay continues or the cutting has no healthy node left, discard it and take a new one from sound growth. Do not keep a failing stem in the same jar and expect additional waiting to solve the problem. A fresh start is usually simpler than trying to rescue tissue that is already soft.
Keep new mint plants contained
Propagation solves the “how do I get another plant?” question, but it also multiplies the amount of mint you need to manage. Mint spreads readily, and a stem or piece with root material can establish in soil. For a small home supply, plant each new cutting in a container rather than adding it to a mixed garden bed where it can spread into neighboring plants; Utah State University Extension advises confining mint because it spreads quickly and is difficult to eradicate once established (USU Extension).
Keep the pot separate from open garden soil and trim stems that reach down to the ground. If you are sharing a plant with someone, pass along the containment advice with the cutting so the new owner can choose a suitable pot from the start. A compact container makes it easy to keep a few plants for kitchen use without letting the extra stems become an unwanted patch.
Conclusion
To propagate mint, take a healthy stem cutting just below a leaf node, remove the lower leaves, and place the bare stem in fresh water with its foliage above the surface. Keep it in a bright window and wait for several visible roots—around an inch is a practical potting cue—before moving it into moist soil. If you already have a root-bearing sprig, pot it directly and preserve its roots.
Give the new plant a gentle transition in indirect light, keep the soil consistently moist, and avoid disturbing the cutting while it settles. Then keep the mint in a container: making more plants is easy, and containing them from the beginning is the part that keeps the extra growth useful.



