How to Safely Remove a Stuck Recessed Light Bulb at Home
Remove a stuck recessed light bulb safely: identify its base, use a steady grip, and stop before broken glass or a damaged socket creates electrical risk.
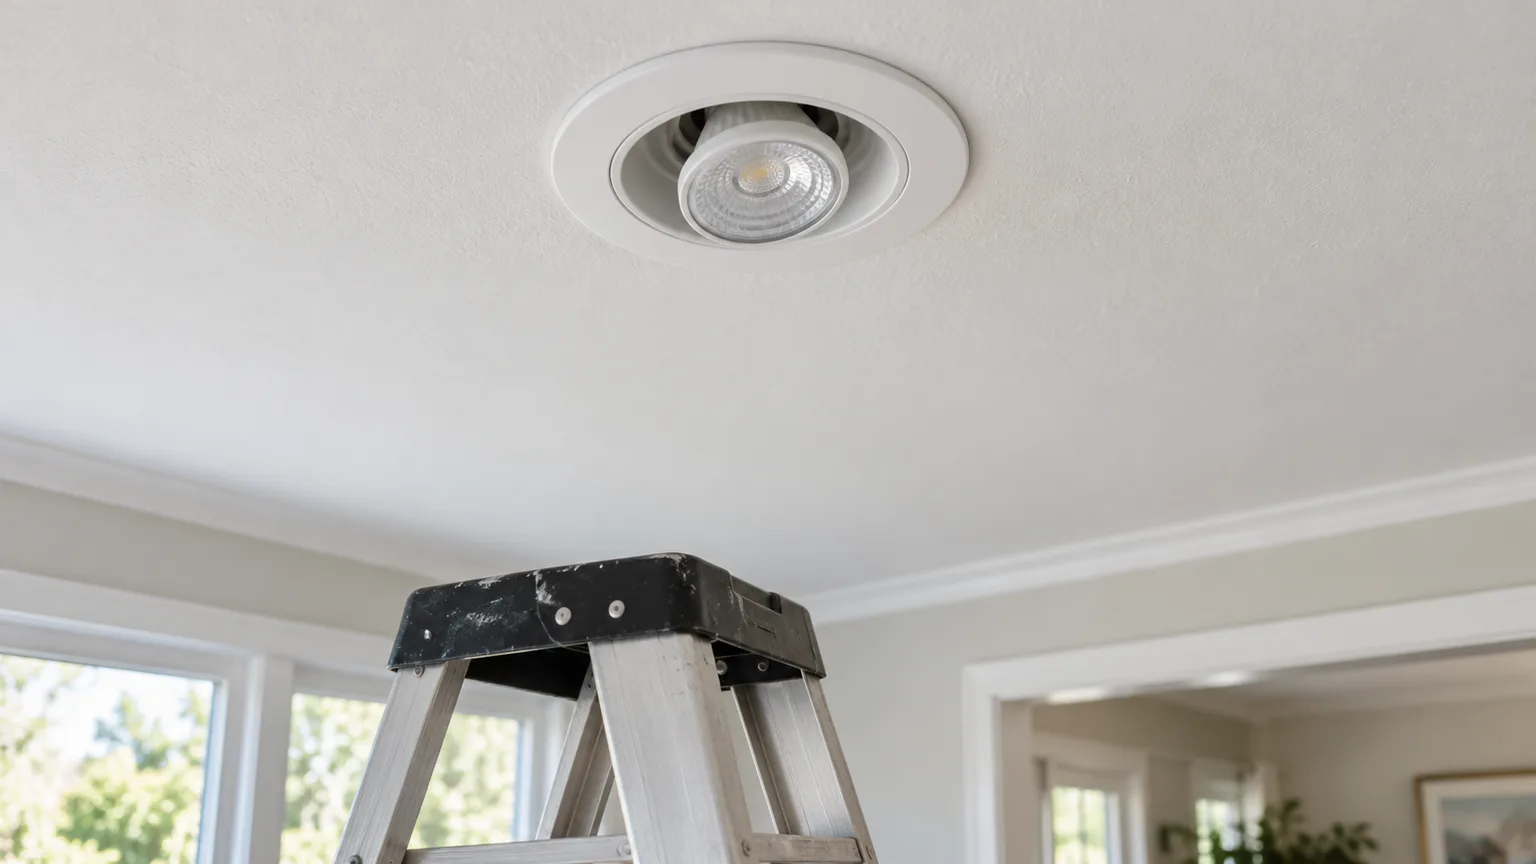
A recessed bulb that will not turn is not always stuck for the same reason. It may be a screw-base reflector lamp wedged against its trim, a GU10 spotlight that must be pressed and turned, a spring-held trim that is blocking your grip, or an integrated LED unit that has no separate bulb to unscrew. Identifying which setup you have is the difference between a controlled removal and twisting the socket, breaking glass, or pulling wiring into view.
Before touching the fixture, turn the light off, let it cool, and switch off the correct breaker. Then use only a small, steady amount of force that matches the bulb base. If the lamp cracks, the socket shifts, the trim will not release, or you can see wiring, stop and call a licensed electrician.
Start with the fixture, not the bulb
Stand on a stable step ladder and look at the light from below before trying to turn anything. A recessed light is an assembly: the bulb or LED module sits inside a socket or driver, while the visible trim may be held by springs, clips, or a twist-lock ring. A round lens can look like the face of a replaceable bulb even when it is part of the trim, so do not assume that every visible glass or plastic surface should rotate.
Check for a label on the trim, lamp, or nearby switch; take a photo before loosening anything; and look up the fixture model if you can identify it. If the light has several identical fixtures, compare the working one from the floor rather than pulling down a unit just to inspect it. Make a note of the bulb shape and any base code printed on the lamp, such as E26, GU10, or GU5.3.
Replaceable bulb or integrated LED?
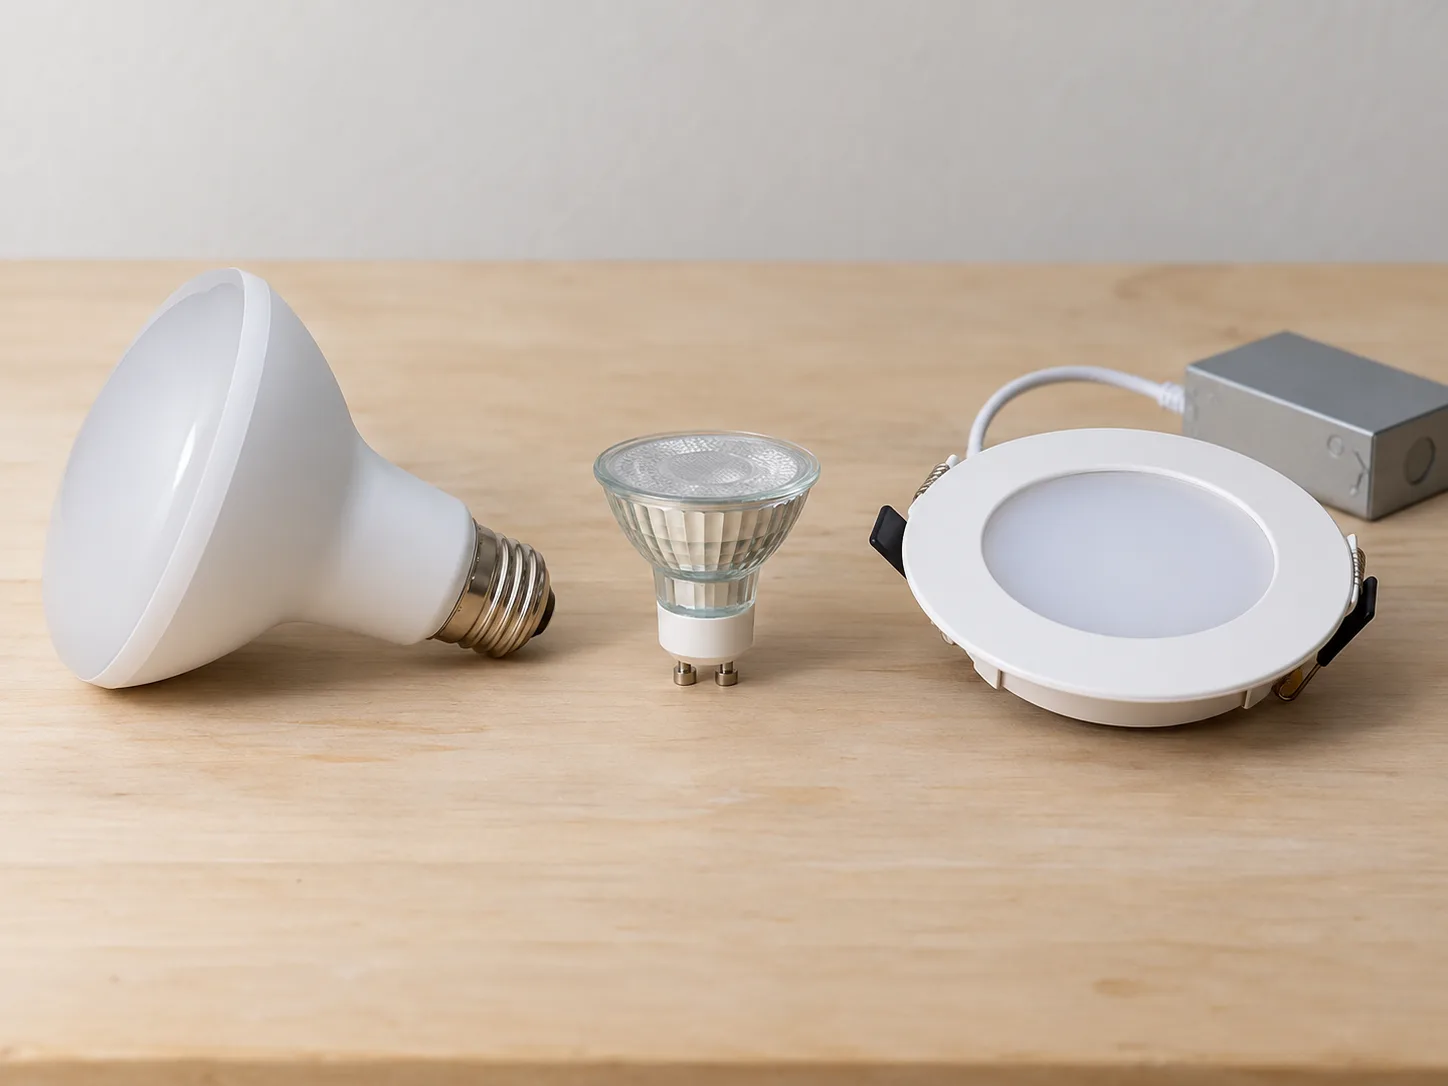
A replaceable lamp usually has a distinct bulb body that meets a socket: a screw-threaded base, two pins, or a twist-lock base. It may be a reflector-shaped BR or PAR bulb, a small spotlight, or another lamp type, and its face is often slightly proud of or set behind the trim. The trim remains in place while the bulb turns, unless the fixture instructions specifically say otherwise.
An integrated LED fixture often has a flat lens or diffuser built into a thin round module, with spring clips at the edge or a small driver box above the ceiling. In that design there may be no separate bulb. The service part, if replaceable, is the complete LED module or trim assembly; do not pry its lens off or twist it as though it were an ordinary screw bulb. Use the fixture label and manufacturer instructions to identify the replacement, or have an electrician handle a hardwired module.
Prepare and de-energize the light
Switch the light off and wait until the bulb is completely cool. Halogen bulbs can stay hot enough to burn skin after the light is switched off; LEDs also retain heat at the base and trim. If the light was on for a long time, wait longer rather than judging by the appearance of the lens.
For a hardwired ceiling light, switch off the circuit at the breaker panel before you handle a stuck lamp. A wall switch is convenient for normal use, but it is not a reliable substitute for disconnecting the circuit when glass could break or your hand might slip toward the socket. OSHA’s electrical work rules say circuits being worked on should be disconnected from energy sources and that a control device alone is not the means of de-energizing them; ESFI likewise advises unplugging electrical decorations before replacing their bulbs. These are useful safety principles even though a routine household bulb change is not the same as electrical repair. OSHA’s electrical work-practice standard and ESFI’s indoor-light safety guidance both emphasize eliminating power before exposed work.
Confirm the circuit is off before access
Use the breaker directory to identify the circuit, then switch off the light at its wall control and turn off the likely breaker. If the directory is unclear, have another adult operate the switches while you identify the circuit from a safe position, or turn off the main breaker only if you understand how to do so safely and can tolerate the loss of power. Do not reach into the fixture to test it, and do not remove a panel cover or probe conductors as part of a bulb change.
Once the breaker is off, verify from the floor that the light cannot turn on at its switch. If you own a non-contact voltage tester and know how to use it, follow its instructions and test it on a known live source both before and after; a positive indication, uncertainty about the result, or an unlabeled/shared circuit is a stop sign, not a reason to guess. The electrician-authored Family Handyman guidance also recommends breaker isolation and verifying the tester’s operation before relying on it. Family Handyman’s broken-bulb safety steps explain the value of confirming de-energization before touching a lamp base.
Set a stable ladder on a level surface directly below the fixture, keep your hips between the rails, and avoid standing on the top cap or stretching sideways. Put on safety glasses in case glass flakes fall, and use gloves with enough grip to hold the bulb without squeezing it. Keep one hand free to steady yourself; do not climb while holding a tool, and do not work over a sink, wet floor, or furniture that can shift.
Identify the bulb base and removal direction
The base determines how the bulb releases. Use a dry cloth to clear dust from the outer lens if needed, then look for visible threads, two pins, or small locking tabs around the perimeter. If you cannot see the base, consult the lamp marking or fixture manual instead of testing directions by force.
For a typical right-hand screw base, viewed from below while facing the bulb, counterclockwise loosens and clockwise tightens. Twist-lock lamps are different: they usually need a slight push toward the socket to unload the retaining tabs, followed by a short turn. Pin-base lamps that are not twist-lock may pull straight out after the trim is released, so never apply the GU10 motion just because the bulb is small.
Standard screw-base reflector bulbs
An E26 medium screw base has a threaded metal shell, like a familiar household bulb, even when the glass or plastic above it is a large BR30 or PAR flood shape. Hold the bulb near its base or broad body, keep the pressure straight and even, and turn counterclockwise in a small arc. Once it breaks free, support the bulb as you continue turning so it does not drop out of the trim.
If it turns a fraction and stops, back off slightly and try a small controlled movement in the loosening direction again. Do not squeeze the glass harder to gain leverage. A bulb that flexes, creaks, flakes, or rocks with the socket is telling you to stop, because continued torque can crack the bulb or loosen the lampholder.
GU10 twist-lock and other pin-base lamps
A GU10 lamp has two short pins with widened ends that lock into matching slots; its base may be printed “GU10.” With the power off and bulb cool, support the trim if it is designed to move, press the bulb gently toward the ceiling to unload the tabs, and turn it only the short distance needed to release the pins. The correct direction can vary by lamp or fixture instructions, so do not rely on a fixed quarter-turn if the lamp’s markings or manual specify a different release motion.
MR16 lamps often have two straight, narrow pins that push into a socket and may use a GU5.3 base; they are not GU10 twist-lock bulbs simply because their reflector looks similar. If you see pins but cannot confirm their style, stop before pulling or twisting. A loose socket, a recessed connector that moves with the lamp, or a lamp that is hidden behind a lens calls for the fixture manual or an electrician rather than trial and error.
Remove the bulb without forcing the fixture
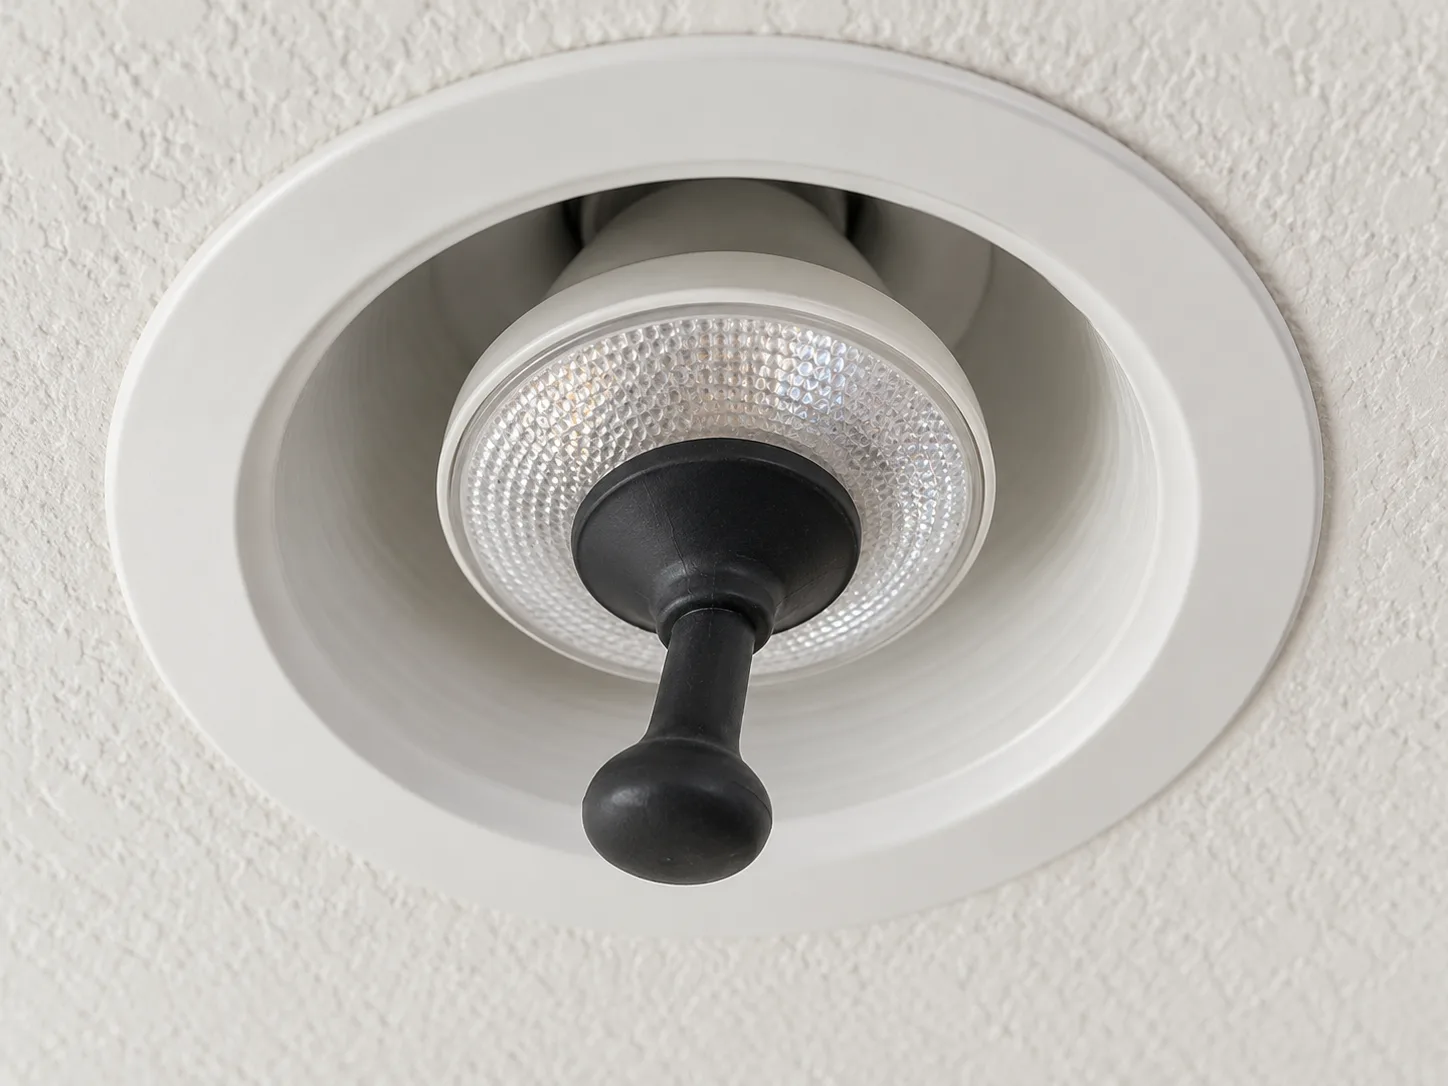
Start with the lowest-risk method that fits the base. On a screw-base bulb, try a dry rubber glove or a clean rubber grip pad around the bulb body, then apply even counterclockwise pressure. Keep the bulb aligned with the socket; bending it sideways can stress the glass and socket at the same time.
Avoid butter knives, screwdrivers, and other metal tools between the bulb and trim. They can chip the bulb, scrape the finish, deform the socket, or become a conductive path if the circuit is not actually isolated. Do not spray silicone, oil, water, or another lubricant into the fixture; liquids can reach electrical parts, and lubricant does not correct a mismatched base or damaged socket.
Use a suction cup on a smooth bulb face
If the bulb has a flat, smooth face that can hold suction, a small bulb-removal suction cup can improve grip without pinching the lens. Wipe the cool bulb face and suction cup dry, center the cup on the bulb, press until it seals, then use the handle to make a slow loosening turn. This method is for intact bulbs with a surface the cup can grip; it will not work well on a textured lens, a domed bulb, or an integrated LED diffuser.
Stop if the cup slides, the glass flexes, or the fixture turns with it. Do not pull the cup downward to yank the lamp from its socket; a suction cup improves rotational grip, not the direction in which the base releases. A bulb that remains stuck after one or two light attempts is a reason to reassess the base and trim, not to increase force.
Remove trim only when it releases easily
Some recessed trims are held by spring clips or torsion springs and can be lowered slightly to expose a bulb’s sides. Others are secured by screws, a twist ring, a gasket, or a manufacturer-specific clip. Only move trim when the model’s instructions show it is intended to come down for routine lamp replacement and you can support it without pulling the assembly or wiring.
If the trim is spring-held, lower it only enough to reach the bulb and keep it supported so it cannot snap back or drop. Do not lever against the ceiling with a metal knife, pull hard on the trim, or reach above the ceiling plane. A small plastic trim tool is appropriate only when the manual calls for releasing an accessible edge; if the trim resists or the spring disappears into the ceiling, stop and refit it if possible without force.
If the bulb still will not move
Pause and return to identification. Confirm that the breaker remains off, the lamp is cool, the base is actually threaded or twist-lock, and the bulb is not part of an integrated LED module. Compare the printed code with the fixture manual; a bulb face that looks like a screw-in reflector can conceal a pin base or an entire replaceable LED module.
If you have the correct base and one gentle grip method still fails, do not cycle through improvised techniques. Avoid duct-tape loops around overhead glass, pliers on an intact bulb, hot glue, raw potatoes, hammering, twisting the trim, or applying more torque. These approaches can drop glass, leave adhesive or food in the fixture, or transfer force to a socket or wiring connection that was never meant to rotate.
Consider why the lamp may be resisting without trying to diagnose it by force. A bulb that was overtightened, cross-threaded, heat-stressed, or corroded into an outdoor-rated fixture may be difficult to release; corrosion, discoloration, or a socket that rocks suggests the fixture needs inspection. If another bulb in the same fixture has repeatedly failed, flickers, or buzzes, the issue may be electrical or thermal rather than a single stuck lamp.
If the bulb breaks in the socket
Stop moving the bulb immediately. Do not put fingers into the socket or attempt the “potato,” hot-glue, or pliers methods while the fixture is overhead. Broken glass can cut through ordinary gloves, and an exposed screw shell or bent contact can still be dangerous if the circuit is energized; practical home-repair sources warn about both glass and shock hazards. Bob Vila’s broken-bulb guide and Family Handyman’s electrical safety sequence both start by isolating power and protecting against glass.
Switch off the breaker, keep people and pets away from the area, and let the fixture cool. If only loose glass has fallen onto the floor, wear eye protection and cut-resistant gloves, pick up large pieces carefully, and sweep the remaining fragments into a rigid container; do not brush shards toward bare feet. The stuck base still in the ceiling is a separate electrical task, and the safest choice is to leave it untouched for an electrician.
If the broken lamp is a CFL or another fluorescent/mercury-containing bulb, use the EPA’s cleanup directions because mercury vapor and fine powder require different cleanup than a broken LED or incandescent lamp. EPA recommends clearing people and pets from the room, airing it out, shutting off forced-air HVAC if practical, and avoiding vacuuming during the initial cleanup unless glass remains after other cleanup steps. Follow local disposal rules, and do not use the ordinary broken-glass routine on the ceiling socket itself. EPA’s broken-CFL cleanup instructions provide the complete, bulb-specific procedure.
Stop at a damaged socket or visible wiring
Do not continue if the socket is cracked, blackened, melted, loose, wet, or visibly corroded; if a wire, connector, or driver is exposed; or if the trim falls farther than expected. Also stop if you hear buzzing, smell burning, see discoloration, or notice a switch or outlet becoming unusually warm. ESFI identifies flickering or dimming lights, discoloration, buzzing, warm switches or outlets, and burning odors as warning signs for a qualified electrician to inspect. ESFI’s electrical safety guidance lists these warning signs.
Leave the breaker off and keep others from switching the light on until the fixture has been inspected. Do not tape over damaged wiring, push a loose socket back into the can, or reinstall a bulb to “see if it works.” Once the fixture is damaged, the task is no longer simply bulb removal; it may involve a lampholder, driver, wiring connection, or the recessed housing.
Fit the replacement and restore the trim
Before installing a new lamp, compare its base, voltage, shape, diameter, and ratings with the old bulb and fixture label. A GU10 line-voltage spotlight and an MR16/GU5.3 low-voltage lamp may look similar from below but are not interchangeable. Use a bulb that fits the fixture’s stated maximum wattage and temperature rating; if the fixture is enclosed or insulation-contact rated, verify that the replacement is approved for that use.
If you choose an LED replacement for a dimmable fixture, check the lamp’s dimmer compatibility instead of assuming any LED will dim smoothly. Check that the bulb is rated for a damp or wet location if the fixture is outdoors or in a shower area. When uncertain, photograph the fixture label and existing bulb and ask the manufacturer or an electrician to confirm the match.
Install a screw-base lamp straight into the socket and stop when it is snug; overtightening makes the next removal harder and can stress the base. For a confirmed GU10 lamp, align the pins with the slots, press gently, and turn according to the instructions until it locks. If either lamp requires unusual force, remove it and recheck the base rather than forcing a mismatch.
Reattach the trim using its original springs or clips without pinching wiring or trapping insulation. If a spring will not return to its slot or the trim hangs crooked, do not switch the circuit back on until the fixture is seated correctly. Once everything is secure, restore the breaker and test the light from the wall switch; if it flickers, buzzes, smells hot, or fails repeatedly, switch it off and arrange an electrical inspection.
When to call an electrician
Call a licensed electrician if the bulb is broken in the socket, the socket or trim moves with the bulb, wires or a driver are exposed, a module is hardwired, or you cannot identify and switch off the correct circuit. Professional help is also the right choice for high ceilings where you cannot use a stable ladder safely, fixtures above stairs, repeated bulb failures, corrosion, water exposure, or any scorching, buzzing, burning smell, or abnormal heat.
You do not need to remove the whole recessed can yourself to get access. An electrician can determine whether the fixture uses a replaceable lamp, a retrofit trim, or a failed integrated LED module, then repair or replace the appropriate part without guessing at the wiring. The modest delay is preferable to breaking the housing, damaging a socket, or turning a stuck bulb into energized electrical work.
Conclusion
To remove a stuck recessed light bulb, first confirm that it is a replaceable bulb, identify its base, turn off the circuit at the breaker, and let the lamp cool. Use the loosening motion that matches the base, add a dry grip or suction cup only when the bulb surface permits it, and release trim only when its design and instructions make that step clear.
Do not pry, lubricate, yank, or keep increasing force when the fixture resists. If the bulb cracks, the base stays in the socket, wiring appears, or the socket shows damage or heat warnings, leave the breaker off and call a licensed electrician; the safest successful repair is the one that ends before a bulb change becomes electrical work.



