How to Stop Ants From Nesting in Your Plant Pots
Find out whether ants are nesting in your plant pot or just foraging, then choose a careful way to remove them and stop the trail from returning.
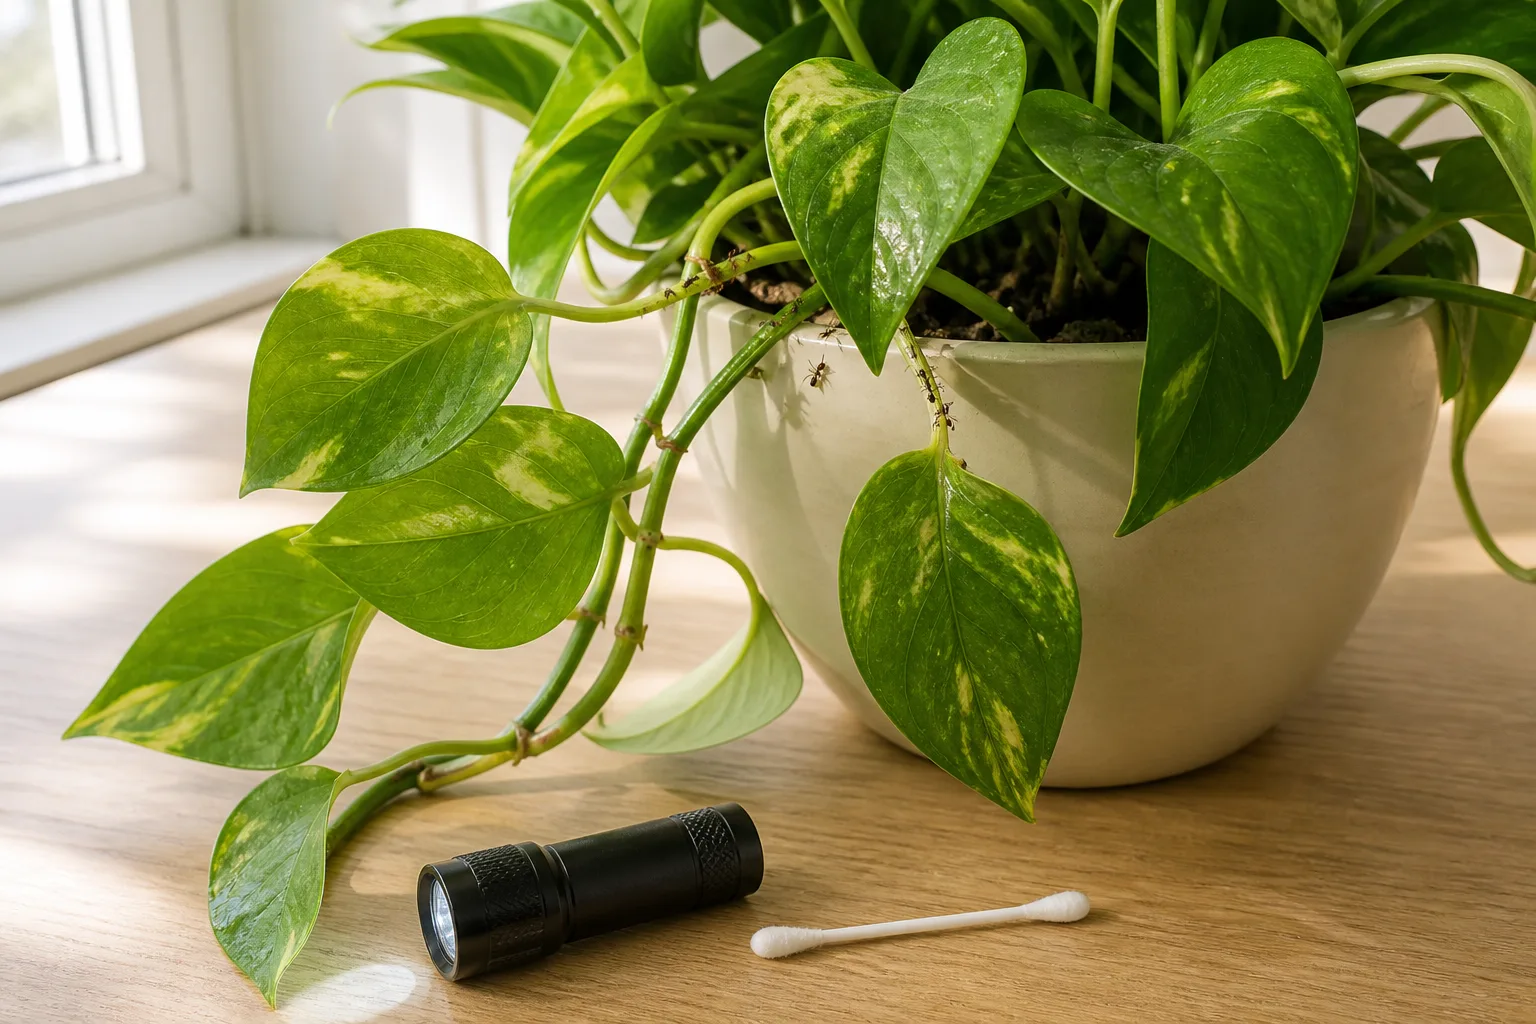
Ants in a flowerpot do not automatically mean the plant is being eaten. They may be crossing the pot on a food trail, visiting aphids or scale insects on the leaves, or nesting in the potting mix itself. First follow the trail and check the drainage holes; then decide whether the pot needs a reset or the ants need a route-level treatment.
The Royal Horticultural Society notes that ants commonly nest in flowerpots and can disturb container roots, though they do little direct damage to most plants. A few workers passing through usually call for observation. Ants repeatedly emerging from the mix, carrying soil, or appearing from several drainage holes are stronger reasons to act.
The quick answer: match the response to what you find
Use the least disruptive step that matches the evidence. Do not dry out a thirsty plant, drown a moisture-sensitive root ball, or pour a contact spray into soil simply because ants are visible.
| What you see | Likely situation | First response |
|---|---|---|
| A line of ants crosses the rim or leaves, with no repeated emergence from the soil | Foraging trail | Follow the route, remove the food source, and wipe the trail from hard surfaces |
| Ants climb toward curled new growth or sticky leaves | Possible aphids, mealybugs, or scale | Inspect leaf undersides and stems; treat the sap-feeding pest if confirmed |
| Ants stream from drainage holes or soil repeatedly | Likely nest in the pot | Isolate the pot and plan a careful repot if the plant can tolerate it |
| Small heaps of fine mix appear on the soil surface | Nesting is more likely | Check the root zone and act if root disturbance or indoor activity is a problem |
If only a few ants pass a healthy plant, monitor rather than intervene. For a confirmed nest, repotting removes the shelter; for an outdoor trail beyond the pot, a labeled bait station by the route targets the colony better than killing visible workers.
Check whether the colony is in the pot
Ants move quickly, so trace their route before disturbing the soil. Look for the nest entrance, not just a place workers cross.
Follow the trail before disturbing the soil
Put the pot on a clear surface or tray, then watch where ants enter and leave. Lift a lightweight nursery pot out of its decorative cover and look underneath it, around the drainage holes, and beneath the saucer. If ants keep appearing from the same hole or from the soil after you gently tap the pot, nesting is more plausible than a passing visit.
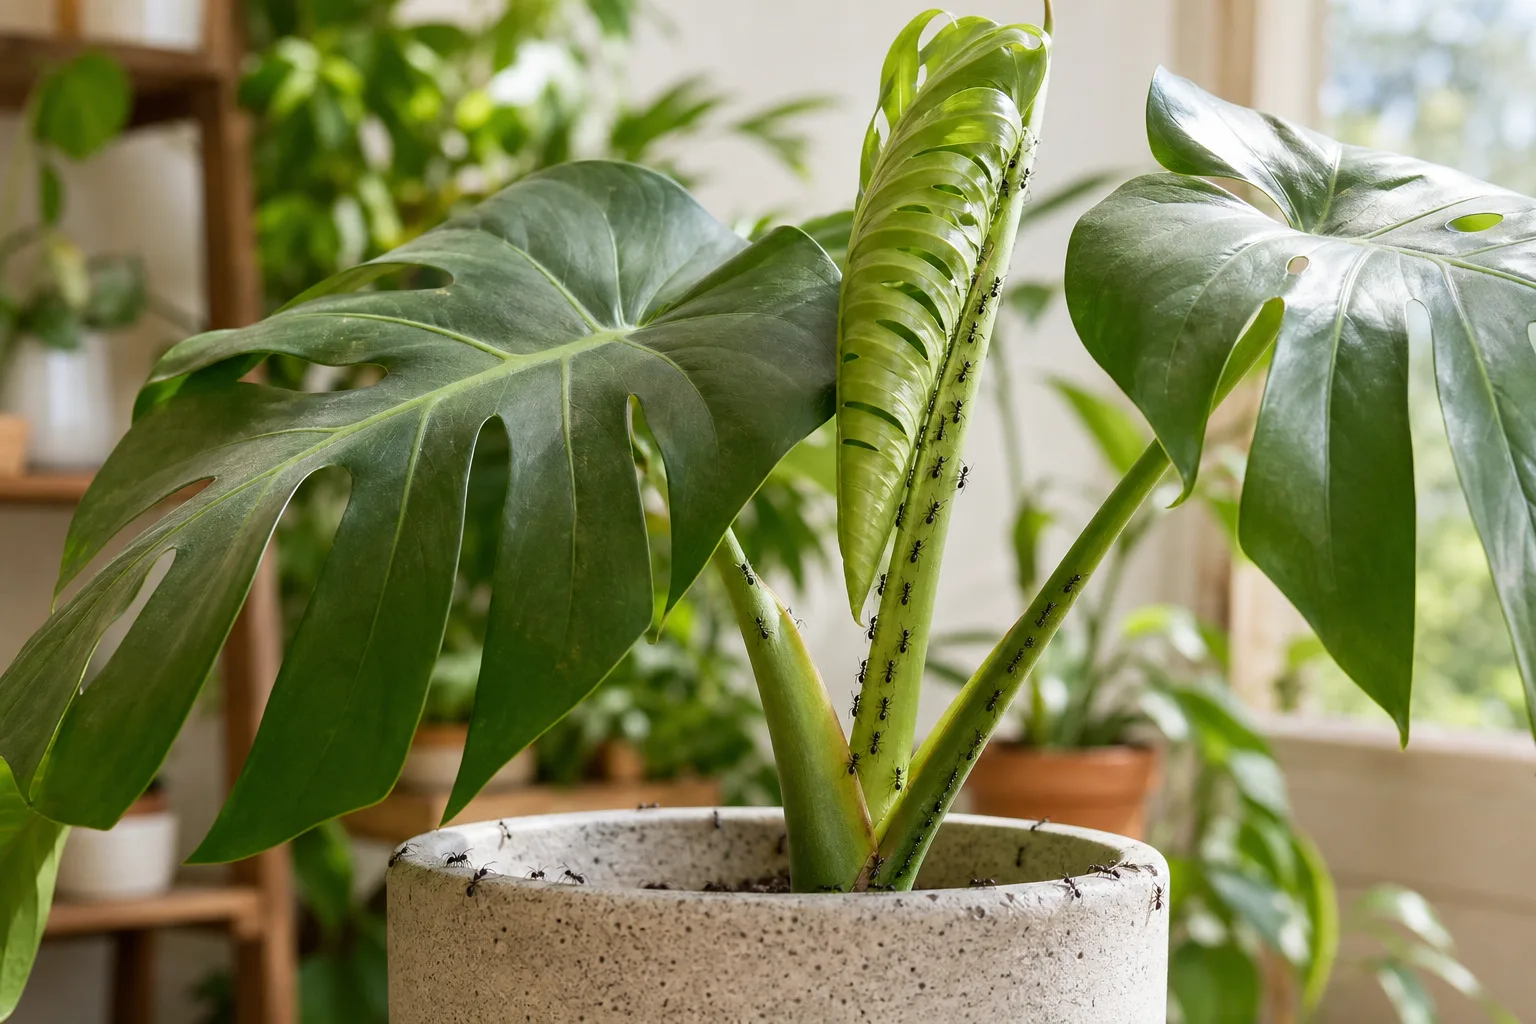
Ants on foliage or the container are a reason to trace their route; they do not prove the colony is inside the pot.
Repeated heaps of fine mix can mark excavation; the RHS lists soil heaps and flowerpots among common signs and nest sites. A heap alone does not prove a large colony, but fresh soil movement plus ants emerging from the root zone is a good reason to intervene.
Follow the trail away from the pot. If it leads to food or a gap under a door, the nest may be elsewhere; clean the residue and trace the entry before repotting without soil-related signs.
Watch the route before and after the plant’s normal watering, then check again later. Water can expose ants or shift their path, but deliberately soaking the pot is not a good diagnostic. If no ants emerge from the soil and the trail does not return, monitor for a few days; repeated activity at the same drainage holes is stronger evidence of a nest.
Inspect leaves for honeydew-producing pests
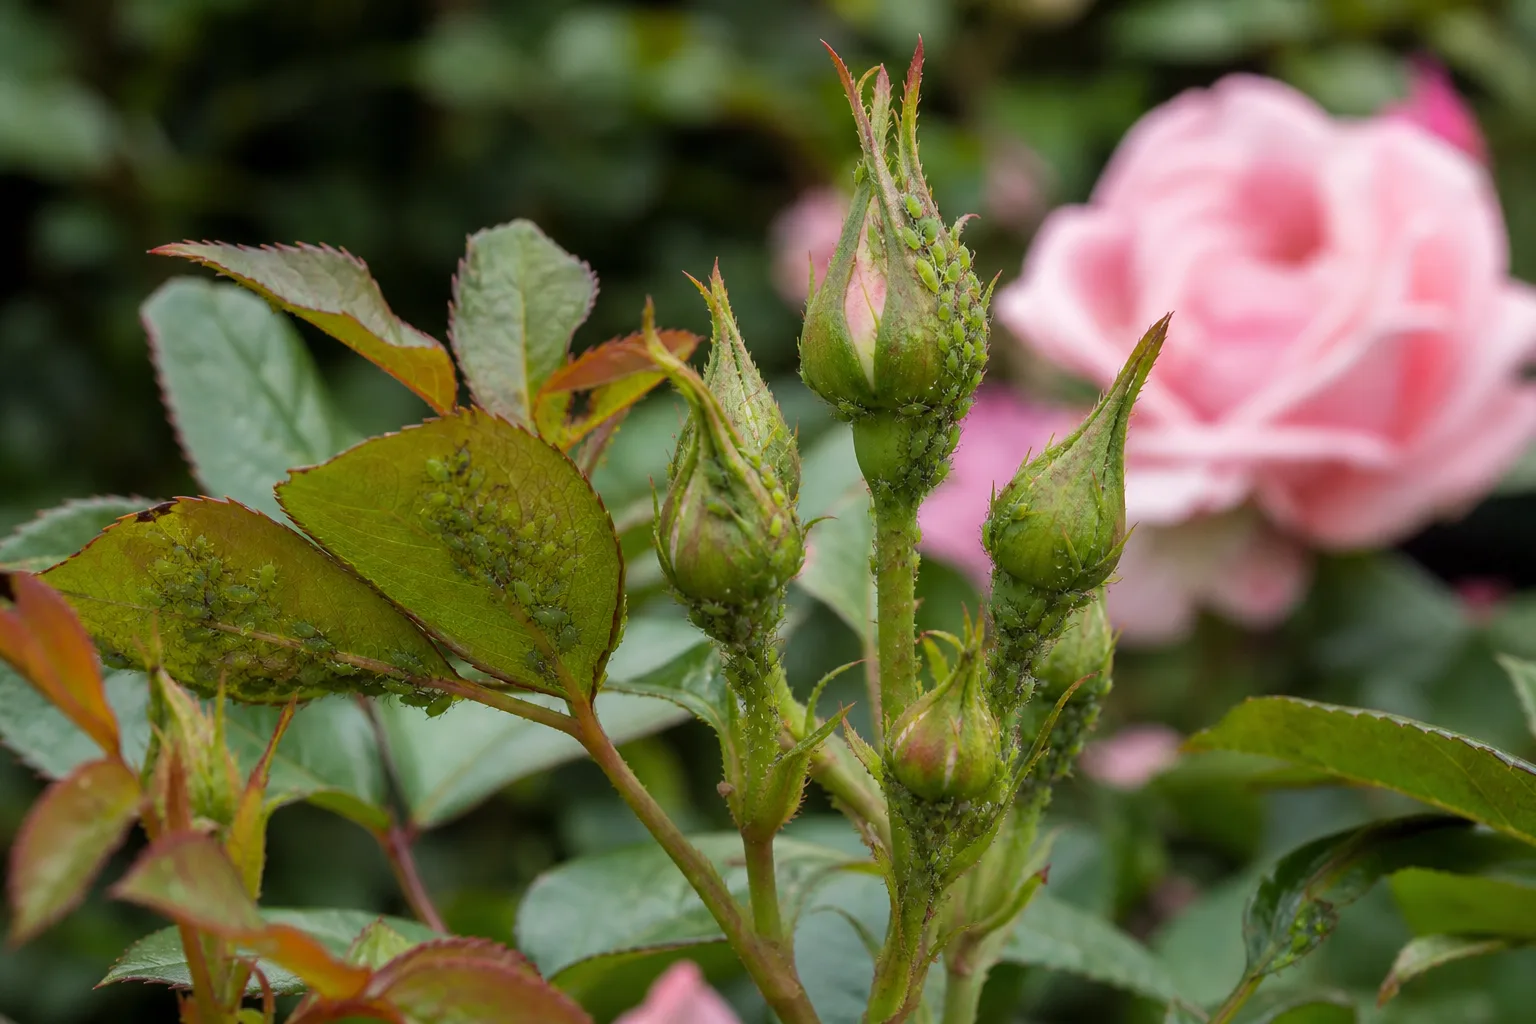
When ants travel up stems, inspect new growth and leaf undersides. Aphids cluster on soft tips; mealybugs look cottony; soft scale appears as fixed bumps. Sticky honeydew or black sooty growth below the insects supports the diagnosis.
Ants collect honeydew from aphids and other sap-feeders, and may protect them from predators. The RHS aphid guide describes this relationship; Gardening Know How and Blooming Expert also advise checking leaves when ants climb the plant. Removing a nest alone may not stop a trail if honeydew remains.
An ant on a leaf does not prove aphids are present, so check before spraying. If you find a small colony, isolate the plant and remove infested tips or wash pests off outdoors. Use insecticidal soap only as labeled for that plant and pest; dish detergent is not a substitute.
Use a flashlight to check stem joints and leaf undersides, and inspect nearby plants if ants travel between pots. After removing a confirmed sap-feeding pest, wipe off honeydew and recheck new growth over the next several days. Ants may continue visiting while residue remains or while workers follow an established trail, so give the cleaning and pest-control steps time before changing the potting mix.
Choose the least disruptive treatment
Choose a response the plant can tolerate. Do not change its watering or soil simply to make the pot less attractive to ants.
If ants are only foraging
Start with the route. Clean food residue near it and wipe the trail from a windowsill or shelf with soapy water. UC IPM notes that this removes scent marks workers follow. Keep household cleaner off leaves and potting mix.
If ants climb from the floor or patio, move the pot and remove bridges such as touching leaves, walls, or railings. Use a stable stand and empty the saucer after watering. Ants can still reach the pot if foliage or furniture connects it to their route.
For a trail that returns from outdoors, observe its route first. An enclosed, labeled bait station beside an active trail lets workers carry bait toward the colony. Keep it away from children and pets, and do not combine it with repellent sprays that stop ants feeding.
If no bait is being taken, first check that the station is beside the ants’ actual route and that rain or irrigation has not washed it out. Some ants prefer sweet food while others are seeking protein, and preferences can change. Follow the product label when changing formulations; do not mix bait ingredients yourself or scatter a station’s contents over the potting mix.
If ants are nesting in the pot
For a healthy plant that tolerates repotting, remove the nest’s shelter by replacing the mix and cleaning the container. Drying or flooding the root zone can stress the plant before ants leave.
Move the plant away from others and prepare suitable fresh mix, a clean draining pot, and water before unpotting. If it is flowering, recently transplanted, wilted, or has fragile roots, weigh repotting stress against the ant problem; a few foragers may be better managed at the trail.
For a large, established colony, a pest professional may be a better first call than a disruptive repot, especially if the plant is valuable or difficult to handle. For a few ants in a small pot, the balance is different: removing loose mix and cleaning the container may take less effort than repeatedly monitoring a hidden nest. Let the scale of the colony and the plant’s condition determine how much intervention is justified.
Repotting will not help if the nest is outside the pot. If ants return from a patio crack, address that route; if they spread through several pots or rooms, seek local pest or extension advice.
Remove ants during a careful repot
Set out fresh mix and a clean pot, then unpot gently over a tray. Avoid shaking the root ball hard; a few soil crumbs matter less than preserving healthy roots.
Rinse the root ball without stripping it bare
Tease away loose mix from the outside of the root ball with your fingers or a blunt tool. If the plant tolerates it, gently rinse visible ants and loose soil with room-temperature water. Do not scrub, split dense roots, or use a strong jet; healthy roots matter more than removing every crumb.
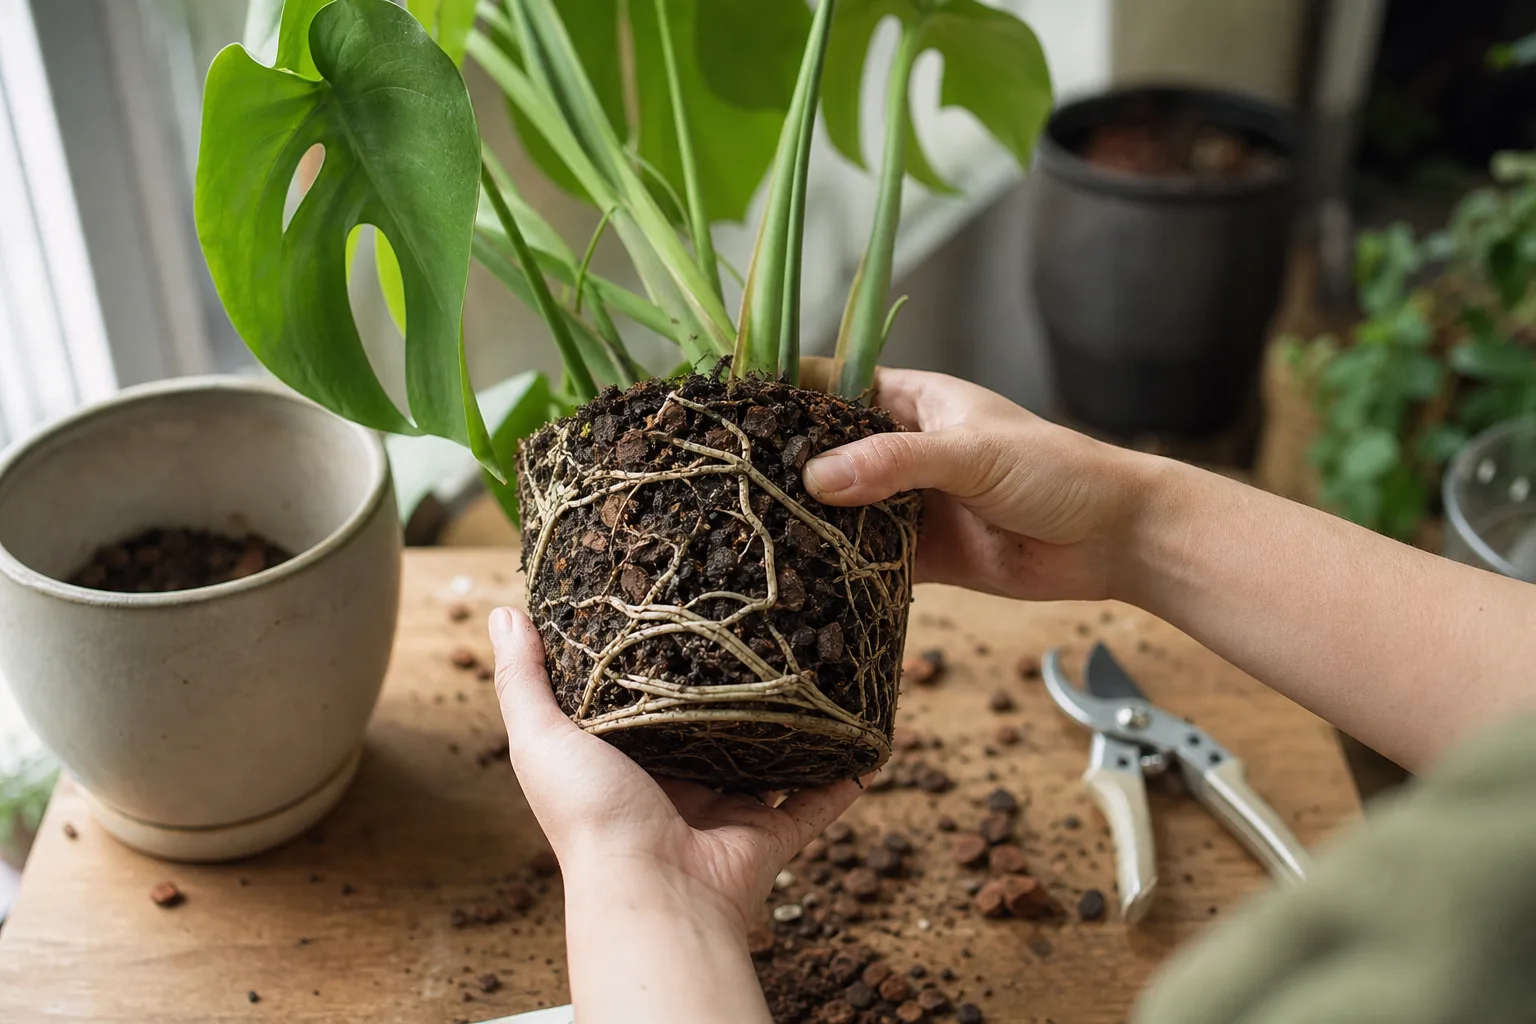
Inspect the root ball gently and preserve healthy roots while removing loose, infested mix.
Trim only clearly dead roots with clean shears if you find soft, dark, or foul-smelling tissue. Ants alone do not indicate root rot; if the roots are firm, move on to fresh mix.
Avoid a long soak as a default. Flooding can deprive roots of air and still leave ants in sheltered pockets; a controlled rinse during repotting lets you remove loose mix while watching the roots.
Stop if the root ball is tightly matted or fine roots break with light handling. With delicate or recently rooted plants, remove only loose mix and avoid combing roots bare. If the colony remains embedded and the plant cannot tolerate a full rinse, preserve the sound roots and ask a local horticulture or pest professional about a less disruptive next step.
Clean the pot and restart with fresh mix
Wash the container and saucer with detergent, scrub the drainage holes, and rinse well. Replace a cracked pot, but do not size up solely because ants were present.
Use fresh mix suited to the plant and keep the same pot size unless its roots need room. The pot needs an open drainage hole; gravel or a dry surface barrier will not remove a nest and can complicate watering.
Set the plant at its original soil depth, keeping the crown and stem base uncovered, and fill around the roots without packing the mix hard. Water as the species normally requires, then let the pot drain completely. Do not compensate for repotting by adding extra fertilizer or moving the plant into harsh sun; stable conditions make recovery easier to judge.
Resume the plant’s usual watering, let excess drain, and empty the saucer. Isolate it while monitoring, clean tools and the work surface, and bag old mix instead of scattering it near other pots.
When ant bait helps
Bait can help with an outdoor trail between pots when a station can sit beside it. Workers carry food back, so effective baits act slowly. UC IPM notes that results can take more than a week; expect gradual decline, not instant disappearance.
Baits differ by attractant and active ingredient, and ants may ignore a formulation that does not match their current food preference. If workers do not visit, reposition the station or try another labeled bait instead of adding product to the soil.
Use an enclosed station inaccessible to children and pets, and follow the label for its location. Broad sprays often kill foragers without reaching the nest; sprays can also stop ants feeding on bait. If an indoor pot is the confirmed nest, repotting is often simpler than drawing more ants into the room.
Put bait where workers can reach it but where children, pets, wildlife, and irrigation cannot. Keep it outside the potting mix and away from edible plant parts unless the label specifically allows that placement. Do not clean or spray directly over the station while ants are feeding; after activity falls, remove or replace the product as its label directs.
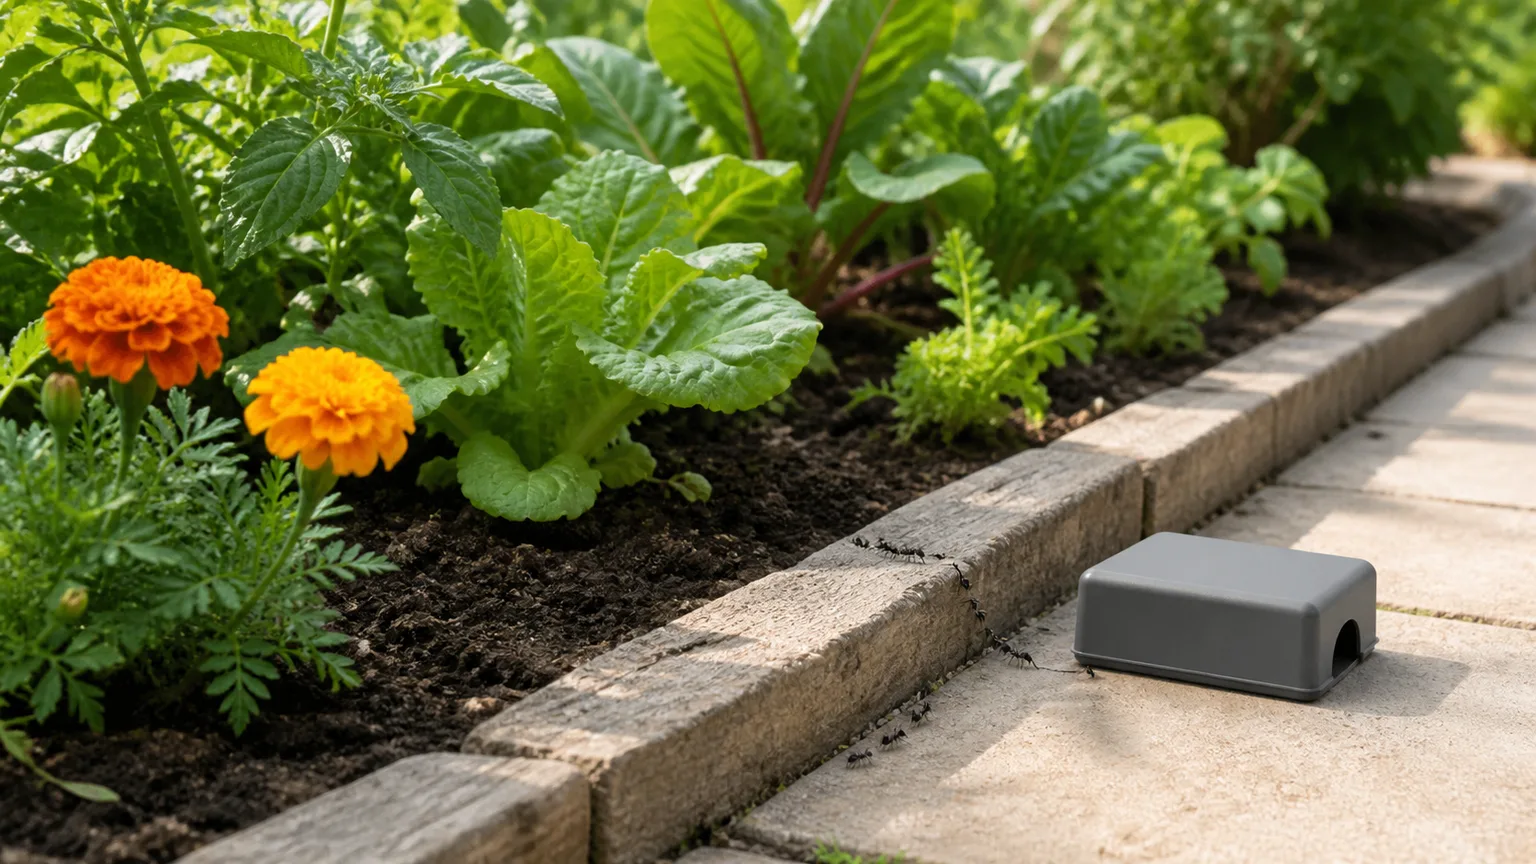
For outdoor trails, place a labeled bait station near the route and outside the potting mix; keep it inaccessible to children and pets.
What not to add to potting soil
Do not pour boiling water, vinegar, soap, essential oils, or unlabeled insecticide into the pot. A contact treatment may miss the queen and brood while stressing roots or foliage. “Natural” does not guarantee safety for every plant or use.
Coffee grounds, cinnamon, citrus peels, and mint are not dependable nest treatments. A scent may disrupt a trail but will not remove the colony; scraps and powders can add mess or moisture to the mix.
Do not starve a moisture-loving plant or waterlog it to force ants out, and do not switch to an unsuitable mix. Keep the plant’s normal care; address ants through inspection, repotting, or a labeled bait station at the trail.
Vinegar can be used to wipe a hard-surface trail if the surface tolerates it, but that only cleans the route. It is not a soil treatment, and applying household mixtures to leaves or roots adds risk without reaching a protected colony. The useful question is not which strong smell ants dislike; it is where workers are nesting or feeding and whether the plant needs intervention at all.
Prevent ants from returning
After removing a nest or breaking a trail, address the conditions that attracted ants. A few practical changes work better than relying on a scent or coating.
Elevate outdoor pots and remove bridges
Raise outdoor pots on feet or a stand instead of setting them on soil or mulch. Clear leaf litter and spilled mix; keep foliage from touching walls, railings, or neighboring plants that bridge to the container.
Space pots so they do not touch the house or each other. Keep drainage open and saucers empty. A maintained moat may interrupt a route, but the pot base must stay above water; it does not eliminate a colony.
Check the pot feet, saucer, and nearby foliage after moving containers, since a single leaf or irrigation line can restore a bridge. Raising a pot helps most when it breaks contact with soil and surrounding surfaces; ants may still use the stand itself. Think of elevation as one part of access control, not proof that the colony is gone.
Indoors, wipe the trail and inspect its entry point. Seal a confirmed gap after ants are no longer trapped inside. Ants emerging from walls or several places likely have a nest elsewhere.
Remove the food and pest source
Check new growth and leaf undersides for ants and sap-feeding pests. Use a plant-appropriate, low-disruption response, wipe away honeydew, remove fallen flowers, and clean spills. Do not spray beneficial insects just because ants are present.
Avoid excess fertilizer when sap-feeders are active, but continue the plant’s normal feeding. Keep new plants apart while checking for ants and honeydew pests so a hitchhiking colony does not spread to nearby pots.
Do not introduce ladybugs indoors as an ant fix. They do not remove a nest, and they may simply leave the room. Outdoors, encourage a balanced garden and tolerate ants when they are not disturbing roots, protecting a damaging sap-feeder, or entering the home.
Indoor and outdoor pots need different precautions
For a houseplant, isolate the pot and find out whether ants emerge from soil or enter at a window, door, or food source. Clean the hard-surface trail first. Indoor bait can draw ants into the room, so secure it and follow the label; it is not the default for a few passing workers.
For outdoor containers, nearby ants may be part of normal garden life. RHS guidance recommends tolerating them where practical; act when a nest disturbs roots, ants tend damaging sap-feeders, or trails enter the home. Place bait by an active trail, never scattered over soil or flowers.
The goal outdoors is to protect the container and solve a specific nuisance, not sterilize the surrounding garden. If an ant nest is under a patio pot but the plant is thriving and no ants enter the house, shifting the pot onto feet and watching may be enough. A nest in a small container that repeatedly pushes mix from the pot or exposes roots calls for a more direct response.
Do not handle large aggressive ants or a colony spreading through the home. Species and pesticide rules vary; ask a local extension service or licensed professional for identification and region-appropriate control.
Check progress before treating again
After repotting, check the drainage holes, soil, saucer, and route daily for several days, then every few days for a week or two. One ant crossing the room does not prove the nest survived; repeated emergence or fresh soil piles are stronger clues.
After placing bait, follow the label and check whether ants are feeding. UC IPM reports that visible numbers may take five to ten days to fall, and colony control can take longer. Replace empty stations as directed; do not add another treatment after one unchanged day.
If ants return, retrace the route: the source may be outdoors, in another pot, at a food spill, or among untreated aphids. If a trail persists despite sanitation and correctly used bait, or the plant declines, get local pest or horticultural advice.
Judge success by the source, not by whether every ant disappears from the garden. After repotting, the same pot should stop producing a steady trail and fresh soil heaps. After baiting, workers should visit the station first and then gradually become less active. If neither pattern changes, reassess the diagnosis before repeating a treatment.
Conclusion
First confirm that soil is the source. Ants on leaves or a windowsill may be foraging; those climbing stems may be seeking honeydew rather than nesting in the pot.
For a confirmed nest, isolate and repot carefully, removing loose mix while protecting sound roots. For an outdoor trail, use a labeled bait station beside the route and give it time to work. Maintain normal plant care, remove the food source, and monitor before treating again.