How to Start Seeds Indoors: A Beginner's Step-by-Step Guide
Learn how to start seeds indoors with a simple setup, correct sowing depth, light, water, timing, and hardening-off steps—without buying a full kit.
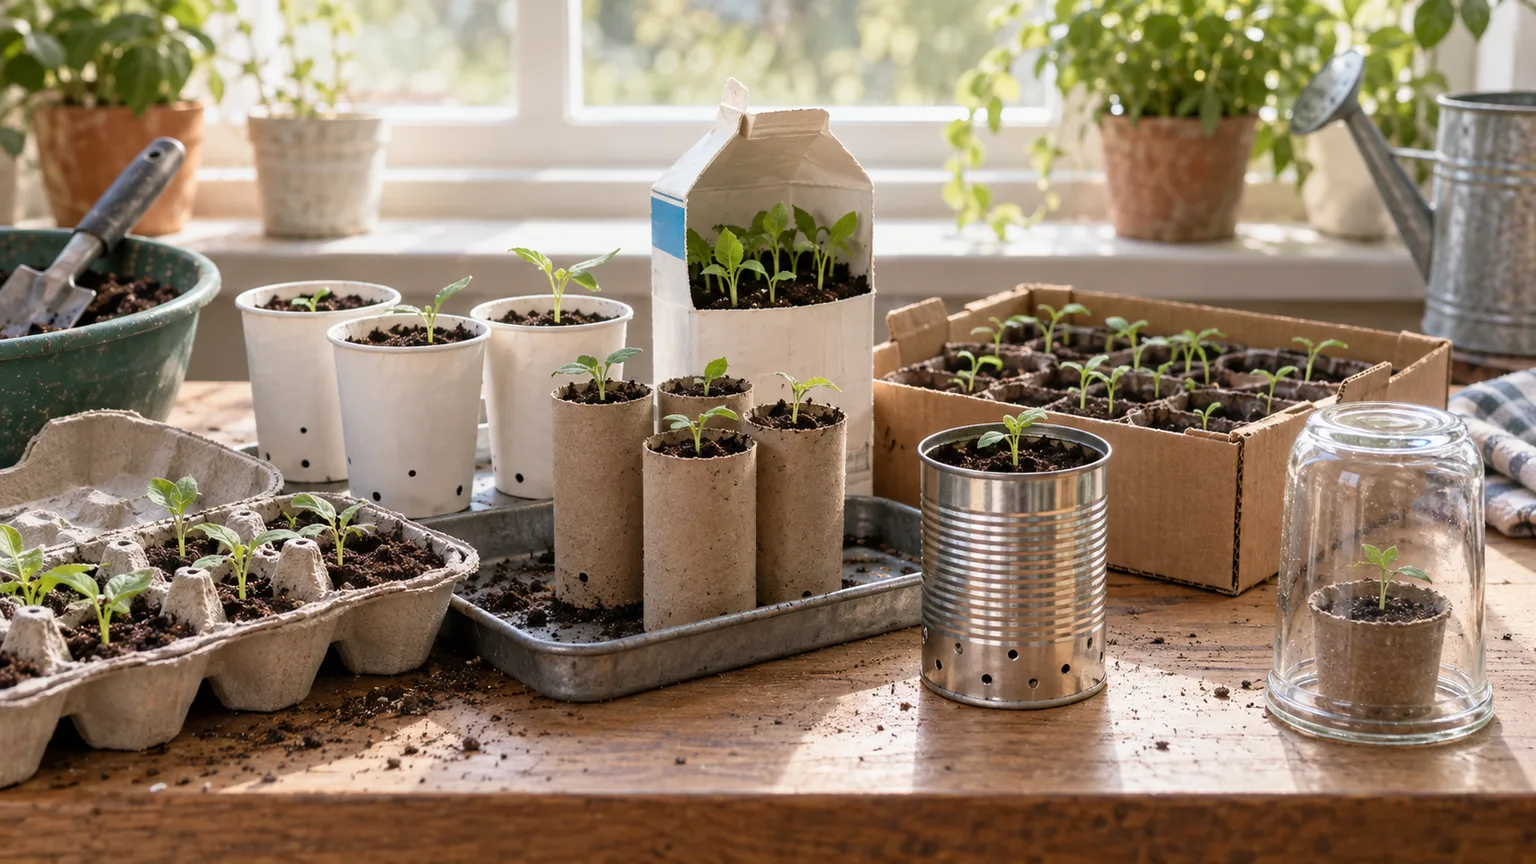
Starting seeds indoors is not a test of how many trays, lights, and gadgets you can buy. For a first attempt, one clean container, a suitable growing mix, a packet of seed, and a plan for light and watering are enough. The parts that make the difference are timing, following crop-specific seed instructions, and changing care as the seed becomes a seedling.
The simplest way to learn is to start a small batch of a crop that genuinely benefits from an indoor head start, label it, and observe it every day. You can expand next season after you learn how quickly your own room dries trays, how much light your window provides, and when outdoor conditions are reliable in your location.
Start indoors only when it solves a problem
Indoor seed starting gives you more control over a plant’s first weeks. It can extend a short growing season, let you grow varieties that local garden centers do not carry, and give slow-growing or frost-sensitive plants time to develop before the garden is ready. It also lets you raise many plants from a packet, though that only saves money if you have the space, light, and time to care for them.
Starting indoors is not automatically better. Some seeds germinate readily in garden soil, and some plants dislike having their roots disturbed. Root crops such as carrots are usually easiest to sow where they will grow; peas and beans grow quickly and are often simpler to direct-sow. A packet that recommends direct sowing is not a challenge to overcome with a tray—it is useful advice about the plant’s growth habit and timing.
For a first indoor project, choose one or two crops rather than filling every cell in a large kit. Tomatoes, basil, and many annual flowers are common indoor choices, but their sowing depth, warmth, and timing differ. If the packet says a crop needs light to germinate, for example, covering it with a thick layer of mix can prevent emergence. Utah State University Extension notes that light requirements and temperature vary among crops, so use the packet or a crop-specific extension guide as the final word, not a one-size-fits-all recipe (Utah State University Extension).
Choose beginner-friendly seeds and plan the planting date
Pick seed for the garden you actually have: the vegetables you eat, the flowers you want to see, and the amount of sun your outdoor spot receives. A packet should identify the variety, planting depth, germination range, and whether to sow indoors or outdoors. Check the packed-for year and store unused seed closed in a cool, dry place. Old seed may still sprout, but fewer seeds may be viable, so do not make your first learning project depend on an unlabeled envelope of unknown age.
For a low-pressure first round, plant a small number of seeds in one or two varieties. A few extras are useful because not every seed is guaranteed to germinate, but sowing an entire packet creates a second problem: more seedlings than you can light, water, and transplant. Savvy Gardening’s practical timing guidance makes the same useful point in another way: crops grow at different rates, so starting everything on one date can leave fast-growing seedlings oversized while slower crops are still developing (Savvy Gardening).
Count backward from the date seedlings can go outside
Do not choose a seed-starting date simply because the first warm weekend feels like spring. First estimate when the specific crop can safely be transplanted outdoors. The average last-frost date is a planning reference, not a promise that frost cannot occur afterward; local elevation, a cold pocket, coastal influence, and current weather can shift the practical date. Cool-season crops may tolerate cooler conditions than tomatoes or peppers, which should not be exposed to frost.
Next, read the packet for how many weeks before transplanting to sow. Count that interval backward from your intended planting-out date, and keep the final week or so available for gradually acclimating seedlings outside. Colorado State University Extension’s general guide gives a broad four-to-eight-week indoor window for many annuals, while emphasizing that timing differs by crop; it also cautions against sowing so early that seedlings become crowded and spindly indoors (Colorado State University Extension). This is a starting range, not a schedule for every seed.
If you are unsure, start later rather than far too early. A compact, actively growing seedling is easier to transplant than a tall plant that has spent weeks pressed against a window or outgrown its cell. If you miss the ideal indoor date, check whether that crop can be sown outdoors later instead of trying to rescue the calendar with stressed, overmature plants.
Know when direct sowing is the easier choice
Direct sowing means planting seed in its final outdoor location. It avoids transplant shock and the indoor-light problem, but the soil must be warm or cool enough for that crop and kept moist while the seeds germinate. It often suits crops that grow quickly or form a sensitive taproot. Starting indoors can be more helpful for plants that need a long season, are vulnerable when tiny, or need a head start before outdoor weather settles.
The choice is not always either-or. Some crops can be started indoors or outdoors, with the best method depending on your climate and the date you want to harvest or bloom. Penn State Extension explains that gardeners can plan indoor sowing by working backward from the outdoor planting date and accounting for the crop’s development time; it also distinguishes that approach from direct sowing in a prepared bed (Penn State Extension). If a packet recommends direct sowing, or says the plant does not transplant well, honor that unless a trusted local growing guide gives a reason to do otherwise.
Gather a simple, workable setup
Before opening the seed packet, clear a spot where containers can stay level and be checked daily. Set out the seed, a marker, clean containers, growing mix, water, and a tray or saucer to catch drainage. Put the supplies together first; once seeds are sown, you do not want to discover that the container has no drainage holes or the label has disappeared.
You do not need a greenhouse, special seed-starting rack, or a heat mat for every crop. A grow light is useful when a bright window cannot provide enough light after emergence, and a heat mat is useful when a warm-germinating crop needs a warmer root zone than your room provides. These tools solve specific problems; they do not compensate for poor timing, waterlogged mix, or the wrong planting depth.
Pick containers, mix, and labels that fit the job
Use a small pot, cell tray, or clean reused container with drainage holes. Individual cells keep roots separated and make later potting-up easier; a shallow flat can work for many small seeds that will be moved soon after they develop true leaves. Reused yogurt cups or food tubs can work if they are clean and you add drainage holes. Avoid tiny containers that dry out in hours, and avoid any container that holds water with no way for excess to escape.
Horticulture magazine describes repurposed cups, trays, and cardboard containers as possible seed starters, with the important caveat that containers must be clean and plastic or other impermeable vessels need drainage (Horticulture). Paper and cardboard dry more quickly than plastic, and some break down before a seedling is ready to transplant. Reuse what is practical, not what makes daily care harder.
Choose a fresh, fine-textured seed-starting mix or a labeled propagation medium rather than heavy garden soil. The mix should hold enough moisture for germination while draining and leaving air around young roots. Garden soil can compact in a small container and may introduce weeds or disease organisms. Pre-moisten the mix before filling cells: a handful should feel like a wrung-out sponge, not drip when squeezed. That makes it easier to place tiny seed and reduces the chance that the first watering will float it away. Utah State Extension recommends loosening dry mix, moistening it evenly, and tapping containers gently to settle rather than packing the medium down (Utah State University Extension).
Label every tray or row with both the plant and the sowing date. Seedlings of different varieties can look nearly identical at the first-leaf stage, and a date lets you compare what actually happened with the packet’s germination estimate. A pencil or waterproof marker on a plant tag is enough; a simple paper log beside the tray can record when you sowed, when sprouts appeared, and any change in light or watering.
Sow seeds at the right depth and spacing
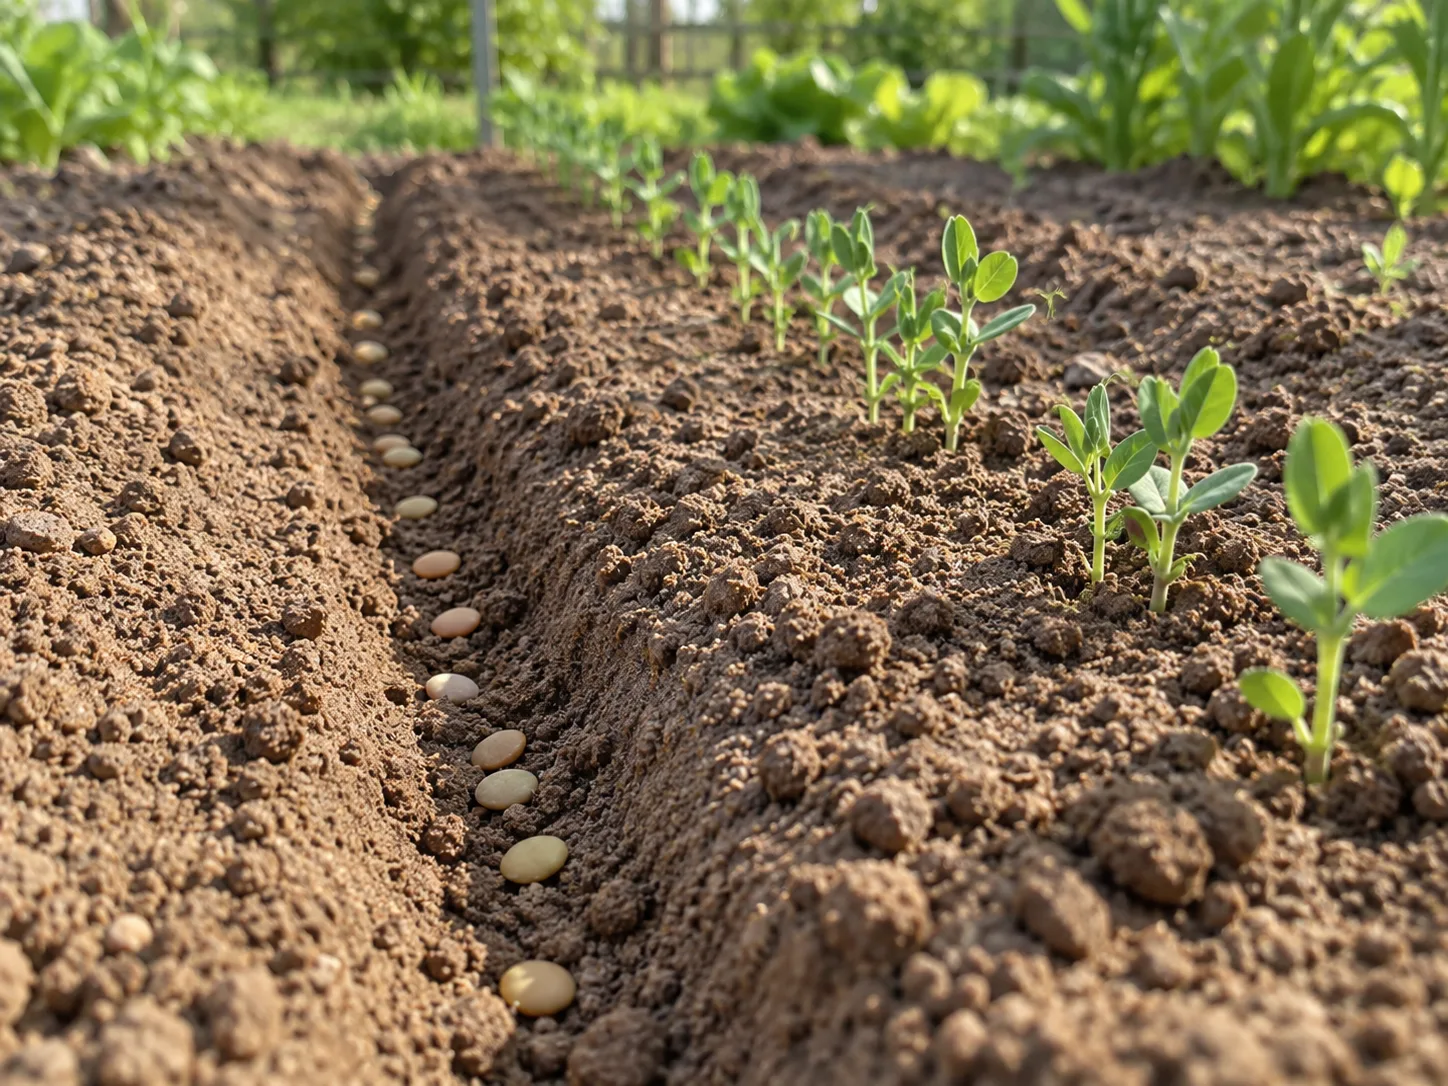
Read the packet before planting. It may say to sow at a particular depth, press the seed onto the surface, or leave it uncovered because light helps trigger germination. When no depth is given, a common starting rule is to cover a seed with roughly two to three times its diameter, but seed size is only a fallback. Very small seeds may need a dusting of mix or no cover at all; a large seed can be buried deeper. The Utah State guide gives the same general depth rule and notes the important light-requiring exceptions (Utah State University Extension).
Fill the container loosely, tap it once or twice so the mix settles, and level the surface. Make the planting hole with a finger, pencil, or dibble, place the seed, cover to the stated depth, and gently firm the surface so seed contacts the mix. Do not press so hard that you compress it into a dense plug. If sowing several seeds in a cell to hedge against low germination, leave enough room to remove extras later without pulling on the plant you keep.
Moisten the surface gently after sowing if needed. A fine spray or a careful pour from the edge is less likely to wash seeds into a corner than a strong stream. If the mix was evenly pre-moistened, it may need only a light settling-in water. Place the container in the location required for germination, then keep its label visible. The packet’s expected germination range tells you when to start watching closely; it does not mean every seed will emerge on the same day.
Create the right germination conditions
Germination is the transition from a dry, dormant seed to a growing embryo that pushes out a root and shoot. Before that happens, most seeds need moisture, oxygen, and an appropriate temperature; some also require light, while others germinate in darkness. The seed packet is the quickest reliable reference because the ideal conditions vary even between familiar crops.
Do not treat warmth and light as interchangeable. Some seeds germinate in a warm place before they have emerged, but a seedling needs light as soon as its shoot appears. The conditions that help a seed open are not automatically the conditions that keep the new plant compact and healthy. Checking trays once or twice a day helps you catch the transition rather than leaving sprouts under a cover or in a dark cupboard for several days.
Keep moisture steady without waterlogging
Seeds must absorb water to begin germination, but a saturated container leaves little air in the mix. Aim for even dampness, not a tray that stays submerged in water. Utah State Extension describes a clear dome or bag as a way to maintain humidity and cautions against putting a covered tray in direct sun, where trapped heat can rise quickly (Utah State University Extension). A loose cover can reduce drying before emergence; it is not a permanent lid for growing seedlings.
If you use a humidity dome, remove it as soon as most seeds in that container have emerged. The cover’s job is to slow evaporation before sprouting; after emergence it can hold the leaves in persistently humid, still air and make it easier to miss overwatering. If a few seeds are slower, move the emerged seedlings into light and uncover them; do not keep the whole tray sealed indefinitely for the last stragglers.
Match warmth to the crop instead of heating everything
Room temperature may be enough for seeds whose packet temperature range overlaps the conditions in your home. Utah State Extension gives 65–75°F as a useful range for many crops and a cooler 55–65°F range for some cool-season vegetables such as broccoli, cabbage, and spinach. Tomatoes and peppers may benefit from warmer media, especially in a cool room. These are examples, not a universal target; check the crop’s own instructions (Utah State University Extension).
A thermostatically controlled seedling heat mat can warm the mix from below when the room is cool. Use it only when the crop needs it, follow its directions, and check the medium so it does not dry faster than expected. Once seedlings emerge, many crops no longer need the extra bottom heat and may grow sturdier in ordinary, slightly cooler room conditions. Do not put seed trays on a radiator or directly on a household heating pad; uneven heat can dry or overheat the small root zone.
Move sprouts into bright light immediately
As soon as a seedling emerges, move it into bright light. A sunny window can work for a small batch if it stays bright for much of the day, but winter daylight, short days, shade from buildings, and a window’s direction can make the light weaker than it looks. If stems lengthen quickly, lean toward the window, or become thin and floppy, the plant is reaching for more light.
A grow light gives you more control when natural light is unreliable. Position the fixture above the leaves at the distance recommended by its manufacturer, and use a timer if it helps keep the day consistent. Many seedlings do well with roughly 14–16 hours of light followed by a dark period, but follow crop and fixture guidance; leaving lights on around the clock is not a shortcut to sturdier growth. Keep the light close enough to be useful without letting hot bulbs scorch leaves, and raise it as the seedlings grow.
Rotate trays on a windowsill so seedlings do not all lean in one direction. If they are already stretched, improve the light now and support them only if needed while they produce sturdier growth; burying a weak stem deeply or adding fertilizer will not fix insufficient light. The University of Minnesota Extension’s seedling troubleshooting guidance identifies low light as a common cause of tall, spindly growth and recommends moving lights closer or providing stronger light rather than simply watering more (University of Minnesota Extension).
Water seedlings by checking the mix, not the calendar
There is no dependable universal instruction to water seedlings every day. A small uncovered cell in a sunny room can dry rapidly, while a covered tray in a cool room may remain wet for days. Check the surface and the container’s weight at least daily, then water when the mix is beginning to dry rather than because a clock says it is time. The goal is consistent moisture with air still reaching the roots.
Bottom watering can help once seedlings are established: add a shallow layer of water to the tray beneath the cells, let the mix wick it upward, then empty any standing water after the mix is moist. If the surface remains dry, use a gentle top watering to finish. For newly sown seeds, a fine mist can protect surface-sown seeds from being displaced. A mister is not always enough to wet the entire cell, though, so use the appearance and weight of the medium rather than assuming the top looks damp means the roots have water.
If leaves droop, check the mix before adding water. A dry, light cell may need a drink; a heavy, wet cell may need drainage and more airflow instead. Minnesota Extension notes that overwatering can limit oxygen around roots and cause symptoms that resemble wilt, so watering a collapsing seedling without checking the medium may make the problem worse (University of Minnesota Extension). Empty water from the catch tray and never leave small pots standing in it continuously.
Thin and pot up before seedlings become crowded
The first pair of leaves that appears after emergence are usually cotyledons, or seed leaves. The next leaves are true leaves and look more like the plant’s normal foliage. If several seedlings share a cell, thin them when they are large enough to handle or follow the packet’s instructions. Keep the strongest one if the plant needs room; snip extras at the soil line rather than tugging them out and disturbing the roots of the survivor.
Pot up when the plant is growing actively and its roots are beginning to fill the small cell, especially if it will remain indoors for more than a short time. Choose a slightly larger container, not an enormous pot that stays wet around a tiny root ball. Water beforehand if the mix is dry, ease the seedling out by supporting the root ball, and handle leaves rather than pinching the tender stem. Set it at roughly its previous depth unless that crop has specific instructions to the contrary, then water gently to settle the new mix around the roots.
Some seedlings need no intermediate pot: start them in a larger cell and transplant them outdoors once they are appropriately sized and hardened off. Others benefit from an early move because they are crowded or the starting cell is too small. Penn State Extension describes thinning and transplanting as ways to give seedlings space while reducing disturbance to the plants that remain; the right moment depends on the crop and its growth rate (Penn State Extension).
Do not fertilize the instant a seed cracks open. The seed itself supplies food for the earliest stage, and many commercial mixes already contain some nutrients. Once true leaves appear, check the mix label and crop guidance; if supplemental feeding is needed, use a diluted, labeled fertilizer rather than guessing at a strong dose. Pale color can also come from wet roots or poor light, so diagnose the setup before adding more nutrients.
Prevent and diagnose common seedling problems
Clean reused containers and tools before sowing, use fresh or appropriately stored growing mix, and avoid crowding seedlings in still, humid air. These habits do not guarantee that disease will never occur, but they reduce common opportunities for it to spread. Provide gentle air movement in a crowded setup if needed; a fan should move air around the plants rather than blast or dry them.
If a seedling pinches at the soil line, falls over, and appears rotted at its base, damping-off is one possible cause. Infected seedlings often do not recover, so remove affected plants, improve drainage and airflow, and clean the tray before reusing it. Minnesota Extension identifies several pathogens associated with damping-off and recommends sanitation of media, containers, tools, and hands as prevention. A limp leaf by itself is not enough to diagnose it: a waterlogged cell, dry mix, low light, or temperature stress can look different and needs a different correction (University of Minnesota Extension).
If nothing has sprouted, resist the urge to dig up every cell on the first day. Compare elapsed time with the packet’s germination range, then check the most likely variables: was the mix too dry or saturated, was the temperature suitable, did the seed need light, and was it buried too deeply? If the expected window has passed, inspect one seed gently. A firm seed that has not swollen may need more time or a different temperature; a soft, mushy seed may have rotted. When only one variety fails in otherwise similar conditions, seed viability or that crop’s special requirement becomes more likely than a general problem with the whole tray.
If several seedlings are long and weak, adjust the light before changing fertilizer or watering. If they collapse and the mix is wet, improve drainage and let the surface dry slightly between waterings. If they wilt in a dry cell, water thoroughly and let it drain. Change one condition at a time when possible; a tray gives clearer feedback when you can tell what helped.
Harden seedlings before transplanting outdoors
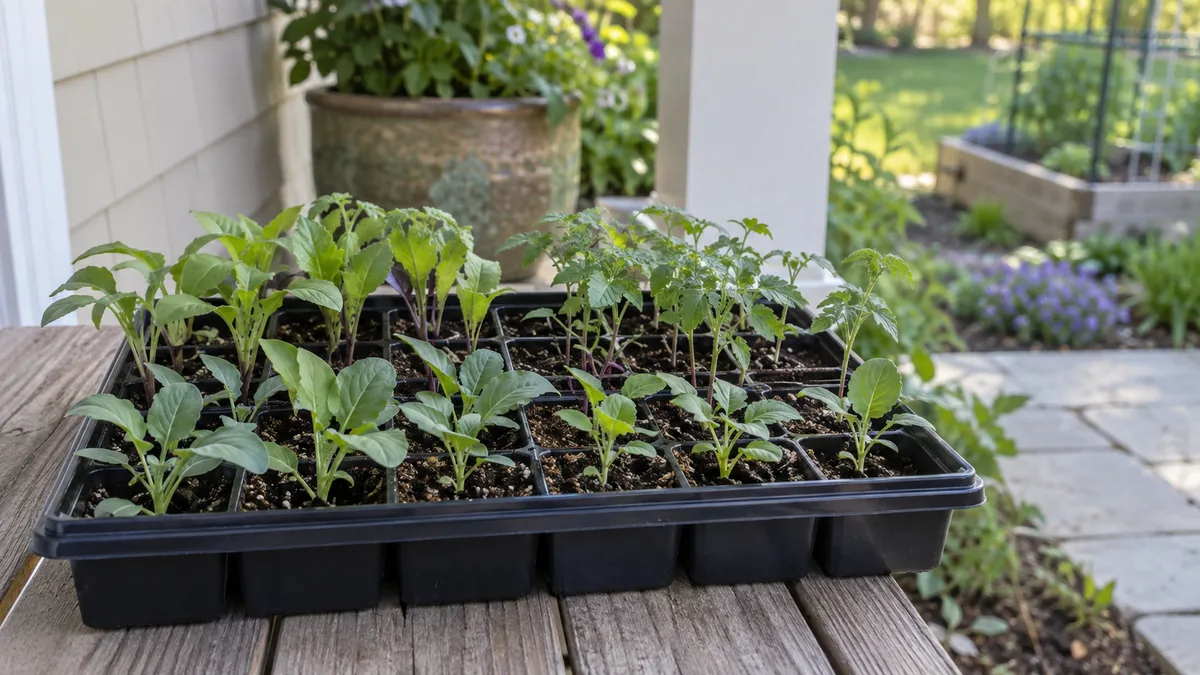
Indoor-grown seedlings are accustomed to sheltered air, stable temperatures, and filtered light. Outside, sunlight can be much stronger, wind increases water loss, and nights can be cold. Move a seedling directly from the windowsill into full sun and it may scorch or wilt even when the planting date is otherwise appropriate. Hardening off is the gradual transition that lets leaves and stems adjust.
About seven to ten days before transplanting, begin with a short period outside in a sheltered, shaded spot on a mild day. Bring plants back indoors afterward. Over successive days, increase the time outside and gradually introduce brighter light and a little more breeze. If the weather is unusually hot, windy, or cold, slow down or bring plants in; hardening off is not a reason to expose tender seedlings to frost or severe conditions. Reduce the protection gradually, not all at once.
Before planting, water the seedling so its root ball is moist, choose a mild part of the day, and follow the crop’s spacing and depth guidance. Water it in, then monitor it closely while roots establish. A cloudy day can reduce midday stress, but the forecast and plant’s cold tolerance matter more than the date on the calendar. Colorado State University Extension recommends gradually exposing indoor-grown seedlings to outdoor conditions before planting, and Penn State also includes acclimation time in the schedule for seedlings destined for the garden (Colorado State University Extension; Penn State Extension).
Conclusion
For your first seed-starting attempt, keep the project small and make decisions in the right order: choose a crop that benefits from an indoor start, count backward from a realistic planting date, sow according to the packet, and prepare light before the first sprout appears. A clean container with drainage and a suitable mix matter more than a fancy tray, while steady observation matters more than following a rigid watering schedule.
The key handoff is the moment germination ends and seedling care begins. Remove the cover, provide strong light, keep the mix damp rather than soaked, thin or pot up before crowding becomes a problem, and acclimate plants gradually before they go outdoors. If the first batch is uneven, use what it tells you about your room, timing, and setup. One healthy transplant is a better start than a crowded tray of seedlings you cannot keep.



