How to Care for Coneflowers in the Winter
Learn how to care for coneflowers in winter with clear advice on cutting back, seed heads, mulch, watering, pots, and spring cleanup.

Winter care for coneflowers is mostly a timing and restraint exercise. Established plants usually handle cold better than gardeners expect; the crown and roots remain alive while the stems and leaves above ground turn brown and collapse. Your job is to prevent avoidable stress—especially drought, waterlogging, premature pruning, and freeze-thaw heaving—without treating a hardy perennial like a tender annual.
The right plan depends on four details: whether the plant is established, how well the bed drains, how exposed your climate is, and whether the coneflower is growing in the ground or a container. The steps below turn those details into a practical decision instead of a one-size-fits-all fall cleanup.
Do Coneflowers Need Winter Protection?
Most established, in-ground coneflowers do not need to be wrapped or covered for an ordinary winter. Coneflowers are herbaceous perennials, so their visible growth can die back while the crown and roots rest below the soil. Purdue Consumer Horticulture describes coneflowers as easy-to-grow plants that prefer full sun and well-drained soil, and their native perennial habit is a better guide to winter care than the appearance of brown stems alone. Purdue’s coneflower profile is a useful reference for that baseline.
Protection becomes more useful when the plant is newly planted, divided late in the season, less hardy than your local winter, or exposed to repeated thawing winds. Containers also deserve extra attention because their roots are surrounded by a relatively small volume of soil above ground, where temperatures change faster than they do in a garden bed. A cover is not automatically helpful, though. In a heavy, wet site, a thick blanket of organic material can hold moisture against the crown and make the winter problem worse.
Think of winter protection as a way to reduce extremes, not as a way to keep the plant warm at all times. Coneflowers need dormancy. They do not need a heated room, continuous wrapping, or a rich late-season feeding to “prepare” them.
Read the Plant Before You Touch It
Do not prune because the calendar says autumn has arrived. Look at the plant. Green, flexible stems and firm leaves are still active, even if flowering has slowed. Cutting them while they are still green removes functioning tissue before the plant has finished moving resources toward the crown.
Wait until a hard freeze or a sustained cold spell has caused the foliage to wilt, brown, and collapse. At that point the plant has entered dormancy and the choice becomes mostly about garden function: do you want winter food and structure, or a shorter, tidier bed? If the stems are brown but upright, leaving them is a valid care decision. If they are diseased, slimy, or lying across the crown in a wet mass, sanitation takes priority.
Decide What the Spent Stems Are Doing for Your Garden
Standing coneflower stems can hold seed for birds, offer small pockets of shelter for insects, and add shape to an otherwise flat winter bed. They can also catch heavy snow, lean into neighboring plants, or look untidy beside a path. Neither choice is morally or botanically superior; match the choice to your garden’s purpose.
Use this quick split:
- Leave healthy seed heads if birds, natural reseeding, and winter texture matter to you.
- Cut the plant back after dieback if the bed needs to be tidy or the stems are collapsing into damp foliage.
- Remove and discard clearly diseased material rather than leaving it as winter habitat.
- If you are undecided, leave most stems and cut only the ones that block paths or mat against the crown.
That middle option is often the most useful. It preserves the plant’s structure and food value while reducing the places where wet debris can sit.
Use This Winter-Care Decision Rule
Start with the plant’s situation, then choose the smallest intervention that solves the actual risk.
Established plant in a sunny, well-drained bed: Let it go dormant, leave healthy stems or cut them after dieback, and skip heavy protection. Water only if the soil is genuinely dry during an unusual winter dry spell.
First-year or recently divided plant: Give the roots more insurance after the plant is dormant. A loose layer of winter mulch can reduce rapid temperature swings, especially where the ground repeatedly freezes and thaws. Do not bury the crown.
Plant in a wet or poorly drained bed: Fix the water problem before adding insulation. Thin mulch will not rescue a crown sitting in saturated soil, and a thick wet layer may reduce airflow.
Container-grown plant: Protect the pot and root zone from rapid temperature changes, keep drainage open, and move the container to a sheltered outdoor position or an unheated protected space when your climate is beyond the plant’s reliable hardiness.
Marginal cultivar or exposed site: Use temporary frost fabric during an exceptional cold or wind event if needed, but remove it when the event passes. A frost cover is a short-term weather tool, not a season-long replacement for suitable siting.
A Month-by-Month Winterizing Timeline
Winter does not begin on the same date everywhere, so use weather and plant condition as your schedule. The following sequence is more reliable than a fixed “prune on October 1” rule.
Late Summer: Stop Forcing New Growth
Once flowering is winding down, avoid pushing the plant with high-nitrogen fertilizer. Penn State Extension notes that most perennials need modest fertilization and that overfertilization can produce soft growth with fewer flowers. Coneflowers generally do better when they finish the season steadily rather than producing a flush of tender tissue just before cold weather. Penn State’s perennial-care guidance explains why soil testing and restrained feeding are safer than automatic fertilizer.
Keep watering new or recently transplanted plants as needed, and remove weeds that compete for moisture. Do not deadhead every flower automatically if you want seed heads for birds or natural reseeding. If you do deadhead for repeat flowers, stop when you want the final heads to mature.
After the First Hard Frost: Assess and Choose
After frost has flattened the foliage, inspect the base of the plant. Healthy dormancy looks dry and papery above ground, with a crown that is not mushy or foul-smelling. Remove leaves or stems with obvious disease symptoms, then decide whether the remaining healthy stalks will stay or be cut. Homes & Gardens’ practical coneflower winterizing guide also places this assessment after frost, while emphasizing that drainage matters as much as cold protection.
If you cut, use clean, sharp pruners and leave a short stub rather than shaving the plant to the soil line. If you leave the plant standing, pull away only debris that is already wet and pressed tightly against the crown. This is also a good time to check that mulch has not been piled against the stem base.
When the Ground Starts to Freeze: Add Mulch if Needed
Apply winter mulch after the plant is dormant and the soil has begun to freeze, not while warm autumn soil is still encouraging growth. Wisconsin Horticulture explains that winter mulch is mainly used to moderate freeze-thaw cycles rather than to prevent the ground from freezing altogether. Its winter-preparation guidance also cautions that leaves can mat down and smother plants when they are used as a dense winter cover.
This timing matters most for new plantings, recently divided clumps, and places with little reliable snow cover. In a mild, rainy climate, you may need little or no extra mulch around an established coneflower.
Midwinter: Monitor Moisture and Snow
Once the bed is frozen, leave it alone as much as possible. Snow on the stems is usually not a reason to strip the plant, and repeatedly walking on frozen soil can compact it or damage crowns that are beginning to thaw underneath. Brush off only a dangerous load from a rigid support or a nearby structure; do not turn routine snow into a pruning session.
During a dry, windy winter, check soil moisture during a thaw. During a wet winter, do not water simply because the plant looks brown—that is normal dormancy. The goal is a crown that is neither desiccated nor sitting in cold, saturated soil.
How to Cut Back Coneflowers Without Weakening Them
Cutting back coneflowers is optional for winter survival, but it can improve sanitation and keep a small bed manageable. Wait until the top growth is fully brown and dry. Then cut the stems to roughly 3 to 6 inches above the soil, making the cuts clean and avoiding the crown itself.
Leaving a stub gives you a visible marker for the plant’s location and reduces the chance of nicking the crown with pruners. It also makes spring cleanup easier because the old growth can be grasped without disturbing emerging shoots. If the plant is in a mass planting, cut stems in sections rather than mowing across the whole bed; a mower can scatter diseased debris and compact wet soil.
Do not make a very low cut just to create a “clean” look. The crown is the point from which next season’s shoots emerge, and winter work should not scrape, gouge, or bury it. If you choose to leave stems through winter, make the spring cut before new shoots have grown through the old clump. Penn State’s seasonal perennial guidance supports gradual spring cleanup and removal of winter protection rather than one aggressive operation.
The Seed-Head Choice: Birds, Reseeding, or Tidiness
The dried cone is more than a dead flower. It can provide food for seed-eating birds and gives the garden winter structure, especially when the surrounding foliage has collapsed. Leaving seed heads also increases the chance of volunteer seedlings, which may be welcome in a naturalistic bed and unwanted in a carefully spaced border.
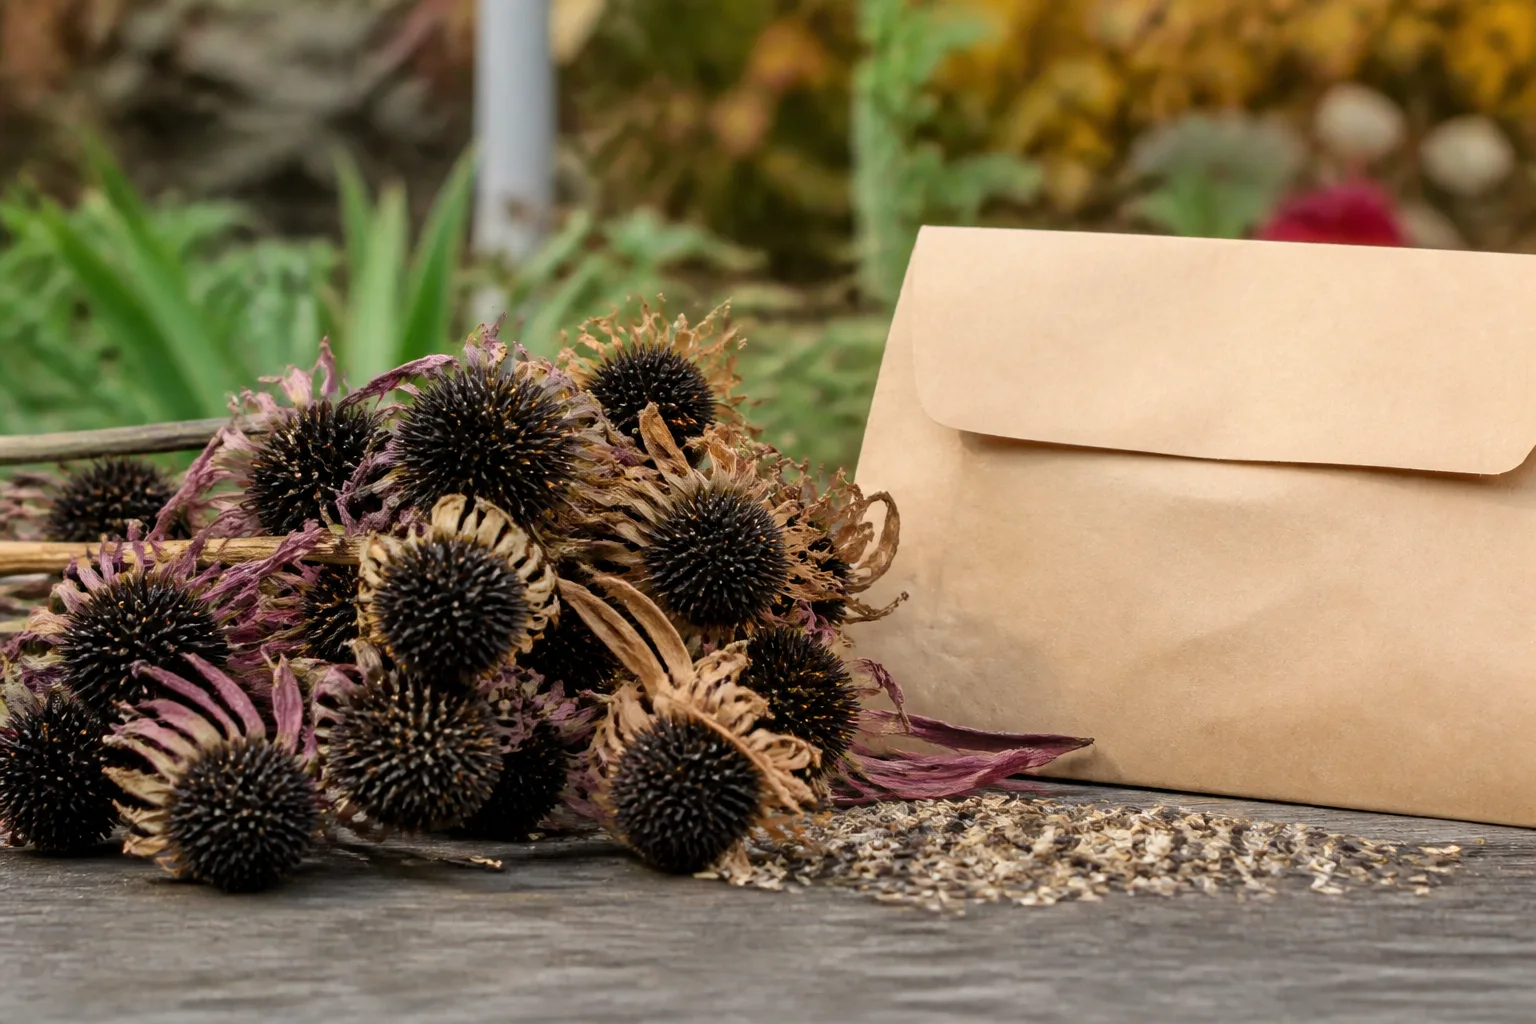
If you want birds but not a thick patch of seedlings, leave a portion of the heads and remove the rest. If you want to save seed, wait until the cones are fully dry and dark, then collect them on a dry day and store the seed in a labeled envelope. Seed-grown plants may not repeat the exact color, height, or flower form of a named hybrid, so use division when preserving a particular cultivar matters.
If you prefer a formal bed, cut the spent heads after they dry and remove loose debris from the crown area. You can still leave a few selected heads at the back of the border. This small compromise often gives wildlife value without allowing every plant to shed seed into a walkway.
Mulch Placement: Protect the Crown, Not the Stem
Winter mulch works by buffering rapid temperature changes and reducing the risk that repeated freezing and thawing will lift a shallow-rooted or newly planted crown. Penn State Extension recommends winter mulch for newly planted or divided perennials and says it should be removed gradually in spring. The practical material can be straw, evergreen boughs, or loose organic matter that does not form a sealed, soggy mat.

Spread mulch evenly over the root zone, generally about 2 to 3 inches for a normal winter-protection layer and somewhat deeper only where a new plant or extreme freeze-thaw exposure justifies it. Leave the crown and the short stem stubs visible. A mulch “donut” is safer than a mound pressed onto the plant because it keeps air moving at the base and makes spring removal easier.
Shredded leaves can work when they are dry and loose, but whole wet leaves may pack together. Straw is airy and easy to remove, while evergreen boughs can hold light insulating snow without sealing the soil. Avoid sour-smelling, moldy, or compacted material and do not use mulch to compensate for a planting spot that drains poorly.
In spring, pull mulch back in stages as the risk of severe freezes falls and new shoots appear. Do not leave a thick, wet blanket over emerging growth; that is when rot and slug damage become more likely.
Winter Watering for In-Ground Coneflowers
Established coneflowers in the ground often need no winter irrigation in regions with regular rain or snow. They do need protection from entering winter severely drought-stressed, so give the bed a thorough watering late in the growing season if the soil is dry and still unfrozen. Then stop following a weekly schedule and check conditions instead.
During a dry winter, test the soil a few inches below the surface during a mild thaw. If it is dry and the plant’s site drains freely, water slowly in the morning so the moisture can move into the root zone before temperatures fall again. Do not water frozen soil, and do not add water to a bed that is already wet from winter rain. Wisconsin Horticulture specifically recommends checking landscape plants for adequate moisture before the ground freezes because winter drought can damage plants even when the air is cold.
Avoid the common mistake of using brown top growth as a thirst signal. Brown stems are part of normal dormancy. Water only after checking the soil, the weather, and the plant’s drainage, and remember that a soggy crown is a more urgent problem than a temporarily dry surface.
Coneflowers in Pots Need a Different Plan
A container exposes roots to colder and faster temperature swings than a garden bed. The plant may be hardy in the ground but vulnerable in a small pot, especially when the container sits on a deck, balcony, or stand above frozen soil. Plant Addicts’ container and winter-care guidance for coneflowers makes the important distinction that potted plants dry out faster and should not be left in standing water.
After the foliage dies back, move the pot to a protected outdoor spot against a building, on the ground, or among other containers. Make sure the drainage holes remain open. In a colder climate, surround the pot with loose mulch or move it to an unheated garage, shed, or cold frame where the plant can stay dormant without being exposed to the full force of wind. Do not place an established coneflower in a warm living room and expect it to behave like a houseplant; low light, warm air, and active growth are a poor winter combination.
Check the pot every couple of weeks during a thaw. Water lightly only when the upper few inches of mix are dry and the pot is not frozen, then empty any saucer. A pot that stays saturated is vulnerable to root damage, while a pot that becomes completely bone-dry can lose fine roots. Keep the balance modest: cool, dormant, and barely moist is safer than either constant wetness or prolonged drought.
Winter Problems and What They Usually Mean
The crown is soft, dark, or foul-smelling. This points more strongly to excess moisture or poor drainage than to cold alone. Stop watering, remove wet mulch from the crown, and improve drainage when the soil is workable. If the crown has collapsed, wait for spring growth before assuming the entire clump is dead; inspect for firm, living tissue rather than judging the stems.
The pot is dry even though it has snowed. Snow can miss a sheltered container, and wind can pull moisture from a small root ball. Check the mix during a thaw and water if it is dry, but never leave the pot standing in meltwater. Move it where precipitation can reach it without creating a saturated saucer.
The plant heaves out of the soil. Freeze-thaw cycles can lift newly planted crowns. Pressing a frozen plant back into the ground can break roots, so wait until the soil thaws enough to work. Re-seat the crown at its original depth, firm the soil gently, and add correctly timed winter mulch for the rest of the season.
There is no new growth when spring arrives. Coneflowers can wake later than nearby bulbs, particularly after a cold or wet spring. Remove winter mulch gradually, check whether the crown is firm, and give the bed time to warm. If the crown is mushy or the stems pull away with no resistance, winter wetness may have caused more damage than low temperature.
Old leaves show spots or mold. Remove clearly diseased debris rather than folding it into the crown or leaving a wet mat in place. Improve spacing and airflow next season, and avoid overhead watering when foliage is active. Winter cleanup reduces the amount of infected material but does not replace diagnosis if the problem returns.
What to Do in Early Spring
As severe freezes pass, pull winter mulch away from the crown in stages. Leave a thin layer over the surrounding soil if it is helping with moisture and weeds, but do not let wet material cover new shoots. Penn State Extension’s seasonal schedule likewise recommends gradually removing winter protection rather than exposing plants all at once during a changeable spring.
Cut back any stems you left standing before new growth becomes tangled through them. Work around the crown with hand pruners, then remove the debris from the bed. If the plant was diseased, do not compost questionable material in a home pile that may not heat enough to destroy pathogens.
Hold fertilizer until the plant is actively growing and a soil test or clear nutrient deficiency justifies it. Coneflowers rarely need a heavy spring feeding, and too much nitrogen can reward leaves and lanky stems more than flowers. A thin top-dressing of mature compost is usually a gentler way to improve the soil around a healthy clump.
Finally, mark any missing plants before you replant. A late-emerging coneflower can look absent for several weeks, so give the crown time to show green shoots before digging it up. Once growth resumes, return to normal full-sun care, deep watering during establishment or drought, and good drainage.
Conclusion: Leave the Crown Dry, Insulated, and Undisturbed
For most established coneflowers, successful winter care is simple: let the top growth finish dying back, choose whether the seed heads should stay, keep water moving away from the crown, and use loose mulch only when the plant or climate needs extra buffering. First-year plants and containers deserve more protection because their roots have less insulation, but even they need cool dormancy rather than indoor pampering.
If you are unsure what to do today, start with the soil and the crown. A dry, firm crown in a well-drained bed usually needs patience; a wet crown needs better drainage; a dormant plant in a small pot needs shelter and careful moisture checks. Make the smallest change that solves the real risk, and your coneflowers will have a better chance of returning with strong spring growth.



