How to Grow Kalanchoe Fedtschenkoi Indoors and Out
Learn Kalanchoe fedtschenkoi care with practical light, watering, soil, pruning and propagation advice, plus fixes for stretched growth, rot and faded color.
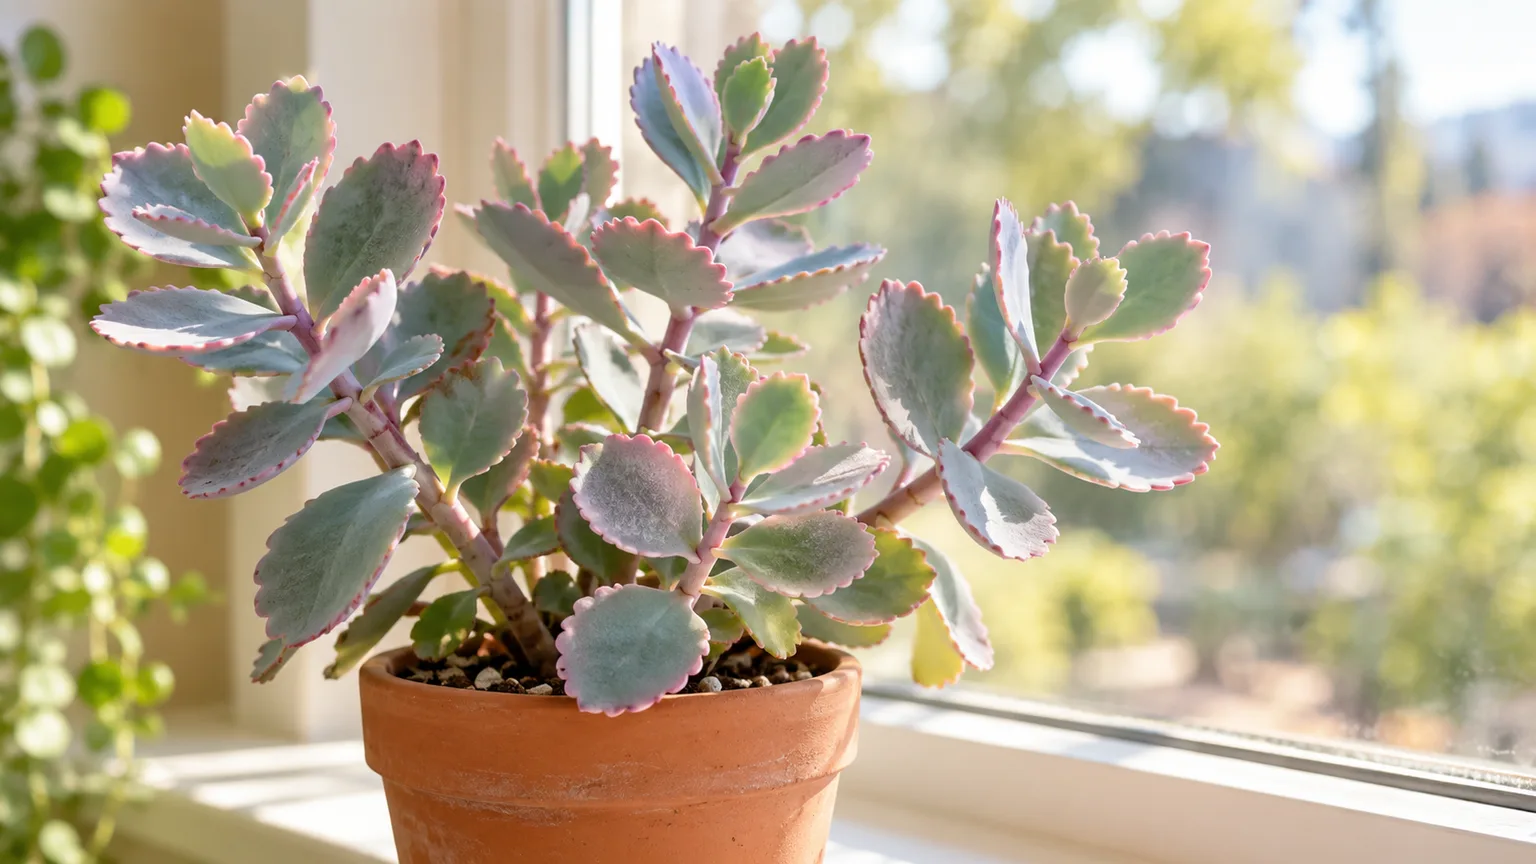
Lavender scallops (Kalanchoe fedtschenkoi) is easiest to keep when you treat it like the succulent it is: give it strong light, let its potting mix dry between thorough waterings, and protect it from cold. The plant’s blue-green leaves can take on lavender or pink edges in brighter conditions, but that color is not a reliable sign that it needs more water or fertilizer.
The most useful care decision is to read the whole plant and its pot before reaching for the watering can. A firm, woody lower stem can be normal; a soft stem in wet soil points toward rot. The difference matters more than any fixed watering interval.
Identify lavender scallops before choosing a care routine
This species belongs to the stonecrop family, Crassulaceae, and is often sold under the common name lavender scallops. UF/IFAS lists Bryophyllum fedtschenkoi as a synonym, while NCBI Taxonomy recognizes Kalanchoe fedtschenkoi as the current scientific name. Those names can both appear on plant labels, so check the species epithet rather than relying on a common name alone. UF/IFAS Assessment, NCBI Taxonomy
Its fleshy leaves grow along branching stems, with rounded scallops around the margins. The foliage is commonly blue-green to gray-green, and the edges may develop pink, mauve, or lavender tones when the plant receives bright light. Strong color can be attractive, but a healthy plant should still have firm leaves and steady growth; color alone cannot tell you whether the roots are healthy.
The plant is native to Madagascar and is grown as a houseplant in places with cold winters. A peer-reviewed study of the species also records Madagascar as its native range. In warm climates it can be used outdoors, but container culture gives you more control over cold snaps and lets you limit where detached leaves or cuttings take root. UF/IFAS classifies it as “not a problem species” in its Florida assessment; that state-specific assessment is useful context, not a substitute for checking local rules or conditions elsewhere. Mejía-Méndez et al., Plants, UF/IFAS Assessment
Quick care at a glance
| Need | Practical starting point | What to watch |
|---|---|---|
| Light | Bright indoor light or gentle morning sun outdoors | Stretching suggests too little light; bleached or crispy patches after a move can mean sun stress |
| Water | Soak the mix, drain fully, then wait until it dries through | A dry surface is not enough if the root zone is still damp |
| Soil | Succulent mix amended with pumice or perlite if it stays wet | Dense, peat-heavy mix can remain wet too long indoors |
| Pot | Drainage hole; choose a modest size | Oversized pots hold more wet mix around a small root ball |
| Temperature | Warm room conditions; move indoors before cold weather | Do not wait for a frost warning to bring a tender container plant in |
| Feeding | Low-dose balanced fertilizer during active growth | Skip fertilizer when the plant is not growing or when roots are stressed |
These are starting points, not a schedule. Sun through glass, a small terracotta pot, a cool room, or an airy soil mix can change how quickly the root ball dries. Use the pot’s weight and a moisture check below the surface to learn the rhythm in your own home.
Choose an indoor or outdoor growing spot
Indoors is the safer year-round choice in a climate with freezing winters. A bright east- or south-facing window can work, but the ideal spot depends on the strength of the light and whether the plant is acclimated to it. If the only window is dim, a grow light can help prevent long, weak stems; keep the plant close enough to receive useful light without heating the foliage.
In a warm, frost-free climate, lavender scallops can grow in a protected bed or patio container where water drains quickly. A container is especially practical if heavy seasonal rain keeps garden soil wet, or if you want to bring the plant under cover when temperatures fall. In a garden bed, do not place it in a low spot where water pools after rain.
For a houseplant that spends summer outside, move it gradually. Start it in bright shade for several days, then introduce a little gentle morning sun and increase exposure only if leaves remain firm and unmarked. A sudden move from filtered indoor light to hot afternoon sun can scorch foliage even though the plant ultimately needs bright conditions.
Give it bright light without scorching it
Light affects both shape and color. In a dim location, new growth stretches between leaves and the stems lean toward the window; older growth does not become compact again, but you can rotate the pot and move it to a brighter position so new growth forms more evenly. A brighter site may also bring out the pink-lavender edge, although leaf color varies with cultivar and growing conditions.
Indoors, choose the brightest spot where the plant avoids punishing midday heat behind glass. A few hours of direct morning sun is often easier to manage than intense afternoon exposure. If leaves have spent months in shade, acclimate them over a week or two rather than setting the pot in full sun all at once.
Outdoors, aim for morning sun or bright filtered light, especially in hot-summer regions. Pale, tan, dry patches on the side facing a window or the afternoon sun point to scorch; move the plant back into gentler light and let damaged tissue remain until it dries. If stems stretch but leaves stay firm and green, increase light gradually rather than adding fertilizer.
Water by soil dryness, not the calendar
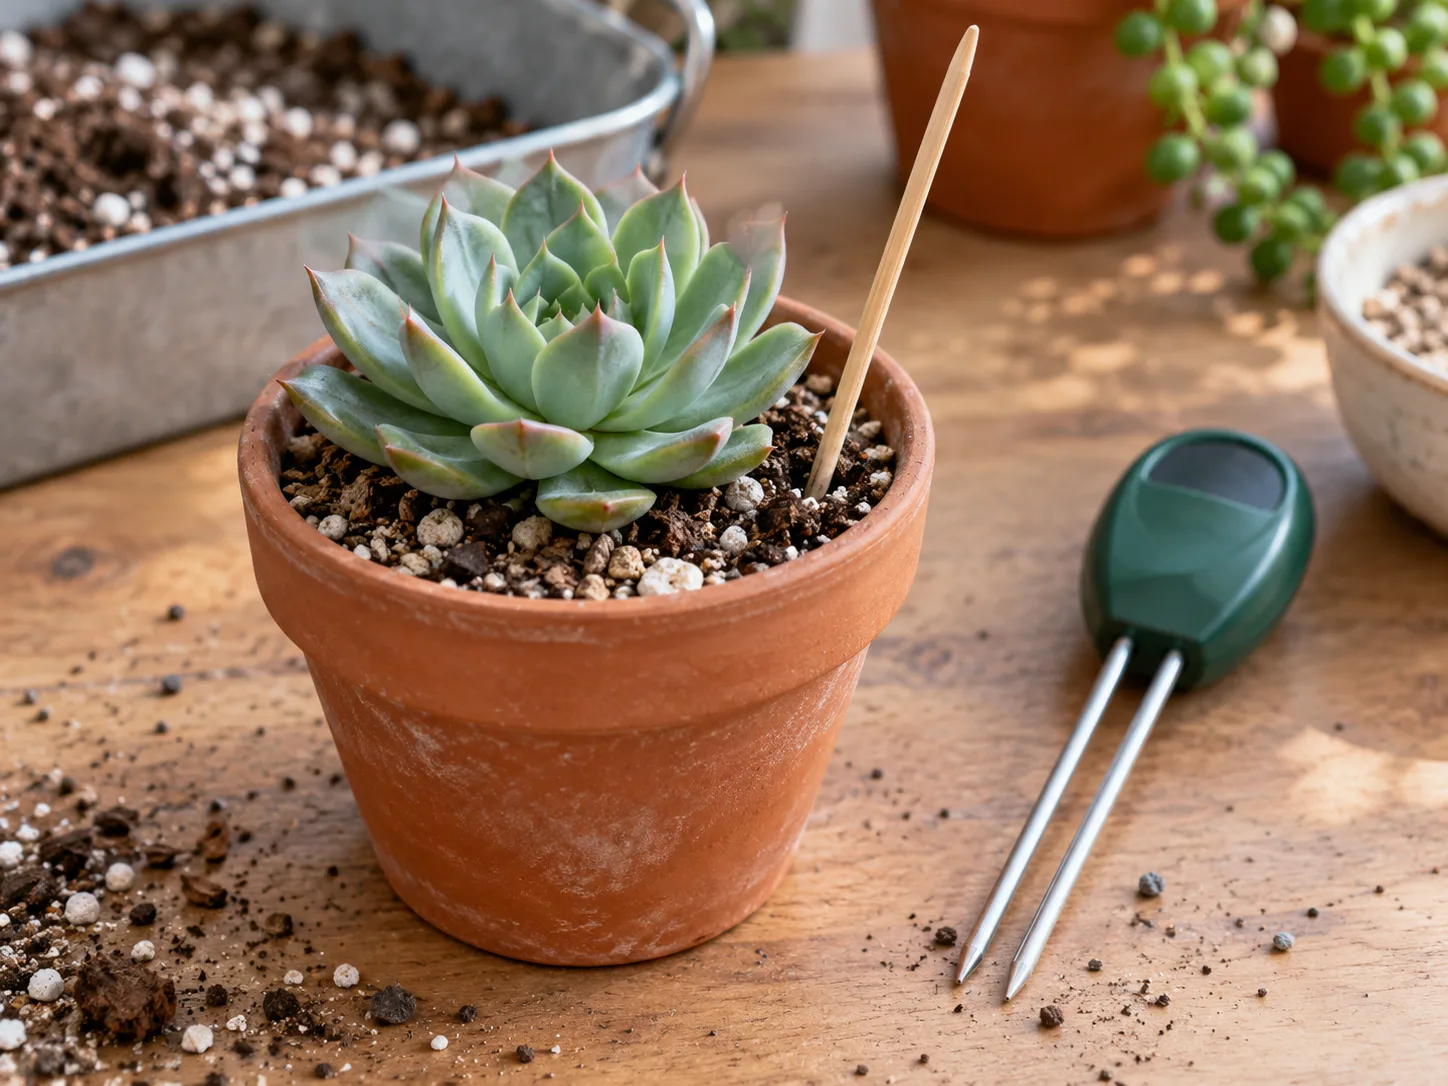
Water deeply enough to wet the root ball, then let excess drain from the bottom of the pot. Wait until the mix has dried through before watering again. The top can look dry while the lower half remains cool and damp, so push a wooden skewer into the mix or use a finger near the drainage hole; if it comes out with damp soil clinging to it, wait.
When the plant is actively growing in a warm, bright room, it will use water faster than it does in a cool, low-light winter room. A small terracotta pot may dry in a few days, while a large plastic pot with a dense mix may stay damp much longer. That is why “once a week” is a poor rule: it ignores the conditions that determine whether the roots are receiving air between waterings.
When it is time to water, soak the mix until water runs freely from the drainage holes and empty the saucer. Avoid repeated small sips that wet only the surface and leave part of the root ball dry. During winter slowdown, water less often because the mix takes longer to dry; do not keep it bone dry for months if leaves are visibly deflating and the mix has been dry for an extended period.
Wrinkled leaves can mean thirst, but check the pot before adding water. If the soil is dry and the leaves are slightly soft or puckered, a thorough drink is reasonable. If leaves wrinkle while the mix is wet, the roots may be damaged and unable to take up water; more water can deepen the problem.
Use a gritty mix and a pot that drains
Start with a commercial cactus or succulent mix. If it stays damp for several days in your room, blend in pumice or perlite to increase air space; coarse mineral material should be mixed through the root zone, not layered at the bottom. A drainage hole is essential because a layer of gravel cannot make a pot without drainage safe from waterlogging.
Choose a container only slightly wider than the root ball. A much larger pot holds extra wet soil the plant cannot use, so drying takes longer and the chance of root problems rises. Unglazed terracotta can help a heavy-handed waterer because moisture evaporates through the pot wall, but it also dries quickly in warm, windy conditions; it is a tool, not a requirement.
Do not use a decorative cachepot as the actual planting pot unless it has a drainage hole. If you keep the plant in a nursery pot inside a cover pot, lift the inner pot out to water and let it drain before returning it. Standing water at the bottom of a cover pot can quietly keep the roots wet even when the visible surface looks dry.
Keep temperatures warm and humidity ordinary
Typical warm indoor temperatures suit lavender scallops. Protect it from cold drafts, frosty windows, and temperatures near freezing; the exact point of damage can vary with duration, wind, moisture, and the plant’s prior conditions. If you move containers outside for summer, bring them indoors before nights turn chilly rather than waiting for visible injury.
Average household humidity is generally adequate for this succulent. A humidifier, misting routine, or pebble tray is unnecessary, and misting can leave water sitting in tight leaf overlaps without solving a real need. Give the plant airflow and avoid placing it in a persistently damp bathroom or against a cold, wet window.
Feed lightly during active growth
Fertilizer is optional when the plant grows in fresh mix and produces steady new leaves. If growth has begun in spring or summer, use a balanced liquid houseplant fertilizer at a reduced label rate, applied to already-moist soil. A light feeding every month or so during active growth is a conservative starting point; stop when growth slows in fall and winter.
Do not try to fix weak stems or pale leaves by feeding first. Low light, wet roots, cold, or old mix are more likely causes, and fertilizer cannot repair them. Strong fertilizer on a dry root ball can stress roots, while excess nitrogen may encourage softer, faster growth that is less compact.
Prune for shape and healthy cuttings
Remove dead leaves and spent flower stalks with clean, sharp scissors. If the plant is tall, sparse, or leaning, trim a healthy stem just above a leaf pair or node; branching may follow below the cut, although the exact response depends on the plant’s vigor and light. Make the cut only when the plant is otherwise healthy, not while it is recovering from rot or a recent cold injury.
Use the removed healthy tips as cuttings rather than discarding them. Avoid taking off a large share of foliage in one session because the leaves store water and support recovery. If the lower stem has become woody but the upper growth is firm, you can shorten the top and restart it while leaving the rooted base to branch again.
Propagate with stem or leaf cuttings
Stem cuttings are the most dependable way to make a second plant. Leaf cuttings are possible, but they are slower and less predictable; a leaf that breaks off without its base intact may simply dry out. BBC Gardeners’ World describes stem and leaf methods for succulents generally, and the same dry, airy setup helps reduce rot risk here. BBC Gardeners’ World succulent-care guide
Use a clean blade, a small pot with drainage, and dry succulent mix. Keep new cuttings in bright indirect light while they root. Do not bury leaves or keep the pot constantly moist: succulent tissue already holds water, so the goal is to encourage roots without inviting the cut surface to decay.
Root a stem cutting
Choose a firm, healthy tip several inches long with multiple leaves. Cut just below a node, remove leaves from the lower portion that will sit in the mix, and leave the cutting in a shaded, airy place until the cut end feels dry and sealed; this may take a day or two depending on stem thickness and room conditions.
Insert the callused end into dry mix deep enough to stand upright, then place the pot in bright, indirect light. Give it a small drink after a few days, and water again only when the mix dries. Avoid tugging on the stem every few days to test for roots; new roots are fine and easy to break. Look for fresh growth and gentle resistance after a few weeks, understanding that cooler conditions can slow rooting.
Once the cutting is anchored and producing new leaves, treat it like an established plant: water thoroughly, allow a full dry-down, and gradually introduce stronger light. If the base turns dark or soft, remove it above the damaged area, let the new cut callus, and restart in fresh dry mix.
Try a leaf cutting when you have patience
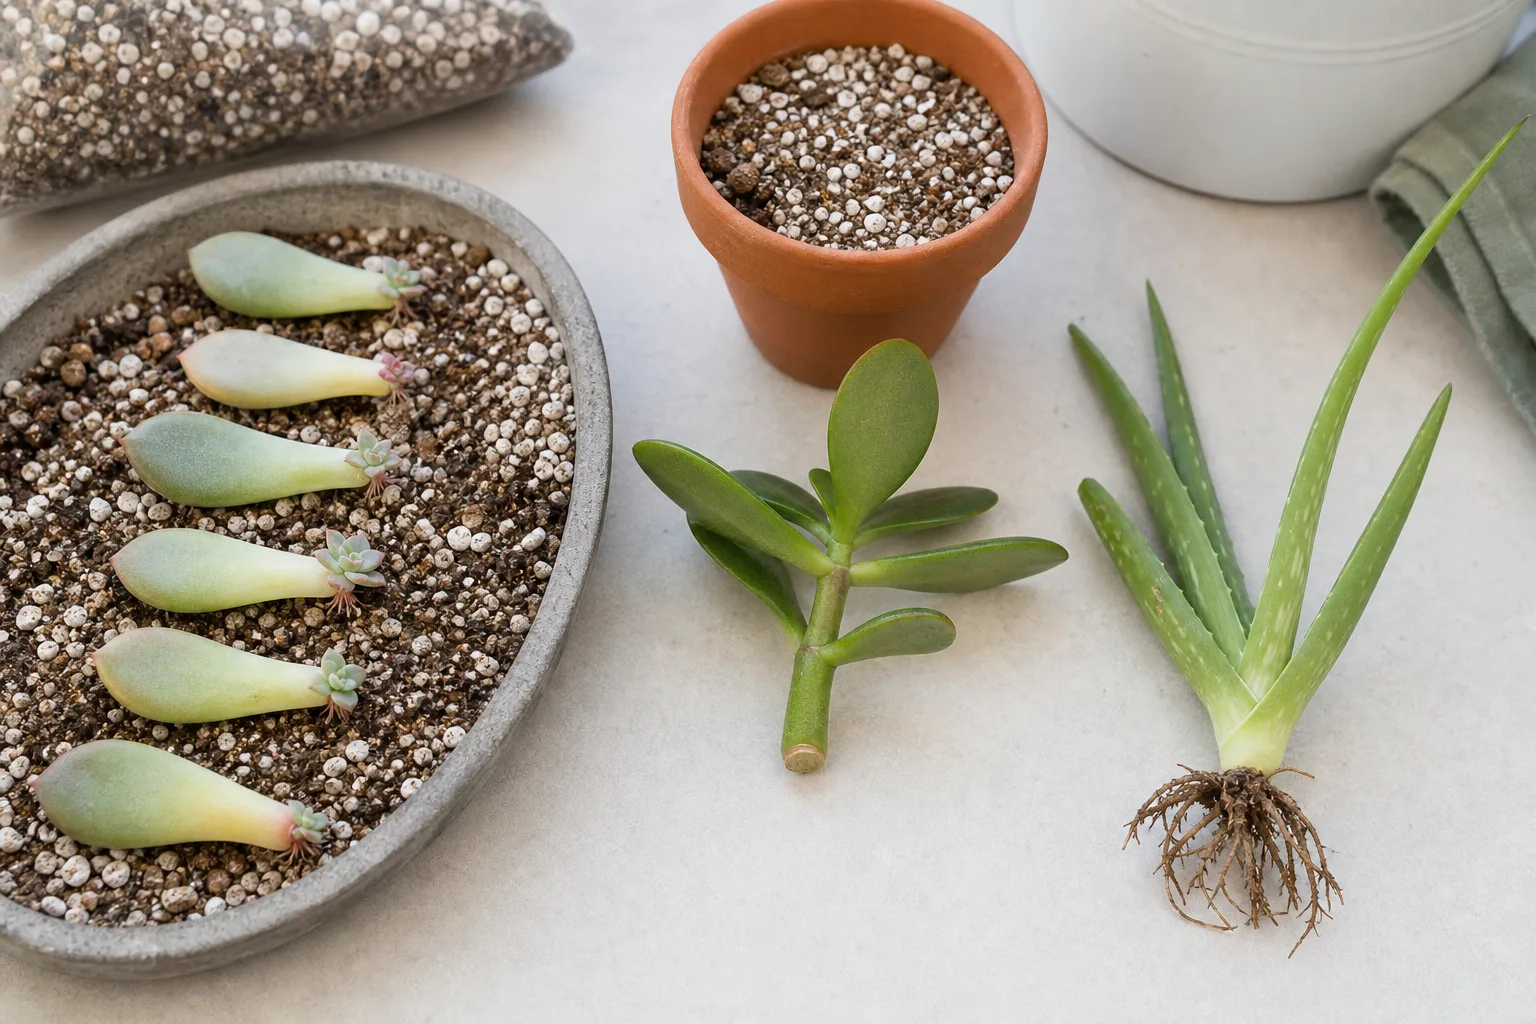
Select a firm leaf and remove it cleanly with the base intact. Let the wound dry, then lay the leaf on top of dry succulent mix rather than burying it. Keep it warm and bright but out of harsh direct sun, and resist frequent misting; damp airless soil around a callus is a common cause of failure.
Some leaves root and form a small rosette; others shrivel without producing a plant. Wait for roots and a visible plantlet before potting it separately, and allow the original leaf to dry naturally as the new growth uses it. Leaf propagation can be a useful experiment, but if you need a reliable replacement quickly, use a stem cutting.
Understand its flowers and bloom timing
Lavender scallops can produce clusters of small, hanging, bell-shaped flowers on upright stalks, often in reddish or brownish tones. A young plant may spend its energy building stems and leaves before flowering, and a houseplant that stays indoors may not bloom on a predictable schedule. A foliage-only specimen can still be healthy.
Start with conditions the plant needs year-round: strong light, a draining mix, and seasonal growth without constantly wet roots. Do not apply a strict blackout schedule borrowed from florist kalanchoe care without evidence that it suits this species. BBC Gardeners’ World and Gardening Know How discuss reblooming Kalanchoe blossfeldiana, a different commonly sold species; its commercial flowering advice should not automatically be treated as a proven recipe for K. fedtschenkoi. BBC Gardeners’ World kalanchoe guide, Gardening Know How kalanchoe guide
If you are growing it outdoors in a warm climate, seasonal day length and natural conditions may support flowering as the plant matures. Indoors, prioritize healthy compact growth rather than forcing blooms with prolonged darkness, abrupt temperature changes, or extra fertilizer. If flower stalks do appear, enjoy them and remove them after they fade if you prefer a tidier plant.
Repot only when the root system needs it
Repot when roots crowd the drainage hole, the plant dries unusually fast despite a suitable mix, or the substrate has broken down and stays wet. A fixed two-year calendar is not necessary. Many succulents tolerate being snug in their pots, and repotting too often can disturb roots without improving growth.
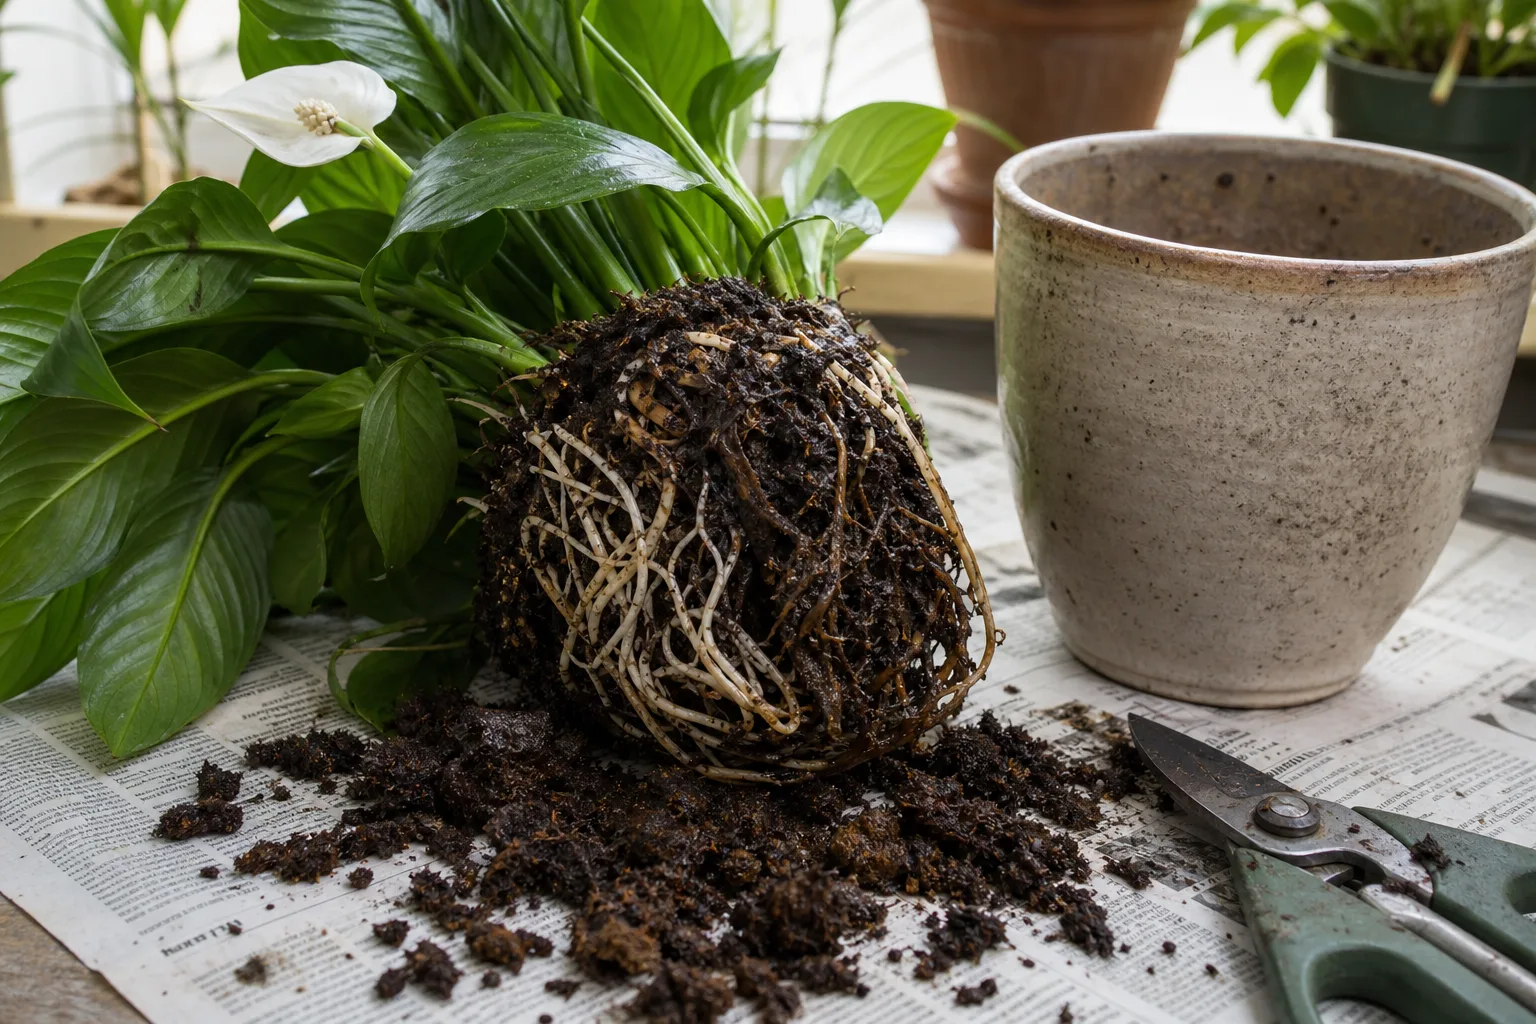
Move up only one pot size and use fresh gritty mix. Handle the plant by its root ball rather than pinching leaves, which can detach easily. If you find black, mushy roots, trim them with a clean blade and remove all wet, decaying mix; let damaged roots dry briefly before setting the plant into fresh, mostly dry substrate.
After routine repotting, give the plant a few days before watering so small root scratches can dry. If you had to remove substantial rot, wait until the plant is stable and the cut surfaces are dry; then water modestly and let the mix dry again. Keep it in bright shade for a short recovery period before returning it to its usual light.
Troubleshoot symptoms in the right order
Start by checking three things: whether the soil is wet or dry below the surface, whether the affected tissue is firm or soft, and whether the symptom began after a change in light or temperature. This quick triage is more useful than reacting to one leaf. Succulents naturally shed some old lower leaves, while sudden widespread leaf loss usually deserves a closer look.
Wrinkled leaves: If the mix is dry, water deeply and see whether the leaves firm over the next several days. If the mix is still damp, do not water; inspect drainage and roots because rot can prevent water uptake even when the pot is wet. Persistent wrinkling after a full dry-to-wet cycle calls for a root check rather than repeated watering.
Soft, brown stems: A firm brown lower stem may simply be aging and becoming woody. A dark, mushy patch, especially near wet soil, suggests rot. Remove the plant from its pot, cut away compromised tissue with a clean tool, and save only firm healthy stem sections as cuttings; discard rotten material and replace the saturated mix.
Pale or stretched growth: Long gaps between leaves and leaning toward a window usually indicate insufficient light. Move the plant brighter in stages and rotate it periodically. Do not give a suddenly relocated plant all-day sun, because it may scorch before it adjusts.
White patches or spots: Powdery mildew can appear as a diffuse dusty coating, while mineral deposits from hard water tend to form sharper marks where droplets dried. Isolate a plant with spreading white growth, improve airflow, keep water off the leaves, and remove heavily affected material. If the spots are raised or cottony, inspect for mealybugs instead of assuming it is mildew.
Manage pests and leaf disease carefully
Check leaf joints, stem forks, and the undersides of leaves when you water. Mealybugs look like small white cottony clusters, scale appears as firm bumps attached to stems or leaves, and spider mites can leave fine webbing and stippled foliage. Isolate an infested plant first so pests do not spread to neighboring houseplants.
For a small infestation, wipe pests away and recheck the plant every few days. If you use insecticidal soap or another labeled product, follow the label for indoor use and test a small area first; succulent leaves can be sensitive to sprays, especially in bright sun. Avoid spraying a stressed plant in hot conditions, and do not treat a suspected fungal patch with an insecticide.
Root rot prevention is mostly about the root environment: a pot with a drain, a mix that lets air back in, and enough time between waterings for the root ball to dry. Powdery mildew is more likely when foliage remains damp in stagnant air. Do not mist this plant as a routine care step.
Keep it away from chewing pets
The ASPCA lists Kalanchoe species as toxic to cats and dogs and identifies bufadienolides as the toxic principle; reported signs include vomiting, diarrhea, and, rarely, abnormal heart rhythm. Place the plant where pets cannot chew it. If a cat or dog may have eaten any part, contact a veterinarian or animal poison service promptly instead of waiting for symptoms. ASPCA Kalanchoe toxicity profile
Conclusion
For a healthy Kalanchoe fedtschenkoi, prioritize bright light, fast-draining soil, and a full dry-down between deep waterings. Adjust the interval to your plant’s actual conditions rather than a weekly calendar, and check whether a symptom’s tissue is firm or mushy before deciding what to do.
Keep it warm, prune only when shape or damage calls for it, and start new plants from healthy stem cuttings if you want the most dependable propagation method. With those simple checks—and a spot beyond the reach of pets—lavender scallops can remain a compact, colorful succulent indoors or in a warm outdoor container.