Kangaroo Paw Fern Care: Light, Water, and Soil
Learn kangaroo paw fern care with practical light, water, soil, humidity, and feeding advice, plus when to repot, divide, and troubleshoot brown fronds.
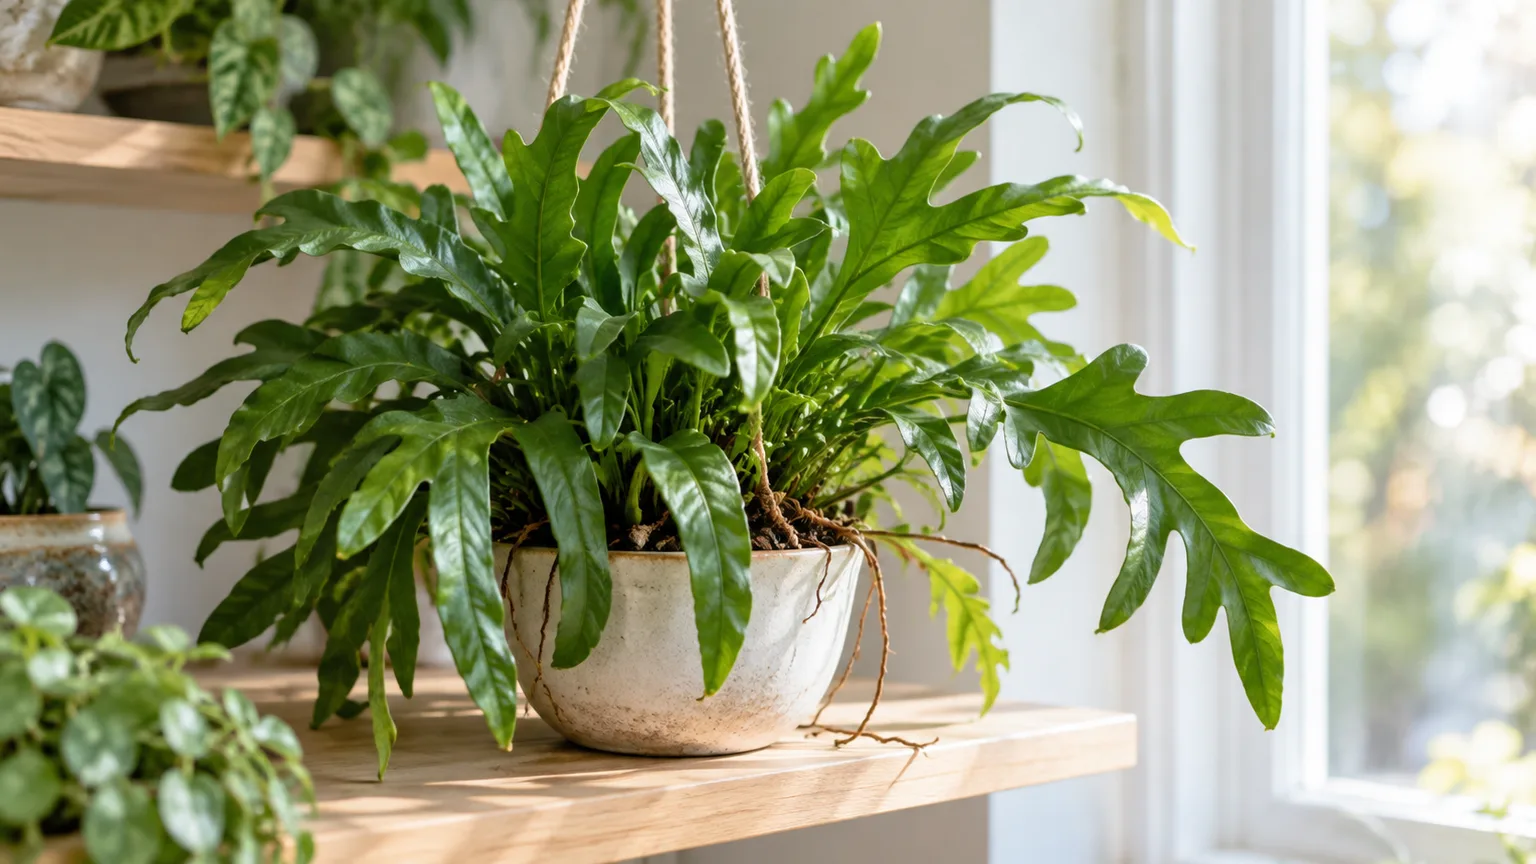
For reliable kangaroo paw fern care, give the plant bright, indirect light, keep its potting mix evenly moist rather than waterlogged, and leave its creeping rhizomes room to travel. It can grow in a regular pot or a hanging basket; the basket is a display choice, not a requirement.
The botanical name is Microsorum diversifolium. Clemson Cooperative Extension describes it as a fern with leathery, dark-green fronds and creeping rhizomes, and notes that a mature plant can reach about 12 inches tall and spread 3 to 4 feet. That low, wide growth habit explains why a plant may look healthy while spreading sideways over the rim instead of growing into a tall, upright clump.
Kangaroo paw fern at a glance
| Care point | Practical target |
|---|---|
| Botanical name | Microsorum diversifolium |
| Common names | Kangaroo paw fern; hound’s tongue fern |
| Growth habit | Clumping fern with creeping rhizomes and arching fronds |
| Mature size | About 12 inches tall and 3–4 feet wide under good conditions |
| Light | Bright, indirect light or filtered shade |
| Potting mix | Moisture-retentive but porous and free-draining |
| Water | Keep evenly moist; do not leave the pot standing in water |
| Temperature reference | Clemson lists roughly 68–72°F by day and 50–55°F at night |
| Display | Wide pot, shelf, or hanging basket |
The measurements and temperature figures are useful reference points, not promises that every store-bought plant will reach the same size or thrive at a precise thermostat setting. The Clemson Cooperative Extension indoor fern guide includes a kangaroo paw fern profile and notes that ferns differ in their cultural needs, so use species-specific guidance instead of applying one rule to every plant with fern-shaped leaves.
The creeping rhizome explains its spreading habit
A rhizome is a creeping stem, not a dead root or a piece of debris. New fronds can emerge along it as it grows across the surface of the mix, so a fern that sends growth toward the edge of a pot is following its normal habit. A broad, shallow container often gives that growth more room than a narrow, deep one.
Common names can also blur differences between species. Kangaroo paw fern is Microsorum diversifolium; Savvy Gardening’s rabbit-foot fern guide describes a different genus, Davallia, with distinctive fuzzy rhizomes, while Houseplant Central’s macho fern profile discusses Nephrolepis biserrata. Those examples are useful reminders to check the botanical name on a label: advice for a rabbit-foot or macho fern is not automatically a care prescription for kangaroo paw fern.
Find bright, indirect light without harsh sun
Place the fern where it receives plenty of light but is shielded from strong direct sun. An east-facing window, a bright north-facing window, or a spot a few feet back from a brighter south- or west-facing window can work; use a sheer curtain if sun reaches the leaves for long stretches. Clemson Extension recommends a bright north-facing position for this species, while its general fern guidance warns that direct sun can damage foliage.
Light that is too weak usually shows up as slow, sparse growth rather than a sudden collapse. If the plant has not made new fronds through a long stretch of active growing conditions, move it closer to a bright window in small steps and watch for scorch. Do not place it in the darkest corner simply because it is a fern: “shade-loving” does not mean it can grow well without useful daylight.
The safest placement balances light with heat. A sunny windowsill can be bright enough but too hot against the glass, especially in summer; a shelf just inside the room may provide more even light. Rotate the pot a quarter turn every week or two if fronds lean strongly toward the window, but avoid repeatedly moving the plant from one extreme to another.
Water for steady moisture without soggy roots
Kangaroo paw fern prefers regular moisture, but its roots still need air. The target is evenly moist potting mix with free drainage, not a pot that stays saturated. Clemson’s species entry calls for regular, even moisture, and its fern guidance warns that standing water and overly frequent watering can damage roots.
Water slowly over the mix until a little drains from the bottom, then empty the saucer or cachepot. If the outer decorative pot has no drainage hole, lift out the nursery pot to water and let it drain before returning it. A drainage layer of stones at the bottom does not replace an open drainage hole; water must be able to leave the root zone.
Do not respond to dry air by adding more water to the soil. A fern can have crispy tips while its root ball is already too wet, particularly if it sits in a dim corner or a cool room. Check the mix first, then adjust one factor at a time so you can tell whether the change helped.
Use the pot and mix—not a calendar—to decide when to water
Touch the top of the mix before watering. When the surface has just begun to dry but the mix below still feels lightly moist, water thoroughly; if the top is wet and the pot feels heavy, wait and check again later. The surface may dry sooner in a small terracotta pot near a warm window than in a large plastic pot in a cooler room, so a fixed “every three days” rule will fail in at least one of those situations.
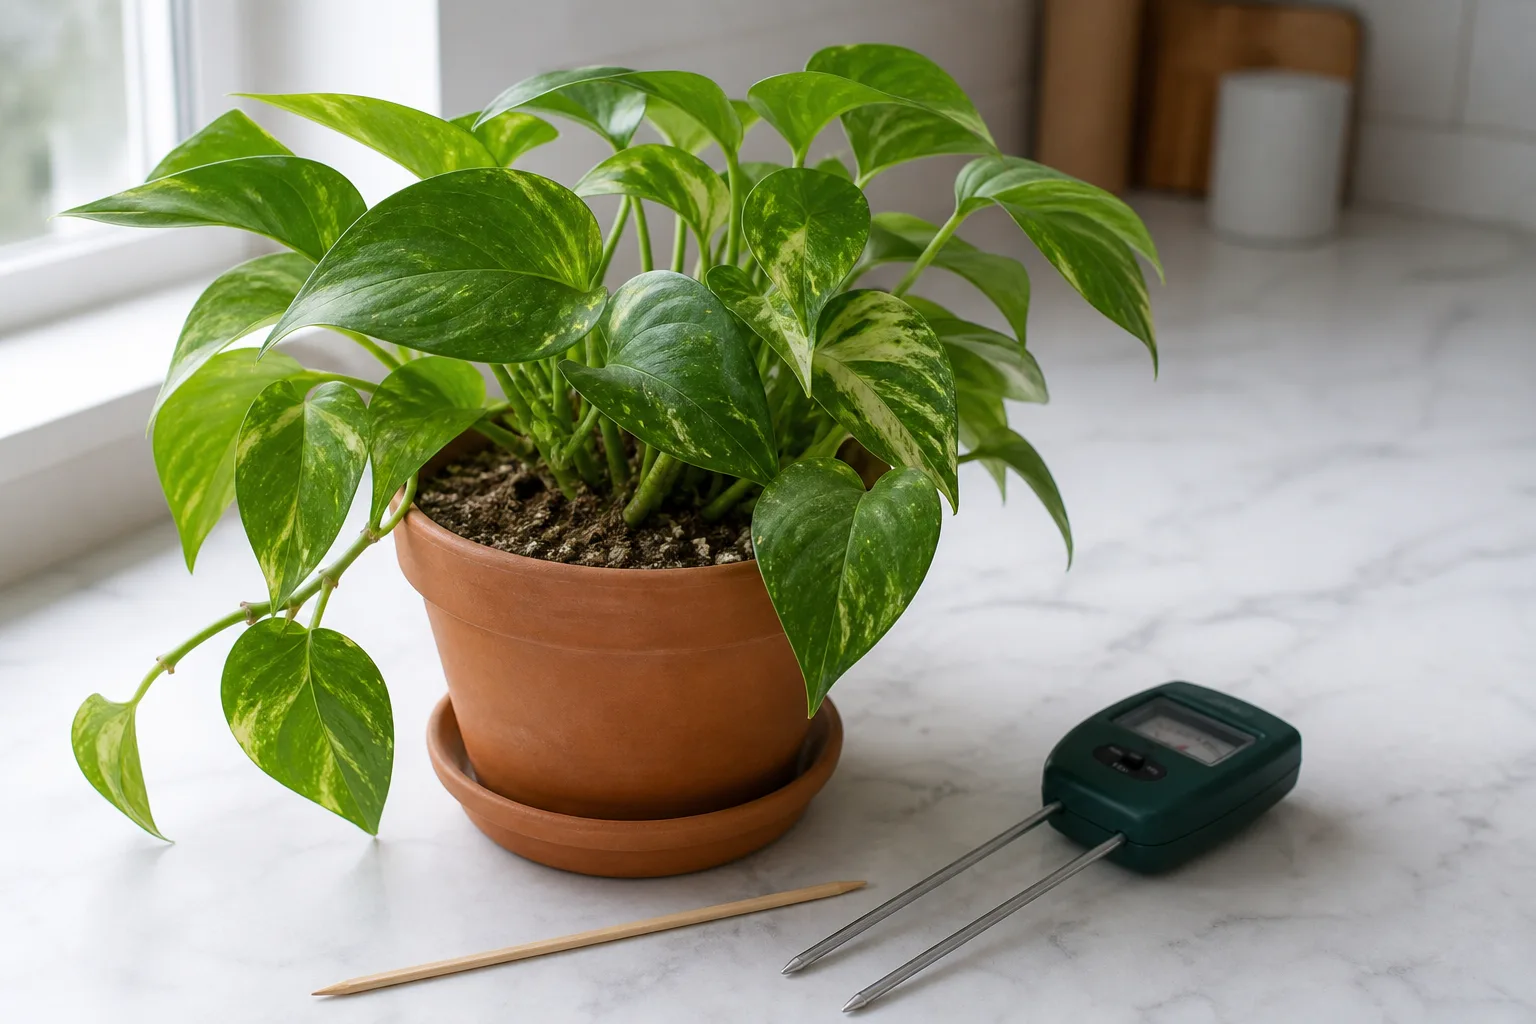
Check the growing mix before watering; pot size, room temperature, light, and season change how quickly it dries.
In winter, the plant may use water more slowly because light levels and growth often decline. Keep the mix from drying out completely, but do not keep the warm-season rhythm if the pot remains moist for longer. If the plant is in active growth under bright light, it may dry faster even when the calendar says it is “winter.”
Choose a loose, moisture-retentive mix and a draining pot
Use a potting medium that holds some moisture without compacting into a dense, airless mass. A standard houseplant mix loosened with perlite or fine bark is a practical starting point; it should wet evenly and drain freely when watered. Clemson Extension recommends porous, organic potting media for ferns and describes a simple fern mix based on packaged houseplant potting mix combined with peat moss or leaf mold; a coir-based mix can be used when you prefer a peat-free ingredient.
Avoid digging garden soil into an indoor container. It can compact, drain unpredictably, and introduce pests or weed seeds. Fine, water-repellent mix that has shrunk away from the pot wall may need rewetting or replacement, while a sour smell or soil that remains cold and wet for days points to a drainage or watering problem.
Choose a container with drainage holes and enough width for the rhizomes to spread. The pot should be only modestly larger than the root ball when you repot; a very large volume of unused mix stays wet longer and makes watering harder to judge. Plastic retains moisture longer, while unglazed terracotta dries faster, so choose material based on your room and watering habits rather than appearance alone.
Keep the creeping rhizomes at the surface
When you pot or repot the fern, set the rooted base at its previous depth and keep the creeping rhizomes resting on top of the mix. Do not bury them to make the plant look tidy. The Royal Horticultural Society’s guide to epiphytic ferns explains that a rhizome is a modified stem and describes how some ferns grow along surfaces instead of behaving like ordinary roots under soil.
A rhizome creeping over the pot edge is not a reason to cut it off. Let it extend, guide it gently over the rim, or divide the plant when it is large enough to support more than one healthy section. If a rhizome is trapped under a heavy layer of potting mix, loosen only the material you can remove without pulling or snapping the stem.
Do not mistake dried soil or old leaf bases around a fern’s crown for pests without checking closely. Look for movement, cottony clusters, or hard bumps before treating. If the plant’s identity is uncertain, compare its botanical label and growth habit before using a care tip written for a fuzzy-rooted rabbit-foot fern or a different rhizomatous species.
Balance warm temperatures with practical humidity
Keep the fern in a comfortable, stable room away from cold drafts, heat vents, and glass that becomes very hot or cold. Clemson Extension’s reference table gives a daytime range around 68–72°F and nights around 50–55°F for kangaroo paw fern. You do not need to create a dramatic day-night swing indoors; the practical point is to avoid chilling the plant or exposing it to frost.
Humidity can help the fronds stay attractive, but chasing a precise percentage is less useful than looking at how the plant responds. If the room is very dry from heating or air-conditioning, group plants together or use a clean room humidifier near the collection. Do not place a damp pot in a closed display case without airflow; persistently stagnant, wet conditions can invite fungal problems.
A bathroom is only a good location if it also has enough light and the plant is not repeatedly chilled by an open window or strong fan. A bright room is better than a dark, steamy one. Misting gives only a short-lived change in the air around leaves, so it is not a replacement for suitable light, stable moisture in the pot, or a room humidifier when the air is consistently dry.
Feed lightly while the fern is actively growing
Feed during spring and summer when the fern is producing new fronds. A balanced liquid houseplant fertilizer diluted to about half the label strength once a month is a cautious routine consistent with Clemson Extension’s light-feeding advice for indoor ferns. Apply it to already moist mix rather than to a dry root ball, and follow the product label if it gives a lower rate for ferns or indoor use.
More fertilizer will not fix dim light, soggy soil, or a plant that is resting through winter. Excess salts can damage roots and contribute to brown tips, so skip a feeding if the plant is stressed, newly repotted into fertilized mix, or not actively growing. If a white crust forms on the soil or pot rim, pause feeding and flush the mix with water that can drain freely.
Do not add fertilizer every time you water unless the label explicitly describes that schedule and the dose is adjusted accordingly. The aim is steady, modest nutrition, not a rapid burst of soft growth. Resume feeding only after the plant has settled and begun growing again if you stopped to correct a root or watering problem.
Groom fronds without cutting healthy rhizomes
Remove fronds that are fully yellow, brown, or badly damaged by cutting them close to the base with clean, sharp scissors. Take out only the affected frond; kangaroo paw fern does not need regular shaping or hard pruning to stay healthy. If a single lower frond yellows while the rest of the plant is producing firm green growth, it may simply be an older frond reaching the end of its life.
Keep the rhizomes and emerging fiddleheads intact while you tidy the plant. Avoid pulling a dead frond if it resists, because the tug can damage the crown or loosen the creeping stem. Wipe dust from leathery leaves with a soft, barely damp cloth or rinse gently in a sink, then let the plant drain before putting it back in a decorative cachepot.
A few dry tips do not require cutting an entire frond back to the soil line. If you want to improve its appearance, trim only the dead portion with a clean blade and leave green tissue in place. The remaining green surface still contributes to the plant’s growth, while the underlying cause—watering swings, hot sun, or dry air—needs a separate check.
Repot when the plant or mix gives you a reason
Repot when the root ball is crowded, roots circle densely or emerge from drainage holes, the pot dries unusually fast despite proper watering, or the mix has broken down and stays soggy. A rhizome that reaches the pot edge by itself does not mean the fern is in trouble; this plant naturally spreads. Repotting every year by habit can disturb a healthy root system without solving anything.
Choose early spring as a convenient time if the plant needs a larger container or division, when new growth is beginning. Use a pot only one size wider, refresh the medium, and keep the plant at its previous depth. If the fern is already stressed by root rot, temperature shock, or pests, first stabilize it rather than combining multiple stressful changes at once.
A careful repotting sequence
- Water lightly the day before if the mix is very dry, then prepare a clean pot with open drainage holes and fresh, lightly moistened mix.
- Tip the plant out while supporting the base and rhizomes; loosen the root ball gently rather than yanking on fronds or creeping stems.
- Inspect the roots and remove only material that is clearly dead or mushy with a clean tool. If the plant is healthy but crowded, decide whether to repot the full clump or divide it.
- Add mix to the new pot, set the rooted base at the same depth, and arrange the rhizomes on the surface where they can continue to creep.
- Backfill around the roots without packing the mix hard, water until excess drains, and empty the saucer.
- Return the fern to bright, indirect light and keep the mix evenly moist as it settles; wait for healthy new growth before resuming fertilizer.
After repotting, some older fronds may droop or yellow while the roots adjust. Keep conditions steady rather than moving the plant repeatedly or feeding it to force growth. If the new pot is much larger than the old one, check moisture more often at first because the expanded mix can remain wet longer than the original root ball.
Propagate by dividing a mature plant
Division is the most practical way to make another kangaroo paw fern at home. Wait until the plant has enough healthy growth to leave a substantial clump behind, then divide in early spring as new fronds begin to appear. Clemson Extension notes that division is a useful method for many ferns and recommends repotting crowded plants in early spring; this timing gives the new pieces a growing season to settle.
Do not divide a small, weak, or recently stressed plant just because it has a visible rhizome. A successful division needs a living section of rhizome attached to roots and several healthy fronds or visible growth points. If the clump is not big enough to separate that way, wait and let it grow.
Choose divisions with viable rhizomes and fronds
Unpot the fern and loosen enough mix to see where the clump naturally separates. Use clean, sharp scissors or a knife to cut through a connection only when you can keep a rooted section with each division. The tool should be washed and dried before use; avoid crushing the rhizome with blunt blades.
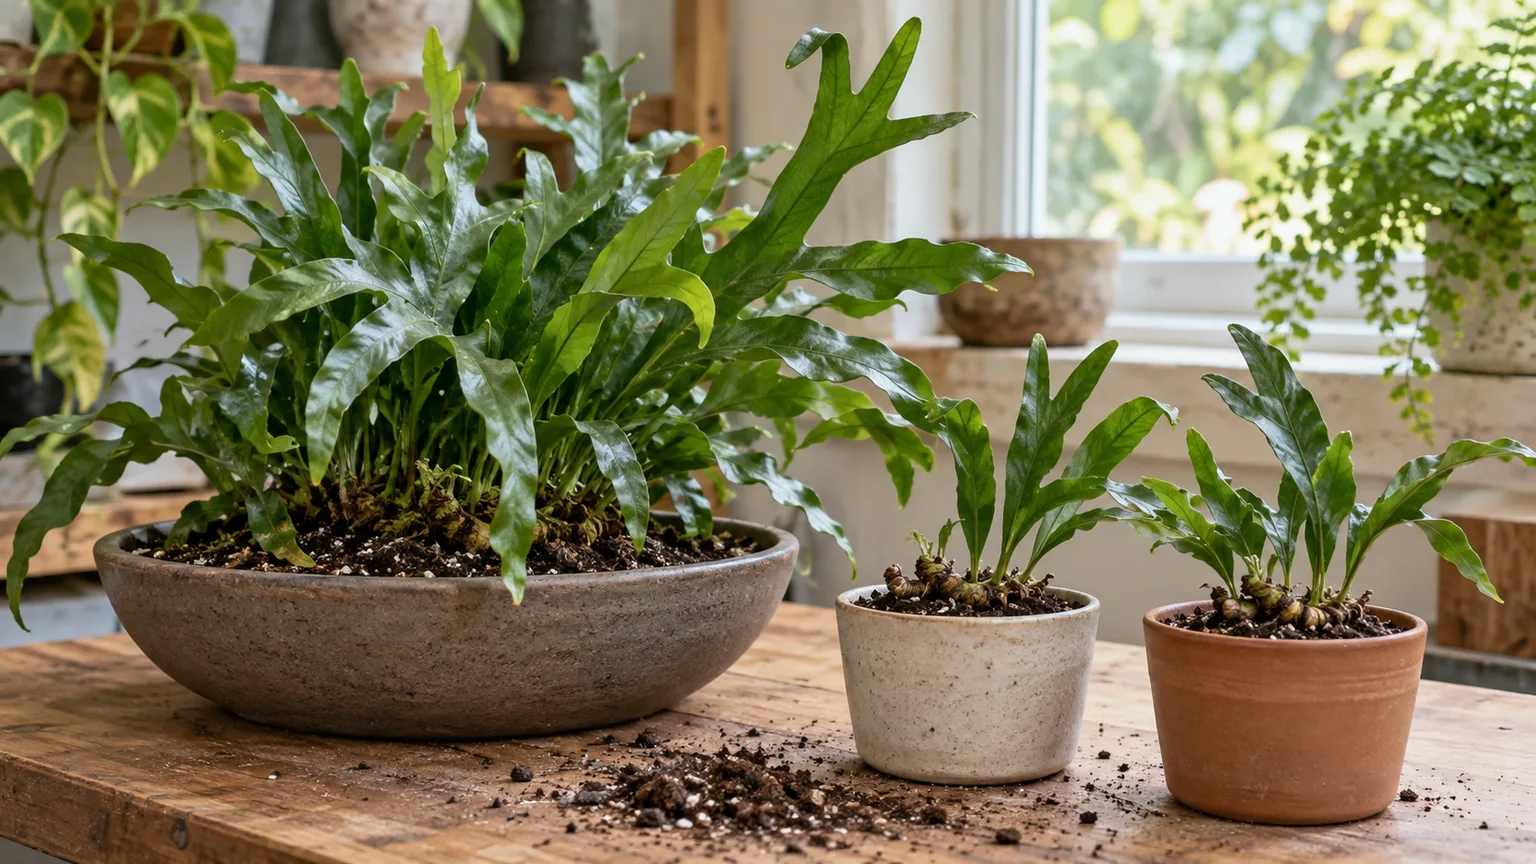
Each new section needs a viable rhizome and attached roots; leave the creeping stems visible rather than burying them.
Pot each division in a small container with drainage and fresh, lightly moist mix. Keep its rooted portion at the old depth and set the rhizome along the surface. Water thoroughly once, let the pot drain, and place it somewhere warm with bright indirect light while it re-establishes; do not seal it in plastic or let the mix stay waterlogged.
New fronds are a better sign of establishment than a fixed number of days. Keep the new plant evenly moist while it settles, but still check the pot before each watering. Once you see active growth, return to the ordinary light feeding routine; if a division wilts briefly, first check whether the mix is either dry throughout or sitting in excess water.
Diagnose yellow leaves, brown tips, and slow growth
A symptom is a clue, not a diagnosis by itself. Read the whole plant: Is the change limited to one old frond, or is new growth also affected? Is the pot wet and heavy, or dry below the surface? Did the plant recently move into direct sun, a cold window, or a room with a heating vent?
Clemson Extension notes that overwatering, underwatering, insects, and mites are more common indoor fern problems than plant diseases, with root rot linked to overly frequent watering or mix that drains poorly. Use that sequence to narrow the cause before adding water, fertilizer, or a spray. Make one change and watch new growth; damaged tissue rarely turns green again.
Match the symptom to moisture, light, or seasonal change
Yellowing: One older lower frond turning yellow while the rest remains firm can be normal aging. Several yellow fronds at once call for a moisture check: persistently wet mix suggests poor drainage or overwatering, while mix dry through the root ball points toward underwatering. If moisture seems appropriate, consider whether light dropped sharply, the pot became cold, or the plant is in a slower winter period.
Brown tips or edges: These can follow dry air, inconsistent moisture, direct sun, or fertilizer salts. First move the fern out of hot sun and vents, then check whether the mix is evenly moist rather than saturated; only adjust humidity after you rule out root-zone problems. Trim dead tissue if you wish, but expect correction to show in the next fronds, not the already-brown tips.
Slow or sparse growth: Growth can slow in winter or after repotting, so give the plant time if it still has healthy fronds. In a bright growing season, check whether it is actually receiving indirect daylight, whether roots are crowded, and whether the mix drains. Avoid doubling fertilizer; a plant with poor light or damaged roots cannot use extra nutrients as a substitute for better conditions.
Soft, dark roots or a sour-smelling pot: Take the plant out if the mix remains soggy and the base is declining. Remove clearly rotted material with a clean tool, discard the saturated mix, and repot the healthy portion in a draining container. If the crown and all rhizomes are soft, there may be little healthy tissue to save; do not keep watering a plant that has lost its viable growth points.
Prevent pests and root problems with a gentle routine
Check both sides of fronds, the crown, and the rhizome surface when you water or groom. Scale insects can look like small fixed bumps; mealybugs may resemble cottony patches. A white mark that wipes away easily may be mineral residue, while pests tend to remain attached or reappear, so inspect with a magnifier before treating.
If you confirm pests, isolate the fern from other plants and remove what you can by hand. Clemson Extension notes that sprays can injure many ferns and describes hand removal or a water spray as options for indoor-fern pests. If you consider a pesticide or horticultural soap, read the label for the specific plant, pest, and indoor setting, then test a small area first; do not assume a “natural” product cannot burn fronds.
Prevent root trouble by using an open-draining pot, emptying cachepots after watering, and not burying the rhizomes. Keep the plant away from stagnant, waterlogged conditions, but do not let the whole root ball dry out in an attempt to prevent fungus gnats. This fern’s best defense is a moisture routine that keeps the mix damp enough for growth while allowing excess water to leave.
Grow it outdoors only where cold is not a threat
Kangaroo paw fern can be used outdoors in mild climates or moved outside for a warm season, but treat it as a container plant if your winters are cold. Give it filtered shade, shelter from strong afternoon sun, and a pot that can drain after rain. Do not assume a sheltered wall or a hanging basket will protect it from frost.
Before putting it outside, acclimate it over several days in a shaded, protected spot. A plant moved straight from a bright indoor room into hot outdoor sun can scorch even when the weather feels mild. Bring it back indoors before nights approach the cold range in the Clemson reference, and inspect the fronds and pot for pests before returning it to a houseplant collection.
If you plan to plant it in a garden bed, check the advice of a local extension service or nursery for your exact winter conditions rather than relying on a generic hardiness number. A container lets you control the soil, move the plant, and keep its rhizomes from competing with other groundcovers. In a frost-prone area, indoor growing is the lower-risk choice.
Conclusion
Kangaroo paw fern care comes down to a few consistent choices: bright filtered light, a freely draining pot, and mix that stays evenly moist without sitting in water. Give the creeping rhizomes room at the surface, keep temperatures stable, and feed lightly while the plant is growing.
When the fern struggles, inspect the soil and location before reaching for fertilizer or pesticides. Repot only when the root ball or mix needs attention, and divide only a mature plant with enough rooted rhizome and fronds for each section. With that routine, its wide, spreading foliage can fill a shelf or basket without demanding a fussy weekly schedule.



